Parse Server example – Continuous Integration
Contents
- 1 Introduction
- 2 Prerequisites
- 3 Step 1 — Create and set up your Travis account
- 4 Step 2 — Create a deploy script
- 5 Step 3 — Create your Travis configuration file
- 6 Step 4 — Create the Cloud Code
- 7 Step 5 — Create a Parse test script
- 8 Step 6 — Configure your android versions
- 9 Step 7 — Testing
- 10 Conclusion
- 11 What is CI?
- 12 What are the steps involved in the Travis process?
- 13 Where does Travis Logs appear in the dashboard?
Introduction
Continuous Integration (CI) is the practice of merging all developer working copies to a shared repository several times a day. Its primary objective is to prevent integration problems, ensure quality and eliminate rework. It is meant to be used in combination with automated unit tests and continuous delivery so as, to reduce the breaking of code and to ensure that the software is always in a state that can be deployed to users, thus making the deployment process much quicker.
To enable all these features, it is necessary to use a CI server. For this tutorial, we will be using Travis CI , which is a hosted, distributed continuous integration service used to build and test software projects hosted on GitHub. Travis can be used to automate all sorts of tasks such as building, testing, and deploying software, with continuous integration and facilitation of technical aspects of continuous delivery.
In this tutorial, we will explain how to build your own Back4App professional app aided by the Travis CI software. We will create a sample Android app using GitHub, i.e. the Git repository, to test the continuous build features, like continuous delivery and continuous testing. Even though our primary focus will be on an Android app, this tutorial will help make it possible for you to use Travis for other operating systems as well.
You can find the complete overview of the in this GitHub project here at: Travis Tutorial
Prerequisites
Before beginning this tutorial, you will need to have Android Studio installed, preferably at the newer version, some familiarity with Cloud Code development and with Git version control system. Travis works only with GitHub repositories so you will need to create a new GitHub account if you don’t have one. It is also necessary to have a Back4App project configured and worked with the command line interface (CLI)
You can find tutorials for downloading and setting up your Cloud Code, a remote project for Git in GitHub and the CLI tutorial in the links below:
Android Studio Official Website
Android Guide With Parse Server
Step 1 — Create and set up your Travis account
Go to the Travis Offical Website and Sign Up for a new account. It is recommended to use the option Sign in with Github, as it will be necessary to connect to GitHub in the process. Proceed to fill the information as needed. You will end on the following page if all goes well.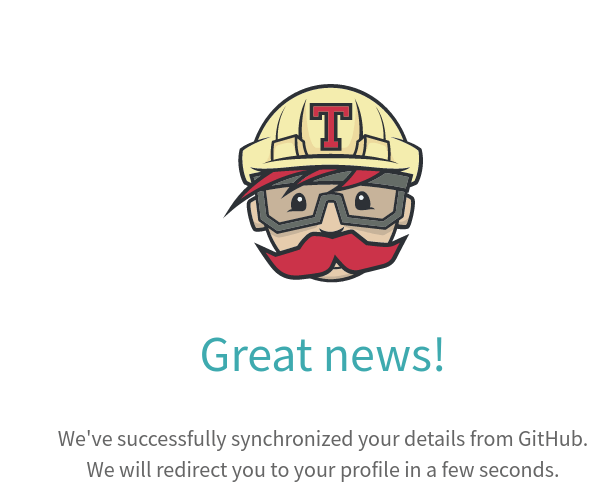
You need to wait a few minutes for the Travis server to synchronize information from your GitHub account. After some time, you will be redirected to the next page, where you will need to click the profile button to choose which of your projects you will use together with Travis.
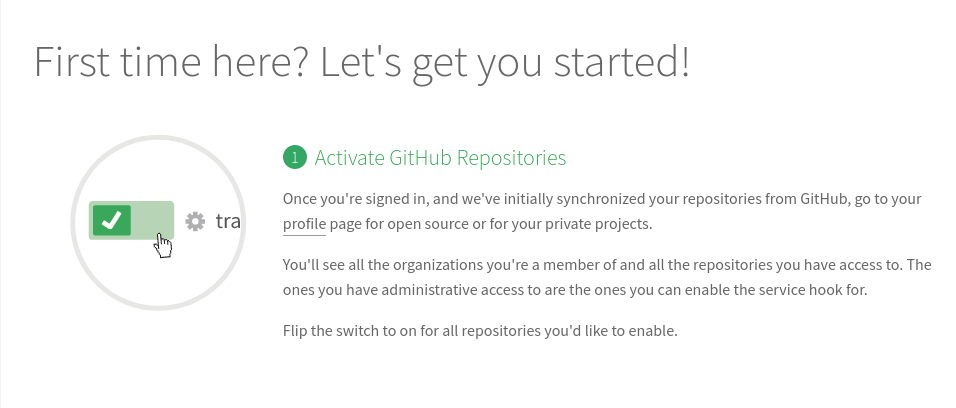
In the profile page, you need to select the project you want to use with Travis. You can click the gear button on the left side of your repository name to change the configurations and make them more advanced (about how the continuous integration will work with your app). It is recommended for you to turn on the option Build only if .travis.yml is present for more safety in the continuous build process, as it will throw an error if your repository doesn’t have one.

After that, click on the Sync account button and go back to the Travis Getting Started Page to continue the tutorial.
Step 2 — Create a deploy script
Now, we will create a bash script to deploy our app to the Back4App server. That script will be uploaded to the Travis virtual machine, so it is essential to make sure it has all the basic configurations and key management of our Back4App account.
Your project must already have a Back4App source directory for cloud code. In this example, we will call the directory named cloud_code. It will be highlighted in red so that you can change it to match the name of your own.
This script is given the name “deploy.sh”, which will be on your source root directory. Here’s the code for it:
#!/bin/bash

cd cloud_code
b4a configure accountkey
b4a deploy
cd ..
Unfortunately, the b4a configure accountkey command asks for the key as an input user argument, which cannot be passed with a flag. For this, we use a tool called Expect which automates answers of user inputs for us. Below is an example of the installation on an Ubuntu machine. You can check more examples on the official Ubuntu documentation for this package: expect documentation
To work with this tool, go to your source root directory and run:
$ sudo apt-get install expect
$ autoexpect ./deploy.sh
Answer all the questions that you will face while configuring your app for the first time. This will auto-generate a file called script.exp in the same source directory. If it doesn’t work, you can create this file and manually add the following code to it:
#!/usr/bin/expect -f
#
# This Expect script was generated by autoexpect on Mon Oct  2 17:42:03 2017
# Expect and autoexpect were both written by Don Libes, NIST.
#
# Note that autoexpect does not guarantee a working script.  It
# necessarily has to guess about certain things.  Two reasons a script
# might fail are:
#
# 1) timing - A surprising number of programs (rn, ksh, zsh, telnet,
# etc.) and devices discard or ignore keystrokes that arrive "too
# quickly" after prompts.  If you find your new script hanging up at
# one spot, try adding a short sleep just before the previous send.
# Setting "force_conservative" to 1 (see below) makes Expect do this
# automatically - pausing briefly before sending each character.  This
# pacifies every program I know of.  The -c flag makes the script do
# this in the first place.  The -C flag allows you to define a
# character to toggle this mode off and on.

set force_conservative 0  ;# set to 1 to force conservative mode even if
           ;# script wasn't run conservatively originally
if {$force_conservative} {
   set send_slow {1 .1}
   proc send {ignore arg} {
      sleep .1
      exp_send -s -- $arg
   }
}

#
# 2) differing output - Some programs produce different output each time
# they run.  The "date" command is an obvious example.  Another is
# ftp, if it produces throughput statistics at the end of a file
# transfer.  If this causes a problem, delete these patterns or replace
# them with wildcards.  An alternative is to use the -p flag (for
# "prompt") which makes Expect only look for the last line of output
# (i.e., the prompt).  The -P flag allows you to define a character to
# toggle this mode off and on.
#
# Read the man page for more info.
#
# -Don


set timeout -1
spawn ./deploy.sh
match_max 100000
expect -exact "\r
Input your account key or press ENTER to generate a new one.\r
NOTE: on pressing ENTER we'll try to open the url:\r
   \"http://dashboard.back4app.com/classic#/wizard/account-key\"\r
in default browser.\r
Account Key: "
send -- "Your Back4App Account Key here"
expect -exact "Your Back4App Account Key here"
send -- "\r"
expect eof
You can check if this script is working by running ./script.exp and checking if the cloud code is correctly uploaded to your Back4App server.
Step 3 — Create your Travis configuration file
It is mandatory to add the configuration file .travis.yml to your project to specify how Travis should build your project. To do that in the Android Studio environment, continue to follow the tutorial below. For other languages, you can check more information in the Travis Language Specific Tutorial on how to create that file.
The first step is to create a .travis.yml file in the root of your project source. After that, open it and write the following code to it.
language: android
jdk: oraclejdk8
# Turn off caching to avoid any caching problems
cache: false
sudo: true
env:
  global:
    - ANDROID_API_LEVEL=25
    - ANDROID_BUILD_TOOLS_VERSION=25.0.2
    - ADB_INSTALL_TIMEOUT=2 # minutes (If ABD instalation pass this time, the build will throw an error)

android:
  components:
    - platform-tools
    - tools
    - build-tools-$ANDROID_BUILD_TOOLS_VERSION
    - android-$ANDROID_API_LEVEL
    # Google Play Services
    - extra-google-google_play_services
    # Support library
    - extra-android-support
    # Latest artifacts in local repository
    - extra-google-m2repository
    - extra-android-m2repository

  licenses:
    - android-sdk-preview-license-.+
    - android-sdk-license-.+
    - google-gdk-license-.+
    - android-sdk-license-5be876d5

# This step is made for automatic acception of licenses whenever Travis builds the code.
before_install:
  - mkdir "$ANDROID_HOME/licenses" || true
  - echo -e "\n8933bad161af4178b1185d1a37fbf41ea5269c55" > "$ANDROID_HOME/licenses/android-sdk-license"
  - echo -e "\n84831b9409646a918e30573bab4c9c91346d8abd" > "$ANDROID_HOME/licenses/android-sdk-preview-license"
  - chmod +x gradlew
  - ./gradlew dependencies || true

# This will install the b4a command line interface tool and configure it
install:
  - curl https://raw.githubusercontent.com/back4app/parse-cli/back4app/installer.sh | sudo /bin/bash
  - sudo apt-get update
  - sudo apt-get install build-essential checkinstall libssl-dev
  - curl -o- https://raw.githubusercontent.com/creationix/nvm/v0.32.1/install.sh | bash
  - sudo apt-get install expect
  - sudo apt-get install nodejs-legacy
  - sudo apt-get install npm
  - sudo npm install
  - nvm install node

# Run your main script
script:
  - ./gradlew -PdisablePreDex
  # Run our test script, if it fails, it will not deploy
  - sudo npm run test
  # Run the script that will make the deploy
  - ./script.exp
Step 4 — Create the Cloud Code
For cloud code we will create a background job for testing, which help us push notifications that can be scheduled and deployed with Travis. In the file of your cloud code, add the following code:
Parse.Cloud.define("jobPushNotification", function (request, response) {
    Parse.Push.send({
        channels: ["Your Channel name here"],
        data: {
            title: "Hello!",
            message: "Hello from the Cloud Code",
        }
        }, {
        success: function () {
            // Push was successful
            console.log("The job notification is running!");
            response.sucess("push sent");
        },
        error: function (error) {
            // Push was unsucessful
            console,log(error);
            response.sucess("error with push: " + error);
        },
        useMasterKey: true
   });
});
After that, just add this file to git and it will automatically be built on Travis. It needs to be uploaded to your Back4App server after the build has finished.
Step 5 — Create a Parse test script
In this section, we will create an example hello word function to test if our cloud code is correctly working. We will create a local Parse Server and will push our cloud code to it. After that, it will run a sample unit test which will check and validate our server.
The example hello word function is in the code mentioned below and you need to put it in your mains cloud code file.
/**
 * Cloud Code Function
 * This function is a beautiful "Hello World".
 * Response "200" is called at the end.
 * @function hello
 * @alias hello
 * @example POST /functions/hello "{}"
 */
Parse.Cloud.define('hello', function (req, res) {
  var random = Math.floor(Math.random() * 10000000);
  var hello = 'world';
  res.success({
    random: random,
    hello: hello
  });
});
After that, we will configure a package.json file to make the script for our test. We will use jasmine test engine for the tests. The package.json should look like the code below. Remember to run the command $npm install after you created the package file so that you can easily install the node modules.
{
  "name": "Continuous_Integration_Back4App_Tutorial",
  "version": "0.0.1",
  "description": "Sample package.json for the Back4App CI tutorial",
  "scripts": {
    "test": "jasmine"
  },
  "author": "",
  "repository": "",
  "license": "ISC",
  "devDependencies": {
    "jasmine": "^2.6.0"
  },
  "engines": {
    "node": ">=6.11"
  },
  "dependencies": {
    "express": "^4.15.3",
    "parse": "^1.9.2",
    "parse-server": "2.3.x"
  }
}
Now it is necessary to configure your tests files. For that create a directory, in the main project root called spec. In that directory create three sub-directories, namely helpers, main and support. You will need to create one file for each of those directories. The structure in the end should look like the one below:
- spec
- helpers
- ParseInitialize.js
- main
- CloudCodeSpec.js
- support
- jasmine.json
- helpers
The ParseInitialize.js file is responsible for creating and setting up a local Parse Server connected with your cloud code. It has the following code:
const path = require('path');
const express = require('express');
const ParseServer = require('parse-server').ParseServer;
const Parse = require('parse/node');
const app = express();
const TestUtils = require('parse-server').TestUtils;

beforeAll(function(done) {
  const api = new ParseServer({
    databaseURI: //localhost:27017/integration',
    appId: 'integration',
    masterKey: 'notsosecret',
    serverURL: 'http://localhost:1337/',
    cloud: path.join(__dirname, '../../cloud_code/cloud/main.js'),
    logLevel: '0'
  });
  app.use('/parse', api);
  app.get('/clear', function (req, res) {
    TestUtils.destroyAllDataPermanently().then(function () {
      res.send('{}');
    });
  });

  Parse.initialize('integration', null, 'notsosecret');
  Parse.CoreManager.set('SERVER_URL', 'http://localhost:1337/parse');
  Parse.Storage._clear();

  app.listen(1337, function() {
    done();
  });
});
The CloudCodeSpec.js is the file that will be your test code. It is the one where you will spend the most time editing. For this tutorial, this file has one test function that will test our cloud function hello. Here’s the code for it:
'use strict';

const Parse = require('parse/node');

describe('Parse', function() {
  it('should have a hello world function', function(done) {
    Parse.Cloud.run('hello')
      .then(function(res) {
        expect(res).not.toBeNull();
        expect(res.random).not.toBeNaN();
        expect(res.hello).toBe('world');
        done();
      });
  });
});
Finally, the jasmine.json file is now the configuration file. The default options for it are in the following code. To modify this file, check the jasmine official documentation.
{
  "spec_dir": "spec",
  "spec_files": [
    "**/*[sS]pec.js"
  ],
  "helpers": [
    "helpers/**/*.js"
  ],
  "stopSpecOnExpectationFailure": false,
  "random": false
}
Step 6 — Configure your android versions
Verify that the versions of your Android API, Android Build Tools, and your JDK at the Travis configuration file are at their correct versions compatible with your build.gradle. Here’s an example of the build.gradle file, which is located in your app directory (not the project level one):
apply plugin: 'com.android.application'

android {
    compileSdkVersion 25
    buildToolsVersion "25.0.2"
    defaultConfig {
        applicationId "com.example.root.travis"
        minSdkVersion 15
        targetSdkVersion 25
        versionCode 1
        versionName "1.0"
        testInstrumentationRunner "android.support.test.runner.AndroidJUnitRunner"
    }
    buildTypes {
        release {
            minifyEnabled false
            proguardFiles getDefaultProguardFile('proguard-android.txt'), 'proguard-rules.pro'
        }
    }
}

dependencies {
    compile fileTree(dir: 'libs', include: ['*.jar'])
    androidTestCompile('com.android.support.test.espresso:espresso-core:2.2.2', {
        exclude group: 'com.android.support', module: 'support-annotations'
    })
    compile 'com.android.support:appcompat-v7:25.3.1'
    compile 'com.android.support.constraint:constraint-layout:1.0.2'
    compile 'com.parse:parse-android:1.15.7'
    compile 'com.parse.bolts:bolts-android:1.+'
    compile 'com.google.firebase:firebase-core:10.0.1'
    compile 'com.google.firebase:firebase-messaging:10.0.1'
    testCompile 'junit:junit:4.12'
    apply plugin: 'com.google.gms.google-services'
}
After that, you need to push this file to your remote repository. Now your project will be built according to your configuration file.
In the next step, you will learn how to test if the configuration was well done and where you can see the build logs.
Step 7 — Testing
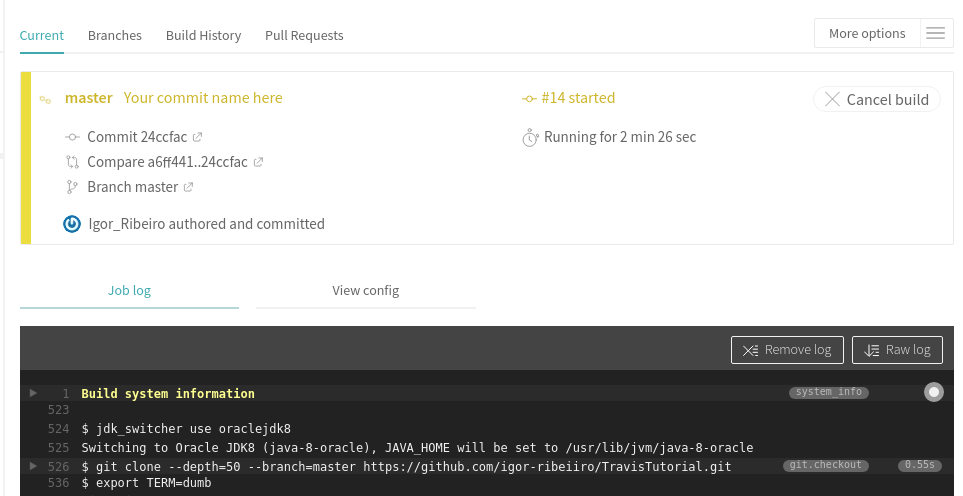
To see if the integration with Travis is working properly, all you need to do is find your projects in the left menu of Travis dashboard. Click on the project you want to see the build status and push some changes to your GitHub repository. It will show that your commit is building like the one below. As you can see in the image, the logs appear right below the build status of your latest commit. Your build status will be building for recent commits.
After some time, the automatic build will end and your commit status will have the passed status and look like the one below.
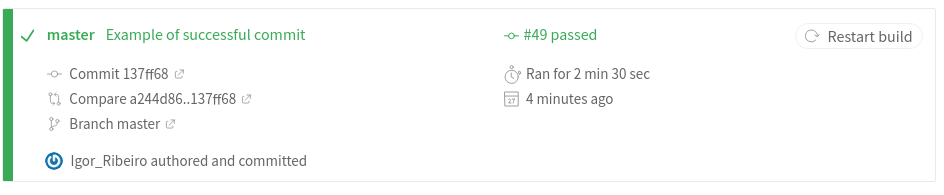
At this same page, you can check your entire build history and see exactly which commit your project passed and which failed. In the example below, you can check that the commit #48 was the last one to fail, followed by the successful ones.

After your last commit has passed on Travis, you can check that your cloud code, on Back4App dashboard has updated successfully.
To check if your background job, which was deployed just with the continuous integration, is correctly running, go to the Background Jobs parse server dashboard of your App and you will see a screen like the one below.
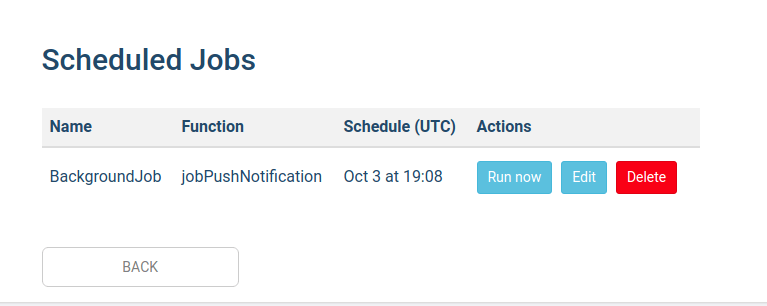
If you click the Run now button, you’ll be able to check the logs, which are found in the Back4App features menu of your app, if the job is running correctly like this one.
![]()
Conclusion
The continuous build with Travis is now ready and you have a professional continuous integrated app. You can explore the complete Travis Documentation for more references.
You can check the entire project in this link: Travis Tutorial Project Github. You can use it to inspire yourself to create a new Continuous Integration project.
Feel free to reach out to us through our website chat if you have any questions.
What is CI?
CI stands for Continuous Integration. This is actually a practice to merge an entire developer working copies to the shared repository multiple times a day. The purpose of this service is to avoid integration problems, eliminate rework and ensure quality.
What are the steps involved in the Travis process?
Here are essential steps involved in this process:
-Visit the official Travis website and create your account there.
-Develop your deploy script
-Create a file for Travis configuration
-Create cloud code
-Create an example function to check whether cloud code is -working properly or not.
-Verify your Android API
-Test Travis integration
Where does Travis Logs appear in the dashboard?
Go to the Left menu of Travis dashboard. The logs will appear just below your latest commit build status. At this page you will be able to check the history of your entire build and see which of your commits passed or failed.

