How to host frontend and backend?
In this tutorial, we will provide a comprehensive guide on hosting a frontend and a backend of an application.
For this purpose, we will host a full-stack app on Back4app. We’ll first work on the backend, then move onto the frontend, and lastly, connect the two components.
Contents
Goals
By the end of this article, you’ll be able to:
- Explain the differences between frontend and backend
- Build a backend using Back4app’s BaaS solution
- Deploy a frontend app to Back4app Containers
- Connect your frontend app with your backend app
What are the differences between frontend and backend?
The backend and the frontend refer to the separation of concerns when building modern web and mobile applications. The easiest way to understand their differences is by visualizing an iceberg.
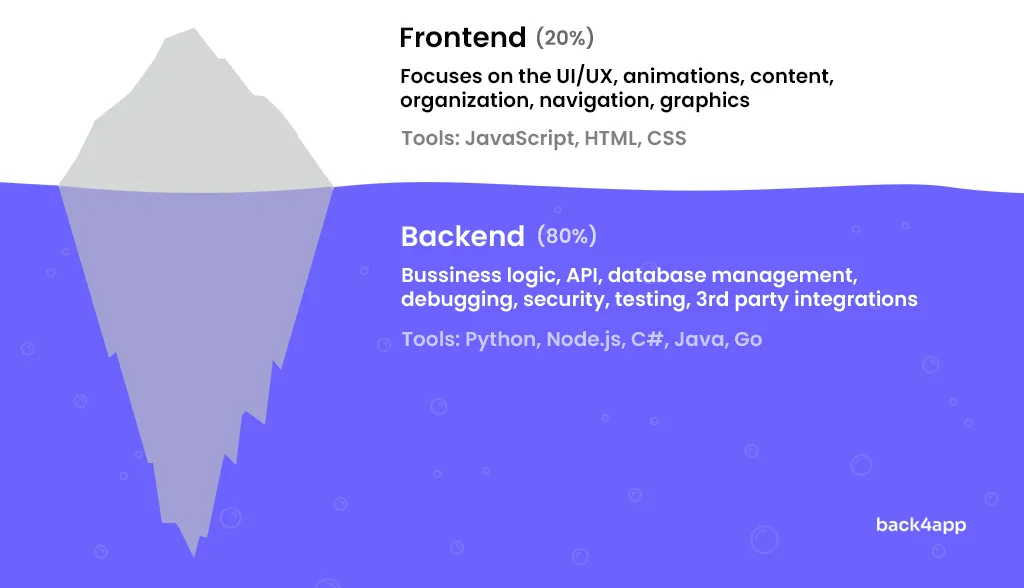
The frontend (or the client side) is everything the user can see and interact with. The frontends come in various formats, such as mobile applications, web applications, web interfaces, or any other type of clients.
This application part is responsible for the UI/UX, design, animations, graphics, and other media types. The client-side constitutes 20% of the project work and is non-repetitive.
On the other hand, the backend (or the server-side) is everything the user can’t see. It’s the bridge between the frontend and the database.
It is responsible for the business logic, background tasks, data storage, scaling, 3rd-party integrations, et cetera. Even though the user can’t directly interact with it, it still highly impacts the quality of an application.
It represents around 80% of the project work and often includes repetitive tasks such as user management, authentication, encryption, etc.
You can deploy your frontend and backend apps to various platforms. I’ve summarized some of my personal favorites in the table below:
| Frontend platforms | Backend platforms |
|---|---|
| Back4app Containers | Back4app |
| Vercel | Render |
| Netlify | Heroku |
| GitHub Pages | Linode |
In this tutorial, you’ll learn how to deploy your frontend and backend to Back4app — for free! Keep reading to learn how to deploy backend and frontend.
Project Introduction
I’ve prepared a full-stack application to demonstrate how to deploy a frontend and a backend to Back4app.
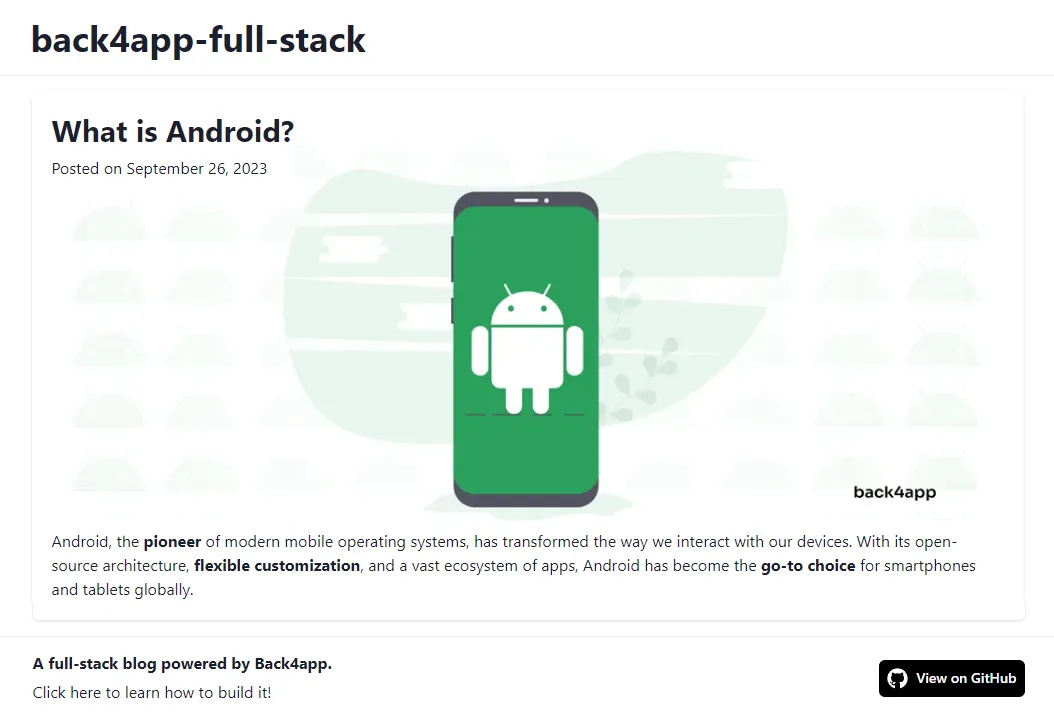
The app serves as a simple markdown blog. The admins can add, edit, and delete articles, while the users can read them.
The final project will look something like this:
As mentioned above, the app consists of two parts: the frontend and the backend. If we visualize the app’s architecture, it would look something like this:

We’ll deploy the backend to Back4app and the frontend app to Back4app Containers. Lastly, we’ll connect the two components via Parse SDK.
I suggest you first follow along with this app and later test your knowledge by deploying your full-stack applications.
Keep reading to learn how to host backend and frontend.
How to host a backend?
In this section, we’ll take care of the backend part of the application.
Objectives
- Build a Back4app application
- Define the database classes
- Set up database ACLs/CLPs
- Populate the database
- Enable the Admin App
Create Back4app App
You’ll need a free Back4app account to follow along. If you aren’t registered, sign up for free!
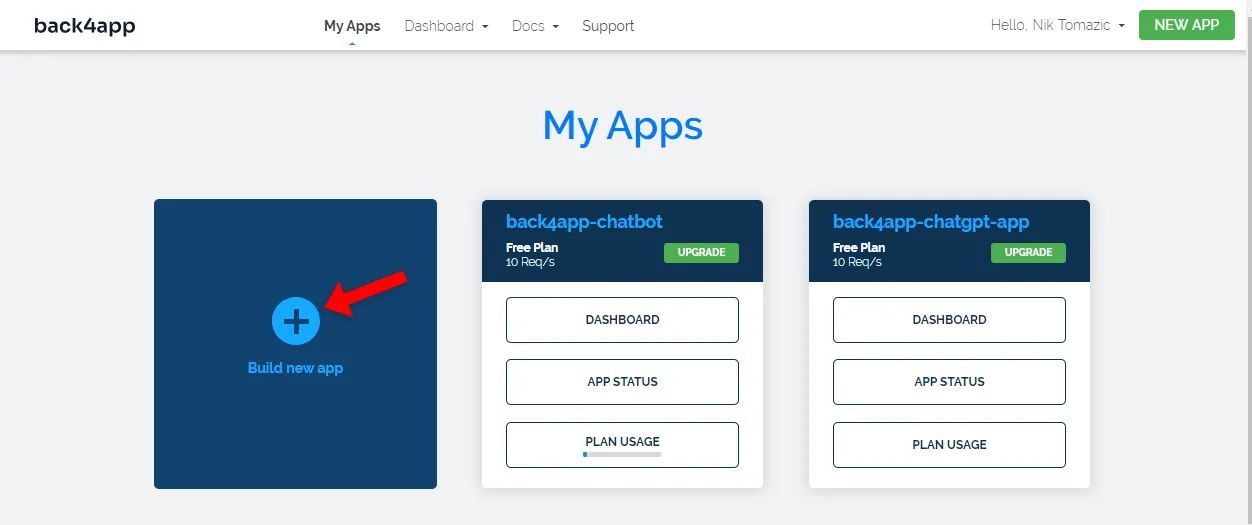
To work with Back4app, you first have to create an application. As you authenticate on Back4app, you’ll be redirected to your app view. Click on the “Build new app” button.
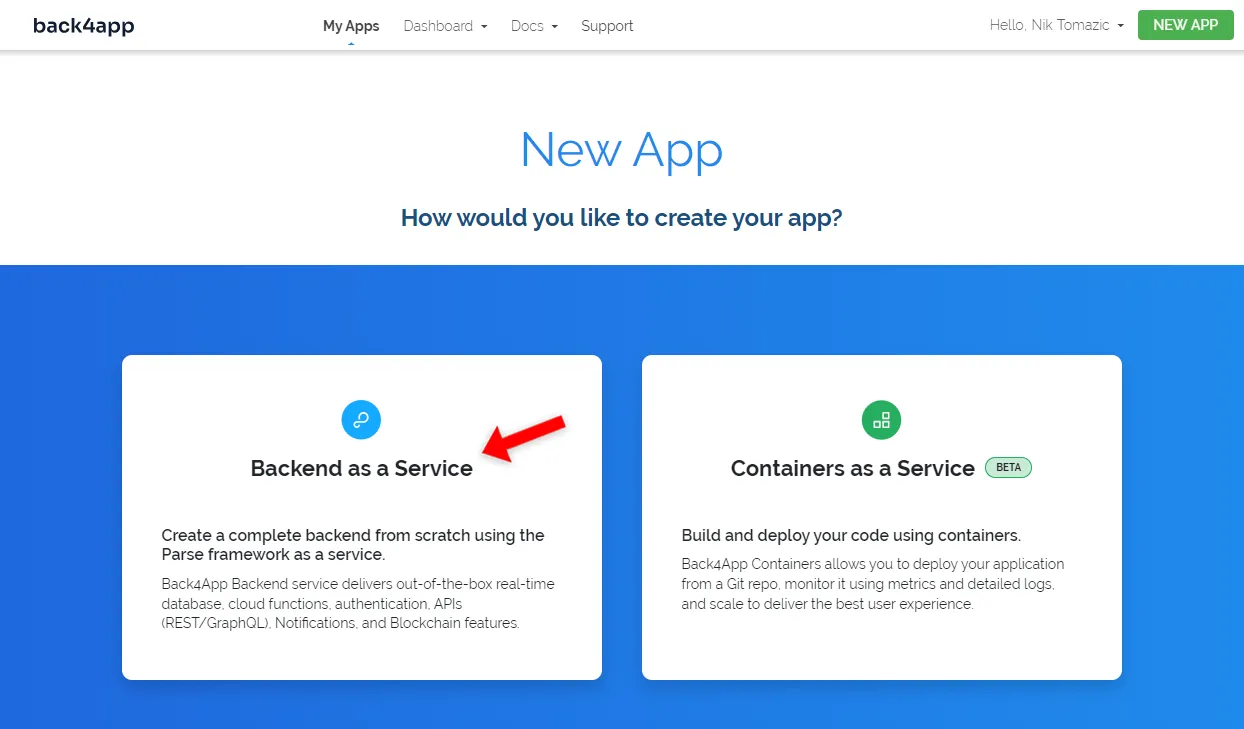
Next, select “Backend as a Service” since we’re deploying a backend.
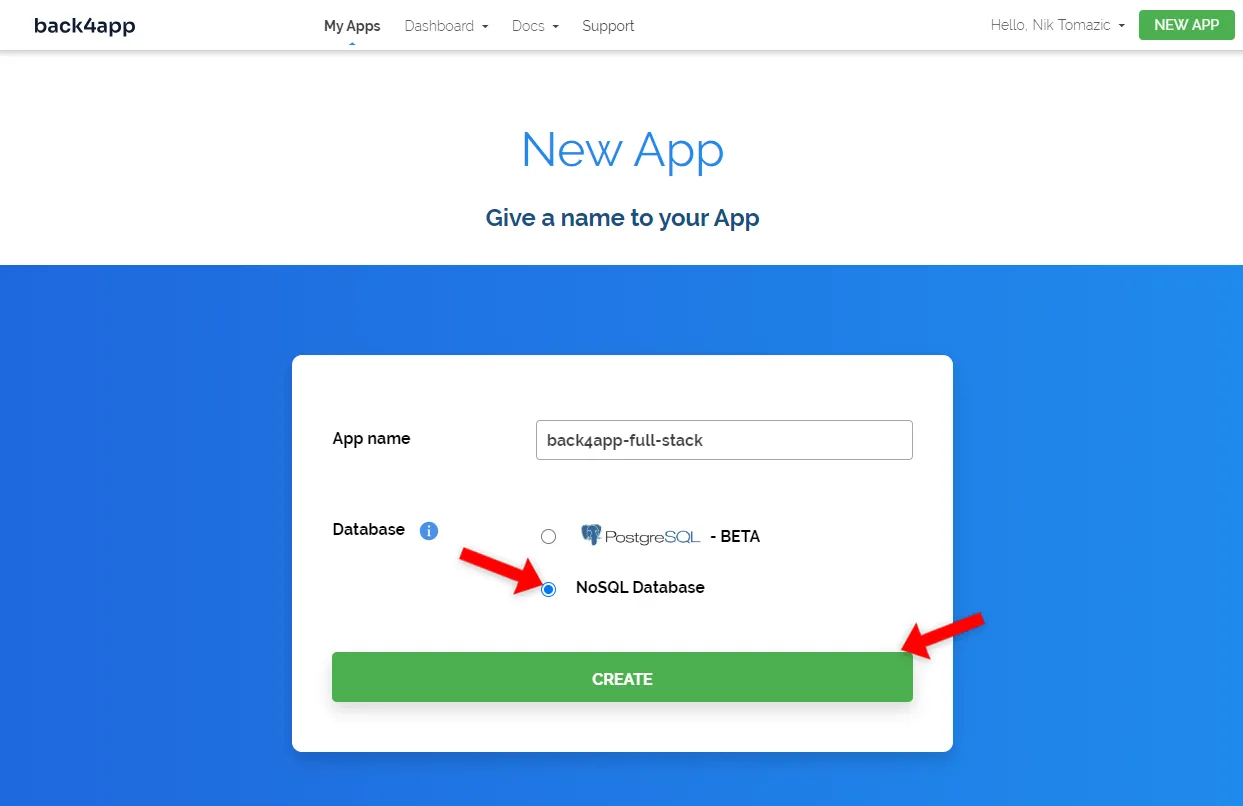
Name your app, select “NoSQL” database, and click “Create”.
The platform will take a little while to prepare everything (e.g., database, scaling, backups, application layer). Feel free to take a short coffee break in the meantime.
Once your app is ready, you’ll be presented with the database explorer.
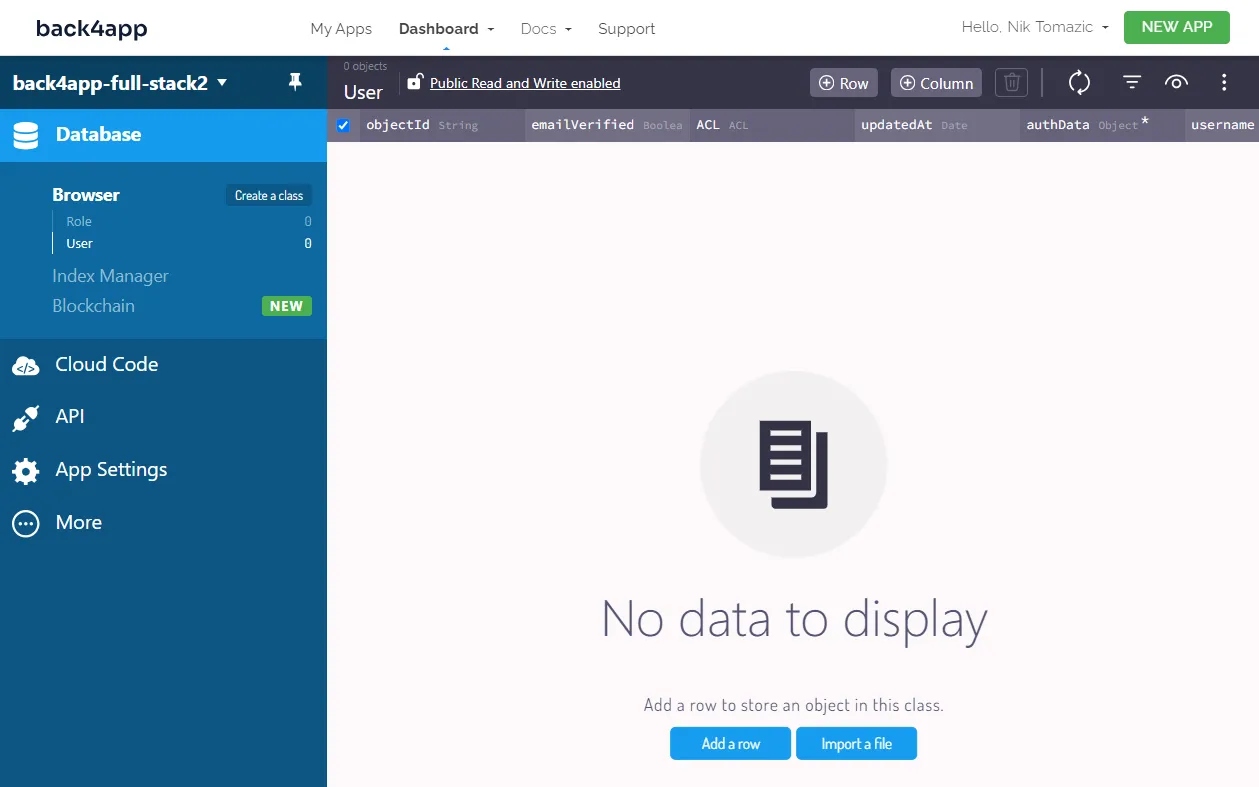
Define Database
In this section, we’ll work on the database classes.
We’ll only need one class since we’re building a simple application. Click “Create a class” on the sidebar, name it Article, leave everything else as default, and click “Create class & add columns”.
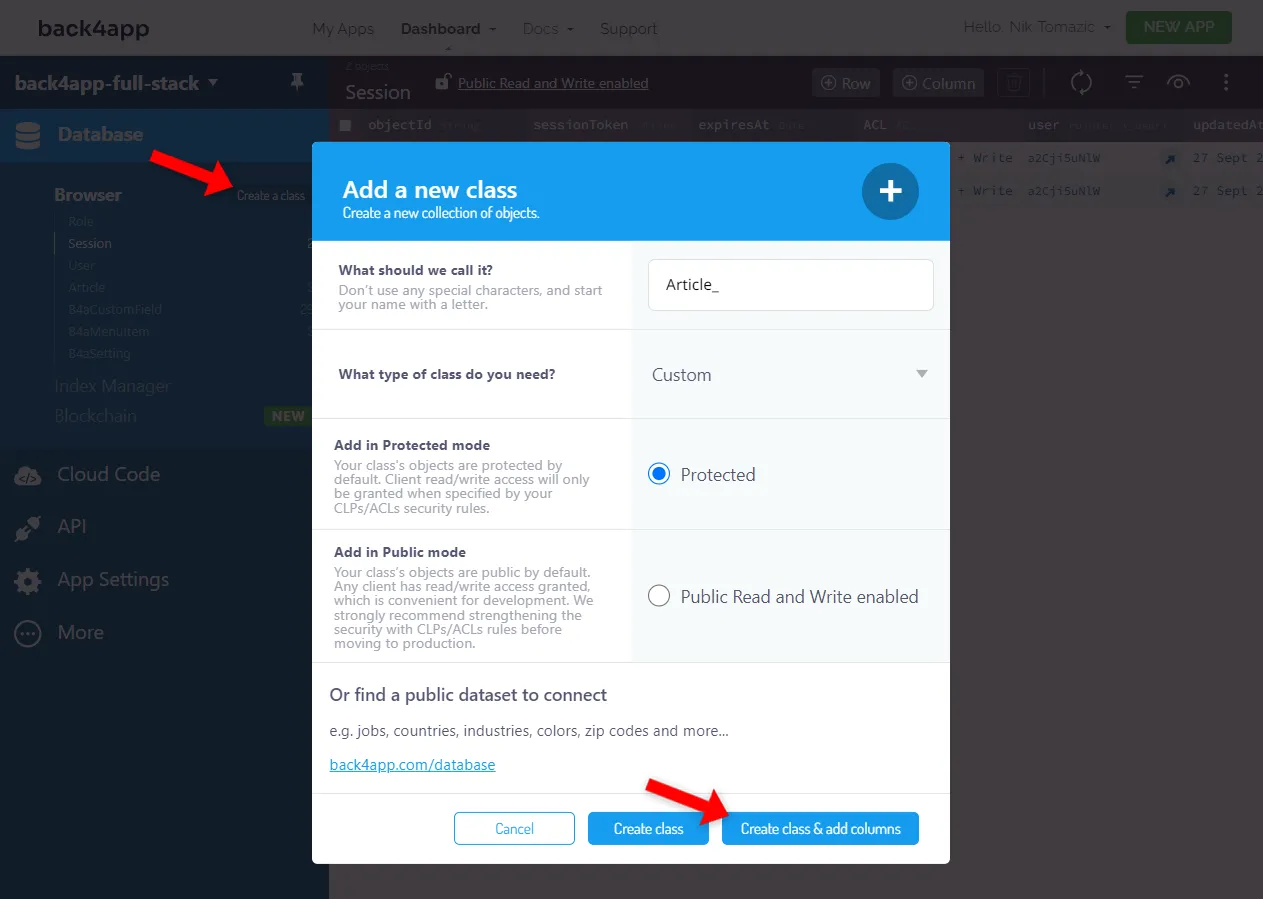
Add the following five columns to it:
+-----------+--------------+----------------+----------+
| Data type | Name         | Default value  | Required |
+-----------+--------------+----------------+----------+
| String    | slug         | <leave blank>  | 1        |
+-----------+--------------+----------------+----------+
| String    | title        | <leave blank>  | 1        |
+-----------+--------------+----------------+----------+
| File      | cover        | <leave blank>  | 0        |
+-----------+--------------+----------------+----------+
| String    | shortContent | <leave blank>  | 1        |
+-----------+--------------+----------------+----------+
| String    | content      | <leave blank>  | 1        |
+-----------+--------------+----------------+----------+
Make sure to add columns for additional data you’d like to store.
By default, database classes are in “Protected mode”. If we want to interact with them from our frontend app, we have to slightly modify the class-level permissions (CLPs). Click the lock icon at the top of the screen and modify the CLPs like so:
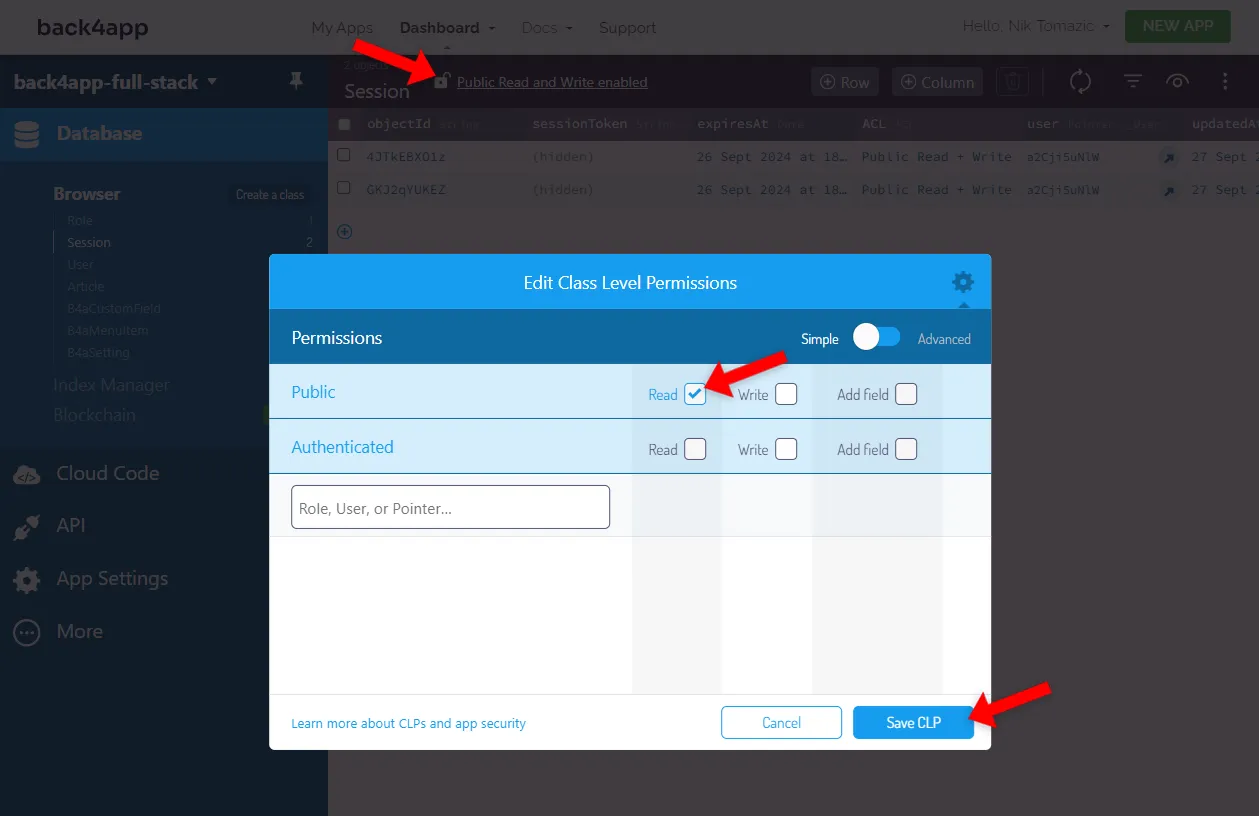
Review the following article to learn more about Parse Security.
Finally, populate the database with some sample articles.
If you don’t have any ideas, feel free to import this database dump. To import it, click on the more option at the top right of the screen and then “Import > Class Data”, then import the JSON.
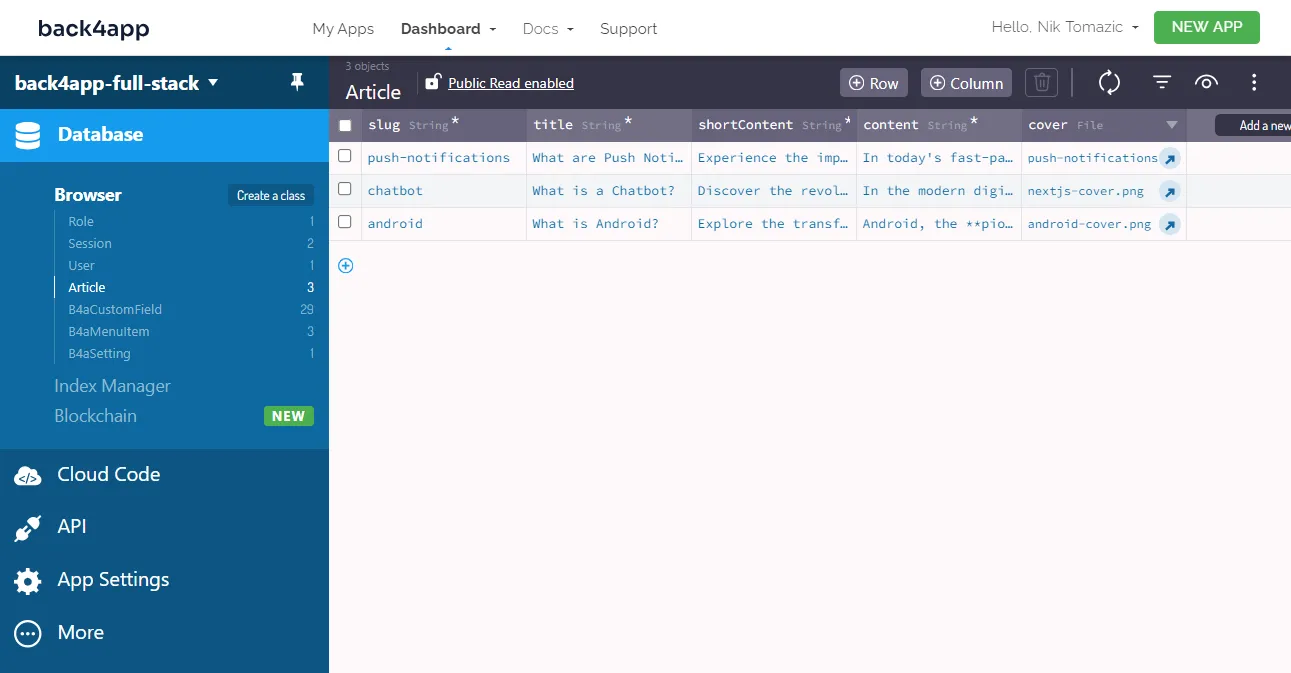
Excellent, that’s it!
We now have some test data to work with.
Admin App
Currently, the only way to manage articles is via the Back4app database view. This isn’t optimal because you don’t want to share your Back4app credentials or add non-tech people to your Back4app dashboard.
Luckily, Back4app comes with a dynamic admin interface for your database models. To enable it, select “More > Admin App” on the sidebar, and then click “Enable Admin App”.
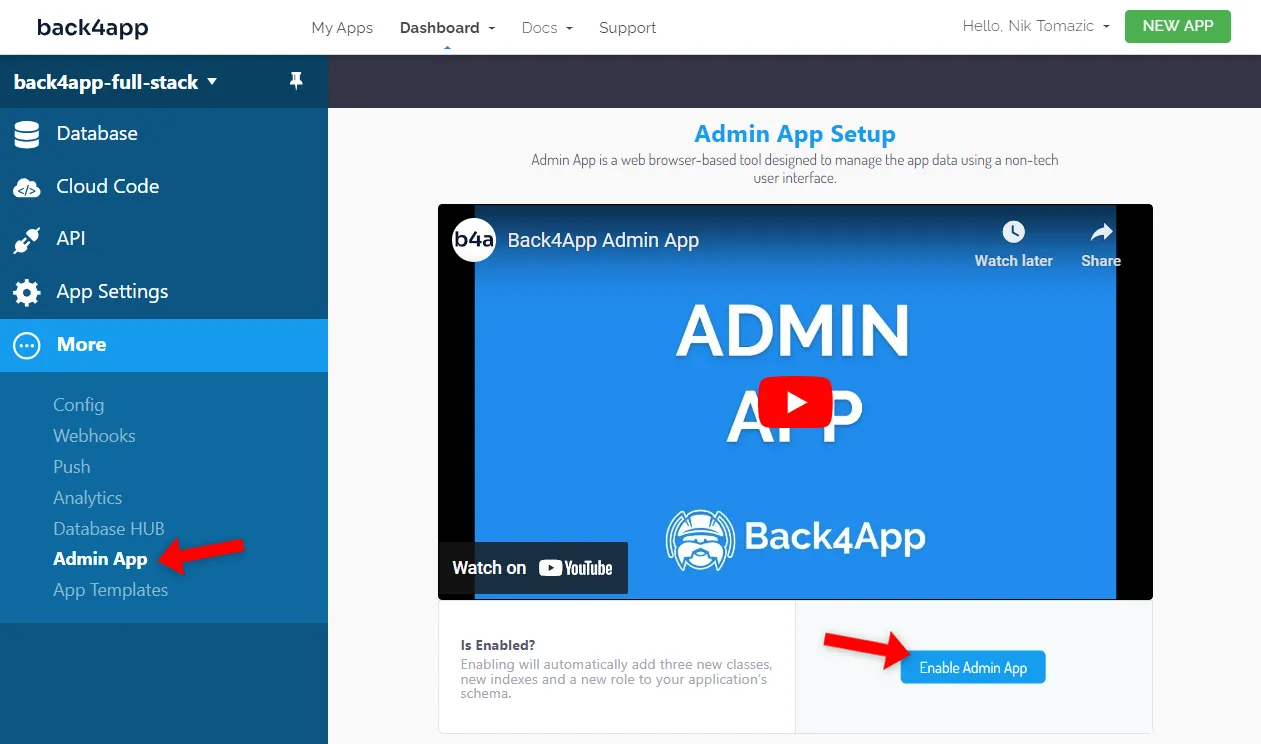
Pick a username, password, and an admin app subdomain. I’ll go with:
username:     admin
password:     verystrongpassword123
admin url:    https://fullstack.admin.back4app.com/
You can now access your admin panel at the selected admin URL.
Open a new tab and navigate to your admin panel. Use your credentials to log in and explore the interface. You can create an article, update it, and then delete it.
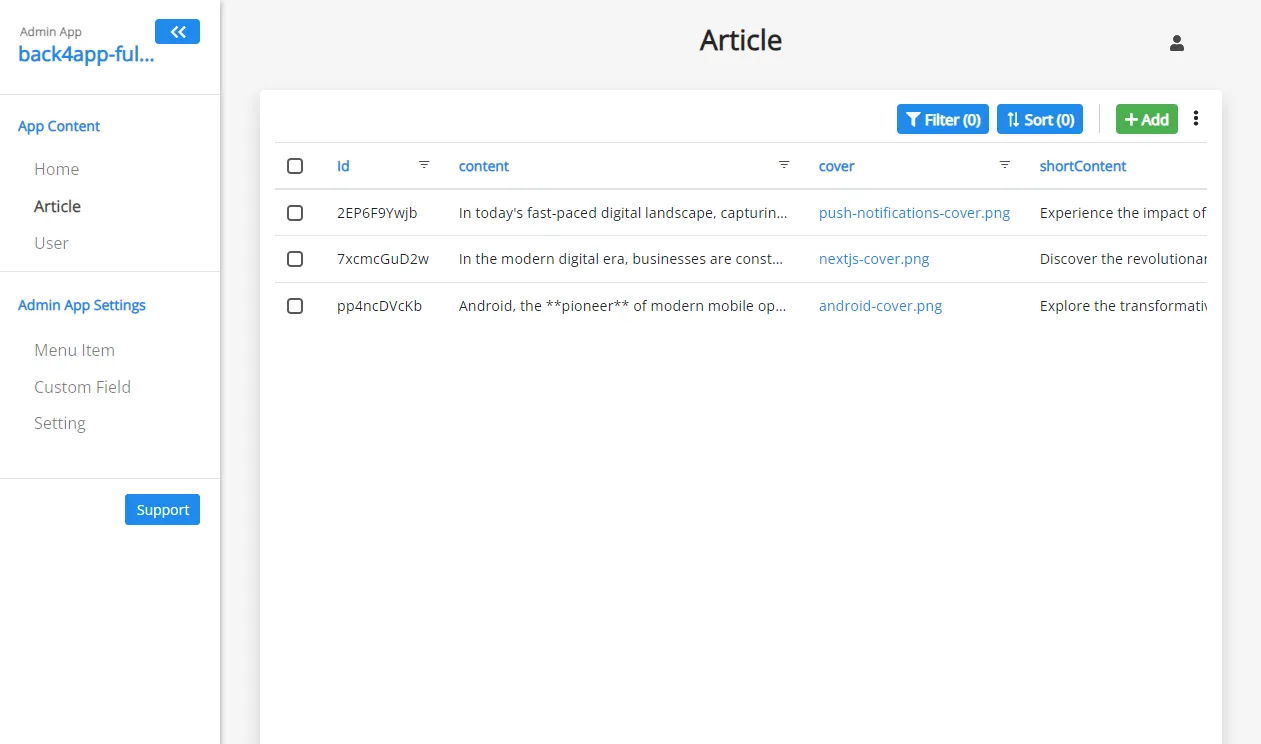
Learn more about Back4app’s Admin App by checking out the docs.
We’ve successfully created a fully-fledged backend with no code.
How to host a frontend?
In this section, we’ll take care of the frontend app.
Objectives
- Setup a local development environment
- Dockerize the application
- Test the Docker images locally
- Push the source code to GitHub
- Deploy the application to Back4app Containers
Local Setup
Start by forking all branches of this repository and then cloning the fork to your local machine:
$ git clone <fork_remote_git_url> --branch dummy
$ cd back4app-heroku-deploy && git branch -m master
We cloned the
dummybranch because it doesn’t include the backend code. We’ll work on the backend code in the next section.
Next, install the project’s dependencies:
$ npm installLastly, start the development server:
$ npm run devOpen your favorite web browser and navigate to http://localhost:3000. You should be able to see the blog index page. Try clicking an article to see if you get redirected to the article details page.
At the moment the article details page is hard-coded. Don’t worry, we’ll fix that later.
Dockerize
To deploy an app to Back4app Containers, you must first dockerize it.
Dockerization is the process of packaging the code in a container that can be deployed anywhere. The easiest way to dockerize an application is using a Dockerfile.
Dockerfile
A Dockerfile script contains instructions for creating a Docker container image. You can use this file to define the environment, install the dependencies, and execute commands required to build and run an application.
Create a Dockerfile in the project root with the following contents:
# Dockerfile

FROM node:18-alpine

WORKDIR /app

COPY package*.json ./
RUN npm ci

COPY . .

RUN npm run build
RUN npm install -g next

EXPOSE 3000

CMD ["next", "start", "-p", "3000"]
This Dockerfile is based on the node:18-alpine image. It sets the working directory, handles the dependencies, copies the project, and builds the app.
Once the app is built, it exposes port 3000 and starts a Next.js server listening on that port.
To learn more about Dockerfiles, check out the official docs.
.dockerignore
The size of a Docker image should be kept to a minimum. The easiest way to reduce a Docker image size is by creating a .dockerignore file. This file lets you specify what files and folders should be excluded from the final image.
For example, you don’t want to include your IDE files, build, .git, or node_modules in your image.
Here’s an example .dockerignore file that you can use:
# .dockerignore

.idea/

/node_modules
/.next/
/out/
/build

.vercel
Ensure to modify the .dockerignore file according to your needs.
Build, run, test
It’s always a good idea to test your Docker project locally before pushing it to the cloud. The easiest way to test your Dockerfile is by installing Docker Desktop.
Once installed, you can build your image:
$ docker build -t blog-frontend:1.0 .List the images to see if the image was successfully created:
$ docker images

REPOSITORY        TAG       IMAGE ID       CREATED             SIZE
blog-frontend     1.0       d361534a68da   2 minutes ago       1.08GB
Run a container using the just-built image:
$ docker run -p 3000:3000 --name blog-frontend blog-frontend:1.0Open your favorite web browser and navigate to http://localhost:3000. Your app should be there!
To terminate the container press
CTRL + con your keyboard.
Push to GitHub
Back4pp Containers is tightly integrated with GitHub. It provides an automatic CI/CD system that redeploys your app with each commit. To deploy your code in the next section, you must first push the changes to the VCS.
Commit all the changes and push them to the cloud:
$ git add .
$ git commit -m "dockerized the application"
$ git push origin master
Navigate to your GitHub repo and make sure the Dockerfile is present in the repository.
Deploy App
You’ll need a free Back4app account to follow along. If you aren’t registered yet, sign up for free!
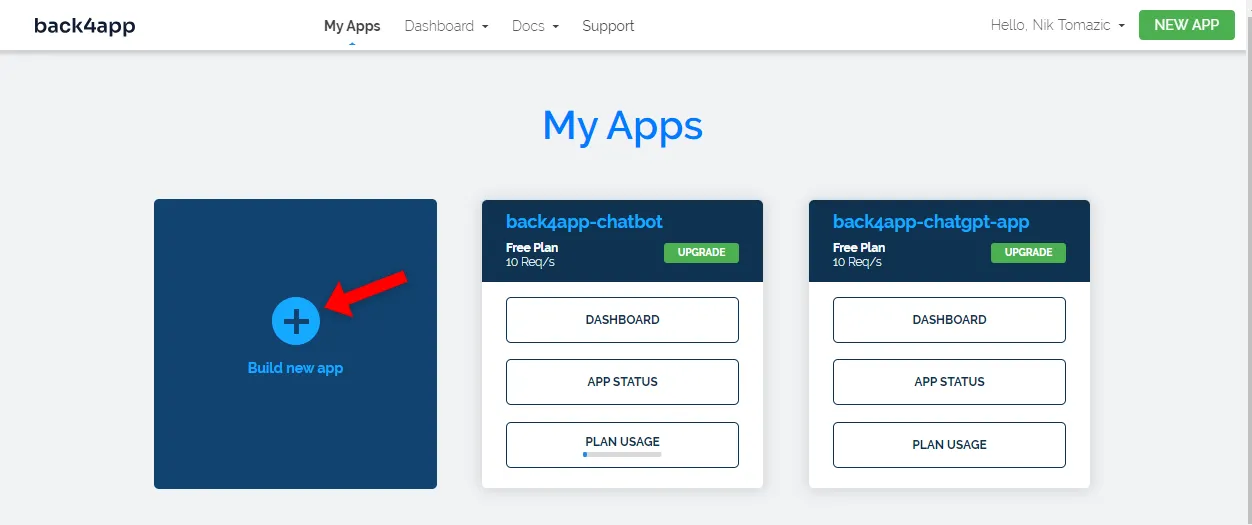
Start off by navigating to your Back4app dashboard and clicking “Build new app”.
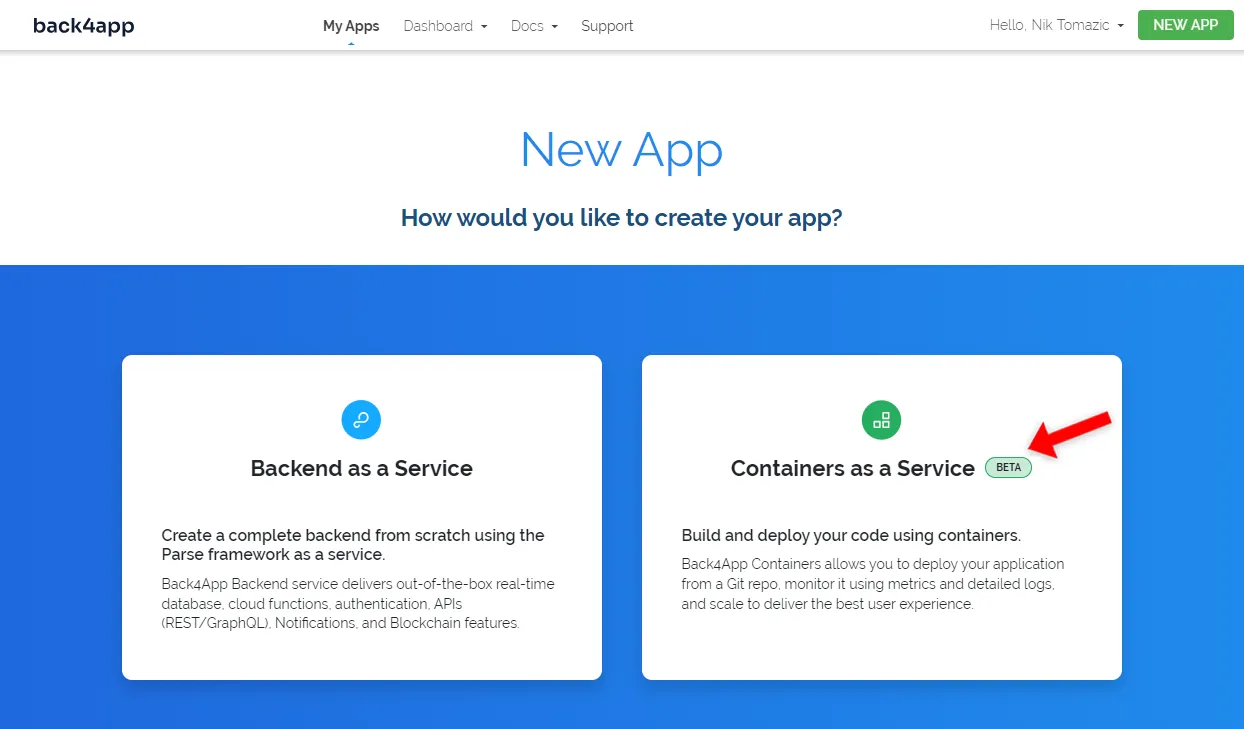
Since we’re deploying a dockerized application, select “Containers as a Service”.
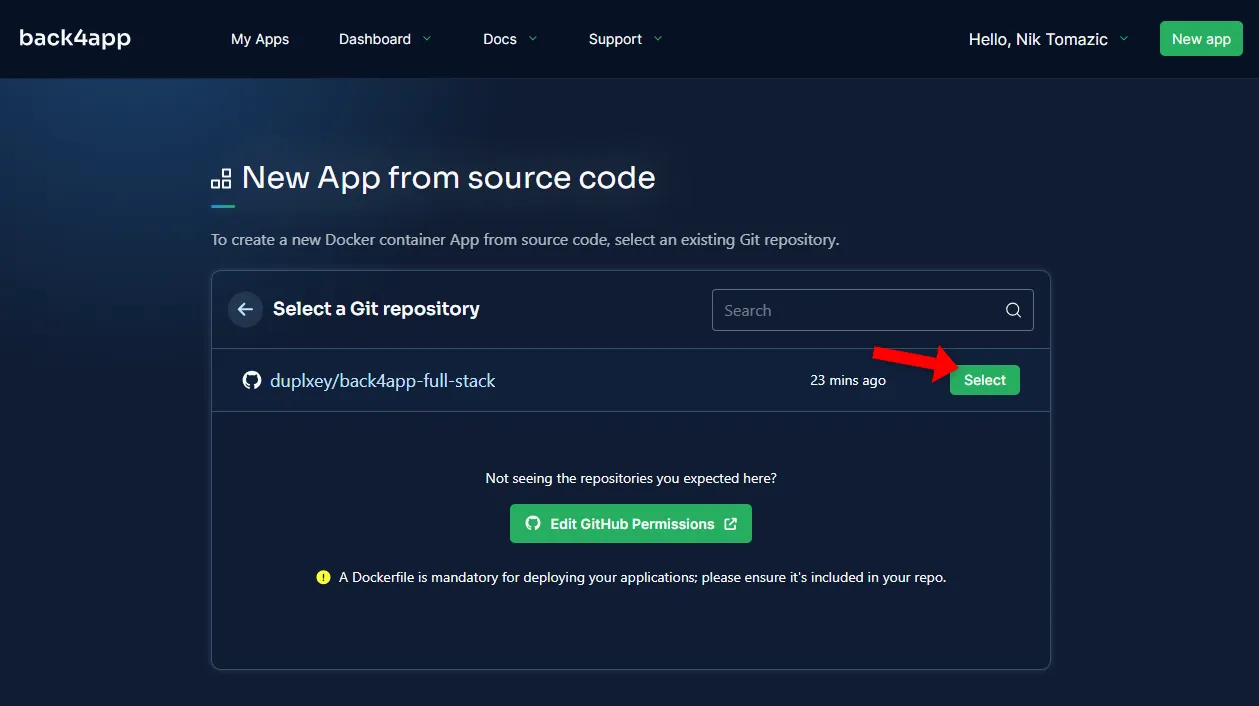
If it’s your first time using Back4app Containers, you’ll be asked to connect your GitHub account with your Back4app account. Ensure to enable access to all the repositories you’d like to deploy.
Next, find the back4app-full-stack repository and select it by clicking “Select”.
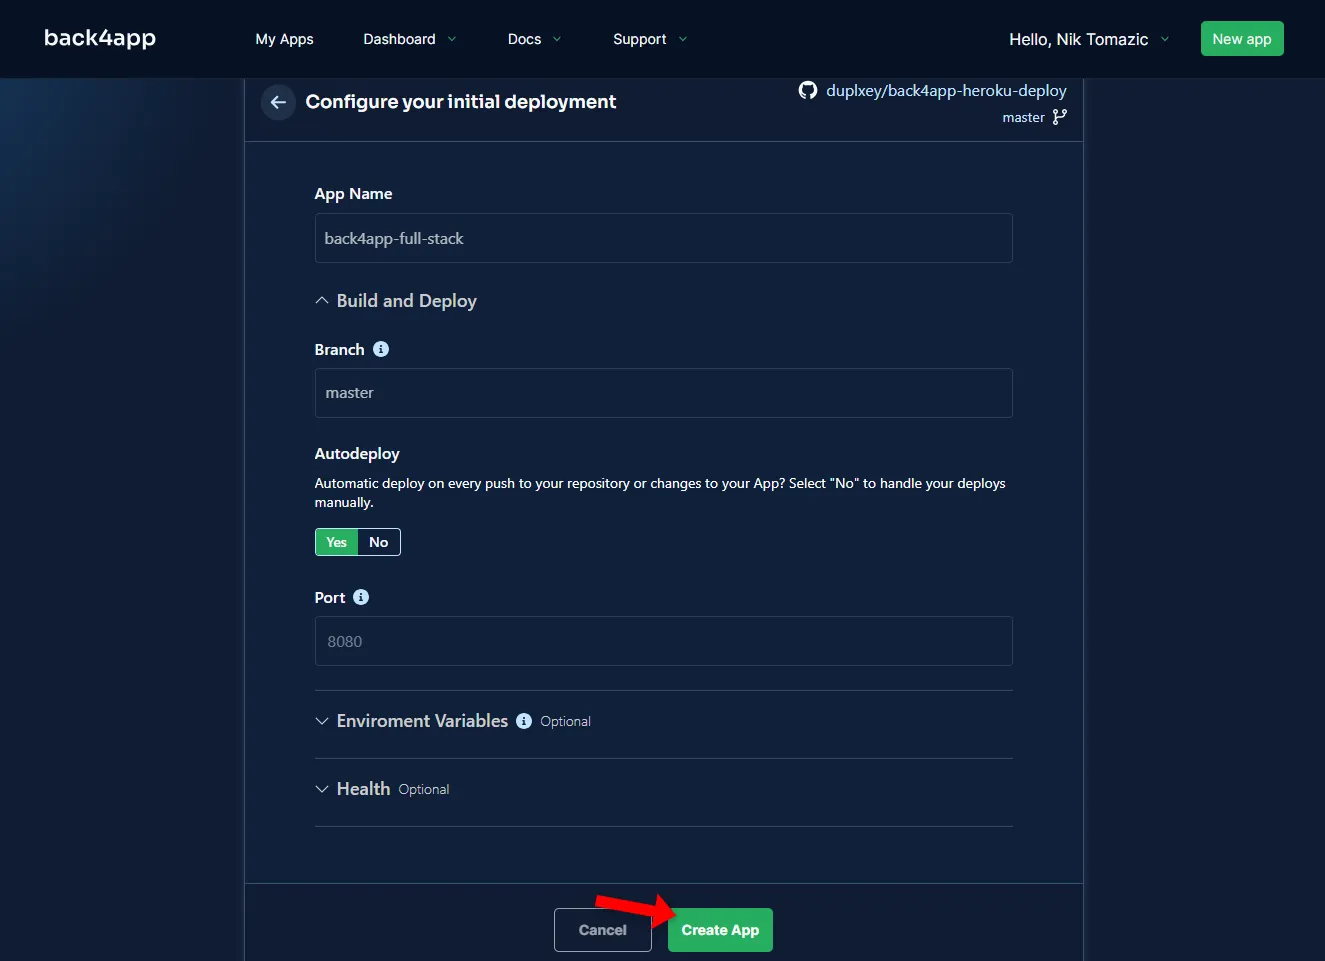
The application we’re deploying doesn’t require any special configuration. All you have to do is provide a descriptive “App Name”. I’ll go with back4app-full-stack to keep things organized.
Lastly, click “Deploy”.
Back4app Containers will take a few minutes to build and deploy your Docker image. The status of your app will change to “Ready” once it has been successfully deployed.
To visit your application, click on the green URL as shown in the image below.
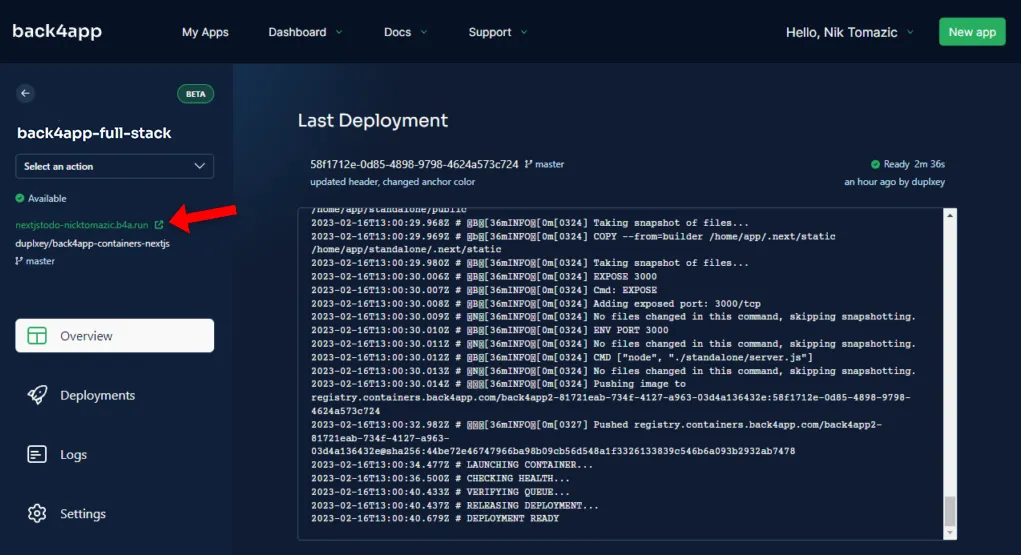
Great, you’ve successfully deployed a dummy frontend app to Back4app Containers.
How to connect frontend to backend?
In this section, we’ll connect our frontend to our Back4app backend.
Objectives
- Install Parse SDK
- Configure Parse SDK
- Fetch data (e.g., with
ParseQuery)
Install Parse SDK
First, install Parse SDK:
$ npm install parseConfigure Parse SDK
To initialize Parse SDK, you’ll have to provide your Back4app “Application ID” and “JavaScript key”. To obtain them, navigate to your Back4app application and select “App Settings > Security & Keys” on the sidebar.
Since we don’t want to expose these secrets in the source code, create an .env.local file:
# .env.local

NEXT_PUBLIC_PARSE_APPLICATION_ID=<your_parse_app_id>
NEXT_PUBLIC_PARSE_JAVASCRIPT_KEY=<your_parse_js_key>
Make sure to replace the placeholders with the actual values.
Initialize Parse SDK
Next, navigate to your providers.js and initialize Parse like so:
// src/app/providers.js

// ...

import Parse from "parse/dist/parse";

const PARSE_APPLICATION_ID = process.env.NEXT_PUBLIC_PARSE_APPLICATION_ID;
const PARSE_JAVASCRIPT_KEY = process.env.NEXT_PUBLIC_PARSE_JAVASCRIPT_KEY;
Parse.initialize(PARSE_APPLICATION_ID, PARSE_JAVASCRIPT_KEY);
Parse.serverURL = "https://parseapi.back4app.com/";

export function Providers({children}) {
    return (
        // ...
    );
}
To be able to access the Parse instance in all of our views. We’ll use React context.
Create a new file named context/parseContext.js and paste the following code inside:
// src/app/context/parseContext.js

"use client";

import {createContext} from "react";

const ParseContext = createContext();

export default ParseContext;
Next, wrap your entire app with the ParseContext and provide the Parse instance to it:
// src/app/providers.js

// ...

import ParseContext from "@/app/context/parseContext";

export function Providers({children}) {
  return (
    <CacheProvider>
      <ColorModeScript initialColorMode={theme.config.initialColorMode} />
      <ChakraProvider theme={theme}>
        <ParseContext.Provider value={Parse}>
          {children}
        </ParseContext.Provider>
      </ChakraProvider>
    </CacheProvider>
  );
}
That’s it! We can now access the Parse instance by using the useContext() hook.
Fetch Data
The last thing we have to do is fetch data from the backend. To do that, we’ll use Parse.Query. This class is basically an ORM for Parse-based databases.
First, replace src/app/page.jsx with the following:
// src/app/page.jsx

"use client";

import NextLink from "next/link";
import {useContext, useEffect, useState} from "react";
import ParseContext from "@/app/context/parseContext";
import {Card, CardBody, Heading, Link, Spinner, Stack, Text} from "@chakra-ui/react";

export default function Home() {

  const parse = useContext(ParseContext);
  const [loading, setLoading] = useState(true);
  const [error, setError] = useState("");

  const [articles, setArticles] = useState([]);

  useEffect(() => {
    (async () => {
      try {
        const query = new parse.Query("Article");
        query.descending("createdAt");
        const articles = await query.find();
        setArticles(articles);
      } catch (error) {
        setError(error);
      } finally {
        setLoading(false);
      }
    })();
  }, [parse.Query]);

  if (loading) {
    return <Spinner size="lg"/>;
  }

  if (error) {
    return <Text color="red">{error}</Text>;
  }

  return (
    <>
      <Stack>
        {articles.map((article) => (
          <Card key={article.get("slug")}>
            <CardBody>
              <Stack>
                <Heading size="lg">
                  <Link as={NextLink} href={article.get("slug")}>
                    {article.get("title")}
                  </Link>
                </Heading>
                <Text>{article.get("shortContent")}</Text>
              </Stack>
            </CardBody>
          </Card>
        ))}
      </Stack>
    </>
  );
}- We obtained the Parse instance via the
useContext()hook. - We created a few states, including
loading,error, andarticles. - We used the
useEffect()hook to run theParse.Querywhen the page is opened. - The
Parse.Queryfetches all the articles ordered bycreatedAt. - We modified the return statement to render the data.
After that replace src/app/[slug]/page.js with this:
// src/app/[slug]/page.js

"use client";

import {formatDate} from "@/app/util/date-util";
import {useContext, useEffect, useState} from "react";
import ParseContext from "@/app/context/parseContext";
import {Card, CardBody, Heading, Image, Spinner, Stack, Text} from "@chakra-ui/react";
import ReactMarkdown from "react-markdown";
import ChakraUIRenderer from "chakra-ui-markdown-renderer";

export default function Article({params}) {

  const parse = useContext(ParseContext);
  const [loading, setLoading] = useState(true);
  const [error, setError] = useState("");

  const [article, setArticle] = useState(null);

  useEffect(() => {
    (async () => {
      try {
        const query = new parse.Query("Article");
        query.equalTo("slug", params.slug);
        const article = await query.first();
        if (!article) {
          setError("This article does not exist.");
        } else {
          setArticle(article);
        }
      } catch (error) {
        setError(error);
      } finally {
        setLoading(false);
      }
    })();
  }, [params.slug, parse.Query]);

  if (loading) {
    return <Spinner size="lg"/>;
  }

  if (error) {
    return <Text color="red">{error}</Text>;
  }

  return (
    <>
      {article && (
        <Stack>
          <Card>
            <CardBody>
              <Stack>
                <Heading as="h2" size="lg">{article.get("title")}</Heading>
                <Text>Posted on {formatDate(article.get("createdAt"))}</Text>
                {article.get("cover") && (
                  <Image
                      src={article.get("cover").url()}
                      alt={`${article.get("title")} cover`}
                      borderRadius="lg"
                  />
                )}
                <ReactMarkdown
                    components={ChakraUIRenderer()}
                    children={article.get("content")}
                    skipHtml
                />
              </Stack>
            </CardBody>
          </Card>
        </Stack>
      )}
    </>
  );
}
We used the analog concepts as in the code above. The main difference between the two code snippets is that we’re fetching a specific article instead of all of them in this one.
And we’re done! Go ahead and test the project locally:
$ next devOnce you’re sure everything is working, push it to the VCS:
$ git add .
$ git commit -m "connected the frontend with the backend"
$ git push origin master
Back4app Containers will automatically redeploy your application with the latest changes.
Conclusion
In conclusion, we’ve successfully deployed a full-stack app to Back4app. Through this process, you’ve gained valuable experience on hosting the frontend and the backend of an application. You should now have no problems deploying your own full-stack apps.
The final source code is available on the back4app-full-stack repo and you learned where to host frontend and backend.


