Auth on Firebase & Parse

In Part 1 and Part 2 of this series, we compared the process of creating an App and integrating frameworks to your XCode project and how Firebase and Parse databases have similar and distinct features that might fit better to your use case.
In this third part, we will start coding and evaluate how much code is necessary to get a Sign-Up / Sign In process working on both platforms.
What we will be building
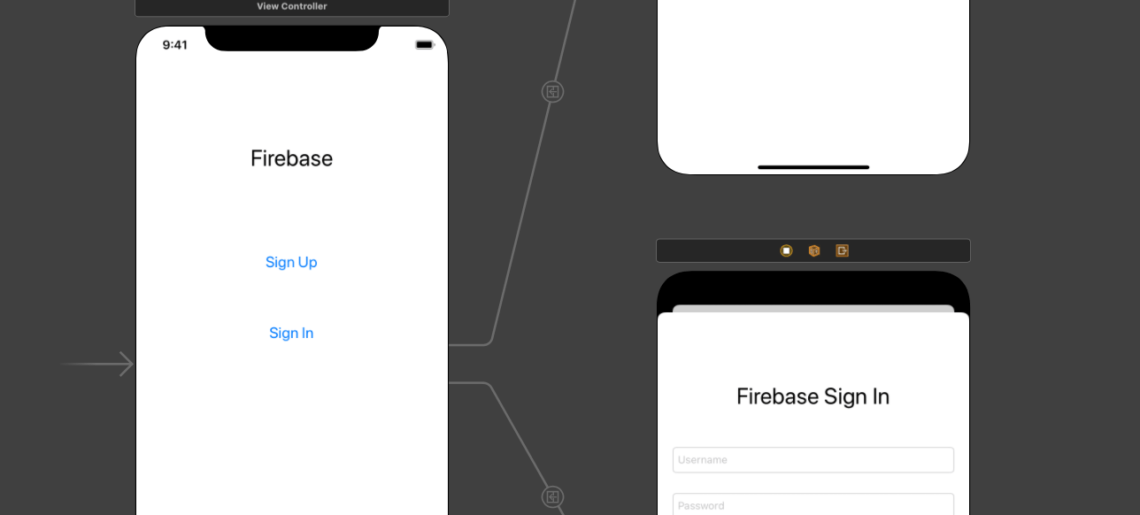
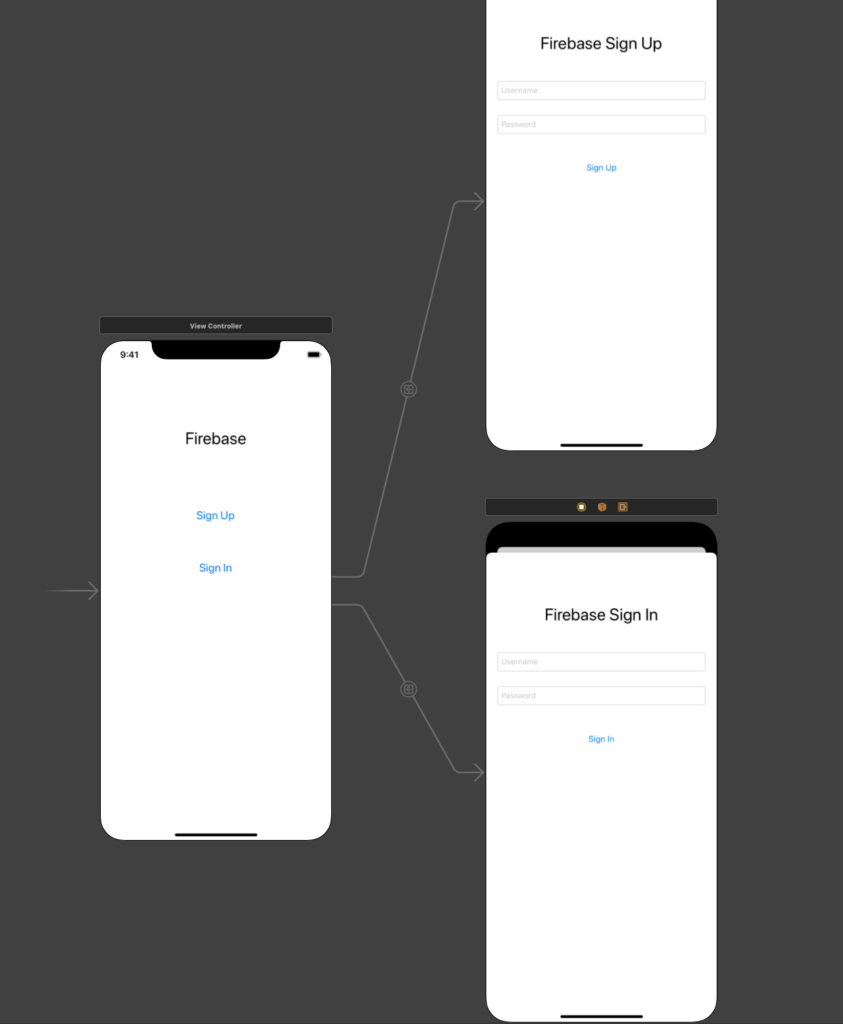
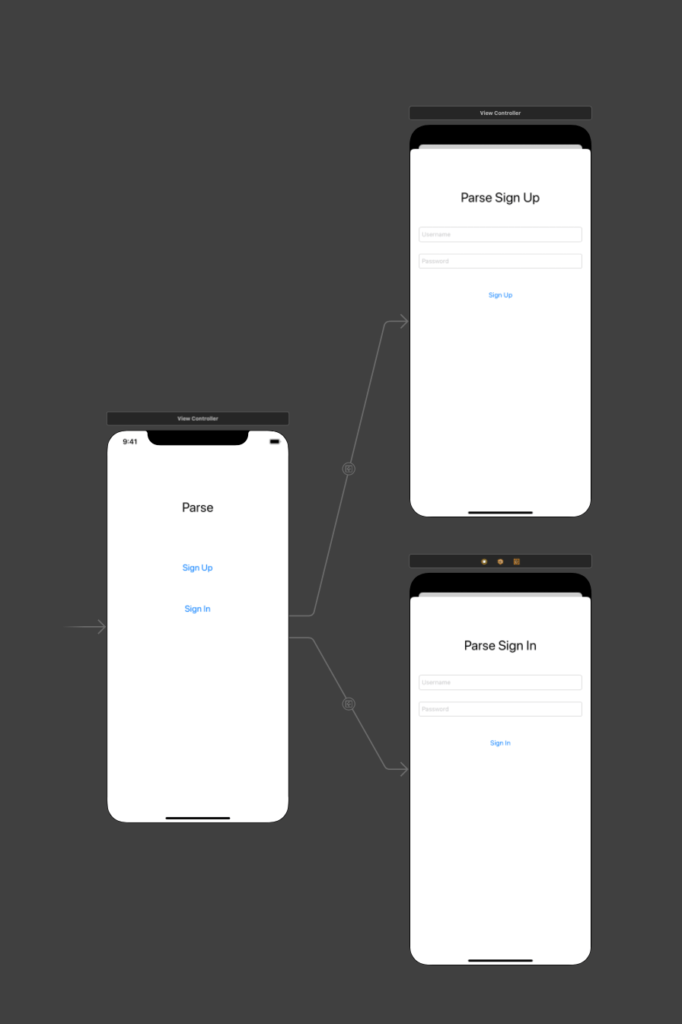
As both platforms will essentially do the same tasks, we will be using the exact same View Controllers design with all controls created similarly:


The main View Controller will perform segues to the Sign-Up and Sign In View Controllers, which will perform the respective actions.
The Firebase code
After installing the Firebase SDK as described in Part 1, we need to initialize it in our AppDelegate.swift file:
import FirebaseThen, inside our application:didFinishLaunchingWithOptions method, we have to initialize the FirebaseApp object, putting the following line above the return true statement:
FirebaseApp.configure()Now, we must add code to all our Views that need information that is private to the signed-in user to listen to the FIRAuth object, which will be called every time a sign-in state changes.
A good place to put this code is in the viewWillAppear method, so the view won’t even load data if not authorized:
handle = Auth.auth().addStateDidChangeListener { (auth, user) in
  // Any other actions that happen upon state change can be written here
}
It is also necessary to detach the listener before we leave such View, so in the viewWillDisappear method, we can add this code:
Auth.auth().removeStateDidChangeListener(handle!)
Signing-up new users will be done in our SignUpViewController, so let’s add this code in the method that gets called when the user presses the Singn-Up button:
Auth.auth().createUser(withEmail: email, password: password) { authResult, error in
  // Code for error handling and other actions can be put here
}
A good error handling for the method above looks like this:
guard let user = authResult?.user, error == nil else {
    print("ERROR CREATING USER \(user.email!).")
    print(error!.localizedDescription)
    return
}
print("\(user.email!) successfuly created.")
Signing in users will be done in our SignInViewController, when the user clicks the Sign In button. The code for signing in a user looks like this:
Auth.auth().signIn(withEmail: email, password: password) { [weak self] authResult, error in
  guard let strongSelf = self else { return }
  // Aditional code for error handling and other actions can be put here
}
Then we can finally retrieve the user’s details after logged in using this code:
if let user = user {
  let uid = user.uid
  let email = user.email
  // Aditional properties can be retrieved here
}
The Sign Out process is achieved by:
firebase.auth().signOut().then(function() {
  // Sign-out successful.
}).catch(function(error) {
  // An error happened.
});
Now, that is quite simple and straightforward.
Let’s take a look at Parse’s approach:
The Parse code
Similarly to Firebase, we will start by installing the Parse IOS SDK, as described in Part 1, then, we need to initialize it in our AppDelegate.swift file:
import ParseAs Parse can be hosted practically anywhere, it is mandatory to also set up your App Id, key and the URL for the Parse host that you are using:
let configuration = ParseClientConfiguration {
    $0.applicationId = "PASTE_YOUR_APPLICATION_ID_HERE"
    $0.clientKey = "PASTE_YOUR_CLIENT_ID_HERE"
    $0.server = "https://parseapi.back4app.com"
}
Parse.initialize(with: configuration)
In our viewDidAppear method, we can check if the user is already logged in, so we can display data:
let currentUser = PFUser.current()
if currentUser != nil {
    // User is NOT logged in. Do not display data.
}
In our SignUpViewController, let’s add some code to create the user when the Sign-Up button is clicked:
let user = PFUser()
user.username = signUpUsernameField.text
user.password = signUpPasswordField.text
user.signUpInBackground { (success, error) in
    UIViewController.removeSpinner(spinner: sv)
    if success{
        // Success signing up. Display data for this user.
    }else{
        if let descrip = error?.localizedDescription{
            // Error signing up. Do not display data and show error message.
        }
    }
}
Signing in is done in our SignInViewController, when the user clicks the Sign In button:
PFUser.logInWithUsername(inBackground: signInUsernameField.text!, password: signInPasswordField.text!) { (user, error) in
    if user != nil {
        // User signed In. Display data.
    }else{
        if let descrip = error?.localizedDescription{
            // User not signed in. Do not display data and show error message
        }
    }
}
Signing Out is performed by:
PFUser.logOutInBackground { (error: Error?) in
    if (error == nil){
        // Success logging out
    }else{
        // Error logging out. Display error message.
    }
}
Conclusion
Firebase sign-up and sign-in need a few lines of code less than Parse does, but Parse can be hosted practically anywhere, which is a huge advantage as there is no vendor lock-in.
Both offer sign-up, sign-in and sign-out processes with error handling and easy code management.
As so, I won’t consider 3 or 4 lines of code as an advantage.
I’ll call this one a draw.


