Deploying a Flask app on Heroku
During the last years Python became one of the most used programming languages. Its applications cover many fields like artificial intelligence, web services, data science, and many more. Particularly, in here, we are interested in developing a RESTful API. In order to do this, we use Flask, a python framework that makes easy to develop any kind of web service based on the HTTP protocol.
Another popular framework for developing web application is Django. In some use cases, one framework may be more adequate.
On the other hand, for the deployment step, we will use Heroku, a well known cloud platform that makes easy to set up a server for our web application.
Heroku offers a couple of methods for you to deploy your application. Some of them may be more suitable for your project environment. Since GitHub is a development tool widely used by developers all over the world, in this tutorial we will use it to allocate our Restful API project. Later on, we will use this repository as the source for the deployment process. We will follow these steps to deploy our Flask app:
- Create an app on the Heroku platform
- Install an add-on in the Heroku app
- Setting up a GitHub repository for the python project
- Deploying the Flask app
Contents
Prerequisites
- A Heroku account. If you don’t have one yet, create one here
- A GitHub account (join to GitHub here)
- Git knowledge (basic level)
- Medium knowledge about RESTful APIs and Python
Create an app on the Heroku platform
- First, go to Heroku platform and sign in with your account. From the dashboard, you can create a new app by clicking on new>Create new app:

- In the follow-up, enter a unique name for the app and select a region where the server will be located. Complete the app creation by clicking on the Create app button:
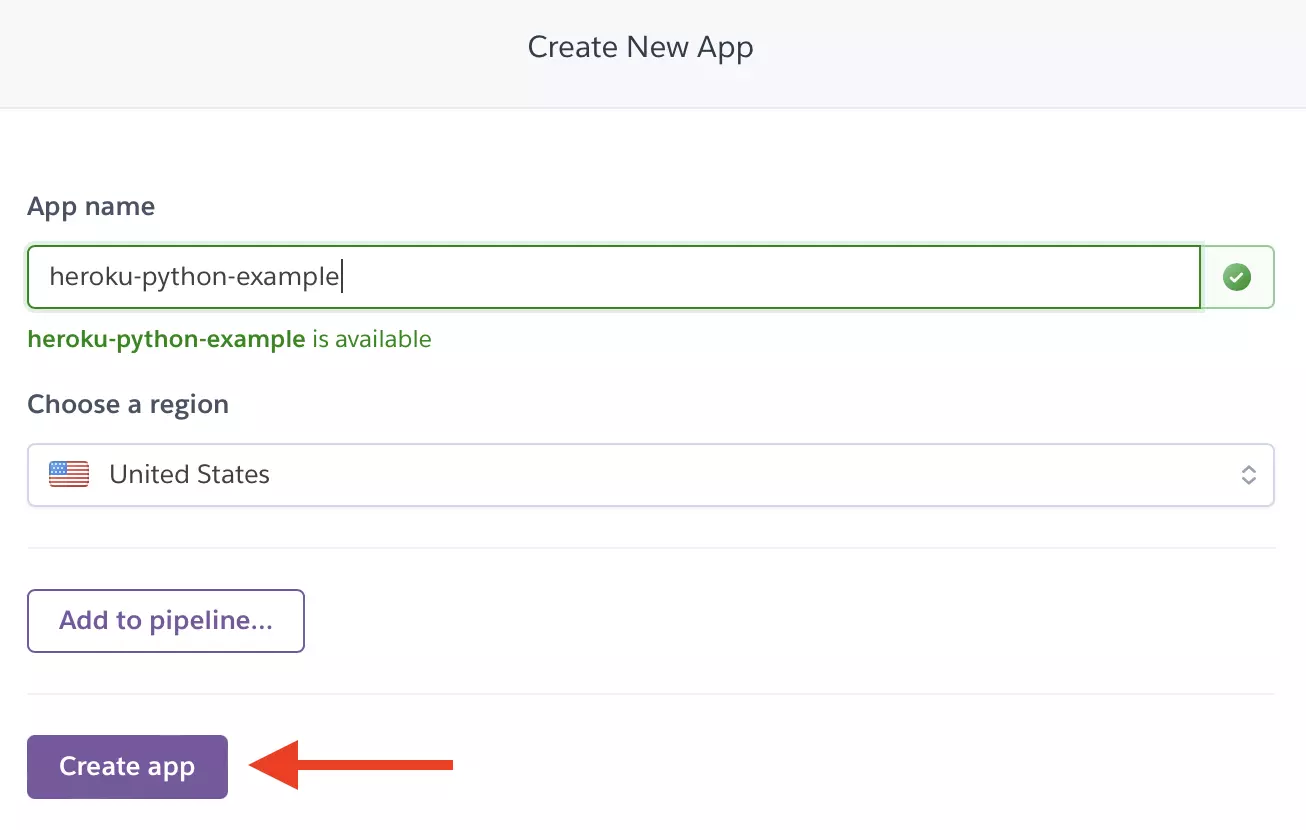
Heroku should redirect you to the app’s dashboard if the creation process succeeded. The app’s dashboard should look like this:

On top of the dashboard there is a set of tabs where you can locate miscellaneous options and configurations for your new app.
Install an add-on in the Heroku app
A web application would not be complete without complementary tools like a database, file storage, etc. Heroku does provide such complements as Add-ons. You can find these add-ons in the app’s dashboard under the Resources tab.
In any RESTful API, managing data stored in a database is crucial for the app to work properly. With Heroku’s add-ons, setting up a database for your app is just a few clicks away. Go to the Resources tab and click on the Find more add-ons button:
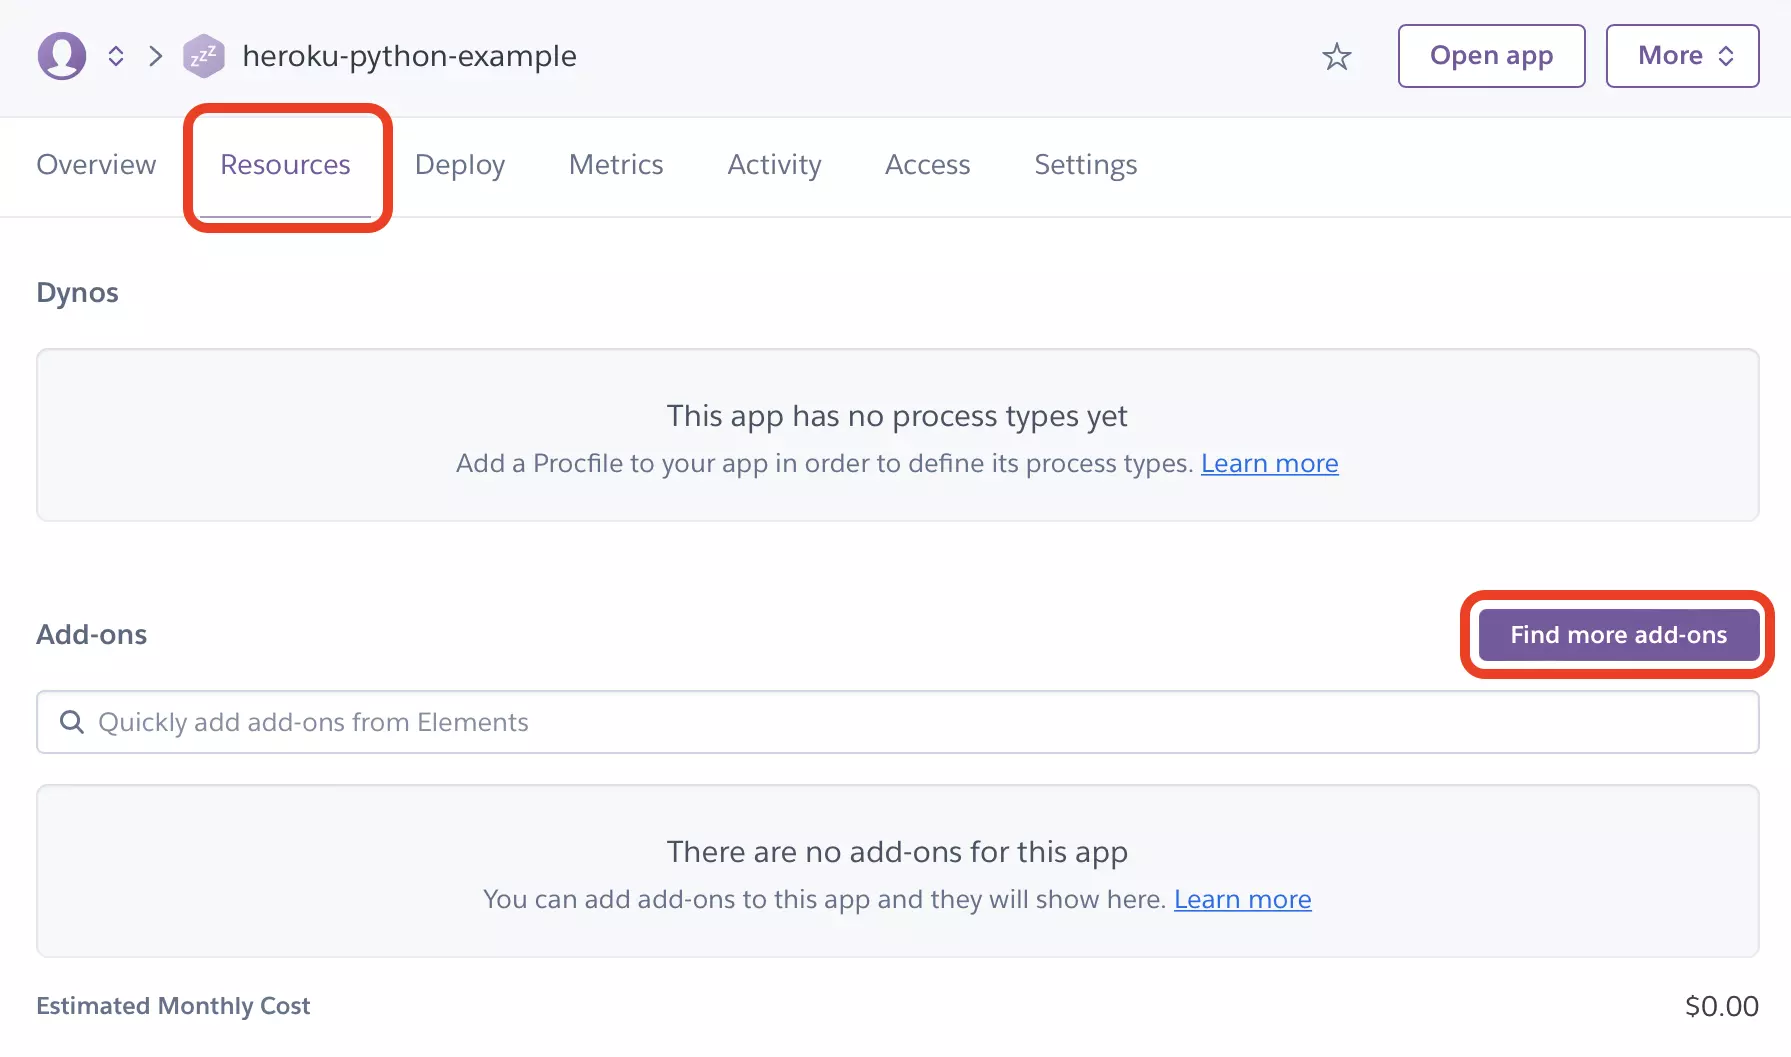
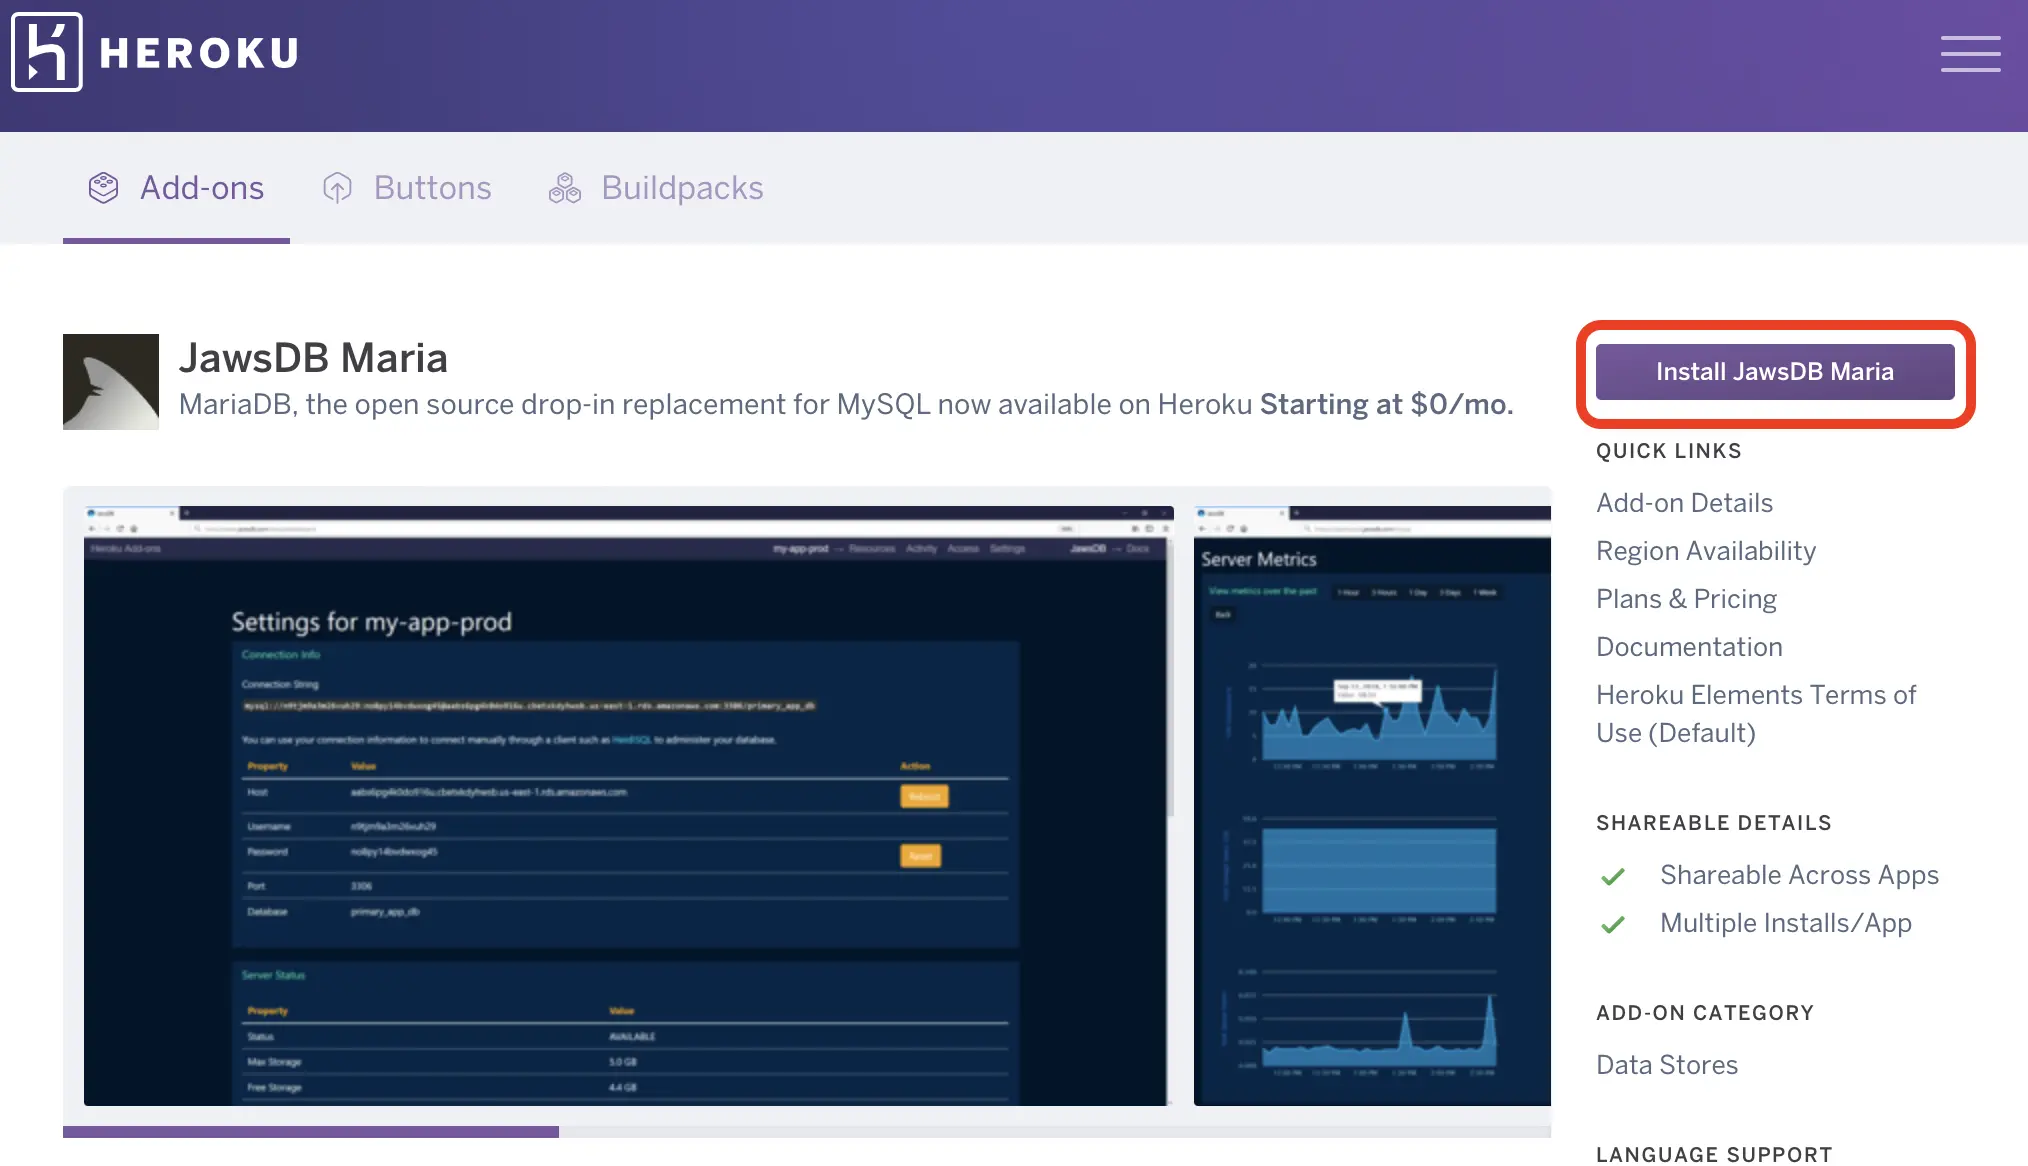
This action should open a new tab in your browser. In this tab, you can see a list of the add-ons Heroku provides for you to integrate them in your app. The Restful API we are trying to deploy on Heroku requires a database, JawsDB Maria database should work for this tutorial. Thus, in the add-ons list, find this database and select it. On the next page, click on Install JawsDB Maria:
To complete the integration process, you have to choose a plan according to your app requirements, and enter the name of the app where the add-on is being integrated. Lastly, click on the Submit Order Form button:
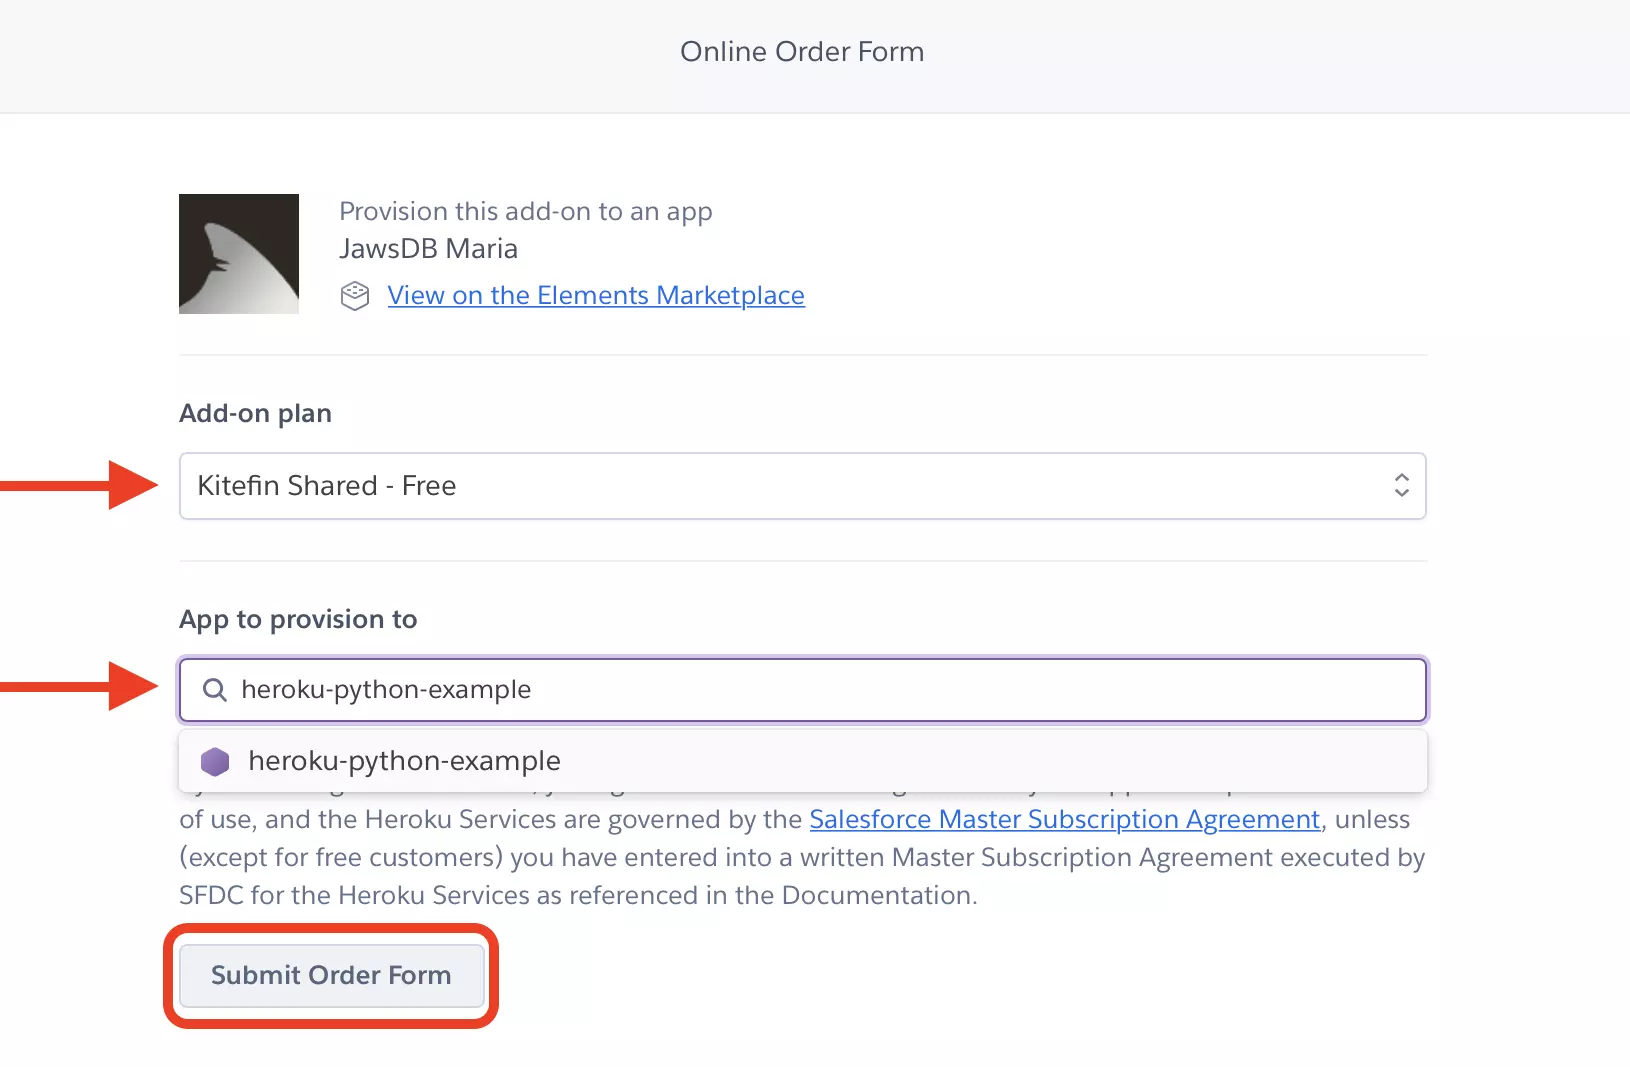
When the integration finishes, the settings, credentials, and any additional configuration value for the JawsDB Maria add-on should appear in the resource tab.
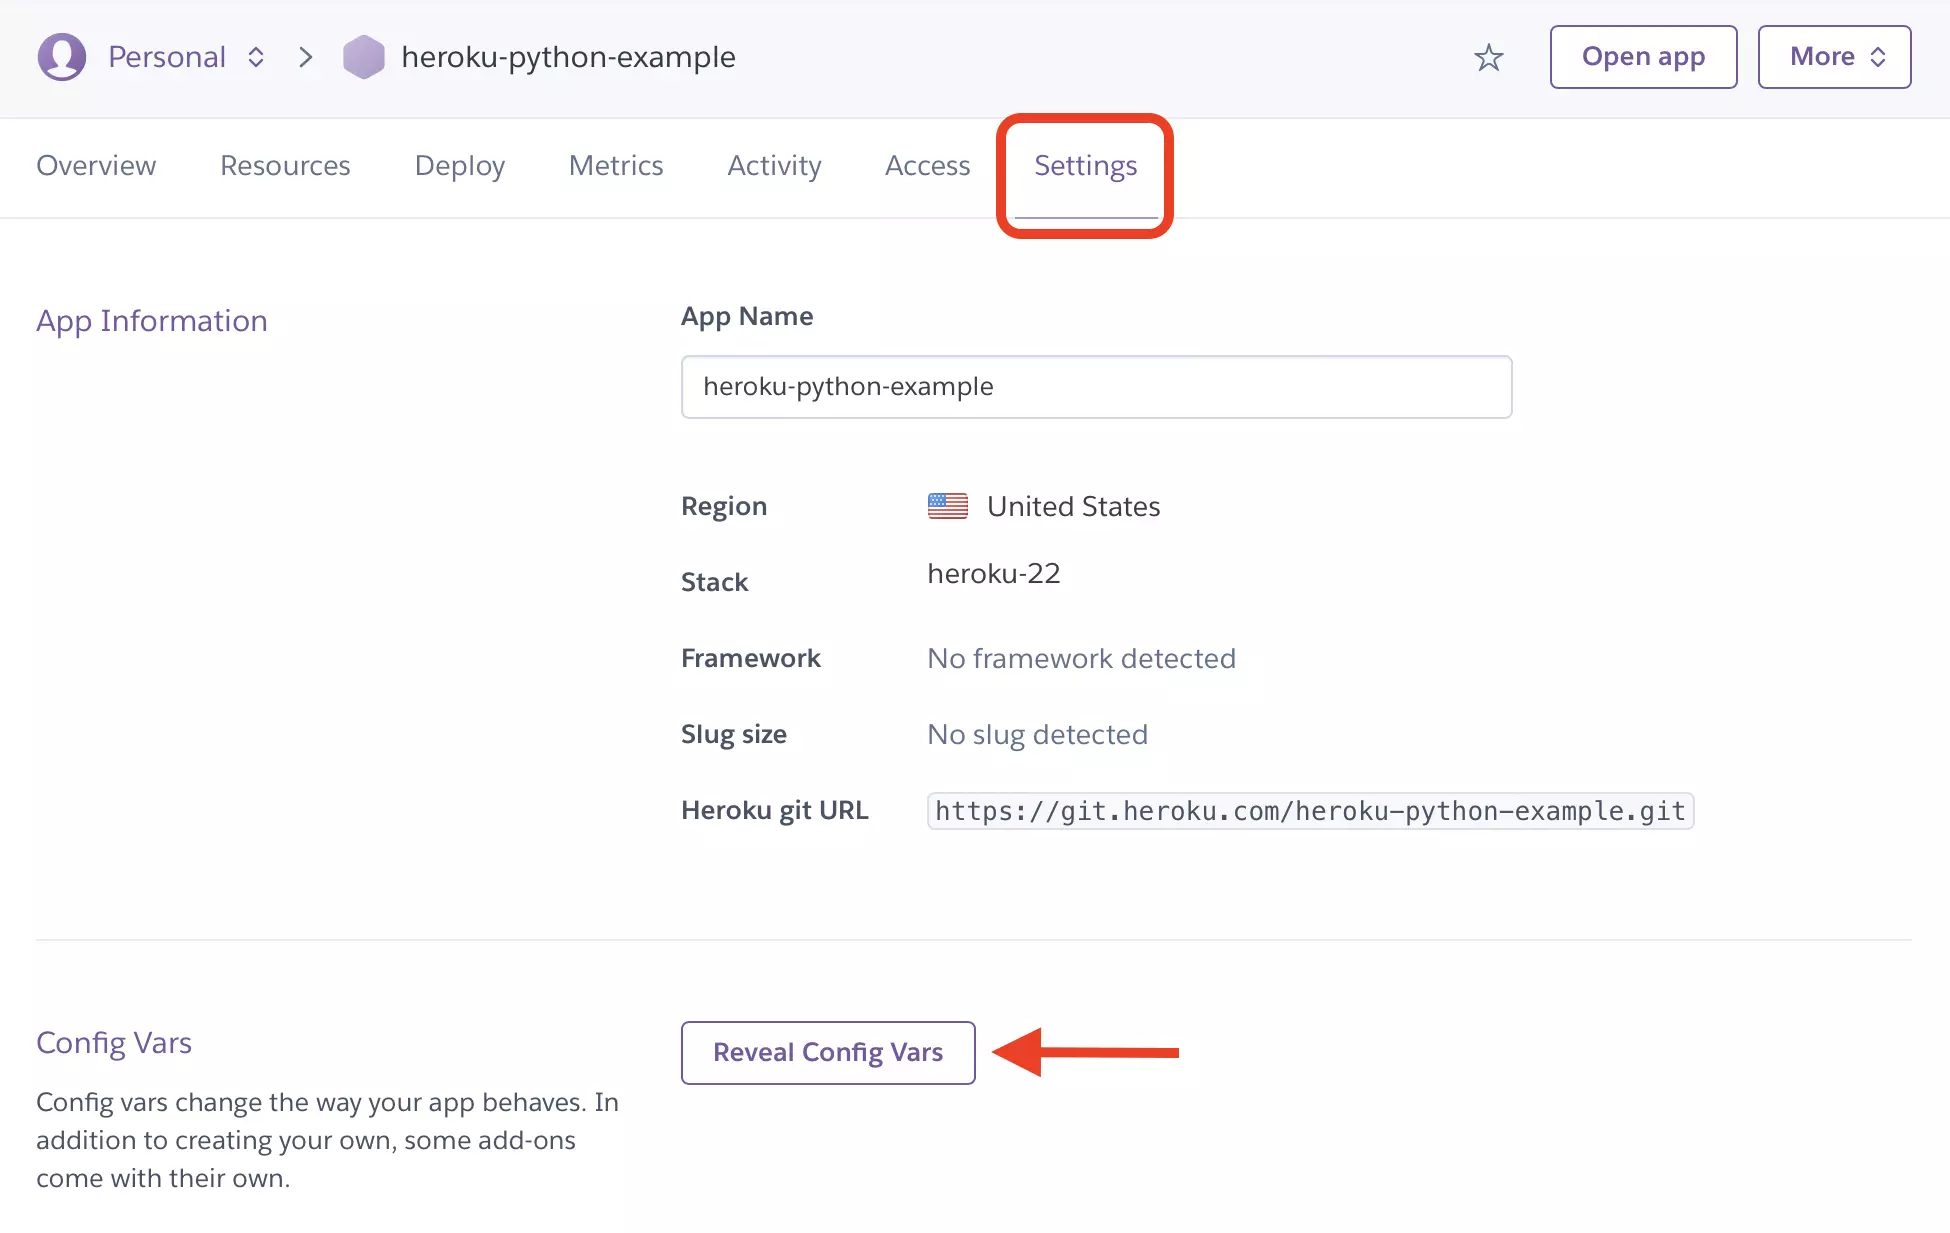
Accessing any database usually requires the hostname, port, credentials, and database name. You can find all this information in the resources tab. Moreover, For accessing this information from your RESTful API, it is recommended to read it from the environment section. From the app’s dashboard, go to the Settings tab and click on Reveal Config Vars:
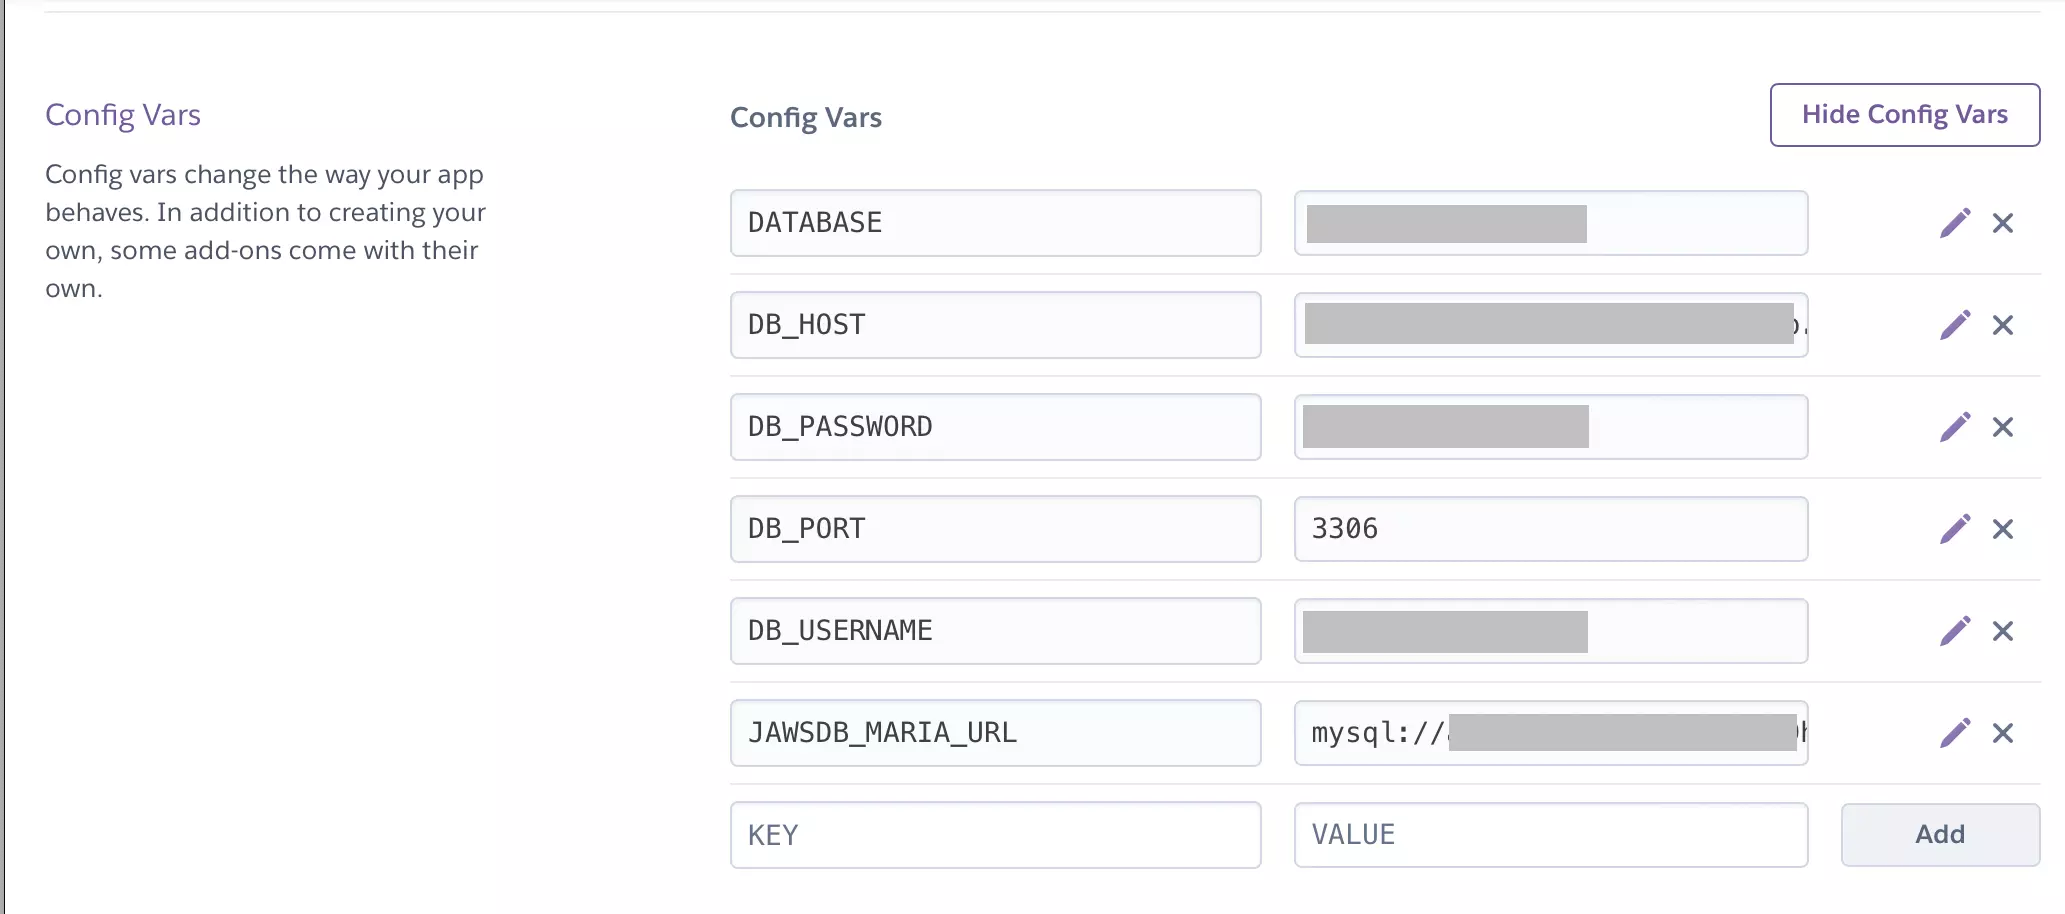
You can add all the environment variables your app might require to function properly. For instance, configuring the JawsDB Maria database you added to the app, you should insert the key-value pairs to access the database:
Setting up a GitHub repository for the python project
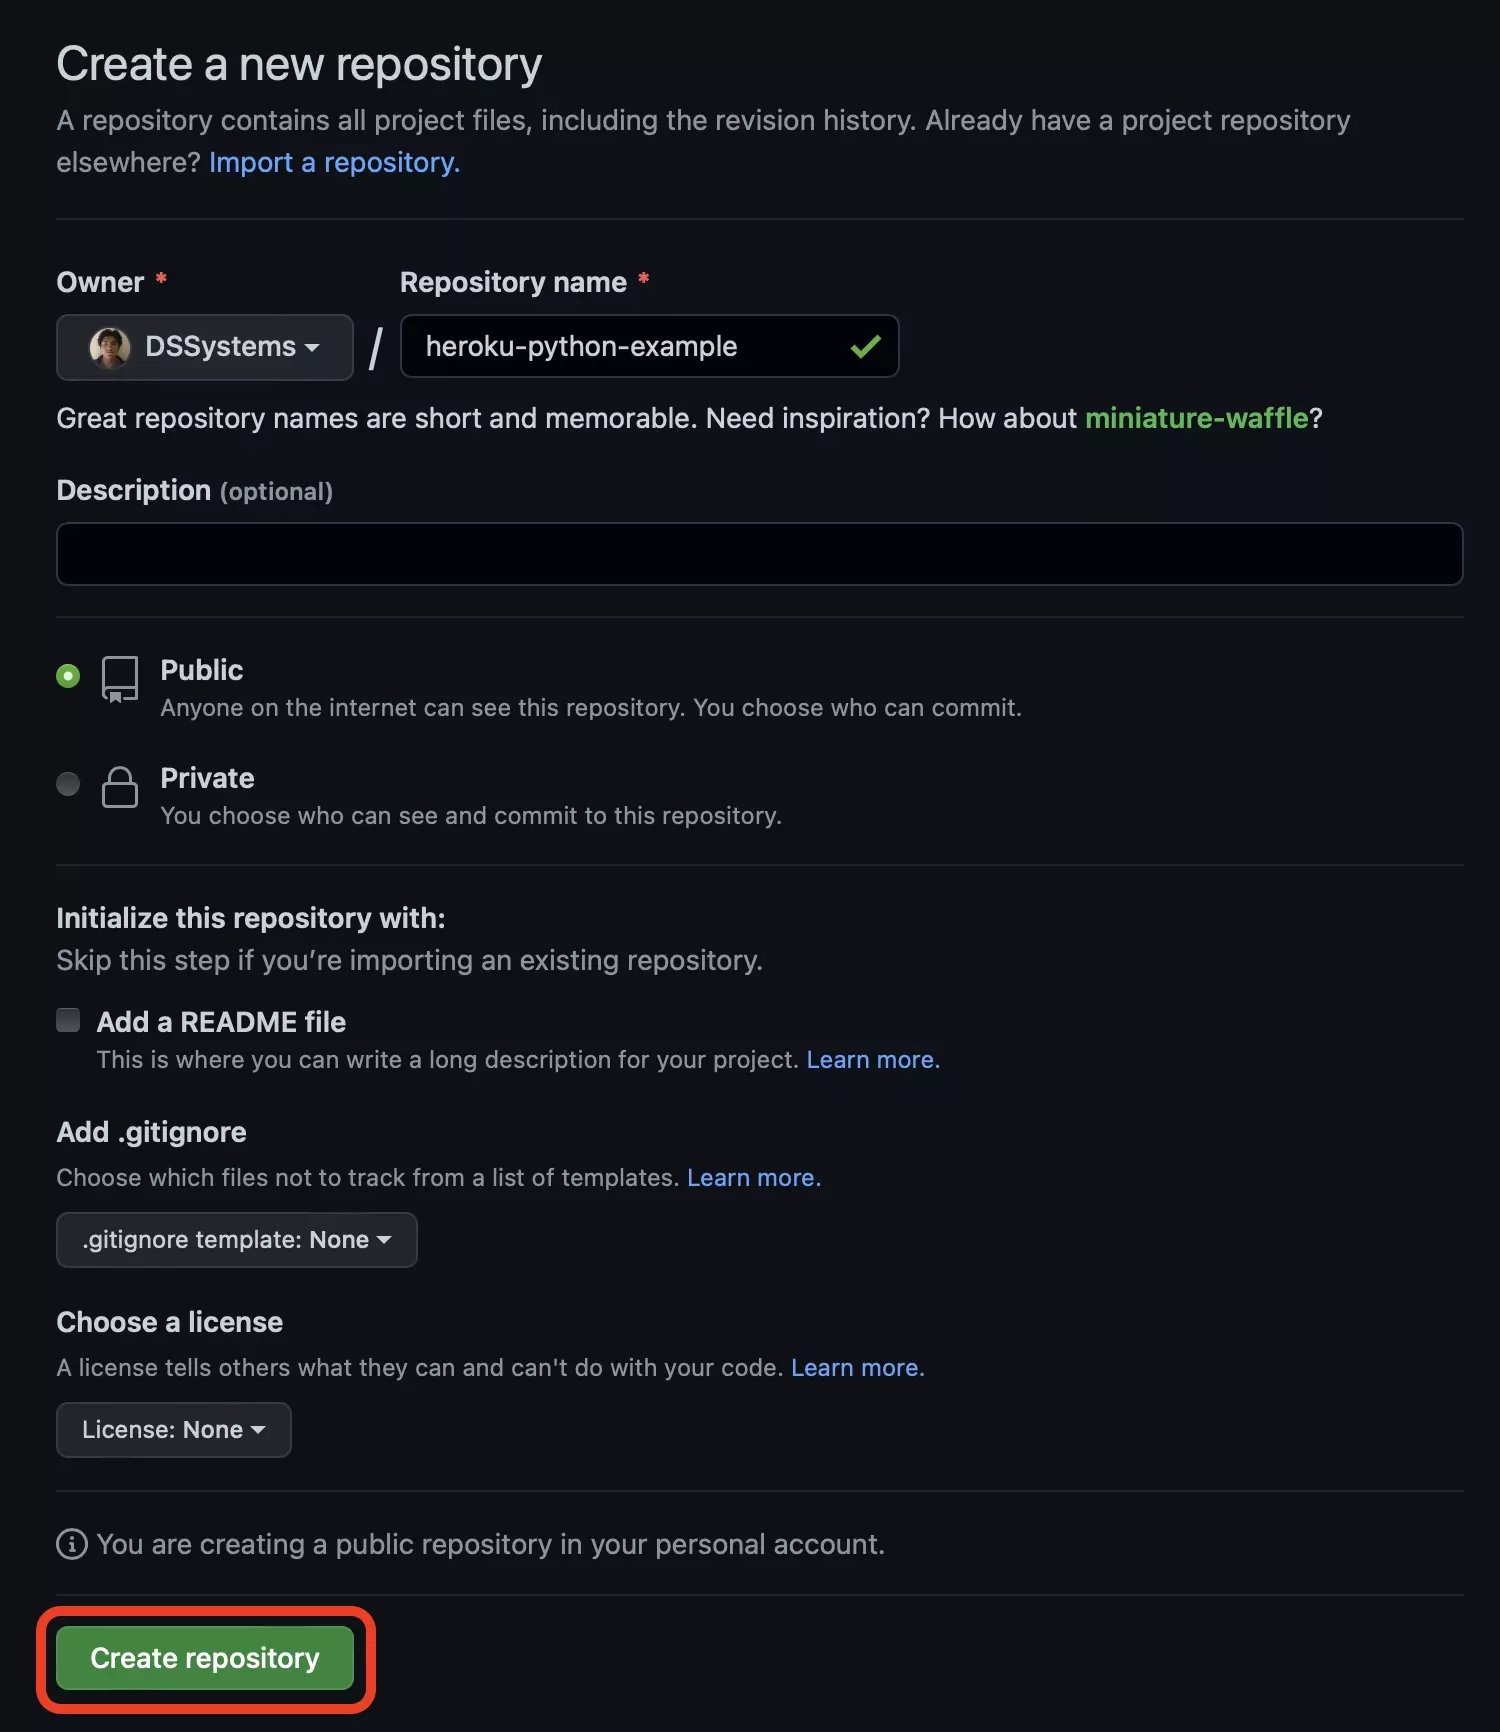
Over the three different methods for uploading any web application onto Heroku, in this tutorial, we are going to deploy it via GitHub. Firstly, go to GitHub, sign in with your account, and, add a new repository. Pick a name for the repository, make it public, and then click on the Create repository button:
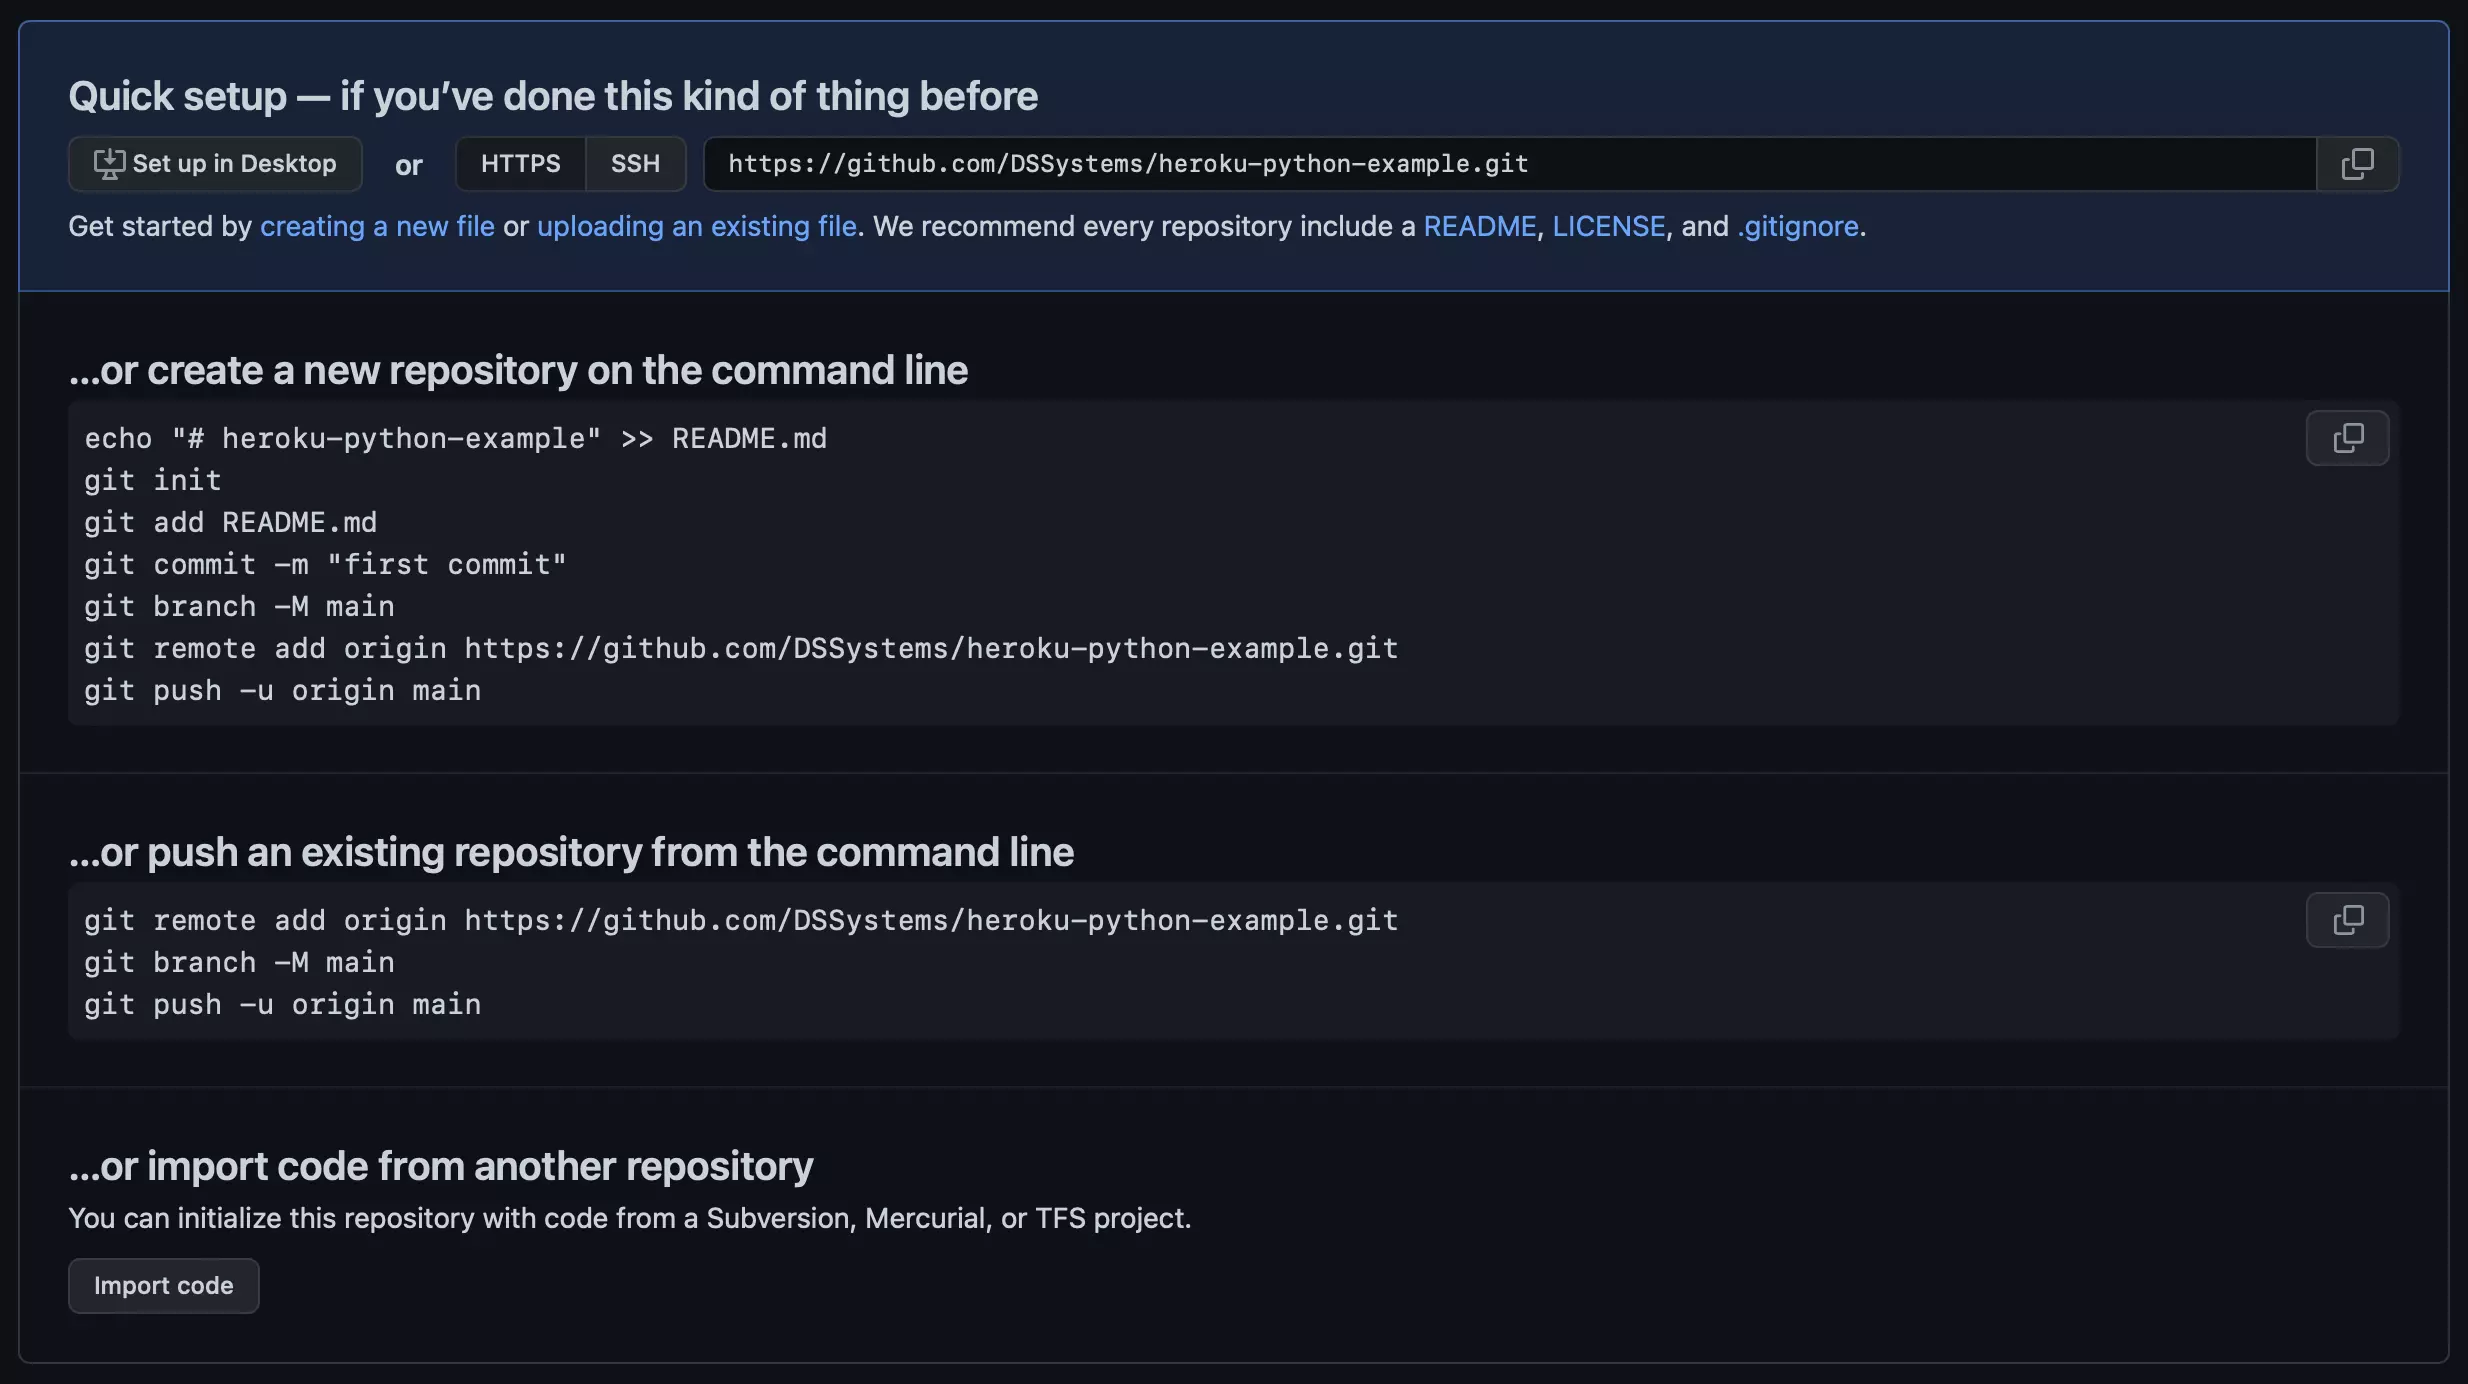
If the process finished without errors, GitHub should redirect you to the repository’s main page. Since this is a new repository, the main page prompts a set of instructions we can follow to push a local repository onto the remote repository.
In this repository you can find an example project for this tutorial.
Before going to the next step, let us detail some key files you have to create on your python project. The Heroku platform needs the following files (in the root directory of your project) to set up and run your application:
requirements.txt: A file containing the frameworks used by your application. For the example project, since we are deploying a web server using the Flask framework, this file contains two lines:
gunicorn
flask
The first line is the will allow Heroku to install the WSGI server, the second line is for installing the Flask framework for python.
Procfile: A file containing the command line to start your application. For a python project using a WSGI server and the Flask framework we have
web: gunicorn wsgi:appWith this line we are telling to Heroku to to run gunicorn. The parameter wsgi:app refers to the module name (wsgi) and a variable name (app), respectively. The variable name refers to a WSGI callable function.
wsgi.py: This is the starting point of the application, its name must match with the module name given in the Procfile.
For more details about these configuration files, you can go to example project.
Deploying the Flask app
Once we have the remote repository with the python project we want to deploy, we go back to the Heroku app set up in Step 1. From the Deploy tab located at the top of the app’s dashboard, we select GitHub as the deployment method:
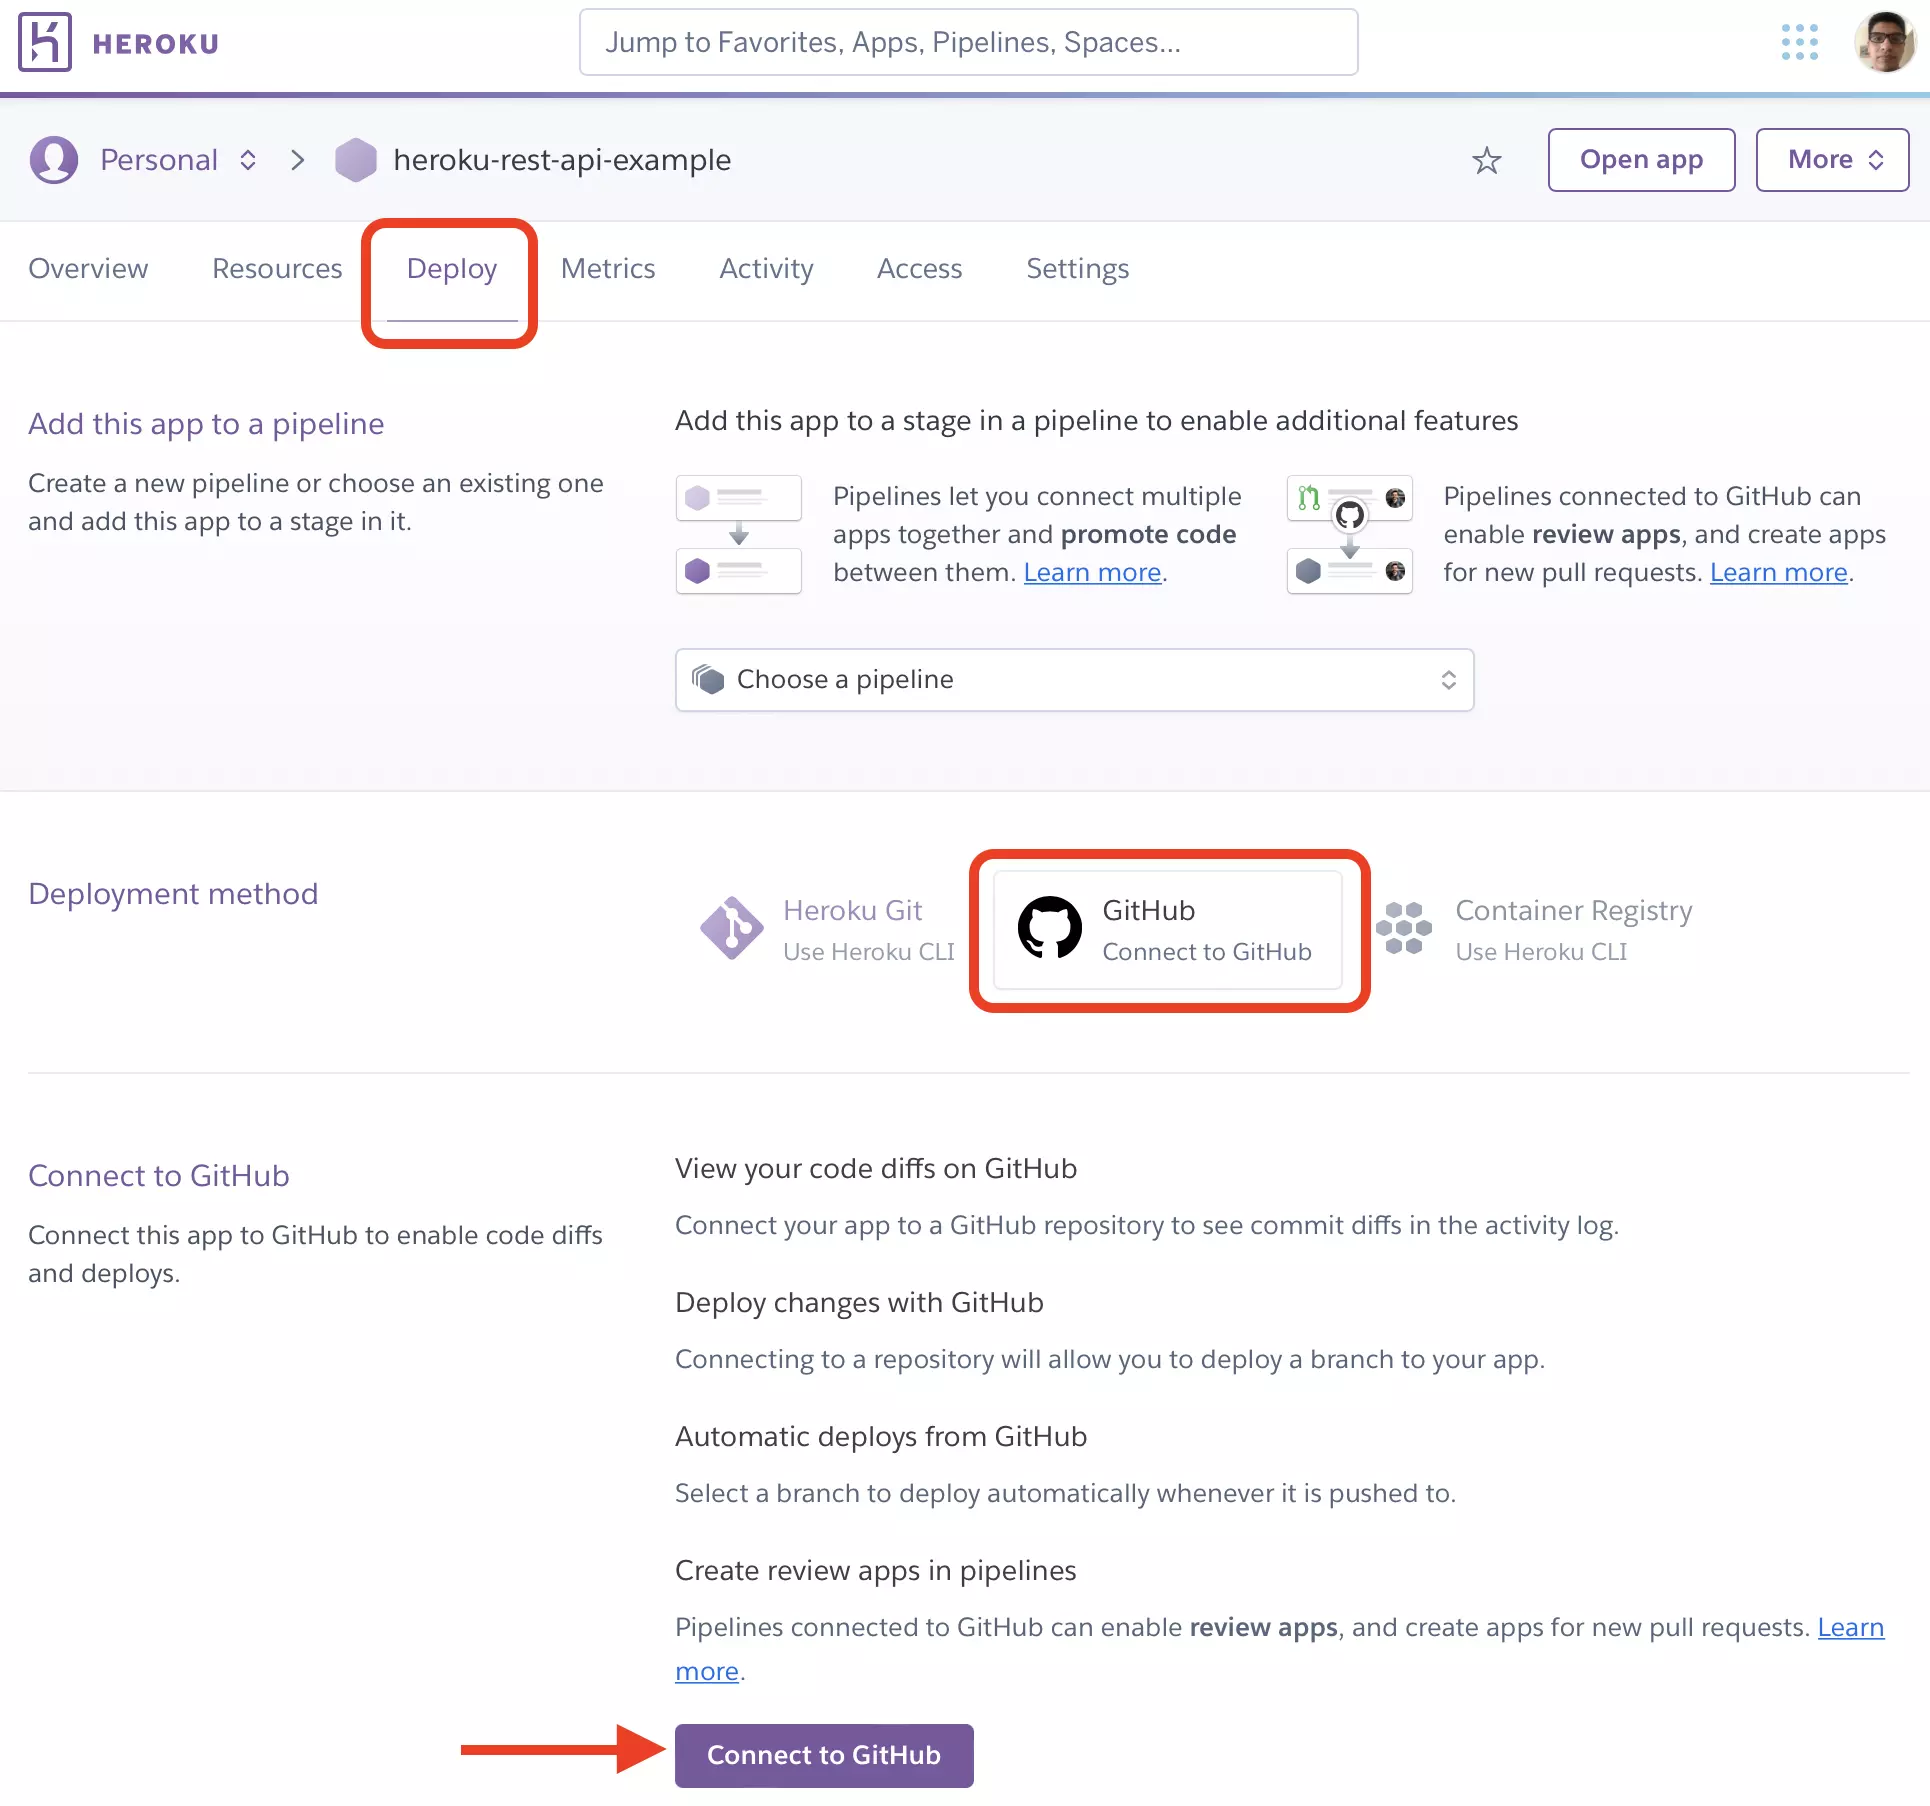
Under this deploy tab, there is an option for connecting the new Heroku app to a GitHub repository. When clicking on this button, it should appear a short form where we provide the corresponding permissions to connect a GitHub account to Heroku.
Once the connection process succeeds, you can search the repository from which Heroku will deploy the python project. Enter the name of the repository and click on the Search button to later click on the Connect button. Now, there should appear two deployment options as shown below:
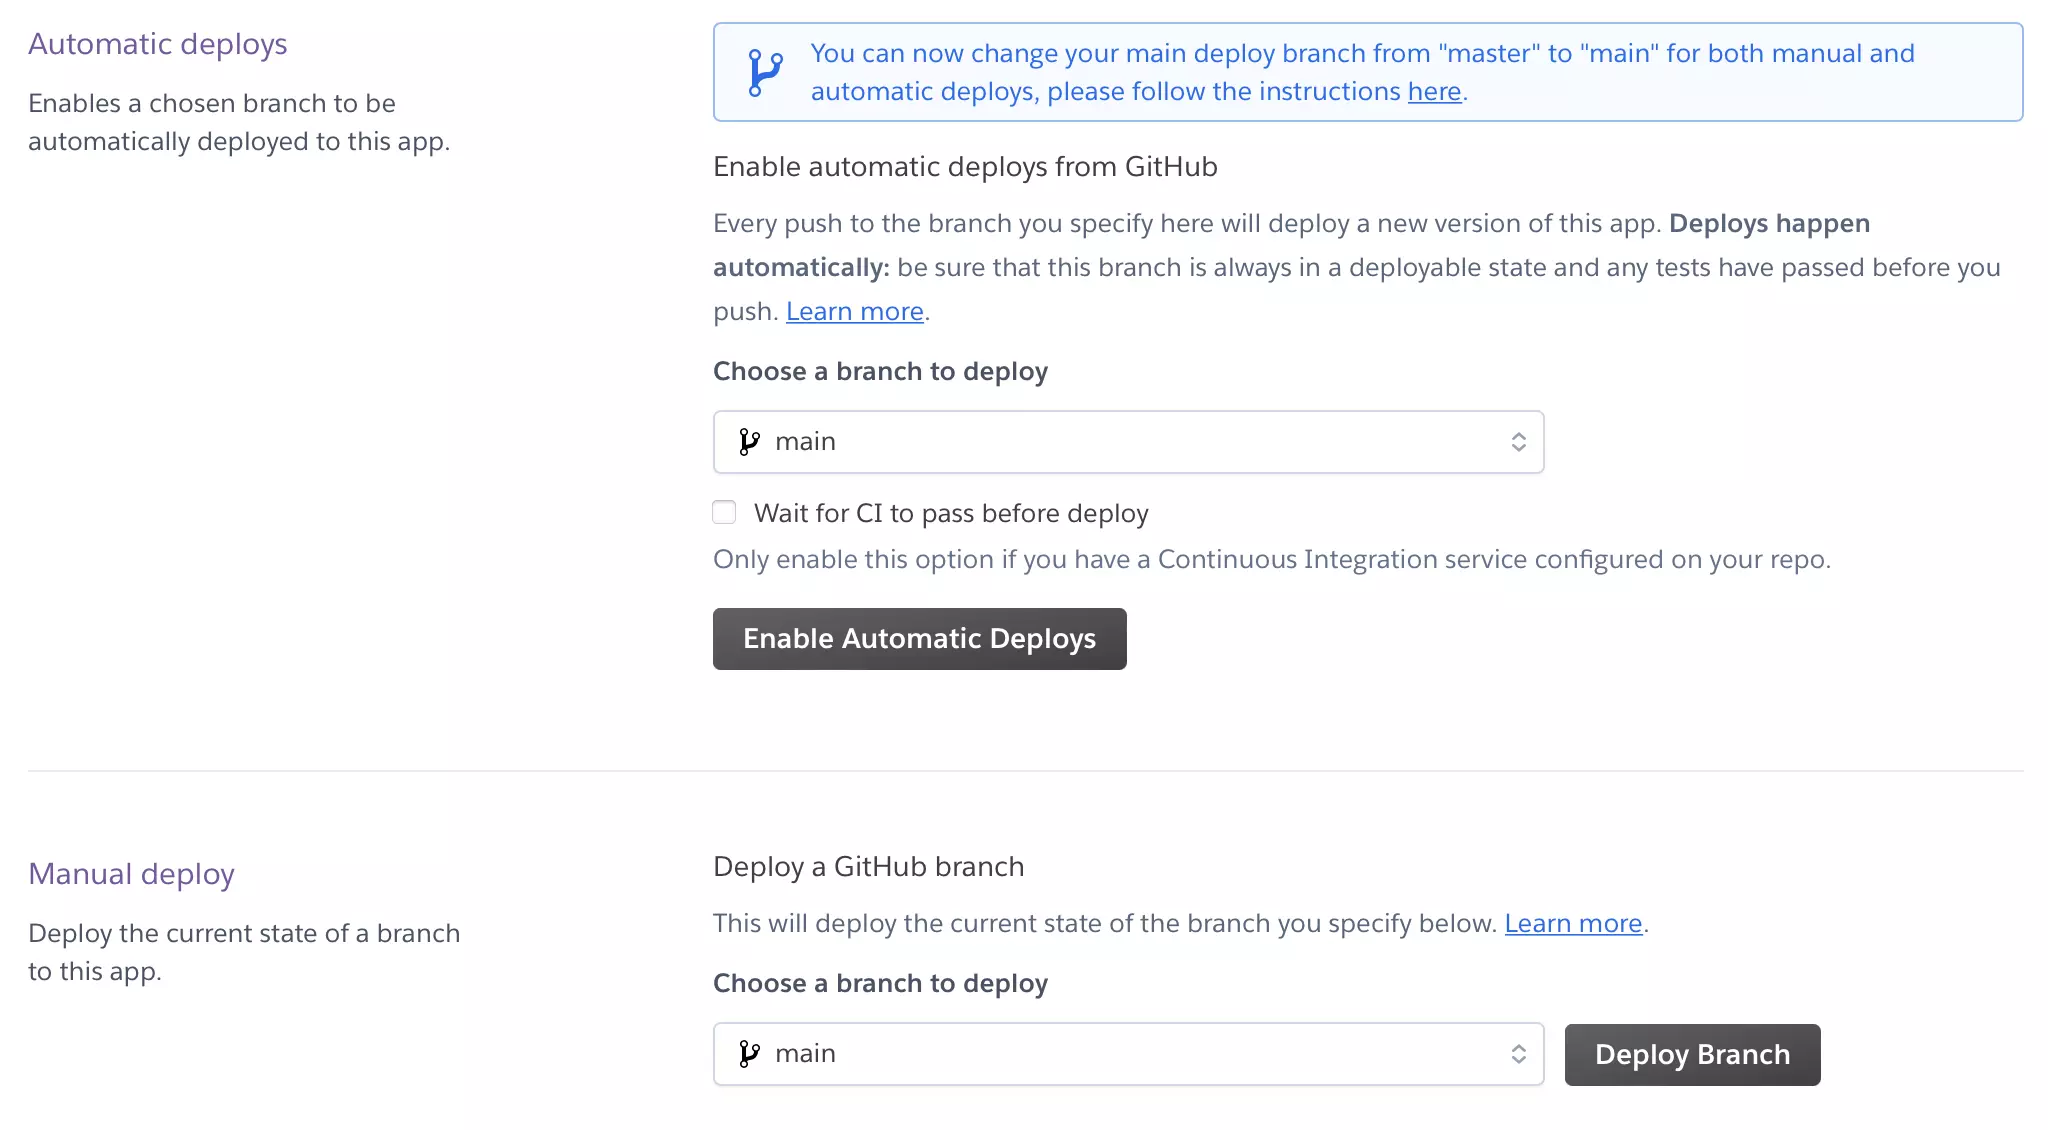
You should pick the option that suits better with your use case. For continuous integration, Automatic deploys may be more adequate than Manual deploys. Select one of the methods to start the deployment process.
Conclusions
As we detailed above, deploying Python applications onto Heroku can be accomplished in 4 simple steps. Furthermore, this prescription could apply to any other application written in other languages besides Pythons. More precisely, you can choose from many build packs Heroku prepared for you to deploy your web apps.
What is Heroku?
PaaS platform from Salesforce to build, run, and operate apps.
What is Flask?
Flask is a python framework to develop web services.
How to deploy a Flask application using Heroku?
– Create an app on the Heroku platform
– Install an add-on in the Heroku app
– Setting up a GitHub repository for the python project
– Deploying the Flask app


