How to Deploy a Nest.js Application?
Choosing the right deployment strategy is important for ensuring your application operates smoothly and is able to scale as required. This article explores different deployment options available for Nest.js applications. Specifically, it focuses on how to deploy Nest.js applications to a Back4app container.
Contents
- 1 Key Takeaways
- 2 What is Nest.js?
- 3 Advantages of Using Nest.js
- 4 Disadvantages of Using Nest.js
- 5 Nest.js Deployment Options
- 6 How to Deploy Nest.js Applications to a Back4app Container
- 7 Creating a Nest.js Application
- 8 Dockerizing the Nest.js Application
- 9 Deploy a Nest.js Application to a Back4app Container
- 10 Optimizing the Deployment Using a Multi-Stage Build
- 11 Conclusion
- 12 FAQ
- 13 What is Nest.js?
- 14 What are the deployment options for Docker?
- 15 How to deploy a Nest.js application?
Key Takeaways
- Choosing the right deployment strategy for a Nest.js application is crucial for scalability and smooth operation.
- Deployment options include Infrastructure as a Service (IaaS) and Container as a Service (CaaS).
- Back4app Containers is a popular CaaS provider for deploying Nest.js applications, offering higher abstraction and simplified management.
What is Nest.js?
Nest.js is a Node.js framework for building scalable server-side applications. It solves the architecture issue that most modern frameworks and libraries don’t address by using a modular architectural framework. This architecture allows developers to create well-organized, scalable, and maintainable codebases.
Advantages of Using Nest.js
Below are some of the advantages of using Nest.js:
- Next.js has a strong opinion on how code should be structured. It, therefore, removes the burden of figuring out how to organize your code on your own.
- It supports TypeScript by default but it also allows you to write pure JavaScript code.
- It uses the Express framework by default under the hood but can be configured to use Fastify, which is faster.
- Nest.js integrates smoothly with frontend libraries like React and Angular.
- It has a command-line utility tool called NestCLI. It automatically generates pre-written code for important parts of your application, like controllers, modules, and middleware contributing to a better developer experience.
- Nest.js has built-in support for microservices. It offers various transporters for exchanging messages between different microservices.
- Nest.js supports integration with any SQL or NoSQL database.
- It provides integrations with popular testing libraries like Supertest and Jest. This makes writing unit tests, integration tests, and end-to-end tests easier.
- Nest.js offers comprehensive and organized documentation, complete with code examples.
Disadvantages of Using Nest.js
Below are some of the drawbacks of using Nest.js:
- The design pattern of Nest.js applications may not align with everyone’s preferences or project requirements.
- Nest.js abstracts the complexity of various processes and their internal workings. This abstraction allows developers to concentrate on the core application logic without worrying about the intricate details. However, this level of abstraction may lead to a sense of dependency, as developers have limited visibility into the specific implementation details.
- Nest.js ships with a lot of features and capabilities. There is a potential risk for developers to overengineer solutions and impact project timelines.
- Nest.js has a steeper learning curve because of its complex architecture and use of TypeScript out of the box,
Whether to use Nest.js for your project ultimately depends on the project requirements, team expertise, and personal preference.
Consider the benefits of Nest.js, its features, its drawbacks, and the scale of your project before making a decision.
Nest.js Deployment Options
When deploying Nest.js applications, you have various options, including Infrastructure as a Service (IaaS) and Container as a Service (CaaS). Let’s discuss these two approaches.
Infrastructure as a Service
Infrastructure as a service (IaaS) is a form of cloud computing that provides server infrastructure over the Internet. This infrastructure includes storage, network, and compute resources that are available on demand, enabling you to scale your infrastructure as needed.
One of the main benefits of IaaS is the level of control it offers. When deploying your application, you have the freedom to configure virtual machines (compute), manage the network, and ensure your application scales and is available. This flexibility allows you to customize the infrastructure to suit your application’s requirements.
The downside of having this much control is that your team has to manage everything. This can be costly.
Some of the popular IaaS providers include:
- Microsoft Azure
- Amazon Web Services (AWS)
- Google Cloud Platform (GCP)
Containers as a Service
Container as a Service (CaaS) is a cloud service for managing containers. It provides a higher level of abstraction over the compute, network, and storage resources compared to IaaS.
With CaaS, you package your Nest.js application code, its dependencies, runtime, and configuration needed to run the application in a container.
This container is created using containerization tools like Docker. Once the container is ready, you can deploy it to a CaaS provider. The CaaS provider takes care of managing and monitoring the deployed application on your behalf.
Since the container is isolated, it can be deployed across different environments without compatibility issues. Moreover, because the execution environment for your Nest.js is standardized, your application behaves consistently across different environments, regardless of the underlying infrastructure.
The high level of abstraction eliminates the need for developers to handle low-level infrastructure details, allowing them to focus on an application’s logic. This improves productivity and enables faster iterations.
Some of the popular CaaS providers include:
- Back4app Containers
- Amazon Elastic Container Service (ECS)
- Google Kubernetes Engine (GKE)
How to Deploy Nest.js Applications to a Back4app Container
Prerequisites
To follow along with this tutorial, ensure you have the following:
- Node.js (version >= 16) installed on your operating system.
- A GitHub account with Git configured on your operating system.
- Docker installed on your machine. You can install Docker desktop from the official Docker site.
- Working knowledge of Nest.js.
Overview of Back4app Containers
Back4app Containers is a CaaS provider that handles the deployment process for you. It manages the server infrastructure, removing the need for manual configuration.
Back4app integrates with GitHub and allows you to add dockerized repositories to your application. This integration makes keeping your application up to date easier.
With the automatic deployment feature, Back4app listens in real-time to your repository and redeploys the application every time you merge commits to the deployed branch.
You can also monitor your deployment from the dashboard and address any issues that may arise.
Project Introduction
In this guide, we will walk through the process of deploying a Nest.js application to Back4app. To begin, we will create a basic Nest.js application which we will dockerize and then push to GitHub. Finally, we will deploy the application to a Back4app container.
Creating a Nest.js Application
Follow the steps below to create a Nest.js application:
- Run the command below in your terminal to install the Nest.js CLI globally.
npm install -g @nestjs/cli- Execute the following command to generate a new Nest.js application.
nest new project-nameFeel free to replace “project-name” with the name of your application. This tutorial uses nestjs-deploy-back4app.
nest new nestjs-deploy-back4appThis command will create all the necessary files and folders you’ll need to get started.
- Navigate to the created project directory and run the following command to launch the development server.
npm run start:devThis will watch for any changes in your code and automatically restart the server when you save a file.
Dockerizing the Nest.js Application
In order to deploy the Nest.js app to a Back4app container, you need to dockerize your application using Docker.
Dockerizing an application means creating a container image for an application. This container image is an isolated and executable software package that includes everything needed to run the application.
To create a container image you need to add a Dockerfile to your project.
A Dockerfile is a text file that provides instructions on how to build the Docker image. It specifies the base image from which you’ll build the image.
It also contains instructions for setting the working directory, installing dependencies, and defines the command for running the application.
Follow the instructions below to dockerize a Nest.js project:
- Ensure you have Docker installed on your machine. Follow the official Docker installation guide to install Docker if you don’t.
- Navigate to the root of your Nest.js project directory and create a file named
Dockerfile.
touch Dockerfile- With your preferred code editor, open Dockerfile and define the base image. This is the image from which you’ll build your production image. This tutorial uses the Node 20 image. It comes with Node and npm installed.
FROM node:18-alpine- Next, create the working directory inside the image. This is where your application code will be stored.
WORKDIR /usr/src/app- Copy the package.json and package-lock.json files to the container. Then run the npm install command to install the project’s dependencies.
# A wildcard ensures package.json AND package-lock.json are copied
COPY package*.json ./

# Install project dependencies
RUN npm install
- Copy the rest of your application code to the container.
COPY ..- Run the build command to bundle your application. This command compiles the TypeScript code to JavaScript and stores it in the dist folder.
RUN npm run build
- Expose port 3000. This specifies which port other applications should use to communicate to this containerized application.
EXPOSE 3000/tcp
- Run your application. Here, we will use
node dist/main.js. The dist folder contains the compiled code while the main.js is the application’s entry point.
CMD [ "node", "dist/main.js" ]
Altogether, your Dockerfile should look like this:
FROM node:20-alpine

WORKDIR /usr/src/app

COPY package*.json  ./

RUN npm ci

COPY . .

RUN npm run build

EXPOSE 3000/tcp

CMD [ "node", "dist/main.js" ]
Add a .dockerignore file
A .dockerignore file works like a .gitignore file. It specifies which files Docker should ignore. It prevents you from adding large and unnecessary files or sensitive data to the image.
To create it, add a new file named .dockerignore at the base of your Nest.js project folder and add the following.
.git
.gitignore
.env
README.md
Dockerfile
node_modules/
.github
.vscode
npm-debug.log
npm-debug.log.*
Now, your node modules, markdown files, env variables, and debug logs will not be copied to your Docker image.
Build the Docker Image Locally
Run the command below on your terminal to make sure the Dockerfile works.
docker build -t nestjs-back4app .The -t flag lets you tag your image with a name. In this case, nestjs-back4app.
If you run docker images on the terminal, you should see the created image.
REPOSITORY        TAG       IMAGE ID       CREATED          SIZE
nestjs-back4app   latest    afcba89613fc   39 seconds ago   333MB
To run the application locally, use the following command.
docker run -p 49160:3000 -d nestjs-back4appThis redirects port 49160 to port 3000 which we specified in the Dockerfile. If you visit localhost:49160, you should be able to access the home page of your application.
Deploy a Nest.js Application to a Back4app Container
Once, you’ve made sure the Dockerfile works, you are now ready to deploy the application to Back4app.
Push Application to GitHub
Back4app accesses your application through GitHub. Create a new repository containing the Nest.js app by following the steps below:
- Visit GitHub and log in to your account.
- Once you’re logged in, click the “+” icon in the top right corner of the page and select “New repository” from the dropdown menu.
- On the “Create a new repository” page, give your repository a name. Then, click the “Create repository name”. Note the repository URL on the next page.
Back in your project folder on your local machine, run the following command to push your code to the repository you’ve just created.
git remote add origin <https://github.com/remigathoni/nestjs-deploy-back4app.git>
git branch -M main
git push -u origin main
After running these commands, your app’s files will be added to the GitHub repository.
Deploy your Nest.js Application
You can now deploy your app to Back4app by following the steps below:
Sign up for an account on Back4App if you haven’t already otherwise log in to your account. You will be redirected to the dashboard.
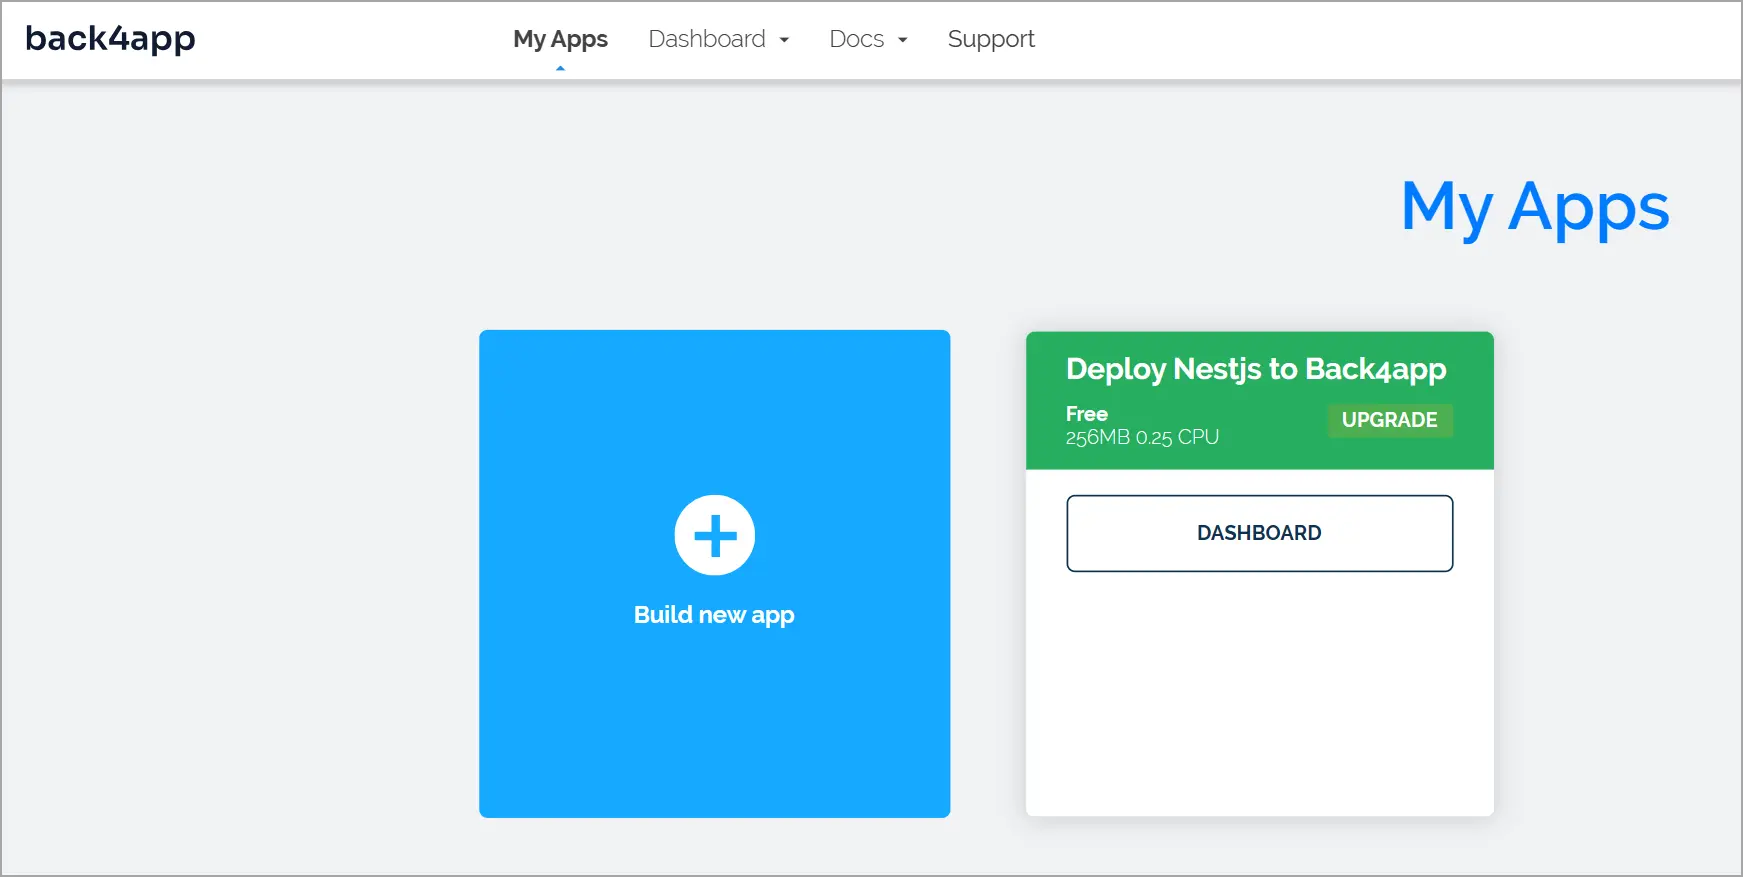
On the dashboard, click on Build a new app.
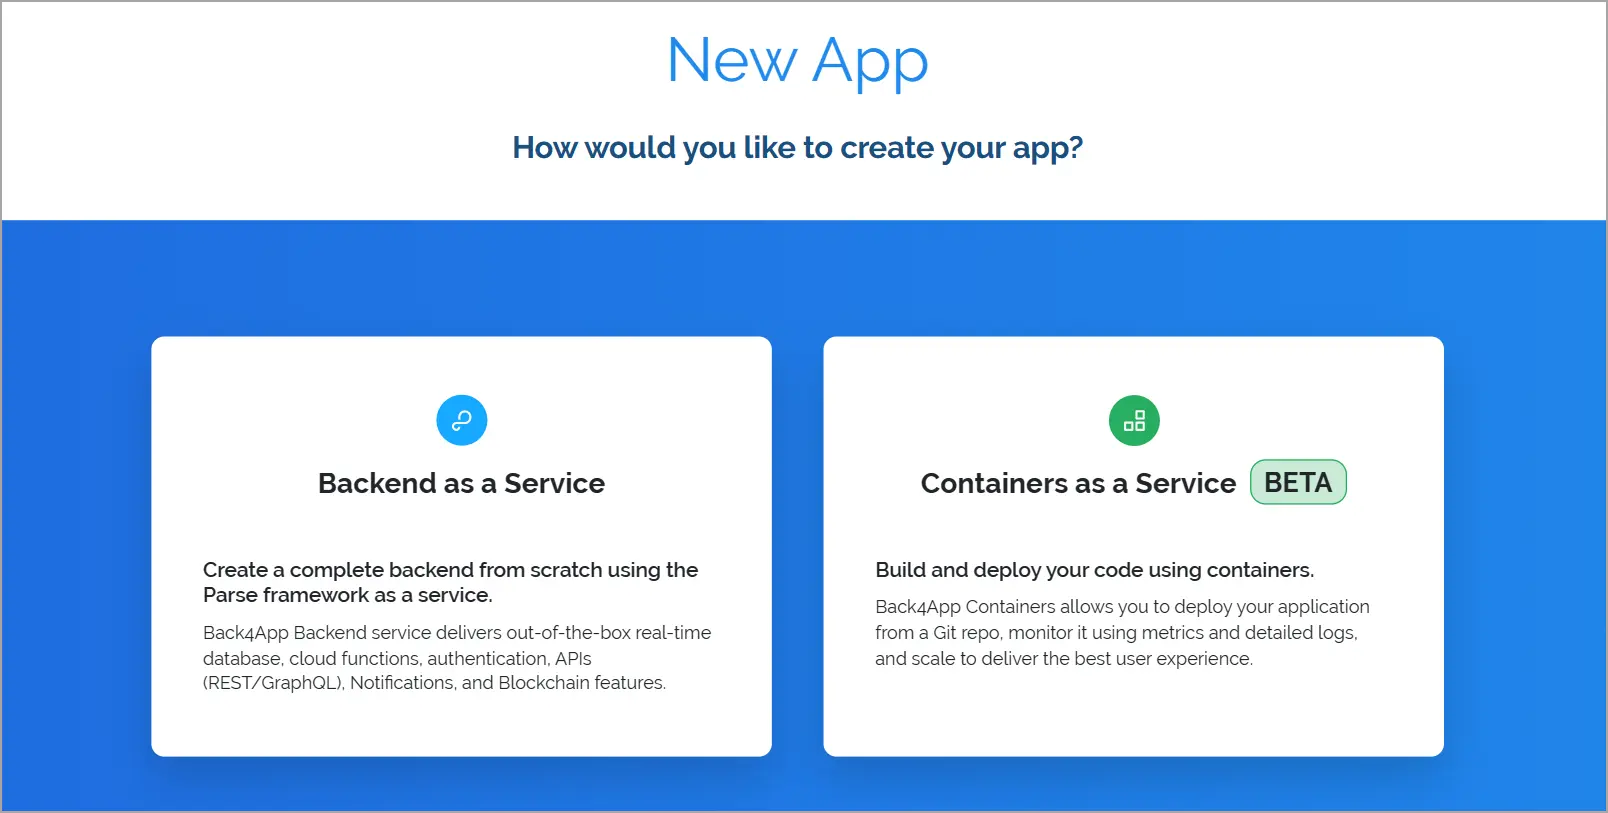
Back4app offers two options for building an app. You can use the Backend as a Service (BaaS) or Container as a Service (CaaS).
BaaS handles your entire backend for you while CaaS lets you deploy a dockerized application. We only want to deploy the dockerized Nest.js app so select Containers as a Service.
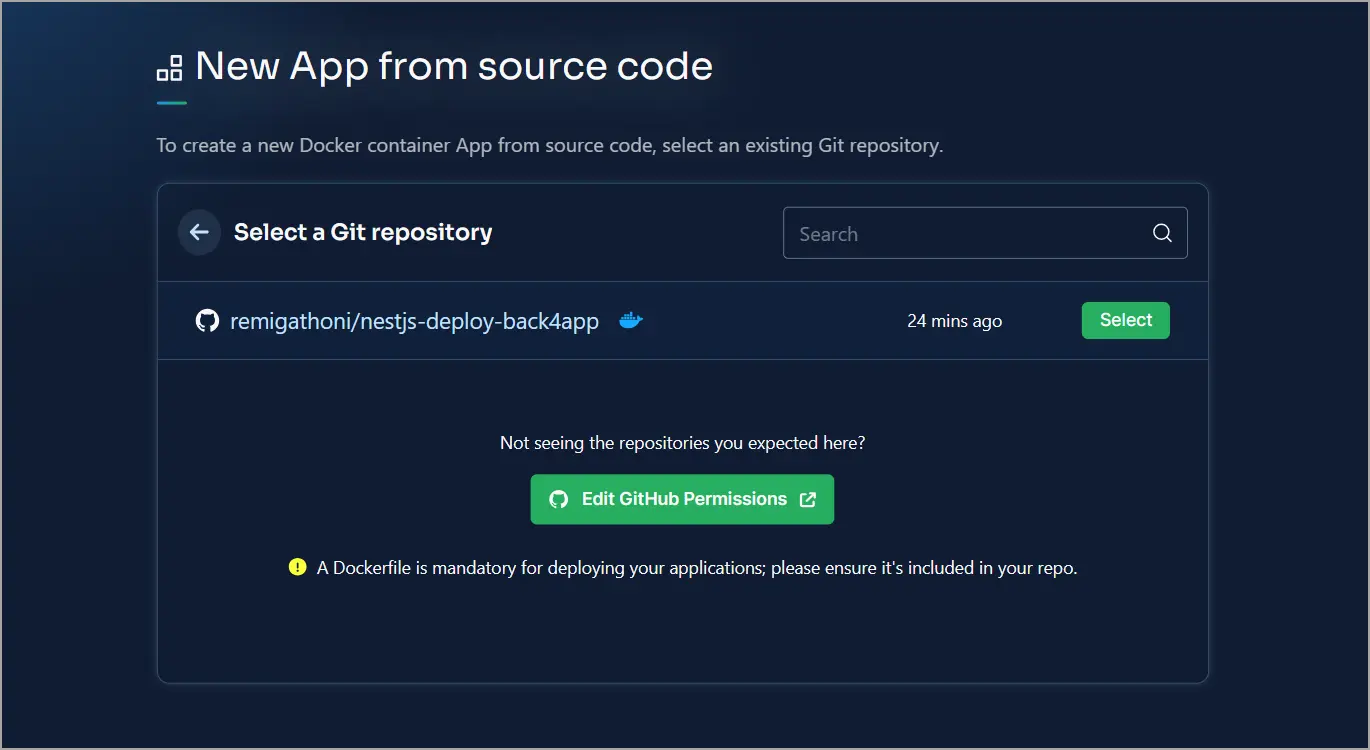
Back4app will prompt you to connect your account to GitHub and grant it permission to access your repositories.
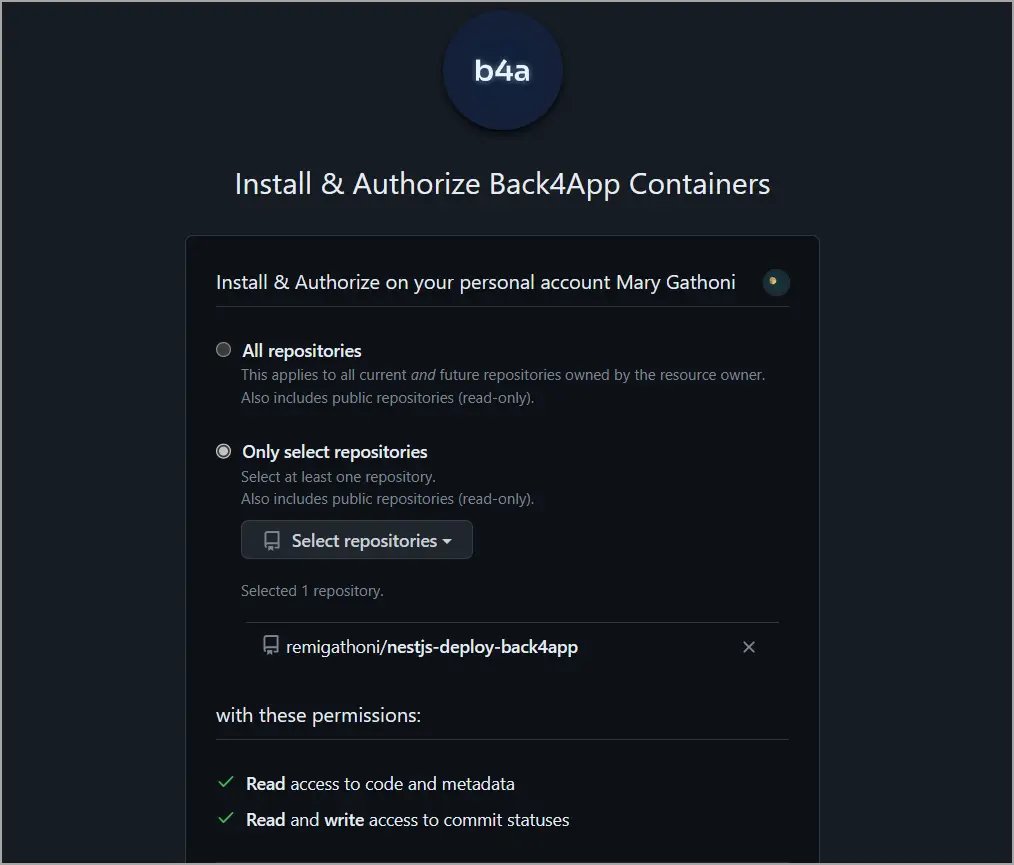
Select the Nest.js repository.
In the deployment options, add a name for your application. You can also set the default branch, root directory, enable or disable auto-deploy, and set environment variables. Here, we only need to set the name.
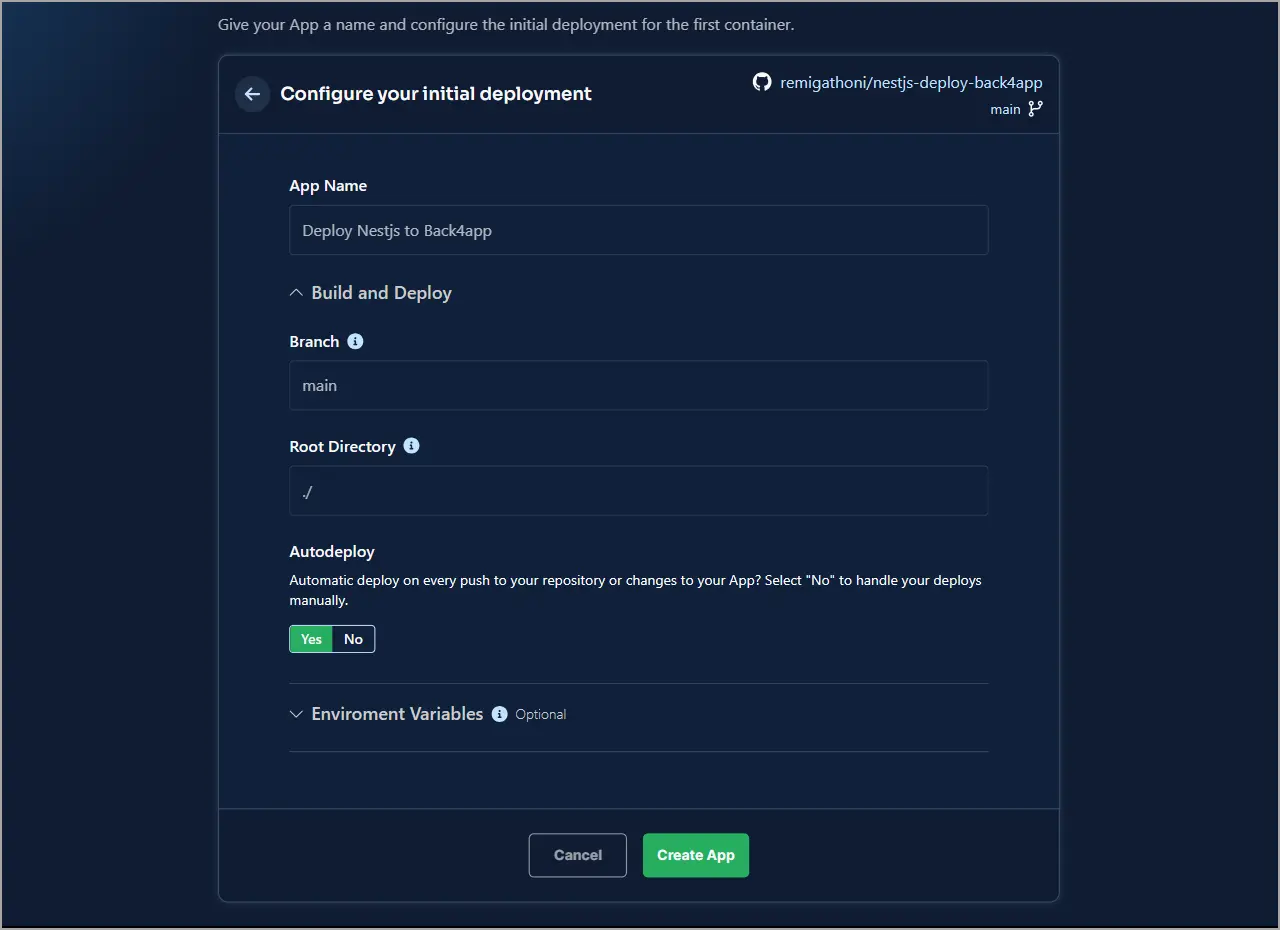
Click the Create App button to deploy the app. This process might take a few minutes.
That’s basically it! You’ve successfully deployed a Nest.js application to Back4app for free.
Optimizing the Deployment Using a Multi-Stage Build
Right now the docker image size is quite large at 333 MB.
REPOSITORY        TAG       IMAGE ID       CREATED          SIZE
nestjs-back4app   latest    afcba89613fc   39 seconds ago   333MB
For faster deployment times, it’s essential to reduce the image size. A smaller image will also reduce cloud storage costs and allow you to optimize your resources. Furthermore, it will reduce security vulnerabilities by reducing the surface area of the attack.
To reduce the size of our image, we can leverage multi-stage builds.
Multi-stage builds allow you to separate the build environment from the runtime environment. This lets you install dependencies and compile the application in a separate container. Later, you can copy only the necessary files to the final production image.
To get started, open the Dockerfile in the Nest.js application with your code editor and delete its contents.
In the Dockerfile, we will have two stage:
- The build stage responsible for building the application. This includes installing the dependencies and compiling TypeScript to JavaScript
- The production page which creates the runtime image. It contains all the files needed to run the application.
A stage is named by appending AS *name-of-stage* to the FROM instruction.
Defining the Build Stage
Follow the instructions below to use the multi-stage build:
- In your DockerFile, define a stage from the Node base image and name it
build.
FROM node:20-alpine as build
Note that node:<version>-alpine base images are much slimmer than node:<version> images.
- Define the working directory.
WORKDIR /usr/src/app- Copy the package.json and package-lock.json files to the container.
# A wildcard ensures package.json AND package-lock.json are copied
COPY package*.json ./
- Install the dependencies
RUN npm ci
Instead of npm install we are using npm ci. These two commands are the same but npm ci ensures a clean install of the dependencies each time it’s run.
- Copy the application code to the build stage.
COPY . .
- Build the application by running the npm build command.
npm run build
Defining the Production Stage
Once you’ve built the application, define the production stage.
- Add the Node.js base image and name it production.
FROM node:20-alpine AS build
- Define the working directory as you did in the build stage.
WORKDIR /usr/src/app
- Use the
from=buildlabel to copy thedistfolder and the node modules from the build image to the current production image.
COPY  --from=build usr/src/app/dist ./dist
COPY  --from=build usr/src/app/node_modules ./node_modules
- Expose port 3000
EXPOSE 3000/tcp
- Start the application using the
CMDcommand.
CMD ["node", "dist/main.js"]
Altogether, your Dockerfile should look like this:
# Build
FROM node:20-alpine AS build
WORKDIR /usr/src/app
COPY package*.json  ./
RUN npm ci
COPY . .
RUN npm run build && npm prune --production

# Production
FROM node:20-alpine AS production
WORKDIR /usr/src/app

COPY  --from=build usr/src/app/dist ./dist
COPY  --from=build usr/src/app/node_modules ./node_modules

EXPOSE 3000/tcp
CMD [ "node", "dist/main.js" ]
If you build the docker image now, you’ll notice its size has significantly reduced.
REPOSITORY             TAG       IMAGE ID       CREATED          SIZE
nestjs-back4app-opt    latest    d29aedae9bef   5 seconds ago   186MB
By reducing the size, you’ll have increased the deployment times and also reduced the amount of storage you need.
Conclusion
Nest.js is a Node.js framework that has an opinionated and modular architecture. It enables developers to build scalable and maintainable codebases.
You have various options for deploying a Nest.js application including Infrastructure as a Service (IaaS) and Container as a Service (CaaS) platforms.
One of the best CaaS providers is Back4app Containers. Back4app containers manage and monitor your deployment, making the transition from development to production hassle-free.
In this guide, you have learned how to deploy a Nest.js application to a Back4app container using Docker. Additionally, you explored the benefits of optimizing your deployment using multi-stage builds.
You should now be able to create a Nest.js application, dockerize it and deploy it to Back4app. The source code is available on this GitHub repo and to learn more, visit the Back4app containers documentation.
FAQ
What is Nest.js?
Nest.js is an opinionated Node.js framework built with TypeScript. It follows a modular design approach, allowing developers to create well-organized, scalable, and maintainable codebases.
What are the deployment options for Docker?
– IaaS (AWS, GCP, Azure)
– CaaS (Back4app Containers, AWS ECS, Google Kubernetes Engine (GKE))
How to deploy a Nest.js application?
– Create a Nest.js application.
– Dockerize Nest.js application.
– Push the dockerized application to GitHub.
– Create a Back4app account.
– Create a Back4app container.
– Give Back4app access to your GitHub.
– Select the Nest.js repository and deploy your application


