Kinvey Migration – Steps to transfer your app
Are you looking for an easy Kinvey migration for your application? Here is an in-depth tutorial explaining the steps to migrate an application to Back4App.
Kinvey is designed for enterprises and developers that intend to build and deploy web, mobile, and chat applications quickly and conveniently.
This impressive cloud solution provides a full-stack JavaScript serverless platform for developing and deploying applications.
The platform provides enterprise-level cloud solutions but makes them available for small and medium-scale businesses.
In the last few weeks, we are seeing an increasing number of people contacting Back4App to support the migration from Kinvey, and this guide intents to help users perform the migration.
Contents
How to Migrate a Kinvey App to Back4App?
This guide provides a step-by-step guideline for migrating a Kinvey app to Back4app.
You will learn the required step for a seamless migration, such as testing your database, files, and the cloud functions you intend to run on the Back4app platform.
After the validation, you can complete the migration and start using Back4app as your reliable cloud provider. Check this guide if you prefer using a CLI migration tool for migration.
This guide will teach you how to move an existing Kinvey App to Back4App. Before transferring your application, you’ll see how to test your DB, files, and functions running on Back4App’s environment.
Step 1 – Create a New Back4App App
First, you must create an app on Back4app before migrating your current app. The tutorial Create your first Back4App application guides you on how to create an app on Back4app. In summarizing, you will need to:
- Sign up to Back4App
- Create a new app
- Navigate over Back4App’s dashboard
- Connect your frontend application to Back4App
Step 2 – Connect Back4App to your current database
Copy the connection string from the database of your present hosting account control panel. You will need this data to connect Back4app to the current database.
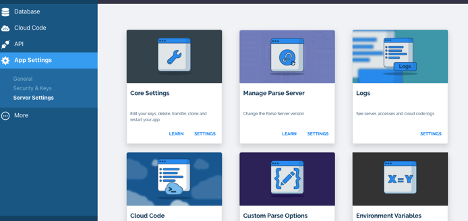
Log on to the Back4app dashboard and navigate to:
- Server Settings
- Core Settings
- Settings
Details available on the image below:

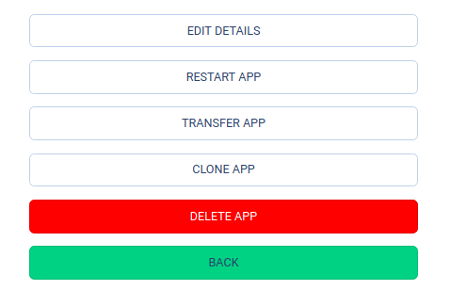
Scroll to the bottom page and locate the section in the image below.

Click the Edit Details button, locate Connection String, and click the “Change Database URI” link. Replace the current value with the connection link you copied earlier.
Once done, you successfully connected your current database to Back4app.
Step 3 – Upload your Cloud Code
Note that you must upload all existing Cloud Code files of your apps to Back4apps to ensure they work properly. To achieve this, you will use the Back4App CLI tool.
You may also migrate them manually with the dashboard below the Cloud Code Functions.
Once you are done with the migration, check the logs located in Server Settings > Logs > Settings > Server System Log.
Step 4 – Migrate your Files
For apps with files such as documents, videos, and images, you must migrate them as well. Amazon AWS S3 powers Back4app storage.
Kindly note that you must handle file migration manually. Compress all the content in a zip file or place them within an S3 bucket.
After that, please email us at [email protected] to help complete the migration to our servers.
Note: In a scenario where the files are saved within a database, simply tell us. We use a different migration method for such cases. For those using other file storage solutions, compress all the content into a zip file and send it to our team.
Step 5 – Updating your frontend
The next step is to verify that app features are correctly working while running on Back4app servers. To achieve this, update your frontend code’s URI and App keys. After that, check the elements one after the other to ensure they are working correctly.
Once you have verified that the app is working perfectly, release a new app version for your users.
Note that at this stage, your app will have two versions -one running on Kinvey servers and a new one running on the Back4app servers.
While the old version points to the old API, the users will be the latest version will be using the Back4app API.
Finally, you will need to move your database to Back4app. Choose a convenient time to move your database and complete the migration.
Step 6 – To finish the process
Finally, you are ready to migrate your database. It is best to complete the migration when you are sure most of your app users have upgraded to the Back4app version. Also, cross-check that you’ve completed all previous migration steps successfully.
Go ahead and complete the database migration yourself using the Back4app command-line interface tool. Alternatively, please open a support ticket, and our team of experts will handle the task for you.
When sending a support ticket for database migration, ensure you supply your Back4app App ID and the parse connection string of your previous server.
Step 7 – Getting Help
If you need help, open a ticket or schedule a technical meeting with our engineering team.
That’s All!
The procedure for migrating your Kinvey App to Back4app will be straightforward if you follow this step-by-step guide. You can get your app running perfectly with the excellent features of Back4app.


