How to Build a GraphQL API with Nest.js?
In this article, you will learn how to build a GraphQL API with NestJS taking advantage of its clean architecture and type safety.
NestJS is a NodeJS framework that helps users create scalable enterprise-grade backend applications by providing type safety and a strict architectural pattern.
GraphQL is a query language for application programming interfaces (APIs) widely used as an alternative to REST due to its speed and stability, which it achieves by responding to querys with precisely the data they request. This GraphQL feature solves the problem of overfetching and underfetching posed by REST.
Contents
Setting up your Development Environment
If you don’t have the Nest.js CLI installed globally on your system, run the command below to install it:
npm i -g @nestjs/cli
The Nest.js CLI contains several commands that help you generate boilerplate code to ease your development process.
Next, create the project and generate the necessary starter files by running the command below:
nest new graphql-api
Then, run the command below to cd into your project directory:
cd graphql-api
Next, install the required dependencies by running the command below:
npm i @nestjs/graphql @nestjs/apollo graphql apollo-server-express
The dependencies installed above include:
nest/graphqlnestjs/apollographqlapollo-server-express
Next, install the TypeORM package and the sqlite database driver by running the command below:
npm install @nestjs/typeorm typeorm sqlite3
You will need the packages installed above to connect to, read, and write a database.
Configuring GraphQL in Nest.js
Nest.js offers two ways of creating a GraphQL API: code-first and schema-first approaches.
The code-first approach features the use of TypeScript decorators and classes to generate the corresponding GraphQL schema.
The schema-first approach features the use of the GraphQL Schema Definition Language (SDL) files, while Nest.js generates TypeScript definitions using classes or interfaces based on the GraphQL Schema.
This tutorial will feature the use of the code-first approach to avoid context-switching between different languages.
To use the code first approach, navigate to your application’s entry file, app.module.ts, and import GraphQLModule from @nestjs/graphql. Like so:
import { GraphQLModule } from '@nestjs/graphql';
Then, in your imports array, call the GraphQLModule‘s forRoot method. This method takes a configuration object as an argument. The configuration options are passed through the underlying GraphQL driver (This tutorial features the use of the Apollo driver). Set the autoSchemaFile property in the configuration object to schema.gql. Like so:
//app.module.ts
GraphQLModule.forRoot({ autoSchemaFile: 'schema.gql' }),
The autoSchemaFile property is the file path where your automatically generated schema will be stored.
Connecting to a Database
To connect your application to a database, navigate to your app.module.ts file and import TypeOrmModule from @nestjs/typeorm.
Like so:
import { TypeOrmModule } from '@nestjs/typeorm';
Next, add the code block below to your imports array:
TypeOrmModule.forRoot({
      type: 'sqlite',
      database: ':memory:',
      entities: ['dist/**/*.entity{.ts,.js}'],
      synchronize: true,
    }),
The code block above creates a database connection between your application and a Sqlite database and shares the connection throughout all the modules in your application.
Generating Resources
Next, create a module to organize your code by running the command below:
nest g module blog
The command above generates a blog module for your application.
Next, run the command below to create a service:
nest g service blog
The code block above generates and registers a service in your application. This service will contain and handle all the business logic for your application.
Next, run the command below to create a resolver:
nest g resolver
The code block above generates and registers a resolver in your application. A resolver specifies instructions for turning GraphQL queries and mutations into data and returns the shape of data specified in a schema synchronously or asynchronously.
Creating an Entity
An entity is a collection of fields that specifies how data is stored in a database.
To create an Entity, in your module folder (blog), create an entity file following the <name>.entity.ts convention, for example, blog.entity.ts.
In your entity file, import the Column, Entity, and PrimaryGeneratedColumn from typeorm. Like so:
import { Column, Entity, PrimaryGeneratedColumn } from 'typeorm';
The Column decorator adds the fields it annotates as columns in a database. The Entity decorator marks the class it annotates as an entity. The PrimaryGeneratedColumn decorator marks the property it annotates as the unique identifier for your table and automatically generates it.
Next, create and export a class, Blog. Then, annotate the class with the Entity decorator to mark it as an entity. Like so:
@Entity()
export class Blog {}
Since this tutorial features a blog API, add an id, title, body, author, and date property to your class. Then, annotate each of the properties with the Column decorator except the id property. Annotate the id property with the PrimaryGeneratedColumn decorator.
Like so:
import { Column, Entity, PrimaryGeneratedColumn } from 'typeorm';

@Entity()
export class Blog {
  @PrimaryGeneratedColumn()
  id: number;

  @Column()
  title: string;

  @Column()
  body: string;

  @Column()
  author: string;

  @Column()
  date: string;
}
Creating an Object Type
An object type is a GraphQL schema definition representing the object the client needs to interact with. For instance, if you’re building a blog API, you’ll need to define the blog schema/entity with a TypeScript class and annotate each field with the appropriate decorators.
Next, in your entity file, import the Int type and the Field and ObjectType decorators from @nestjs/graphql. Like so:
import { Field, Int, ObjectType } from '@nestjs/graphql';
The Field decorator marks a specific class property as a GraphQL field. Only properties annotated with this decorator will be defined in the schema. It accepts an optional return type function and a configuration object as arguments.
The Int type is required to clear potential ambiguity between the TypeScript and GraphQL type systems. It is required for only properties with number values as they can either be integers or float.
The ObjectType decorator marks a class as a GraphQL type.
Next, annotate your Blog class with the ObjectType decorator to mark it as a GraphQL type. Like so:
@ObjectType()
export class Blog {}
Finally, specify your type’s required properties inside the class and annotate each of them with the Field decorator. For example:
//blog.entity.ts
import { Field, Int, ObjectType } from '@nestjs/graphql';
import { Column, Entity, PrimaryGeneratedColumn } from 'typeorm';

@Entity()
@ObjectType()
export class Blog {
  @PrimaryGeneratedColumn()
  @Field((type) => Int)
  id: number;

  @Column()
  @Field()
  title: string;

  @Column()
  @Field()
  body: string;

  @Column()
  @Field()
  author: string;

  @Column()
  @Field()
  date: string;
}
Your finished Object Type should look like the code block above.
Notice that the id with a number type in the code block above was explicitly specified as an integer to avoid ambiguity between the TypeScript and GraphQL type systems.
Finally, inject your Entity into your application to create an access layer between your application and your database.
To achieve this, navigate to your blog.module.ts file, import TypeOrmModule from @nestjs/typeorm, and import your Blog entity.
Then, add the code block below to your module decorator:
imports: [TypeOrmModule.forFeature([Blog])],
The code block above creates a repository that will act as an access layer between your application and the database.
Creating a Service
Navigate to your previously generated service file, blog.service.ts, and import InjectRepository from @nestjs/typeorm and your object type.
Like so:
import { InjectRepository } from '@nestjs/typeorm';
import { Blog } from './blog.entity';
Next, add the code block below to your BlogService class to inject your repository:
constructor(
    @InjectRepository(Blog)
    private blogRepository: Repository<Blog>,
  ) {}
Next, add the code block below to your service class to implement the logic for retrieving all the blogs in the database:
async getAll(): Promise<Blog[]> {
    return await this.blogRepository.find();
  }
Next, you’ll need to implement the logic for adding a new blog to your database, but first, you’ll need to create an Input Type.
Creating an Input Type
To create an input type for your mutations that take complex objects, create a dtos folder in your blog folder. Then, in your dtos folder, create a new file, create-blog.input.ts.
In your create-blog.input.ts file, import the Field and the InputType decorators. Like so:
import { Field, InputType } from '@nestjs/graphql';
The InputType decorator marks a class as a GraphQL input type.
Next, create and export a class, BlogInput. Then, annotate the class with the InputType decorator. Like so:
@InputType()
export class BlogInput {}
Finally, add all the required blog properties and annotate them with the Field decorator.
Like so:
//create-blog.input.ts
import { Field, InputType } from '@nestjs/graphql';

@InputType()
export class BlogInput {
  @Field()
  id: number;

  @Field()
  title: string;

  @Field()
  body: string;

  @Field()
  author: string;

  @Field()
  date: string;
}
Your finished input type should look like the code block above.
Next, import your input type into your service file and add the code block below to your service class to implement the logic for adding a blog to the database:
async createBlog(blogInput: BlogInput): Promise<Blog> {
    const newBlog = this.blogRepository.create(blogInput);

    return this.blogRepository.save(newBlog);
  }
The input type is applied the same way a regular Nest.js data transfer object is applied, as a validation mechanism for incoming data. Like dtos, you can also perform additional validation on the data using the class-validator package.
Creating a Resolver
Navigate to your previously generated Resolver file, blog.resolver.ts, and import your entity, input type, and service. Like so:
import { Blog } from './blog.entity';
import { BlogService } from './blog.service';
import { BlogInput } from './dto/create-blog.input';
Next, add the code block below to your Resolver class to inject your service into your resolver:
constructor(private blogService: BlogService) {}
Next, import the Args, Mutation, and Query decorators from @nestjs/graphql.
Like so:
import { Args, Mutation, Query } from '@nestjs/graphql';
The Args decorator extracts the arguments object from the underlying platform and populates the decorated parameter with the value of all arguments or a single specified argument.
The Mutation decorator specifies a route as a mutation.
The Query decorator specifies a route as a query.
Next, pass the function below into the Resolver decorator to specify the object type:
(of) => Blog
Then, add the code block below to your Resolver class to resolve the getAll method.
 @Query((type) => [Blog])
  async getAllBlogs() {
    return this.blogService.getAll();
  }
Finally, add the code block below to your Resolver class to resolve the createBlog method.
 @Mutation((returns) => Blog)
  createBlog(@Args('blogInput') blogInput: BlogInput): Promise<Blog> {
    return this.blogService.createBlog(blogInput);
  }
Note: Be sure to specify the return type function for each decorator.
Your finished Resolver class should look like the code block below:
@Resolver((of) => Blog)
export class BlogResolver {
  constructor(private blogService: BlogService) {}

  @Query((type) => [Blog])
  async getAllBlogs() {
    return this.blogService.getAll();
  }

  @Mutation((returns) => Blog)
  createBlog(@Args('blogInput') blogInput: BlogInput): Promise<Blog> {
    return this.blogService.createBlog(blogInput);
  }
}
Testing your API using the GraphQL Playground
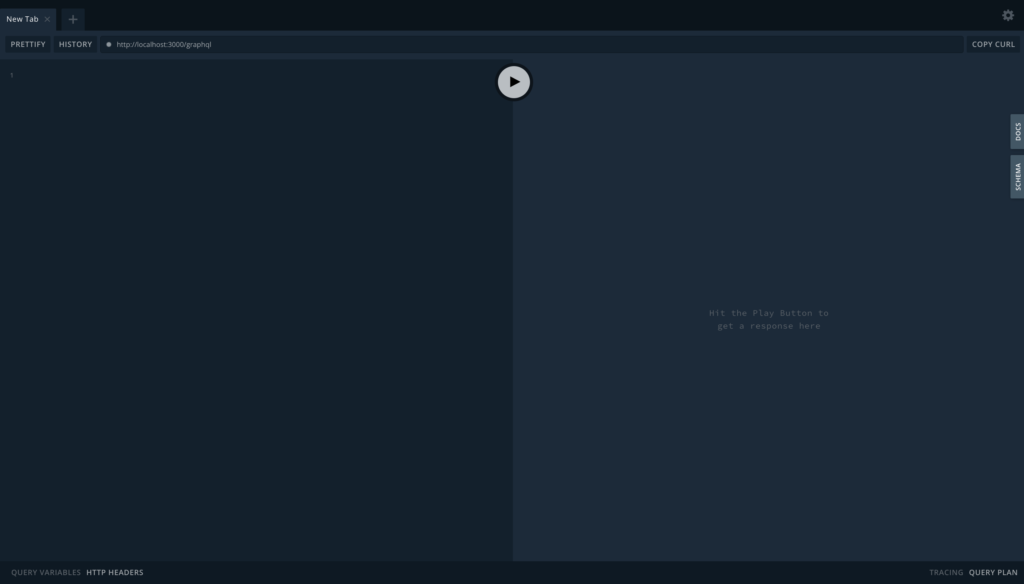
To test your application using the GraphQL playground, available by default, run the command below and navigate to http://localhost:3000/graphql.
npm start
Next, you should see a playground where you can test your queries and mutations, as shown in the image below.

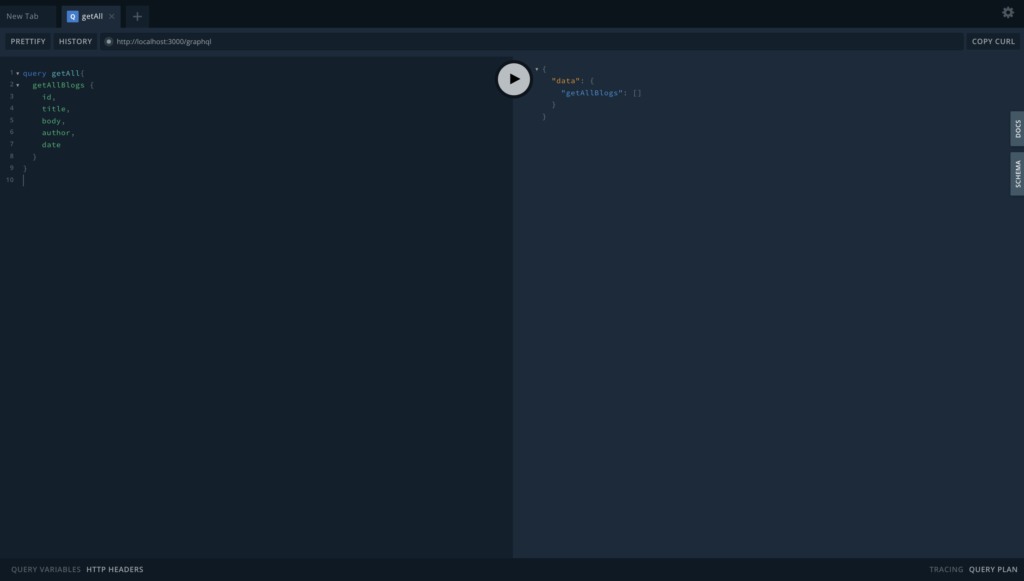
To retrieve all the blogs from the database, run the query below:
query getAll{
  getAllBlogs {
    id,
    title,
    body,
    author,
    date
  }
}
An example is shown in the image below:

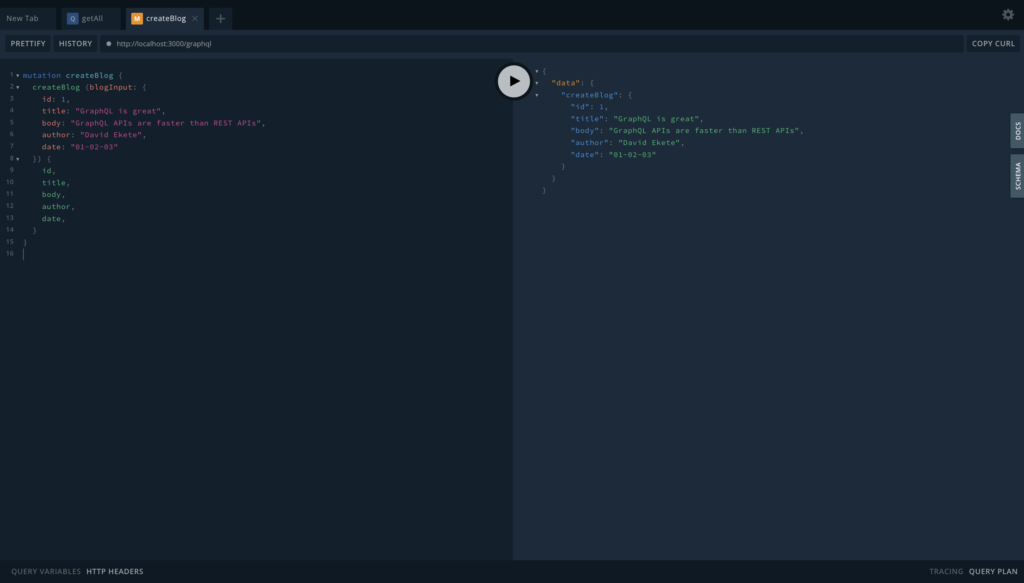
To add a blog to your database, run the mutation below:
mutation createBlog {
  createBlog (blogInput: {
    id: 1,
    title: "GraphQL is great",
    body: "GraphQL APIs are faster than REST APIs",
    author: "David Ekete",
    date: "01-02-03"
  }) {
    id,
    title,
    body,
    author,
    date,
  }
}
An example is shown in the image below:

Back4app and GraphQL
Due to the many advantages GraphQL has over REST, such as data fetch control, the Back4app platform provides a GraphQL API integrated into your parse applications running on the platform.
This integration allows you to check your server’s backend health, perform Create, Read, Update, Delete (CRUD) operations on your database, and much more by writing simple GraphQL queries and mutations.
For example, to check your backend server’s health using the GraphQL API, run the query below:
query Health {
  health
}
The query above will return:
{
  "data": {
    "health": true
  }
}
To get started with the GraphQL feature, navigate to your Parse dashboard and select and click your app. In your app’s UI, select and click Core, then select and click API console and choose the GraphQL console.
Following the instructions above will open up a GraphQL console where you can run your queries and mutations similar to the GraphQL playground you used in development. You can learn more about Back4app’s GraphQL feature in the Back4app documentation.
Conclusion
This article covered how you can create a GraphQL API in Nest.js and test the API with the GraphQL playground. GraphQL APIs have several advantages over REST APIs.
However, they are not ideal for every application. Be sure to consider the pros and cons of GraphQL and REST before picking which would be suitable for your application.
Irrespective of your choice, GraphQL or REST, you’d still need to deploy your application. Back4app is a low-code BaaS based on open-source technologies that simplifies your backend-building process by eliminating repetitive tasks using reusable templates and managing most of your backend infrastructure.
Some of the features of Back4app include a real-time database, cloud functions, native APIs and SDKs, a complete user management system, and a lot more.
This platform also features a free tier that allows you to explore the platform without paying a fee.
Happy building!
FAQ
What is GraphQL?
GraphQL is an open-source data query and manipulation language for APIs, created by Facebook in 2012.
What is Nest.JS?
Nest.JS is an open-source Node.js framework for building efficient, scalable server-side applications.
How to create a GraphQL API with Nest.JS?
– Configure GraphQL in Nest.js
– Connect to a Database
– Generate Resources
– Create an entity
– Create a object type
– Create a service


