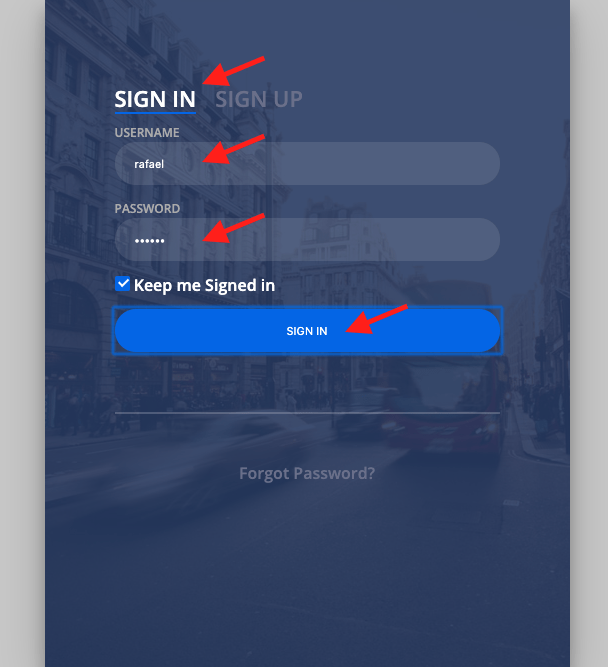
Mastering Web API authentication with Parse – Javascript SDK and GraphQL flavours
Many applications, especially websites, need to restrict access to their content, and having user accounts that show only information relevant to that user in a secure way is the most popular way to accomplish that.
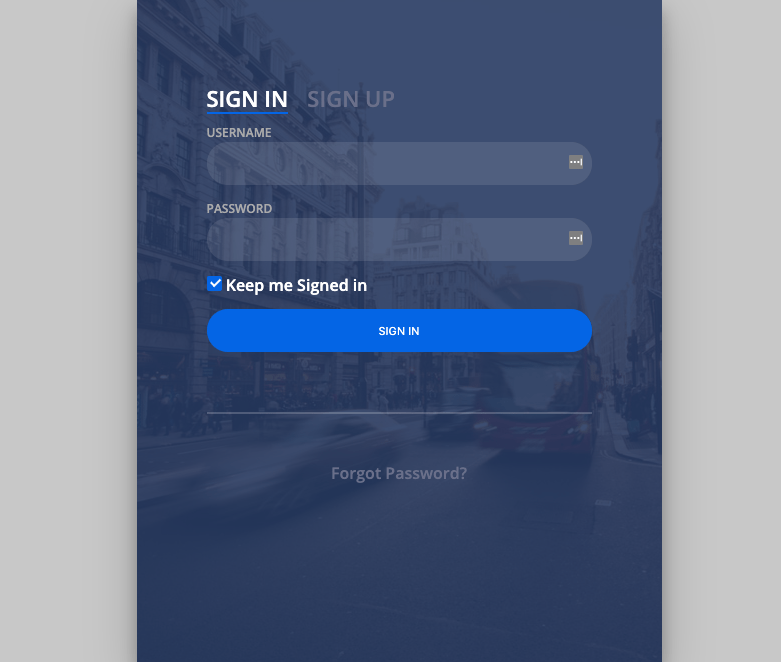
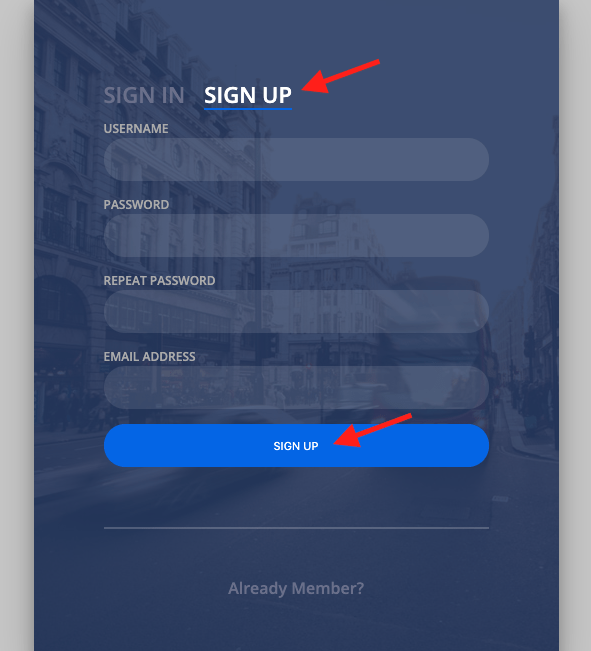
Today we will learn how to implement the Login functionality to an already existing HTML page, writing very little code and having Parse doing all the heavy lifting for you, and in order to do that, I chose the Login Form template which you can download for free.
We will be using two distinct technologies that you can choose from: the Javascript SDK and GraphQL through Javascript.
GraphQL is our brand new shiny technology that was just released and my goal is to compare both ways to do the same thing, so you can pick the one you like best.
SPOILER ALERT!! I am sure you will like GraphQL better…
That already has all the necessary files for visually display the file but lacks functionality, which we will be adding.
If you want to know more about GraphQL take a look at this post: What is GraphQL
This will be quite an extensive article, so let me show you what you will learn exactly, by chapter:
- Setting up your Web Hosting in Back4app
- Enable GraphQL usage
- Deploy your first website
- Create your first Javascript file
- Embed the Parse SDK
- Configure and instance the SDK in your code
- Add users graphically
- Use the Javascript SDK for sign up a user
- Test the sign up with your website (hardcoded values)
- Write code to read forms and apply to your Javascript code
- Test the sing up with your website (dynamic values)
- Create the Log In process with the Javascript SDK
- Test the login with your website (dynamic values)
- Conclusion of the Javascript SDK part
- Introduction to GraphQL
- What you will need to use GraphQL
- Installing tools you will need
- A quick explanation of how we will generate code for the frontend
- Using NPM modules on your NodeJS code
- Introduction to Queries and Mutations in GraphQL
- Queries
- Mutations
- Create your own GraphQL SingUp method
- Create your own GraphQL LogIn method
- Use Browserify to convert your NodeJS code to frontend compatible code
- Include that code into your HTML file
- Code Javascript functions to call the code Browserify generated
- Test your GraphQL SignUp and Login
- Conclusion of the GraphQL part
Contents
- 0.1 1. First Steps First
- 0.2 2. How about GraphQL?
- 0.3 3. Deploying Your First Website
- 0.4 4. Bring on Some Intelligence
- 0.5 5. Adding the Parse Framework
- 0.6 6. Firing up Parse engines
- 0.7 7. But I only have a few users…
- 0.8 8. No users? No problem! signUp() to the rescue!
- 0.9 9. Testing… Testing… 123…
- 0.10 10. Hooray!! Now let’s make it smarter…
- 0.11
- 0.12 11. Testing time again. Now for real.
- 0.13 12. It’s Login time, baby!
- 0.14 13. And noooow….
- 1 14. Conclusion of the Javascript SDK part
- 1.1 15. Let the GraphQL in
- 1.2 16. What we will need
- 1.3 17. Installing the GraphQL client and Browserify
- 1.4 18. How exactly is this going to work?
- 1.5 19. Some NodeJS code
- 1.6 20. Queries and Mutations, Generic or Specific
- 1.7 21. Queries
- 1.8 22. Mutations
- 1.9 23. Our own signUp method with GraphQL
- 1.10 24. And since we are here… LogIn..
- 1.11
- 1.12 25. Browserifying (say whaaat?)
- 1.13 26. Including our shiny new code on HTML
- 1.14 27. Show me some action!
- 1.15 28. Testing
- 1.16 29. Conclusion of the GraphQL part
- 1.17 How to enable GraphQL?
- 1.18 How is GraphQL a right choice?
1. First Steps First
The very first step is to create your App in Back4app if you don’t already have one. You can check the steps to create one using this doc.
This step is common for both technologies so independently of which you choose, you’ll have to do this.
After creating our App, we need to set the Web Hosting feature. Yes. You can host your websites with static content on Back4app for free. Great huh?
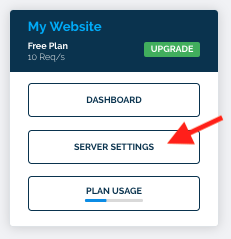
After having your App created, go to Server Settings:
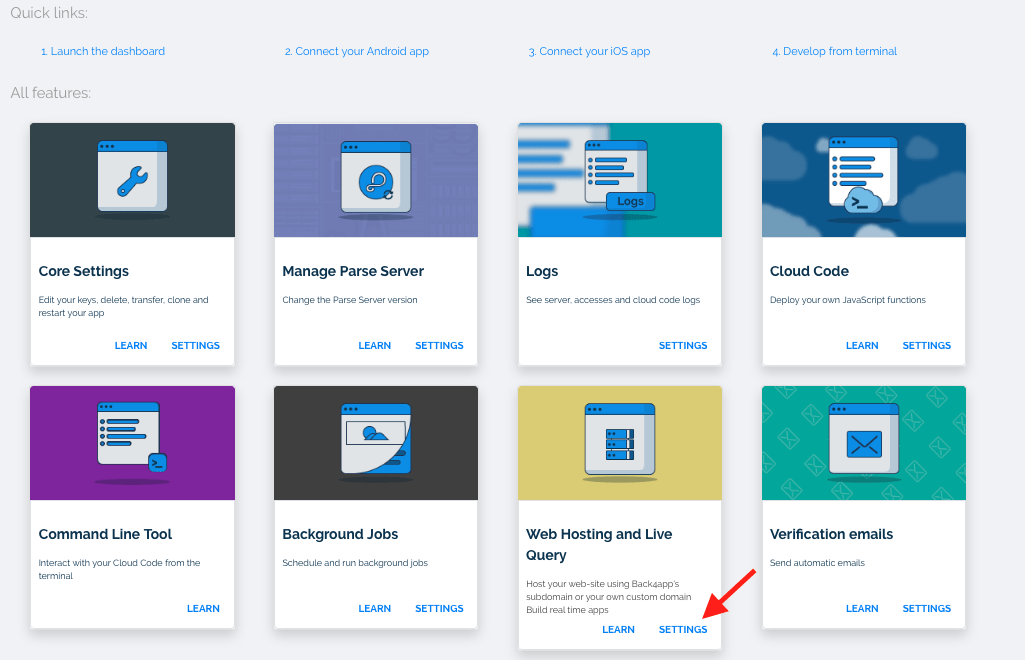
And under Web Hosting and Live Query, click Settings:
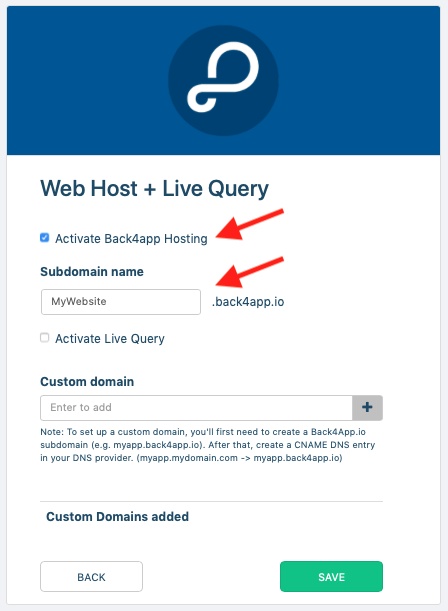
Now activate Back4app Hosting and choose a good domain name for your application. You can directly access that domain within back4app.io, or you can create a CNAME record on your DNS pointing to that domain if you wish:
Now you are ready to start deploying some code.
2. How about GraphQL?
If you want to use GraphQL, there is another step to take. If you plan to use only the Javascript SDK, you can use any Parse version, but why not use the latest and greatest?
Go to Server Settings:
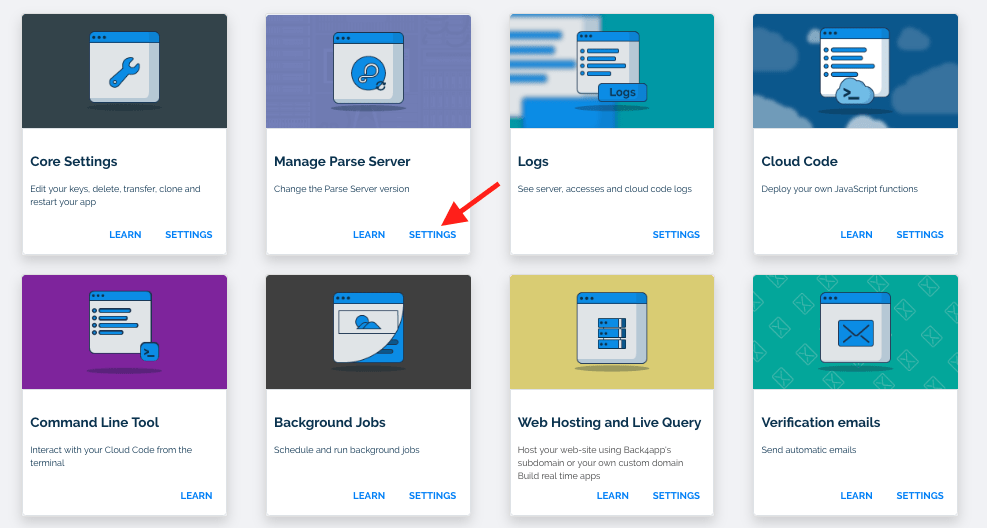
And under Settings in Manage Parse Server:
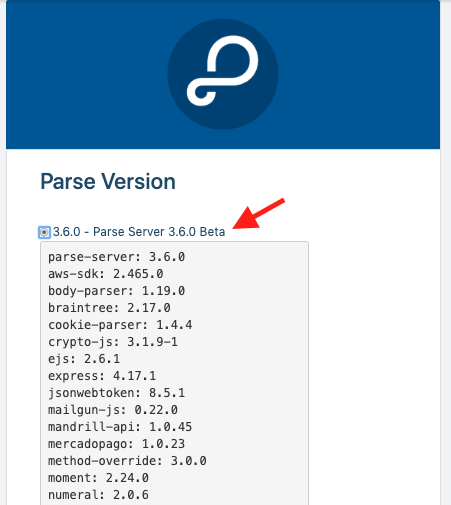
Pick a version that is over 3.5.0. In Back4app I used 3.6.0:
Now you should have GraphQL enabled and we are good to go!
Oh, just so you know, you can use GraphQL and SDKs on the same app. No need to choose.
If you are only interested in GraphQL, you can scroll to chapter 15 of this tutorial now.
3. Deploying Your First Website
Now that we have set the Web Hosting feature, we can deploy our website.
This step is also common for both technologies.
It won’t have any functionalities yet, but it feels good to see it working for the first time, so let’s do it.
Go to Server Settings once again:
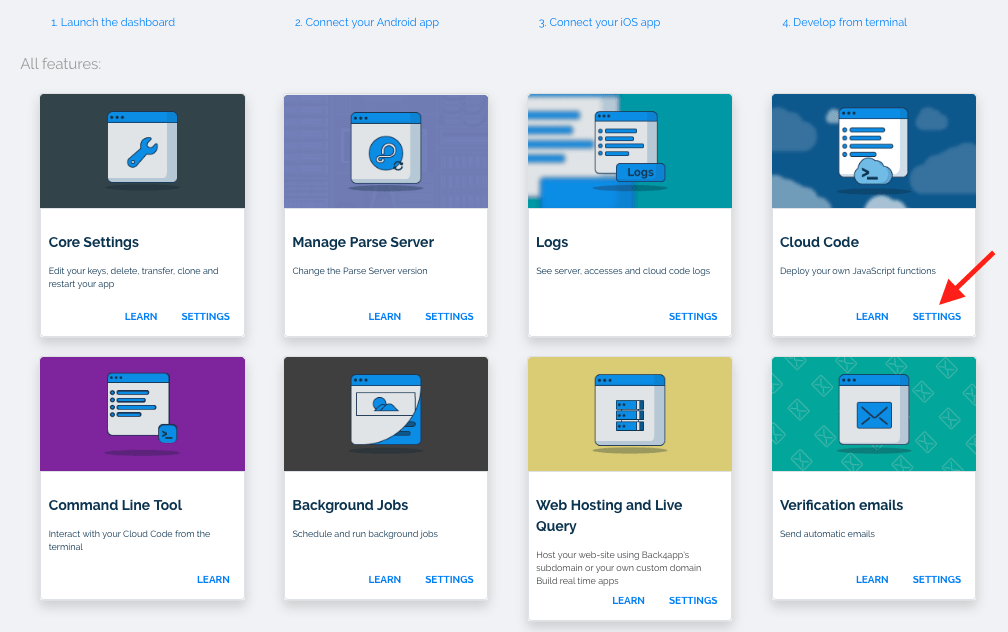
And now choose Settings under Cloud Code:
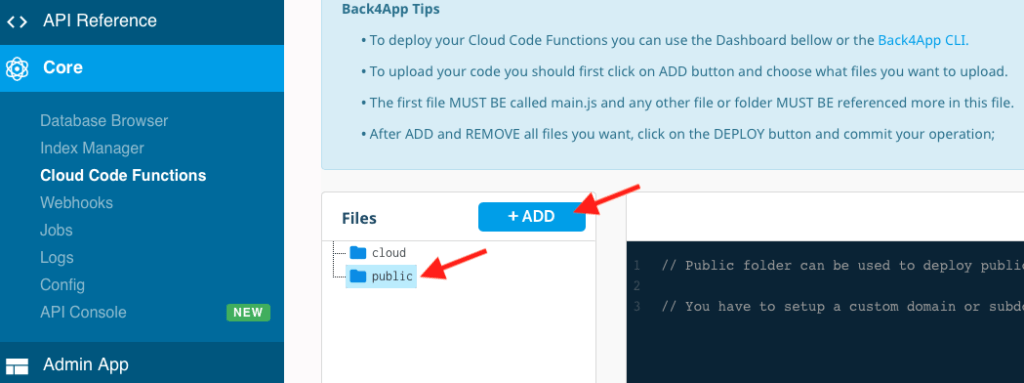
In there you will find two folders: Cloud and Public.
Cloud is for deploying Cloud Code, which is NodeJS code that runs from Back4app servers, doing all the heavy load of processing for your applications and bringing many advantages such as saving battery and data plan in cellphones, as the cellphone itself won’t have to actually process much nor retrieve a full load of data, relying only on the very final result of processing, delivered by the Back4app’s servers.
The public is for deploying static content such as HTML, CSS and static Javascript files. This is the one we are interested in at this moment.
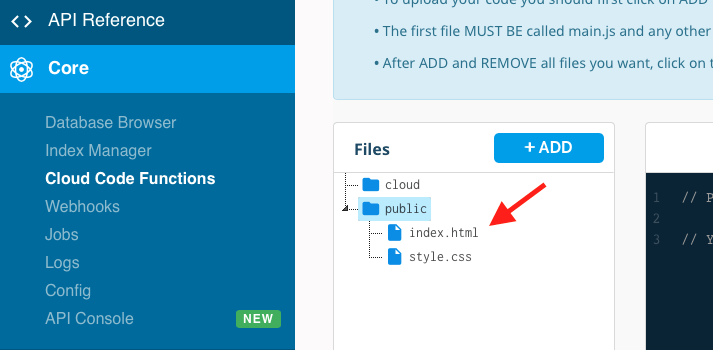
Select that folder and click the +ADD button above, and add both the HTML and CSS files for our template that you downloaded from the website at the first chapter.
After selecting those files, hit the Deploy button and you should see the files in the Public folder:
And now it is time for some testing.
If you hit the URL you set on the Web Hosting , you should see your shiny new website is now running totally for free:
4. Bring on Some Intelligence
A fancy shiny new website is up and running and that took us what? 2 minutes? Good look beating that for free, Internet!
And did I tell you it is fully secure and has HTTPS already built-in? Because we are not paying for certificates when Back4app will give them for free, are we?
Now it is time to get some intelligence into that. And how if we make it taking just another 2 minutes? I like it intelligent and I like it fast.
Startup your favorite IDE flavor and let’s get some Javascript. Visual Studio Code for me, please. And an espresso with it.
From now on I’ll focus on Javascript SDK only, and later on, on GraphQL only.
Create a new file called Parse.js and we are good to go.
5. Adding the Parse Framework
(Javascript SDK only)
Parse makes it reeee..(breathes)..eeeeally easy to deploy its frameworks. You first have to instantiate the Javascript framework by adding the following line in the Head section of your index.html file:
<script src="https://npmcdn.com/parse/dist/parse.min.js"></script>
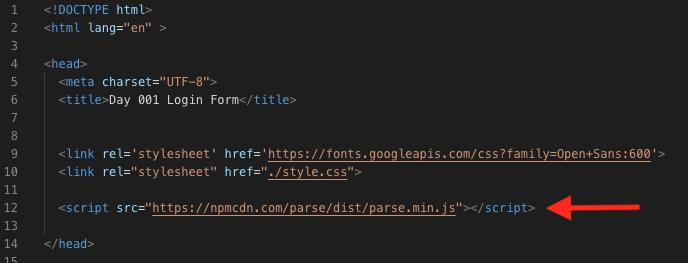
Now the full Parse (minified) framework can be accessed from your Javascript code and we can use everything from it.
6. Firing up Parse engines
(Javascript SDK only)
Now we already have access to the Parse framework, but we need to fire it up before hitting the throttle.
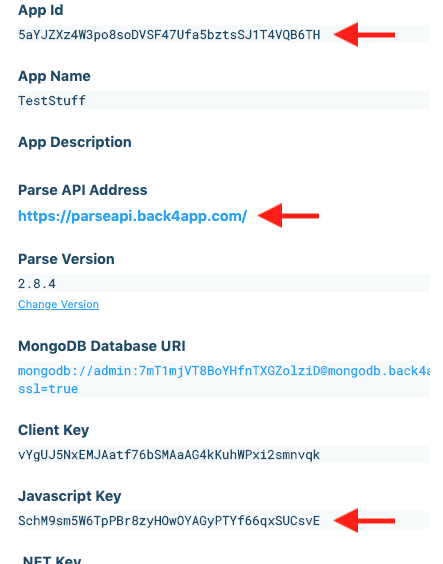
We need to identify our App to Parse and the way we do that is setting the AppId and Javascript Key for our Application, along with the server URL which tells our application we are running in Back4app.
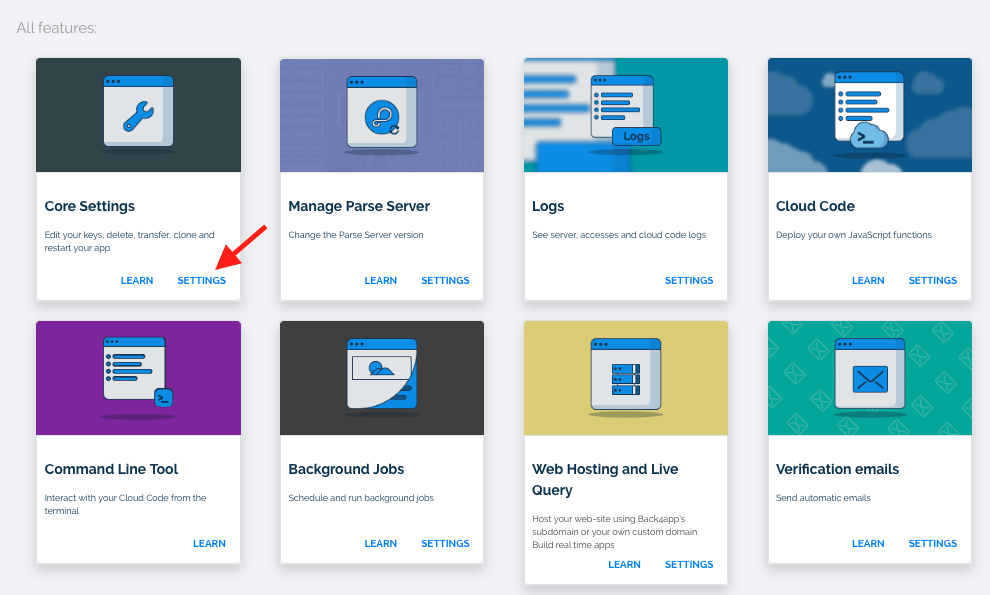
To do so, go to Server Settings:
and in Settings under Core Settings:
you will find all the information you need:
Copy that information and let’s paste it into our Parse.js file like this:
Parse.initialize("YourAppIdHere", "YourJavascriptKeyHere");
Parse.serverURL = 'YourParseAPIAddressHere'
Parse.initialize("5aYJZXz4W3po8soDVSF47Ufa5bztsSJ1T4VQB6TH", "SchM9sm5W6TpPBr8zyHOwOYAGyPTYf66qxSUCsvE");
Parse.serverURL = 'https://parseapi.back4app.com/';
Now our application has full access to Parse and Parse knows our settings so it can operate.
Greenlight. Full throttle!
7. But I only have a few users…
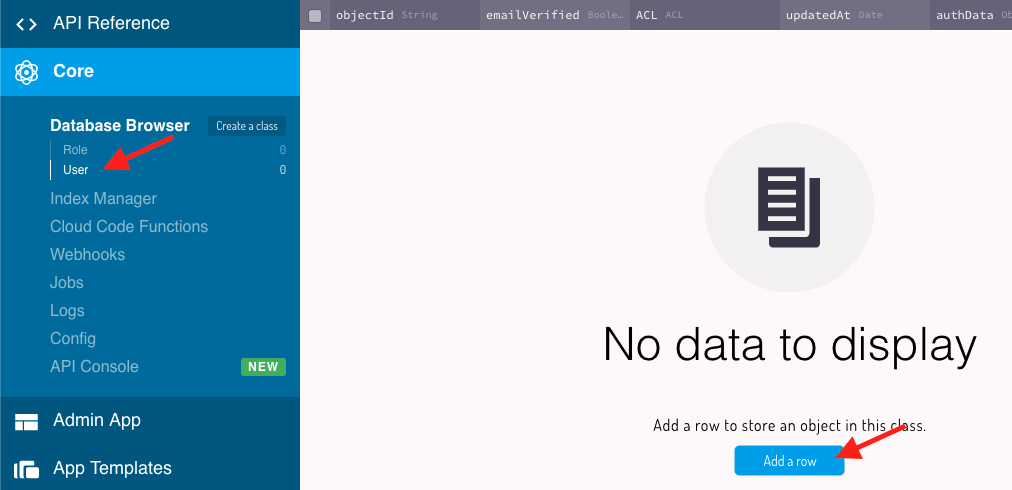
If your application does not need users to register and you prefer to manually manage them, you can get the User class in the Database Browser of the Parse Dashboard, hitting the Add a Row button:
But realistically, your application will probably grow over time and having users being able to register to the system themselves will help.
8. No users? No problem! signUp() to the rescue!
(Javascript SDK only)
At first, your application won’t have any users in it, so we must provide a way for users to register.
Our website already has a beautiful form for that. Let’s make it work, shall we?
And what if I told you we can do it with less than 12 lines of code? Sounds better?
The Parse.User class has three basic properties that you can set. You can set more if you want or need, but these three are already created for convenience and two out of those three are mandatory:
- username (mandatory)
- password (mandatory)
- email (optional)
Let’s add a test user to our database just to check the operation. Add this to your Parse.js file:
function singnUp(){
    var user = new Parse.User();
    user.set("username", "alex"); // sets the value from the Username form to the property username
    user.set("password", "abc123"); // sets the value from the Password form to the property password
    user.set("email", "[email protected]"); // sets the value from the Email form to the property email
    try {
        user.signUp(); // Everything worked and the user signed in
    } catch (error) {
        alert("Error: " + error.code + " " + error.message); // Oops.. something wrong happened
    }
}

This will create a new user with hardcoded values:
username: alexk
password: abc123
email: [email protected]
We will learn how to retrieve those values from the form further on this article, but for this test user, this will do.
Now open your index.html file and look for this line:
<input type="submit" class="button" value="Sign Up">
And change it to this:
<input type="submit" class="button" value="Sign Up" onclick="singnUp()">
Basically what we did here is we set an onClick event to fire the function signUp that we just coded.
Deploy both files to the Cloud Code Public folder (the new Parse.js file and the changed index.html file as well) as you learned above and reopen the website on your browser.
9. Testing… Testing… 123…
Time for some testing, baby! Let the code speak by itself!
Go to the Sign Up section and you don’t have to fill up anything as we are not passing real data, only a hardcoded test, and click the Sign Up button:
and if it everything worked well, you should see in your Parse Dashboard you now have that user together with a new Session for the user:
10. Hooray!! Now let’s make it smarter…
(Javascript SDK & GraphQL)
Now that we can sign up users, let’s make the full operational signUp function.
We will need to read the values of the form in order to insert them in the database and for that, we will use the javascript method:
document.getElementById("idOfTheInput").value
I found out while writing this article that the template we used has a small issue. The IDs must be unique so we can retrieve the correct values, and our template has a few repeated, probably due to copying and pasting code by the creator, so let’s change that.
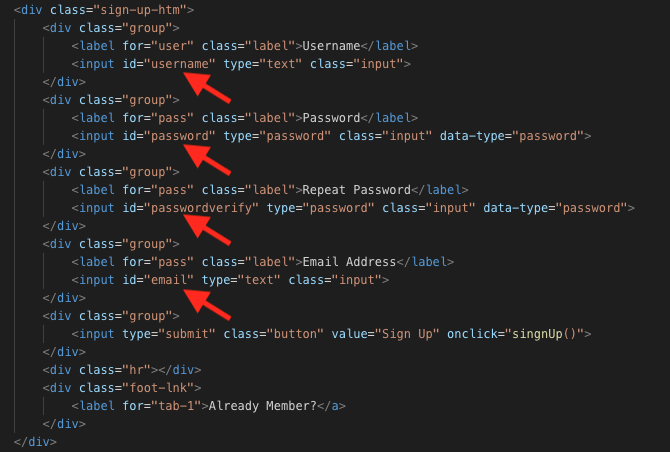
Go to your HTML file and find the following lines in the sign-up-htm section:
<input id=”user” type=”text” class=”input”>
<input id=”pass” type=”password” class=”input” data-type=”password”>
<input id=”pass” type=”password” class=”input” data-type=”password”>
<input id=”pass” type=”text” class=”input”>
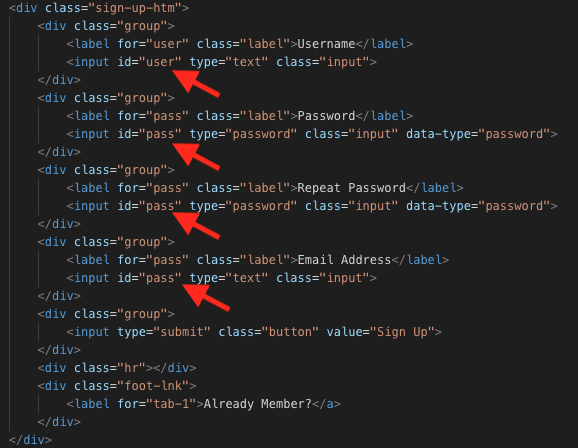
Notice the id attribute for those lines repeat a few times over the code. Let’s change that for unique ones:
<input id=”username” type=”text” class=”input”>
<input id=”password” type=”password” class=”input” data-type=”password”>
<input id=”passwordverify” type=”password” class=”input” data-type=”password”>
<input id=”email” type=”text” class=”input”>
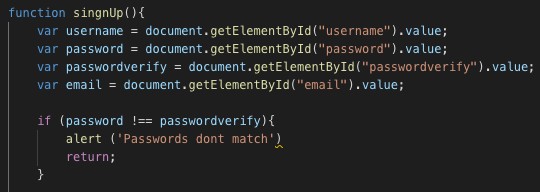
    var username = document.getElementById("username").value;
    var password = document.getElementById("password").value;
    var passwordverify = document.getElementById("passwordverify").value;
    var email = document.getElementById("email").value;
And since we are here, let’s make a password check by adding:
    if (password !== passwordverify){
        alert ('Passwords dont match')
        return;
    }
    user.set("username", "alexk"); // sets the value from the Username form to the property username
    user.set("password", "abc123"); // sets the value from the Password form to the property password
    user.set("email", "[email protected]"); // sets the value from the Email form to the property email
    user.set("username", alexl); // sets the value from the Username form to the property username
    user.set("password", password); // sets the value from the Password form to the property password
    user.set("email", email); // sets the value from the Email form to the property email
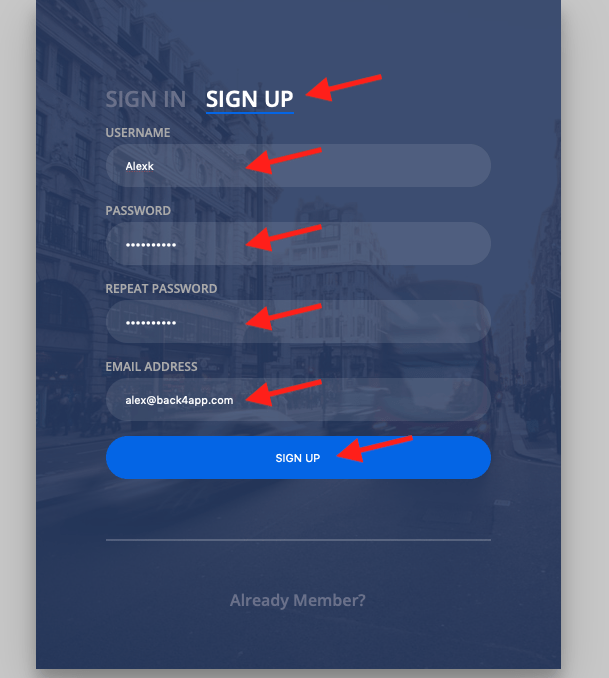
11. Testing time again. Now for real.

12. It’s Login time, baby!
(Javascript SDK only)
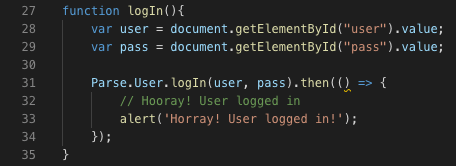
Let’s keep it short and simple. Why complicate stuff?
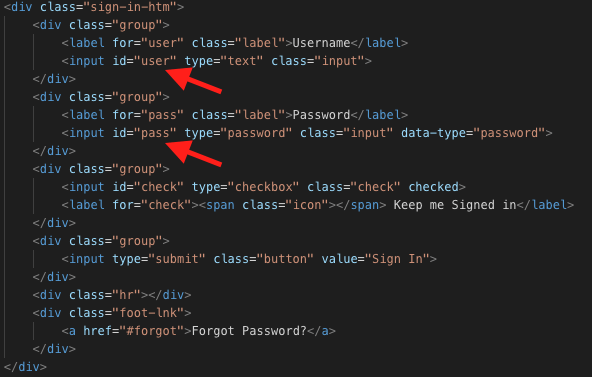
function logIn(){
    var user = document.getElementById("user").value;
    var pass = document.getElementById("pass").value;
}


Parse.User.logIn(user, pass).then(() => {
    // Hooray! User logged in
    alert('Hooray! User logged in!');
});
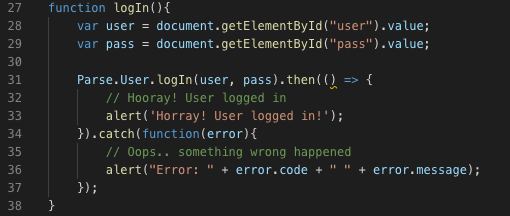
Parse.User.logIn(user, pass).then(() => {
    // Hooray! User logged in
    alert('Hooray! User logged in!');
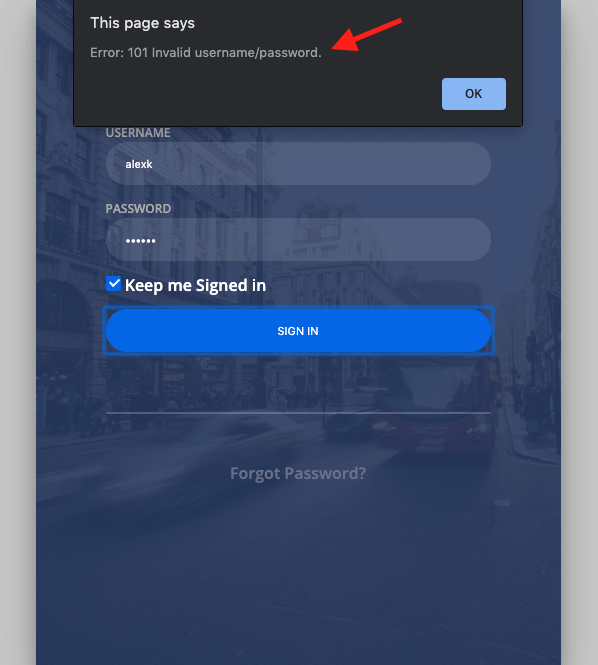
}).catch(function(error){
    // Oops.. something wrong happened
    alert("Error: " + error.code + " " + error.message);
});
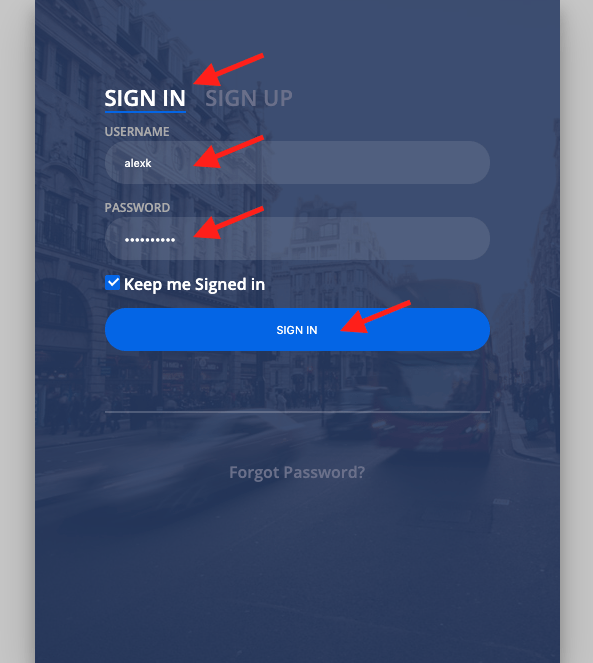
13. And noooow….

14. Conclusion of the Javascript SDK part
Having less code written, we also have less code to maintain over time, so maintenance also got cheaper.
Enjoy!
15. Let the GraphQL in
If you got excited with the Javascript SDK, now get some popcorn because the show is about to start.
Back4app now supports GraphQL, which is to say we keep up with the latest and greatest trend fashion technology, and now Parse are smarter than ever!
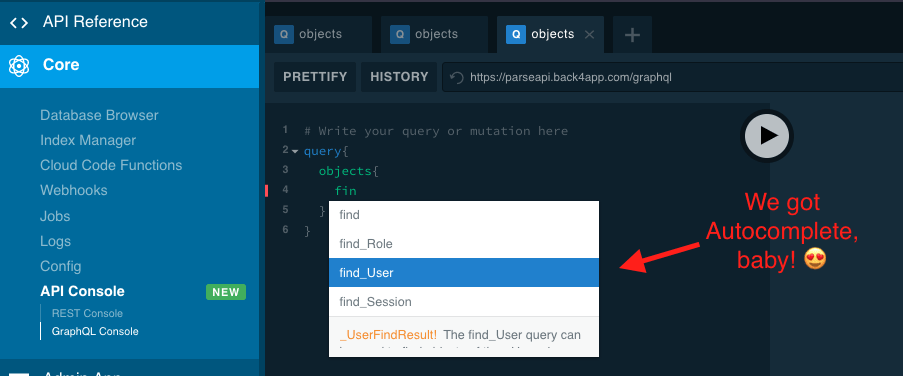
You can rely on a fully working GraphQL Playground with autocomplete (yes!!!) to generate the queries we will do.
Also, we can specify exactly what we want to retrieve, which translates to smaller payloads, making your data delivery faster to the end-users and APIs soooooo much easier to maintain over time.
Ok. Enough talking. GraphQL is so awesome if I don’t stop myself, I’ll keep writing over it and not showing how to use.
16. What we will need
(GraphQL only)
If you didn’t change your Parse version to at least 3.5.0 (3.6.0 on Back4app is the earliest to support GraphQL), go all the way up to section 2 of this article and do that.
We will need NPM installed so we can use its modules.
Those modules are written in NodeJS and initially designed for backend programming, so we will have to change that.
I will not show you how to install NPM, as the tutorial on the website above cover that quite extensively.
I will though show you how to use those so we can save a looooot of effort when coding.
Ready? So get those tools installed, fasten your seat belts and let’s go!
17. Installing the GraphQL client and Browserify
(GraphQL only)
GraphQL has a few clients available for you to use. As I couldn’t pick one (because all of them are quite good), I decided to go for the easiest to configure on this first tutorial, and use the other ones on the next tutorials so we can compare them.
I found that the easiest to set up is graphql-request, which you can install by opening a terminal, going to the folder of our Parse.js is in and typing:
npm install graphql-request
If the installation succeeds, you should have something like this:
We can also install a tool called Browserify.
Browserify makes the transition of the NPM modules to be used on the front end (your browser). Remember when I said NPM modules are initially designed for backend use? This tool will make it available on the frontend with minimal effort.
I like to install it globally (the -g key) so I can use it from anywhere:
npm install -g browserify
And again if everything works well, you should have something like this:
Now we have our GraphQL client installed and can convert it to frontend use. Took 2 minutes to do so, so we are progressing fast.
18. How exactly is this going to work?
(GraphQL only)
Basically, we will:
- Write some NodeJS code using the NPM modules
- Convert it to frontend compatible code using Browserify
- Export that code so we can call it from other files
- Call that code from our Javascript code
The command to browserify is:
browserify inputFile.js -o outputFile.js
The outputFile.js will contain our frontend compatible code, so let’s spin things up, create our inputFile.js, and open it in our favorite IDE.
19. Some NodeJS code
(GraphQL only)
We will start by adding our NPM module to our code by requiring it.
const { GraphQLClient } = require('graphql-request');
And create a global export with the name we will use to call our function, in this case, signUp:
global.singUp = function() {

}
With that, we can start adding code to our singUp function.
Let’s start by adding our endpoint URL, which you can retrieve from your GraphQL Playground:
const endpoint = 'https://parseapi.back4app.com/graphql';
And as we need to authenticate, instantiate our GraphQL client passing that URL as a parameter, along with the authentication headers: X-Parse-Application-ID and X-Parse-Javascript-Key. Those will have the AppId and the Javascript Key that you learned how to retrieve on step 6.
const { GraphQLClient } = require('graphql-request')

global.singUp = function() {
    constendpoint='https://parseapi.back4app.com/graphql';

    constgraphQLClient=newGraphQLClient(endpoint, {
        headers: {
            "X-Parse-Application-Id":"5aYJZXz4W3po8soDVSF47Ufa5bztsSJ1T4VQB6TH",
            "X-Parse-Javascript-Key":"pLuH6zKGl8thmIJfWFjvXll4B2YTAnlhlpAGVuoq"
        },
    });
}
Now it is time for us to write some GraphQL queries and mutations.
20. Queries and Mutations, Generic or Specific
(GraphQL only)
At the time of writing this document, Back4app and Parse work with Queries and Mutations. New methods can be developed over time, but let’s discuss these two.
Queries are used when only retrieving data from the server.
Mutations are used when you are changing data on the server, which can or cannot also retrieve results.
So, if you’re just consuming information, you should use a Query, and if you are adding or changing information, you should use a Mutation.
We will start with a simple Query and evolve to mutations after that.
While speaking about that, we have Specific and Generic methods in GraphQL, each with their own advantages and disadvantages.
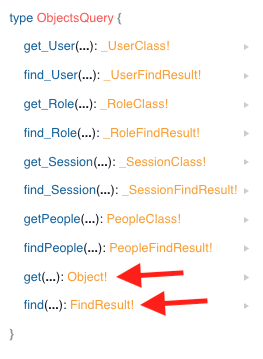
Generic methods allow you to operate in any class. If you are making a generic query for instance, you can retrieve data by specifying the class you want. This is awesome because you can use the same syntax for almost everything, and when using Mutations, you can create classes and objects that don’t exist at first.
The drawback is that as you don’t have Schemas for Generic methods, you cannot rely on Autocomplete so you must know what you are doing.
Examples of Generic methods get and find.
Generic Mutations are update, delete or create.
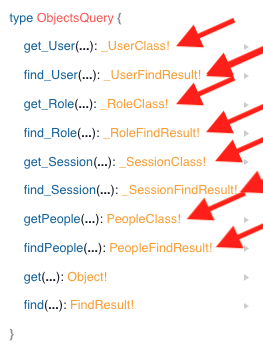
Specific methods, on the other hand, have Schemas so they can only be used by Classes that are pre-existent. This is the drawback.
But using Specific methods brings another level of awesomeness, letting us count on Autocomplete and having way more powerful resources to retrieve our data.
Specific queries will start with get and find, and have the class name right next: findPerson, getPerson and so on.
Specific mutations start with create, update and delete and have the class name next: createPerson, getPerson, deletePerson:
21. Queries
(GraphQL only)
Let’s make a simple Query to play with GraphQL.
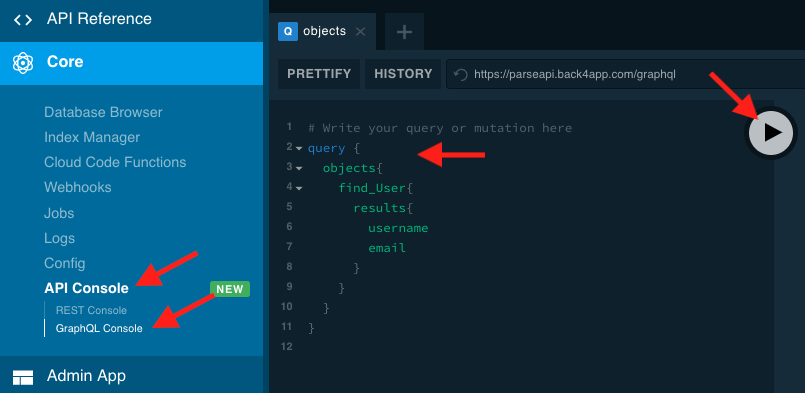
On your Parse Dashboard, go to API Console, then GraphQL Console.
Type the following query using the Specific query for find a User. At any point, you can press CTRL + Spacebar (Windows) or OPTION + Spacebar (Mac) to have Autocomplete as you type.
Queries can vary depending on the Parse version that you choose:
Parse 3.7.2:
query {
    objects{
        find_User{
            results{
                username
                email
            }
        }
    }
}
Parse 3.8:
query {
  users{
      results{
          username
          email
      }
  }
}
Parse 3.9:
query {
  users{
      results{
          username
          email
      }
  }
}
Click the Play button:
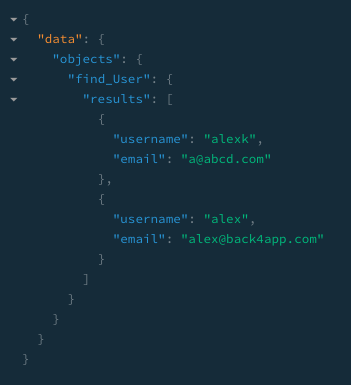
You should see the Users we created with the Javascript SDK. If you skipped that part, just add a few Users as described in chapter 7 and try and run your Query again. You should see results like this:
We just used the specific query find_User to find all users, retrieving their username and email. We specified exactly what we wanted to retrieve, generating a smaller payload, while counting on Autocomplete to help us develop so during the process we knew which operations were available.
Awesome, huh?
Let’s make it better!
22. Mutations
(GraphQL only)
Let’s create our GraphQL mutation with the specific method signUp to operate just like our signUp method in Javascript.
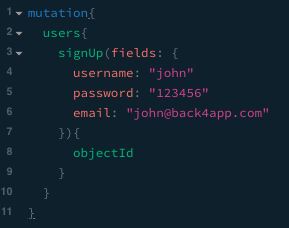
The Mutation will be like this:
Parse 3.7.2
mutation{
  users{
    signUp(fields: {
      username: "john"
      password: "123456"
      email: "[email protected]"
    }){
      objectId
    }
  }
}
Parse 3.8
mutation SignUp{
  signUp(fields:{
    username: "somefolk"
    password: "somepassword"
  }){
    objectId
    createdAt
  }
}
Parse 3.9
mutation SignUp{
  signUp(fields:{
    username: "somefolk"
    password: "somepassword"
  }){
    id
    createdAt
    sessionToken
  }
}
Run and check that the user was added to the User class in the Database Browser.
Yay! Now let’s have it working on our code.
23. Our own signUp method with GraphQL
(GraphQL only)
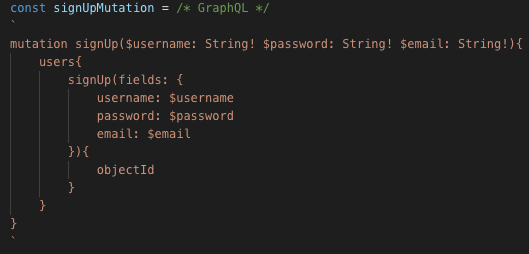
For our javascript signUp method, we will use a Mutation that is almost the same as the one we used on the GraphQL Playground, but while there we used hardcoded values, here we must set variables to assume values that the user types on the forms.
For using variables on the GraphQL client we are using, we must first specify the variable names and types on the method. We will pass 3 variables for our signUp method: username, password, and email, which are all strings, so our method singUp will be:
const signUpMutation = /* GraphQL */
`
mutation signUp($username: String! $password: String! $email: String!){

}
`
Then we have to use those variables inside our create_User method, like this:
Parse 3.7.2
        users{
            signUp(fields: {
              username: $username
              password: $password
              email: $email
            }){
              objectId
            }
        }
Parse 3.8
        users{
            signUp(fields: {
              username: $username
              password: $password
              email: $email
            }){
              objectId
            }
        }
Parse 3.9
        users{
            signUp(fields: {
              username: $username
              password: $password
              email: $email
            }){
              id
            }
        }
And finally set values for it in a different JSON object, which will be passed as a parameter along with the Mutation:
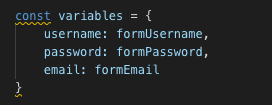
const variables = {
        username: formUsername,
        password: formPassword,
        email: formEmail
    }
Now, notice I have 3 values there formUsername, form Password and formEmail which I will retrieve from the form and pass to our singUp function, so I must specify those on the function parameters:
global.singUp = function(formUsername, formPassword, formEmail)
And ready we are!
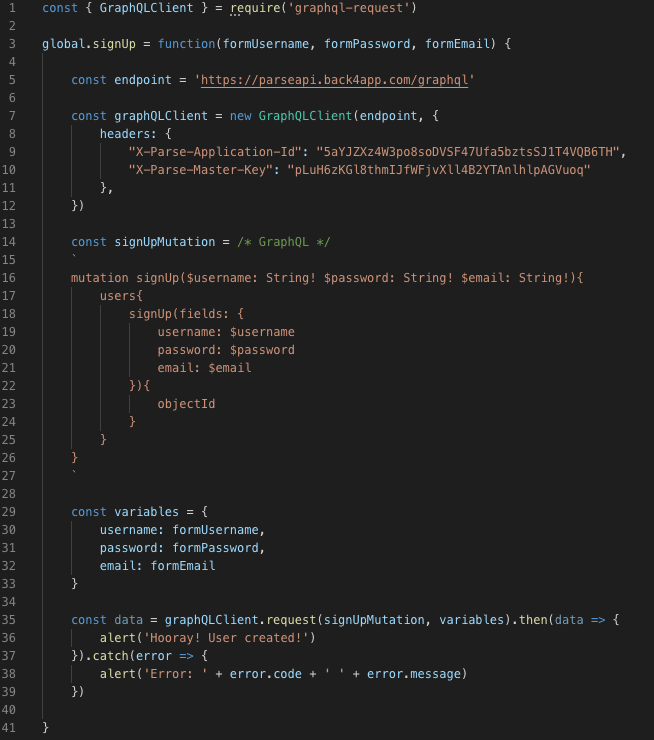
Here is the full method:
const { GraphQLClient } = require('graphql-request')

global.signUp = function(formUsername, formPassword, formEmail) {

    const endpoint = 'https://parseapi.back4app.com/graphql'

    const graphQLClient = new GraphQLClient(endpoint, {
        headers: {
            "X-Parse-Application-Id": "5aYJZXz4W3po8soDVSF47Ufa5bztsSJ1T4VQB6TH",
            "X-Parse-Master-Key": "pLuH6zKGl8thmIJfWFjvXll4B2YTAnlhlpAGVuoq"
        },
    })

    const signUpMutation = /* GraphQL */
    `
    mutation signUp($username: String! $password: String! $email: String!){
        users{
            signUp(fields: {
                username: $username
                password: $password
                email: $email
            }){
                objectId
            }
        }
    }
    `

    const variables = {
        username: formUsername,
        password: formPassword,
        email: formEmail
    }

    const data = graphQLClient.request(signUpMutation, variables).then(data => {
        alert('Hooray! User created!')
    }).catch(error => {
        alert('Error: ' + error.code + ' ' + error.message)
    })

}
24. And since we are here… LogIn..
(GraphQL only)
Since I already explained every step of the singUp mutation, I will just leave the code for the logIn method, which follows exactly the same principles but using the specific mutation logIn:
mutation logIn($username: String! $password: String!){
  users{
    logIn(username: $username password: $password){
    	sessionToken
    }
  }
}
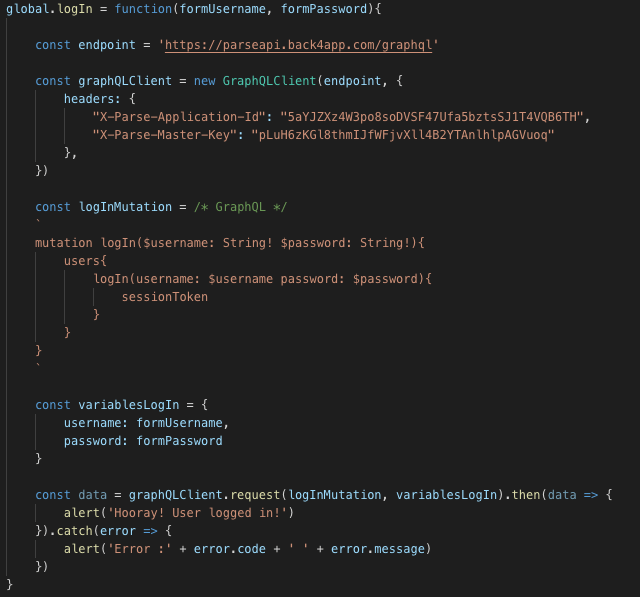
And the full code would be:
global.logIn = function(formUsername, formPassword){

    const endpoint = 'https://parseapi.back4app.com/graphql'

    const graphQLClient = new GraphQLClient(endpoint, {
        headers: {
            "X-Parse-Application-Id": "5aYJZXz4W3po8soDVSF47Ufa5bztsSJ1T4VQB6TH",
            "X-Parse-Master-Key": "pLuH6zKGl8thmIJfWFjvXll4B2YTAnlhlpAGVuoq"
        },
    })

    const logInMutation = /* GraphQL */
    `
    mutation logIn($username: String! $password: String!){
        users{
            logIn(username: $username password: $password){
                sessionToken
            }
        }
    }
    `

    const variablesLogIn = {
        username: formUsername,
        password: formPassword
    }

    const data = graphQLClient.request(logInMutation, variablesLogIn).then(data => {
        alert('Hooray! User logged in!')
    }).catch(error => {
        alert('Error :' + error.code + ' ' + error.message)
    })
}
25. Browserifying (say whaaat?)
(GraphQL only)
Remember on chapter 18 I gave you the command to Broserify (a.k.a. turn our NPM modules to be frontend compatible)?
If you don’t, here it is again:
browserify inputFile.js -o outputFile.js
Let’s run it on our inputFile.js and output it to a file named graphql.js:
browserify inputFile.js -o graphql.js
If everything succeeded, we should not have any output:
How easy was that, huh?
26. Including our shiny new code on HTML
(GraphQL only)
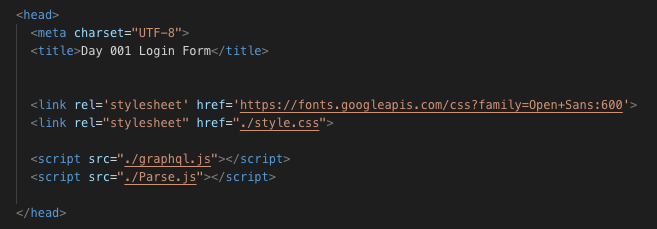
Inside the head tag of our HTML file, include the generated graphql.js file.
And since you’re there, also create a new blank file called Parse.js and include it as well. We will be using that to call our GraphQL methods:
<script src="./graphql.js"></script>
<scriptsrc="./Parse.js"></script>
Attention: Just in case you skipped the Javascript part of the tutorial, please go back to chapter 10 and change the IDs of the HTML tags as described there. We will need that part working in order to retrieve values from the forms.
27. Show me some action!
(GraphQL only)
We did a lot of progress until here, huh? Let’s add some code to get some action!
Again, if you skipped the Javascript section, go back to chapter 10, and take a look at how we use Javascript to read values from the forms using the getElementById method:
document.getElementById("idOfTheInput").value
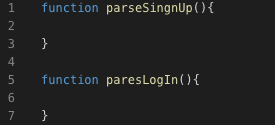
So let’s open our Parse.js file and add our two methods in there, logIn and singUp:
function parseSignUp(){

}

function parseLogIn(){

}
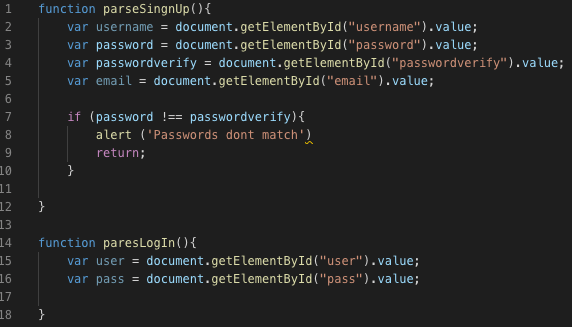
And let’s also add the code for reading the values from the forms, along with some password equality validation code, again, explained on chapter 10:
function parseSingnUp(){
    var username = document.getElementById("username").value;
    var password = document.getElementById("password").value;
    var passwordverify = document.getElementById("passwordverify").value;
    var email = document.getElementById("email").value;

    if (password !== passwordverify){
        alert ('Passwords dont match')
        return;
    }

}

function parseLogIn(){
    var user = document.getElementById("user").value;
    var pass = document.getElementById("pass").value;

}
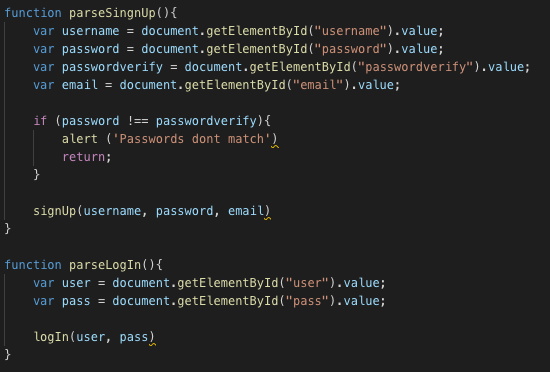
But this time, instead of using the Javascript SDK, let’s just call our methods signUp and logIn from our graphql.js file. The full code will then be:
function parseSingnUp(){
    var username = document.getElementById("username").value;
    var password = document.getElementById("password").value;
    var passwordverify = document.getElementById("passwordverify").value;
    var email = document.getElementById("email").value;

    if (password !== passwordverify){
        alert ('Passwords dont match')
        return;
    }

    signUp(username, password, email)
}

function parseLogIn(){
    var user = document.getElementById("user").value;
    var pass = document.getElementById("pass").value;

    logIn(user, pass)
}
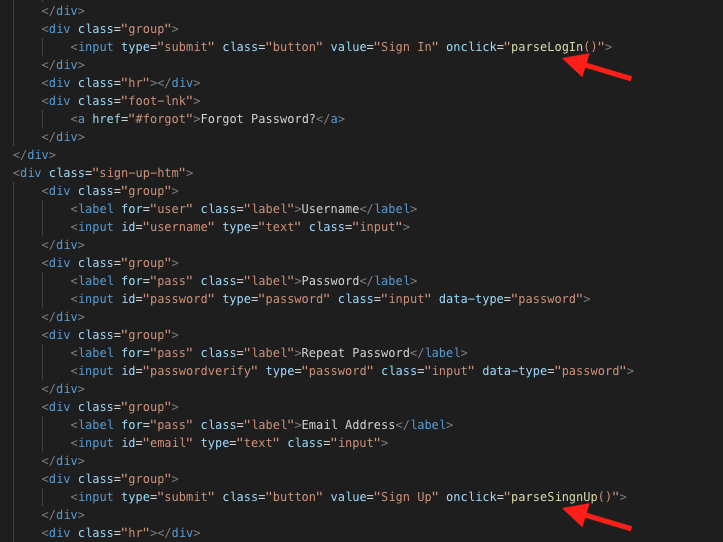
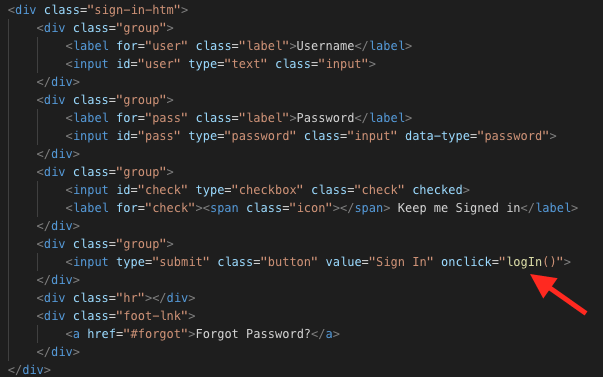
Oh, and don’t forget to call those on the onClick events in the HTML file:
Deploy everything as explained in chapter 3 and we are ready for some…
28. Testing
(GraphQL only)
Access your website and go to the Sign Up section. Fill the form up and hit the Sign Up button:
If everything worked, you should see your new user in the Users table:
Now go back to the Sign In section and try to log in with that user:
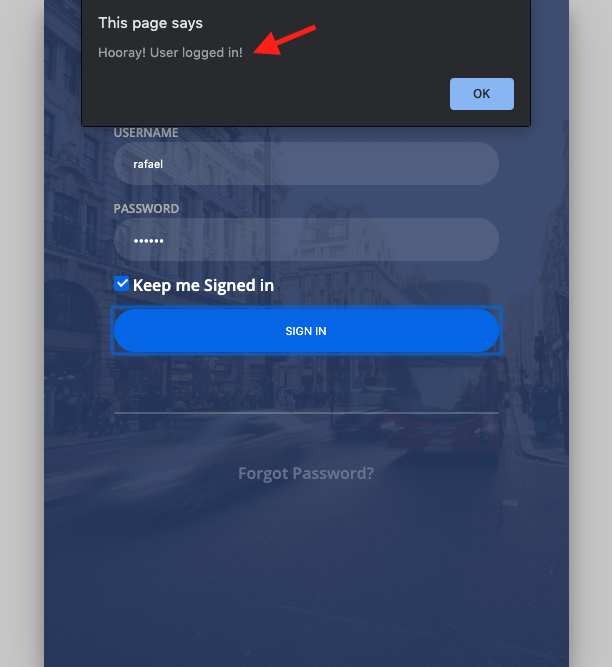
If everything worked as expected, you should now be logged in:
29. Conclusion of the GraphQL part
Phew! I know this was a lot of information, but now you are a Sign-Up and Login master! Congratulations!
GraphQL might seem a little more troublesome at first contact, with a few more processes in order to be used, but believe me: when you get the hang of it in your development process, it will be a breeze!
We now have a much more organic, easier to maintain code, that we made with the help of Autocomplete and could test and verify responses on the GraphQL Playground even before we started coding. This is huge because you can not only have all your queries written and tested before producing code but because you can now split development for a team: a few developers can write the GraphQL queries while others write the Javascript code, accelerating the whole process.
Better than that, if you need to change anything in your code from now on, it is just a matter of changing the queries and you’re good to go.
Can it get any better? Of course, it can!
Using the exact same syntax you can reuse the GraphQL queries for every platform. It is similar to all languages. You don’t have to ask yourself “how do I do that in this language that I am not familiar with?” anymore. Same queries, different languages.
I hope you give GraphQL a chance in your development process. I am pretty sure you will be amazed by how much you can reach!
How to enable GraphQL?
Enabling GraphQL is easy and recommended also because it is the latest update. You need to take one extra step for this though. Here are the steps
-Click server settings
-Under settings go to Manage parse server
-You need to select a version over 3.5.0
This will be a simple 3 step process.
How is GraphQL a right choice?
Here are the reasons which make GraphQL the right choice here.
-It has bit more to do but once you practice it, you will enjoy its ——-Speed of working
-Your work can be split with it
-Process speed is increased rapidly with it
-Changing of code will only require changing of queries with GraphQL.
So, these things make GraphQL the right choice.
