Deploying a PHP application on Heroku
Since its first appearance back in 1995, PHP is among the most used programming languages to develop web applications. Its simplicity and efficiency allowed developers to build miscellaneous web applications like Facebook, Wikipedia, WordPress, and more.
In order to deploy a PHP web application, we usually need to set up an Apache server. Fortunately, nowadays cloud platforms like Heroku allow us to easily have our project up and running in a few steps.
In this tutorial, we will deploy a PHP web application on the Heroku platform. This platform offers to developers different ways to deploy their applications. In particular, since GitHub is widely used for managing projects, we will focus on deploying a PHP project on the Heroku platform, from a GitHub repository.
We can reduce the deployment process in four steps:
- Create a Heroku app
- Configure an add-on on the Heroku app
- Upload the PHP project onto GitHub
- Deploy the PHP project
Contents
Prerequisites
- A Heroku account (Sign up if you do not have one)
- A GitHub account (join here)
- Basic Git knowledge
- A PHP project to deploy on Heroku
Create a Heroku app
Firstly, you need to sign in to your Heroku account. In the main dashboard, below your profile picture, there is a New button, click on it and then click on Create new app:

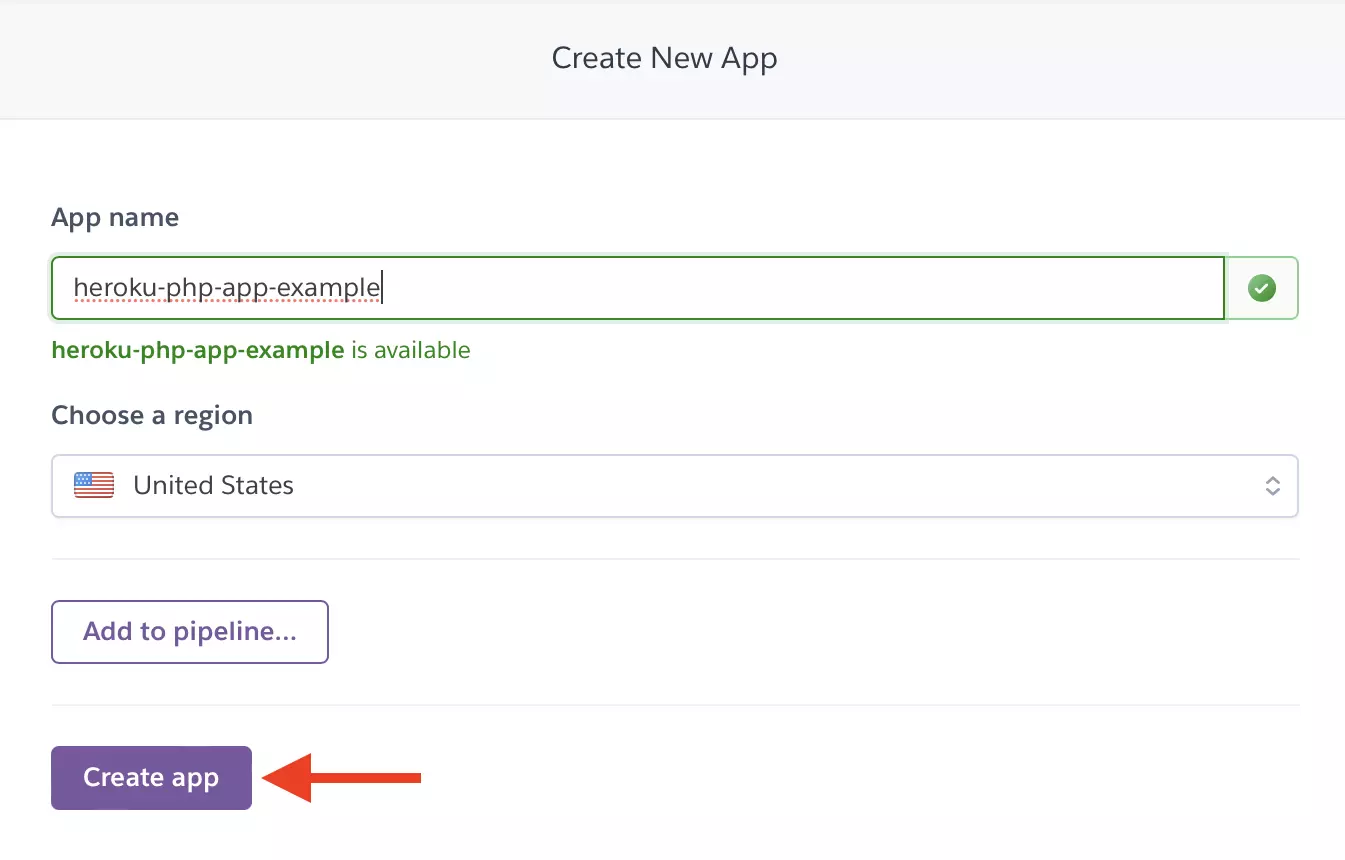
On the next page, you need to enter a (unique) name for the app, select a region where the app should be allocated in, and then click on Create app:
Once Heroku successfully creates your app, it will redirect you to its corresponding dashboard. In this panel, you have a set of tabs where you can find the different actions and configurations related to your Heroku app:
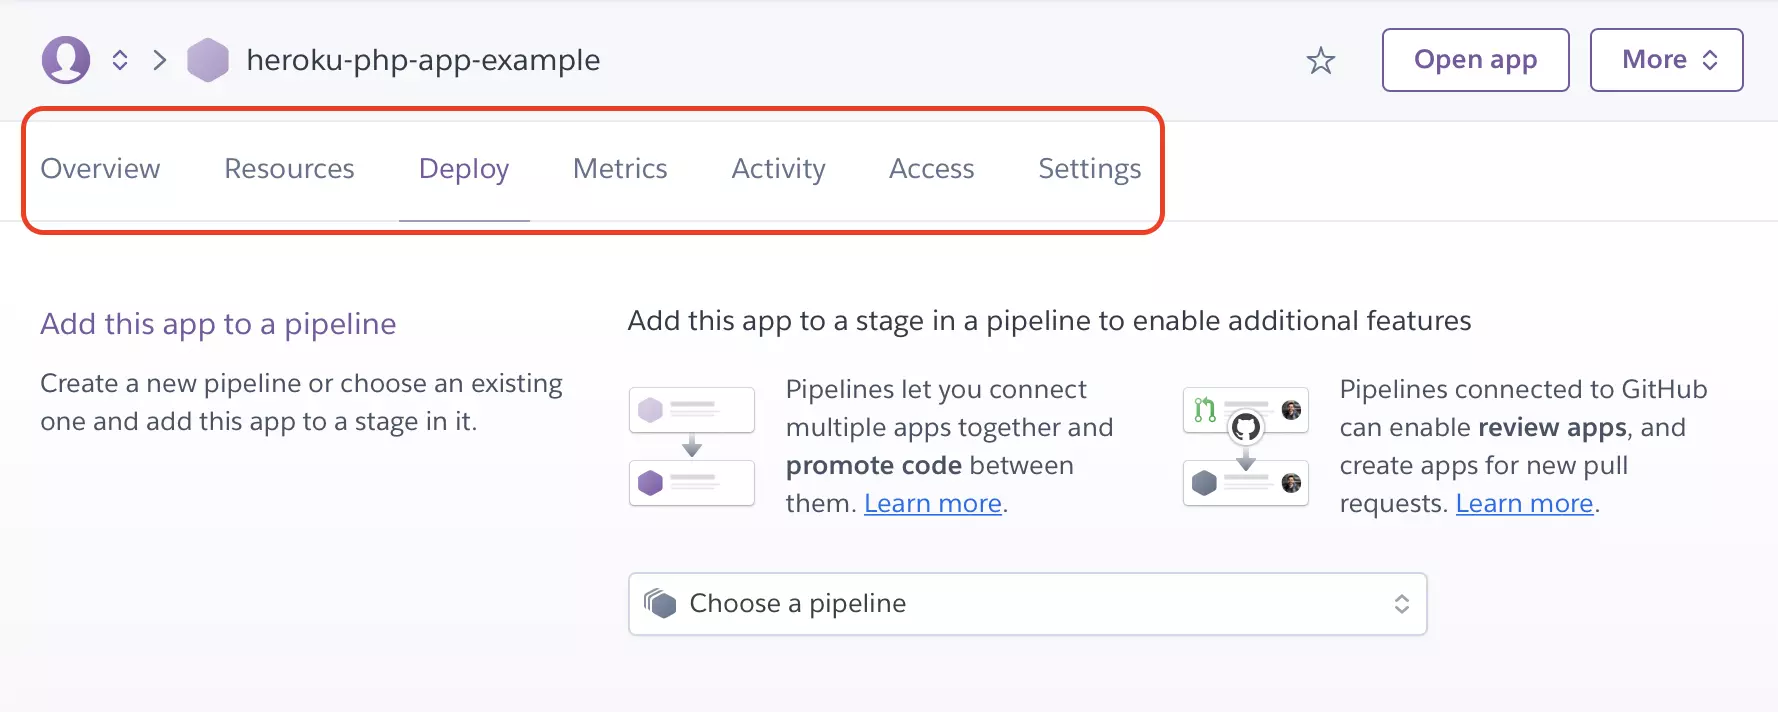
In each tab, you can find a specific setting or capability your Heroku app is able to use. For instance, in the following step, you will learn how to integrate the so-called Add-ons in a Heroku app.
Configure an add-on on the Heroku app
Any web application usually requires additional tools and resources to provide a good service to customers. Heroku integrates an Add-on system where you can find resources for your web applications. For instance, having a database, file storage, and analytic tools are some of the key features in almost any web application. As an example, we will add the JawsDB Maria database available in Heroku’s Add-on library.
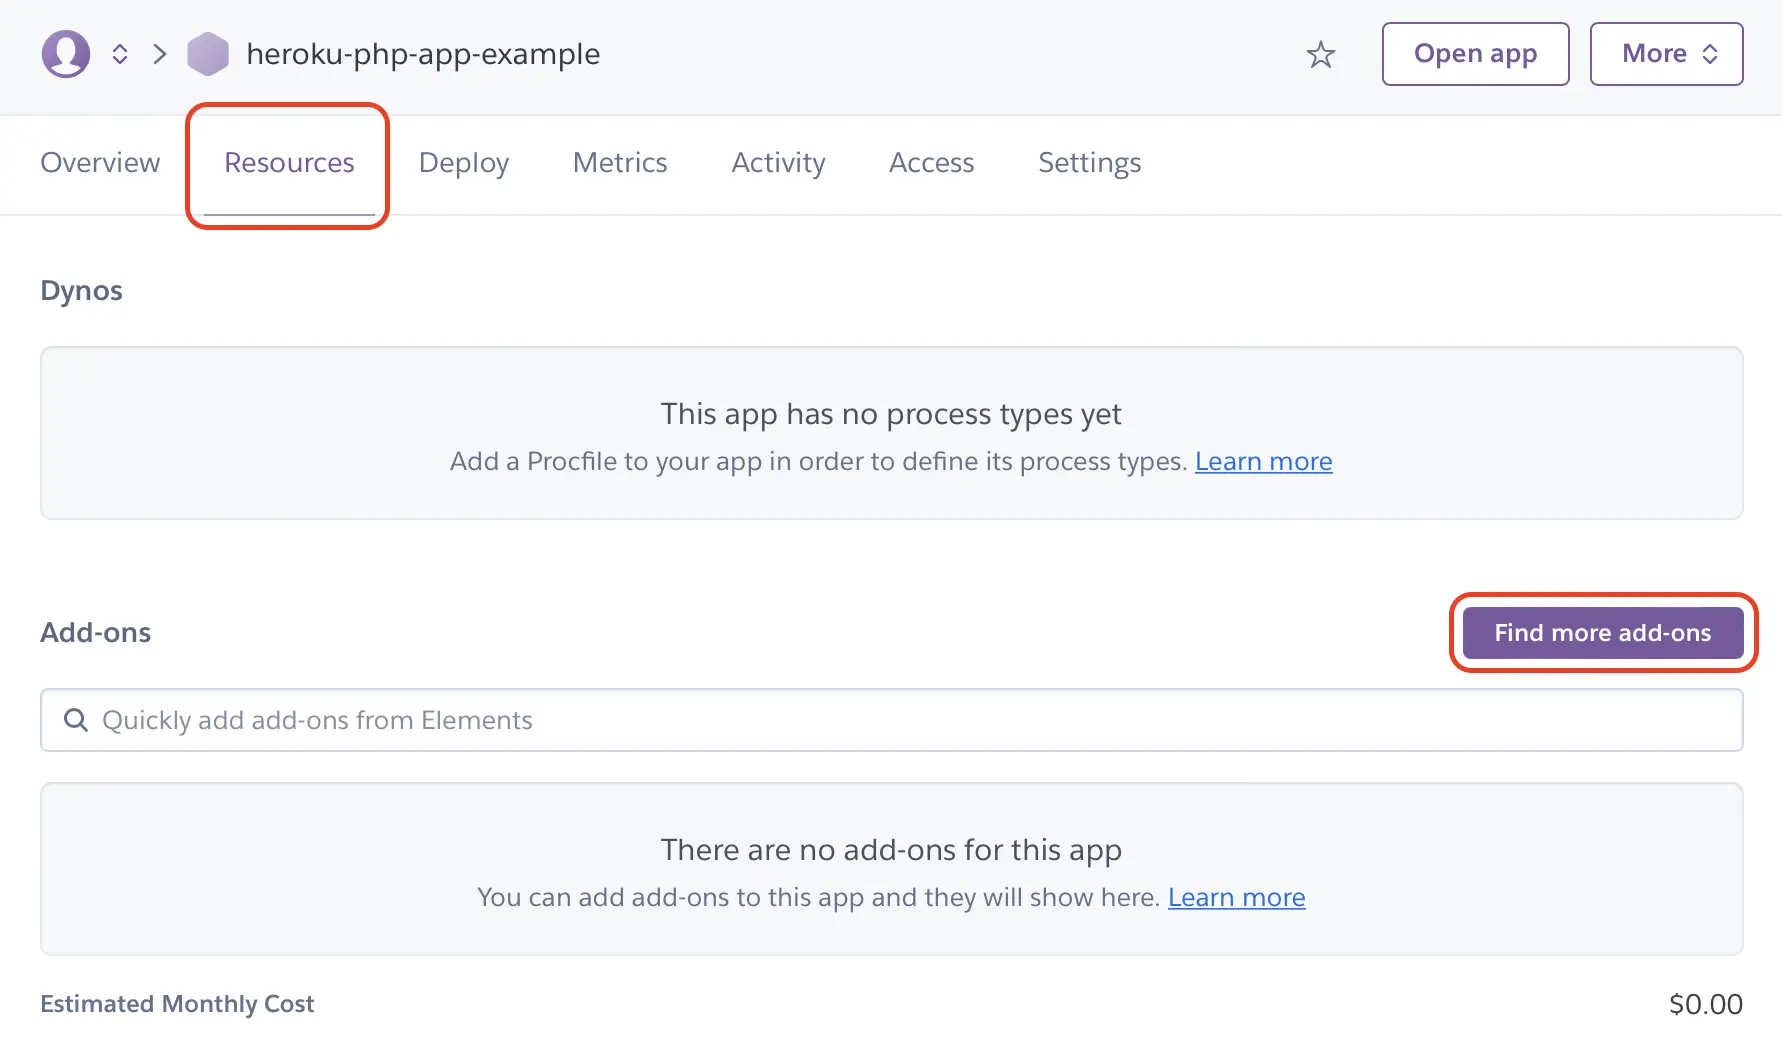
In the dashboard of your Heroku app, go to the Resource tab. Below, you should click on Find more add-ons:
In a new browser tab, you should have a list of all the Add-ons available via the Heroku platform. Depending on your use case, you could integrate as many as your web application needs.
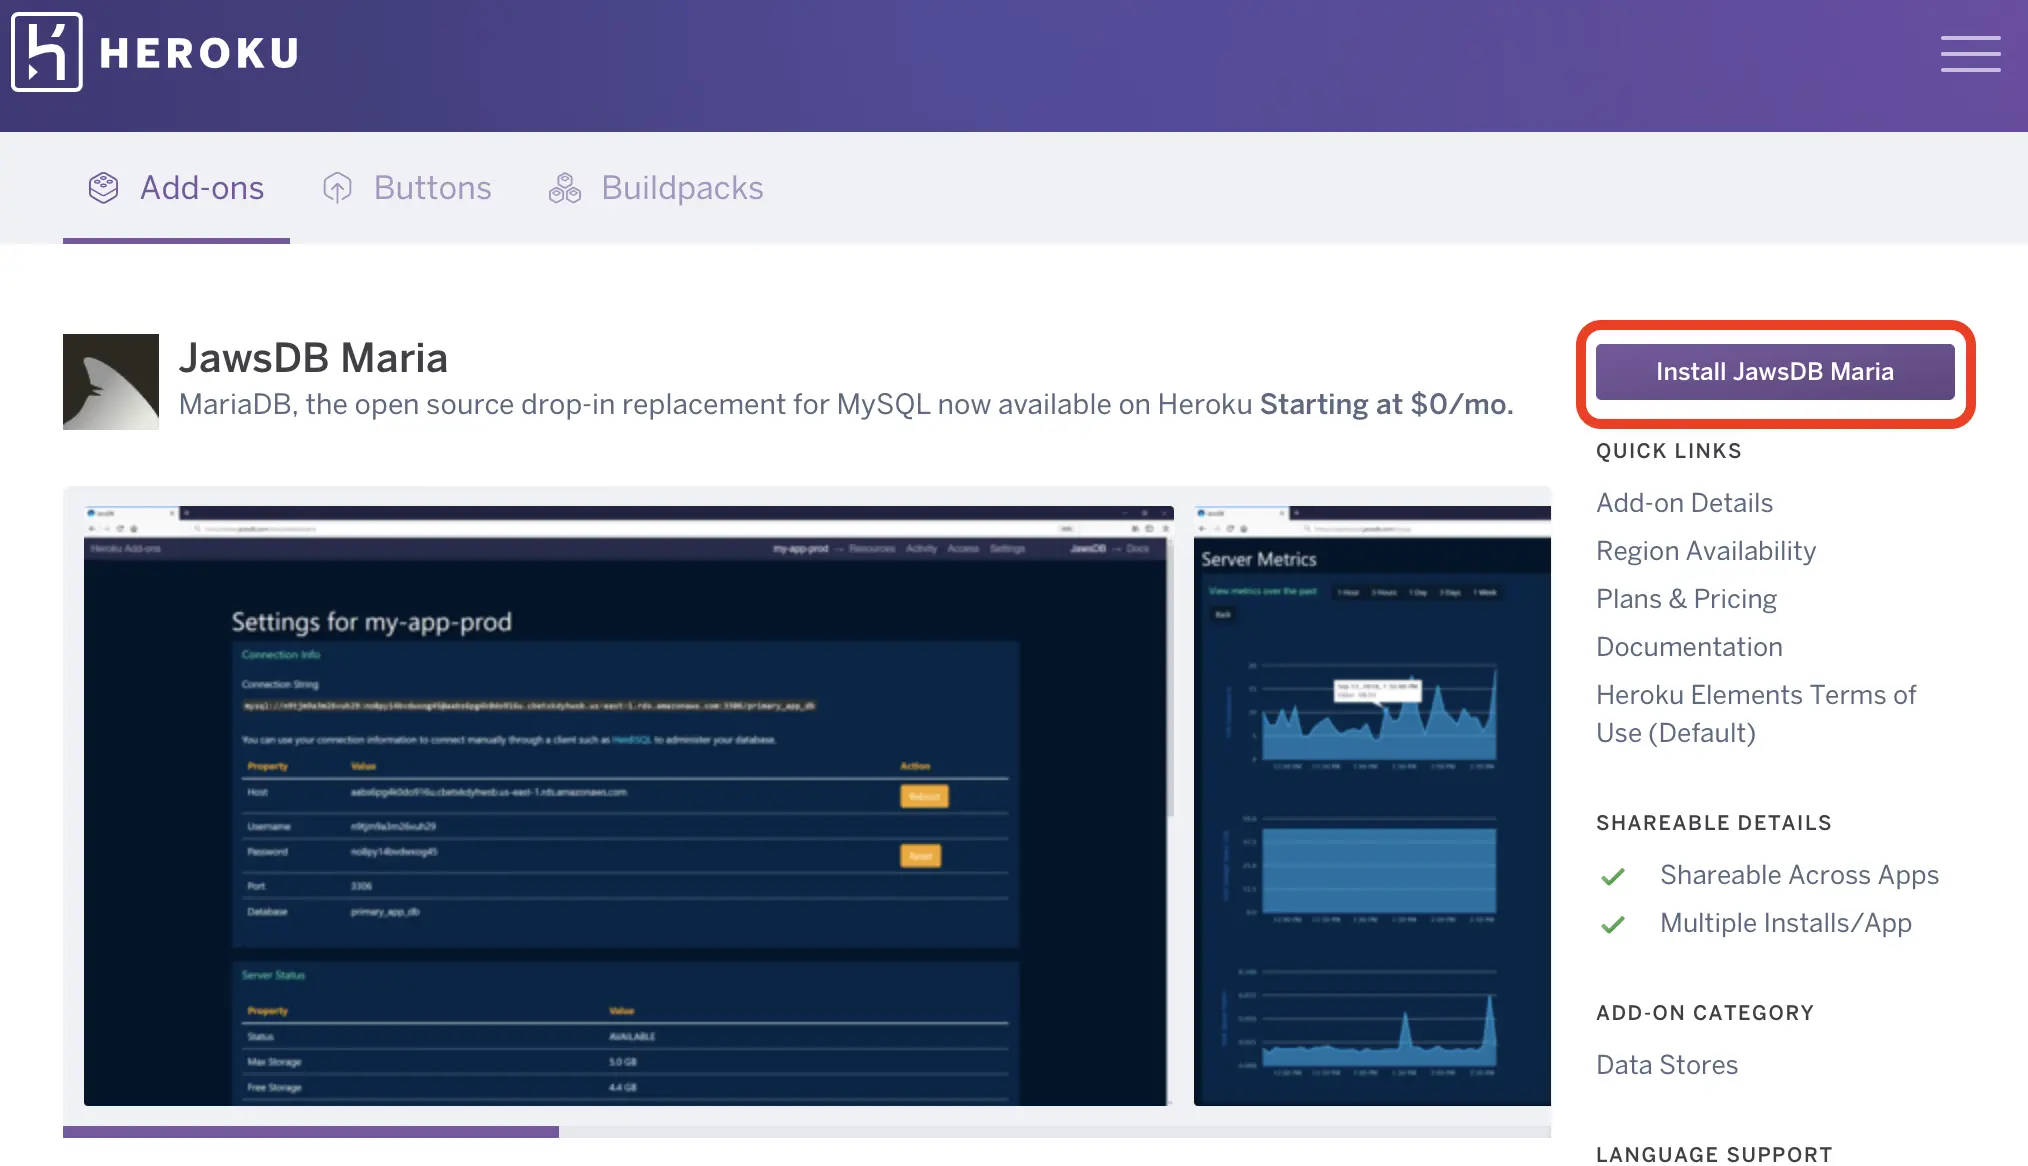
In this tutorial we are adding a JawsDB Maria database. Therefore, in the add-ons list, scroll through the different items and find the JawsDB Maria add-on. When you click on this add-on, you can find (in a new tab) the add-on settings. Next, click on the Install JawsDB Maria button to continue with the configuration:
On the follow-up page, select an appropriate plan for the add-on according to your web application needs. Below the add-on plan, you need to enter the Heroku app’s name where the add-on is integrated to:

To finish with the add-on integration, click on Submit Order Form. Once Heroku completes the process, you can go to the Resources tab of the app’s dashboard to manage all the settings and credentials associated with the add-on.
Before going further, since we added a database to the Heroku app, it is necessary to establish a method to access this database from the deployed PHP app. We accomplish this by using environment variables. On Heroku, adding any key-value data (like credentials, hostnames, keys, etc) can be done from the app’s dashboard under the Settings tab:
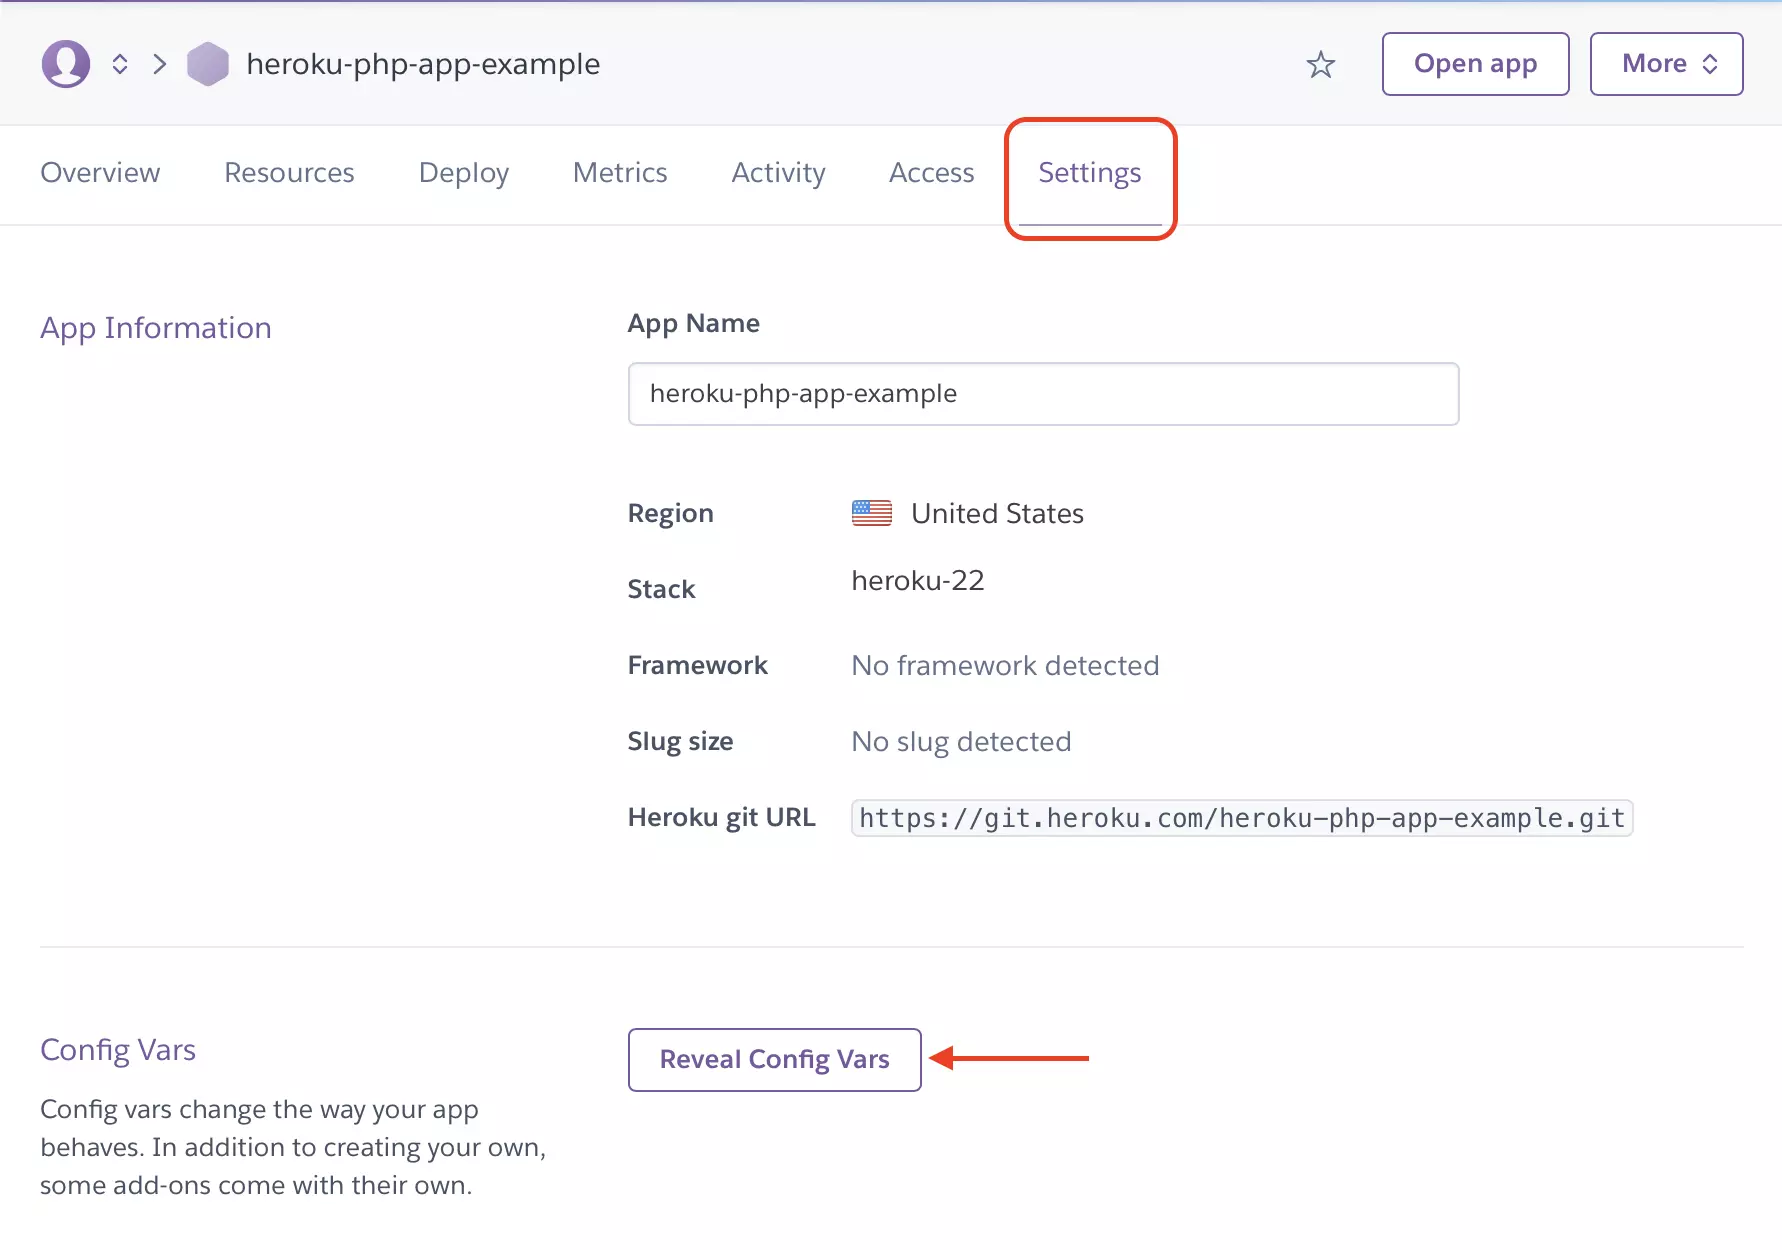
Thus, in the Config Vars section, we can set up the credential, and database information about the JawsDB Maria add-on:
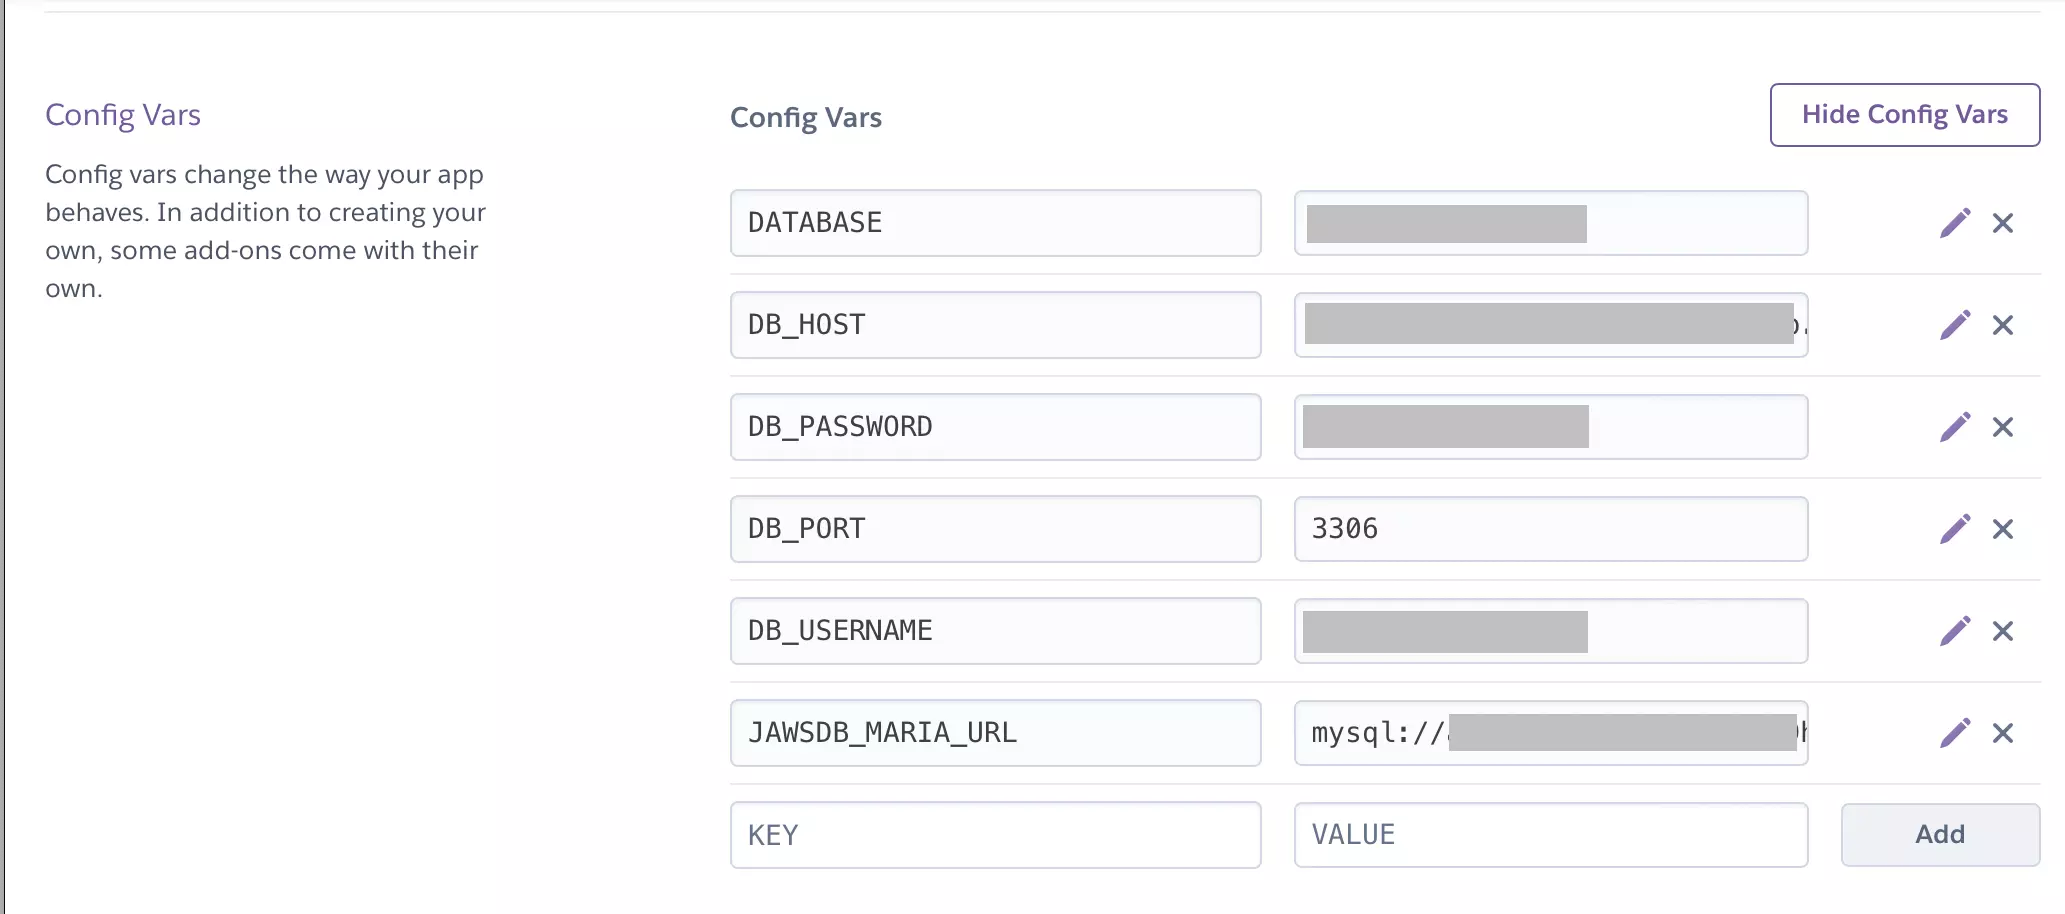
With this, you should be able to retrieve this information as environment variables and use them in your PHP project.
Upload the PHP project onto GitHub
Before proceeding to the deployment part, we have to set up the PHP application we want to deploy. Developers all over the world use GitHub to manage and store the code bases of their applications. Therefore, we should upload our PHP project onto GitHub.
After signing in to your GitHub account, on your main page, click on add a new repository On the follow-up, enter a name, pick a visibility option, and then click on Create repository:
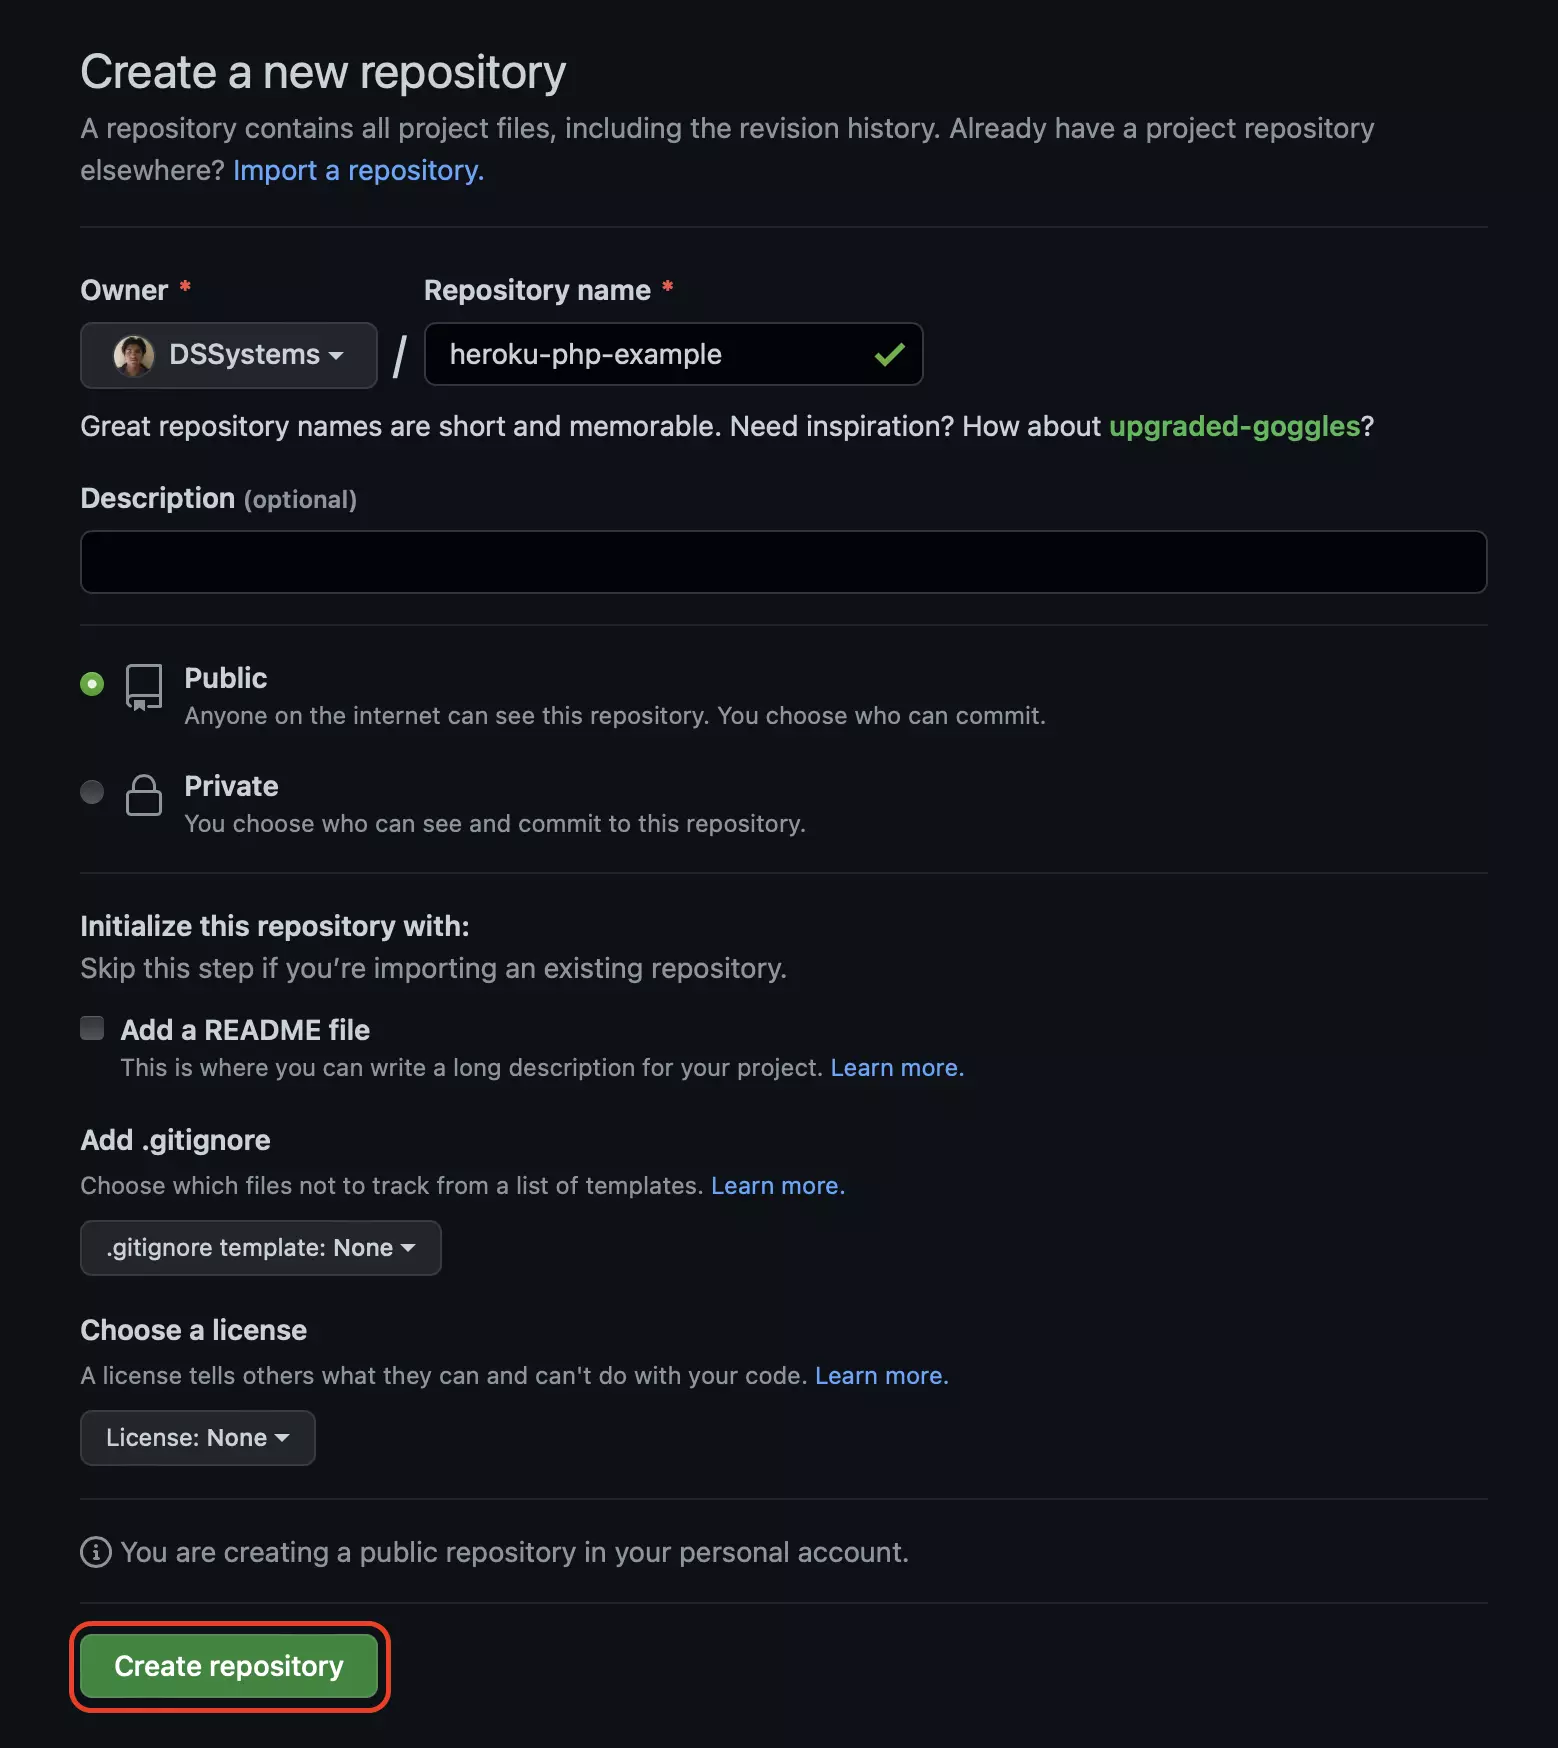
As seen in the above screenshot, the repository for this tutorial can be found at https://github.com/DSSystems/heroku-php-example. The first time one creates a remote repository on GitHub, its main page should look like this:
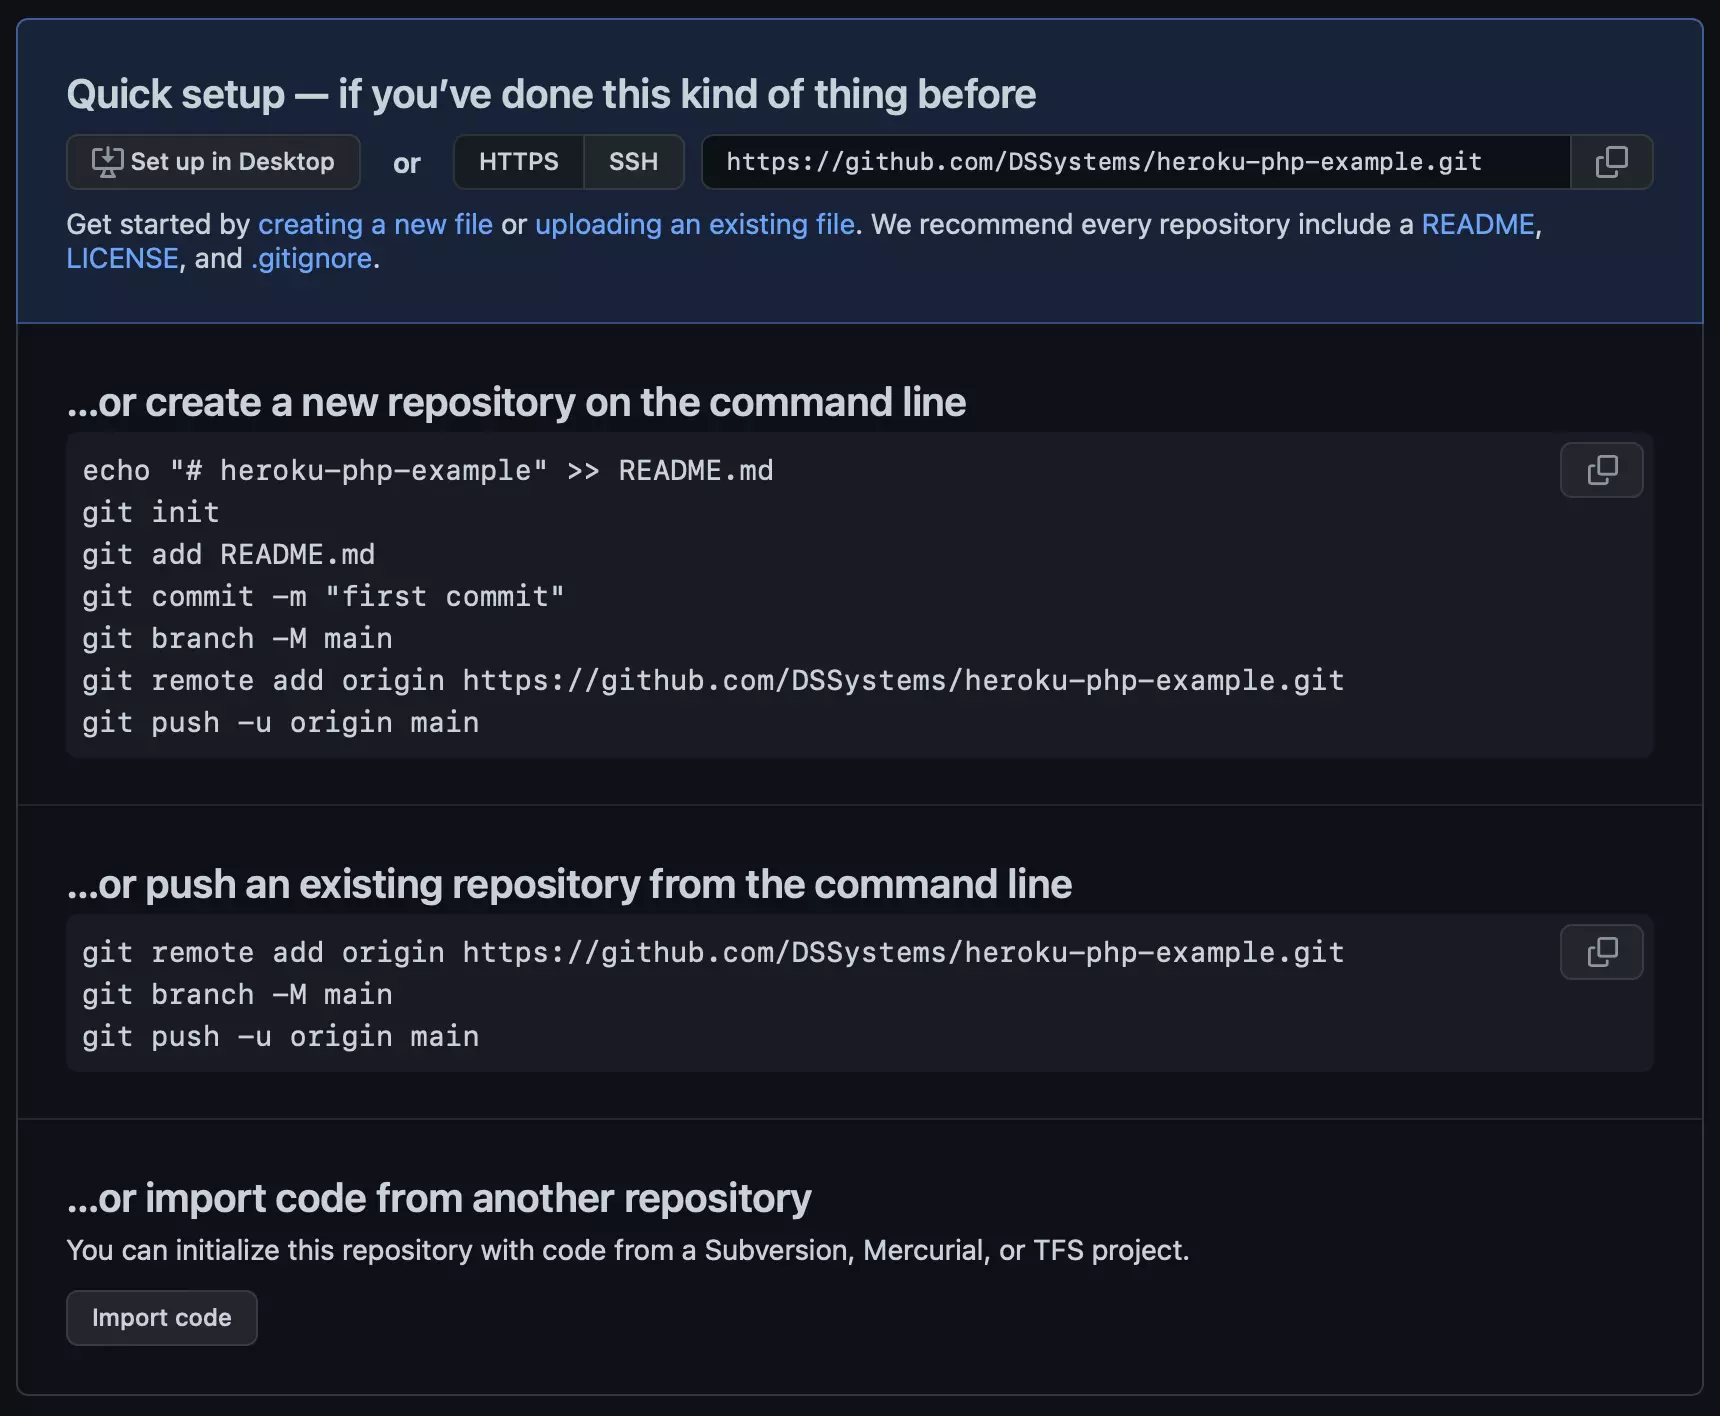
Therefore, you can follow one of the two options GitHub suggests to link your local repository to the newly created remote repository.
For Heroku to properly run your web application, you need to have s couple of configuration files on the root of your PHP project repository. The most important configuration file is the Procfile. This is a text file Heroku uses to run the starting script to run your web application.
For a PHP project using Apache as web server, the content of the Procfile may look like this:
web: vendor/bin/heroku-php-apache2 app/The string after the web: keyword simply runs an Apache server, and the app/ string is the name of the static public directory associated with the PHP project.
For more details about configuration files, visit Heroku’s official documentation.
As an example, in this repository, we provide a simple PHP project you can clone and deploy as you go through this tutorial.
Deploy the PHP project
With the remote repository ready, we proceed to the deployment stage. Go back to the dashboard of the Heroku app created in the first step. Under the Deploy tab, you can find the different methods and settings related to the deployment process. As mentioned before, we are using GitHub as the source of our PHP project. Therefore, in the Deployment method select the GitHub option. If you are deploying via GitHub for the first time, you will need to connect your GitHub account to Heroku. In the Connect to GitHub section, click on the button with the same name:
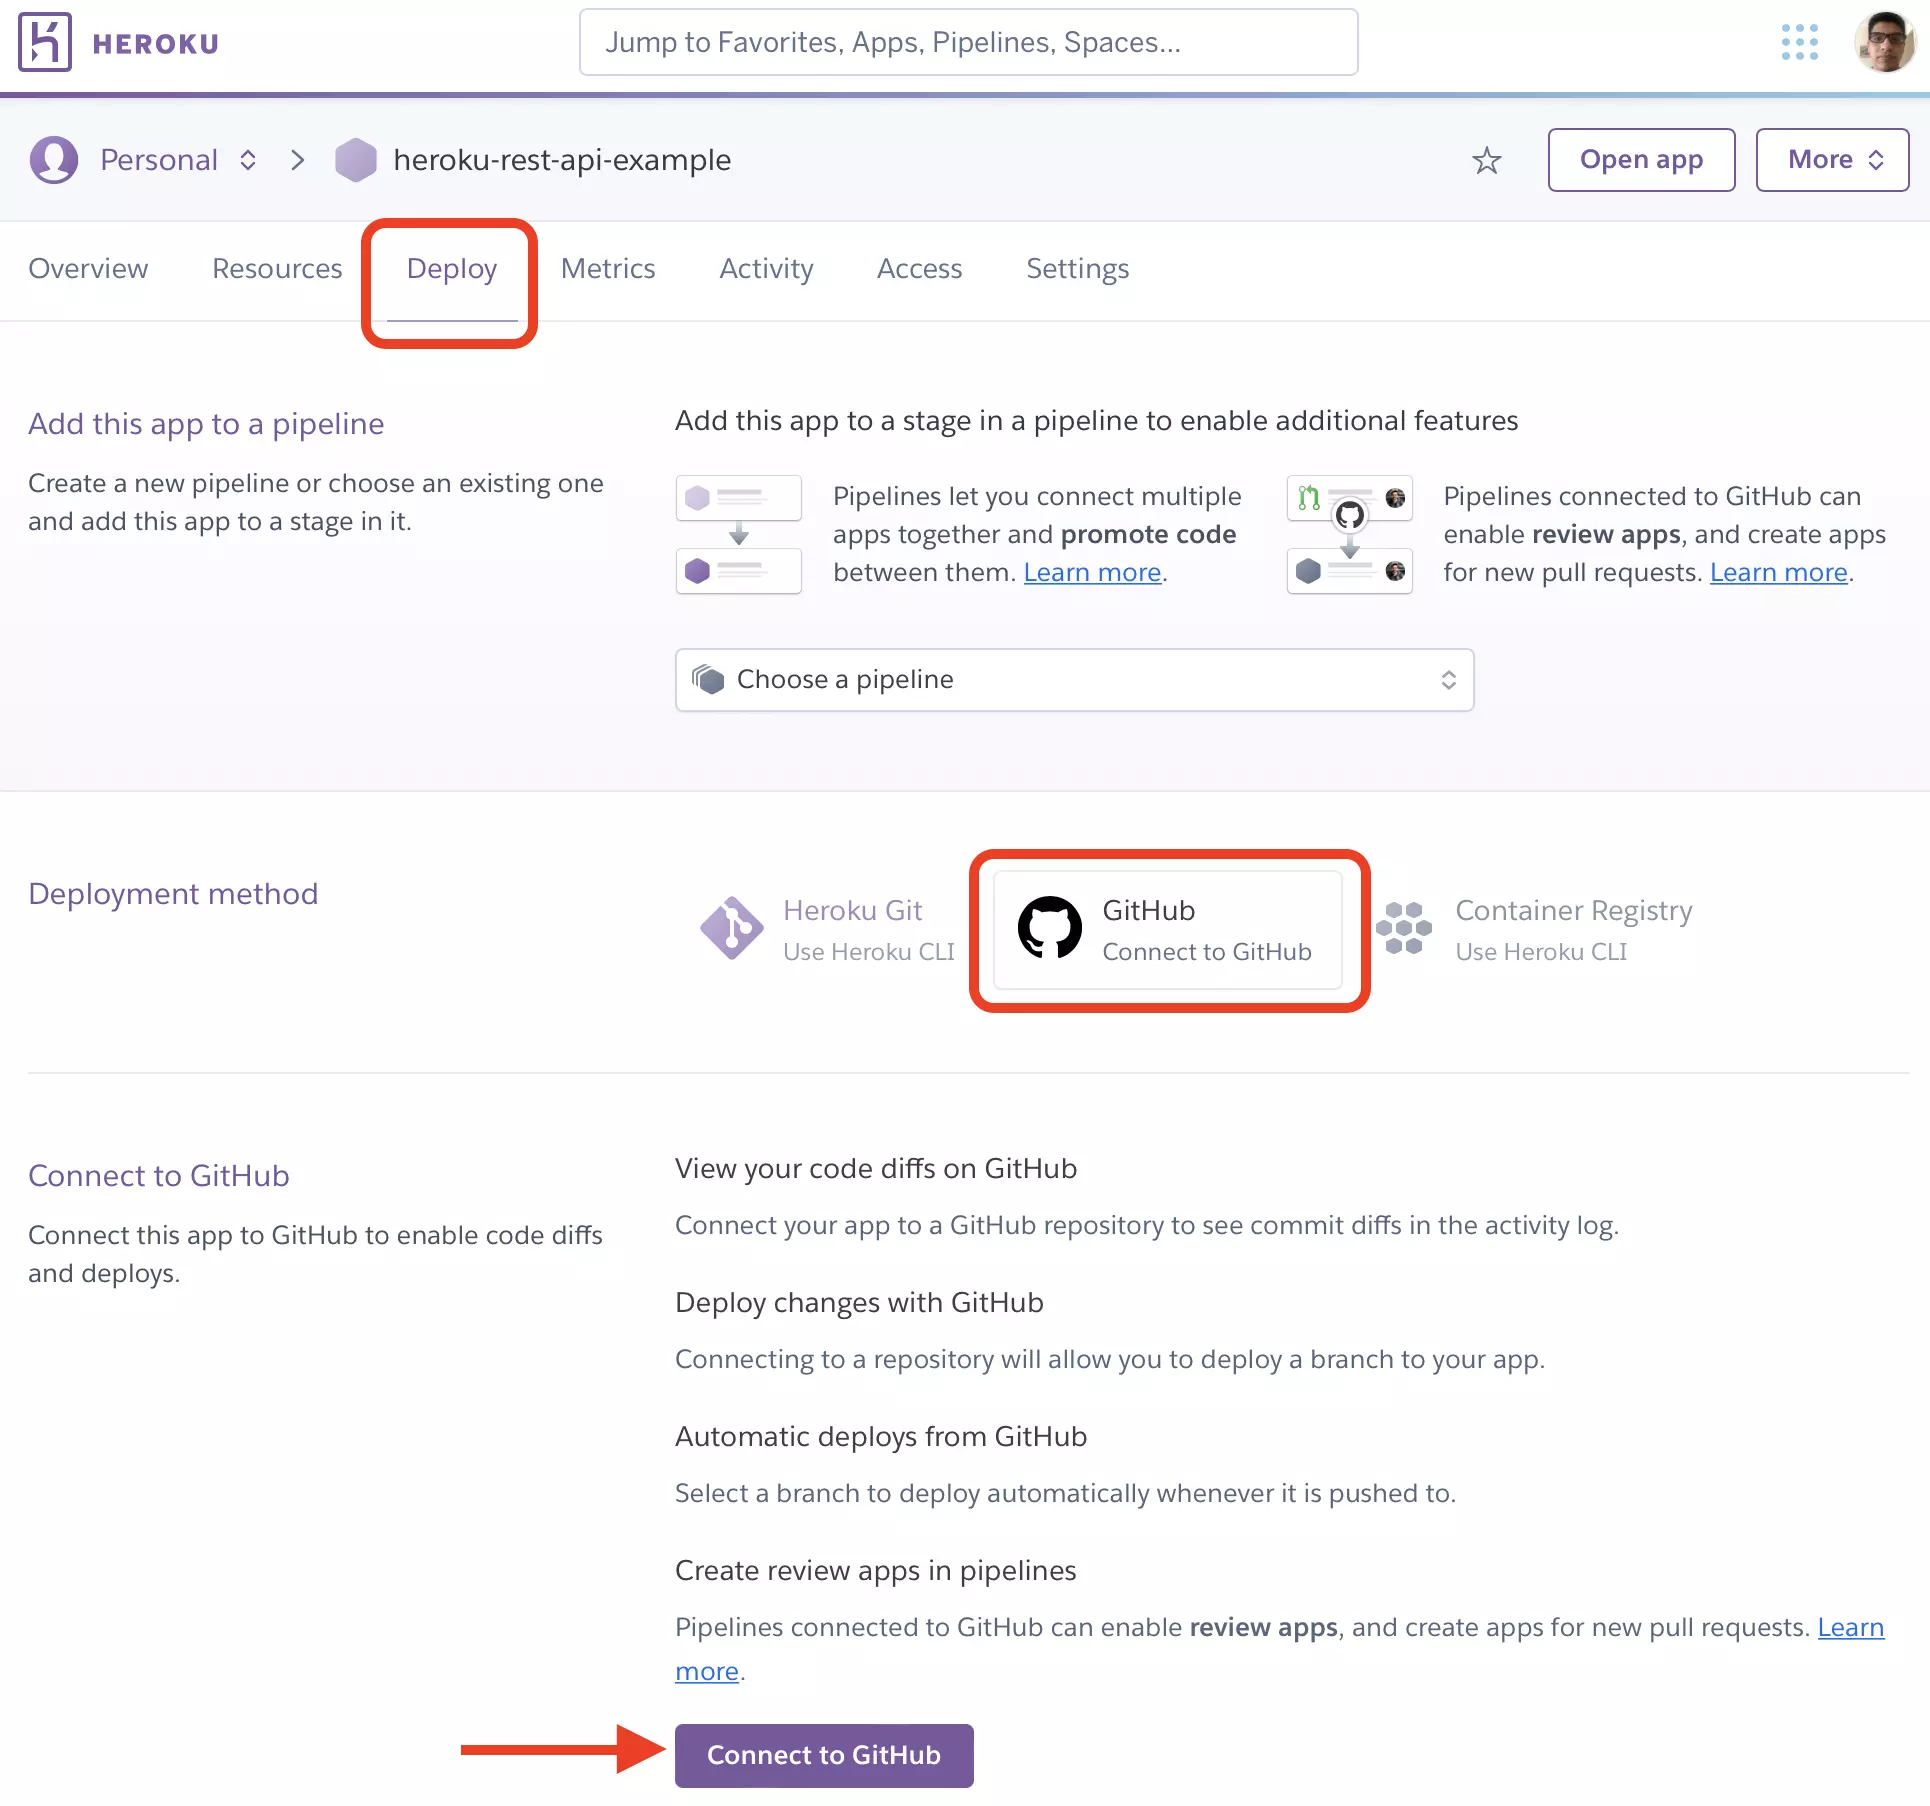
Give the corresponding permissions to connect your GitHub account with the Heroku platform. Once this is complete, a new section should appear. In this new section, you will have a text field to enter the repository name from which Heroku should deploy your PHP project:
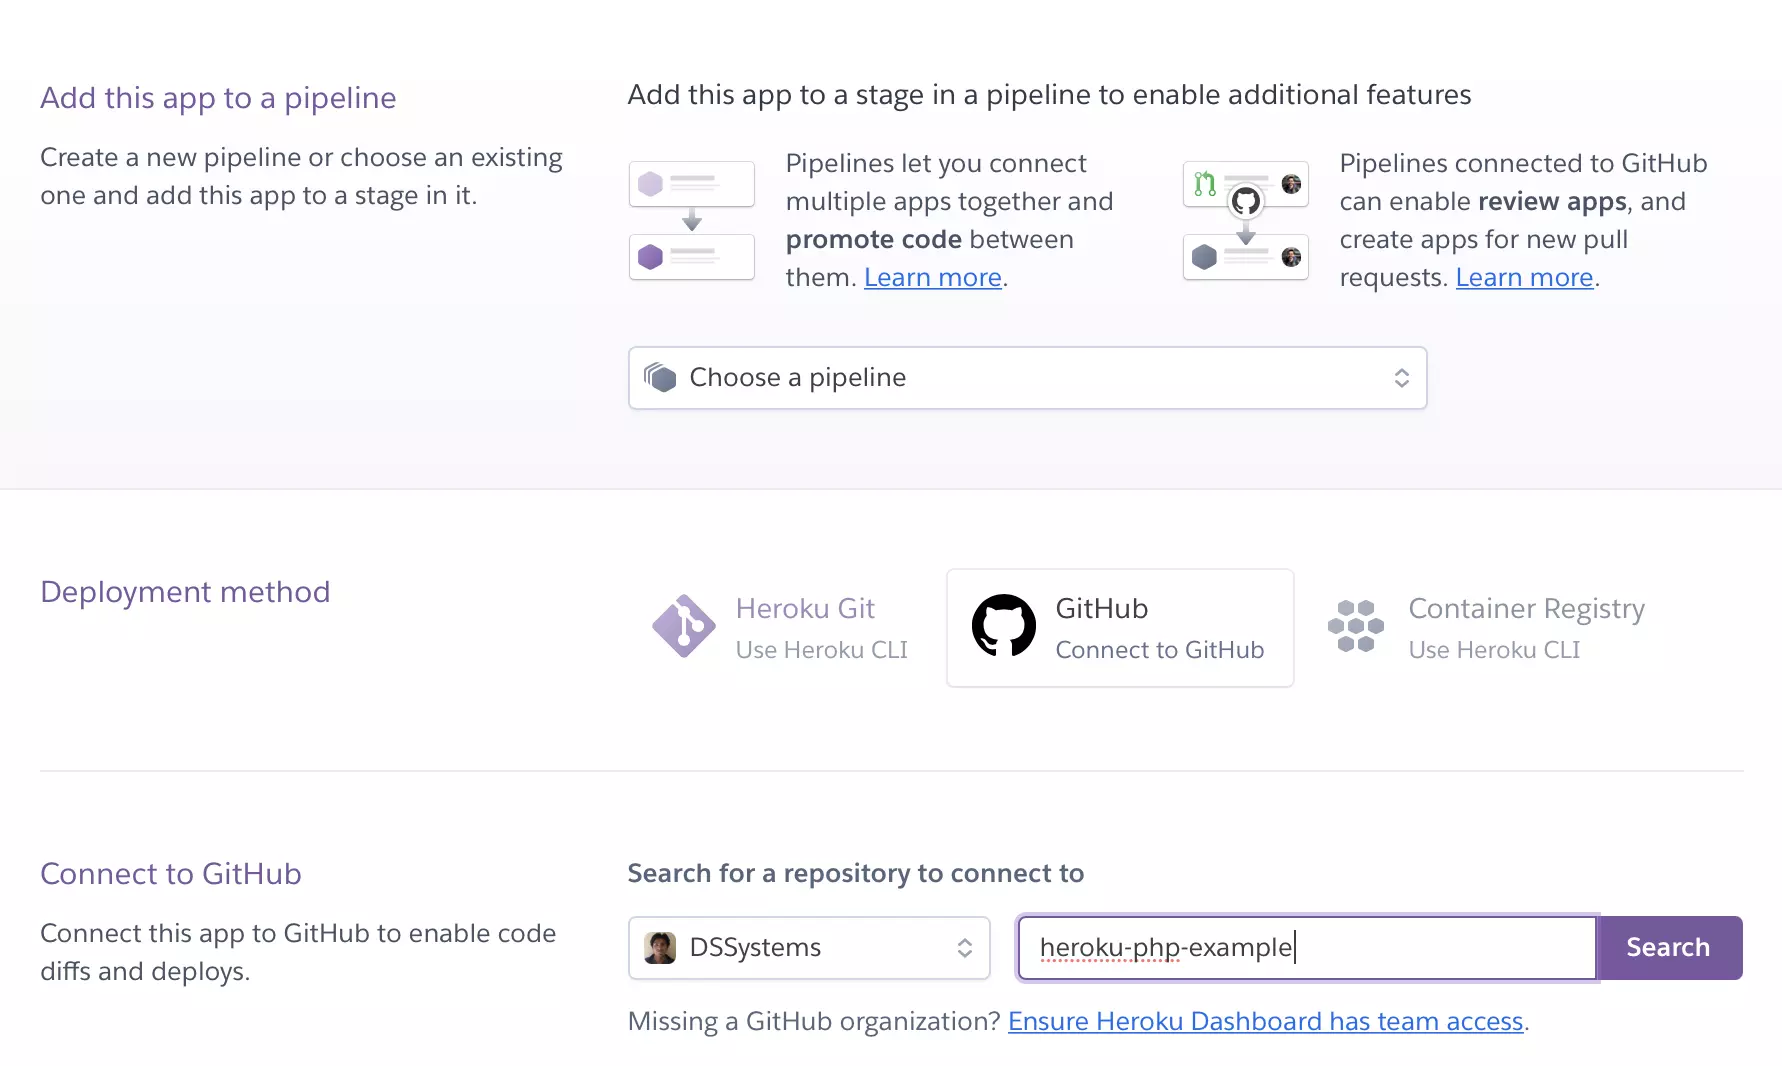
Click on Search and then Connect when Heroku finds the remote repository. If the connection process succeeded, below you will find two deploying options. The first one (Automatic deploys) is used when you need to automatically update your app when a new push is committed in your remote repository. On the second option (“Manual deploy”), you choose when updating your web application. Depending on your use case, pick one of the methods
Conclusions
By the end of this tutorial, you learned how to set up and deploy a PHP project on the Heroku cloud platform. The steps detailed above are not constrained to PHP projects. The only stage that may vary is the configuration files Heroku require to identify and set up your web application. For instance, the script in the Procfile will differ between different projects. For more details about this, see the build packs Heroku provided for you to set up any web application you want.
What is Heroku?
A PaaS platform from Salesforce to build, run, and operate apps.
What is PHP?
It is a programming language to develop web applications.
How to deploy a PHP application on Heroku?
– Create a Heroku app
– Configure an add-on on the Heroku app
– Upload the PHP project onto GitHub
– Deploy the PHP project


