How to build a reservation app with Vue?
Managing reservations is an essential part of business in the service industry, where scheduling and customer capacity are critical, such as restaurants.
With Back4app, the Twilio API, and Vue, you can build a simple restaurant reservation app with features such as making reservations, receiving confirmation messages, and viewing reserved slots.
In this article, you will build and deploy a reservation app with Vue on the front end, Back4app to handle your backend and deployment needs, and Twilio to communicate with users through Whatsapp.
Contents
Project Overview
In this guide, you will build a simple reservation application with Vue. The reservation application will have a ReservationForm view and a ReservationList view.
Guests interact with the ReservationForm view to input their reservation details, such as name, email, date, time, and phone number. They also see all reservations made in the ReservationList view.
You will make use of the following:
- Back4app Backend: You will create a Back4app backend to store and manage reservation data from your Vue application in a database.
- Twilio API: You will integrate the Twilio API into your Vue application to send WhatsApp confirmation messages to guests who have booked a reservation.
- Back4pp’s AI Agent: You will create four cloud functions with the Back4app AI agent, which you will integrate into your Vue application to handle:
- Storing the reservation details on a Back4App database
- Checking the availability of the date and time to be reserved
- Sending a WhatsApp success message with the Twilio API telling the guest that their reservation has been made.
- Viewing reservations that guests have already made in your database.
- Back4app Containers: You will deploy your Vue application to a Back4app container to make it accessible online.
Building Your Vue Application
This section will guide you through setting up your development environment and building the boilerplate of your reservation application.
Setting Up Your Development Environment
To create a Vue application, run the following command in your terminal:
npm create vue
The command above will prompt you to name your application and enable certain features for your application, such as adding TypeScript, JSX support, etc. Select no for all the options except “Vue Router”. You will need it to navigate between views.
Next, cd into the created directory and run the command below to install the required dependencies:
npm install
Next, install the Parse SDK by running the command below:
npm install parse
The Parse SDK allows you to communicate between your Vue application and your Back4app backend.
After setting up your development environment, proceed to create your reservation application views.
Creating the Views of Your Application
Create the ReservationForm and ReservationList views in your application’s views directory.
Then, enable routing between these two views by adding the code below in the index.js file in your router directory:
// index.js
import { createRouter, createWebHistory } from "vue-router";
import ReservationForm from "@/views/ReservationForm.vue";

const router = createRouter({
  history: createWebHistory(import.meta.env.BASE_URL),
  routes: [
    {
      path: "/",
      name: "Home",
      component: ReservationForm,
    },
    {
      path: "/reservations",
      name: "Reservations",
      component: () => import("@/views/ReservationList.vue"),
    },
  ],
});

export default router;
The code block above sets up routing within your Vue application. It defines a / route and a /reservations route. When guests access the app’s URL, the code block directs them to the ReservationForm view as the Home route.
The /reservations route directs the users to the ReservationList view. This route is lazily loaded, meaning your app only loads this route when necessary, which helps improve your app’s performance.
Next, to enable users to navigate between the two routes, configure your App.vue file to render a navigation bar displaying the route links:
//App.vue
<script setup>
import { RouterLink, RouterView } from 'vue-router'
</script>

<template>
  <header>
    <div class="wrapper" id="app">
      <nav>
        <RouterLink to="/">Home</RouterLink>
        <RouterLink to="/reservations">View Reservations</RouterLink>
      </nav>
    </div>
  </header>
  <RouterView />
</template>
The code block above displays the App.vue file, which acts as your application’s main layout. The code block imports the RouterLink and RouterView components from the Vue Router library, representing each route with a RouterLink component.
The RouterLink component takes a to prop to specify the route the link directs to. The RouterView component acts as a placeholder, dynamically rendering the content of the current route.
In your ReservationForm.vue file, add the code block below to create a form for users to input their reservation details:
// ReservationForm.vue
<template>
  <div>
    <form>
      <input v-model="reservation.name" placeholder="Name" required />
      <input
        v-model="reservation.email"
        type="email"
        placeholder="Email"
        required
      />
      <input
        v-model="reservation.date"
        type="date"
        placeholder="Date"
        required
      />
      <input
        v-model="reservation.time"
        type="time"
        placeholder="Time"
        required
      />
      <input
        v-model="reservation.phoneNumber"
        type="tel"
        placeholder="Phone Number"
        required
      />
      <button type="submit">Create Reservation</button>
    </form>
  </div>
</template>

<script setup>
import { ref } from "vue";
const reservation = ref({
  name: "",
  email: "",
  date: "",
  time: "",
  phoneNumber: "",
});
</script>
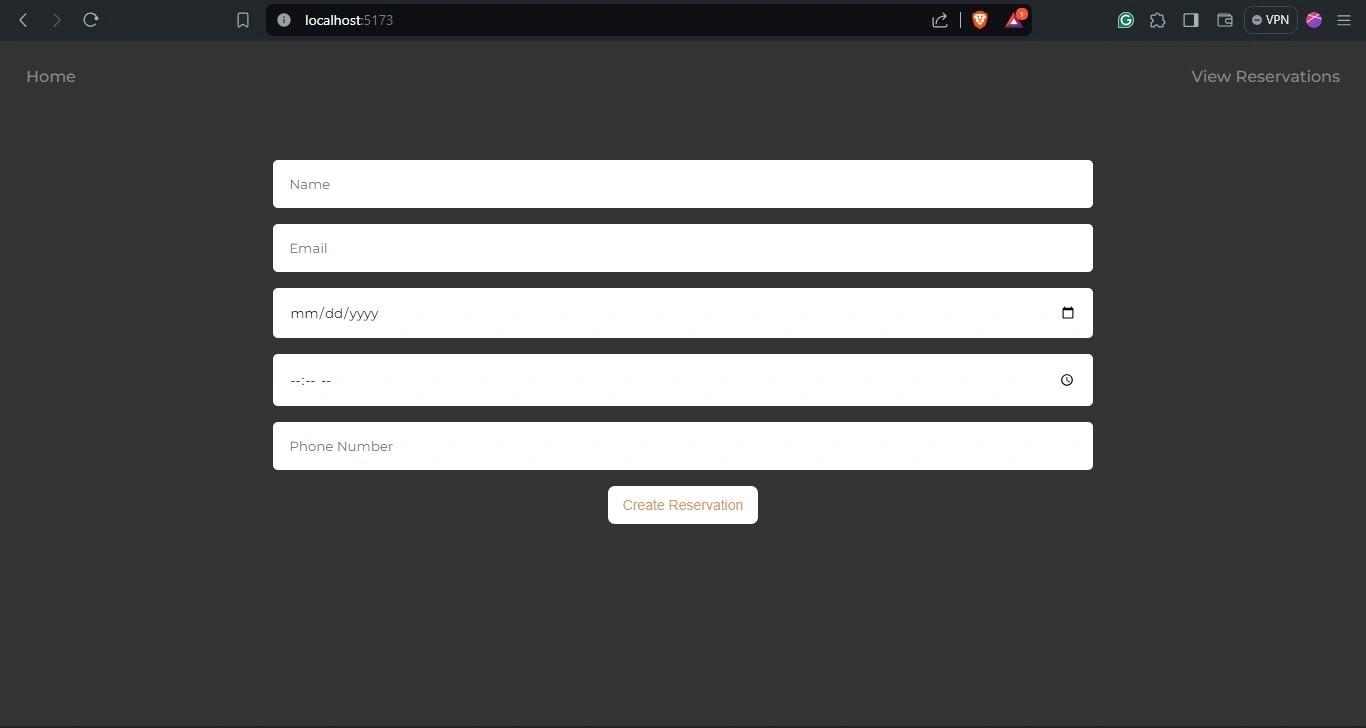
The code block above creates a form element with required fields to capture inputs for various details like the user’s name, email, date, time, and phoneNumber.
The above code block then creates a reactive reservation object to store the user details with the ref function from the vue library.
Next, add the following code block to your ReservationList.vue file to display the list of reservations users have made:
// ReservationList.vue
<template>
  <div>
    <ul v-if="reservations.length" class="wrapper">
      <li
        v-for="reservation in reservations"
        :key="reservation.objectId"
        class="card"
      >
        <p>Name: {{ reservation.name }}</p>
        <p>Date: {{ new Date(reservation.date).toLocaleDateString() }}</p>
        <p>Time: {{ reservation.time }}</p>
        <p>Phone: {{ reservation.phoneNumber }}</p>
      </li>
    </ul>
    <p v-else>No reservations found.</p>
  </div>
</template>

<script setup>
import { ref } from "vue";

const reservations = ref([]);
</script>
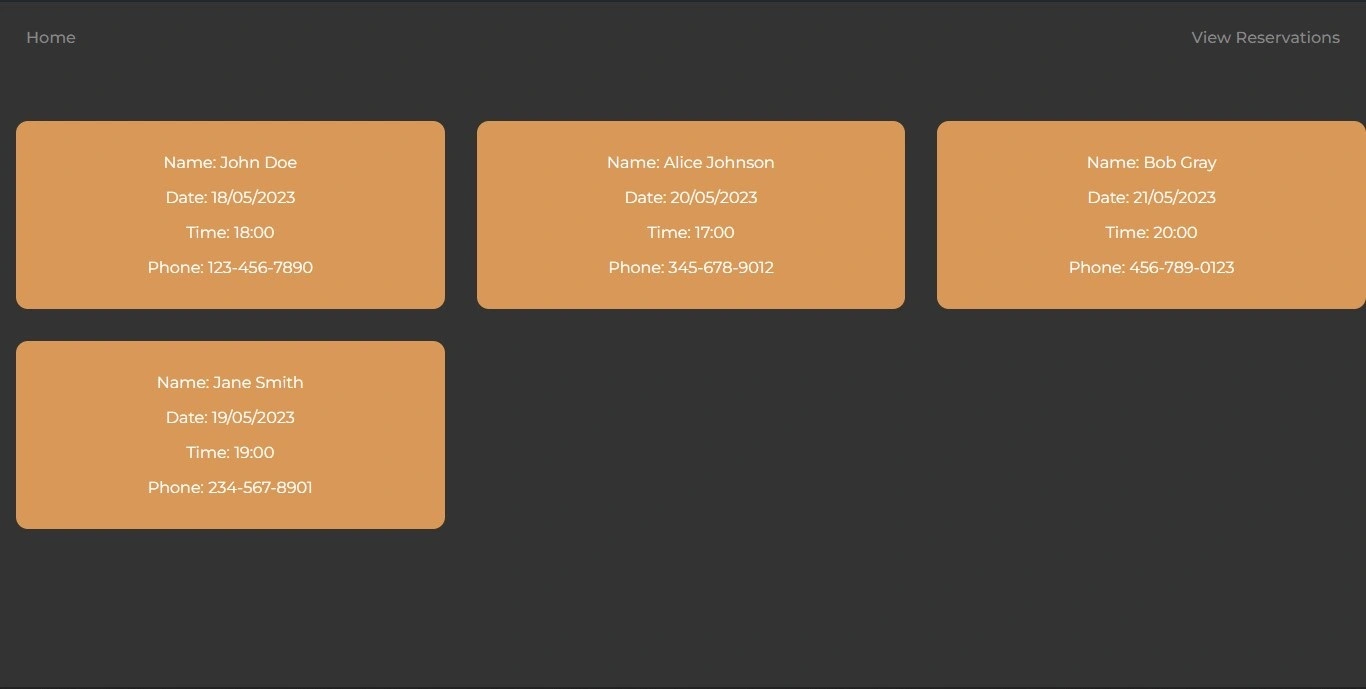
The code block above uses a vue conditional statement directive, v-if, to display existing reservations, if any.
If reservations exist, the code block iterates through each reservation in the reservations array with the v-for directive and displays the made reservations.
Styling the Views of Your Application
Add the following scoped style block to your ReservationList view to control the appearance of the list and other elements:
// ReservationList.vue
<style scoped>
h1{
  margin-block-end: 2rem;
}

.card{
  background-color: #D99858;
  display: flex;
  flex-direction: column;
  gap: 1rem;
  border-radius: 12px;
  padding: 2rem;
  align-items: center;
}

li{
  color: #FFFFFF;
}

.wrapper{
  display: grid;
  grid-template-columns: repeat(3, 1fr);
  gap: 2rem;
}

div{
  padding-inline-start: 1rem;
}

</style>
Add the scoped style block below to your ReservationForm view to control the appearance of the form:
// ReservationForm.vue
<style scoped>

  form{
    display: flex;
    flex-direction: column;
    gap: 1rem;
    align-items: center;
  }

</style>
Finally, define global styles for your Vue application by adding the following CSS styles to your main.css file in the assets directory:
/* main.css */
@import url('<https://fonts.googleapis.com/css2?family=Montserrat:ital,wght@0,100..900;1,100..900&display=swap>');

*{
  margin: 0;
  padding: 0;
  box-sizing: border-box;
}
body{
  font-family: "Montserrat", sans-serif;
  background-color: #333333;
  color: #FFFFFF;
}
nav {
  padding: 10px;
  display: flex;
  justify-content: space-between;
}
nav a{
  color: inherit;
  text-decoration: none;
  font-weight: 500;
  color: #888888;
  margin-block-end: 3rem;
}
nav a:hover{
  color: #D99858;
}
header{
  padding: 1rem;
}
button {
  background-color: #FFFFFF;
  color: #D99858;
  border: none;
  padding: 0.7rem 0.9rem;
  font-size: 14px;
  border-radius: 7px;
  font-weight: 500;
}
button:hover {
  background-color: #D99858;
  color: #FFFFFF;
}
input{
  inline-size: 100%;
  border: none;
  border-radius: 5px;
  outline: none;
  padding: 1rem;
  font-family: "Montserrat", sans-serif;
}
.container{
  inline-size: 60%;
  margin: auto;
}
After building the boilerplate of your reservation application, create a Back4app Backend to store reservation details in a database.
Creating a Back4app Backend
Creating your Backend on Back4app requires a Back4app account. If you do not have one, you can sign up for free.
Log in to your account and click the “NEW APP” button at the top right corner. This will lead you to a page where you will choose the “Backend as a Service” option.
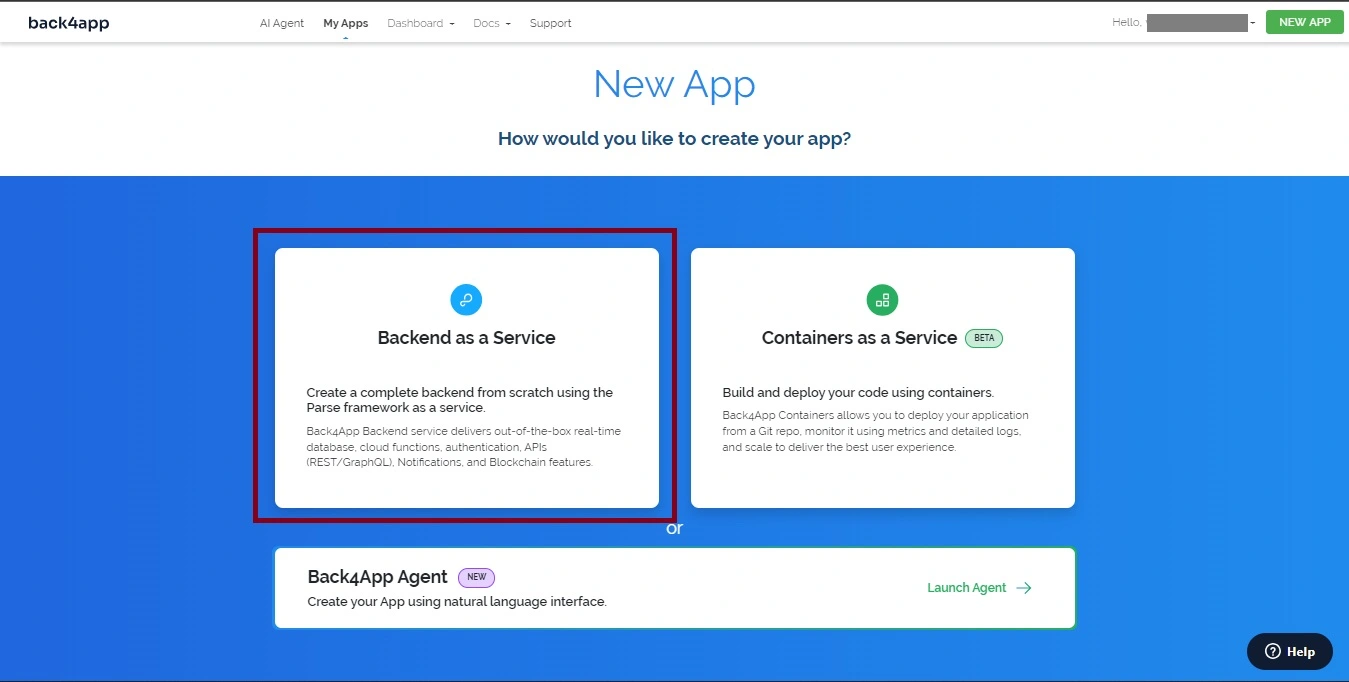
Clicking “Backend as a Service” will prompt you to give your app instance a name and select the database type for your application. Select the PostgreSQL database and hit the “Create” button.

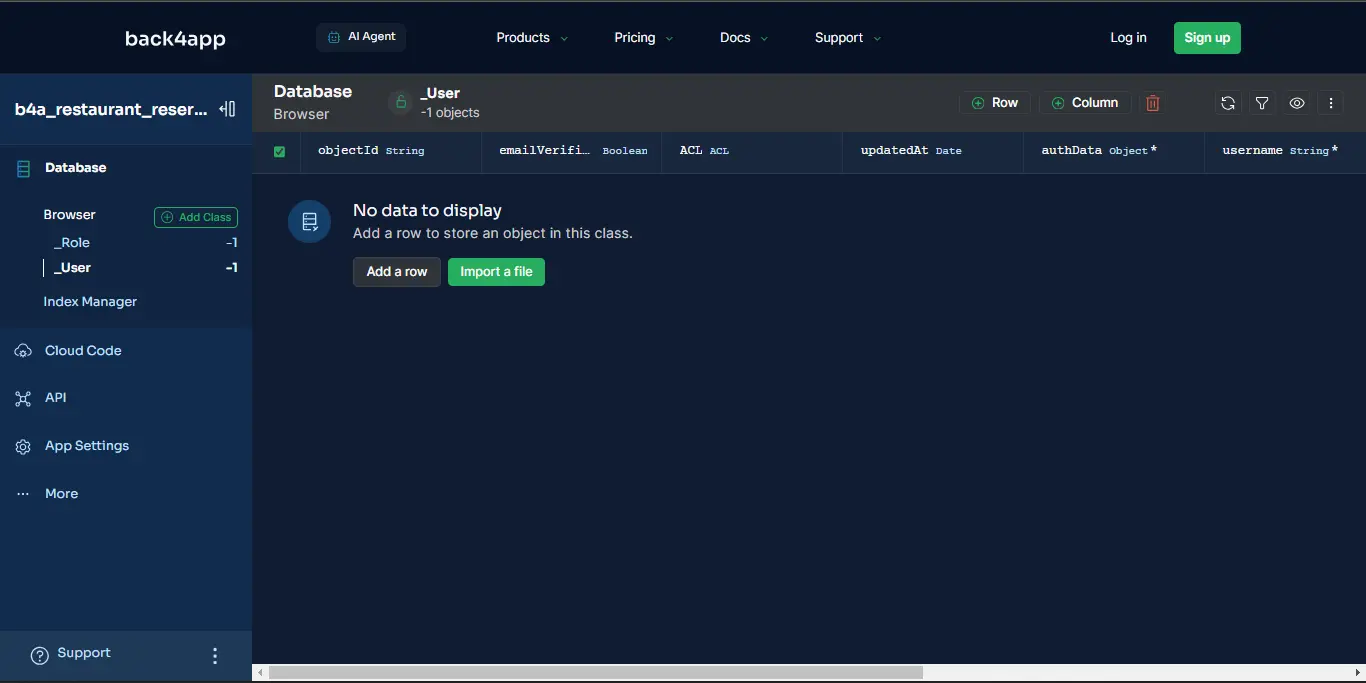
After Back4app sets up your application, you will be directed to your application instance, as shown below.
Retrieve your “Application ID” and “JavaScript Key” from the “Security & Keys” section. You can locate this section by clicking “App Settings” in the sidebar.
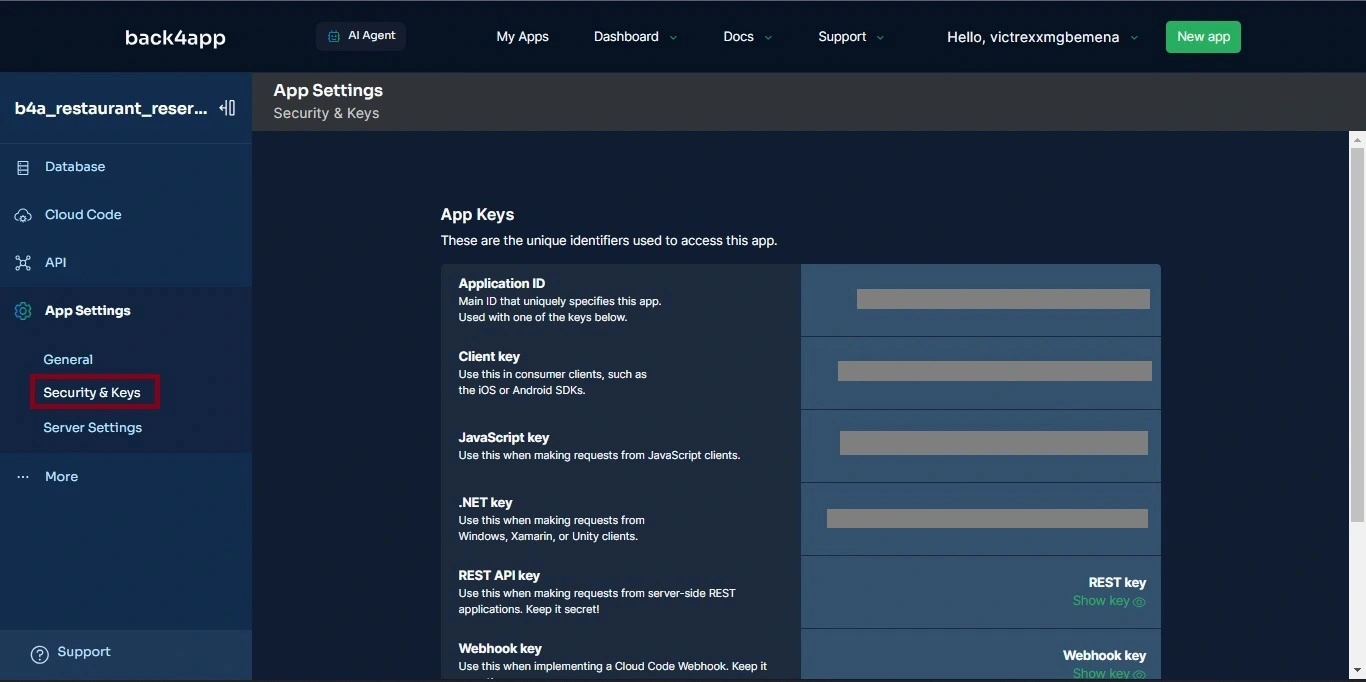
Next, create a .env file and add your “Application ID” and “Javascript Key” to load them as environmental variables within your application:
VITE_BACK4APP_APPLICATION_ID = <YOUR_APP_ID>
VITE_BACK4APP_JAVASCRIPT_KEY = YOUR_JAVASCRIPT_KEY>
Now, modify your main.js file to initialize Parse in your Vue application. Like so:
//  main.js
import "./assets/main.css";
import { createApp } from "vue";
import App from "./App.vue";
import router from "./router";
import Parse from "parse/dist/parse.min.js";

Parse.initialize(
  `${import.meta.env.VITE_BACK4APP_APPLICATION_ID}`,
  `${import.meta.env.VITE_BACK4APP_JAVASCRIPT_KEY}`,
);

Parse.serverURL = "<https://parseapi.back4app.com/>";

const app = createApp(App);

app.use(router);

app.mount("#app");
The code block above imports and initializes the Parse SDK in your Vue application, allowing your application to communicate with your Back4app backend.
Now, you need to store reservation details on your Back4app database. To store a guest’s reservation details, you will create a class within your database using Back4app’s AI agent.
The class will store reservation details, such as the name, email, date, etc.
Creating the Reservation Class and Cloud Functions Using the AI Agent
Locate the “AI Agent” tab on the top left side of your screen and feed the agent with the prompt below to create the class in the database:
Create database tables in my Back4app app with the following information.

1. Reservation Class:
Class Name: Reservation

Fields:
objectId (String, Automatically generated by Back4App).
name (String, Required)
email (String, Required)
date (Date, Required)
time (String, Required)
phoneNumber (String, Required)

Populate the database tables with test data.

My Parse App ID: <Your Parse App ID>
You should get a response similar to the one below:
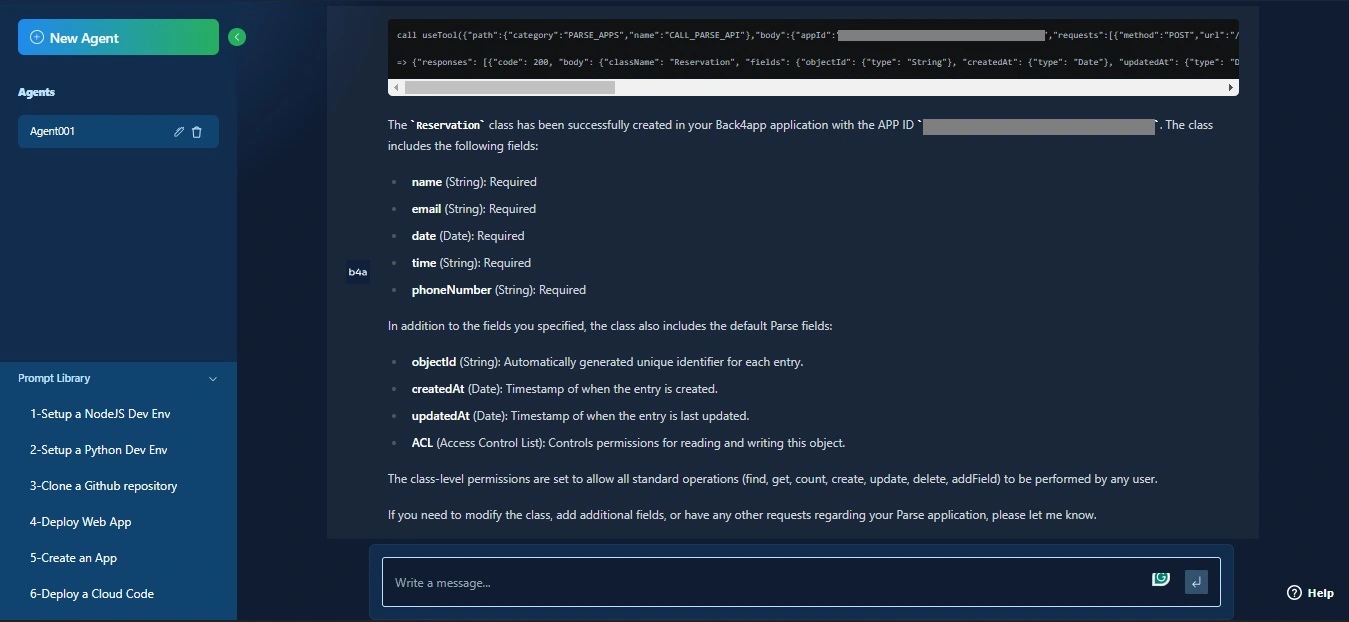
After successfully creating your Reservation class with fields to store your reservation details. You will make four cloud functions with the AI agent that will interact with the database you created.
Prompt the AI agent with the following command to create a cloud function to store data in the Reservation class:
Create a Cloud Code function "createReservation" that takes in necessary
arguments to create a new reservation in the Reservation class.
You should get a response similar to the one below:
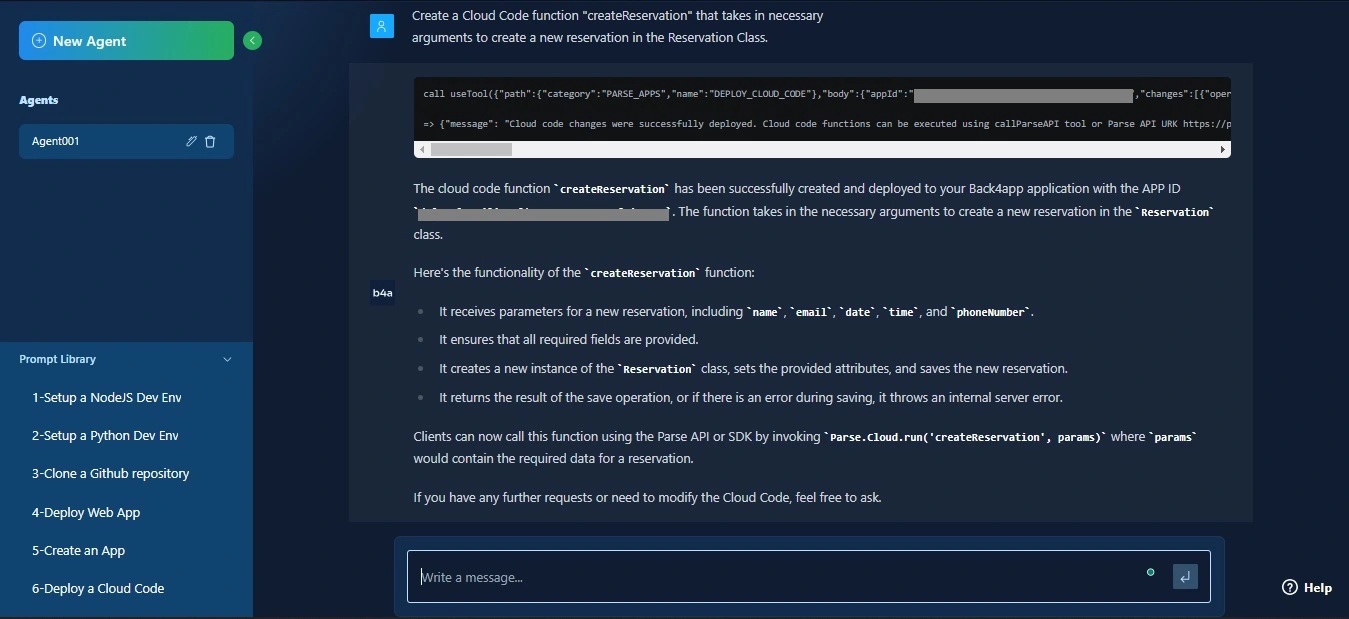
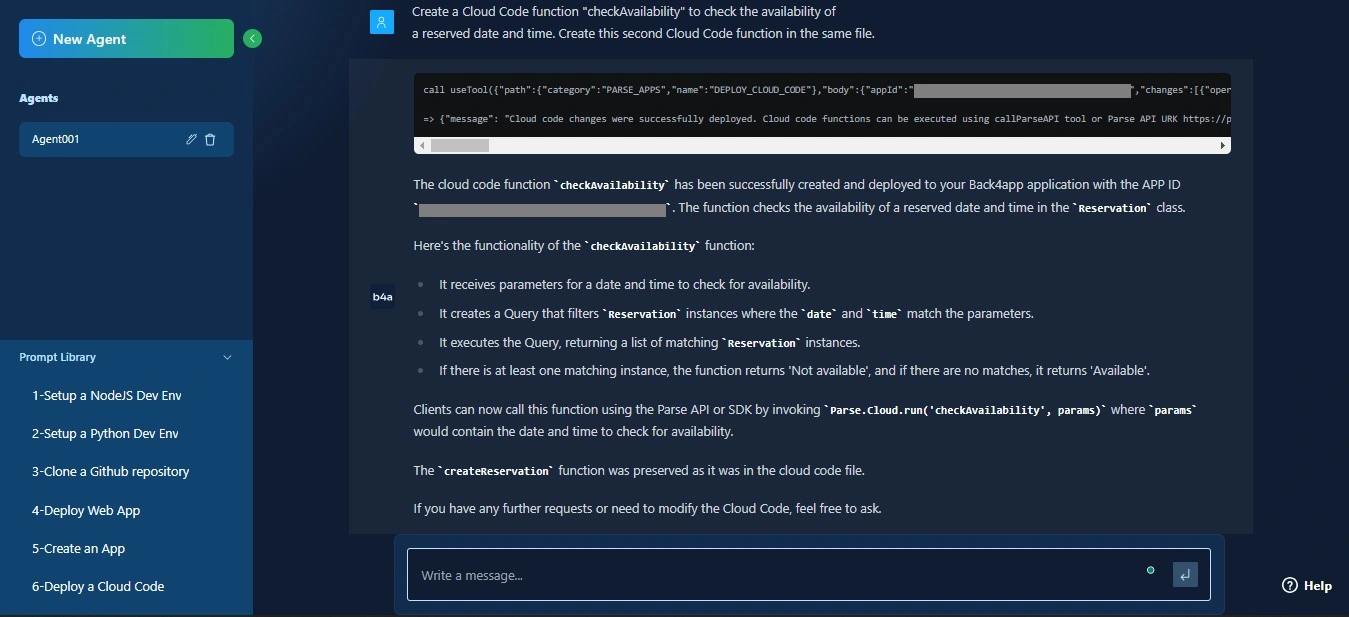
After creating the createReservation function, feed the AI agent the following command to check the availability of a date and time the guest needs to reserve:
Create a Cloud Code function "checkAvailability" to check the availability of a reserved time and date. Create this second Cloud Code function in the same file.You should get a response similar to the one below:
Sending WhatsApp messages with Twilio’s WhatsApp API requires creating and setting up a Twilio account. Twilio provides an API allowing users to send Whatsapp messages from your application.
Get your Twilio account SID, Twilio authentication token, and Twilio Whatsapp number from your Twilio account and prompt the AI agent to create a sendWhatsAppConfirmation cloud function with Twilio’s API:
Create a Cloud Function with Twilio's WhatsApp API to send a WhatsApp confirmation message. Here are the Twilio account details you will need:
Twilio Account SID: <Your Twilio Account SID>
Auth Token: <Your Twilio Authentication Token>
WhatsApp number: <The Twilio WhatsApp Number>
You should get a response similar to the one below:
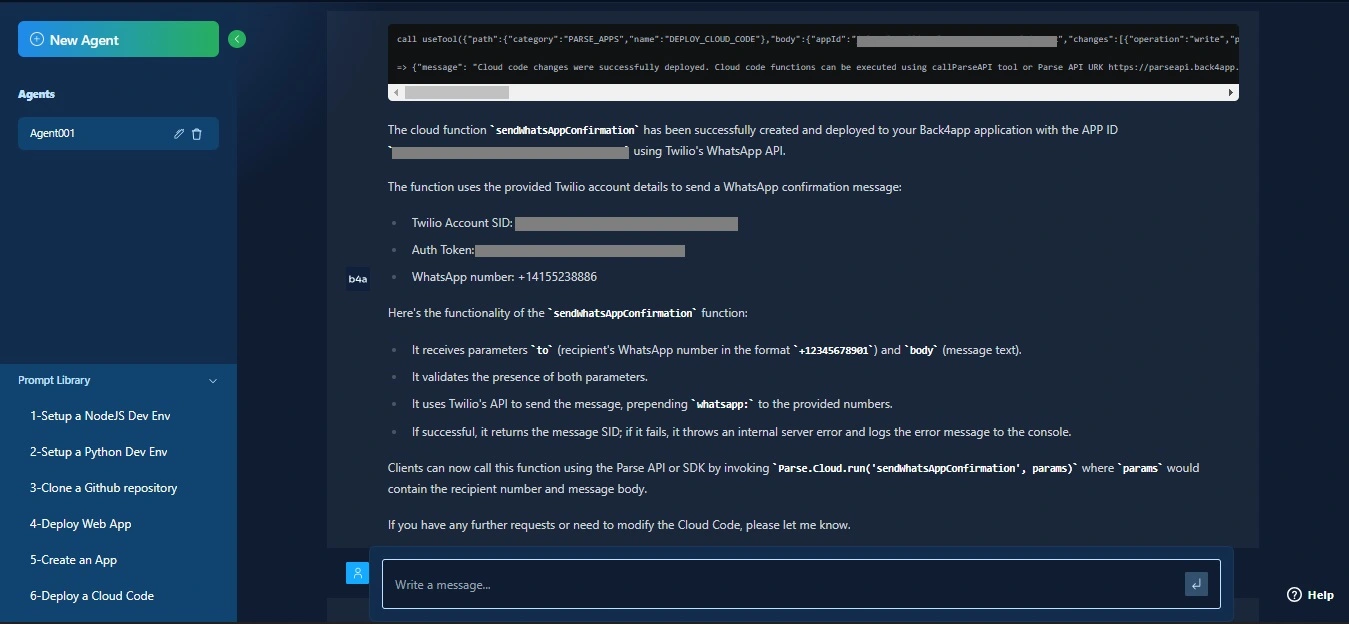
Next, prompt the AI agent to create the last cloud function to view all reservations stored in the database:
Write a cloud code function to view all reservations stored in the database in the same file with the other three cloud functions.You should get a response similar to the one below:
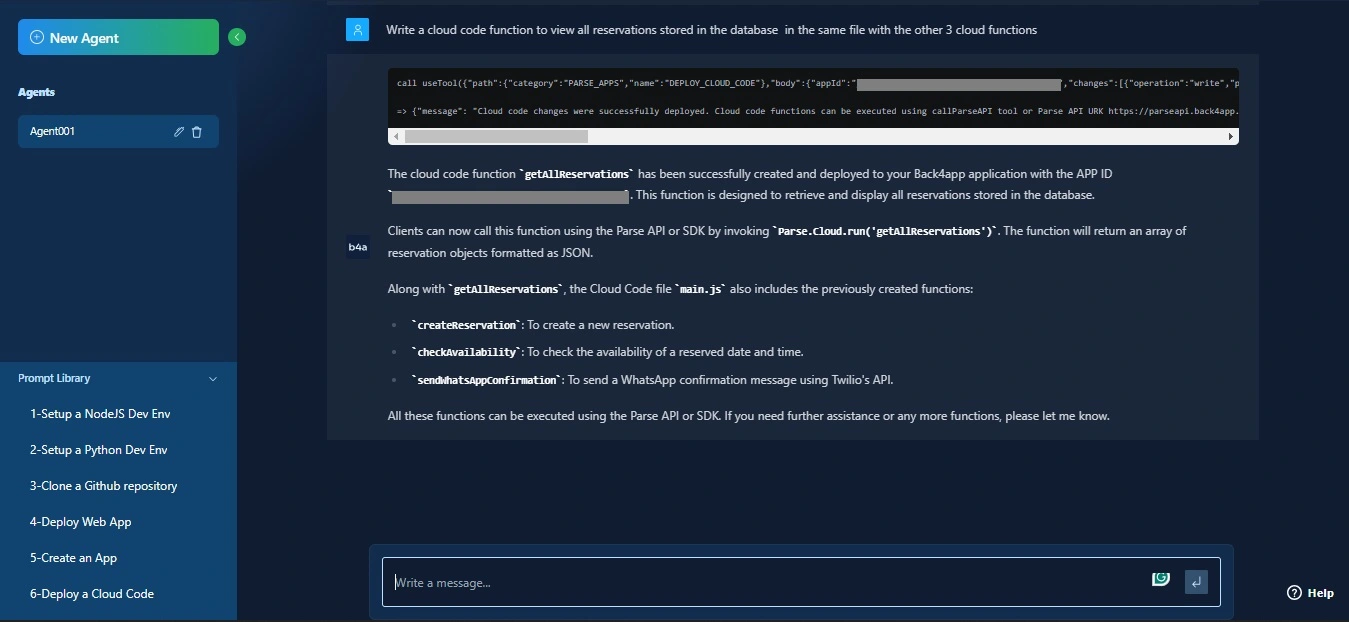
You have created all the functions you need for your application with the Back4app instance. The next step is to integrate your cloud functions on your Back4app backend into your Vue application.
Integrating your Cloud Functions in Your Vue Application
This section will teach you how to integrate your cloud functions into your Vue application. You can call the cloud functions you defined on your Back4app’s Backend within your Vue application by running the Parse.cloud.run() function.
Modify the template block in your ReservationForm.vue file to run a submitReservation function on submission of the form:
// ReservationForm.vue
<template>
  <div>
    <form @submit.prevent="submitReservation">
      // calls the function on form submission
      <input v-model="reservation.name" placeholder="Name" required />
      <input
        v-model="reservation.email"
        type="email"
        placeholder="Email"
        required
      />
      <input
        v-model="reservation.date"
        type="date"
        placeholder="Date"
        required
      />
      <input
        v-model="reservation.time"
        type="time"
        placeholder="Time"
        required
      />
      <input
        v-model="reservation.phoneNumber"
        type="tel"
        placeholder="Phone Number"
        required
      />
      <button type="submit">Create Reservation</button>
    </form>
  </div>
</template>
Next, modify the script block in your ReservationForm.vue file to define the submitReservation function and run the cloud functions associated with submitting the form:
// ReservationForm.vue
<script setup>
import { ref } from "vue";
import Parse from "parse/dist/parse.min.js";

const reservation = ref({
  name: "",
  email: "",
  date: "",
  time: "",
  phoneNumber: "",
});

const submitReservation = async () => {
  try {
    const availabilityResult = await Parse.Cloud.run("checkAvailability", {
      date: reservation.value.date,
      time: reservation.value.time,
    });

    if (availabilityResult.available) {
      const creationResult = await Parse.Cloud.run("createReservation", {
        ...reservation.value,
        date: {
          __type: "Date",
          iso: new Date(
            reservation.value.date + "T" + reservation.value.time,
          ).toISOString(),
        },
      });

      if (creationResult) {
        await Parse.Cloud.run("sendWhatsAppConfirmation", {
          to: reservation.value.phoneNumber,
          reserveeName: reservation.value.name,
          body: "Your reservation has been confirmed.",
        });

        alert(
          "Reservation created and confirmation has been sent via WhatsApp.",
        );
      }
    } else {
      alert("Sorry, the chosen date and time are not available.");
    }
  } catch (error) {
    console.error("Error creating reservation:", error);
    alert("Error while processing your reservation: " + error.message);
  }
};
</script>
The code block above calls the submitReservation function to handle the reservation submission.
The function first checks the availability of the chosen date and time by calling the checkAvailability cloud function.
If the specified date and time are available, the code block calls another cloud function, createReservation, to create the reservation with the guest’s details.
The code block then calls the sendWhatsAppConfirmation cloud function to send a WhatsApp message to notify the guest that they have successfully reserved the time slot.
Next, to allow guests to view all time slots reserved, modify the script block of the ReservationList.vue file to run the getAllReservations cloud function:
// ReservationList.vue
<script setup>
import { ref, onBeforeMount } from "vue";
import Parse from "parse/dist/parse.min.js";

const reservations = ref([]);

const fetchReservations = async () => {
  try {
    const result = await Parse.Cloud.run("getAllReservations");
    reservations.value = result;
  } catch (error) {
    console.error("Error retrieving reservations:", error);
    alert(error.message);
  }
};

onBeforeMount(fetchReservations);
</script>
The code block above calls a fetchReservations function just before Vue mounts the component with the onBeforeMount vue function.
The fetchReservations function runs the getAllReservations cloud function to retrieve all reservations stored in the Reservation class on the Back4app database.
Testing the Application
Before deploying your application to a Back4app container, test the application to ensure all the features are fully functional.
Start your application by running the command below:
npm run dev
Running the command above starts your application at http://localhost:5173/.
Navigate to http://localhost:5173/ to view your application, as shown in the image below:
If you navigate to the “View Reservations” tab, you will see the reservations your AI agent populated the database with.
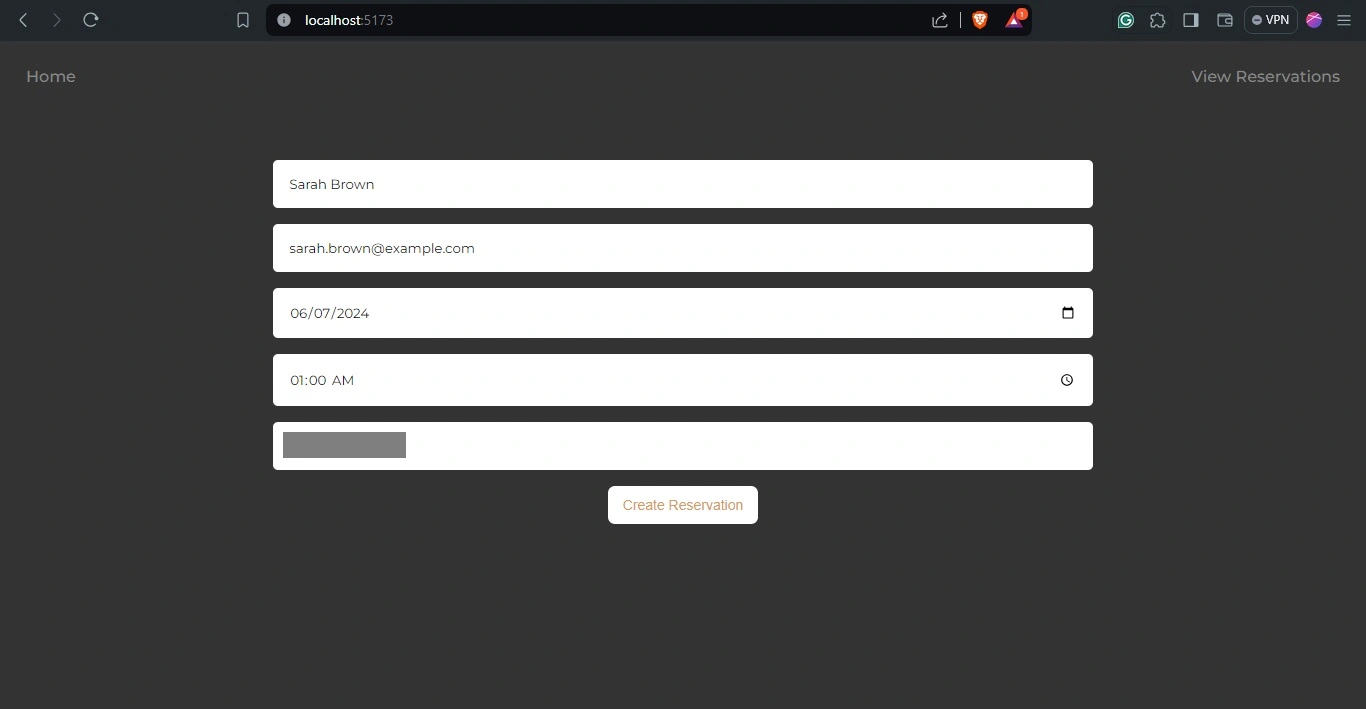
Create a new reservation by filling out the form and clicking the “Create Reservation” button.
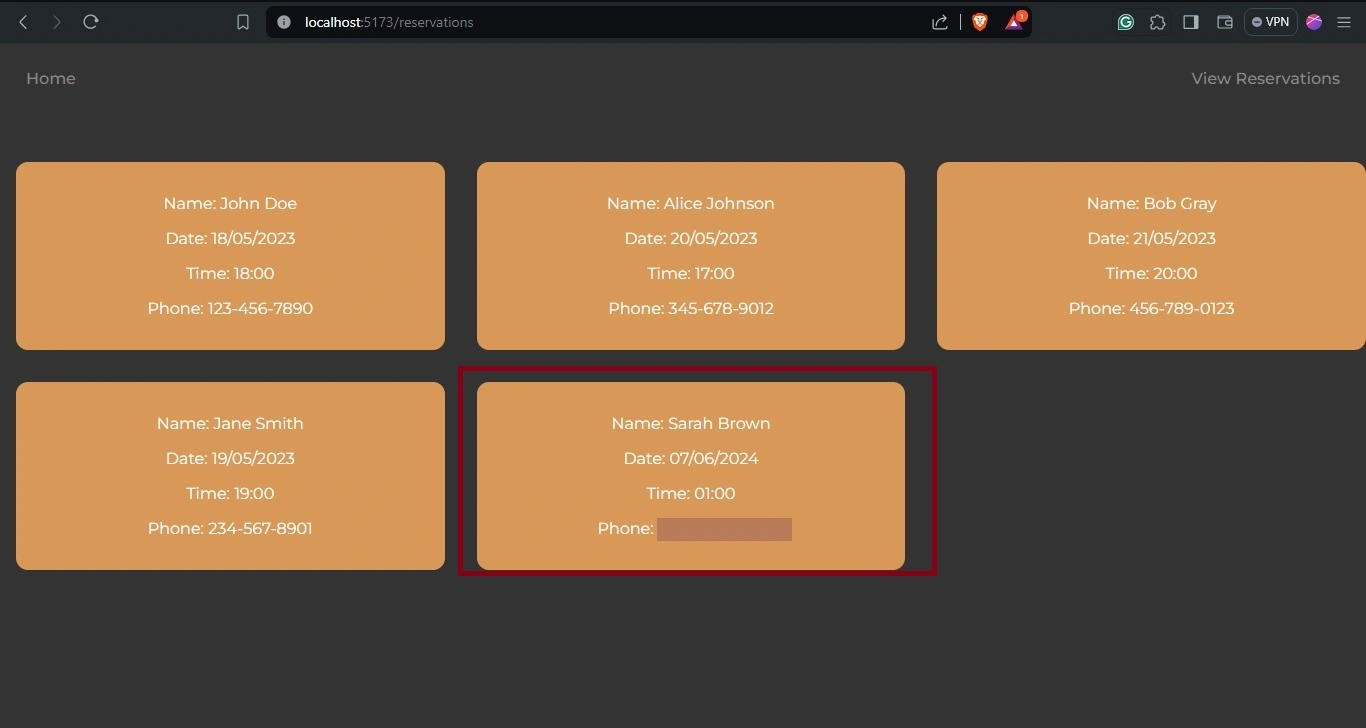
To check if your reservation was successful, navigate to the “View Reservations” tab, where you will see your reservation.
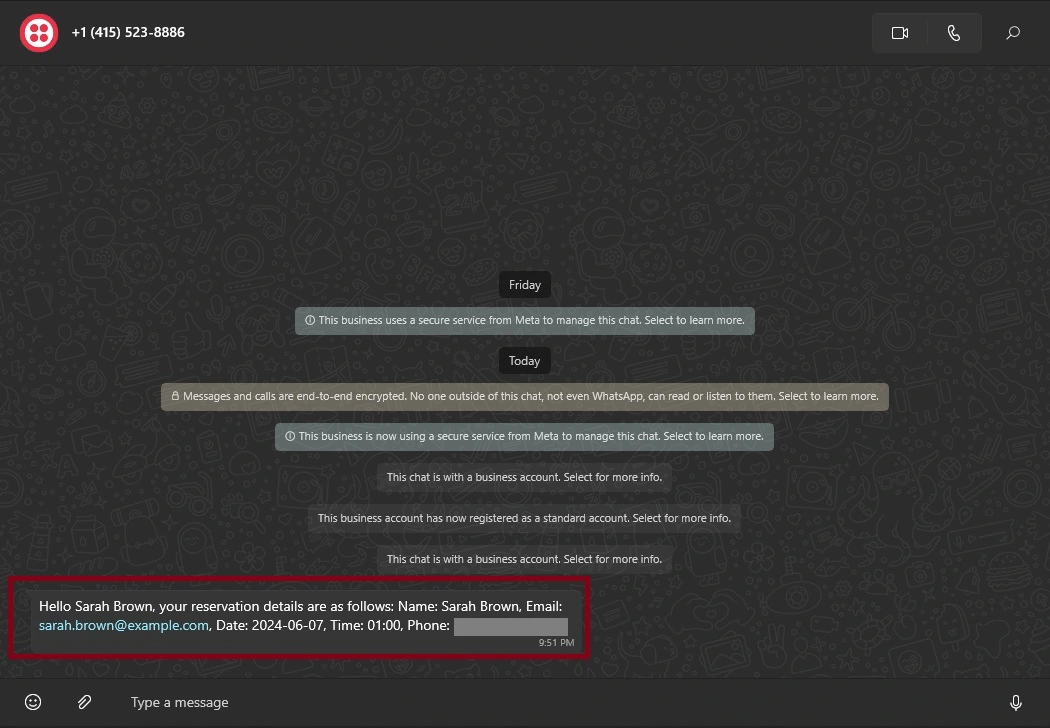
Finally, open your WhatsApp application to view the confirmation message sent to your WhatsApp number.
Deploying your Application with Back4app’s AI Agent on Back4app Containers
To deploy your application to a Back4app container, you need to create a Dockerfile for your Vue application.
Create a Dockerfile in your project’s root directory and add the code block below:
# Dockerfile

FROM node:18

WORKDIR /app

COPY package*.json ./

RUN npm install

COPY . .

RUN npm run build

FROM nginx:1.19.0-alpine

COPY --from=0 /app/dist /usr/share/nginx/html

EXPOSE 80

CMD ["nginx", "-g", "daemon off;"]
After creating your Dockerfile, push your code to a GitHub repository. To deploy your application from GitHub with the AI agent, Back4app requires you to install the Back4App Containers GitHub App on your GitHub account.
You will also need to grant the application the necessary permissions required to access your application’s code repository.
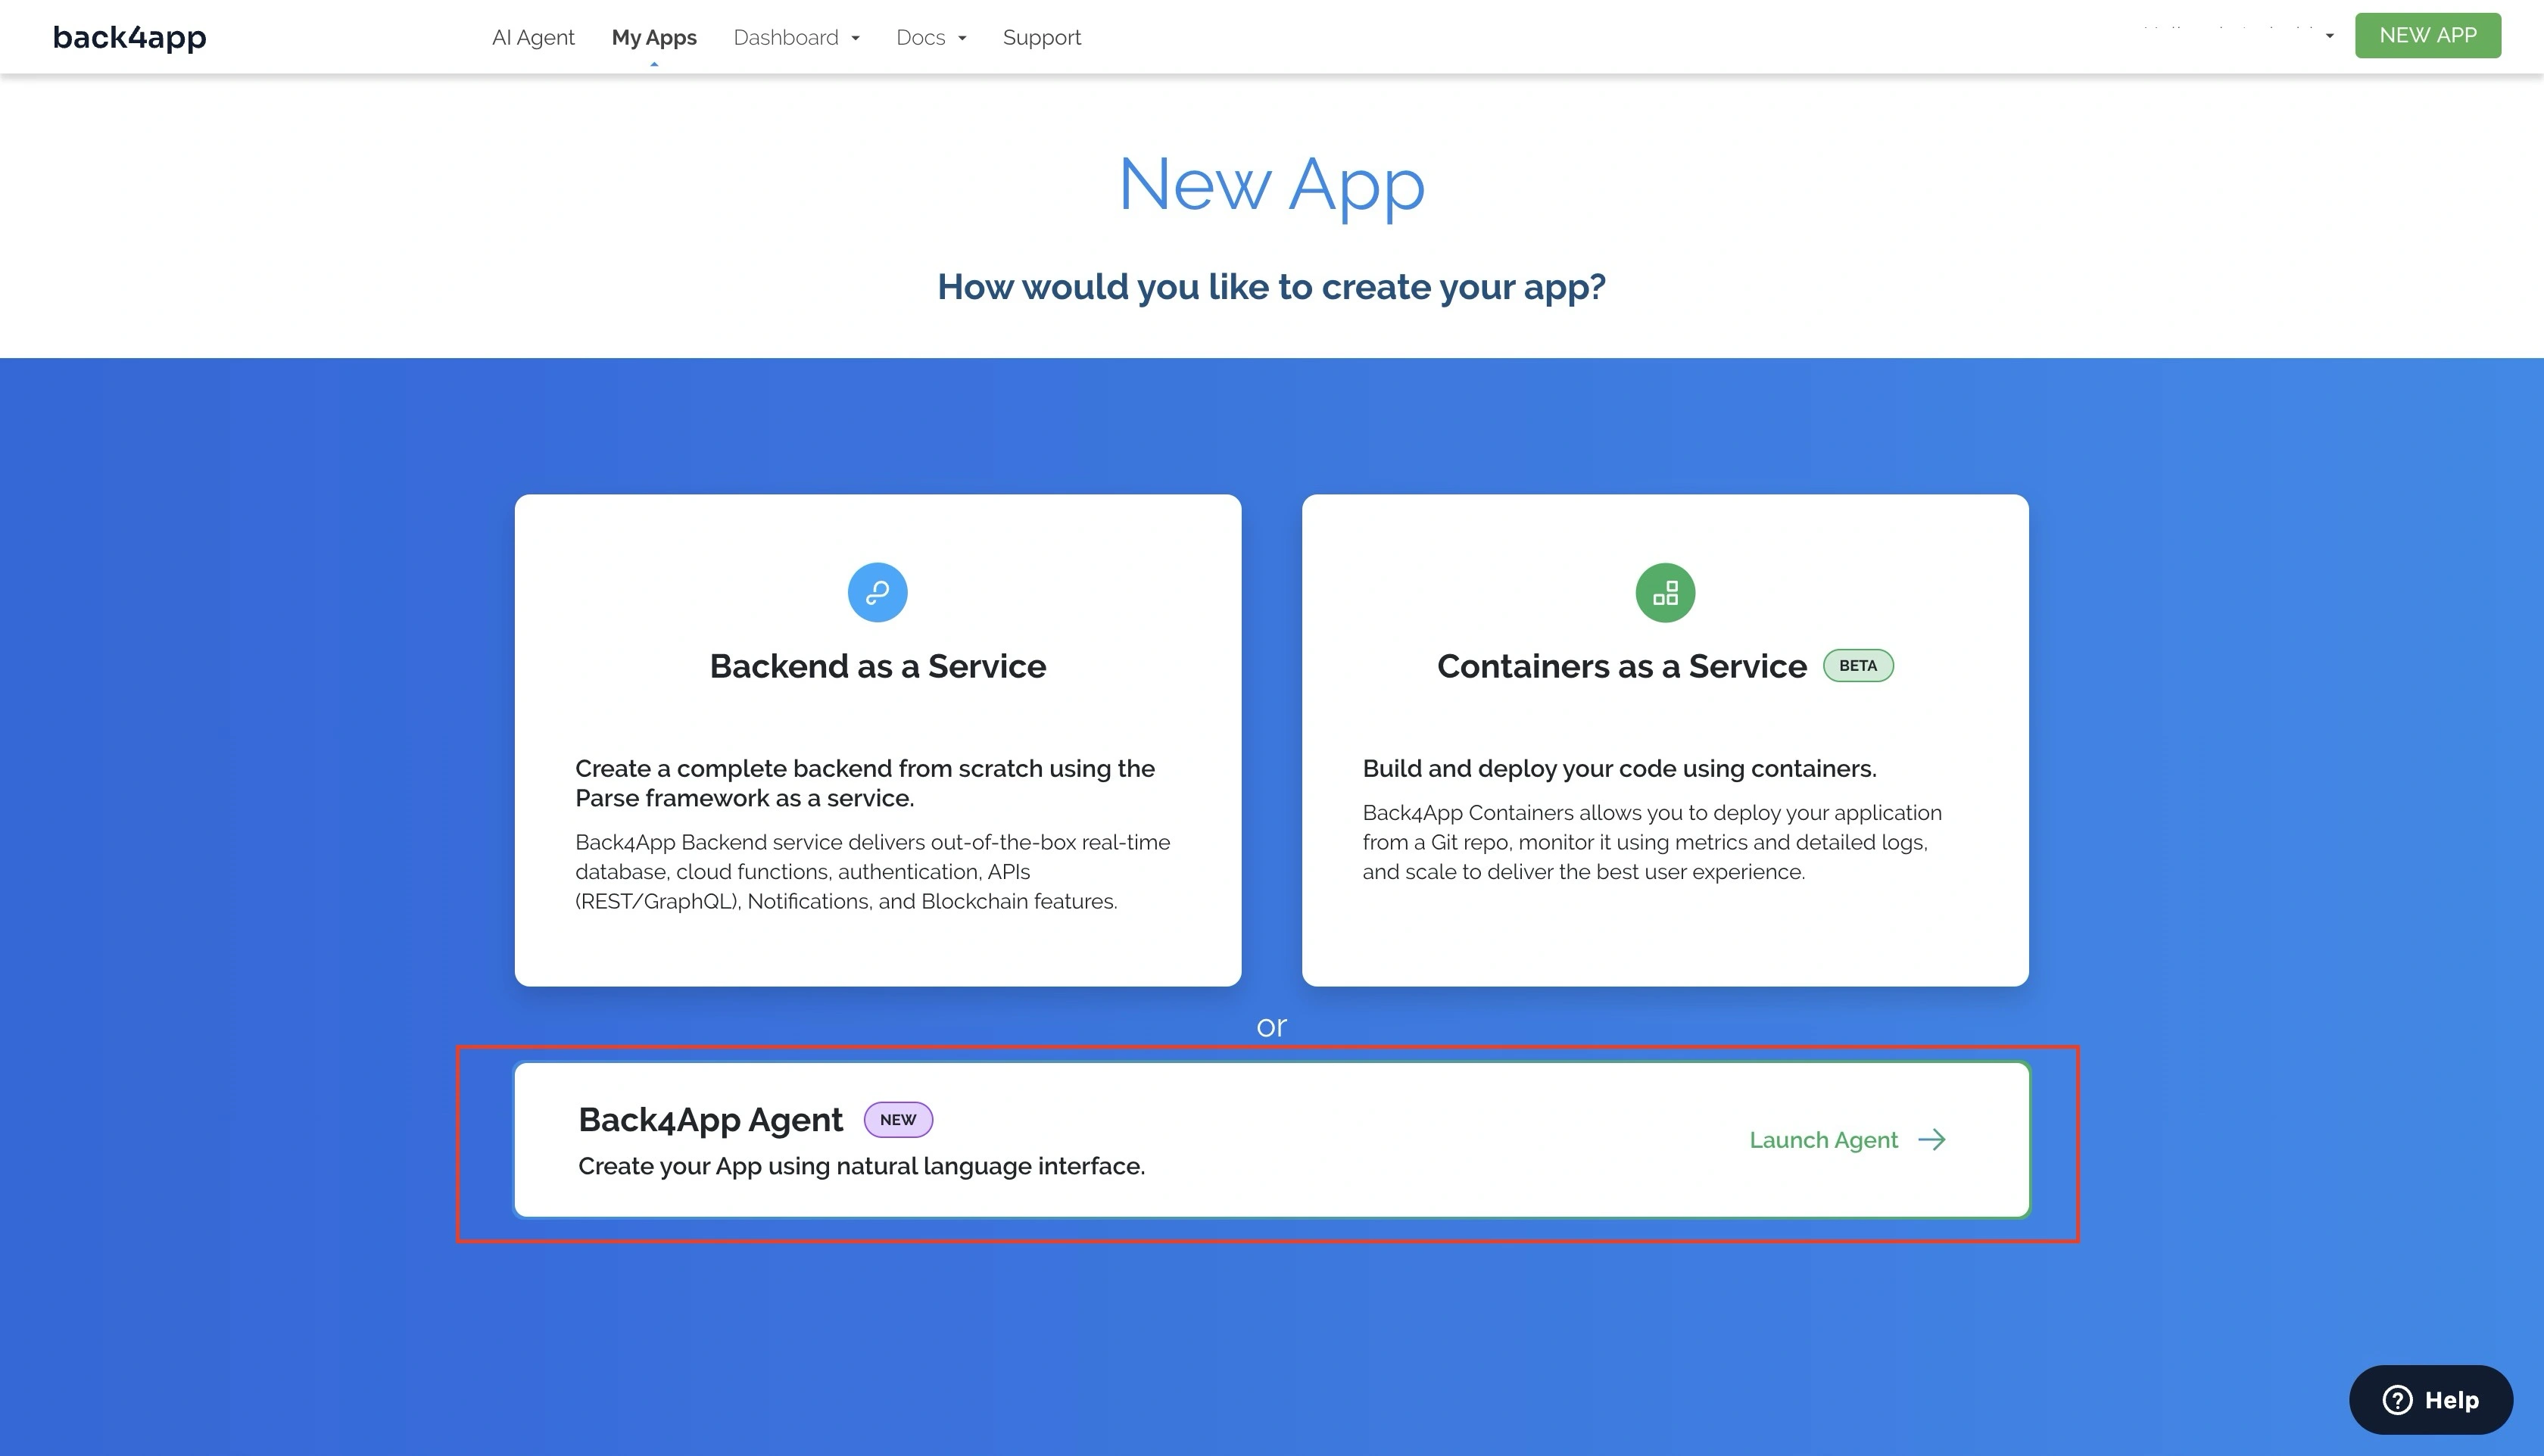
Next, navigate to the Back4app homepage and click the “New App” button located at the upper right corner of your display.
This will take you to a setup screen, where you will need to pick the type of app you want to create.
Select the Back4app Agent option, as shown in the image below.
When you select the Back4app Agent option, you will be redirected to the Back4app AI agent page.
Give the AI agent the prompt below to start your application’s deployment process:
Deploy my "YOUR_REPOSITORY_URL" repository on GitHub to a Back4App Container.
Here are the required environmental variables:
VITE_BACK4APP_APPLICATION_ID = "BACK4APP_APP_ID"
VITE_BACK4APP_JAVASCRIPT_KEY = "BACK4APP_JAVASCRIPT_KEY"
Replace the placeholders with their actual values. The prompt above will start your deployment process.
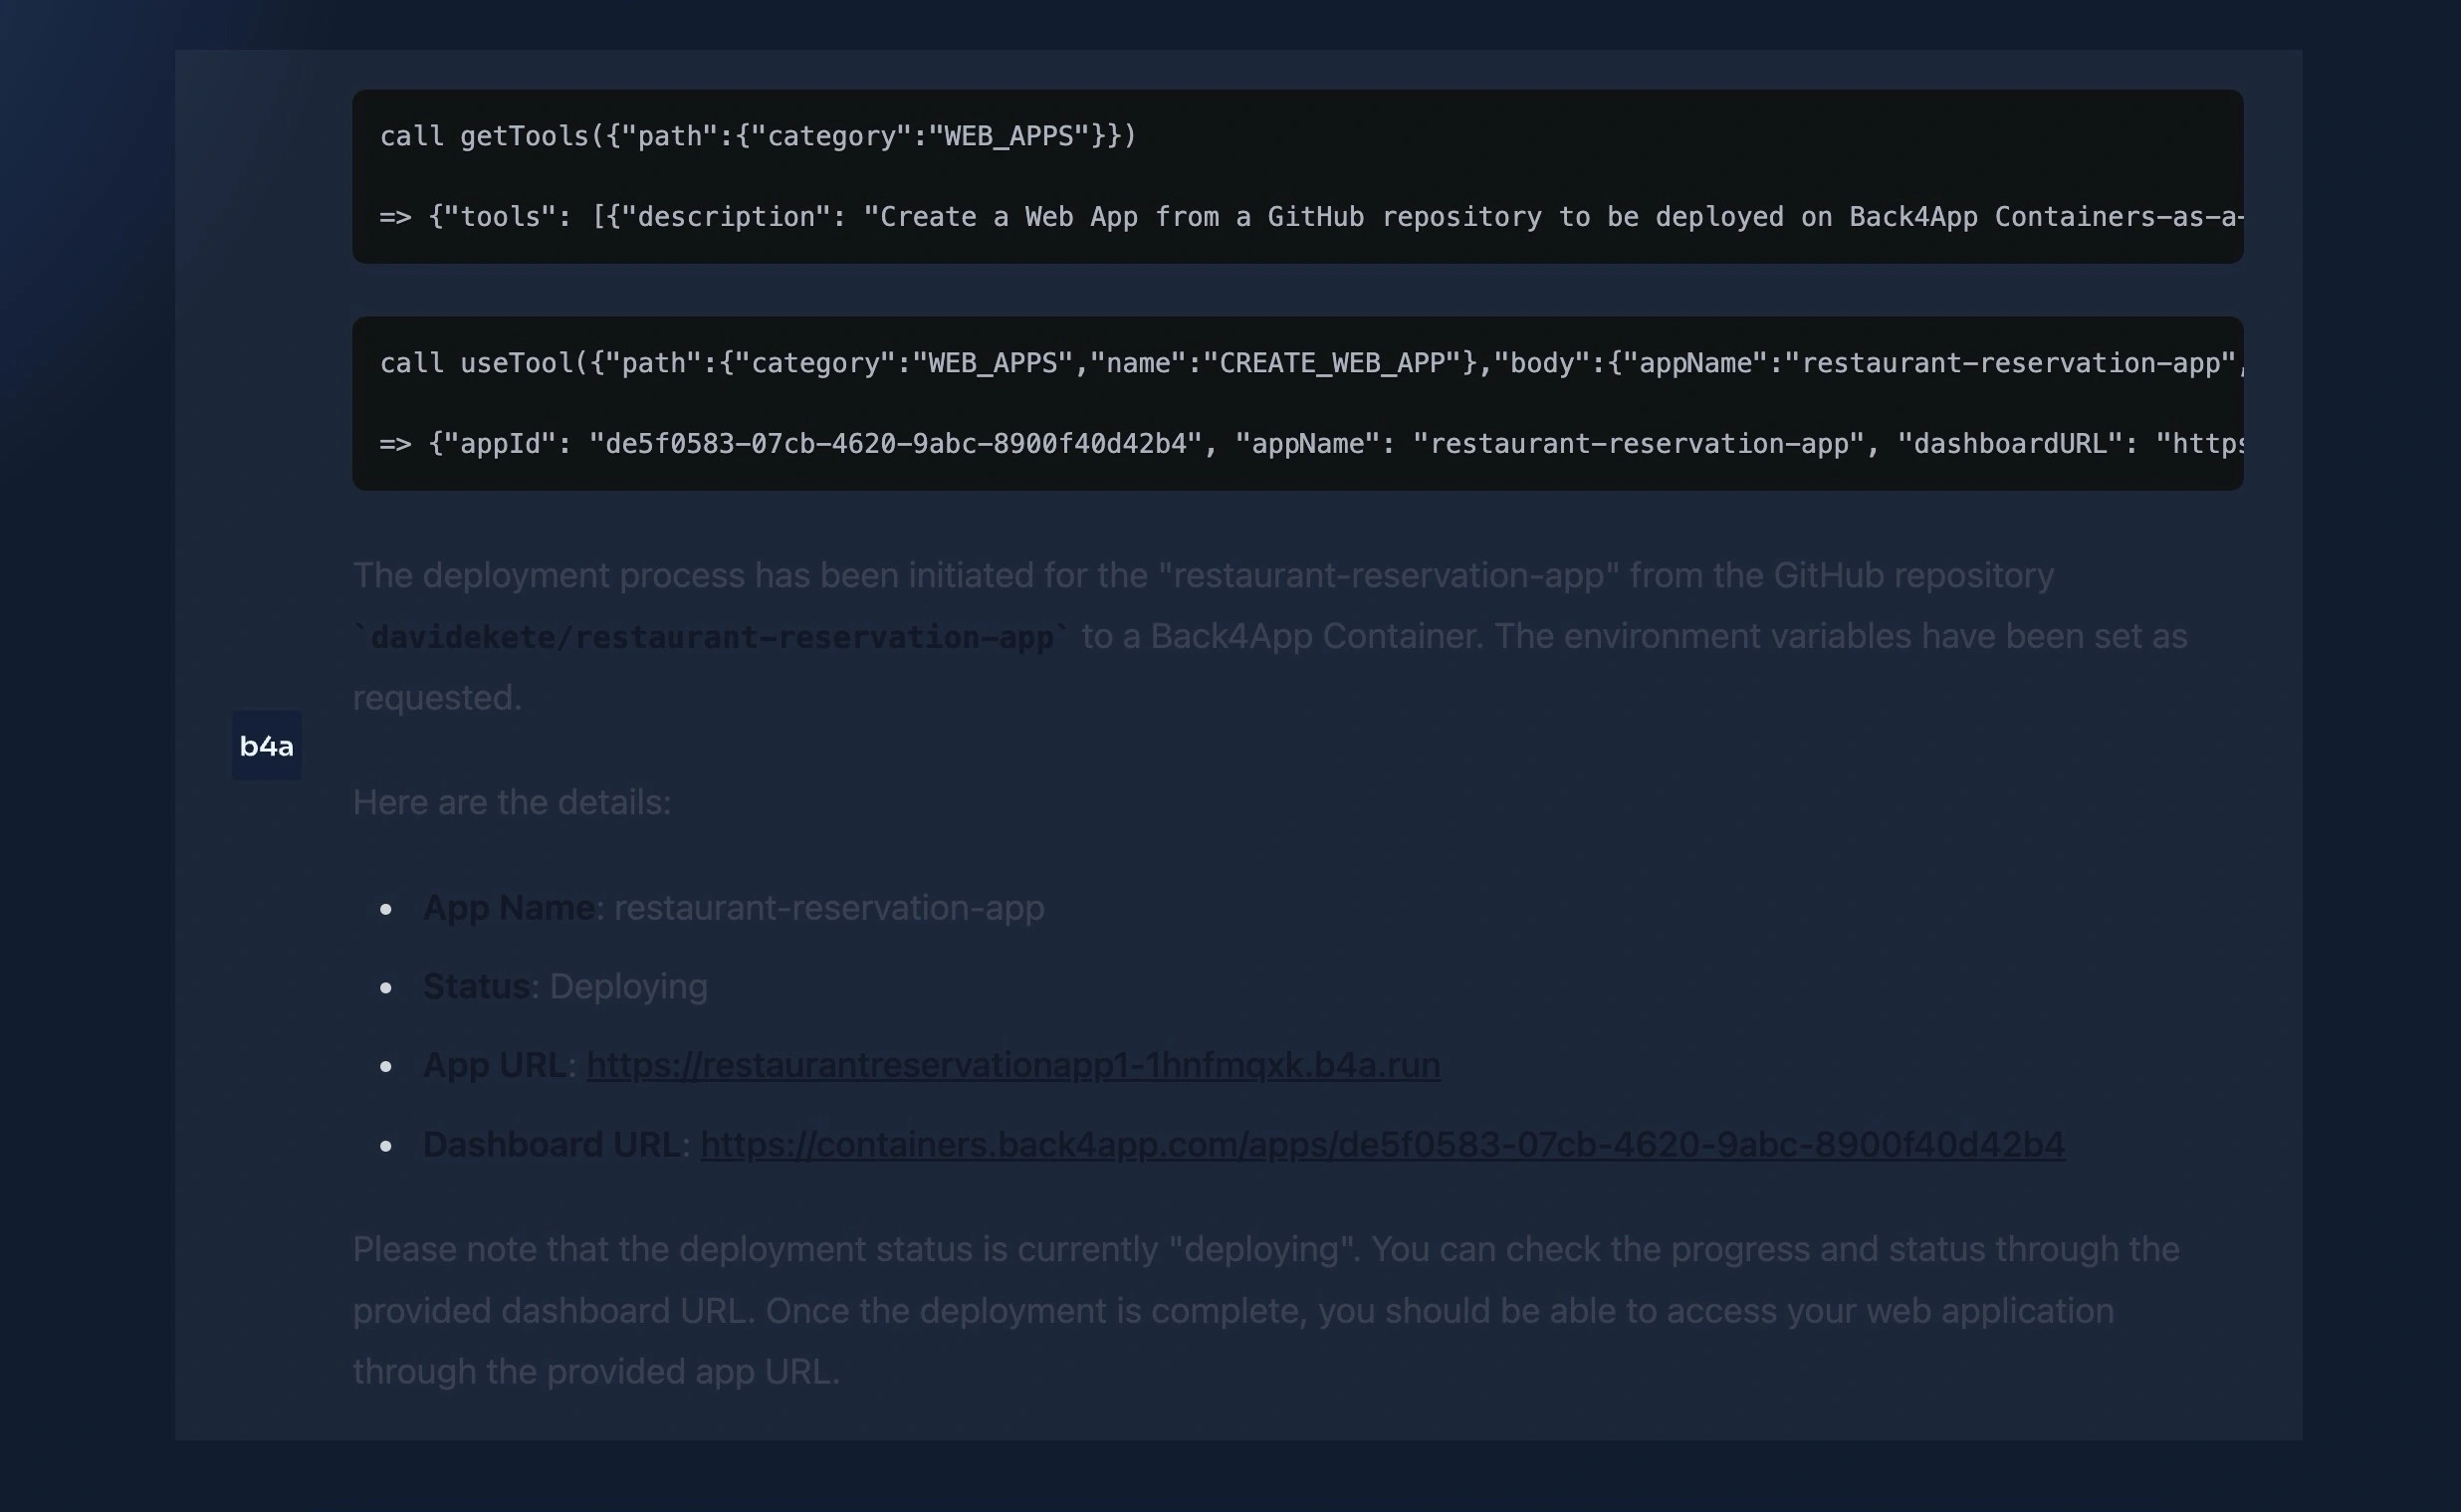
When completed, the AI agent will respond, indicating success or a pending deployment. If you get a pending deployment, you can monitor your app’s deployment status on your Back4app container dashboard.
You should get a response similar to the image below:
Alternatively, you can manually deploy your application to a Back4app container.
Conclusion
In this article, you built and deployed a functional restaurant reservation app using Back4app, Vue, and the Twilio API.
With your app, users can make reservations, which are stored on your Back4app backend. They can view the reservations they made through interfaces created by Vue and powered by your Back4app cloud code, which you generated using the AI agent.
Additionally, your app confirms successful reservations via WhatsApp messages powered by the Twilio API.
You can find the full code used in this tutorial on this GitHub repository.


