How to deploy a FastAPI application?
While hosting providers are plenty, just a few offer a Common Gateway Interface (CGI) or the mod_wsgi module to support Python hosting. But among the developers that took the 2023 Stack Overflow Developer Survey, containerization with Docker takes the lead for application development and deployment.
For Python applications developed using a framework like FastAPI, deployment via a Container-as-a-Service (CaaS) is as straightforward as pushing your code to GitHub. In this blog, you’ll learn to dockerize your FastAPI application and deploy it via a CaaS.
Contents
Key Takeaways
- Docker and FastAPI is a strong duo; they allow for streamlined, packaged deployments with dependencies included.
- FastAPI excels in async ops, data validation, and OpenAPI but falls short in community backing and compatibility.
- Back4app eases FastAPI deployment, syncing with GitHub for automatic updates, and offering cloud database setup.
What is FastAPI?
FastAPI is a lightweight open-source Python web framework for developing RESTful APIs. Launched in 2018, it supports the Pydantic model and Starlette, placing it on the same performant level as Node.js and Golang. The framework is also customizable, allowing you to design your codebase flexibly.
With its support for JSON Schema and type-hinting in Python versions 3.6 and later, the Pydantic model allows FastAPI to parse data easily and validate it at run-time.
The Starlette framework introduces the Asynchronous Server Gateway Interface (ASGI) into FastAPI; this lets you perform asynchronous operations in Python RESTful APIs and run your code on the Uvicorn ASGI server.
Like Nodemon in Node.js, the Uvicorn server listens to changes in the API routes and re-initiates the run time for every update.
Although only 7.42% of the developers that took the 2023 Stack Overflow Developer Survey indicated that they use FastAPI, as of writing, GitHub puts its total users at 203k. With over 498 contributors and 190 releases at the time of writing, FastAPI receives consistent updates and patches.
However, putting FastAPI on the same performance level as Golang and Node.js is still a debate among developers.
While others agree, some maintain that while it’s a significant improvement to Python web development, FastAPI still doesn’t compare with the performance of either.
Advantages of FastAPI
- Support for asynchronous operations: Besides Python’s default synchronous operations, FastAPI supports function declarations using async/await. Thanks to Starlette, which also confers WebSocket support. This adds concurrency to your program, allowing your application to perform other operations while waiting for slower operations like database queries.
- Support for data validation: Using the Pydantic BaseModel, FastAPI leverages Python’s data type hints to maintain strictness while parsing data. This prevents the wrong data type from entering the database. Hence, unlike dynamic models requiring extra validation libraries, model validation is straightforward and readily available in FastAPI.
- Fully standardized: FastAPI complies with the OpenAPI specification for serving HTTP APIs across the web, making it easy for consumer apps and clients to understand an API they want to use. Under the hood, it also uses the JSON Schema declaration to ensure the test and live user-submitted data are valid before submitting it to the database.
- Flexibility: Unlike Django, FastAPI doesn’t limit the developer to a particular codebase architectural standard. Instead, it leaves that decision to the developer. Hence, you can design your codebase with flexible naming conventions and declare general app settings and unit test suites on the go. Code modularization and separation of concern (SOC) are also straightforward.
And if using object-oriented programming (OOP), which we recommend, you can easily compose your models into your endpoint classes. As you build, appending API endpoints to your routes is also straightforward.
- It has an easy learning curve: Despite having a smaller user community than frameworks like Flask and Django, FastAPI stands out with its extensively comprehensive documentation and tutorials. With a development background, particularly in Python or JavaScript, you can easily pick it up. Its overall simplicity and flexibility contribute to faster development processes.
Limitations
- Low community support: FastAPI doesn’t have many users as Django or Flask. It’s still relatively new. So the community support is lower; this can be challenging, especially for new developers.
- Limited version compatibility: FastAPI only supports later versions of Python, starting with Python 3.6 upward. Hence, machines or servers running Python versions earlier than 3.6 must upgrade to install and run FastAPI successfully.
FastAPI Deployment Options
Infrastructure-as-a-service (IaaS) and container-as-a-service (CaaS) are scalable cloud infrastructures for deploying applications.
While you can deploy a FastAPI application via a virtual private server (VPS) or shared hosting, none is as scalable as an IaaS or a CaaS.
IaaS
An IaaS is a platform that provides on-demand computing resources in the cloud. It delivers all the virtualized resources needed to set up a deployment server for your application, usually on a pay-as-you-go basis.
In addition to the compute infrastructure, an IaaS includes storage and other network resources like load balancers, VPNs, firewalls, DNS management, and more. You’re responsible for managing your computing environment and can customize or scale its resources to fit your application’s requirements.
CaaS
A CaaS is a platform-as-a-service (PaaS) that lets you deploy your application in the cloud as containers. Unlike an IaaS, a CaaS manages all the computation baseline required to host your application under the hood.
These include the container run time environment, orchestration, storage, load balancing, and more. Thus, you can focus on building your application rather than bothering about infrastructure management.
Since you’re deploying your application as a container, it makes CI/CD integration straightforward without worrying about technical configurations. This makes application release and updates more rapid.
FAST API Deployment Process
Let’s go through the deployment process step-by-step, starting with the prerequisites. But since we’ll deploy our FastAPI application using Back4App containers, let’s quickly see what they are before proceeding.
Overview of Back4app Containers
Back4App Containers is a cloud platform that allows you to deploy dockerized applications quickly in the cloud. The platform syncs with your GitHub repository and automatically updates your deployment each time you push a release. This way, it helps eliminate manual container updates and server downtimes.
With Back4App Containers, you only need to push your code and subsequent releases to GitHub from your local machine, and the platform handles container image orchestration under the hood. Back4App also features real-time deployment tracking and real-time logging.
Hence, you can trace deployment steps and determine the point of failure—if there are any. And if your app crashes at run-time, which might happen for an interpreted language like Python, real-time logging helps you trace errors in the console to fix them quickly.
Here are the key features of Back4App:
- Easily sync your Back4App app with your codebase repository on GitHub.
- Deploy your application to the cloud via a Back4App container by pushing your code and subsequent updates to your GitHub repository.
- All you need is a Dockerfile. Back4App handles all dependency installations for you.
- Encrypt your environment variables easily during deployment and subsequent releases.
- Monitor deployments in real-time and manage rollbacks.
- Monitor your application usage history with real-time logs.
- Deploy mobile and web applications to the cloud
Download and Install Python
We’ll use Python 3.10.6 in this blog. But you can use any Python version not earlier than 3.6. Go to python.org to download and install the latest compatible Python version for your OS—if you’ve not already done so. Otherwise, ignore this section.
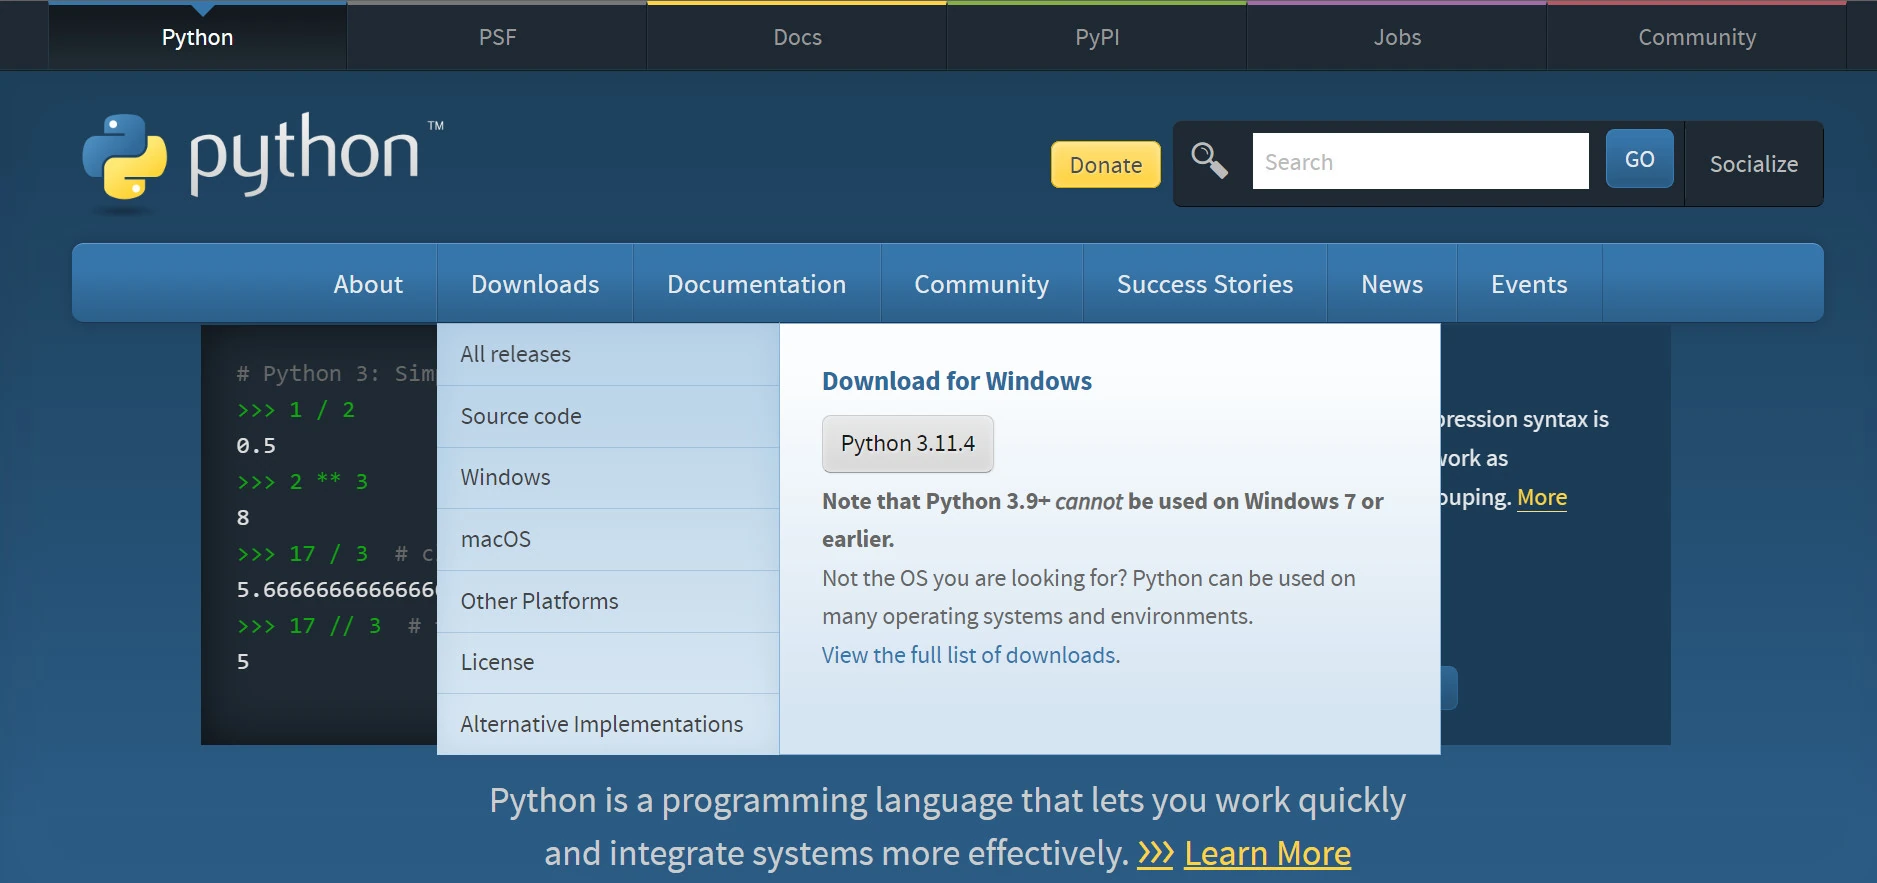
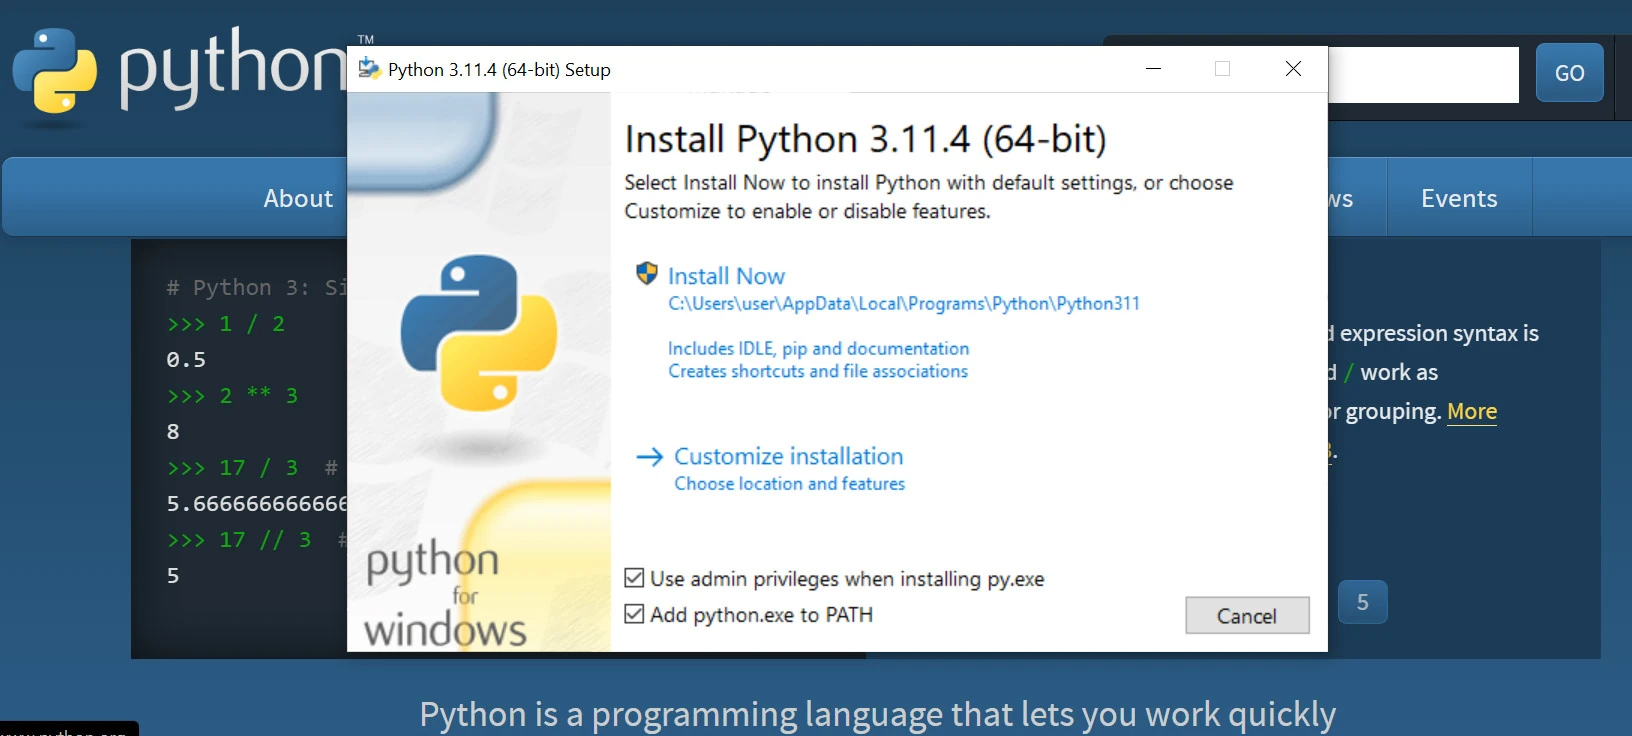
Once downloaded, click the installation file and follow the onscreen prompts to install Python on your local machine.
Ensure you tick the Add python.exe to PATH option to add Python to your system variable path; this makes it executable via the command line.
If using a Mac, it already comes with Python 2.7 by default. You can update this to the latest version using Homebrew via the terminal:
brew install python3Run the following command in your terminal to check your Python version.
python --versionActivate a Python Virtual Environment and Install FastAPI
Next, create a new project directory and open the command line to this folder. Then activate a Python virtual environment using venv.
This package comes with Python and requires no installation. It allows you to manage Python dependencies in isolation rather than installing them globally.
Execute the following command via the terminal to create a virtual environment, replacing env_name with your preferred environment’s name.
py -m venv env_nameRun the following command to activate the virtual environment.
.\env_name\Scripts\activateInstall FastAPI and Uvicorn
The next step is to install the FastAPI framework and the Uvicorn server runtime into the active virtual environment. This also installs Pydantic and Starlette.
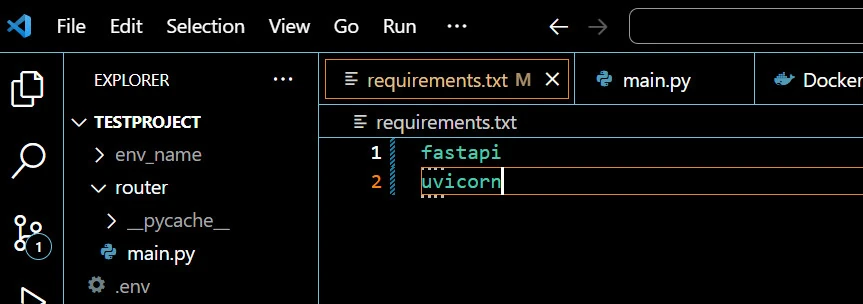
Create a requirements.txt file in your project root and enter the packages to install, as shown below.
fastapi
uvicorn
Below is the demonstration in VSCode. You can append more dependencies to this file as the need arises.
Run the following command via the terminal to install the listed dependencies. Ensure the virtual environment is still active.
pip install install -r requirements.txtThe command installs the specified package as shown below.
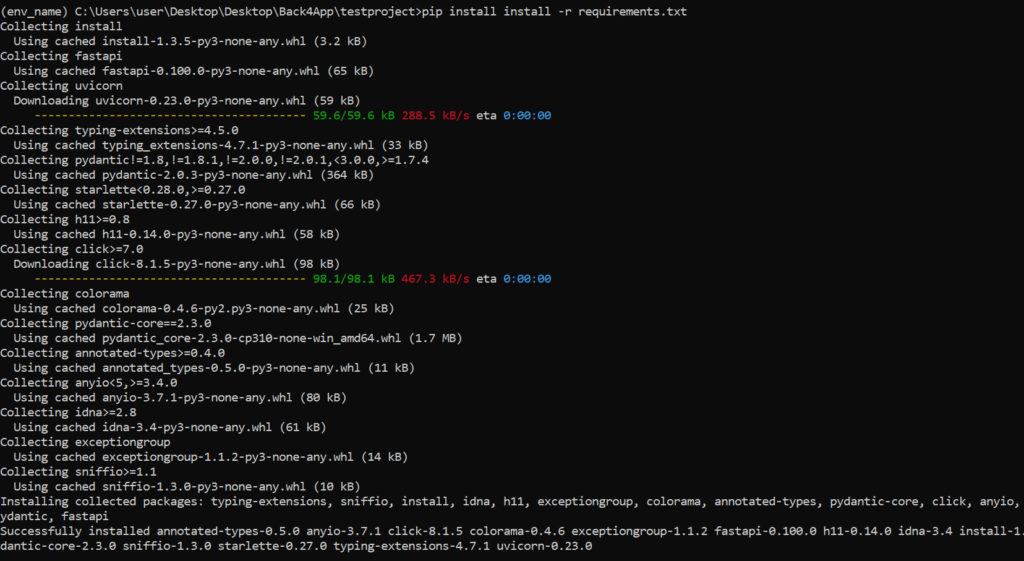
Once installed, update the requirements.txt using the following command:
pip freeze > requirements.txtThe above command overwrites the requirements.txt with the installed dependencies, including their correct version numbers. Ensure you do this whenever you install a new dependency into your virtual environment.
The requirements.txt file looks like this after the update:
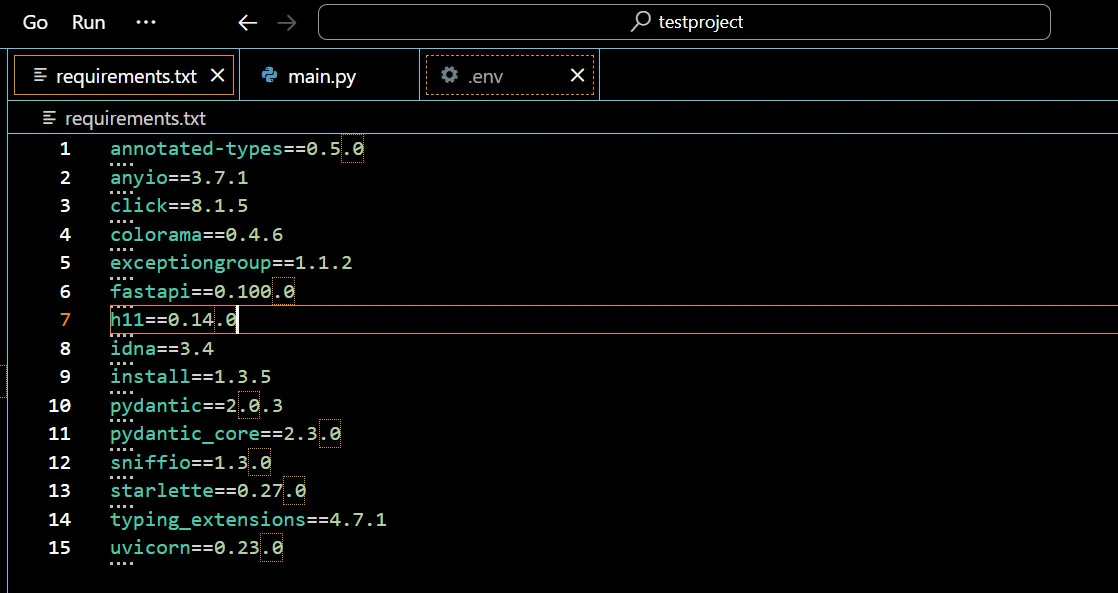
Project Introduction
We’ll write a simple “Hello World” FastAPI application and deploy it using free Back4App Containers. No worries if your project is complex. Deployment takes the same step, and you also get free monthly uptime regardless.
However, if your app handles many requests daily, you might want to upgrade after deployment to give your visitors a smoother user experience with zero downtime.
App Code
Make a new router directory in your project root folder and create a main.py file inside that directory. This file handles your application API endpoints and router. Skip to the following section if you already have a project to deploy.
Here’s the “Hello World” code:
from fastapi import FastAPI, APIRouter
import uvicorn

app = FastAPI()
class HelloWorld():
    def read_hello(self):
        return {"data": "Hello World"}
router = APIRouter()
router.add_api_route('/api/v2/hello-world',
endpoint = HelloWorld().read_hello, methods=["GET"])
app.include_router(router)

if __name__ == "__main__":
   uvicorn.run("main:app", host="127.0.0.1", port=8000, reload=True)
To run the uvicorn server and test the hello-world API endpoint, execute the main.py file via the command line:
python main.pyThis starts the development server on port 8000 as specified.

Since this is a GET request, we can test it directly on any web browser. Below is the result.
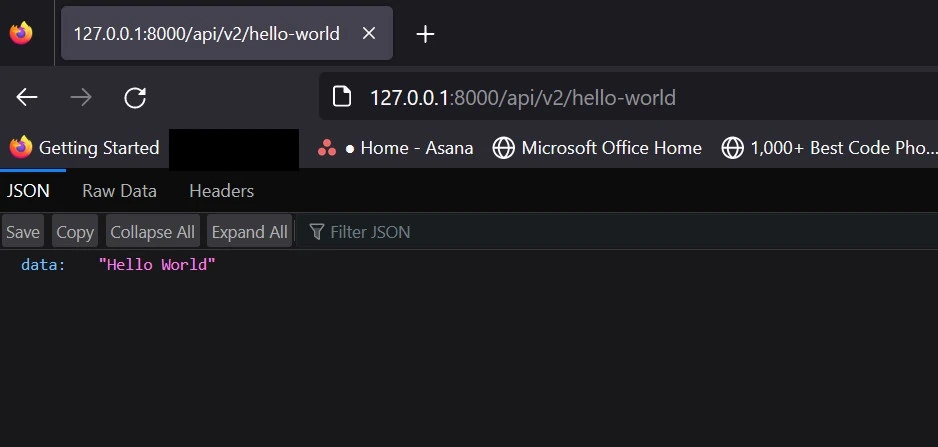
Dockerize the App
Next, create a Dockerfile in your project root folder. You can do this by creating a new file in VS Code and naming it Dockerfile.
Once created, type the following commands to build a Docker image:
FROM python:3.9-slim
WORKDIR /app
COPY requirements.txt .
RUN pip install --no-cache-dir -r requirements.txt
COPY . .
EXPOSE 8000
CMD ["uvicorn", "router.main:app", "--host", "0.0.0.0", "--port", "8000"]
Push to GitHub
Head over to your GitHub account and go to Repositories. Start a new repository by clicking New at the top right.
Head over to your GitHub account and go to Repositories. Start a new repository by clicking New at the top right.
If you’ve already pushed your code to GitHub, add the Dockerfile to the copy on your local machine and re-push to your repository.
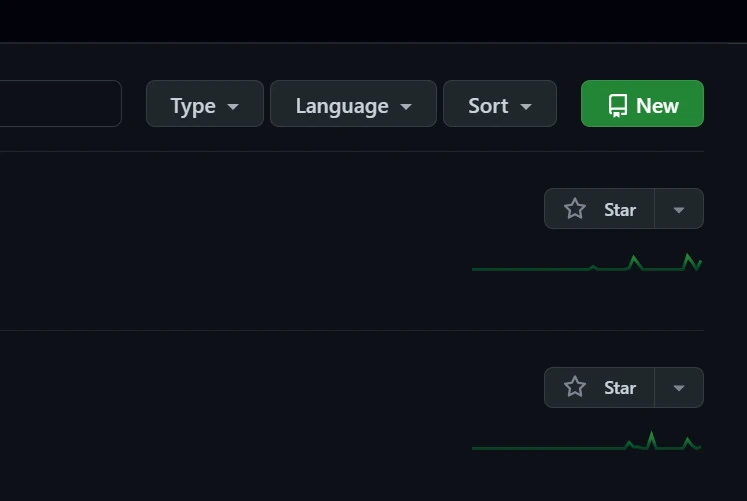
Give your repository a name and click Create repository at the bottom-right.
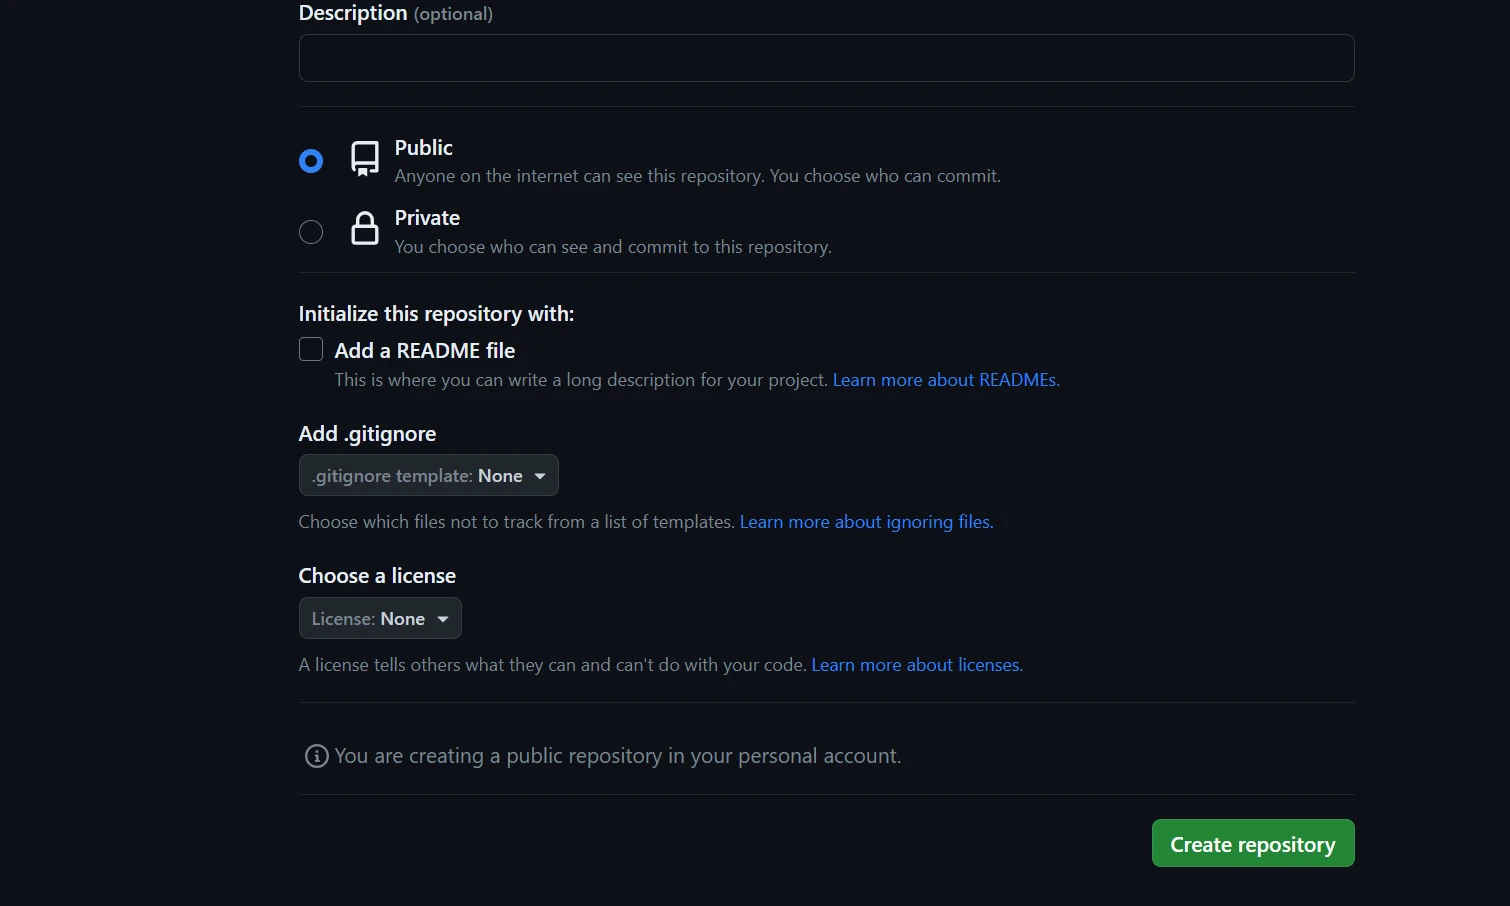
Next, initialize a local repository using the init command as shown:
git initIgnore the venv folder and your .env file using .gitignore to avoid pushing them to your repository. To do that, create a .gitignore file in your project root folder and enter the folders and files you want to ignore, as shown below.
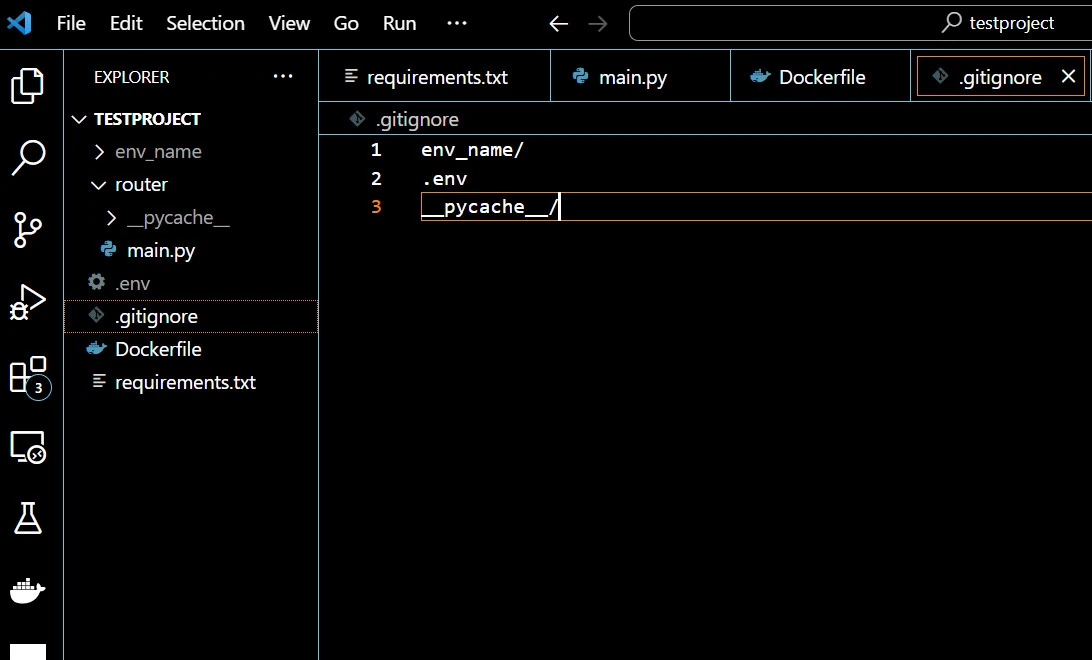
Run the following commands via your terminal one after another to push your code to your repository.
1. git add .
2. git commit -m "commit message"
3. git branch -m main
4. git remote add origin <URL of the created repository>
5. git push -u origin main
Deploy the App With a Back4App Container
If you’ve not done so already, ensure you create a new Back4App account. To hasten the process, use the Google or GitHub sign-in option.
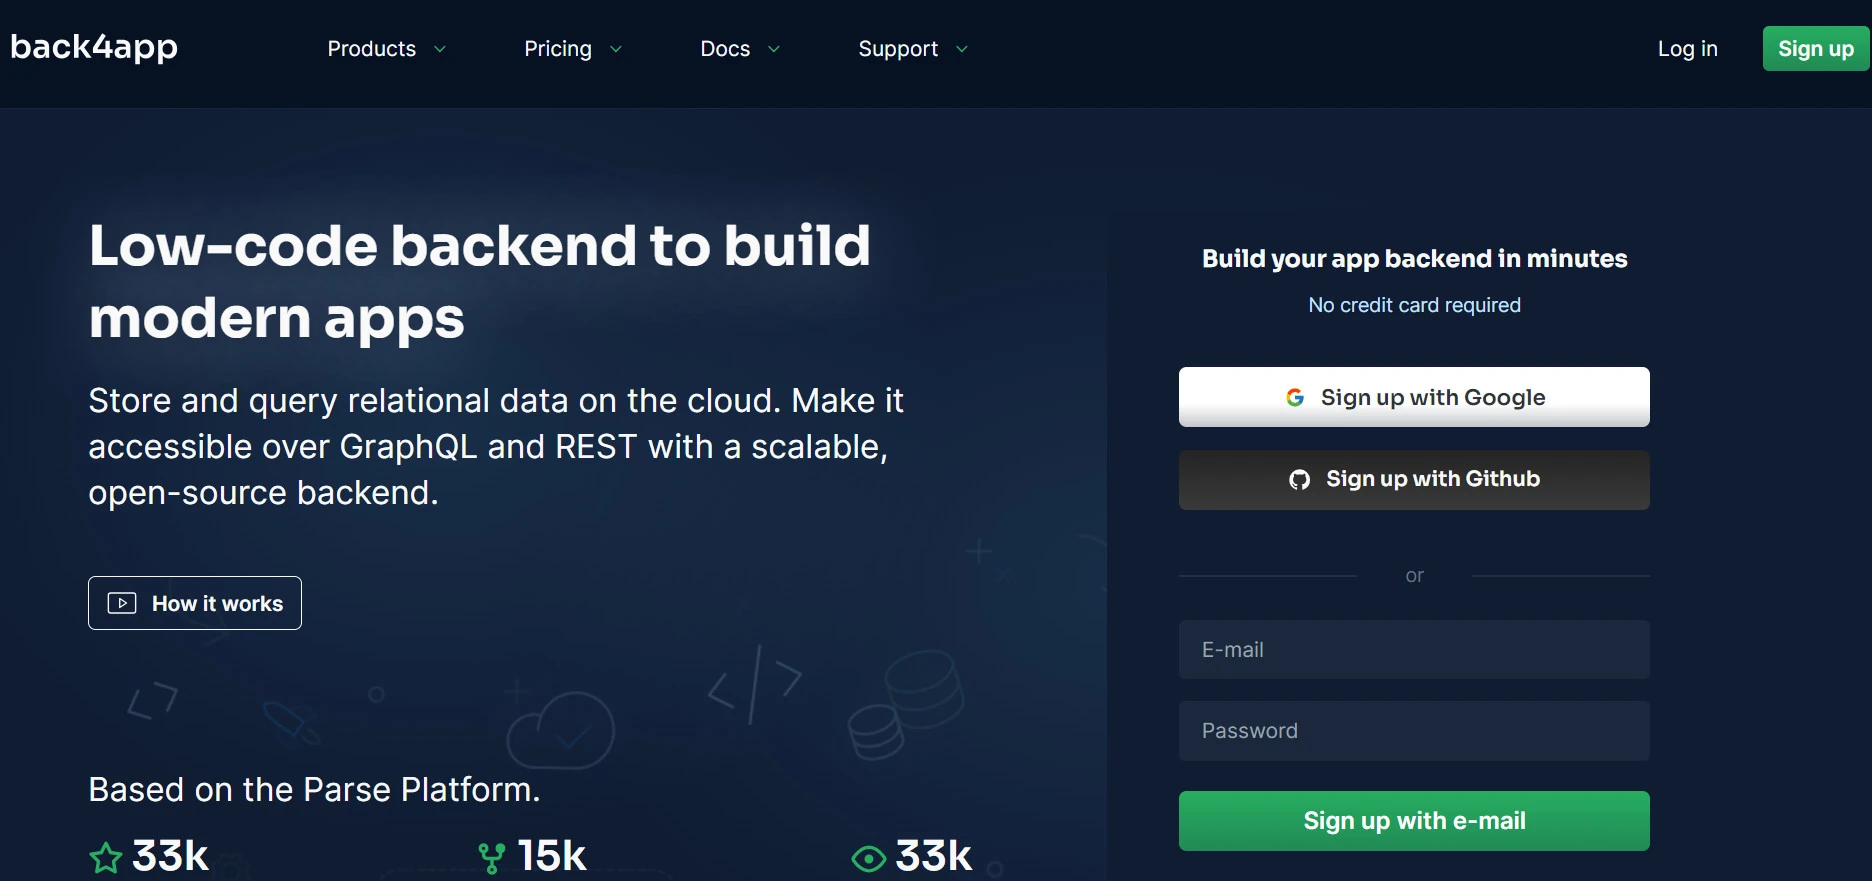
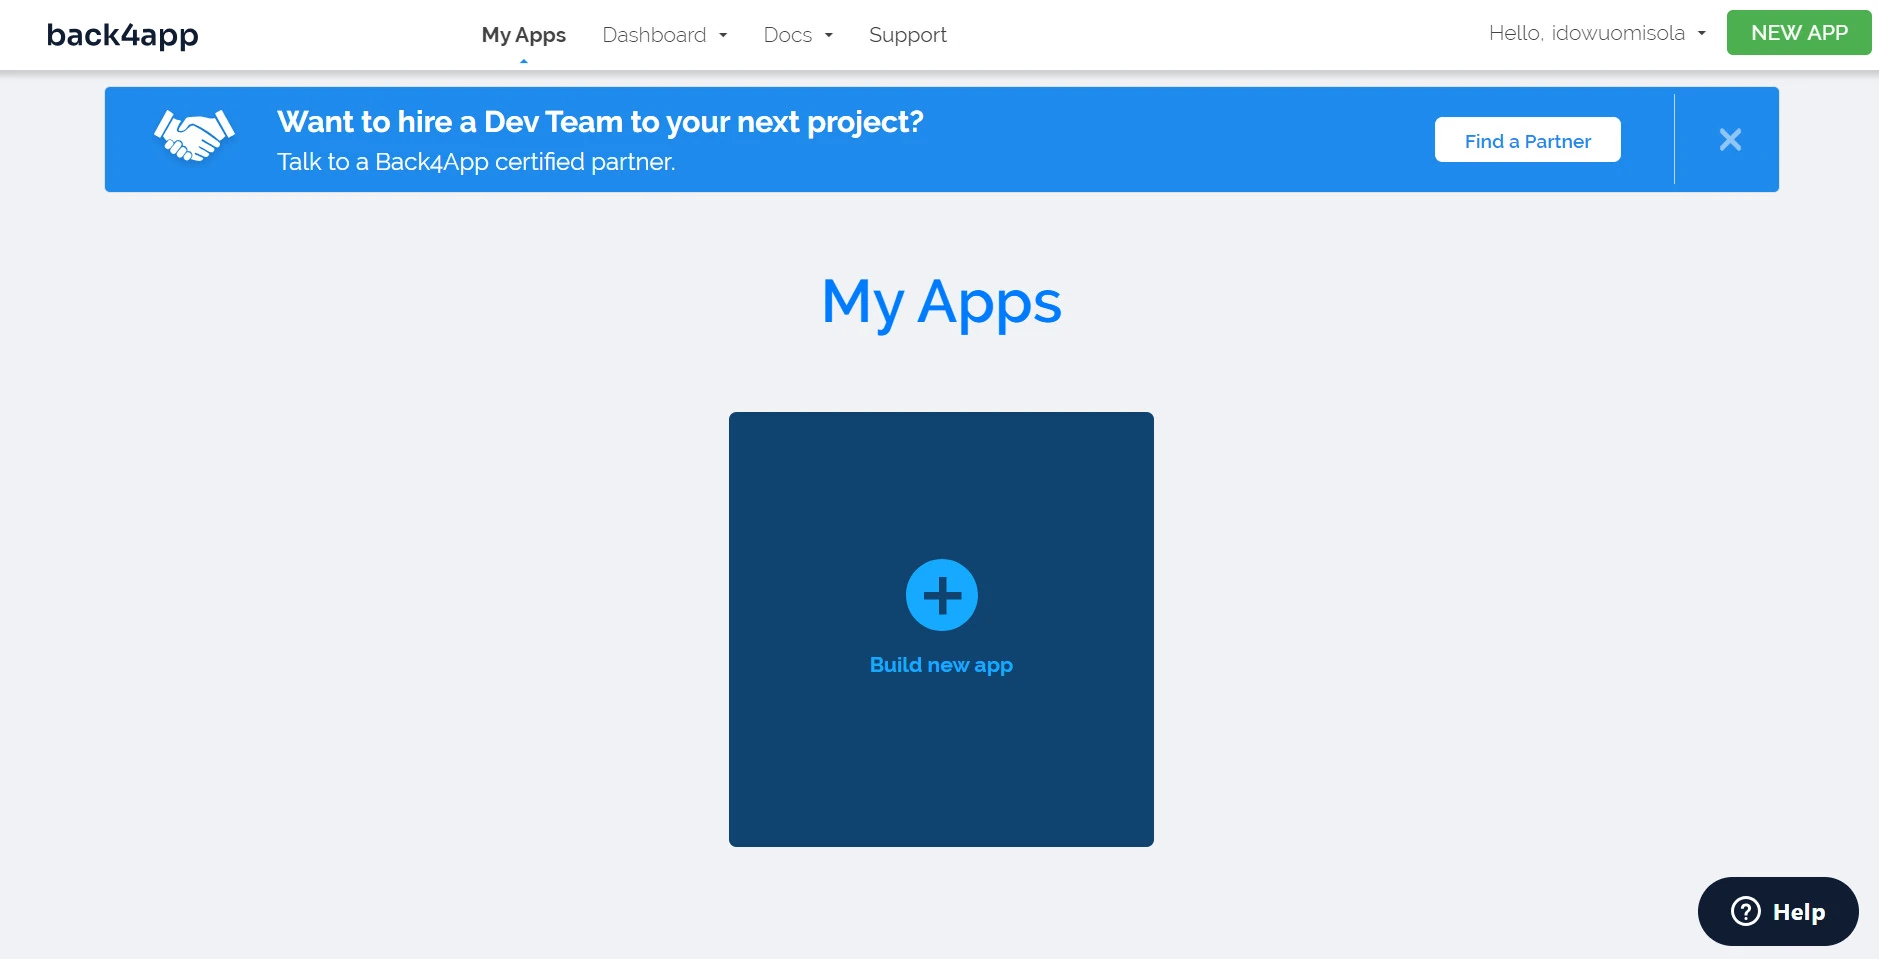
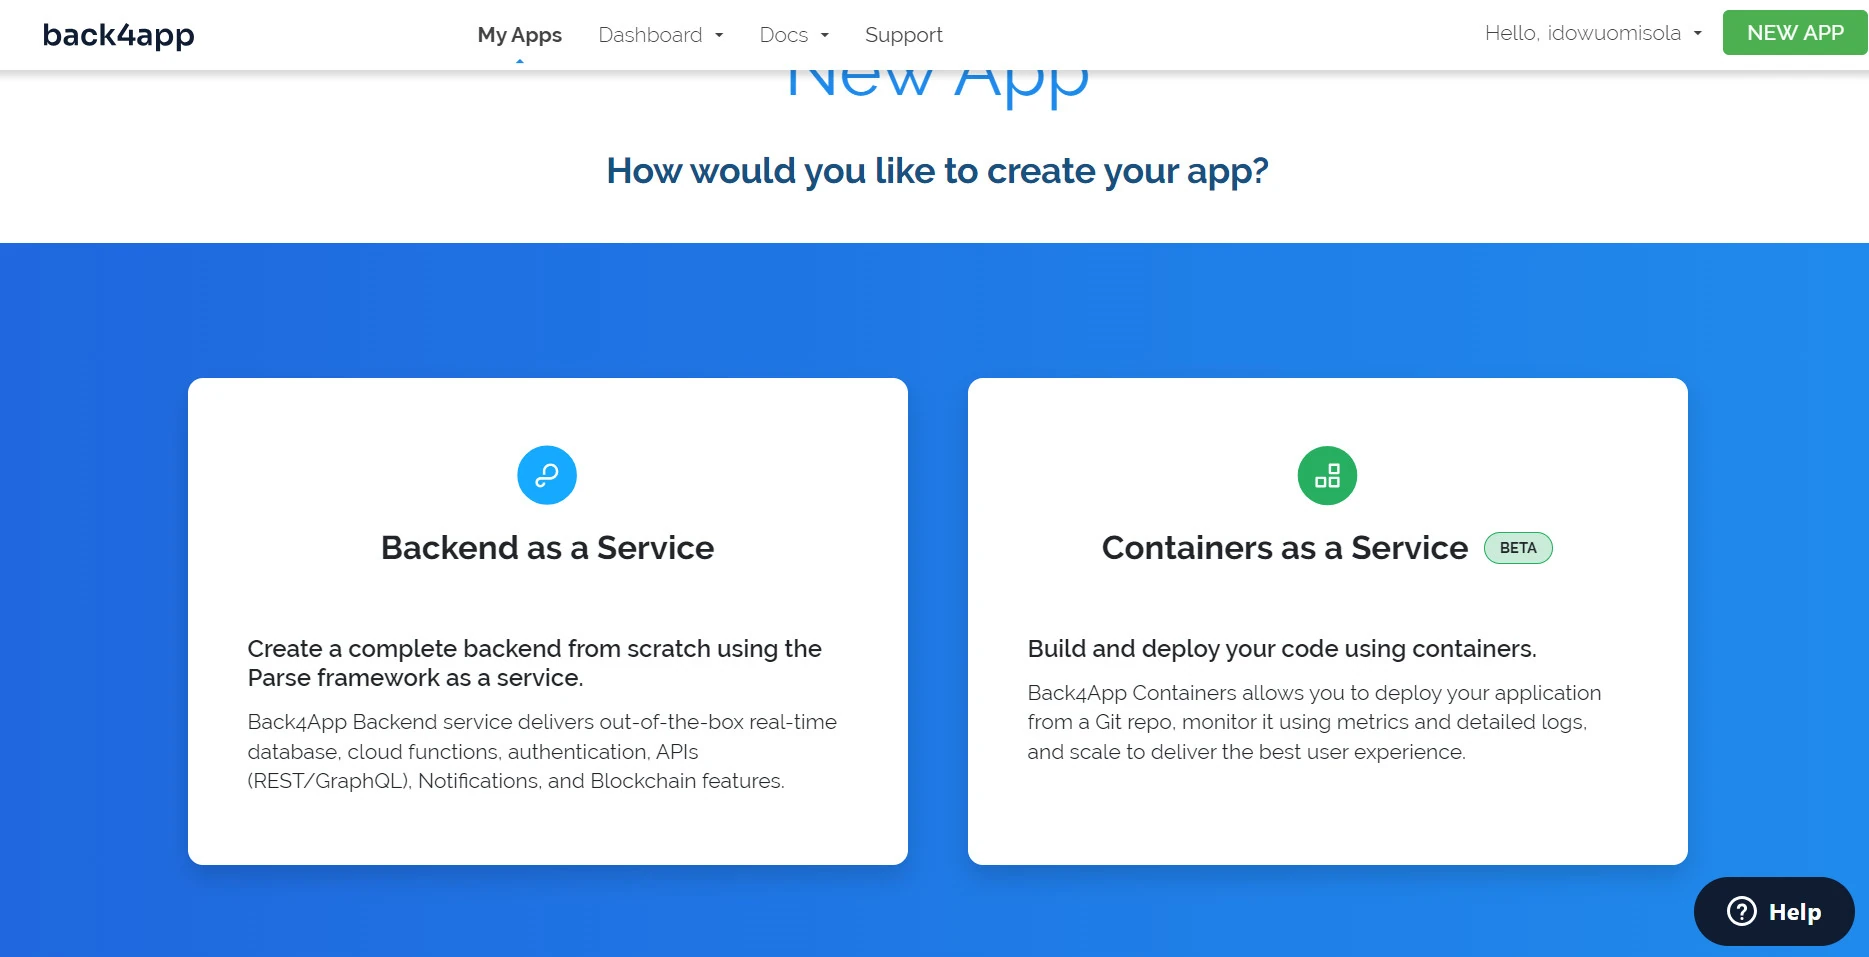
Once signed in, click the Build new app widget.
Go to Containers as a Service.
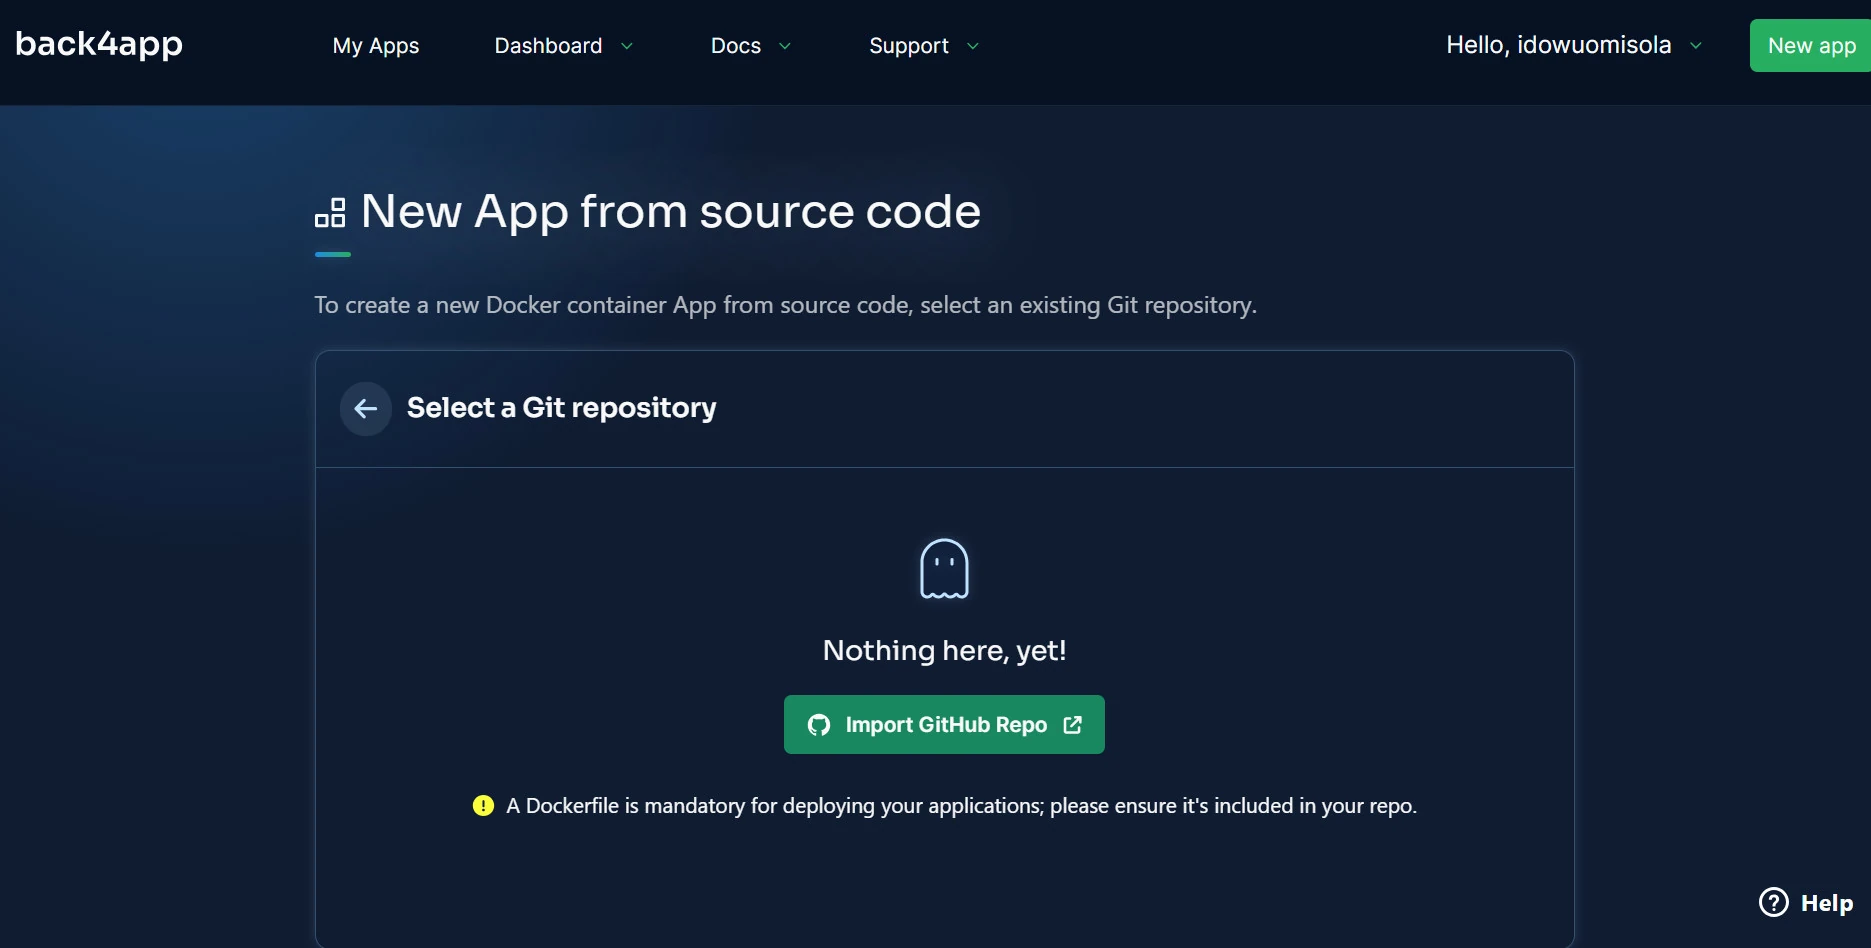
On the following page, click Import GitHub Repo. Grant GitHub permission to authorize Back4App when prompted.
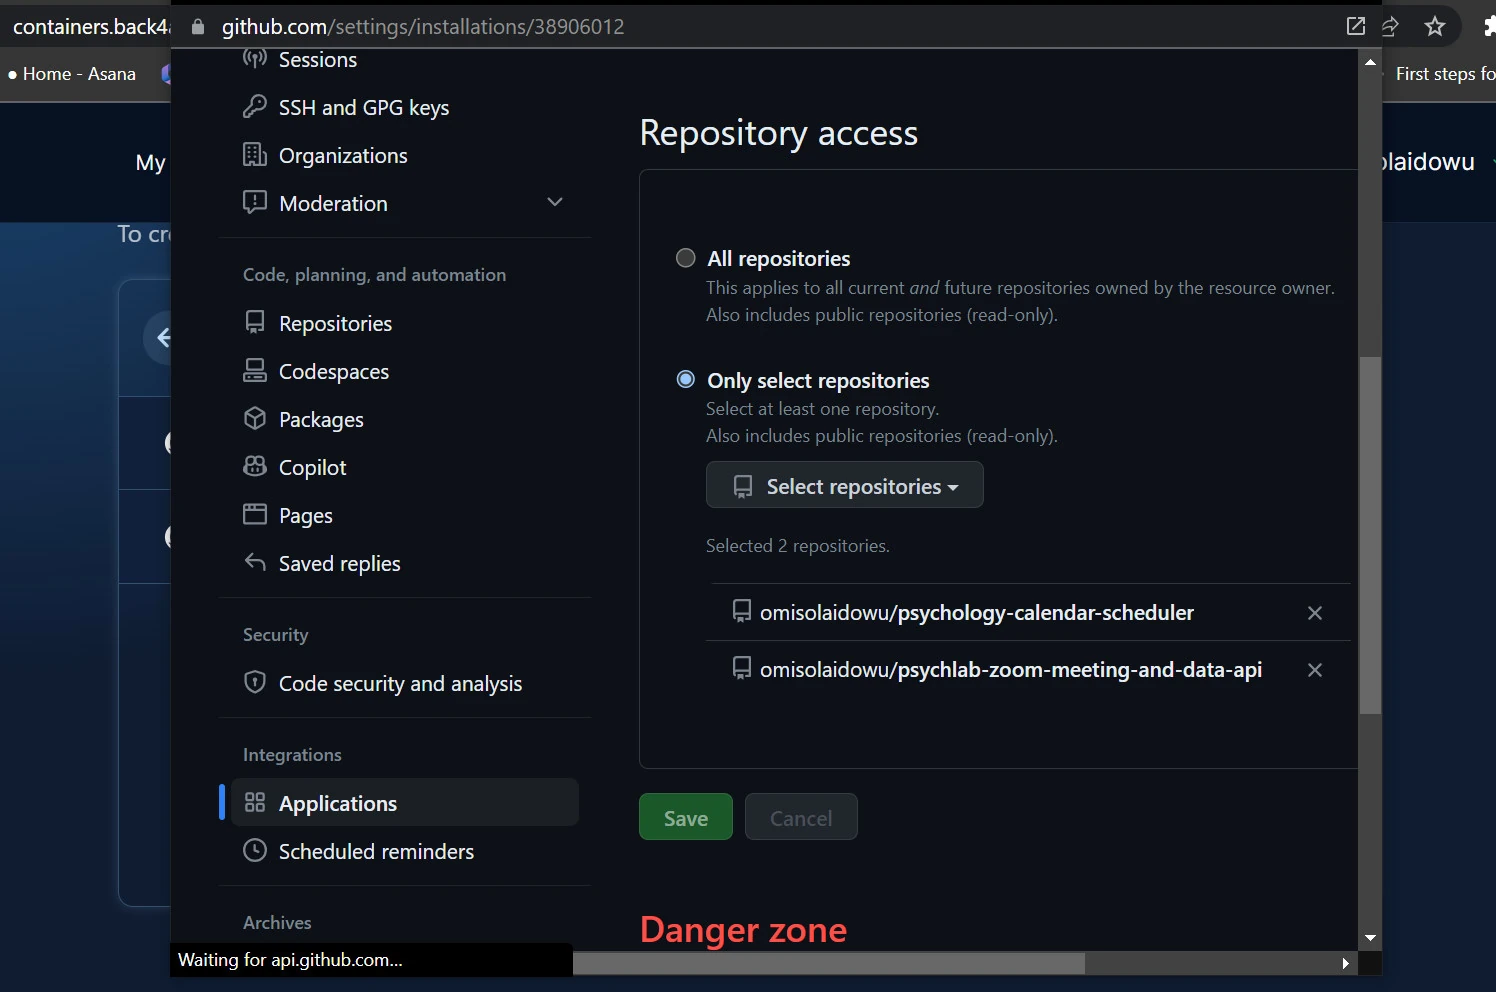
Under Repository access in the opened modal, click Select repositories. Select the repository containing the project you want to deploy and click Save.
Back4App will sync the selected repository automatically. Once redirected to Back4App, click Select to the right of the added GitHub repository. Next, fill in the App Name field with your preferred app name.
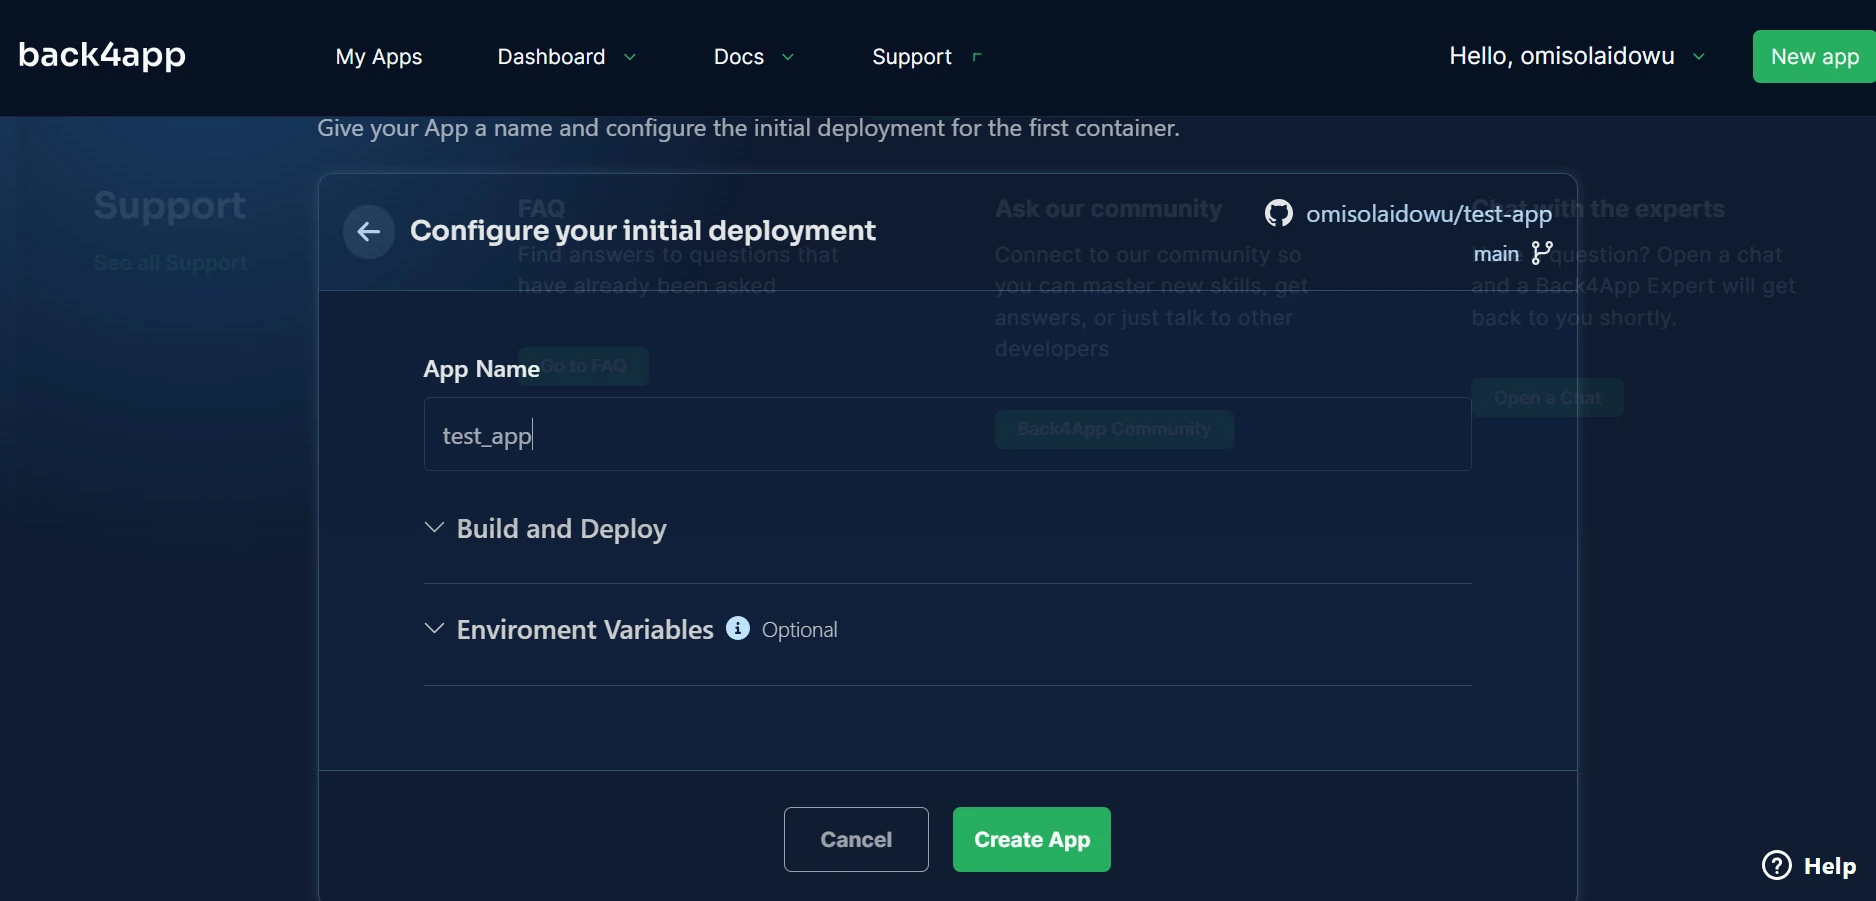
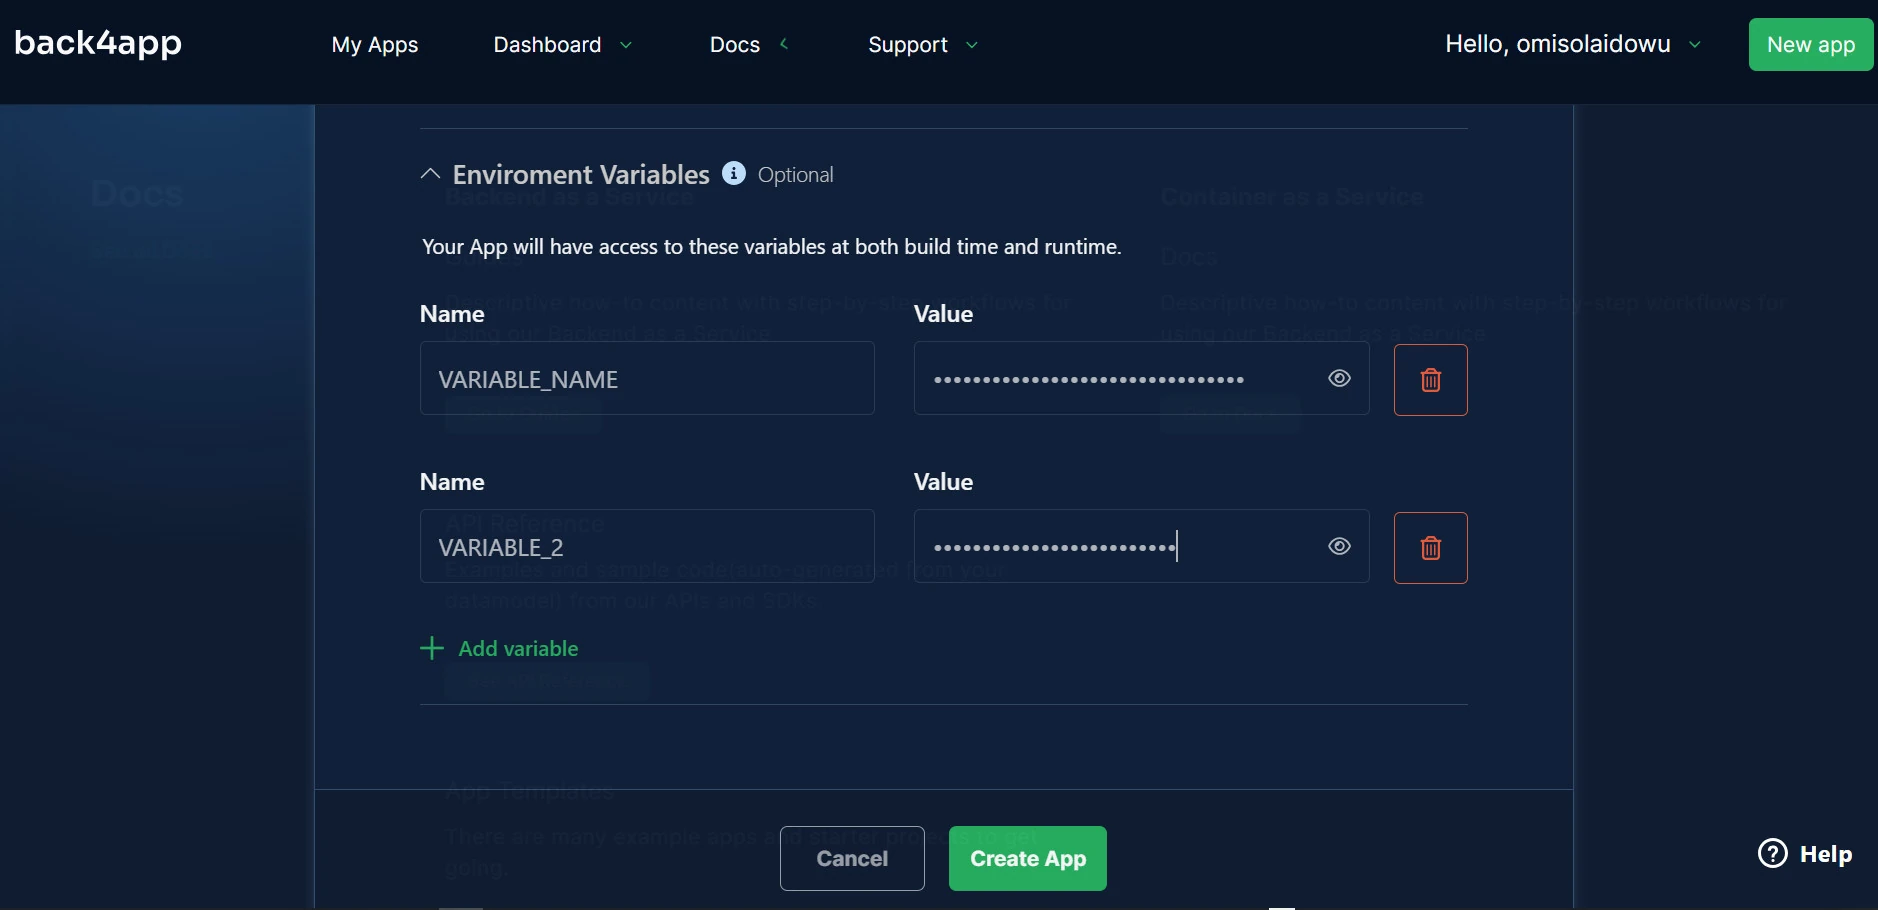
If your FastAPI application has secrets masked inside a .env file, click Environment Variables to enter your environment variables. Click Add variable and type your variable name using uppercase characters.
Ensure you use the same naming convention as the variables in your project’s .env file to avoid name errors.
This step encrypts and adds your variable values to your deployment. Finally, click Create App to deploy your FastAPI application.
The deployment instance for the FastAPI application runs as shown below.
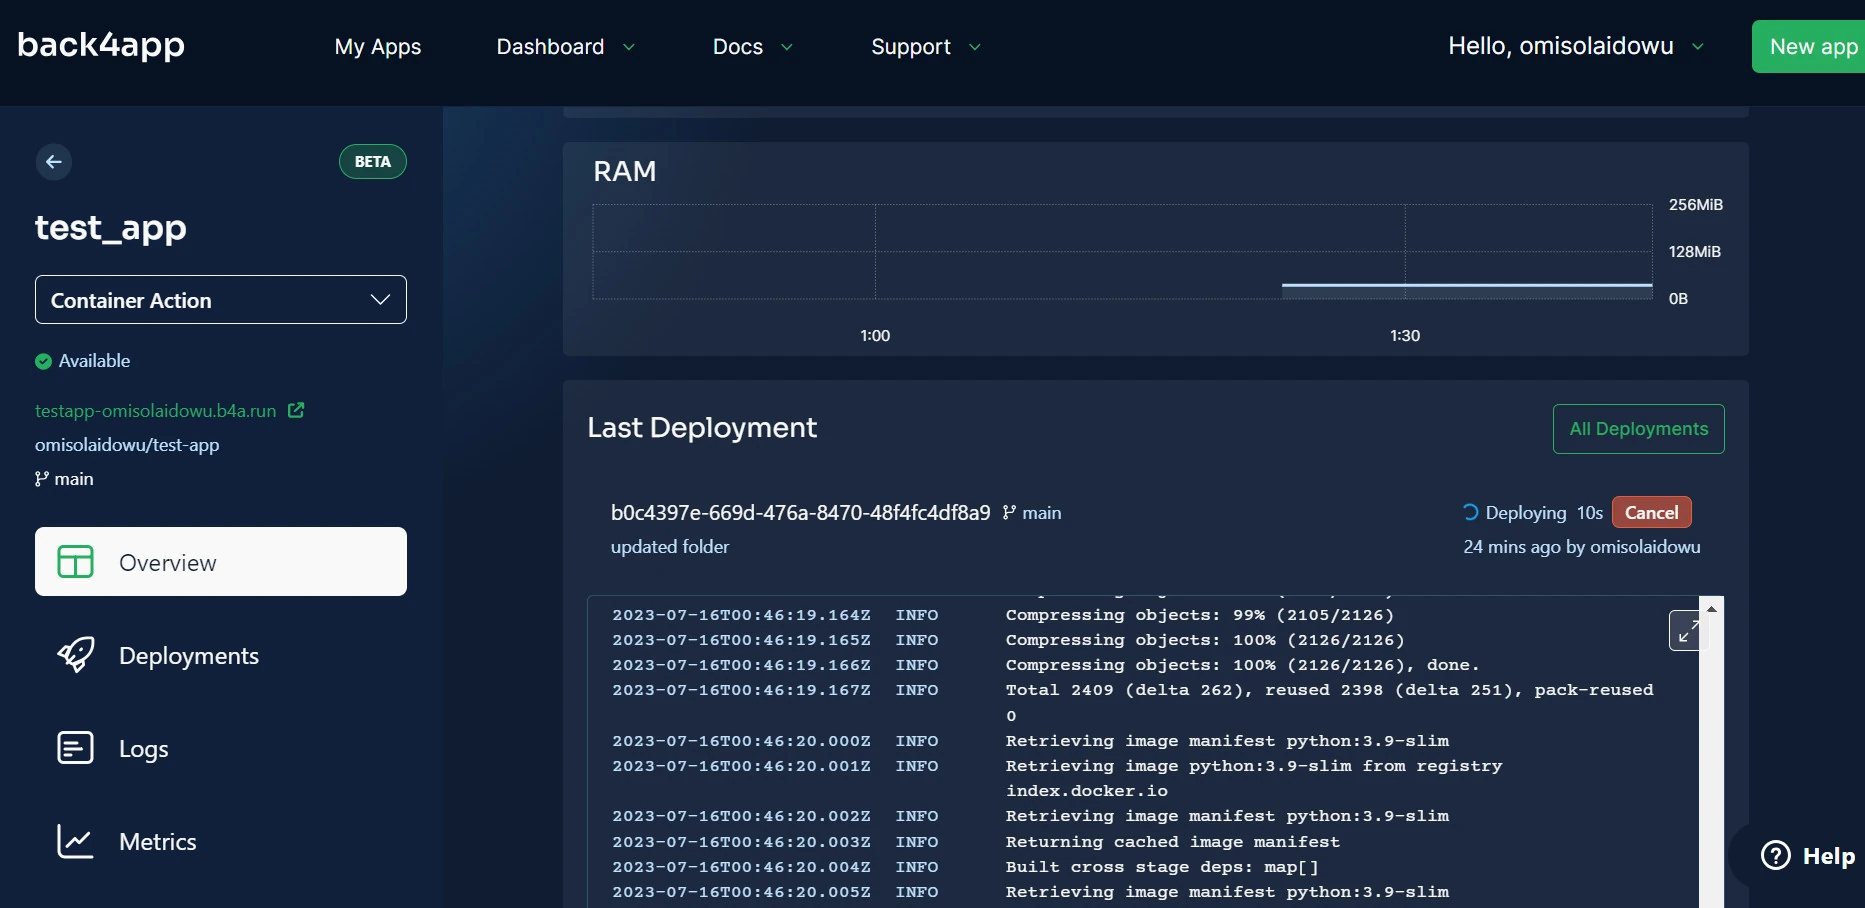
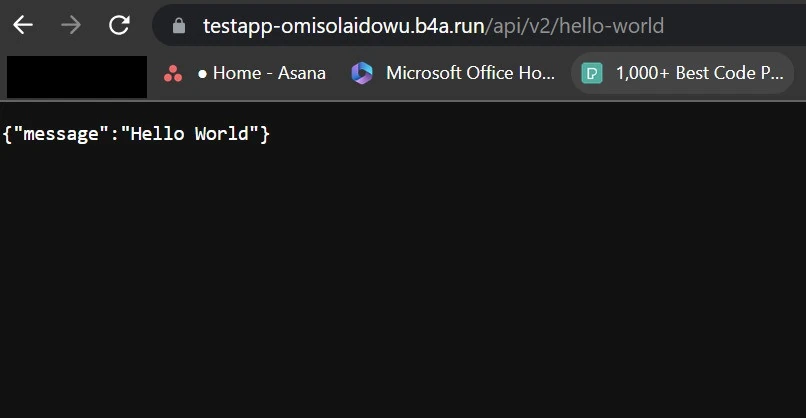
To view the live version of your application, click the URL on the left sidebar. Going to https://testapp-omisolaidowu.b4a.run/api/v2/hello-world, in this case, returns the expected response.
Conclusion
It’s one task to develop an application using Python’s FastAPI. But it’s another thing to deploy it seamlessly to serve clients.
In addition to aiding faster deployment, CaaS is less technical. While you’ve seen how to deploy a FastAPI application, that’s not all.
You might want to deploy the client-side application on a separate container instance and connect to the FastAPI endpoints using the generated URL as the base URL.
If you liked this article, please check our tutorial on How to deploy a Flask application.
What is FastAPI?
FastAPI is a high-performant web framework for developing RESTFul APIs with Python.
How to deploy a FastAPI application?
– Create a Docker image for your project using a Dockerfile.
– Push your Code to GitHub.
– Sign in to your Back4App account and create a new app.
– Connect your container instance with the GitHub repository containing the target project.
– Deploy your FastAPI application and view real-time deployment logs.


