Getting started with Heroku and NodeJS
Nowadays deploying web applications no longer requires setting up a server from scratch. Cloud platforms like Heroku allows us to deploy and set up web applications in a few steps.
In particular, in this tutorial, we will learn how to deploy a REST API on the Heroku platform. The API is developed using NodeJS. Heroku provides different methods for us to upload our projects onto the platform.
Depending on the use case, one method may be better than the other. With no particular preference, we will upload the API on GitHub and connect the repository to Heroku for deployment. All the process is split into the following steps:
- Set up a new application on Heroku
- Configure an add-on in the new application
- Set up the NodeJS REST API project
- Deploy the project
Contents
Prerequisites
- A Heroku account. Sign up here if you do not have one yet
- A GitHub account (join to GitHub here)
- Some knowledge about Git
- Some knowledge about NodeJS and RESTful APIs
Step 1: Setting up a new application on Heroku
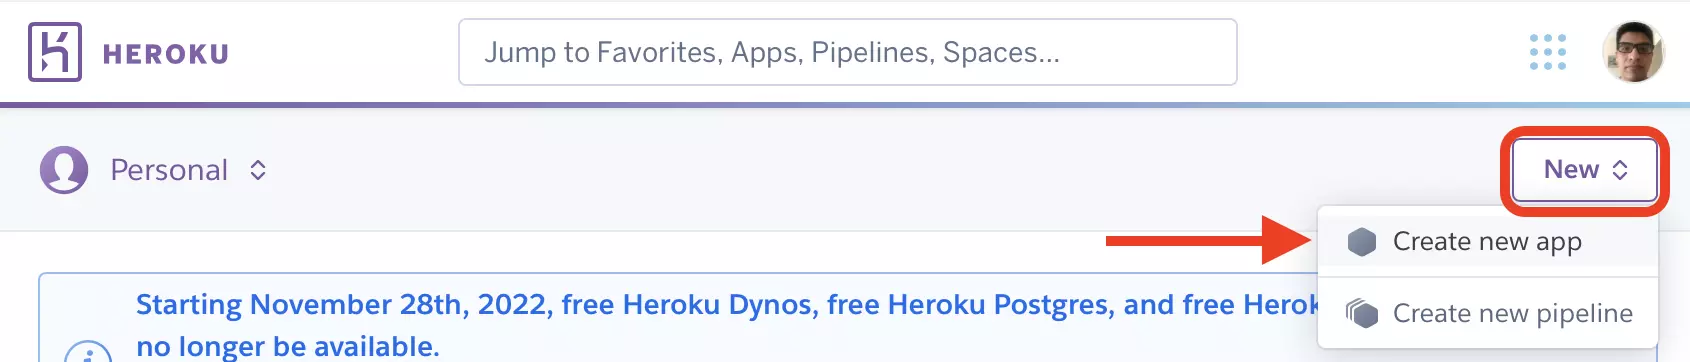
- Once you signed up on the Heroku cloud platform, go to your dashboard and click on new and then Create new app:
- On the next page, you provide a name for the app and the server location. Once this is complete, click on Create app:

After Heroku created the app, it redirects you to the app’s dashboard:
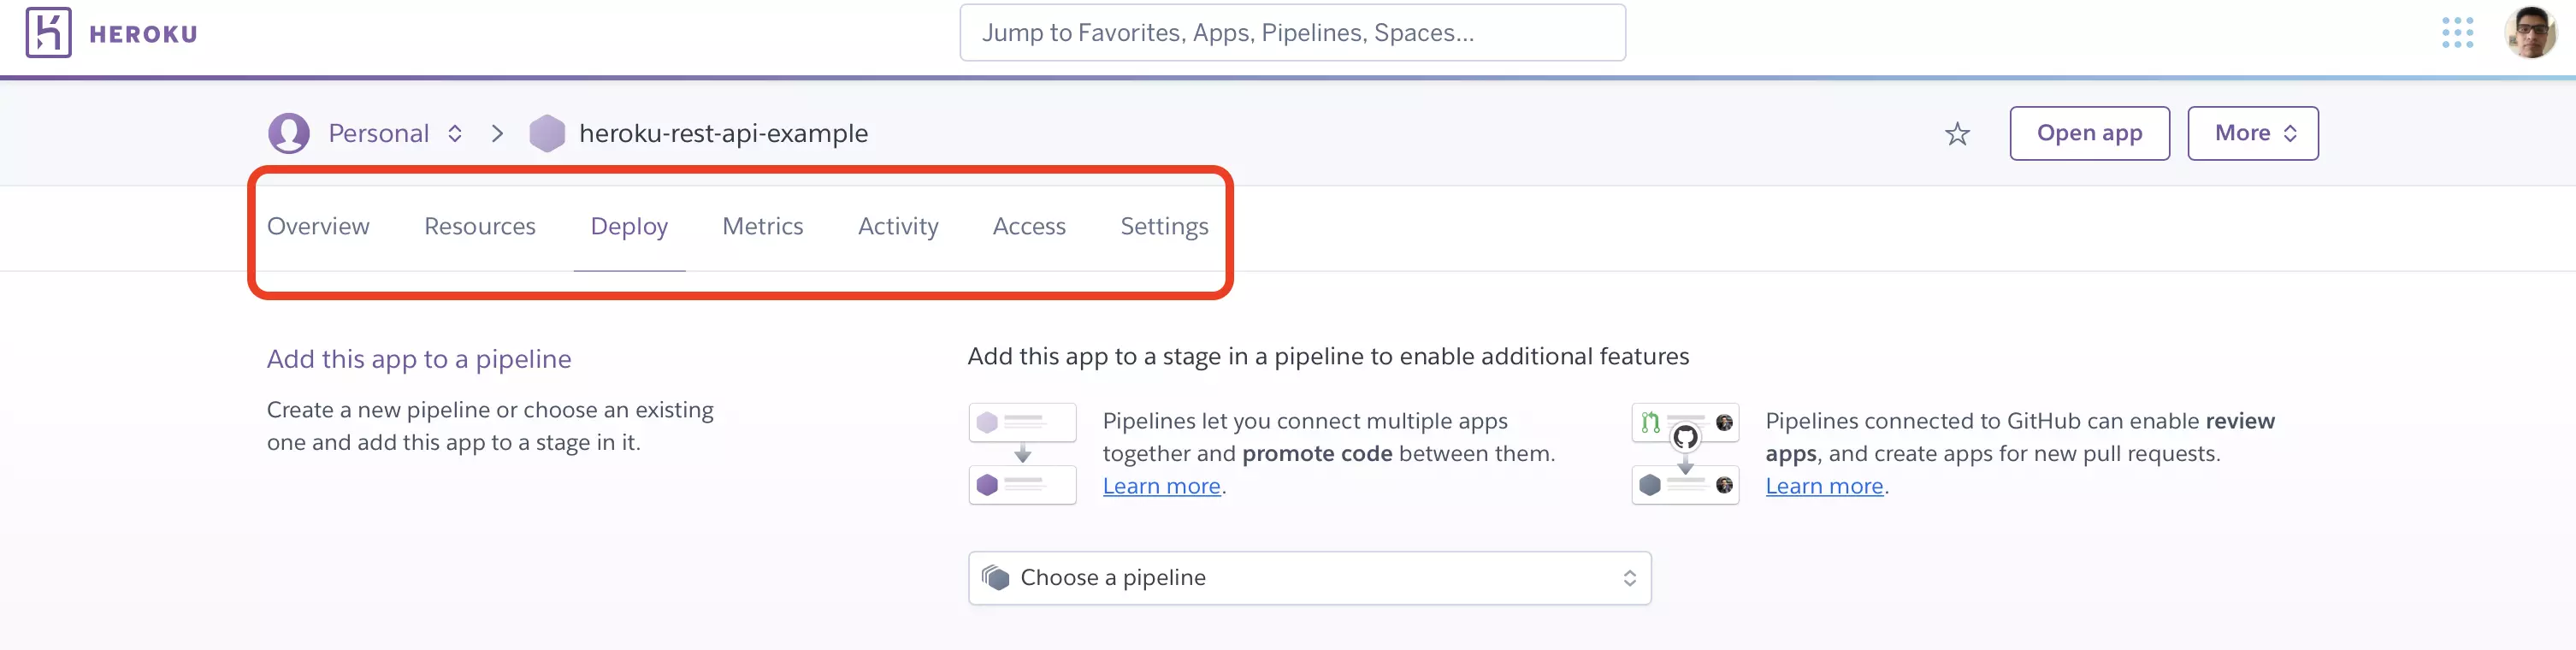
In this dashboard, we find the different options like configurations, resources, and deployment for the app.
Step 2: Configure an add-on in the new application
Before deploying our NodeJS app, we should first take a look at the Resources tab. This tab is where you can set up the different Add-ons the Heroku platform provides for your web application. These add-ons include Data storage, Databases, etc.
In particular, for a RESTful API having access to a database is important. Thus, in the Resources tab, we click on Find more add-ons and add a database for our NodeJS project:

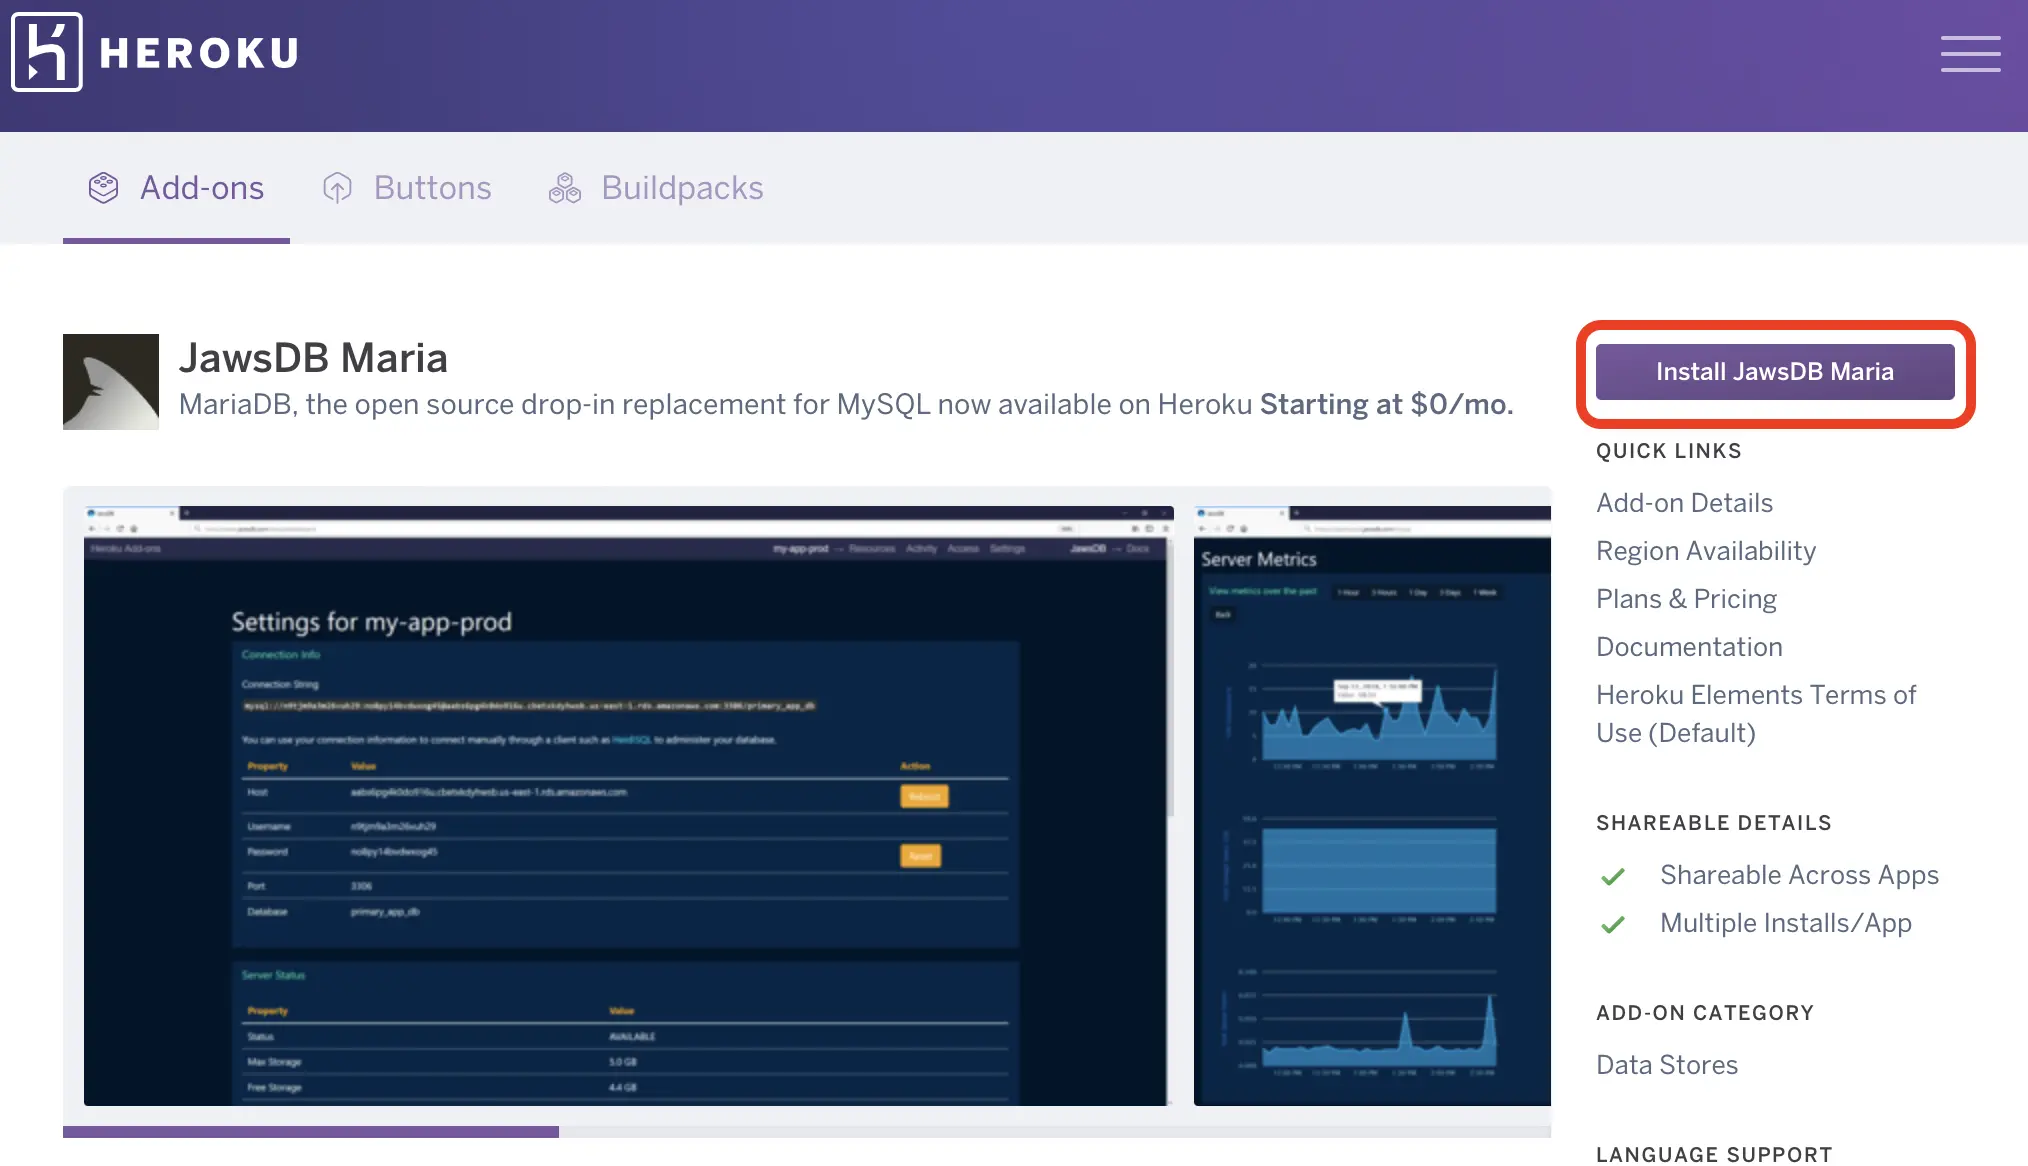
In a new window, you will find a list of all the available add-ons. For this tutorial, we will use the JawsDB Maria Database. Find this add-on and click on it, and in the follow-up, you click on Install JawsDB Maria:
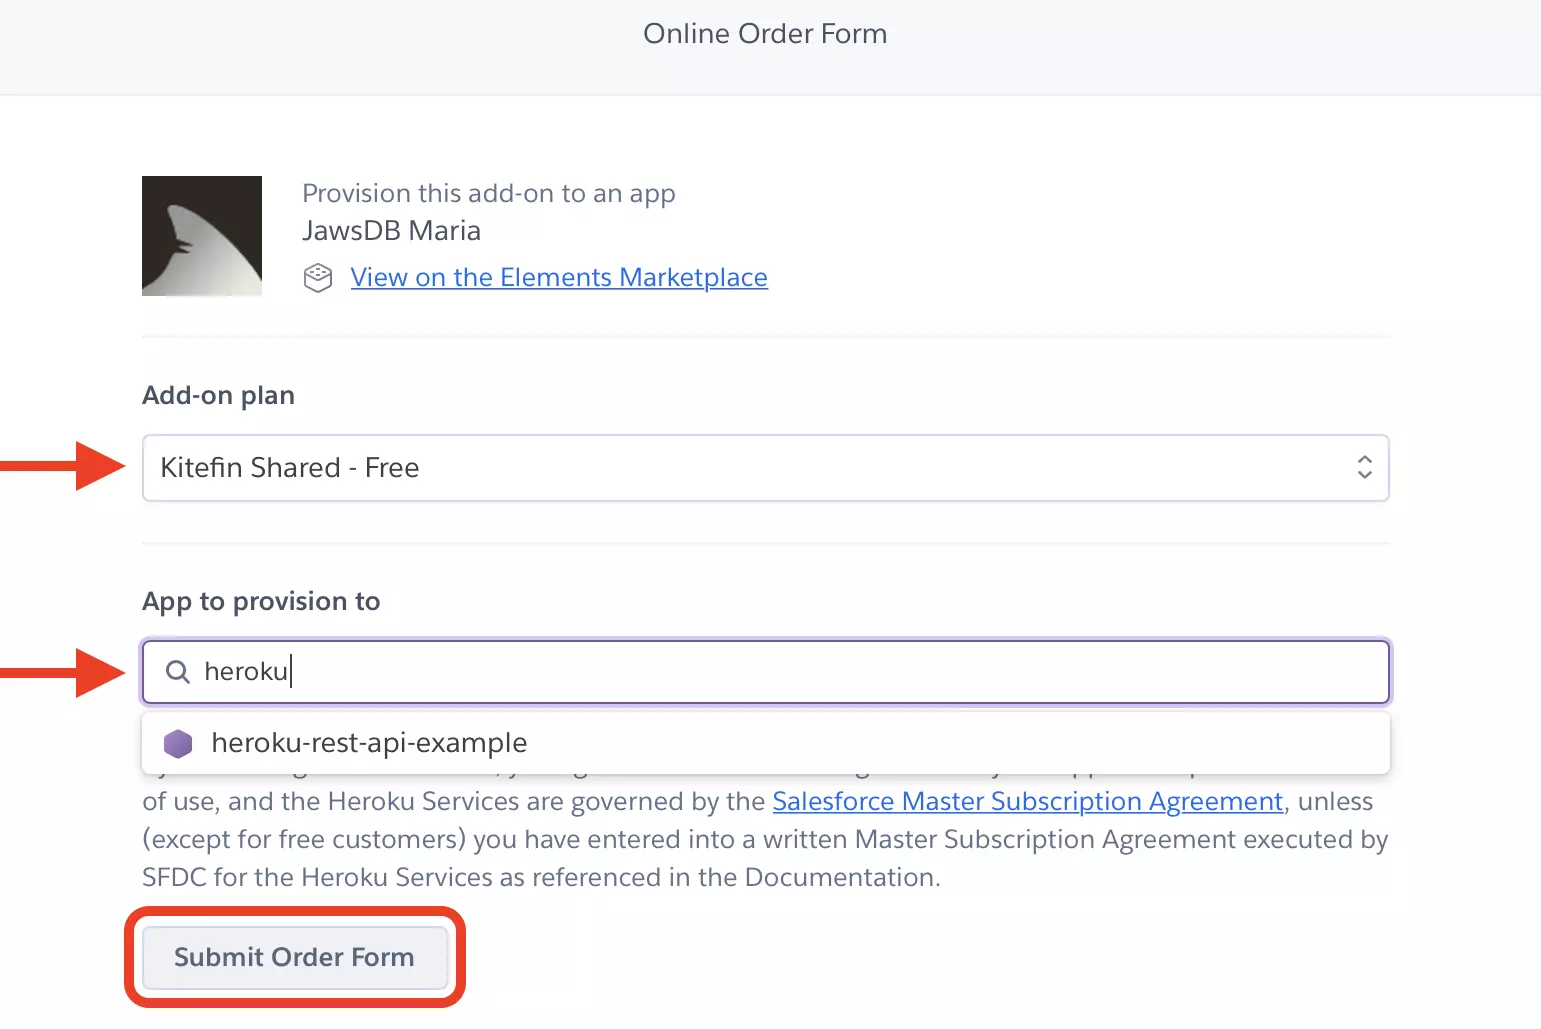
Next, you should select a plan and enter the app’s name which the add-on should be integrated. Click on the Submit Order Form to finish the process:
With this, in the resource tab, you should find a shortcut to the JawsDB Maria add-on. By clicking on the add-on, you can find its settings, credentials, and keys if available.
For databases, we are interested in the host, credentials, port, and database name. All this information can be found in the resources tab of the Heroku app.
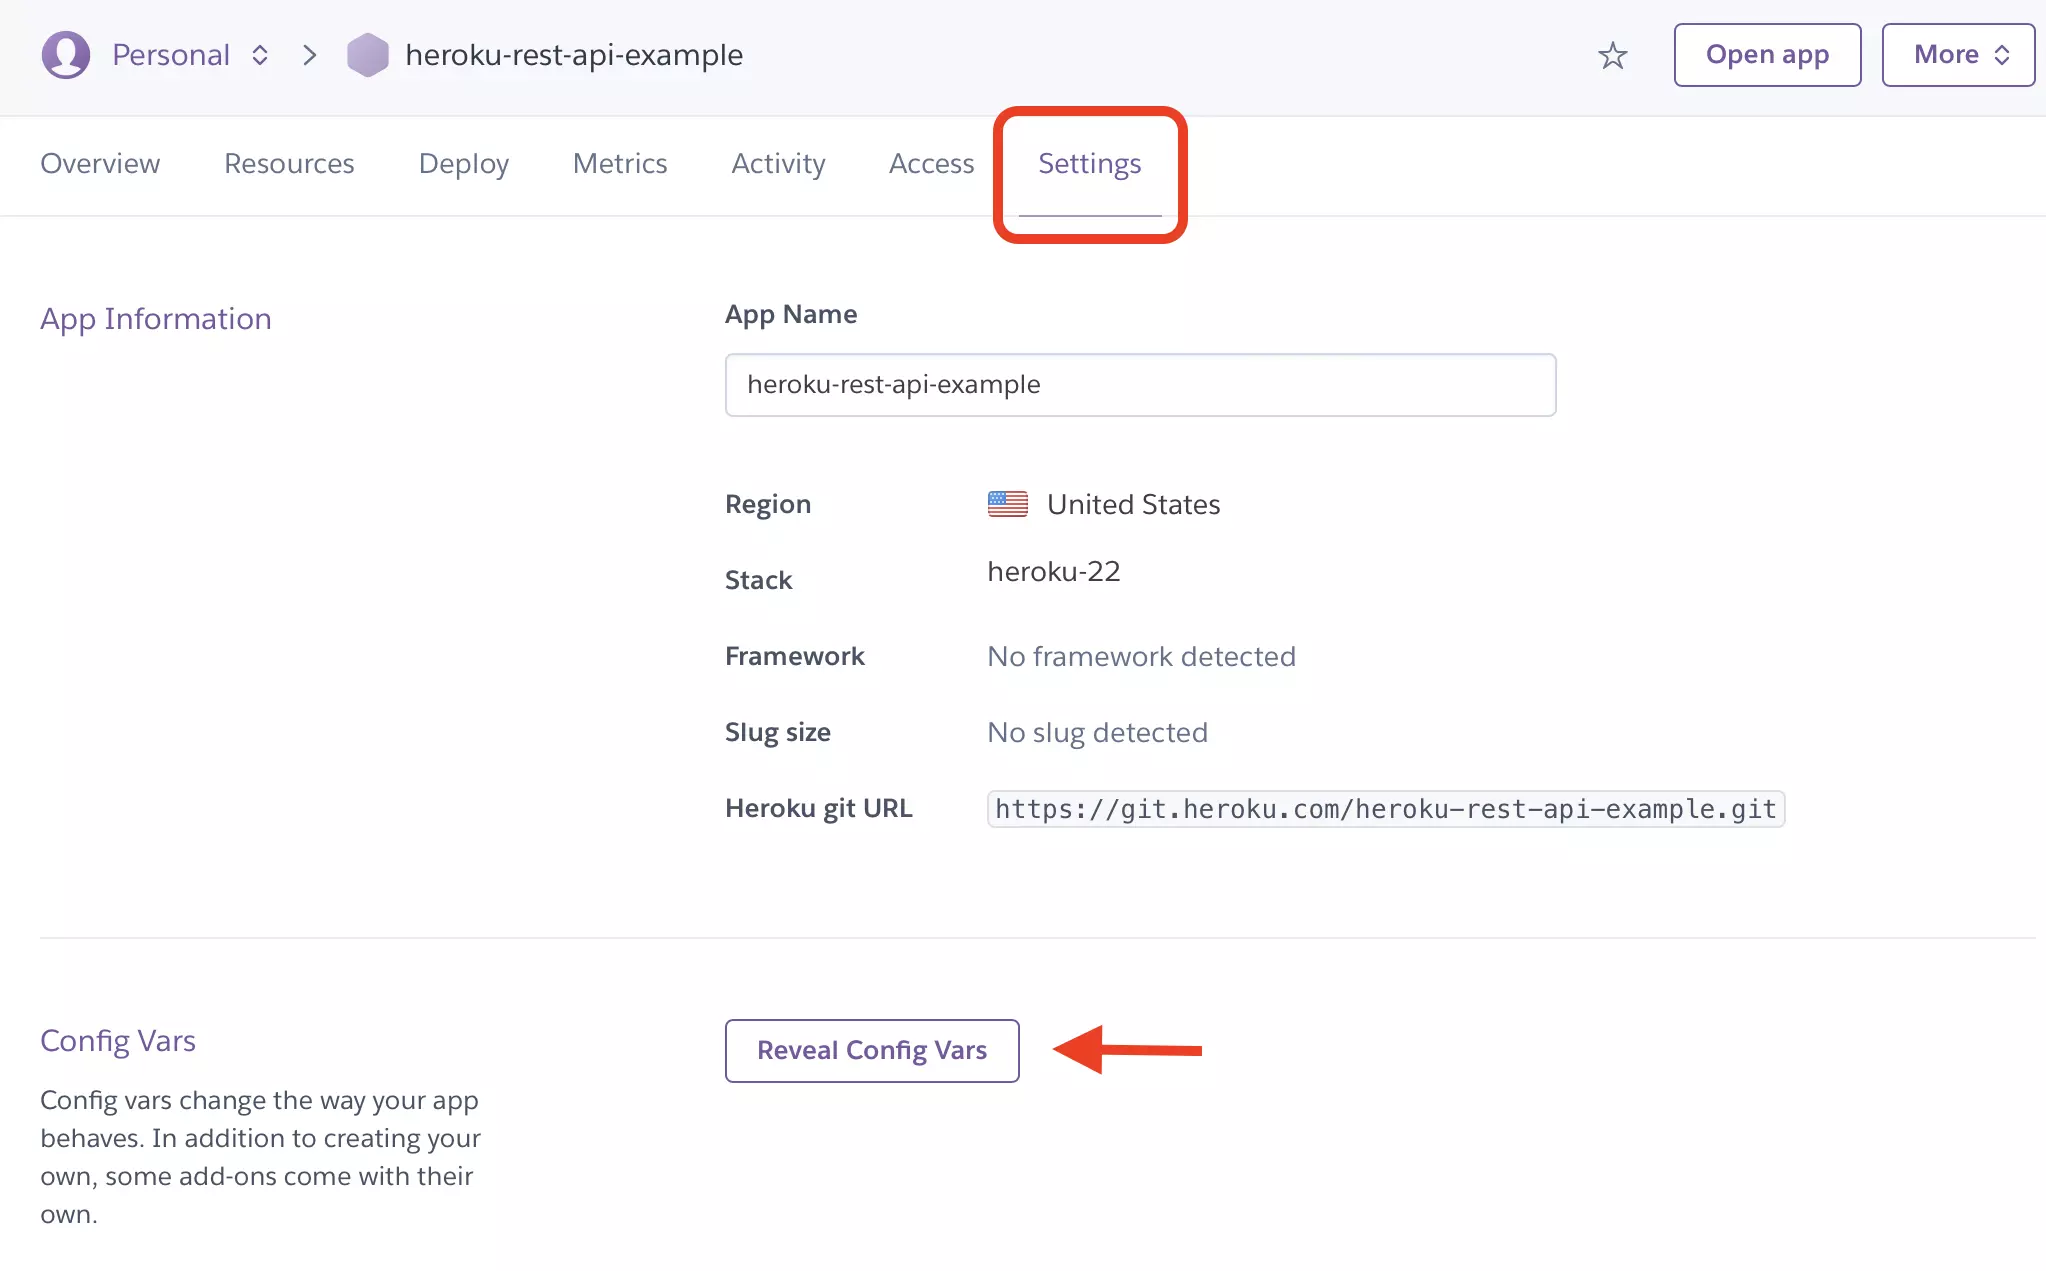
Furthermore, in order for the app to access this database, you should set up this information in the environment section. In the app’s dashboard go to the settings section and click on the Reveal Config Vars button:
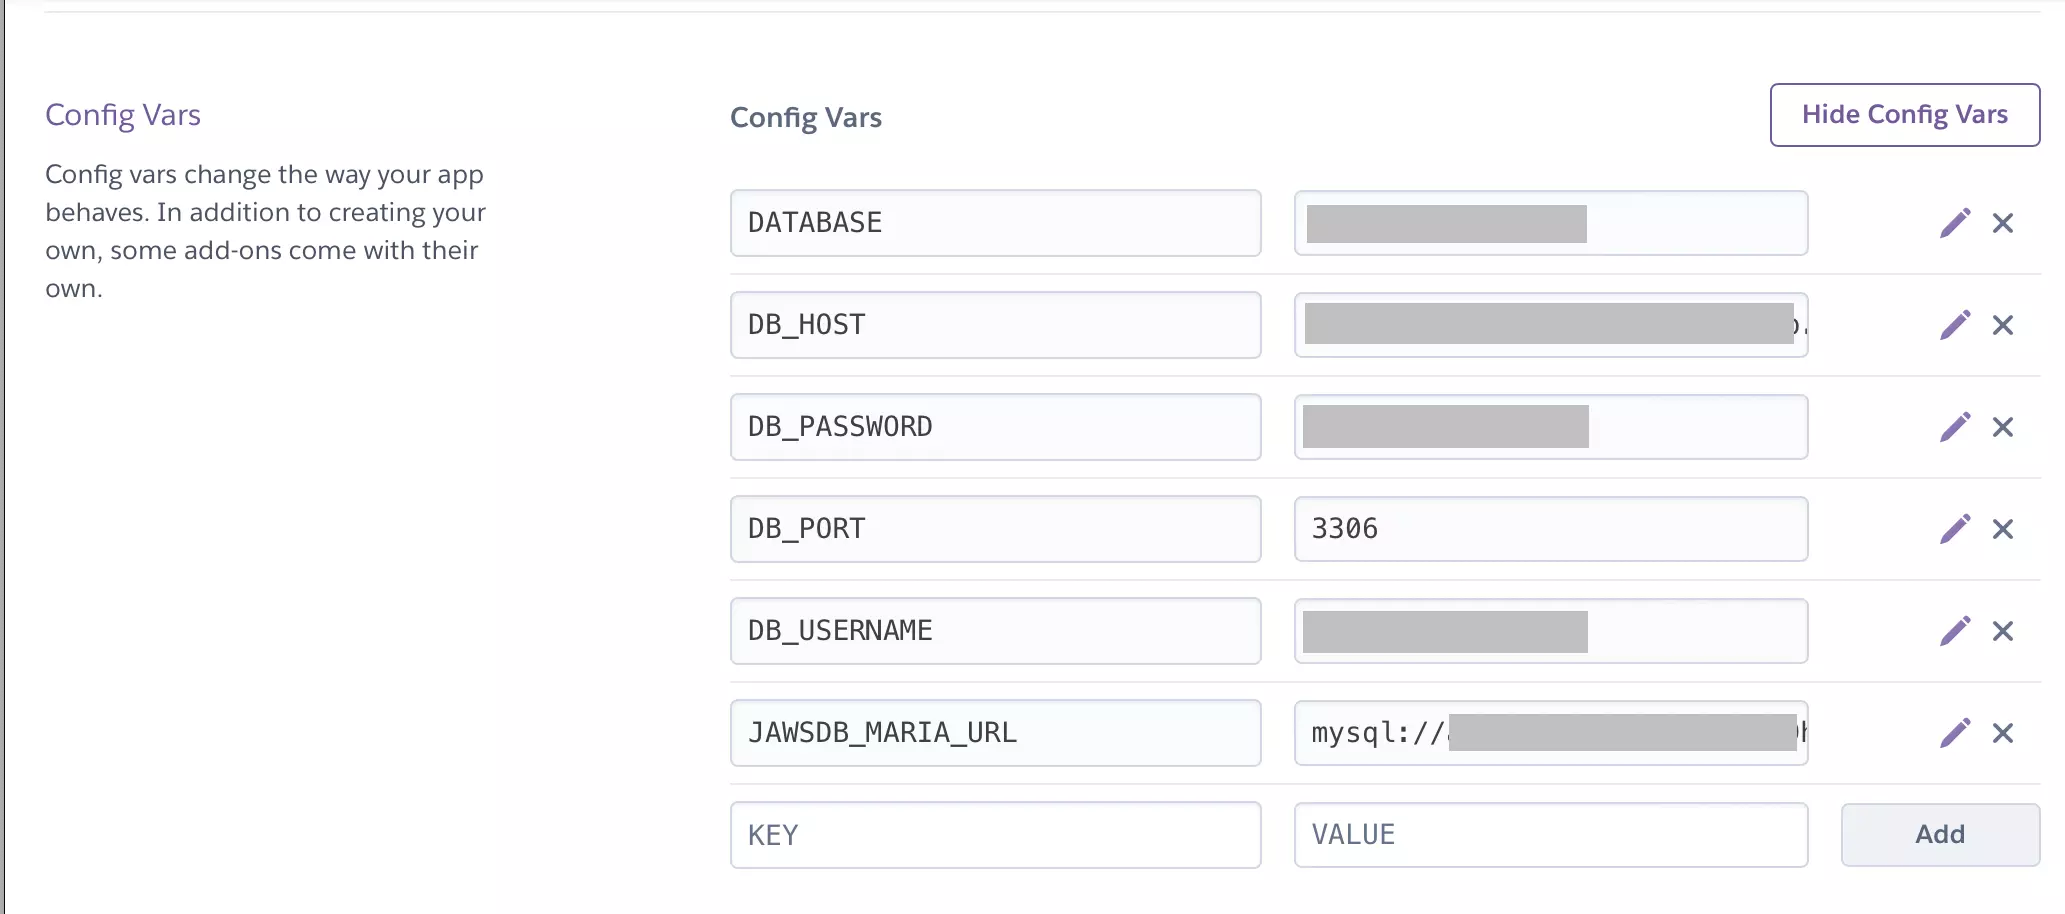
Add the necessary variables that you may need in your .env file. For instance, in order to configure the JawsDB Maria Database, we would add the following fields (The values are retrieved from the add-on information)
With this, we have all set up in the Heroku cloud. The next step is to set up the NodeJS project.
Step 3: Set up the NodeJS REST API project
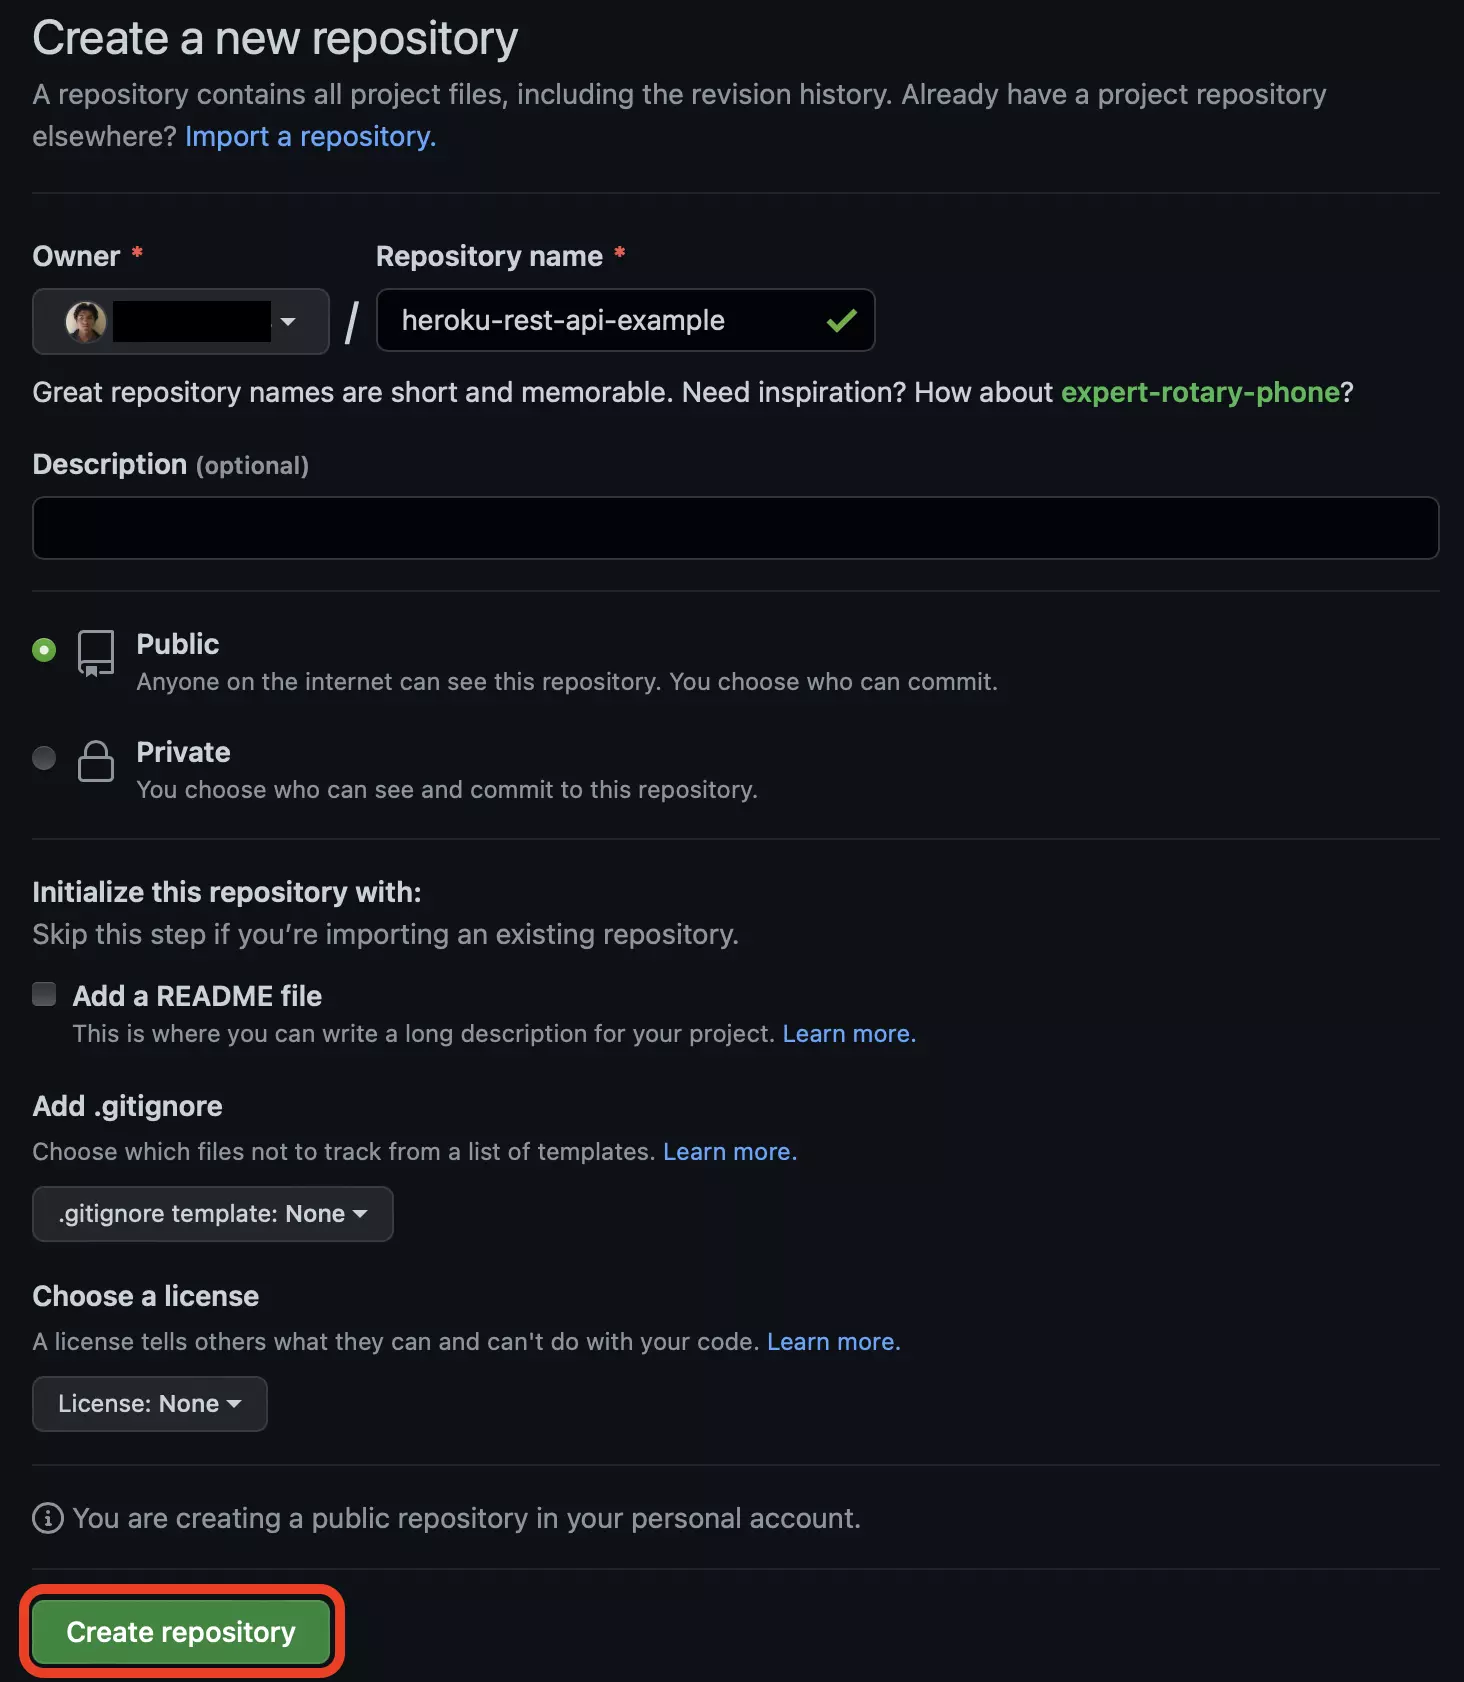
In order to upload the NodeJS project onto Heroku, we have to upload it onto GitHub first. Once you sign in to your GitHub account, add a new repository. Enter a name for the repository, set the visibility, and click on Create repository:
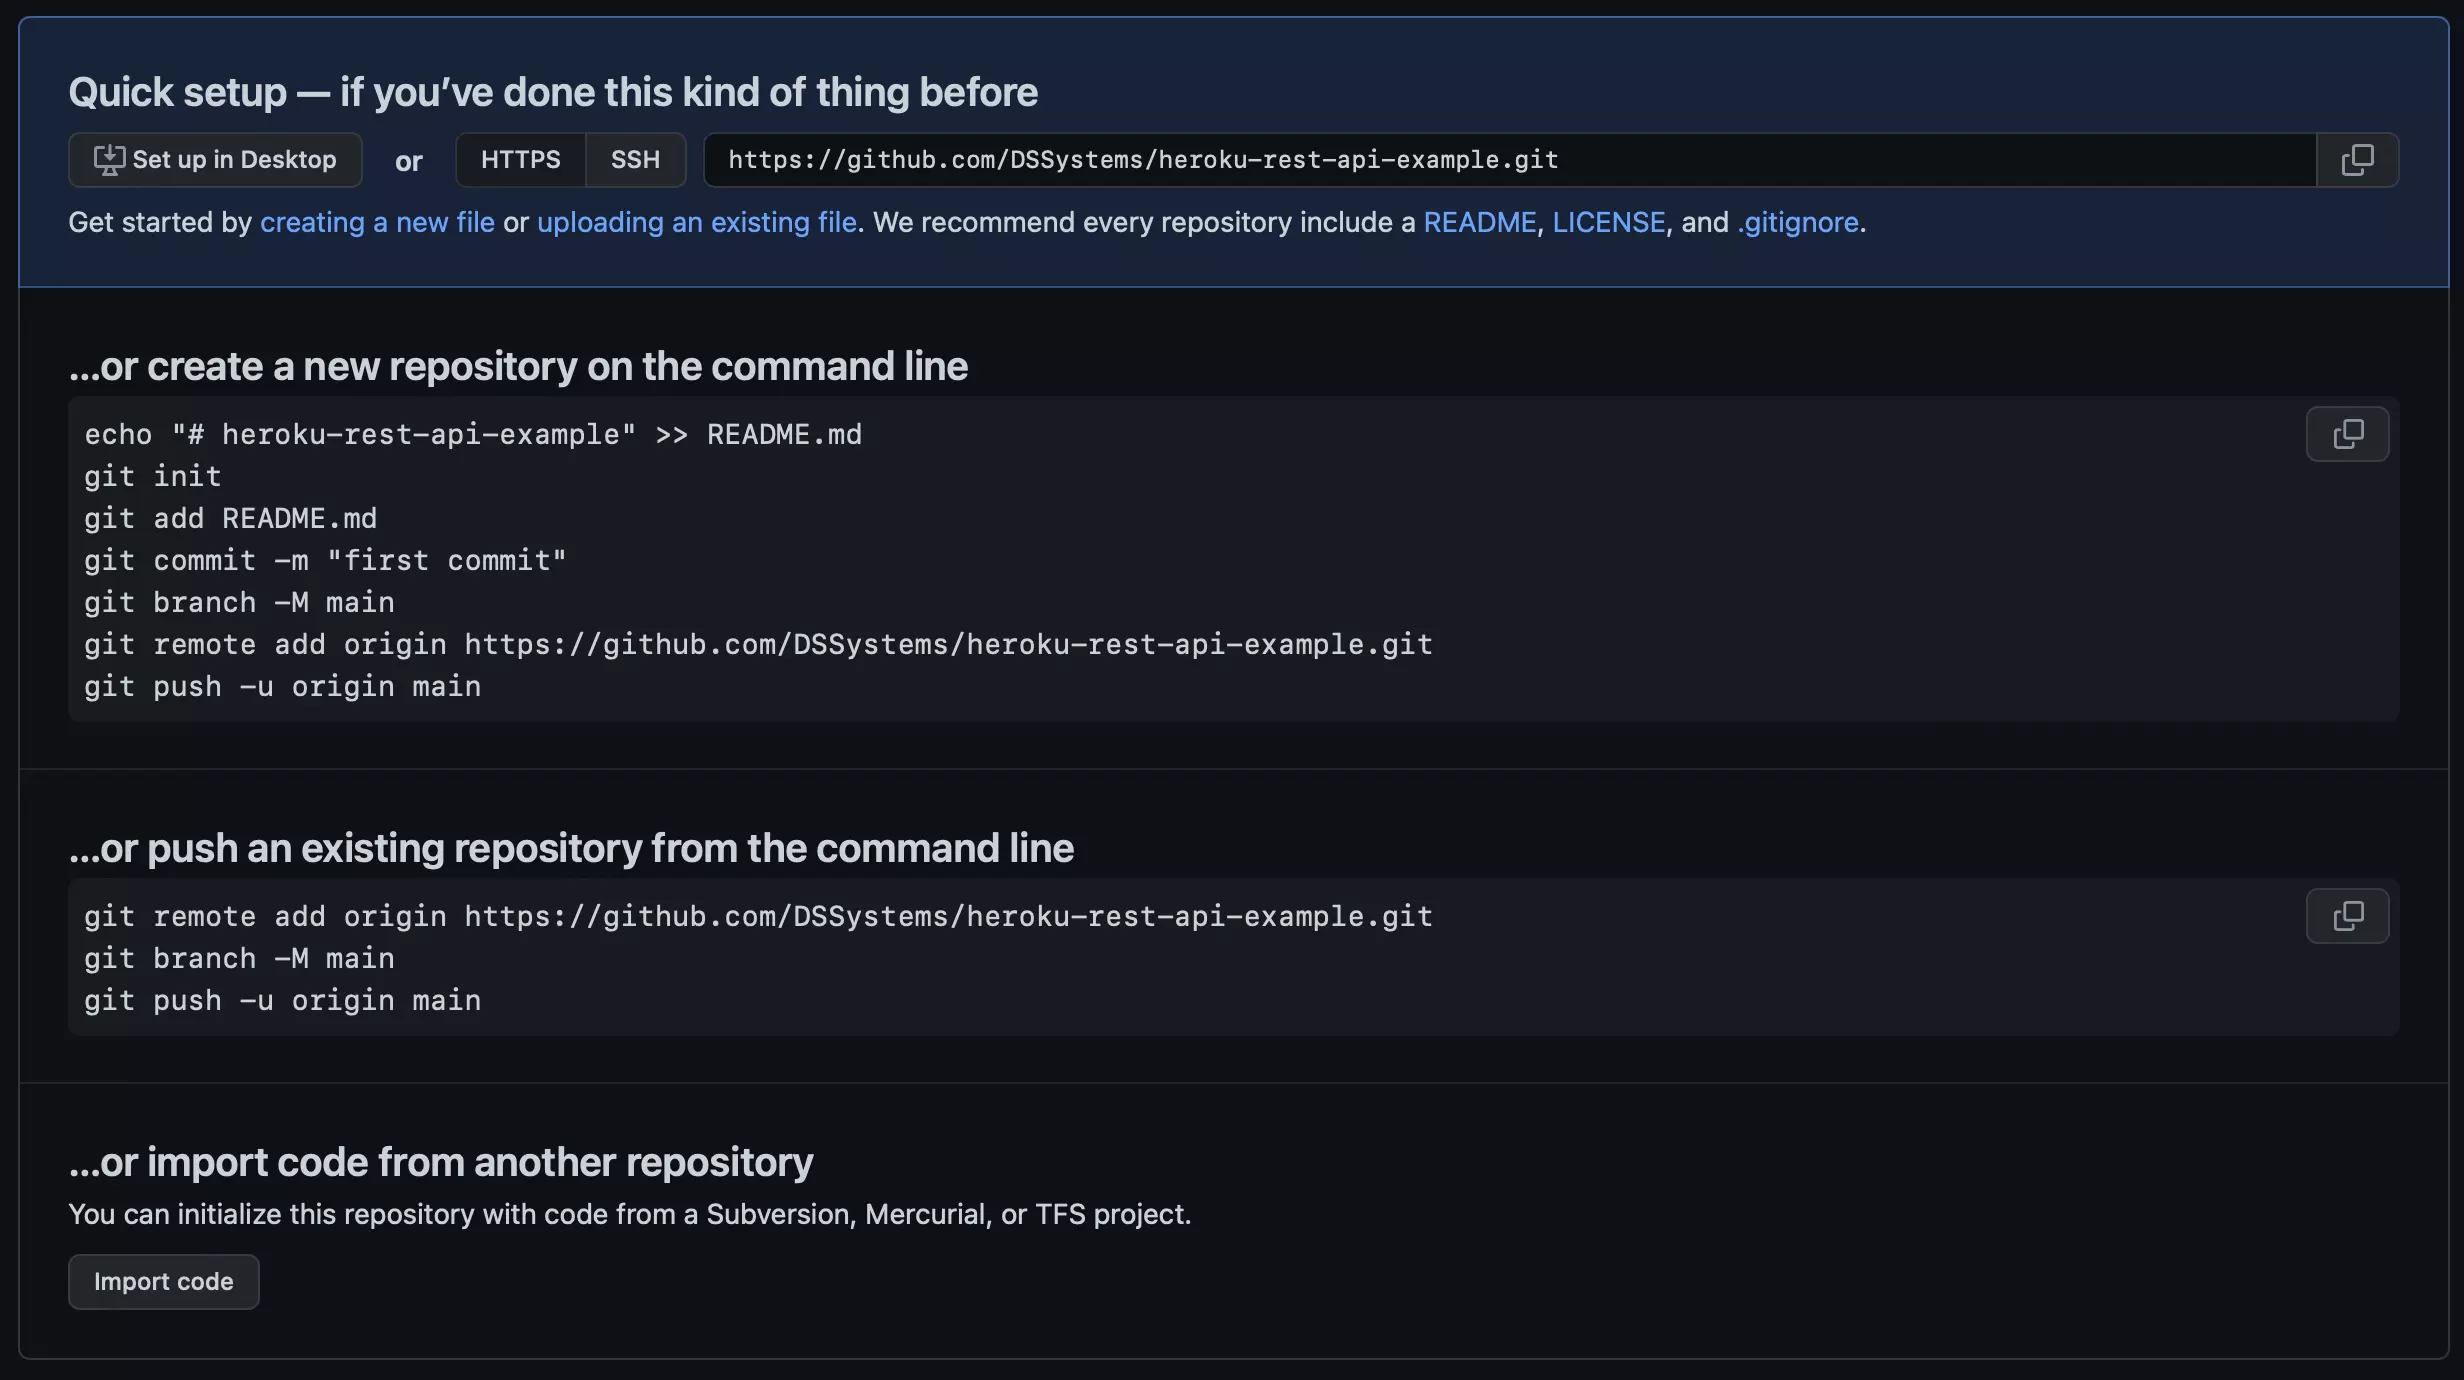
When the creation process is complete, GitHub redirects you to the repository main page, which should look like https://github.com/MY_GITHUB_ACCOUNT/heroku-rest-api-example. On this page, you will find the necessary instructions to create a local repository and push it onto GitHub:
You are ready to deploy it on the Heroku Cloud.
We are providing a simple NodeJS project that you can clone and use as an example for this tutorial. You can find it at https://github.com/DSSystems/heroku-rest-api-example.
Step 4: Deploy the project
With the NodeJS project repository complete, now you are able to deploy it. To accomplish this, go to Heroku and select the app you created in Step 1. In the dashboard, go to the Deploy tab and select GitHub as the deployment method:
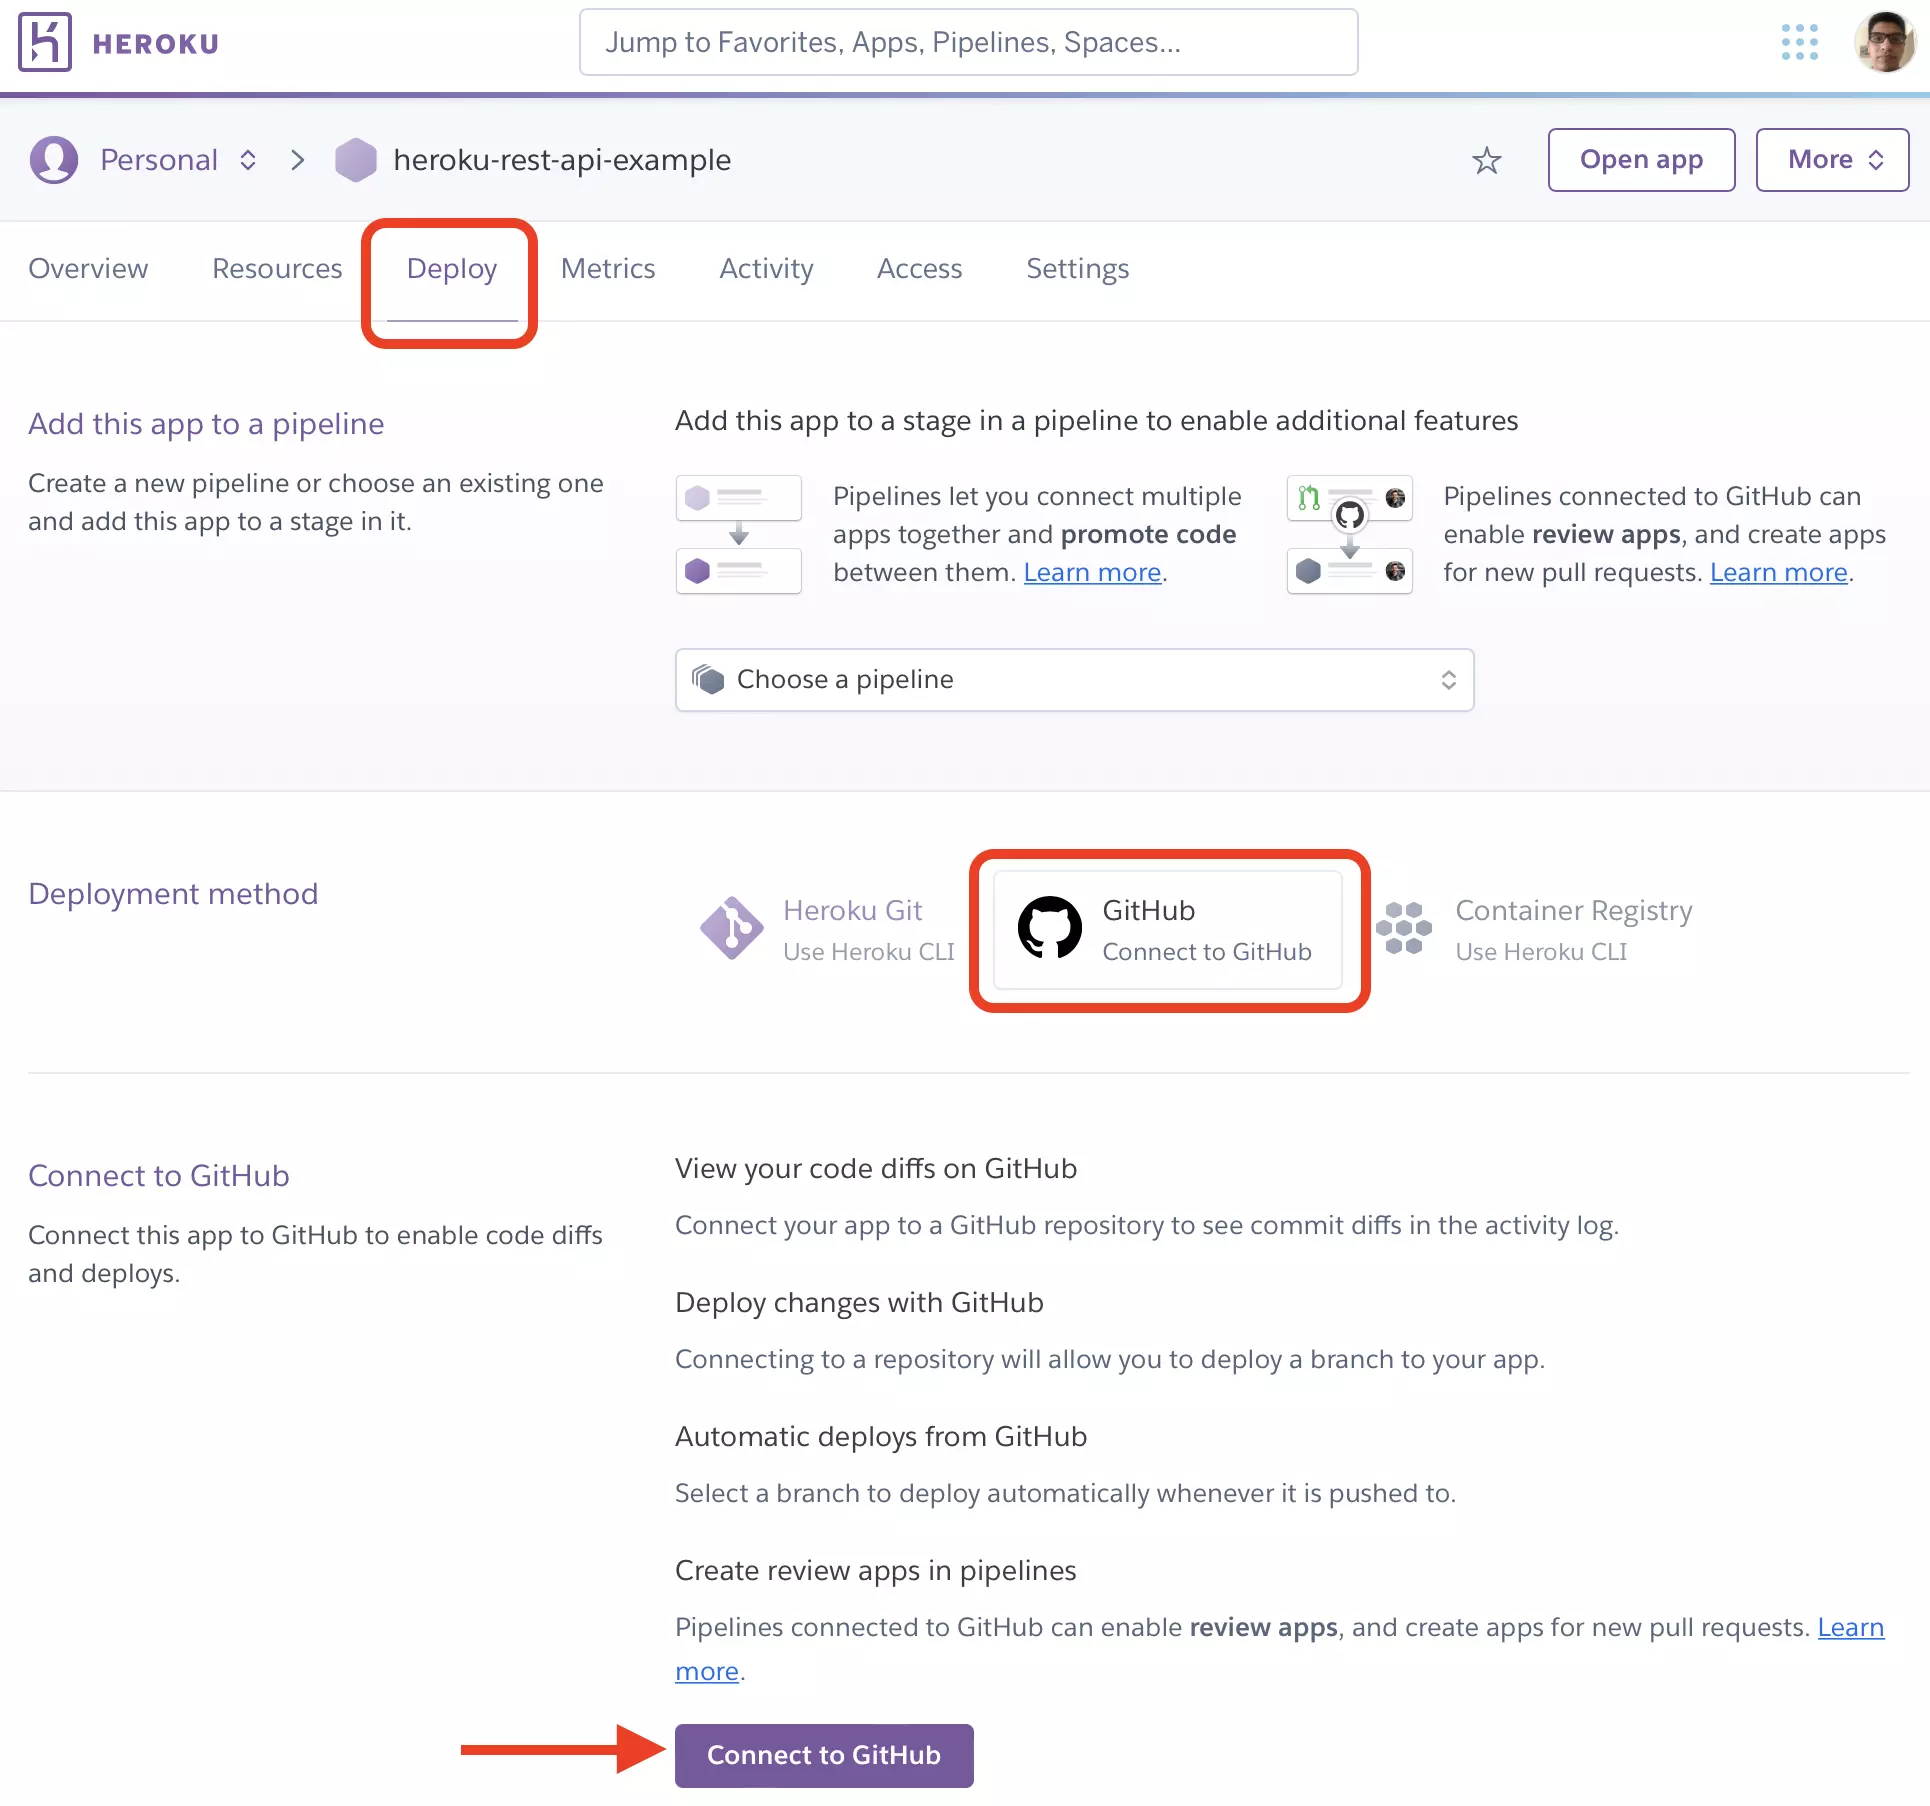
Below should appear an option to connect the Heroku app to GitHub. Click on the button and provide the corresponding permissions.
When this is complete, you can select the repository of the project we want to deploy, enter the name of the repository, click on Search and then click on Connect. If the connection succeeded, you should see the following options:
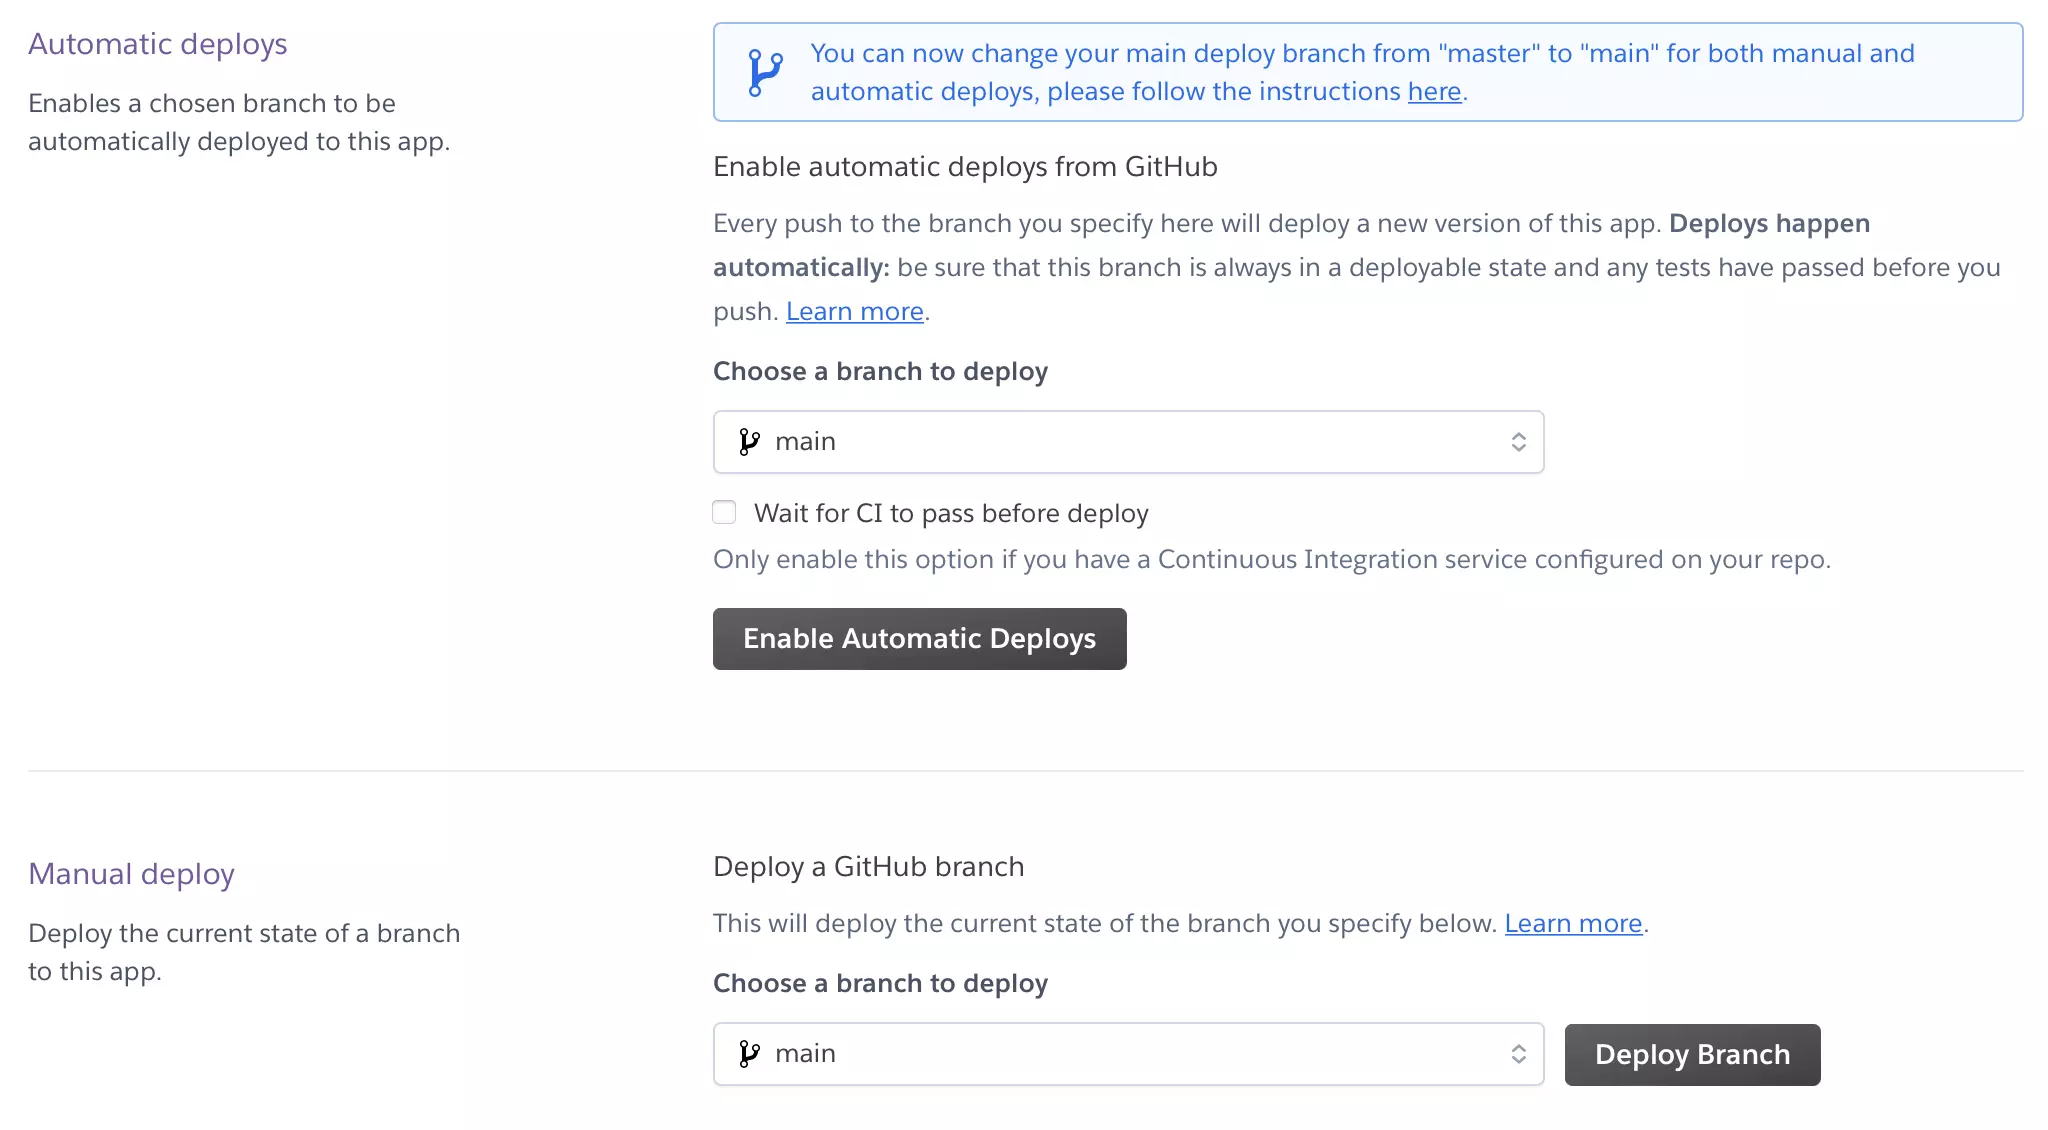
Depending on your use case, you can choose Automatic deploys or Manual deploys method, click on one of them to start the deployment.
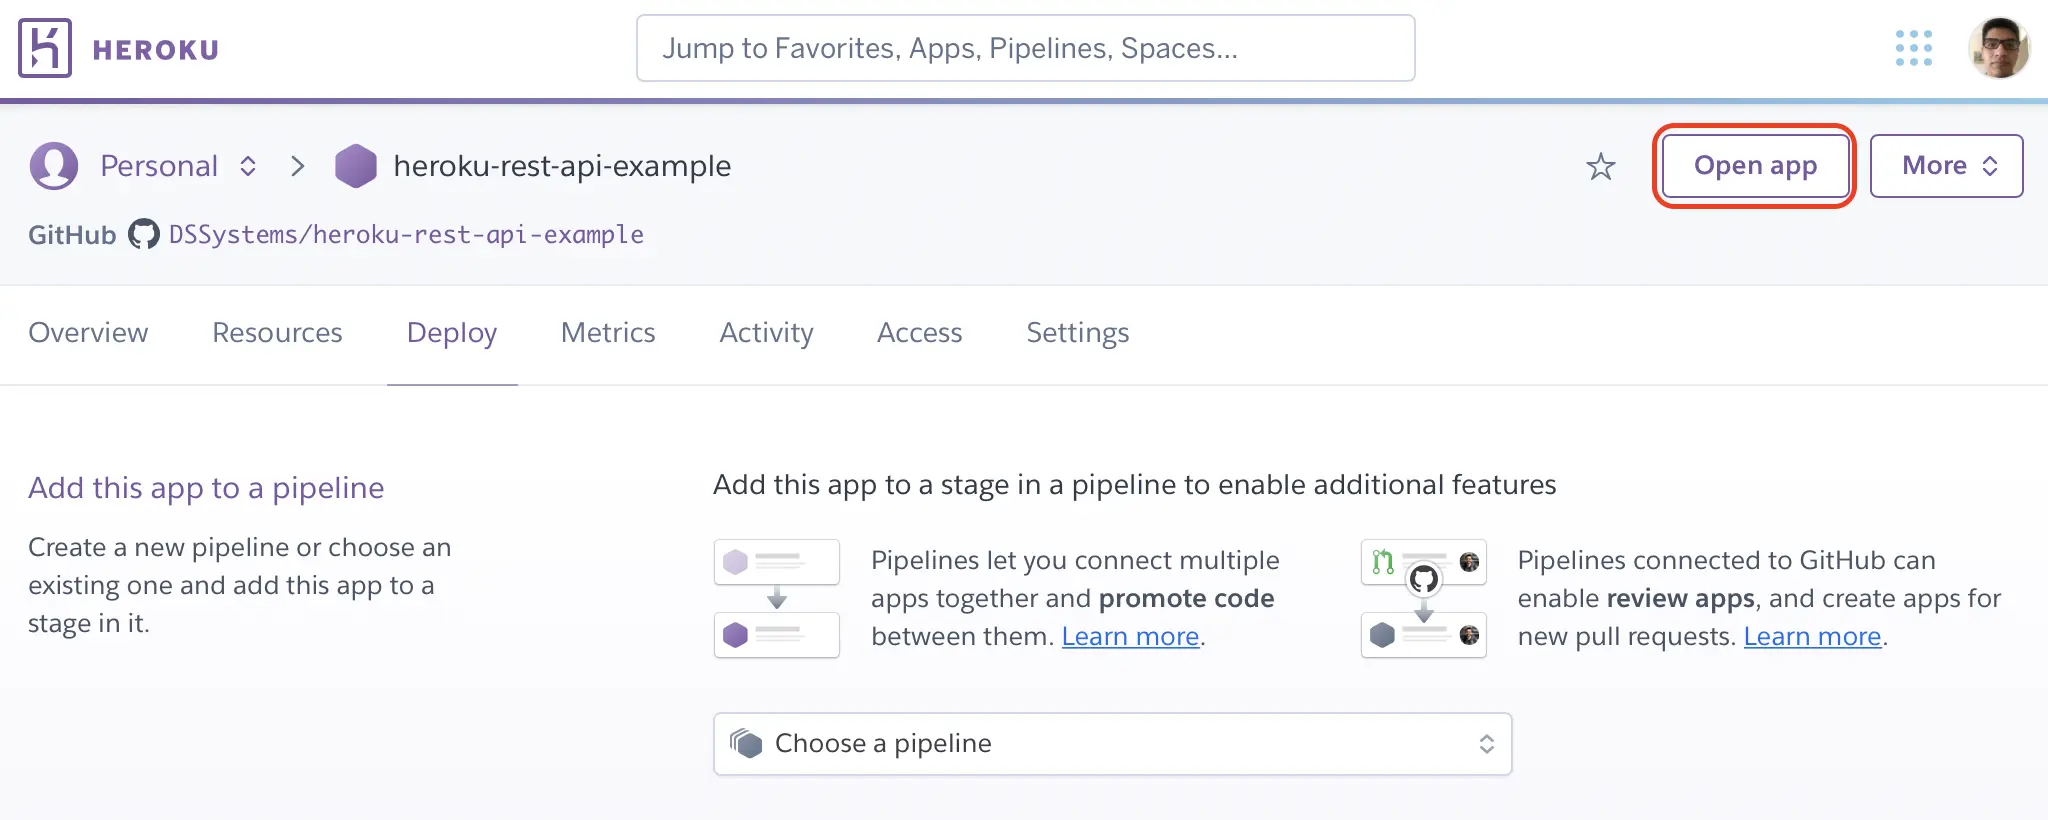
With this, the deployment is complete. Now, in the top right corner, below your profile, you can click the Open app button to start using your NodeJS API:
Conclusions
In this tutorial, you learned how to deploy a NodeJS API on the Heroku platform. This procedure is not limited to NodeJS projects, Heroku offers many other applications written not only using NodeJS. Here you can find all the resources and products you can deploy on the Heroku platform.
To know more how to create and deploy a NodeJS application, please read the article Steps to Deploy a NodeJS app.
FAQ
What is Heroku?
PaaS platform from Salesforce to build, run, and operate apps.
How to deploy a NodeJS app using Heroku?
– Set up a new application on Heroku
– Configure an add-on in the new application
– Set up the NodeJS REST API project
– Deploy the project

