How to build a GraphQL API?
In recent years GraphQL has become a popular choice for building complex APIs. This is because it eliminates some of the limitations of traditional REST APIs and makes your API more flexible and efficient.
In this article, we’ll discuss GraphQL, its advantages and disadvantages, key GraphQL terminology, and compare GraphQL APIs to REST APIs. On top of that, we’ll teach you how to build your own GraphQL API on Back4app and connect to it from a Next.js frontend.
Contents
- 1 GraphQL Introduction
- 2 GraphQL vs REST
- 3 Common GraphQL Terms
- 4 How does GraphQL work?
- 5 What are the advantages of GraphQL?
- 6 What are the disadvantages of GraphQL?
- 7 How to build a GraphQL API?
- 8 Conclusion
- 9 FAQ
- 10 What is GraphQL?
- 11 What are the main differences between REST and GraphQL?
- 12 What are commonly used GraphQL terms?
- 13 How to build a GraphQL API?
GraphQL Introduction
GraphQL is a query language and a server-side runtime for developing application programming interfaces (APIs). With GraphQL, clients can specify exactly what data they need from the API, rather than relying on the backend to provide a fixed set of data.
GraphQL is a modern and efficient approach to building fast and flexible APIs. It has a built-in type system and is based on a strongly-typed schema that defines the data available through the API. It supports real-time updates and subscriptions and allows developers to fetch data from multiple data sources. Besides that, it makes it easy to evolve APIs by giving developers the ability to deprecate fields without impacting existing queries or mutations.
GraphQL can be used from the start of a project or integrated into an existing API. Some companies also combine it with REST and then migrate step by step.
It was developed internally by Facebook in 2012 and later open-sourced in 2015. GraphQL has gained popularity with the rise of single-page applications (SPAs) and mobile apps. Since its release, it has been adopted by many tech giants such as GitHub, Airbnb, Pinterest, and Shopify.
GraphQL vs REST
GraphQL and REST are two popular approaches for building web APIs.
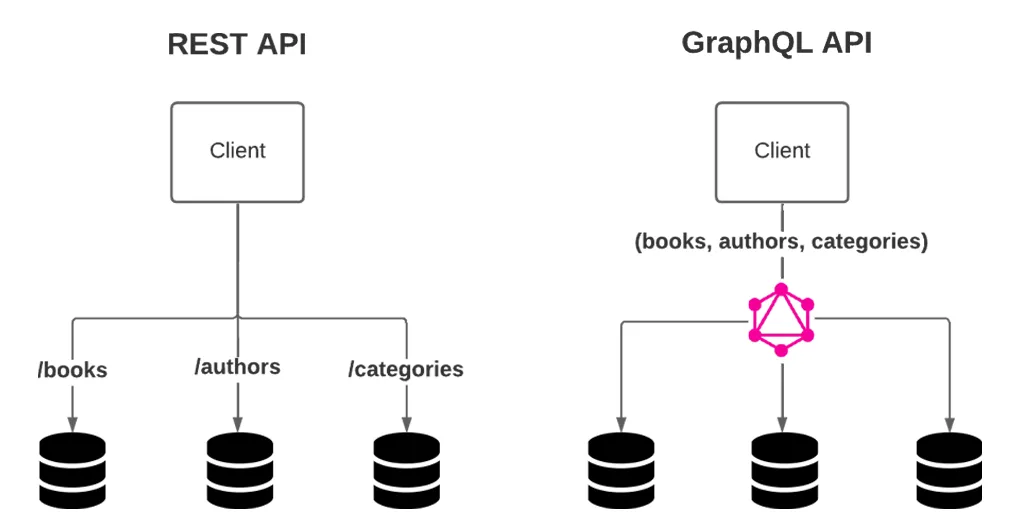
REST (Representational State Transfer) is a software architectural style that describes the structure of the web. It was introduced in 2000 and has been the de facto standard for building web APIs for over a decade. It utilizes HTTP methods such as GET, POST, PUT, PATCH, and DELETE to manipulate the resources. Each resource is hosted at its endpoint (check out the image below) and every time we request a resource the entire “dataset” is returned.
This architecture introduced two problems. The first one is under-fetching (getting too little data) and over-fetching (getting too much data). Moreover, REST APIs don’t allow us to subscribe to data changes.
This is where GraphQL comes in. GraphQL has a single endpoint and allows us to query data from multiple data sources in a single request. It allows us to define exactly what data we need. Additionally, GraphQL allows us to subscribe to data changes without polling the server. It makes our API more predictable and self-documented.
In the end, the choice between GraphQL and REST will depend on the specific requirements of your project. Even though GraphQL is great it might introduce too much complexity for simple projects.
Common GraphQL Terms
Let’s look at some of the common terms you may encounter when working with GraphQL.
Type
GraphQL has a type system and is strongly typed. It comes with some built-in scalar types such as Int, Float, String, and Boolean, but also allows you to define custom types.
A custom type can be defined like this:
type User {
    username: String!
    password: String!
    friends: [User!]
}
Schema
A schema is a description of the data available through a GraphQL API. It includes the object types, their fields and associated data types, relationships, queries, mutations, and more. A schema is usually defined using the Schema Definition Language (SDL).
Resolver
A resolver is a function that retrieves the data for a particular field in a GraphQL query. Resolver functions are responsible for fetching the data from a data source and returning it in the expected format.
Query
A query is a read-only request for data from a GraphQL API. You can think of queries as GET requests in REST API.
Example:
query GetUser {
    user(id: "Wfx8o2AZrE") {
        id
        username
        fullName
    }
}
This query returns the list of all the users.
Mutation
A mutation is a request for manipulating the data in a GraphQL API. You can think of mutations as POST/PUT/PATCH/DELETE requests in REST API. Mutations can also define what data is returned.
Example:
mutation CreateAuthor {
  createAuthor(input: {fields: {firstName: "William", lastName: "Shakespeare"}}) {
    author {
      id
      createdAt
    }
  }
}
This mutation creates a new author and returns the author’s id and createdAt.
Subscription
A subscription is a request for real-time updates from a GraphQL API. Subscriptions allow clients to receive updates as soon as they are available, without polling the server.
Example:
subscription OnPostCreate($postID: ID!) {
  userAdded(postID: $postID) {
    id
    user
    content
  }
}
This subscription is called when a new post is created.
How does GraphQL work?
To implement a GraphQL API you’ll have to perform the following steps:
- Describe your data using a schema
- Connect resolvers to data sources
- Write queries and mutations
- Get predictable results
By using Back4app or a similar service most of this work will be abstracted away. As you create the database models Back4app will automatically generate the GraphQL schema and documentation. More on this in the practical part of the tutorial.
What are the advantages of GraphQL?
GraphQL is easy to learn, users can aggregate data from multiple sources, and it’s a modern language for your API.
Schema
GraphQL API is based on a strongly typed schema. This allows you to detect type errors and bugs in compile time rather than in runtime. Moreover, GraphQL APIs are introspective, meaning that they can provide information about themselves without relying on any external documentation.
Flexible and Efficient Data Fetching
GraphQL APIs are extremely flexible since they allow clients to specify exactly what they need. This solves the problem of under-fetching and over-fetching and reduces the number of API requests. Fewer API requests result in better performance.
API Updates
With GraphQL, you can seamlessly integrate new fields and types without affecting current queries. Deprecated and outdated fields can also be concealed from tools. GraphQL APIs provide apps with constant access to new features and encourage the development of cleaner, more sustainable server code.
Single Source of Truth
A GraphQL schema sets a single source of truth in a GraphQL application. It offers an organization an easy way to manage its entire API.
GraphQL Extensions
GraphQL is backed by a huge community of GraphQL developers and comes with many open-source extensions. The extensions simplify some of the common API tasks such as pagination, caching, performance monitoring, and so on.
What are the disadvantages of GraphQL?
Complexity
GraphQL shifts much of the work of a data query to the server side, making the backends more complex. On top of that, the query language and schema definitions might require more upfront planning and maintenance.
Learning curve
GraphQL has a steeper learning curve than REST. Additionally, GraphQL developers are usually more expensive and harder to find than REST developers.
Lacking Standardization
One of the main criticisms of GraphQL is the lack of standardization in its implementation. REST APIs have a well-established set of principles and best practices while GraphQL documentation only provides some general tips on how to implement stuff. This can lead to inconsistencies and confusion in how GraphQL APIs are designed and used.
Security
The great thing about GraphQL is that the clients can request exactly what they need, but on the other hand, that could be a potential security risk. It’s important to properly validate and sanitize user input to prevent malicious queries from being executed.
How to build a GraphQL API?
This section of the article looks at how to create a GraphQL API with Back4app and connect to it from a Next.js frontend.
Prerequisites
- Experience with JavaScript ES6
- Experience with React and Next.js
- Basic understanding of GraphQL
What is Back4app?
Back4app is an exceptional Backend as a Service (BaaS) solution that operates on top of open-source software. The platform provides a wide range of features that allow users for easier and quicker development of web and mobile applications. It allows businesses to focus on their business logic without having to worry about the backend or the underlying infrastructure.
Back4app comes with an easy-to-use dashboard that is packed with features, and a command-line interface (CLI). It also provides Software Development Kits (SDKs) for various popular tools such as Node.js, Flutter, React Native, Android, Angular, iOS, and more.
Back4app follows a straightforward pricing model that can meet the needs of any app. They also offer a free plan (no credit card required) that is great for testing and prototyping.
Want to learn more about Back4app? Check out Why use Back4app?
Project Introduction
We will be building a simple web TODO application. The app is going to be composed of two parts: the backend and the frontend. The backend will be powered by a GraphQL API and deployed on Back4app. The frontend on the other hand will be written in TypeScript using the Next.js framework. To connect the frontend to the backend we’ll use the Apollo Client.
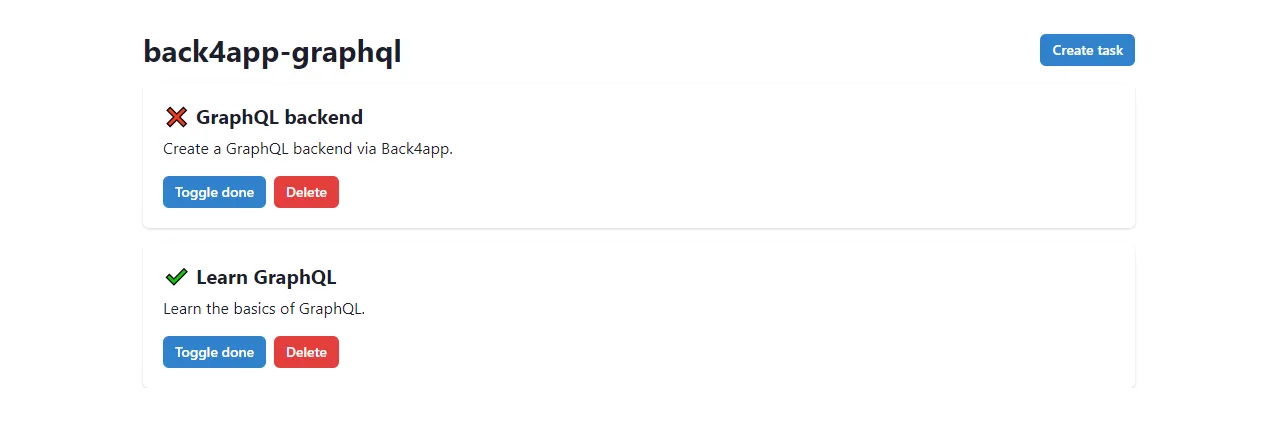
The final application will look like this:
Backend
Create Back4app App
To proceed with the following steps, you will need to have a Back4app account. If you already have one, please log in. Otherwise, feel free to sign up for a free account.
In order to use Back4app, the initial step is to create an app. Once you have logged into your dashboard, you will be able to view a list of your current apps. To create a new app, click on “Build a new app”.
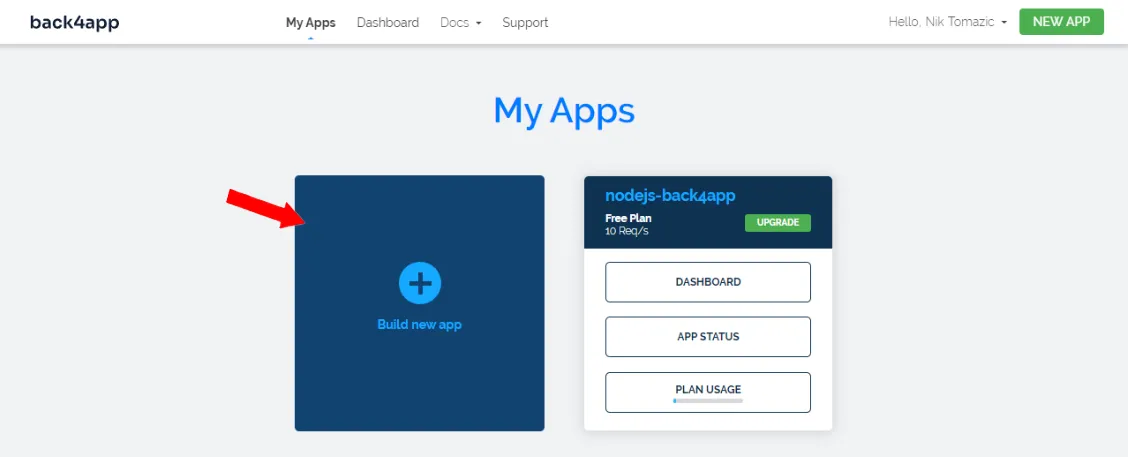
As we are constructing a GraphQL API, choose “Backend as a Service” option, and specify a unique name for your app. Additionally, choose “NoSQL” as the database type.
Wait patiently for Back4app to configure everything required for your app, including the database, application layer, scaling, backups, and security.
After the setup is complete, you will be directed to your app’s dashboard.
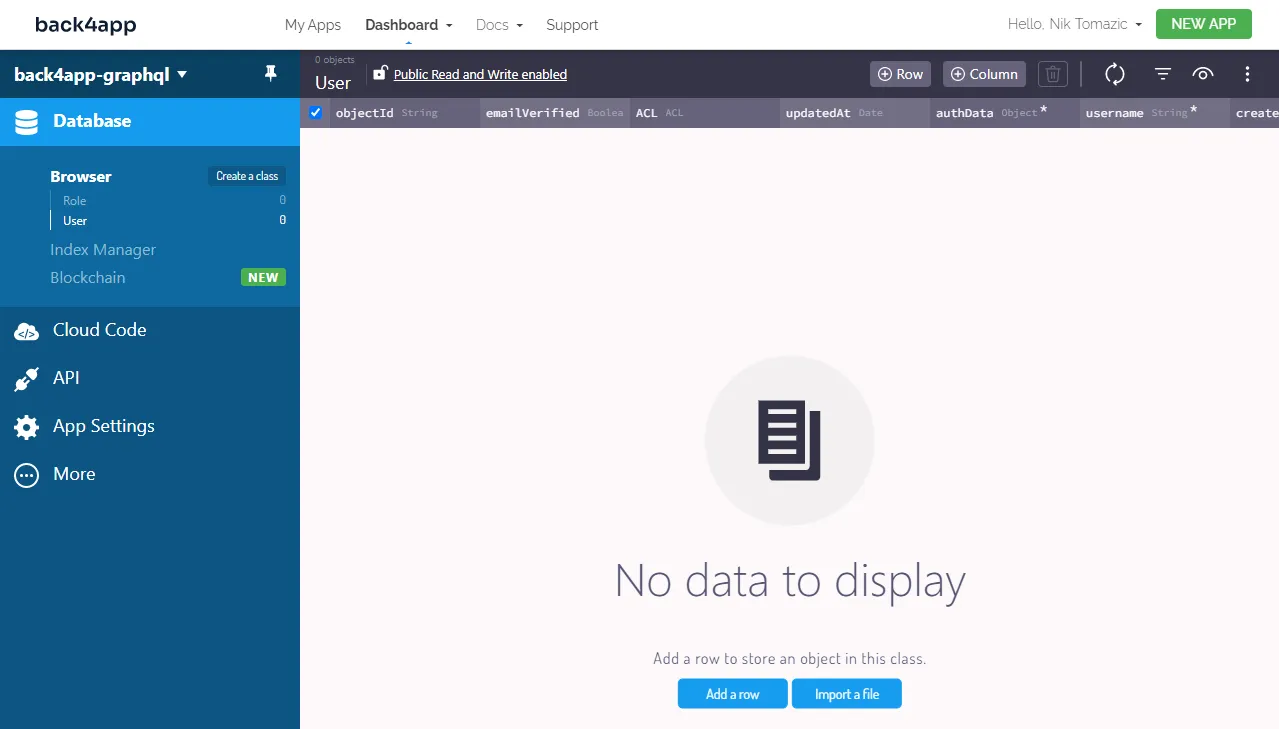
Define Database Models
Since we’re building a simple TODO app we’ll only need one database model.
To get started, go to your Back4app dashboard and locate the “Database” option in the sidebar. From there, choose “Create a class”, and give it the name “Task”. Make sure to select “Public Read and Write Enabled” and then click “Create class & add columns”.
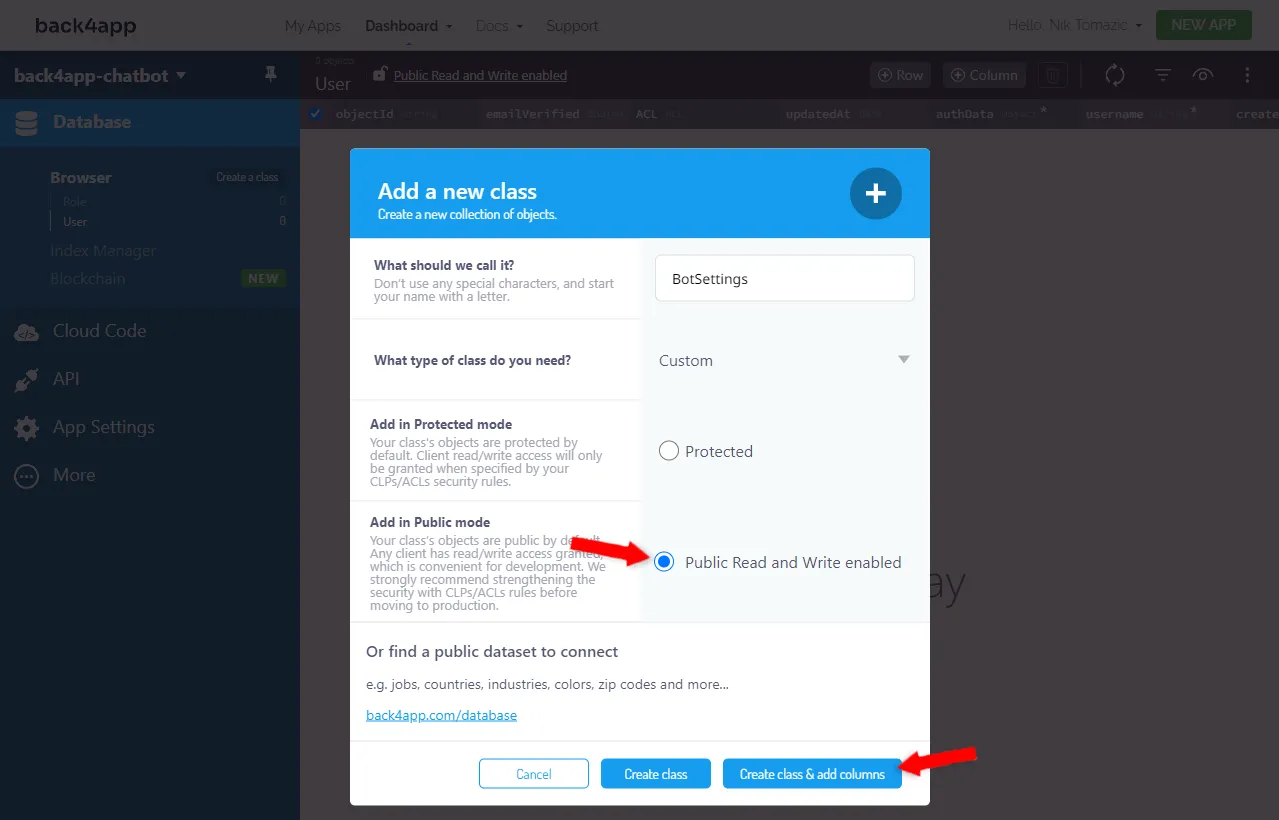
Include the subsequent columns:
+-----------+------------------+---------------+----------+
| Data type | Name             | Default value | Required |
+-----------+------------------+---------------+----------+
| String    | name             | <leave blank> | yes      |
+-----------+------------------+---------------+----------+
| String    | description      | <leave blank> | no       |
+-----------+------------------+---------------+----------+
| Boolean   | isDone           | false         | no       |
+-----------+------------------+---------------+----------+
After you create your database model you’ll notice that four database columns have been added automatically:
objectIdis your object’s primary keyupdatedAtis the timestamp of the last updatecreatedAtis the timestamp of the creationACLdefines the “Access Control List”
Keep them in mind since we’ll need them later in the tutorial when working on GraphQL queries and mutations.
To get familiar with the Back4app dashboard try adding two sample tasks, eg:
+-----------------+----------------------------------------+--------+
| name            | description                            | isDone |
+-----------------+----------------------------------------+--------+
| GraphQL backend | Create a GraphQL backend via Back4app. | false  |
+-----------------+----------------------------------------+--------+
| Learn GraphQL   | Learn the basics of GraphQL.           | true   |
+-----------------+----------------------------------------+--------+
GraphQL API Console
GraphQL API Console allows us to test GraphQL queries and mutations before implementing them in code. To access the console select “API” on the sidebar and then “Console > GraphQL”.
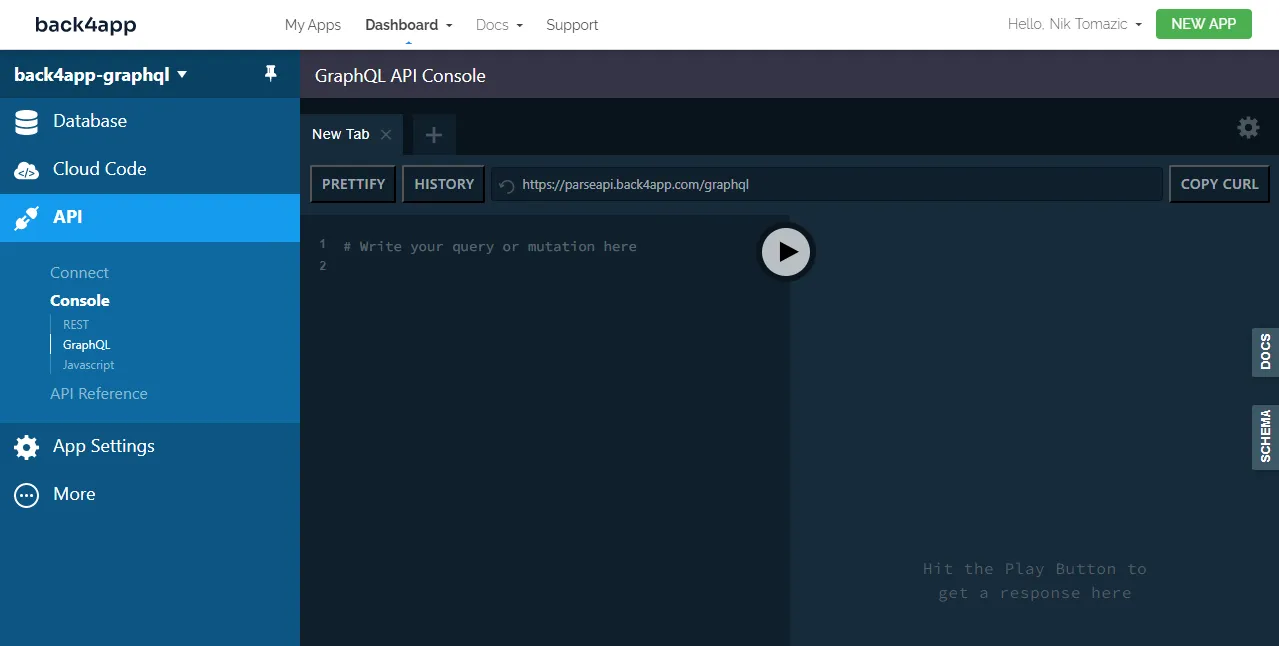
The console is extremely easy to use. On the left side, we can enter our custom queries and mutations and then the results are displayed on the right.
To check if everything is working run the following query:
query CheckHealth {
    health
}
You should get the following JSON response:
{
  "data": {
    "health": true
  }
}
One of the great things about Back4app is that it is based on Parse. As we created our database model Parse automatically configured GraphQL for us. That includes generating a GraphQL schema, docs, and so on.
Let’s try listing the tasks and their details from the database:
query GetTasks {
  tasks {
    count
    edges {
      node {
        id
        name
        description
        isDone
      }
    }
  }
}
You should get a similar response:
{
  "data": {
    "tasks": {
      "count": 2,
      "edges": [
        {
          "node": {
            "id": "VGFzazpXQkJzSkRtV2xU",
            "name": "GraphQL backend",
            "description": "Create a GraphQL backend via Back4app.",
            "isDone": false
          }
        },
        {
          "node": {
            "id": "VGFzazpnM2lhNzdwUXBp",
            "name": "Learn GraphQL",
            "description": "Learn the basics of GraphQL.",
            "isDone": true
          }
        }
      ]
    }
  }
}
Getting a specific object, creating objects, updating them et cetera is done similarly. I won’t go too much into detail now since I’ll explain these queries and mutations later in the tutorial. Additionally, Back4app docs cover these topics well:
- Creating an object
- Getting an object
- Finding objects
- Updating an object
- Deleting an object
- Authentication
That’s it for the backend part. In the next section, we’ll start working on the frontend.
Frontend
Create Next App
The easiest way to bootstrap a Next.js project is by using the create-next-app utility. Open your terminal and run the following command:
$ yarn create next-app

√ What is your project named? ... back4app-graphql
√ Would you like to use TypeScript with this project? ... No
√ Would you like to use ESLint with this project? ... Yes
√ Would you like to use the `src/` directory with this project? ... No
√ Would you like to use the experimental `app/` directory with this project? ... No
√ What import alias would you like configured? ... @/*

Successfully created a Next.js app.
Next, run the development server:
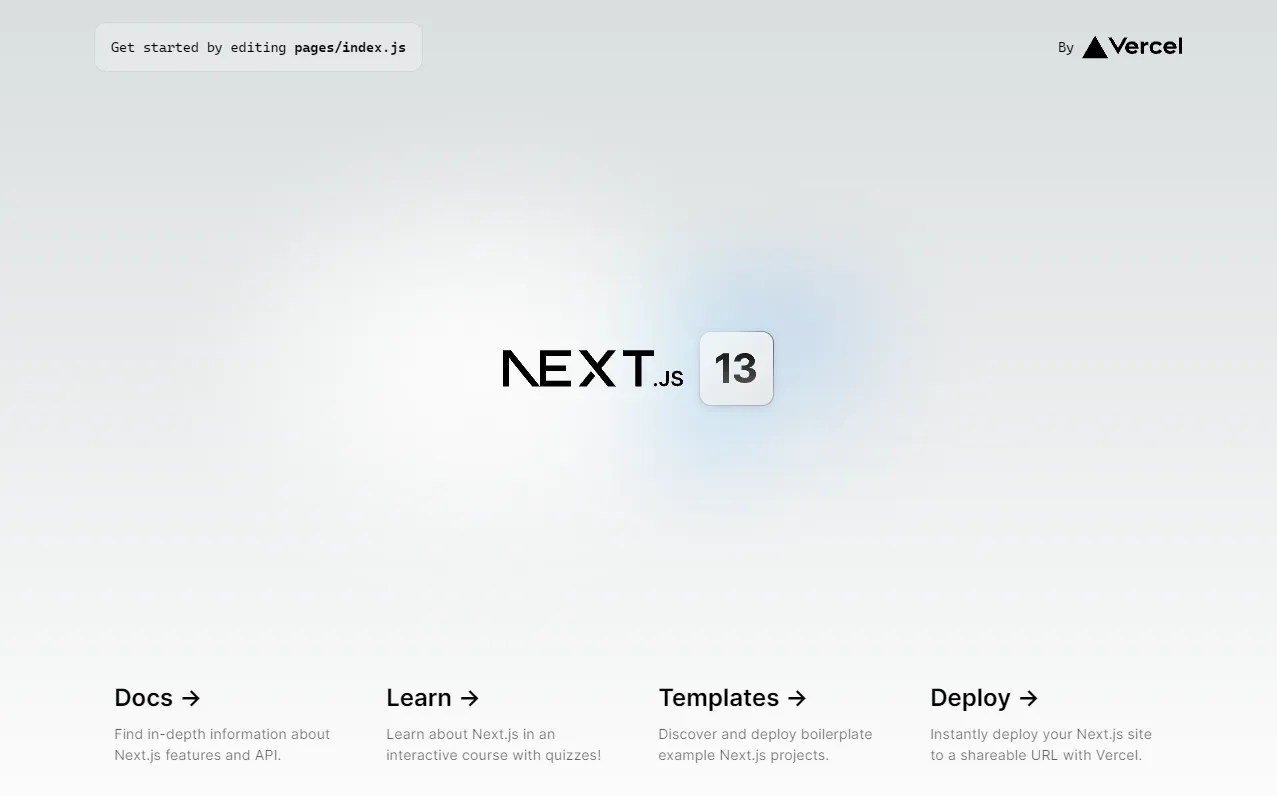
$ yarn devNavigate to http://localhost:3000 and you should see the default Next.js landing page.
ChakraUI
To accelerate and simplify the UI/UX building process we’ll use ChakraUI. Chakra UI is a simple, modular, and accessible component library that gives you everything you need to build your React apps.
In case you run into any problems refer to ChakraUI: Getting started with Next.js.
To install it run:
yarn add @chakra-ui/react @emotion/react @emotion/styled framer-motionNext, navigate to your _pages/app.tsx and wrap your app with the ChakraProvider like so:
// pages/_app.tsx

import "../styles/globals.css";
import type {AppProps} from "next/app";
import {ChakraProvider} from "@chakra-ui/react";

export const theme = extendTheme({});

function MyApp({ Component, pageProps }: AppProps) {
  return (
    <ChakraProvider theme={theme}>
      <Component {...pageProps} />
    </ChakraProvider>
  );
}

export default MyApp;
Don’t forget to import the ChakraProvider:
import {ChakraProvider} from "@chakra-ui/provider";To avoid random color flashes make sure to load the color mode script before the content. To do that you can utilize _document.js like so:
// pages/_document.tsx

import {ColorModeScript} from "@chakra-ui/react";
import { Html, Head, Main, NextScript } from "next/document";
import {theme} from "@/pages/_app";

export default function Document() {
  return (
    <Html lang='en'>
      <Head />
      <body>
        <ColorModeScript initialColorMode={theme.config.initialColorMode} />
        <Main />
        <NextScript />
      </body>
    </Html>
  );
}
Great, you’ve successfully installed ChakraUI.
User Interface
Moving along, let’s create the user interface. Our web app will have the following two pages:
/displays the list of taskscreate/displays the form for creating tasks
Start by replacing pages/index.tsx with the following contents:
// pages/index.tsx

import type {NextPage} from "next";
import {
    Button, Card, CardBody, Container,
    Heading, HStack, Stack, Text, VStack
} from "@chakra-ui/react";
import Link from "next/link";

let data = {
  "tasks": {
    "count": 2,
    "edges": [
      {
        "node": {
          "id": "VGFzazpXQkJzSkRtV2xU",
          "name": "GraphQL backend",
          "description": "Create a GraphQL backend via Back4app.",
          "isDone": false
        }
      },
      {
        "node": {
          "id": "VGFzazpnM2lhNzdwUXBp",
          "name": "Learn GraphQL",
          "description": "Learn the basics of GraphQL.",
          "isDone": true
        }
      }
    ]
  }
};

const ListPage: NextPage = () => {

  const handleMarkAsDone = async (id: string, isDone: boolean) => {
    console.log("TODO: mark task as done and refetch");
  };

  const handleDelete = async (id: string) => {
    console.log("TODO: delete task and refetch");
  };

  return (
    <>
      <Container maxWidth="container.lg">
        <HStack w="fill" justifyContent="space-between" mt={8} mb={4}>
          <Heading as="h1" size="lg">back4app-graphql</Heading>
          <Link href="/create">
            <Button size="sm" colorScheme="blue">
              Create task
            </Button>
          </Link>
        </HStack>
        <VStack spacing={4}>
          {data.tasks.edges.map((edge) => {
            let task = edge.node;
            return (
              <Card key={task.id} w="100%">
                <CardBody>
                  <Stack direction="column">
                    <Heading as="h2" size="md">
                      {task.isDone ? "✔️" : "❌"}{" "}
                      {task.name}
                    </Heading>
                    <Text>
                      {task.description}
                    </Text>
                    <Stack direction="row" pt={2}>
                      <Button size="sm" colorScheme="blue" onClick={() => handleMarkAsDone(task.id, task.isDone)}>
                        Toggle done
                      </Button>
                      <Button size="sm" colorScheme="red" onClick={() => handleDelete(task.id)}>
                        Delete
                      </Button>
                    </Stack>
                  </Stack>
                </CardBody>
              </Card>
            );
          })}
        </VStack>
      </Container>
    </>
  );
};

export default ListPage;- We used ChakraUI to design the user interface.
- The tasks are currently loaded from the static array named
data. - We’ll later utilize
handleMarkAsDone()andhandleDelete()to send GraphQL API requests.
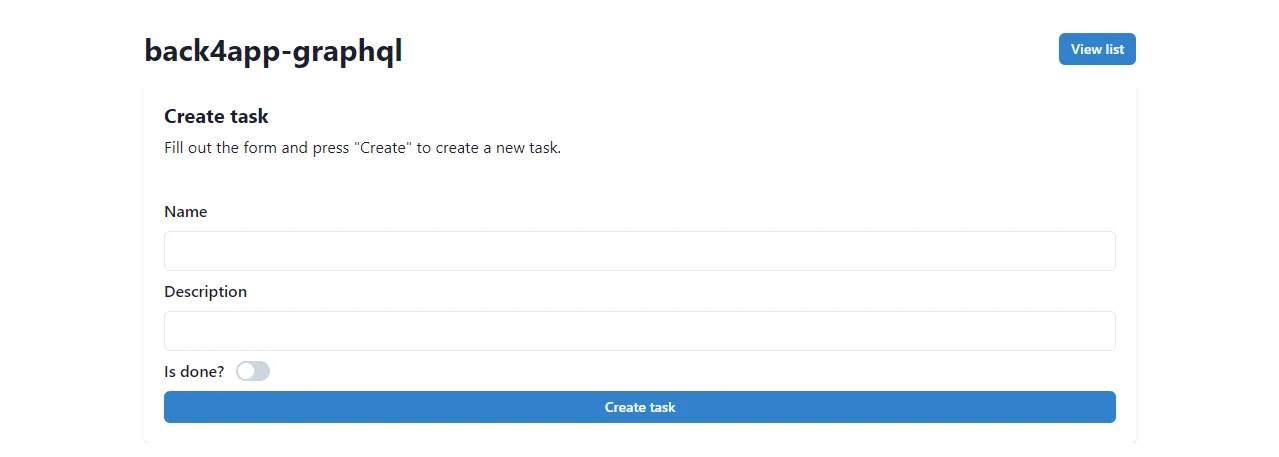
Next, create a create.tsx file within the pages folder with the following contents:
// pages/create.tsx
import type {NextPage} from "next";
import {
Button, Card, CardBody, CardHeader, Container, FormControl,
FormLabel, Heading, HStack, Input, Stack, Switch, Text
} from "@chakra-ui/react";
import Link from "next/link";
import {useState} from "react";
import {useRouter} from "next/router";
const CreatePage: NextPage = () => {
const router = useRouter();
const [name, setName] = useState("");
const [description, setDescription] = useState("");
const [isDone, setIsDone] = useState(false);
const [formError, setFormError] = useState("");
const handleSubmit = (event) => {
event.preventDefault();
if (!name || !description) {
setFormError("Please enter the title and the description.");
return;
}
console.log("TODO: call the GraphQL API and redirect");
};
return (
<>
<Container maxWidth="container.lg">
<HStack w="fill" justifyContent="space-between" mt={8} mb={4}>
<Heading as="h1" size="lg">back4app-graphql</Heading>
<Link href="/">
<Button size="sm" colorScheme="blue">
View list
</Button>
</Link>
</HStack>
<Card>
<CardHeader>
<Stack direction="column">
<Heading as="h2" size="md">Create task</Heading>
<Text>
Fill out the form and press "Create" to create a new task.
</Text>
</Stack>
</CardHeader>
<CardBody>
<form onSubmit={handleSubmit}>
<Stack direction="column">
{formError && <Text color="red.500" fontWeight="bold">{formError}</Text>}
<FormControl>
<FormLabel>Name</FormLabel>
<Input type="text" value={name} onChange={(event) => setName(event.target.value)}/>
</FormControl>
<FormControl>
<FormLabel>Description</FormLabel>
<Input type="text" value={description} onChange={(event) => setDescription(event.target.value)}/>
</FormControl>
<FormControl display="flex" alignItems="center">
<FormLabel mb="0">
Is done?
</FormLabel>
<Switch isChecked={isDone} onChange={() => setIsDone(!isDone)}/>
</FormControl>
<Button size="sm" colorScheme="blue" type="submit">Create task</Button>
</Stack>
</form>
</CardBody>
</Card>
</Container>
</>
);
};
export default CreatePage;- We again used ChakraUI components to create the UI.
- We created a React-controlled form for creating tasks.
- The function
handleSubmit()will be utilized later to send an API request.
Relaunch your web server and visit your web app at http://localhost:3000. You should see the two hard-coded tasks. Next, click on “Create task” to see the task creation form.
GraphQL Client
To connect to a GraphQL API from the frontend you first need to install a GraphQL Client. I suggest you go with the Apollo Client, since it’s easy to set up, non-opinionated, and doesn’t require much boilerplate.
Start by installing @apollo/client and graphql:
$ yarn add @apollo/client graphqlTo initialize the client you’ll need to provide your Back4app API credentials. The easiest way to obtain your credentials is to navigate to your GraphQL Console and take note of the headers.
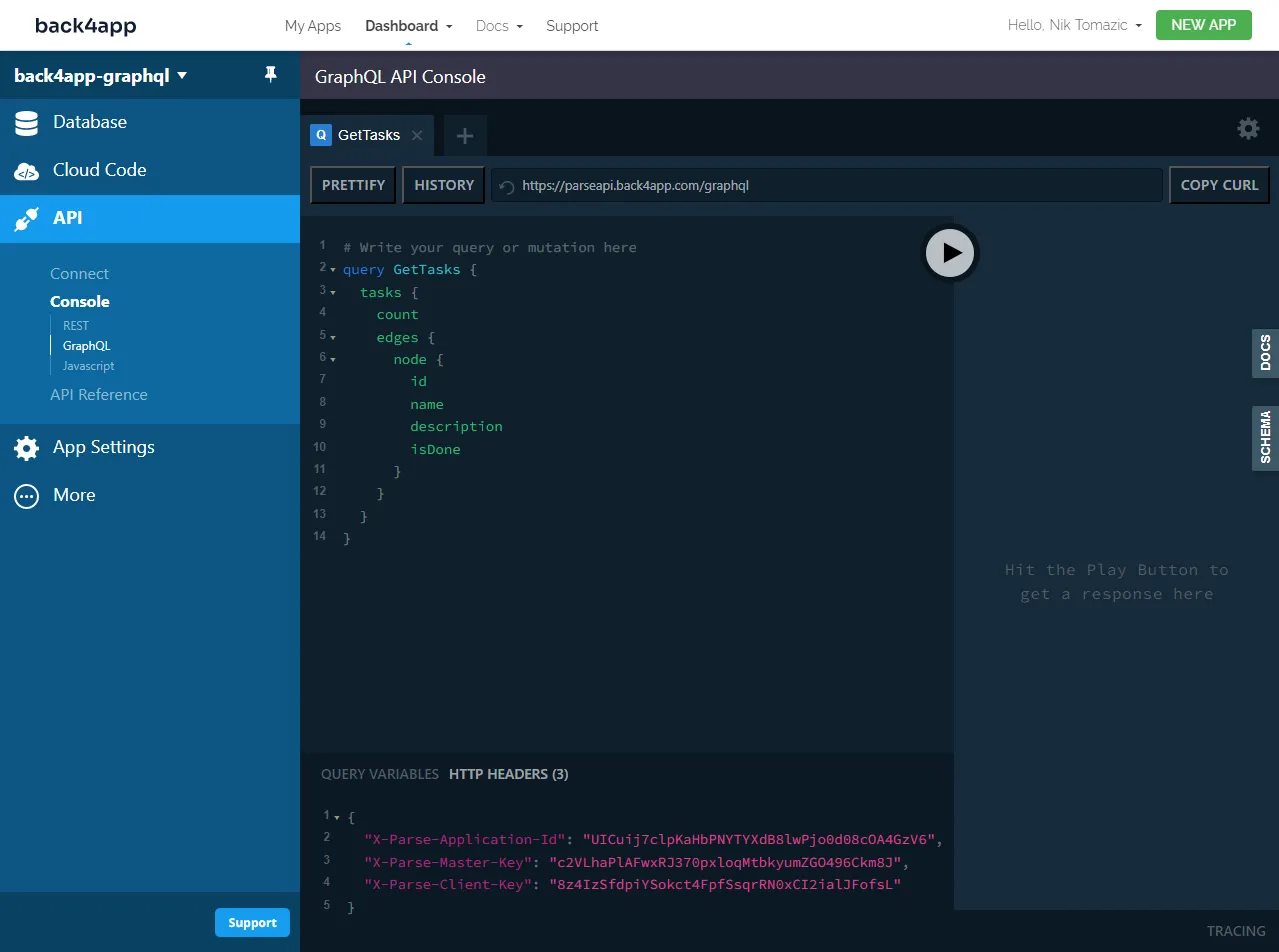
Since you don’t want to expose your API keys in the source code create a .env.local file in the project root with the following contents:
# .env.local

NEXT_PUBLIC_PARSE_APPLICATION_ID=<YOUR_PARSE_APP_ID>
NEXT_PUBLIC_PARSE_MASTER_KEY=<YOUR_PARSE_MASTER_KEY>
NEXT_PUBLIC_PARSE_CLIENT_KEY=<YOUR_PARSE_CLIENT_KEY>
Next, navigate to pages/_app.tsx and initialize the Apollo client, then wrap your application with the ApolloProvider like so:
// pages/_app.tsx

// ...
import {ApolloClient, ApolloProvider, InMemoryCache} from "@apollo/client";

const client = new ApolloClient({
  uri: "https://parseapi.back4app.com/graphql",
  headers: {
    "X-Parse-Application-Id": process.env.NEXT_PUBLIC_PARSE_APPLICATION_ID,
    "X-Parse-Master-Key": process.env.NEXT_PUBLIC_PARSE_MASTER_KEY,
    "X-Parse-Client-Key": process.env.NEXT_PUBLIC_PARSE_CLIENT_KEY,
  },
  cache: new InMemoryCache(),
});

function MyApp({ Component, pageProps }: AppProps) {
  return (
    <ChakraProvider theme={theme}>
      <ApolloProvider client={client}>
        <Component {...pageProps} />
      </ApolloProvider>
    </ChakraProvider>
  );
}
Wait for your frontend to recompile then visit your web app and check the console for any errors. No errors mean that the connection has been successful.
GraphQL Queries and Mutations
The last thing you have to do is to define your GraphQL queries and mutations and then call them from your React code.
To enable GraphQL code assistance in your IDE navigate to the Back4app GraphQL Console, select “Schema” on the sidebar, and download it as SDL. Then create a new file named schema.graphql in the project root and paste in the SDL contents.
First, navigate to pages/index.tsx and add the following queries after the imports:
// pages/index.tsx

const GET_TASKS = gql`
  query GetTasks {
    tasks {
      count
      edges {
        node {
          id
          name
          description
          isDone
        }
      }
    }
  }
`;

const UPDATE_TASK = gql`
  mutation UpdateTask($id: ID!, $isDone: Boolean!) {
    updateTask(input: { id: $id, fields: { isDone: $isDone } }) {
      task {
        isDone
        updatedAt
      }
    }
  }
`;

const DELETE_TASK = gql`
  mutation DeleteTask($id: ID!) {
    deleteTask(input: { id: $id }) {
      task {
        id
      }
    }
  }
`;
These three queries are pretty self-explanatory. The first one returns a list of all the tasks, the second one updates a specific task’s isDone property, and the third one deletes a specific task.
Next, modify the top of ListPage like so:
// pages_index.tsx

// ...

const ListPage: NextPage = () => {

  const {loading, error, data, refetch} = useQuery(GET_TASKS);
  const [deleteTask] = useMutation(DELETE_TASK);
  const [updateTask] = useMutation(UPDATE_TASK);

const handleMarkAsDone = async (id: string, isDone: boolean) => {
    try {
      const updateTaskResponse = await updateTask({
        variables: {id: id, isDone: !isDone}
      });
      console.debug(updateTaskResponse);
      refetch();
    } catch (error) {
      console.error(error);
    }
  };

  const handleDelete = async (id: string) => {
    try {
      const deleteTaskResponse = await deleteTask({
        variables: {id: id},
      });
      console.debug(deleteTaskResponse);
      refetch();
    } catch (error) {
      console.error(error);
    }
  };

  if (error) return <p>Oops, something went wrong.</p>;
  if (loading) return <Spinner/>;

  // ...
};

export default ListPage;- We used
useQuery()to execute theGET_TASKSquery and store the result. - We used
useMutation()to define the GraphQL mutations. - We updated
handleMarkAsDone()andhandleDelete()to utilize the mutation hooks.
Moving along, modify pages/create.tsx in a similar fashion:
const CREATE_TASK = gql`
  mutation CreateTask($name: String!, $description: String, $isDone: Boolean!) {
    createTask(
      input: {
        fields: { name: $name, description: $description, isDone: $isDone }
      }
    ) {
      task {
        id
      }
    }
  }
`;

const CreatePage: NextPage = () => {

  // ...

  const [createTask] = useMutation(CREATE_TASK);

  const handleSubmit = (event) => {
    event.preventDefault();

    if (!name || !description) {
      setFormError("Please enter the title and the description.");
      return;
    }

    createTask({
      variables: {name: name, description: description, isDone: isDone}
    }).then(response => {
      router.push("/");
    });
  };

  // ...
};

export default CreatePage;
Don’t forget about the import:
import {gql, useMutation, useQuery} from "@apollo/client";Great, that’s it!
Relaunch your development server and visit your web app. Check if tasks are loaded from the database, try creating a new task, marking it as done, and deleting it.
Conclusion
In conclusion, GraphQL is a good choice for building complex APIs due to its flexible querying capabilities and efficient data retrieval. While it has many advantages over traditional REST API there are some drawbacks you should consider when starting a project.
In this article, we’ve discussed the advantages and disadvantages of GraphQL, compared it to REST APIs, and introduced some of the key GraphQL terminology. You should now be able to build your own simple GraphQL API on Back4app and connect to it from a JavaScript frontend.
You can grab the final source code from GitHub repo.
FAQ
What is GraphQL?
GraphQL is a query language and a server-side runtime for developing powerful and flexible APIs.
What are the main differences between REST and GraphQL?
REST is a standardized and simple approach to building web services, while GraphQL offers more flexible querying capabilities and eliminates under-fetching and over-fetching of data.
What are commonly used GraphQL terms?
– Schema is a description of the data available through a GraphQL API.
– Resolver is a function that retrieves the data for a particular field in a GraphQL query.
– Query is a read-only request for data from a GraphQL API.
– Mutation is a request for manipulating the data in a GraphQL API.
– Subscription is a request for real-time updates from a GraphQL API.
How to build a GraphQL API?
1. Create a free account on Back4app.
2. Design the database models.
3. Write the queries and mutations via Back4app GraphQL API Console.
4. Install a GraphQL client (such as Apollo or Relay) on your frontend project.
5. Initialize the client and connect to the GraphQL API.


