Learn to a Build Scalable Backend with AI
A “scalable” backend is a backend that can handle increased load without a considerable decline in performance.
Building a scalable backend involves several processes and considerations, such as database design and deployment strategy.
In this article, you will learn how to build a scalable backend with the help of artificial intelligence (AI).
Contents
What Makes a Backend Scalable?
Various factors implemented during the software development lifecycle work together to make a backend scalable.
One factor contributing to a backend’s scalability is the speed of the database queries.
Slow queries increase your server’s response time and affect its ability to process multiple requests concurrently.
You make your queries faster by implementing a proper schema design and writing efficient queries.
Asynchronous processing is another factor that can make a backend scalable. Resource-intensive tasks can block execution threads and limit the server’s ability to process concurrent requests.
You can solve this problem by delegating resource-intensive tasks like large computations and file uploads to background jobs.
Another factor is your deployment strategy. You must deploy your backend using a scalable deployment strategy via services like Back4app.
For example, new containers spin up automatically as traffic spikes, distributing the load across multiple instances without manual intervention.
Similarly, the system scales down as demand drops, releasing unused resources.
In this tutorial, you will build a kennel management application that implements all the abovementioned factors to make it scalable.
Designing a Scalable Backend with AI
As mentioned above, you will build a kennel management application. Here are the application requirements:
- Your application will allow owners to check their dogs into your kennel.
- When an owner checks their dog into your kennel, your application will store details about the dog, such as its name, breed, age, owner name, and image. Then, it will generate a unique code for the owner.
- The unique code the owner receives is the only way to retrieve their dog from your kennel at the end of the visit.
- During the visit to your kennel, you will keep track of all the activities the dog was involved in. This tutorial will only include eating, medication, and grooming.
- At the end of the visit, the owner will provide the unique code they received at check-in and retrieve their dog(s).
The first step in actualizing the requirements above is to design a normalized database with little to no data redundancy.
You will design and create this database schema with help from the Back4app AI Agent which will act as an AI backend generator.
The Back4app AI Agent
The Back4app AI Agent is an LLM that interfaces with Back4app products, the Backend Platform, and the Web Deployment Platform.
It allows you to interact with these products using prompts and it will help you to create a scalable backend with AI.
To access the AI agent, you need a Back4app account. If you don’t have one, you can sign up for free.
Log in to your Back4app account and click the “AI Agent” link on your dashboard’s navbar.

Clicking the link will take you to the AI Agent page, as shown in the image below.
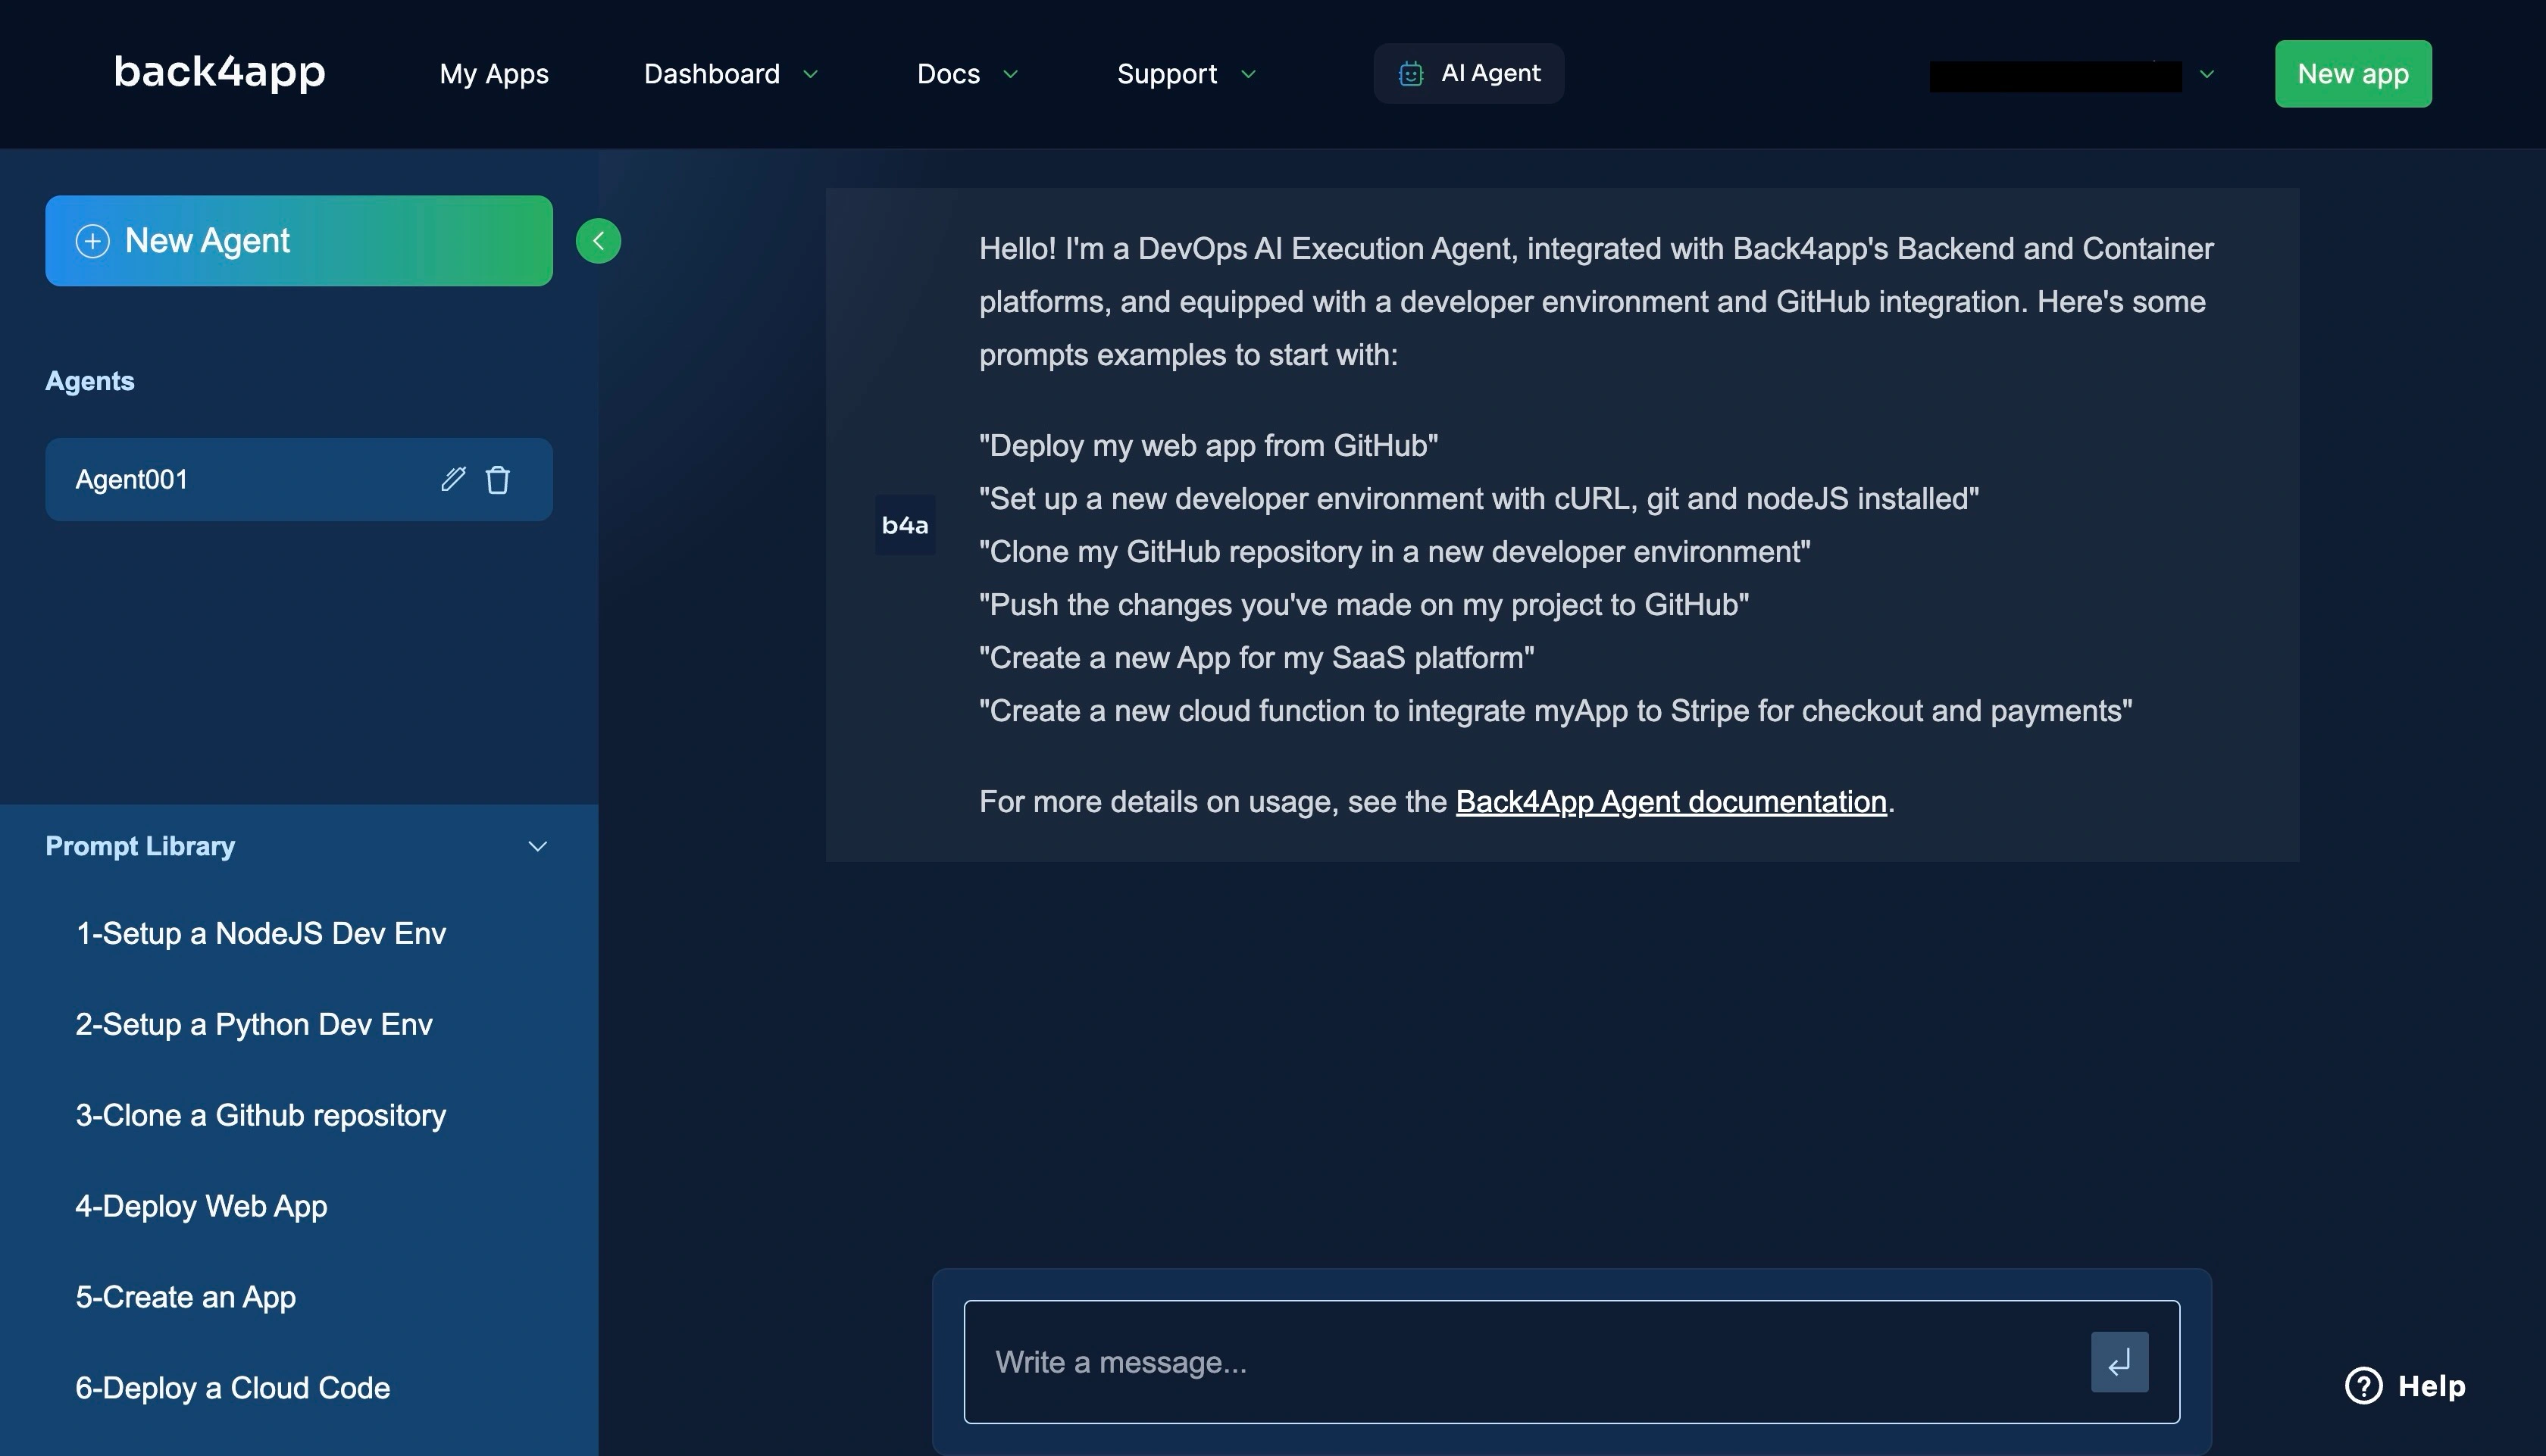
You can enter various prompts on this page, such as one to create a new BaaS app on your Back4app account.
Build a backend with AI
To create a new backend application on Back4app, you can enter the prompt below or something similar into the AI agent.
- Create a new backend application called "Kennel Management Backend"You should get a response saying that the application has been created successfully.
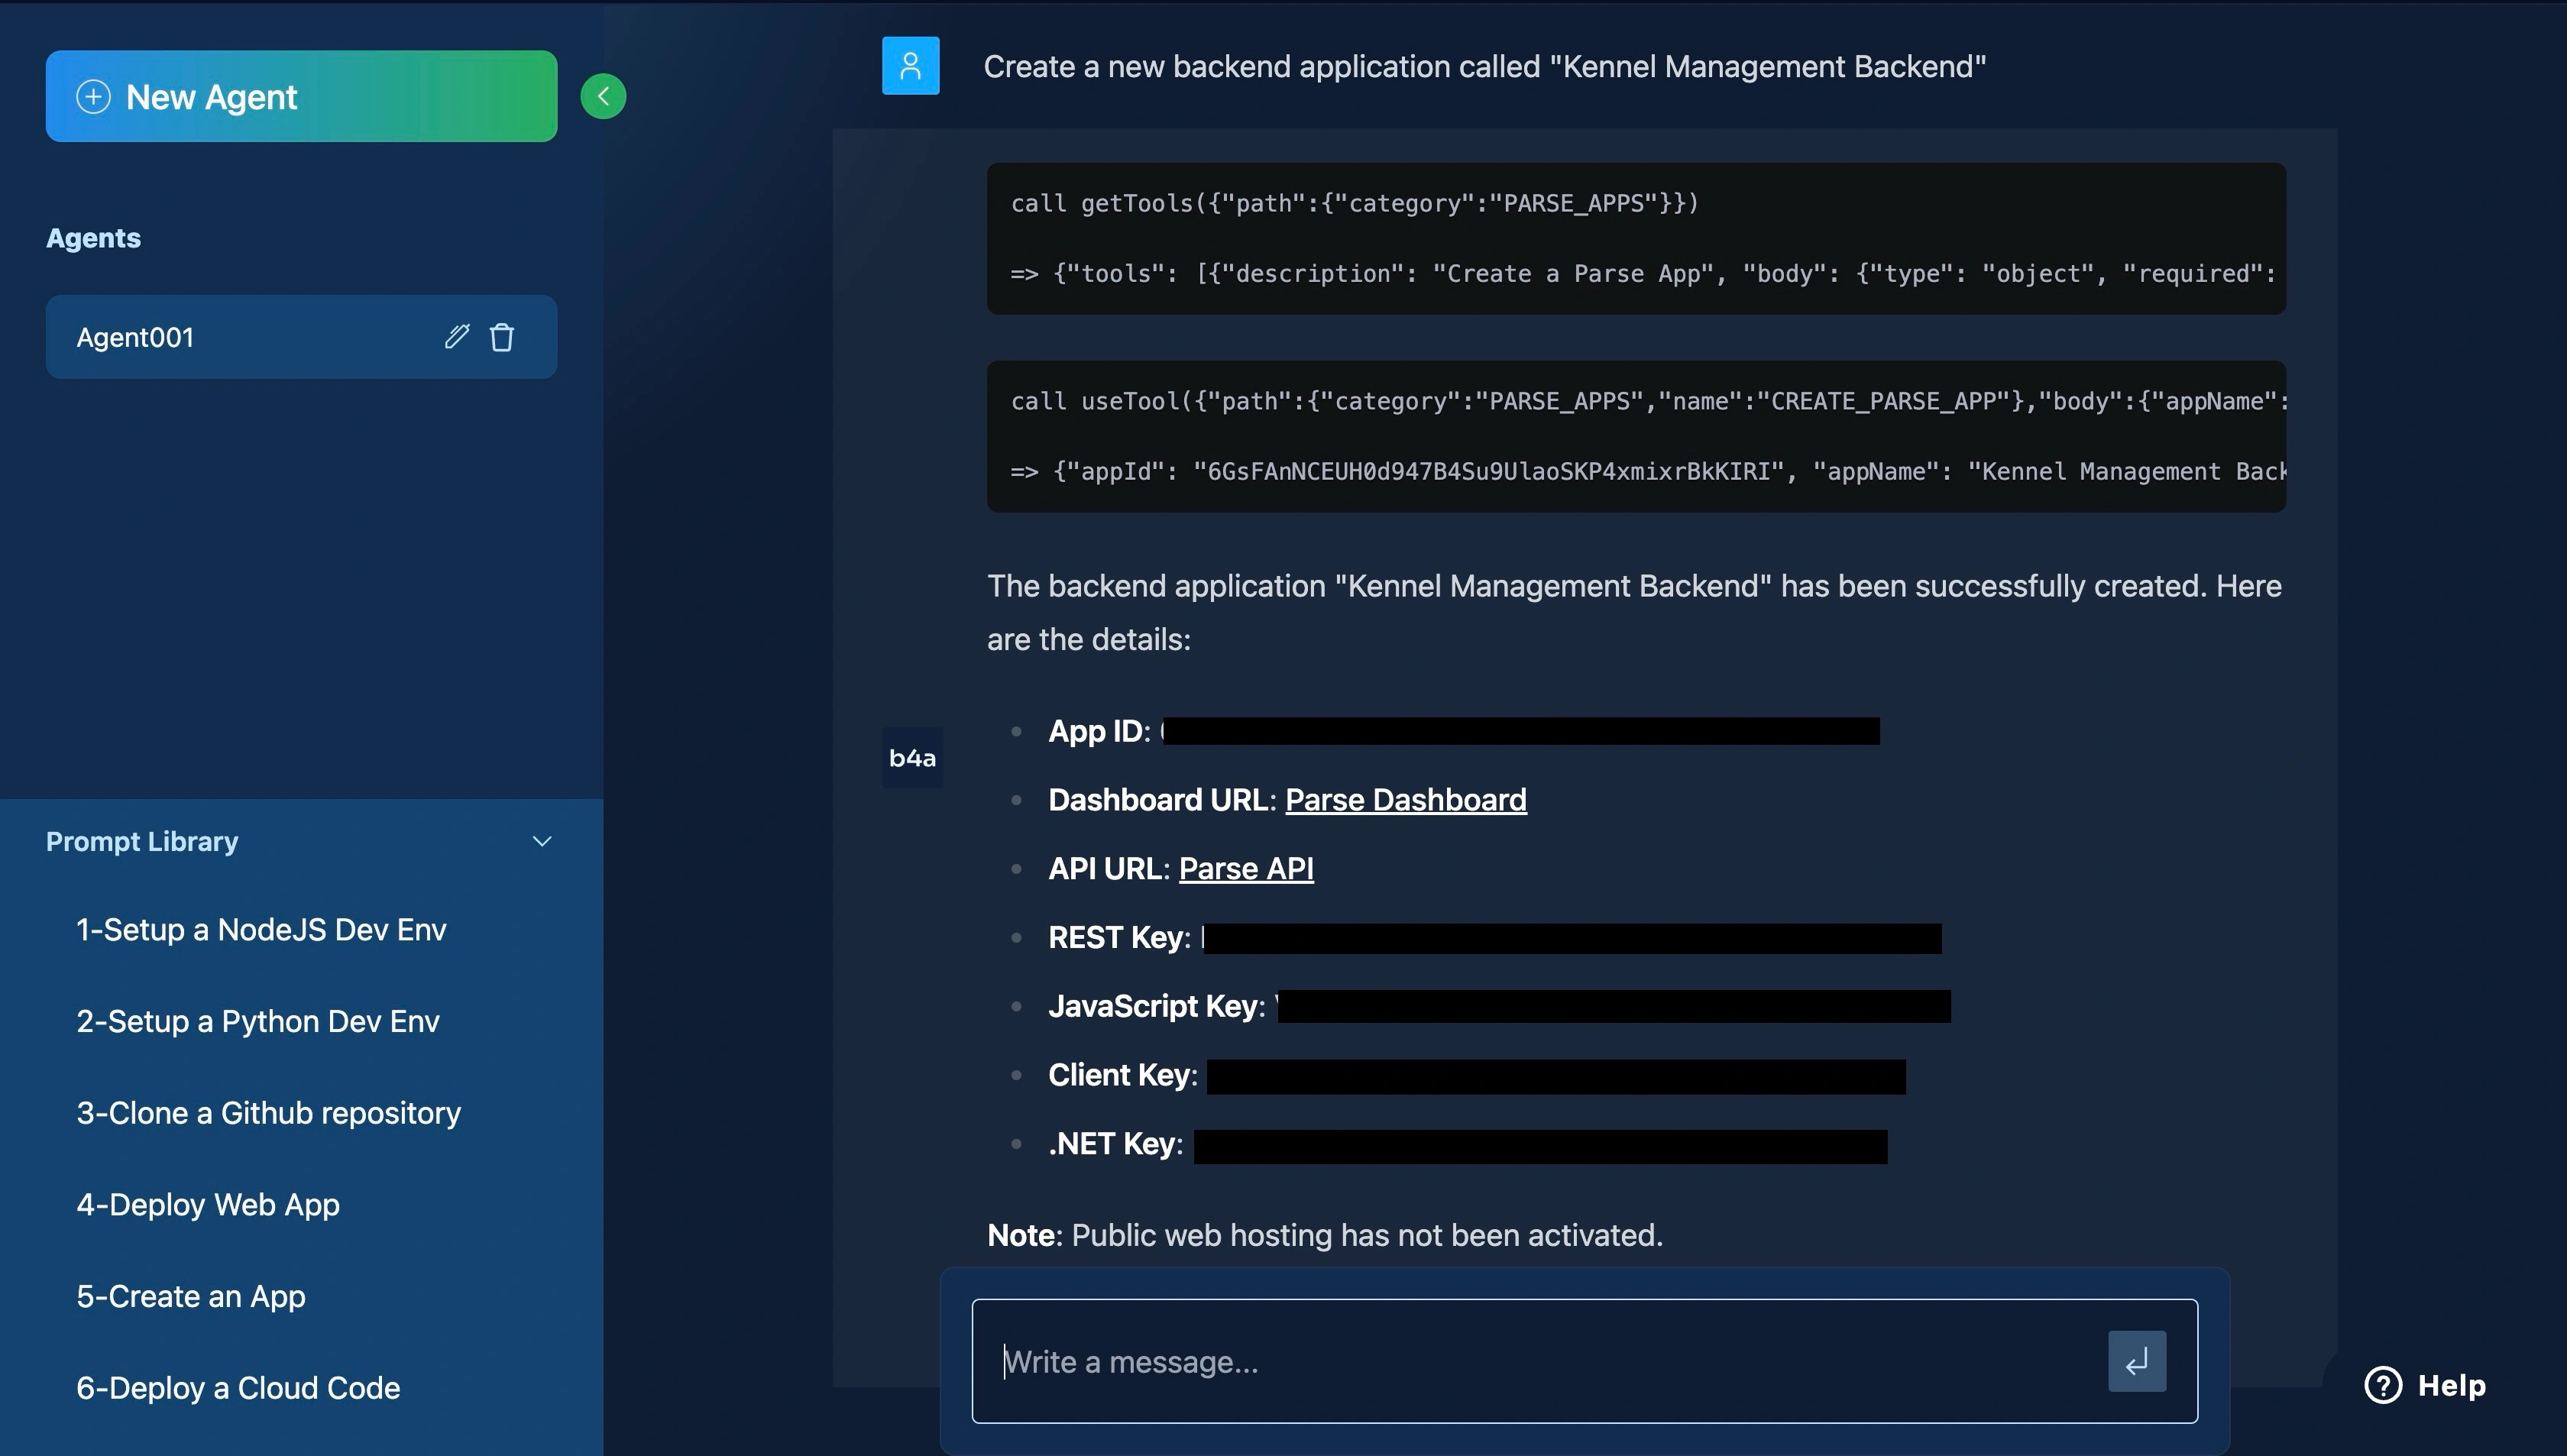
You can view the created app on your Back4app dashboard, as shown in the image below.
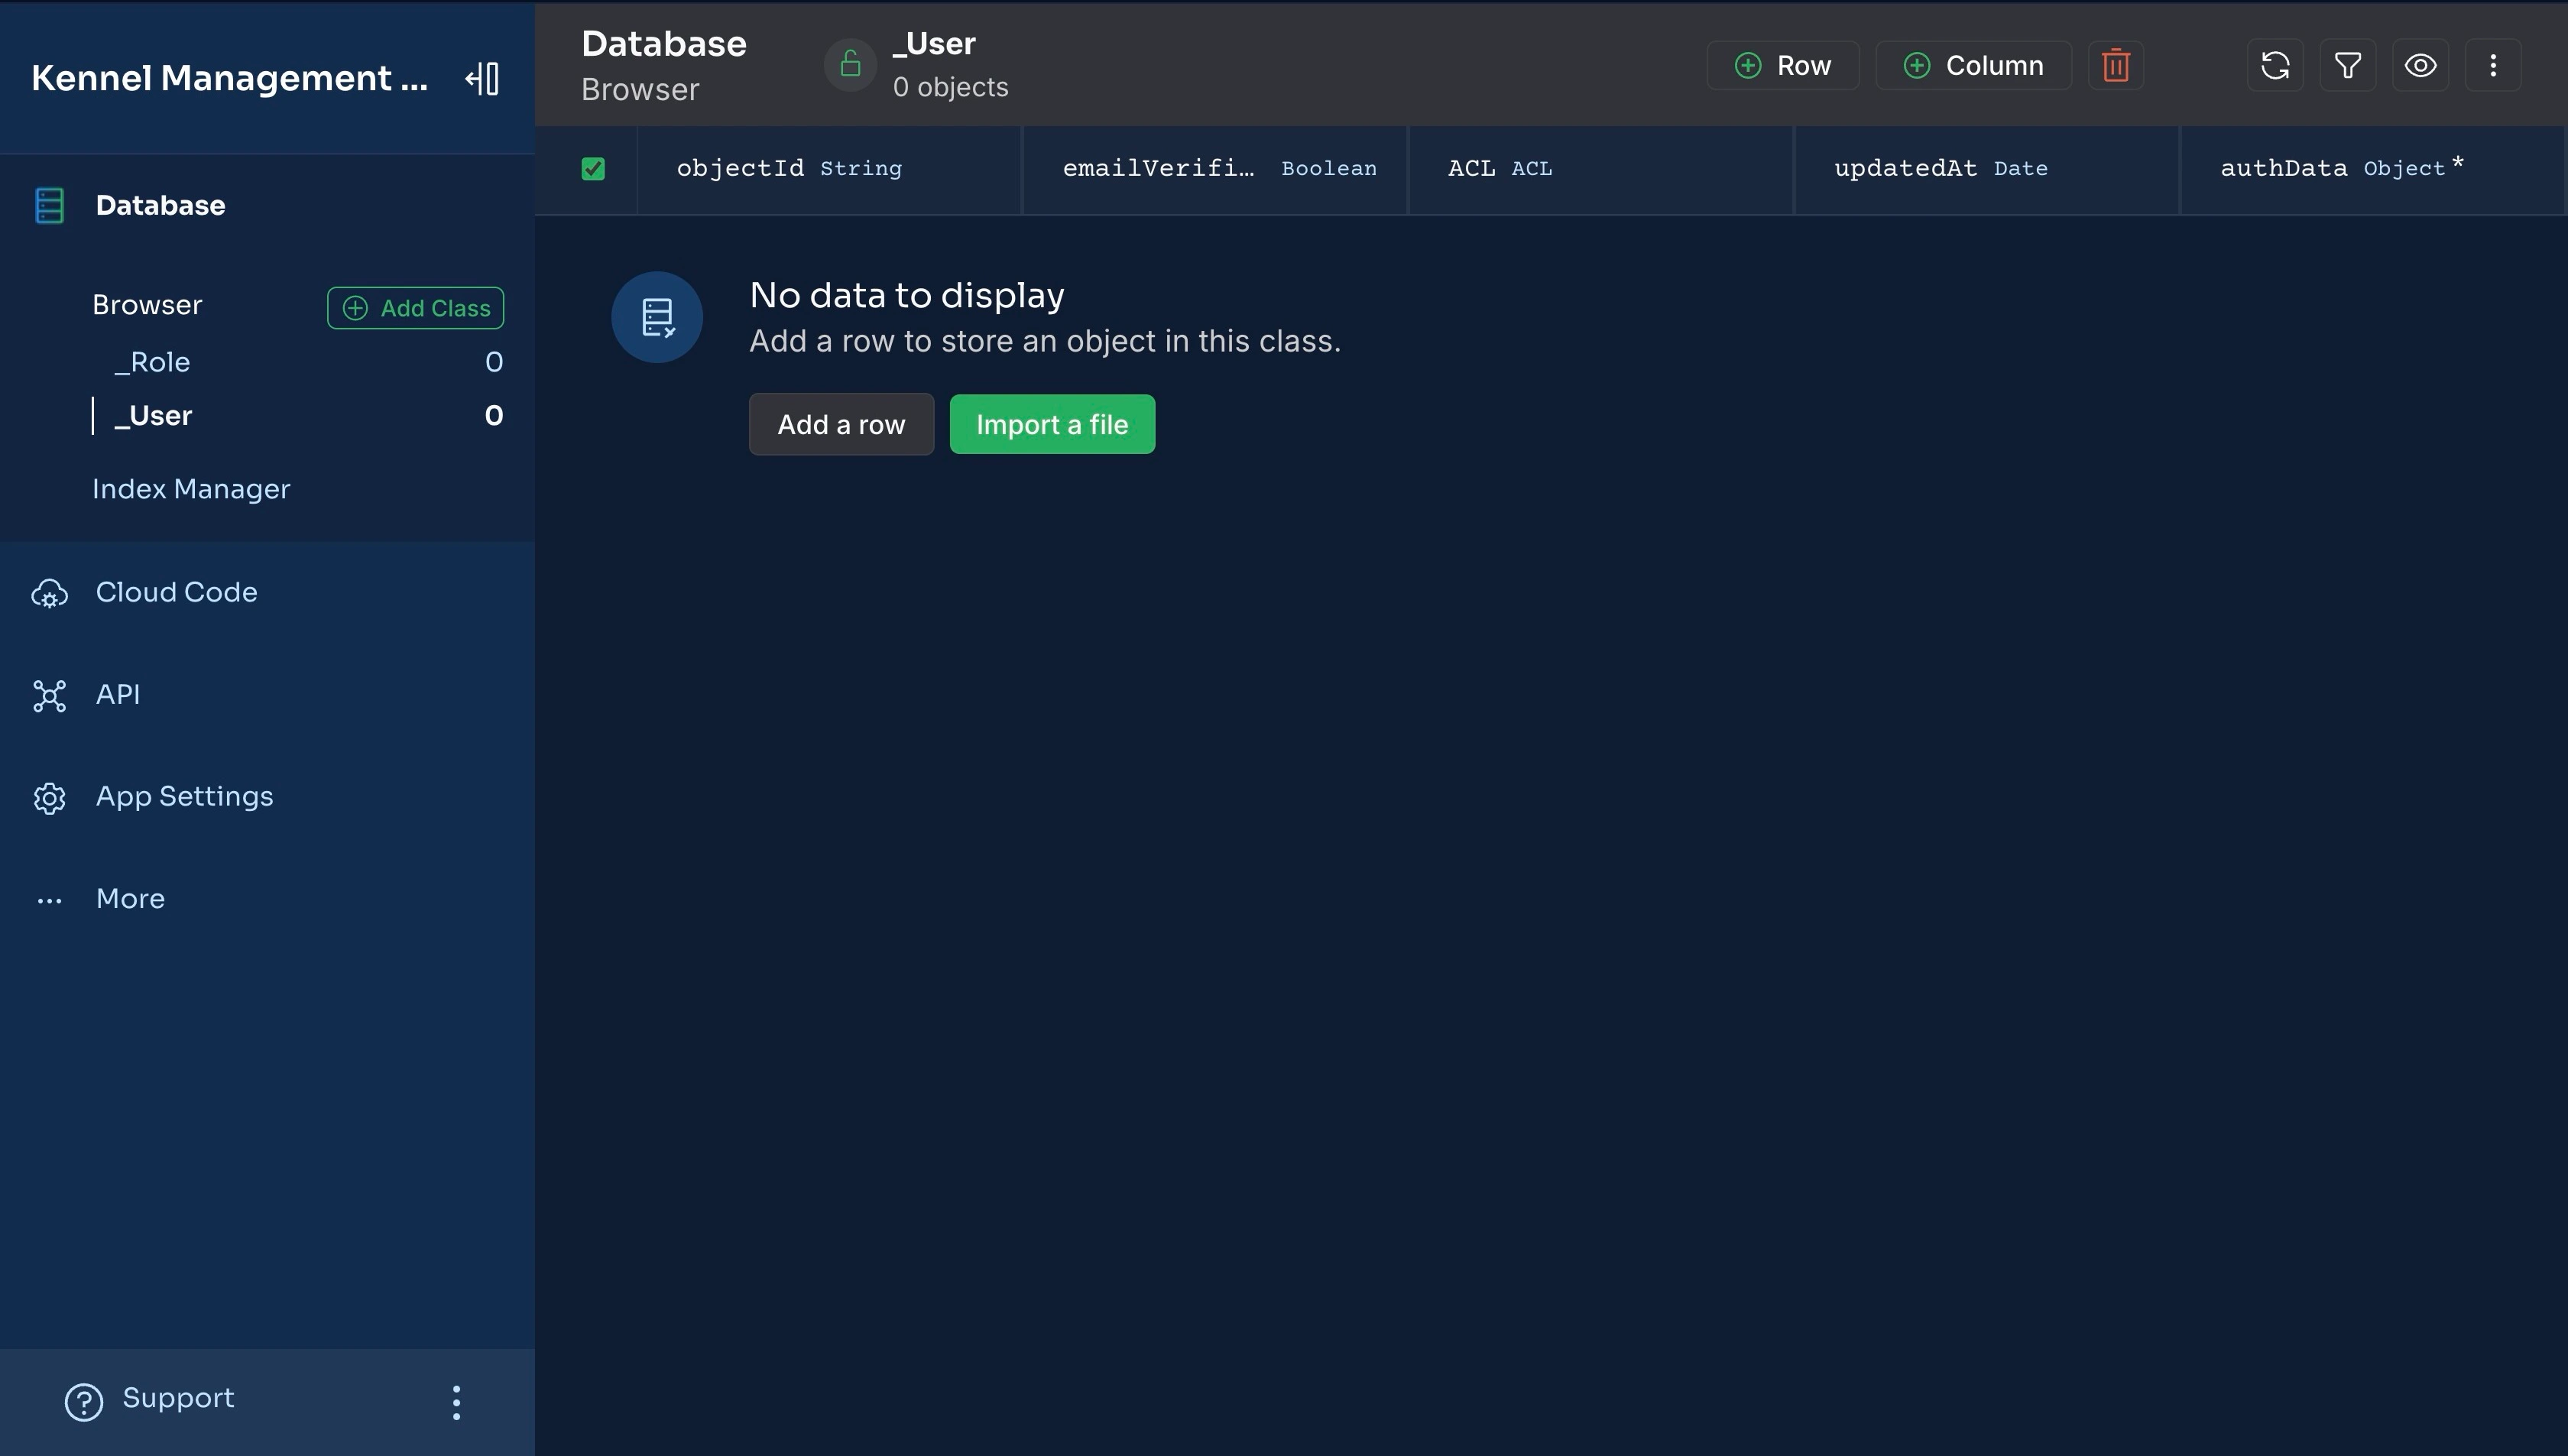
As shown in the image above, the database on your new backend app is empty except for the default _User and _Role classes.
Next, you will design and add the database schema to your backend app.
Designing Your Database
To design a normalized database schema for your application requirements above, enter the prompt below or something similar into the AI agent.
- Design a normalized database schema for a dog kennel management application.

- The app stores dog details: name, breed, age, a unique owner username, owner contact details, and an image;

- When an owner checks in and generates a unique code for the owner to retrieve the dog.

- It tracks activities during the visit (eating, medication, grooming).
The owner provides the unique code to retrieve their dog at the end of the visit.

- Ensure relationships between entities like dogs, owners, visits, activities, and the retrieval code are properly structured.
The prompt above should return a database schema similar to the one visualized below.
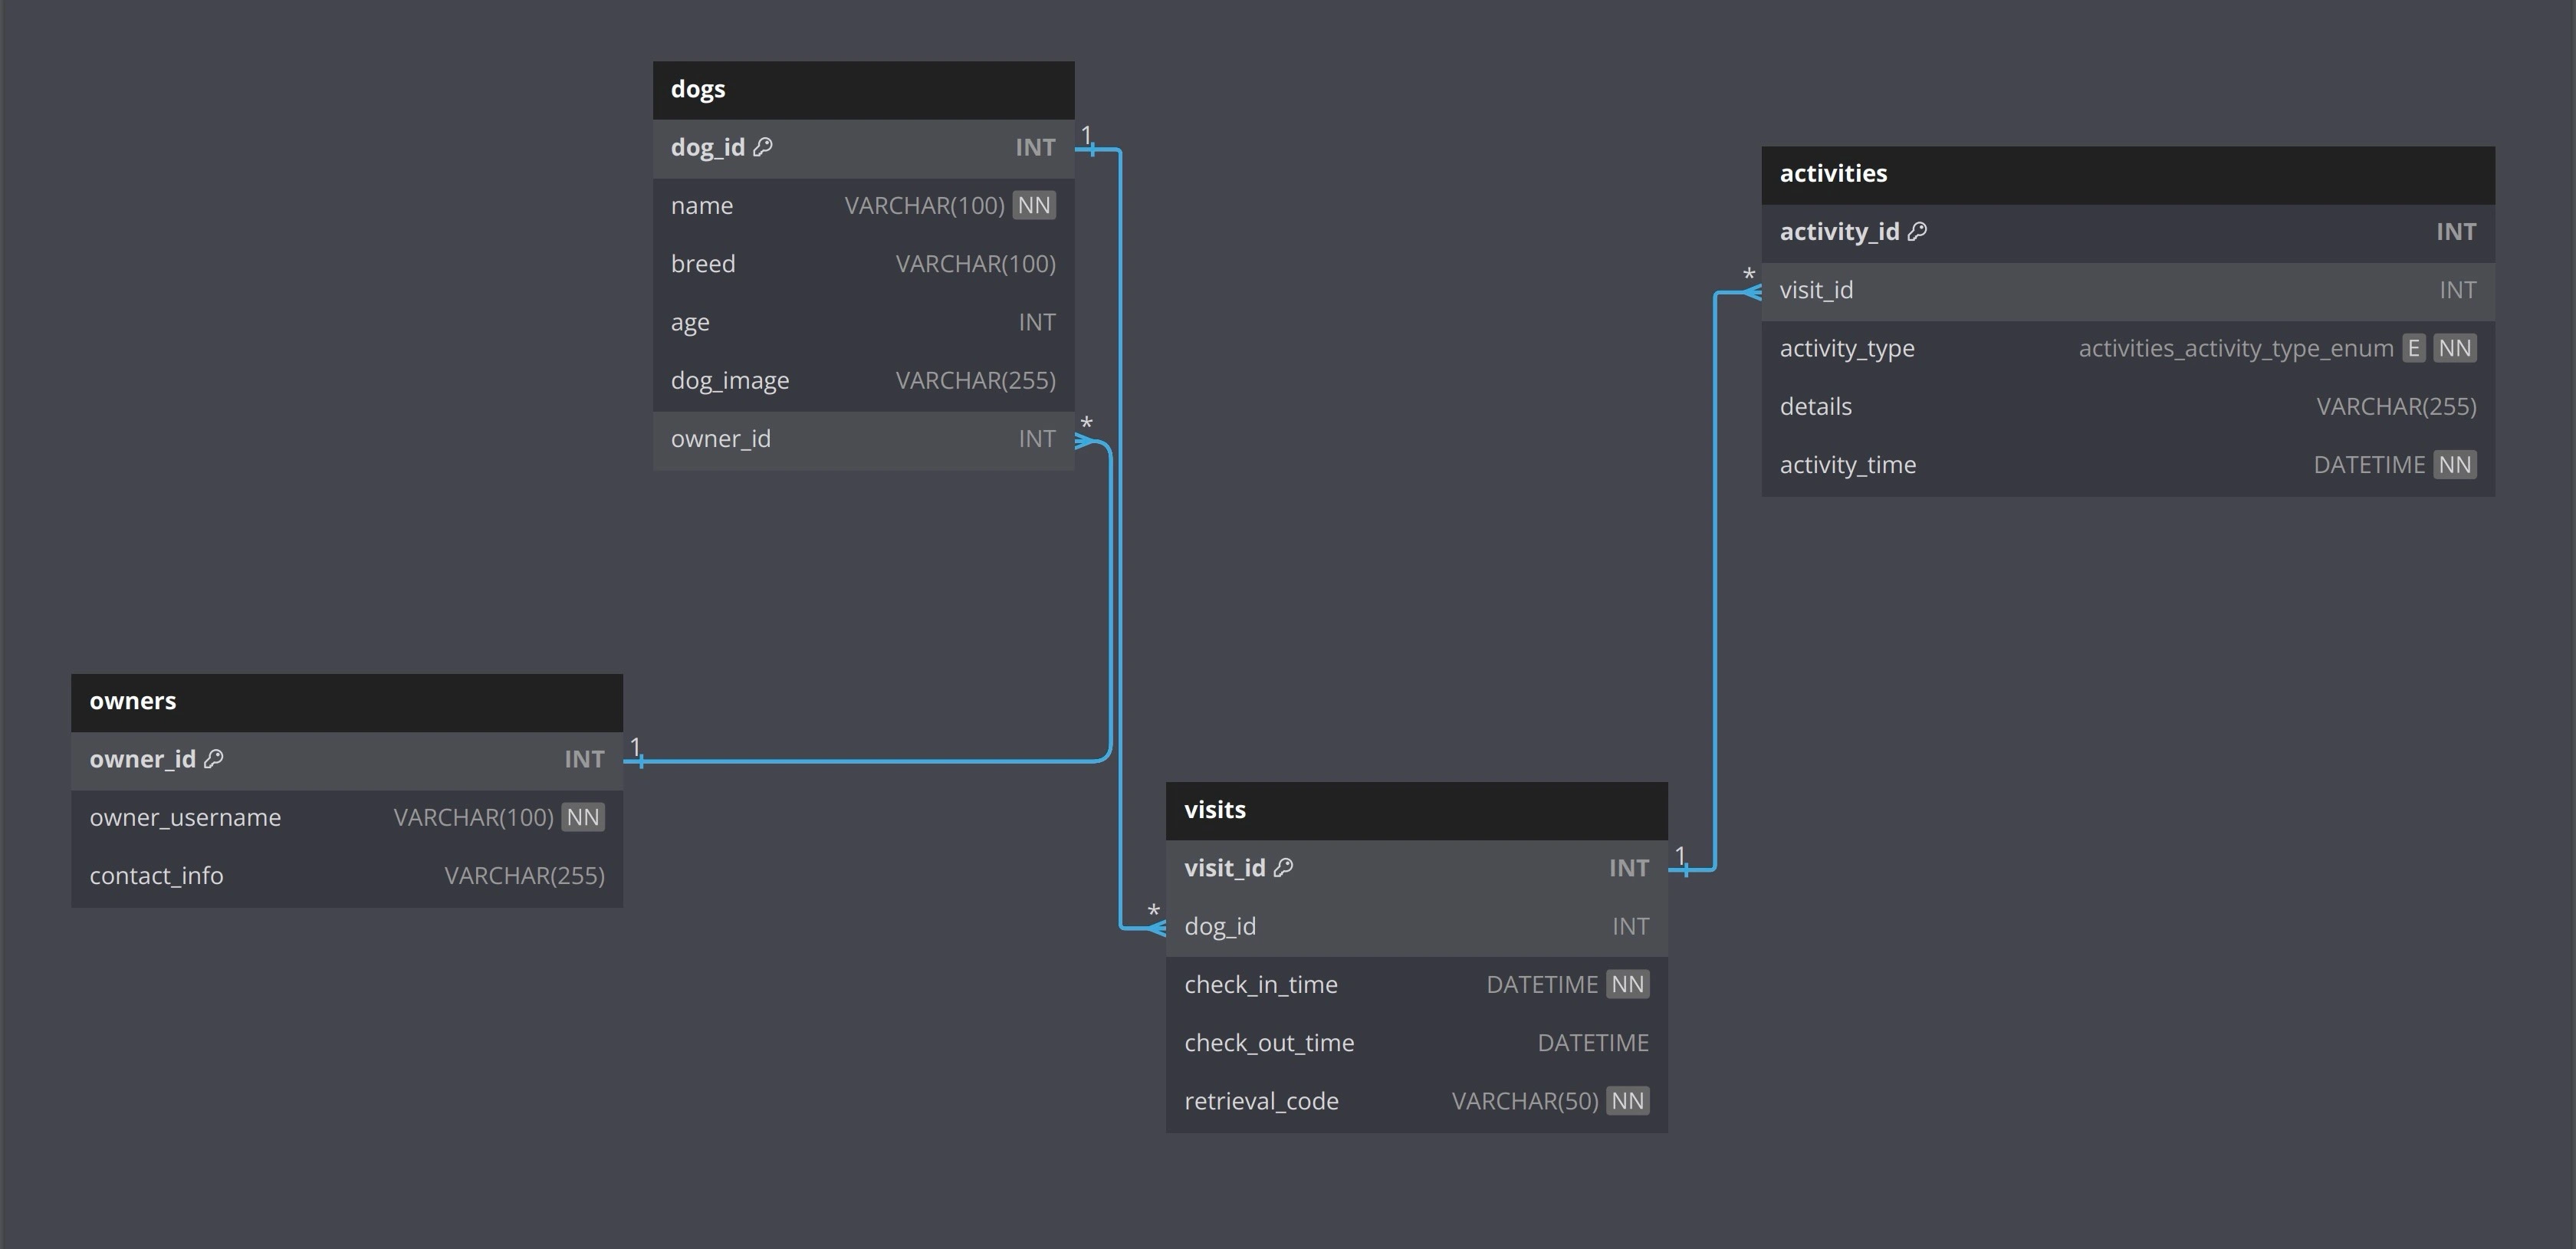
The database schema above has four tables: owners, dogs, visits, and activities. An owner can have multiple dogs (one-to-many), but each dog belongs to only one owner, linked through a foreign key in the dogs table.
Similarly, a dog can have multiple visits (one-to-many) over time, each being specific to that dog and tracked in the visits table via a foreign key.
Additionally, each visit can involve several activities (one-to-many), such as feeding, grooming, or medication, each tied to a specific visit through the visit_id foreign key in the activities table.
Now that you have the design of your database, you will prompt the AI to create the database in your backend using a prompt similar to the one below.
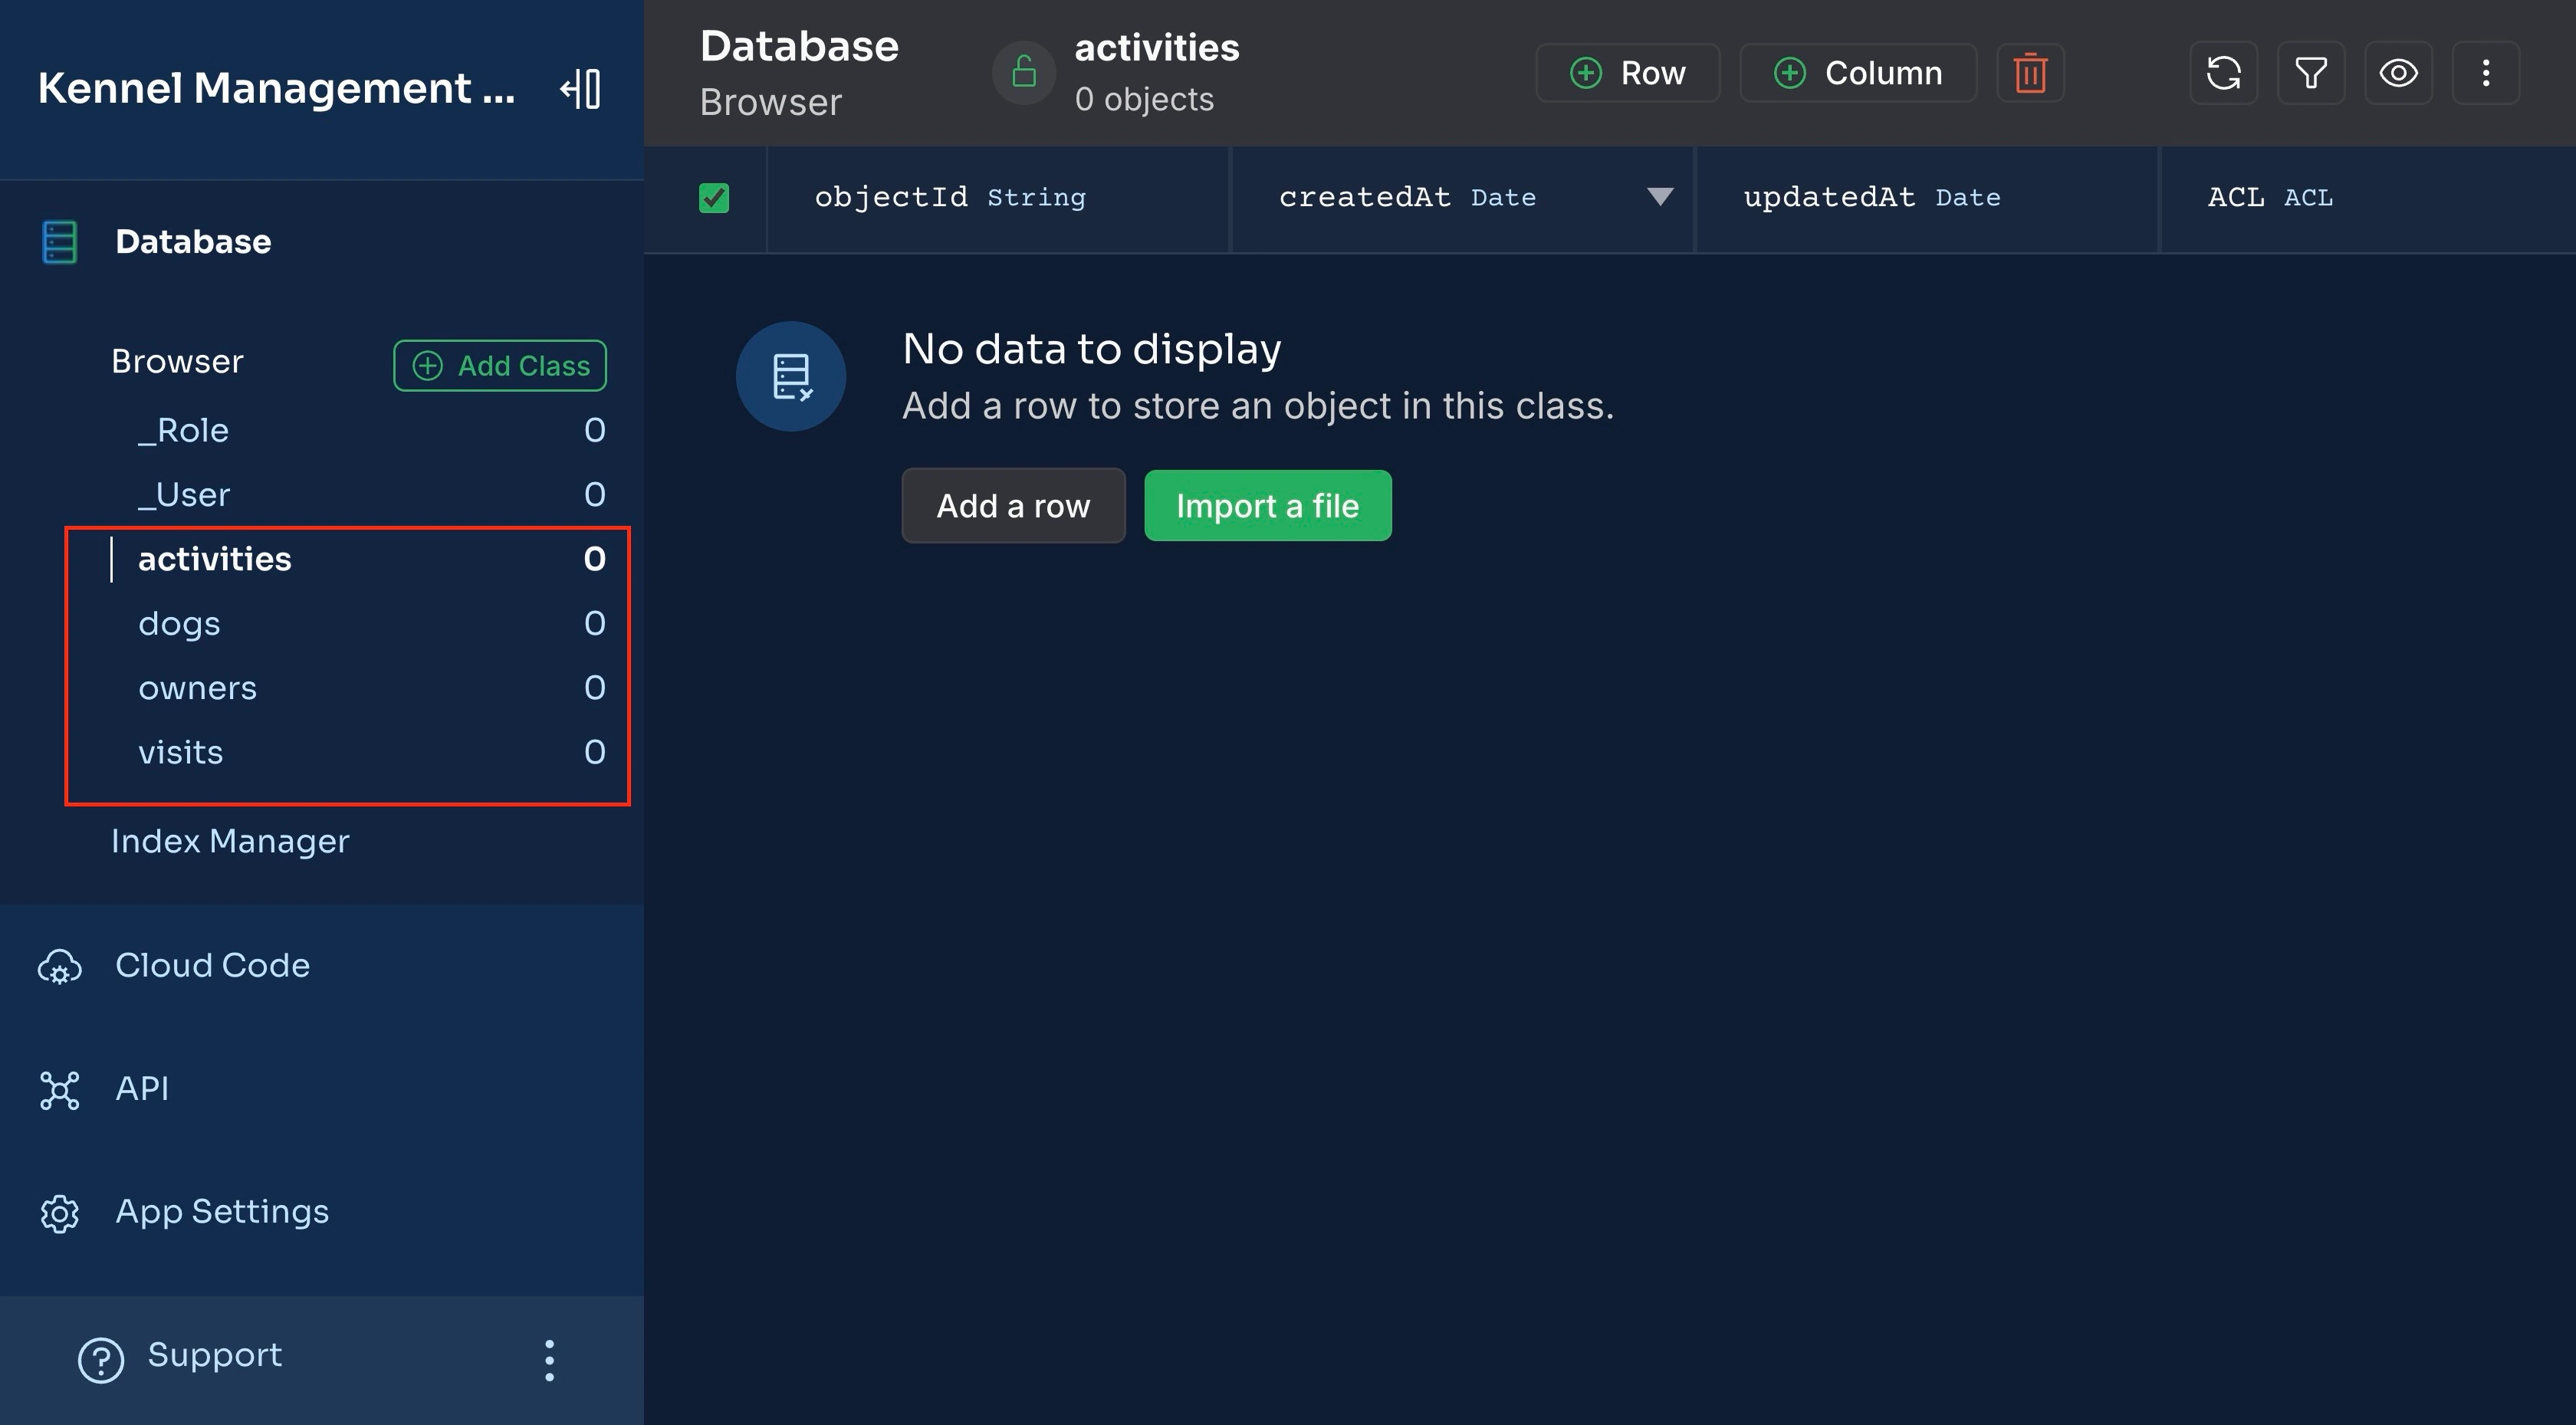
- Create the designed database in the backend app "Kennel Management Backend".You should get a response that the database has been created successfully. You can confirm by checking your app dashboard for the newly created tables, as shown in the image below.
Now that you have created your backend and added your application’s database tables, you will implement the application logic.
Implementing your Backend Logic with AI
From the application requirements, your application should enable owners to check their dogs into the kennel, store details like the dog’s name, breed, age, owner name, and image, and generate a unique retrieval code for the owner.
To implement these requirements, you need a utility function that generates a unique retrieval code and one that uploads the dog’s image in the background to ensure the upload task doesn’t slow down your application’s response time.
Implementing Utility Functions
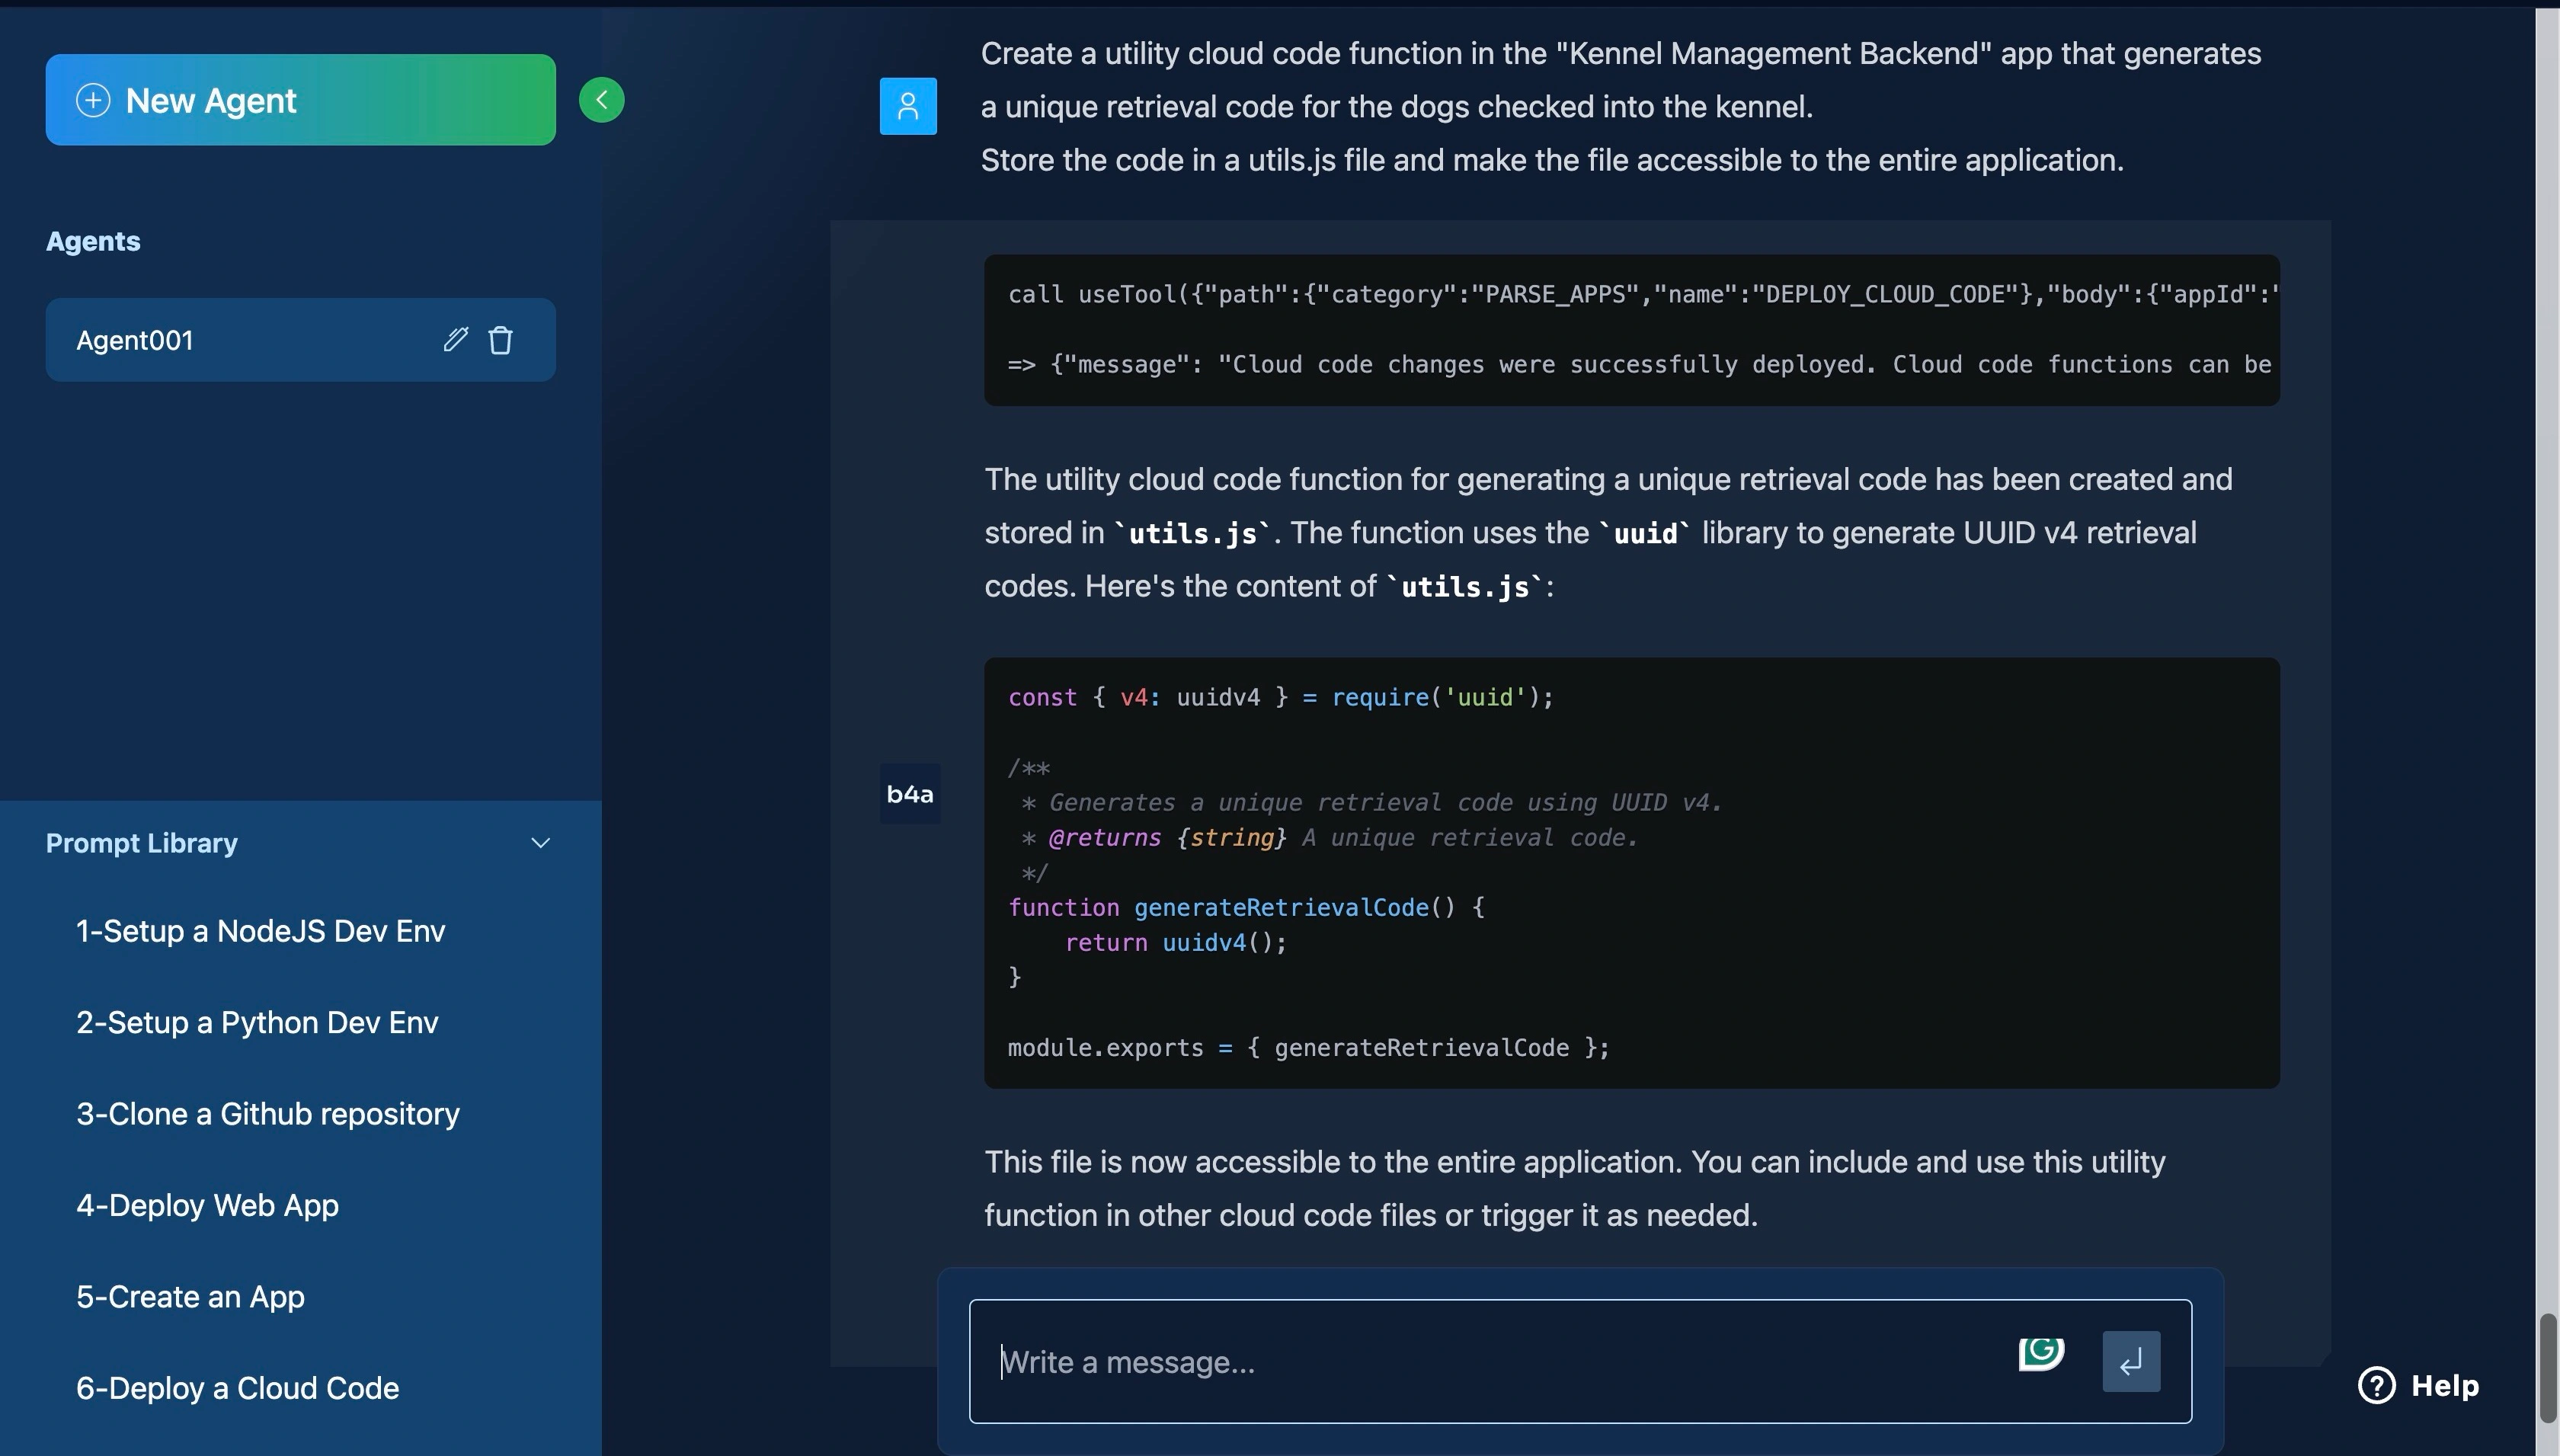
You can create a utility function that generates a unique code by feeding the prompt below or something similar to the AI Agent:
- Create a utility cloud code function in the "Kennel Management Backend" app that generates  a unique retrieval code for the dogs checked into the kennel.

-Store the code in a `utils.js` file and make the file accessible to the entire application.
You should get a response that the cloud code function has been created, similar to the response in the image below.
Next, generate the function that uploads the dog’s image and associates it with the corresponding dog record by feeding the prompt below or something similar to the AI Agent:
- Create an asynchronous utility Cloud Code function named `uploadDogImage` that accepts three parameters: `dogName`, `dogImage`, and `dogId`.

- The function should upload the `dogImage`, using `dogName` as the image name, and ensure that the image is properly associated with the corresponding dog record identified by `dogId`.

- Implement error handling to manage any issues during the upload process and confirm the association with the dog record.

- Add the `utils.js` file and make it accessible to the entire application.
The prompt above ensures the dog image is uploaded correctly and associated with the correct dog record while handling possible errors.
You should get a response that the function was created successfully.
The two utility functions were implemented in a utils.js file to maintain code modularity. Now, you have the two utility functions needed to implement the check-in feature for your application.
Implementing the Check-in Feature
To implement the check-in feature for your application, you need the dog’s name, age, breed, image, and the owner’s username.
Then, you need to generate a retrieval code for the owner, record the visit, upload the dog’s image (in the background), and return the code to the owner.
You can add the logic above to your backend application by feeding the prompt below or something similar to the AI Agent:
- Create an asynchronous Cloud Code function named `checkIn` in a `main.js` file that accepts five parameters from a request body: `dogName` (String), `dogAge` (Number), `dogBreed` (String), `ownerUsername`(String), and `dogImage` (File).

- The function should first validate and sanitize each input to ensure they conform to expected types and formats.

- It should then search for an owner in the `owner` table using `ownerUsername` and create a new owner record if none exists. Next, the function should create a new record in the `dogs` table with  the provided `dogName`, `dogBreed`, `dogAge`, and the corresponding `ownerId`.

- After that, it should call the `generateRetrievalCode` utility function to create a unique retrieval code.

- The function must also use the `uploadImage` utility to upload `dogImage`, running this process in the background without awaiting the return value.

- Finally, it should create a record in the `visits` table that includes relevant details such as the `ownerId`, `dogId`, and the generated retrieval code, and return a success message along with the retrieval code to the user.

- Ensure error handling is implemented for database operations and input validation, returning appropriate error messages where necessary.
You should receive a response indicating that the function was created successfully.
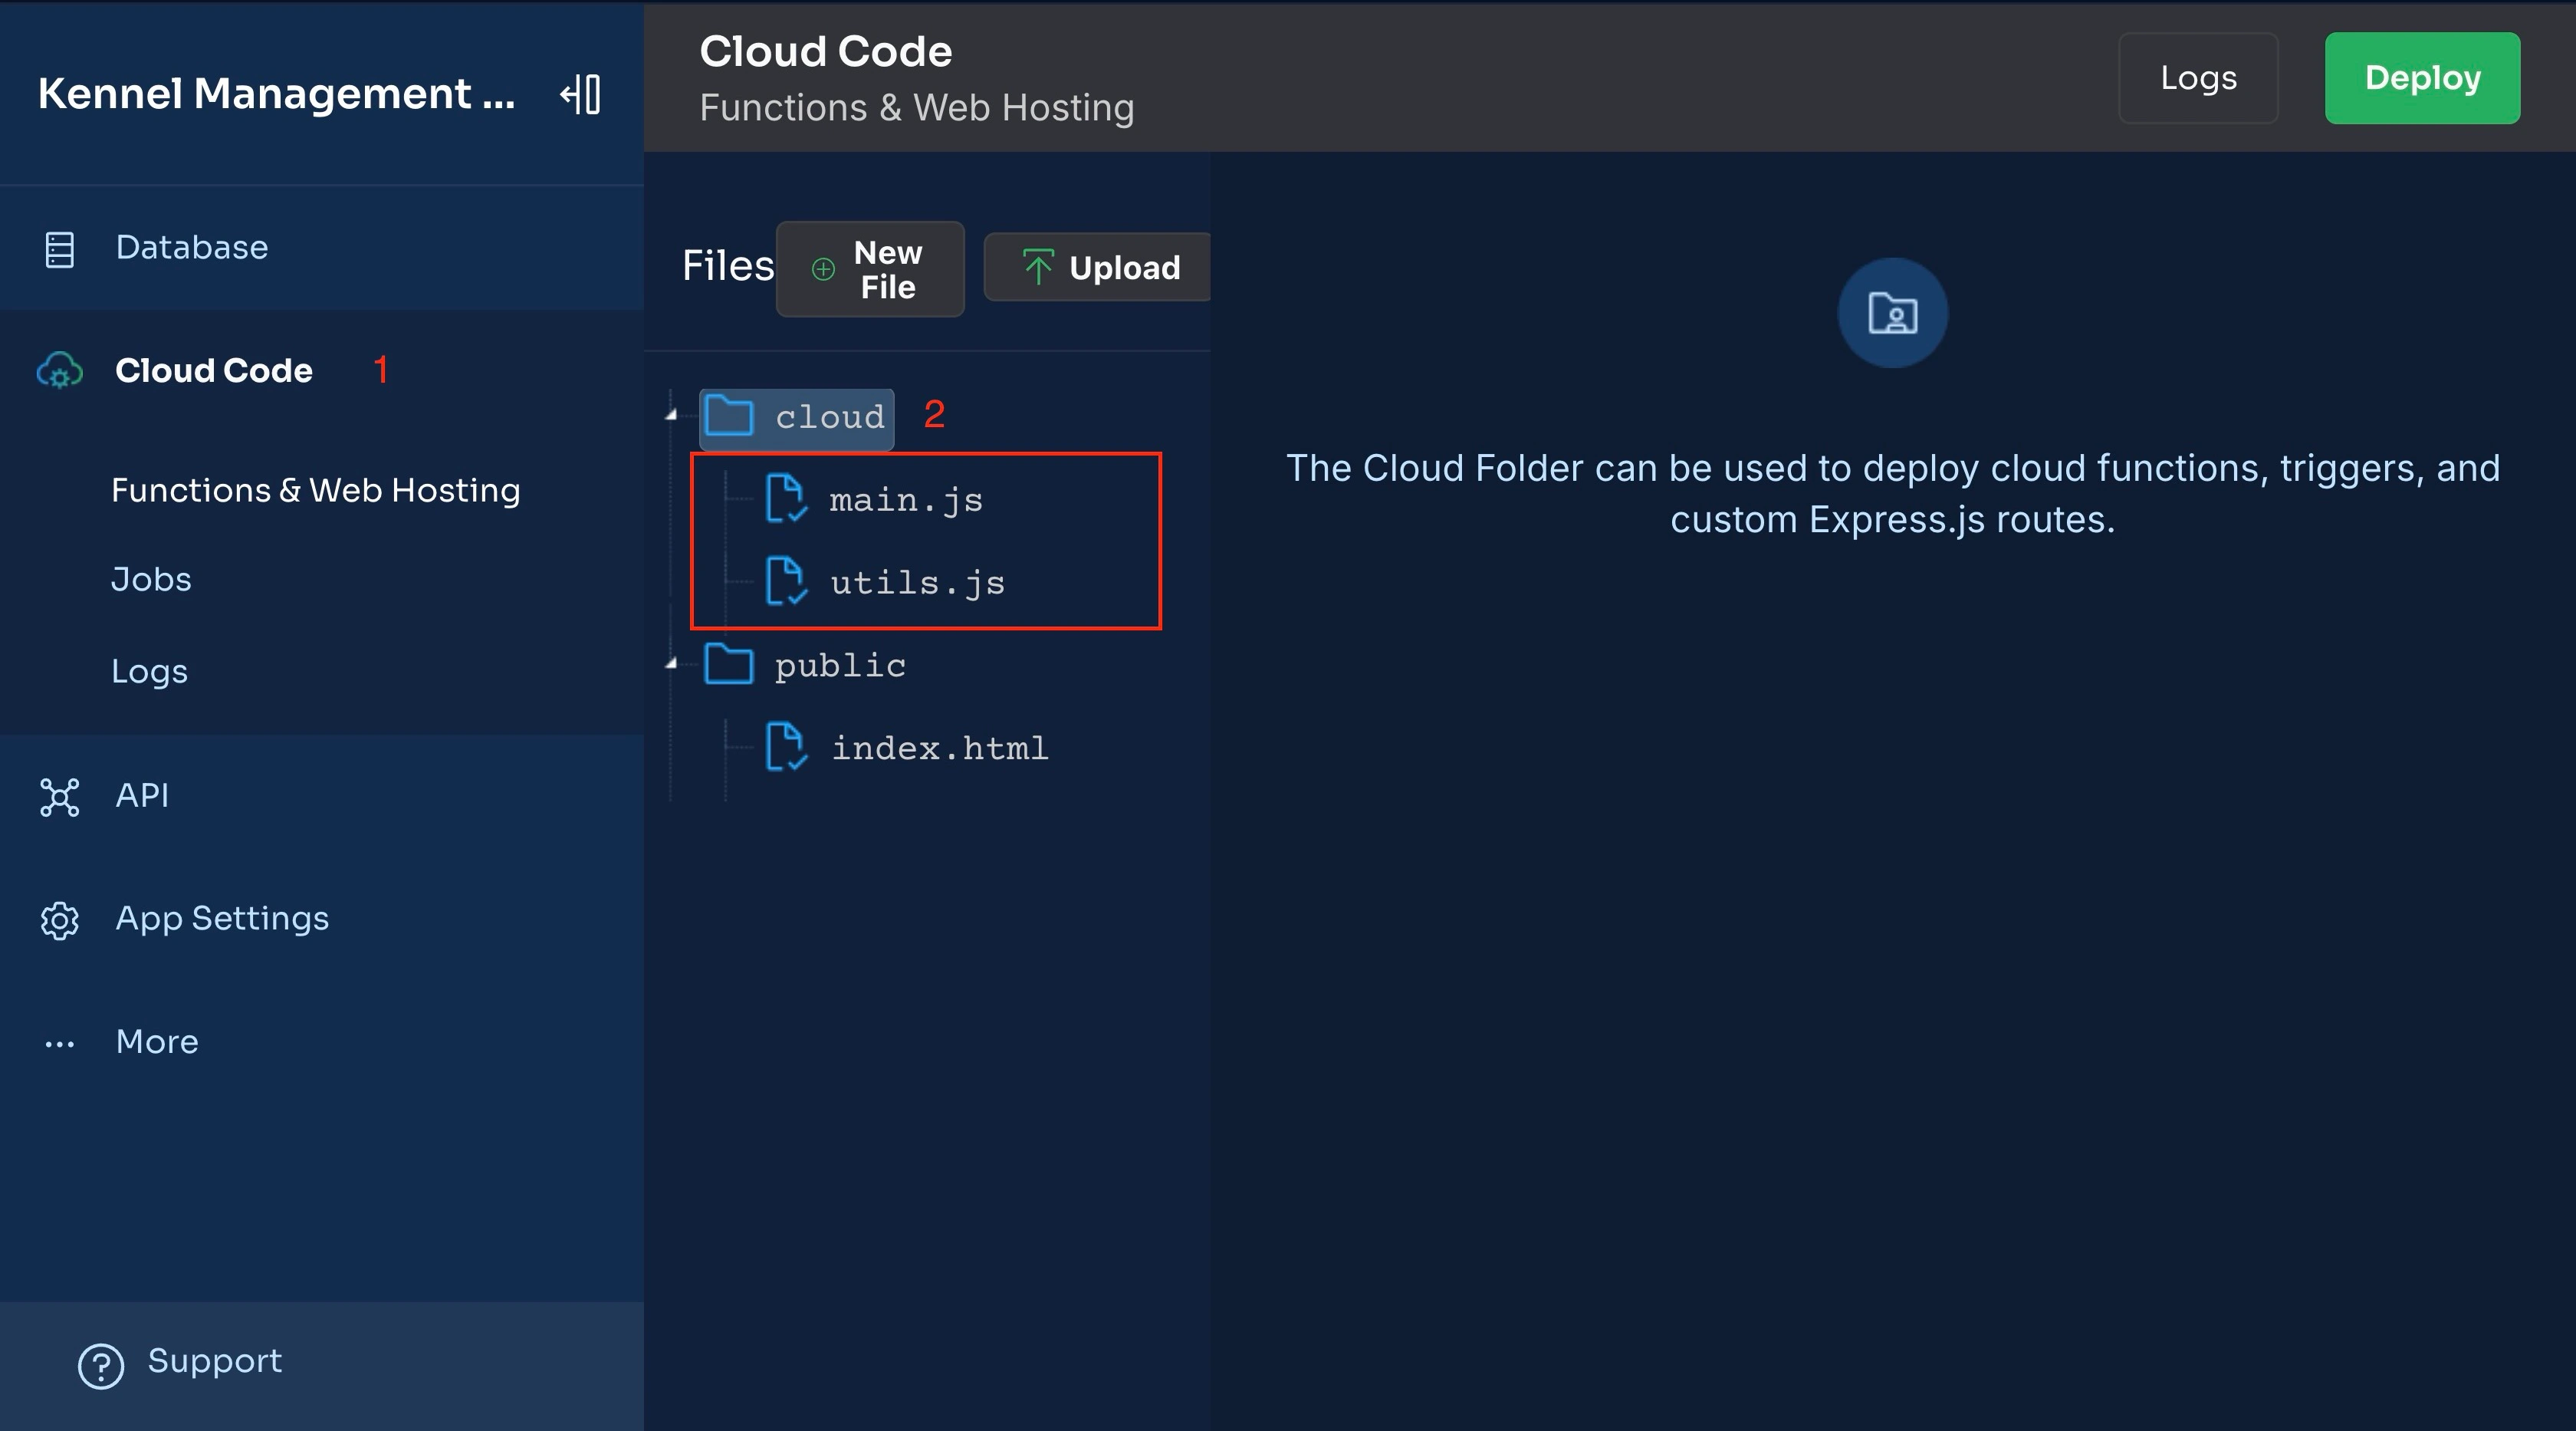
You can review the code created by the AI agent and modify it if necessary on your App Dashboard → Cloud Code, as shown in the image below.
Now, you can check in new dogs into your kennel. Next, you will implement the record activity feature.
Implementing the Record Activity Feature
Based on the application requirements, your application should keep track of all the activities the dog was involved in during the visit.
To implement the record activity feature, you need to fetch the visit record and create a new activity with the required information.
You can add the logic above to your backend application by feeding the prompt below or something similar to the AI Agent:
- Create an asynchronous function called `recordActivity` that accepts three parameters from a request body: `visitId`, `type`, and `description`.

- It should first check if a visit with the specified `visitId` exists in the database.

- If the visit is not found, return an appropriate error message.

- If the visit exists, the function should create a new activity record  with the visitId, type, and description, set the time to the current date,
and return a success message, after a successful creation.

- Ensure error handling is implemented for database operations and input validation, returning appropriate error messages where necessary.
You can check your dashboard to ensure this function was implemented correctly and make any changes if necessary.
Implementing the Checkout Feature
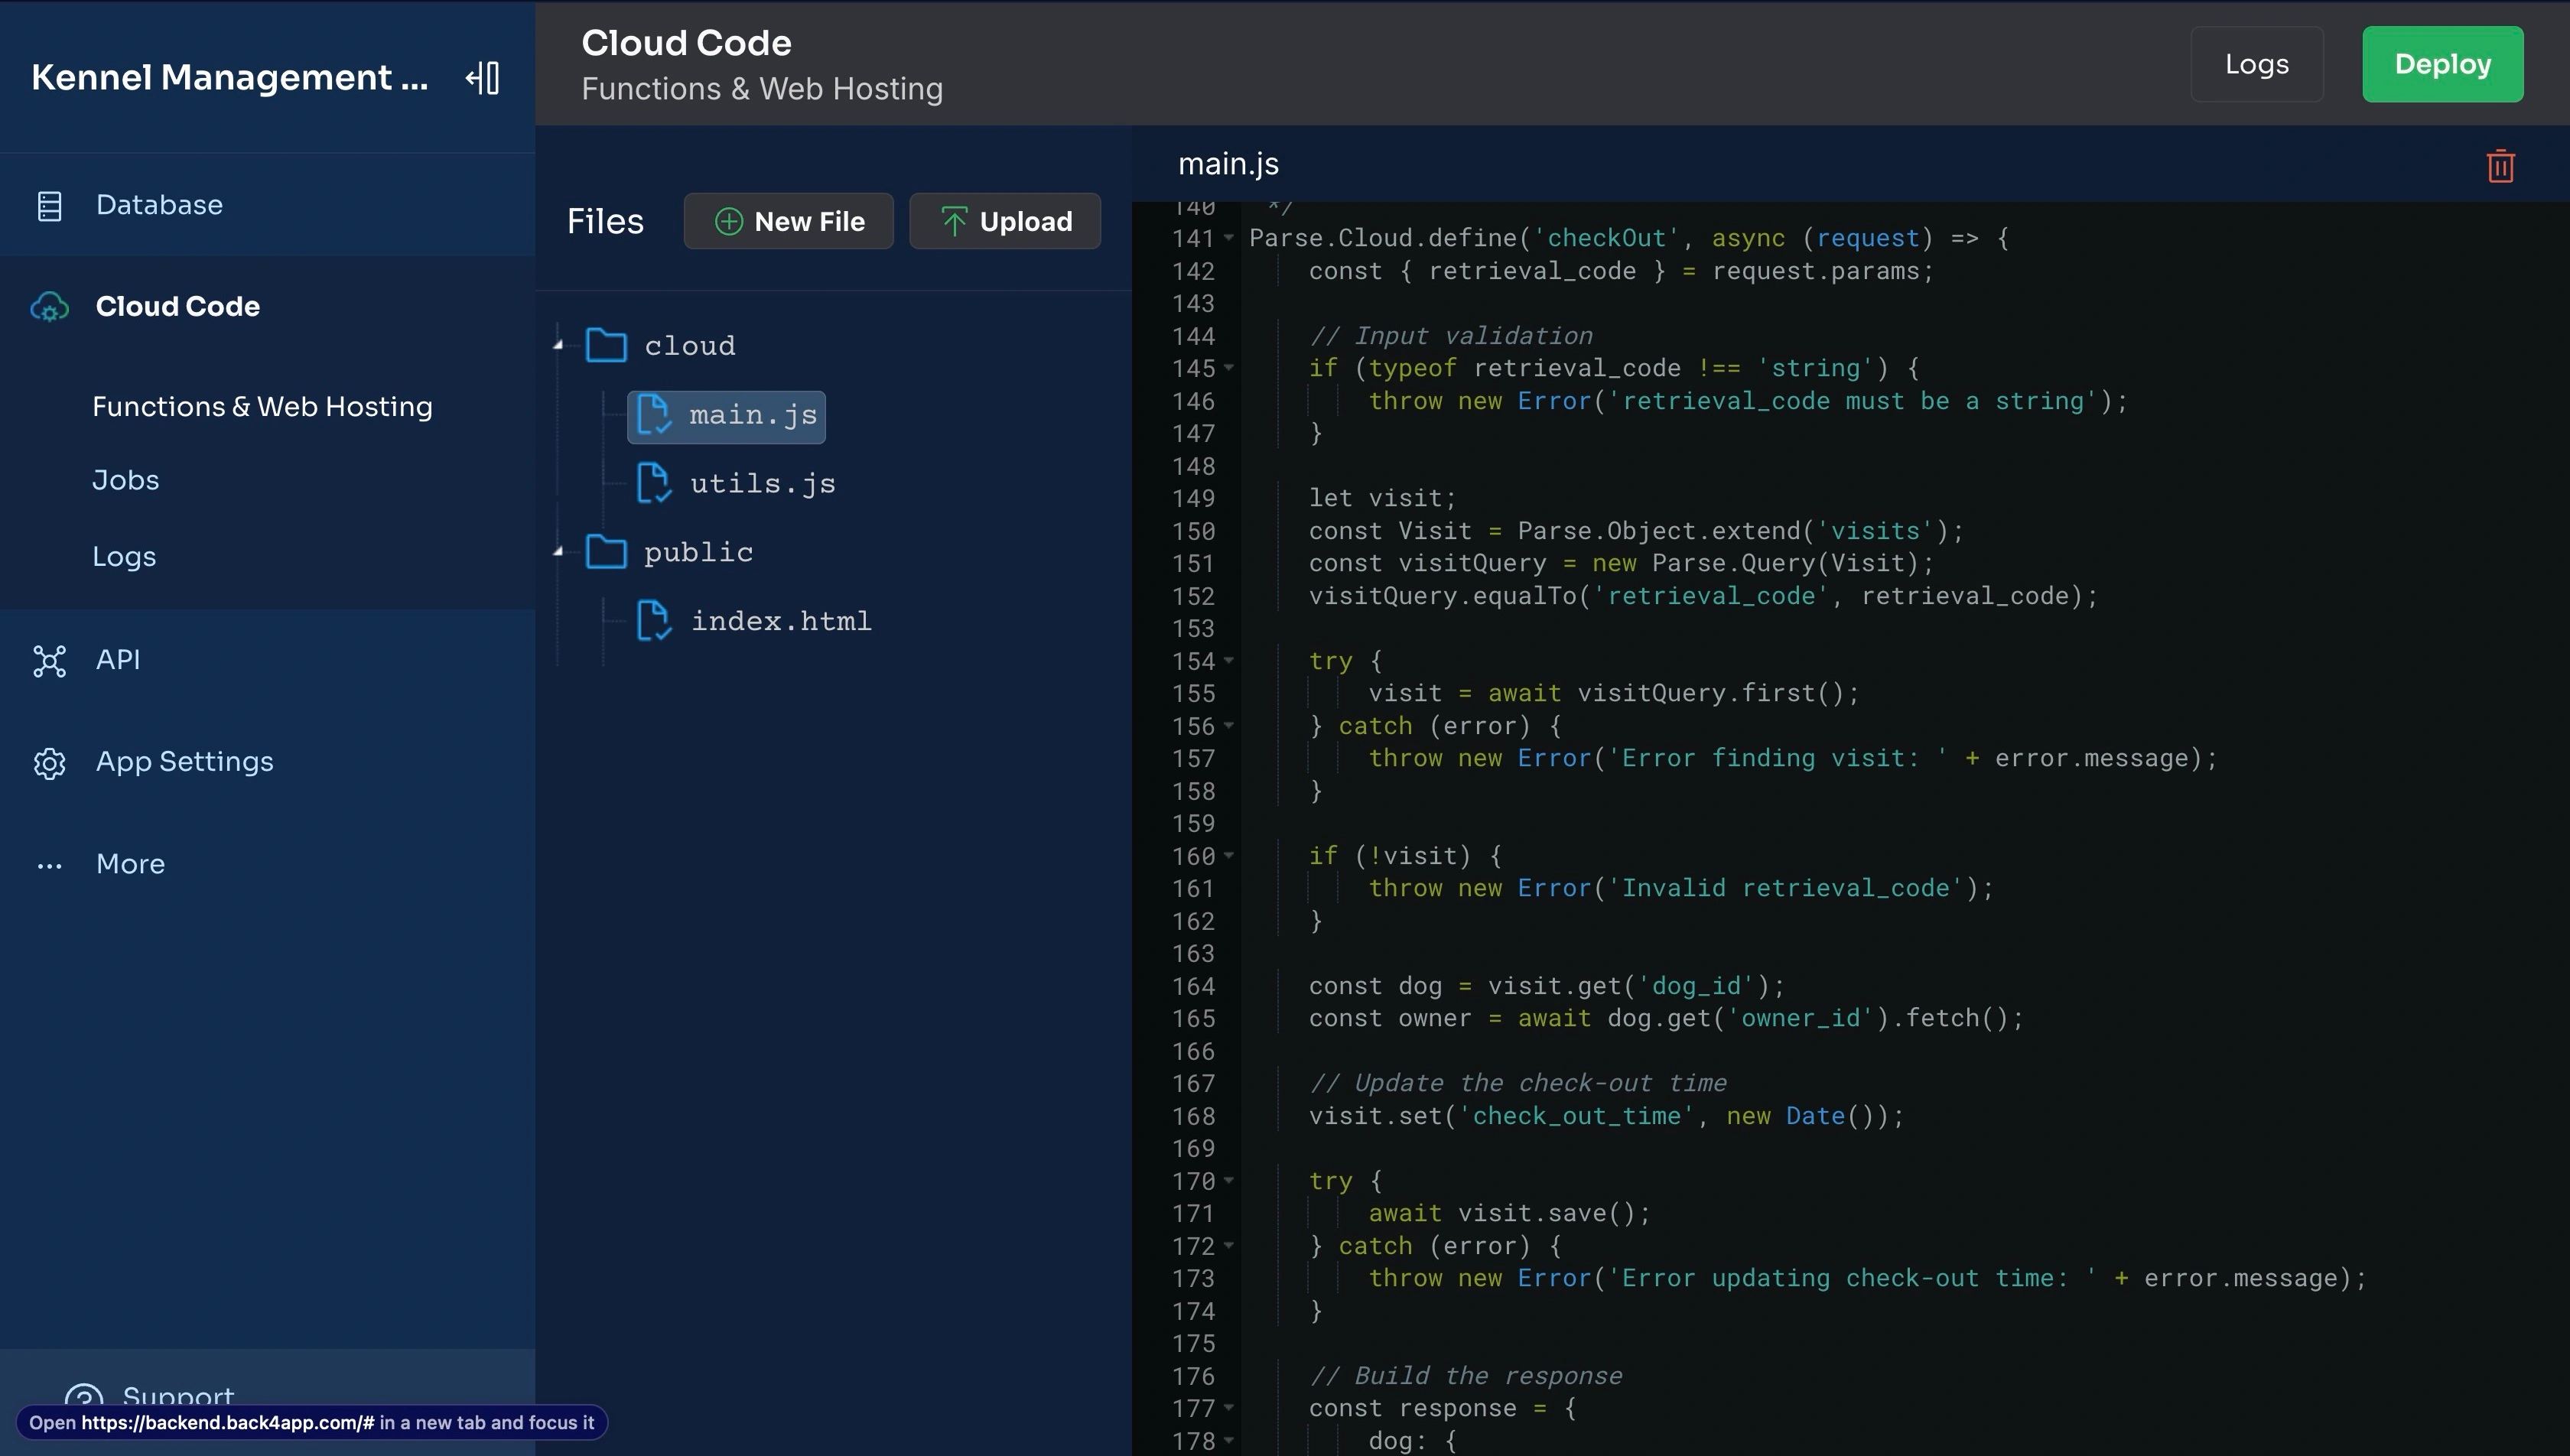
To implement the checkout feature, you need to fetch the visit record using the retrieval_code, include related dog and owner details, update the check_out_time, and return a response with the dog’s and owner’s information, as well as the visit’s check-in and checkout times.
You can add the logic above to your backend application by feeding the prompt below or something similar to the AI Agent:
- Create an asynchronous cloud code function called `checkOut` that retrieves dog and visit details based on a `retrieval_code` extracted from the request body.

- The function should fetch the corresponding visit record in the `Visit` table  and include related dog details from the `Dog` table and the `Owner` table.

- The function should select specific dog attributes such as `name`, `breed`, `age` and image.

- If no visit is found, return a message indicating that the `retrieval_code` is invalid.

- Upon successfully finding the visit, the function should update the `check_out_time` to the current date and save the updated visit record.

- Finally, structure a response that includes the dog's information
along with its owner details, as well as the visit's `check_in_time` and `check_out_time`.

- Implement error handling to catch and log any issues during the process,
returning a relevant error message in case of failure.
You can review the code created by the AI agent on your App Dashboard → Cloud Code → main.js.
With the checkout feature fully implemented, you have completed the application requirements for a simple kennel management application.
Conclusion
In this article, you build a scalable kennel management application that supports check-ins, tracks dogs’ activities during visits, and allows owners to retrieve their dogs at the end of the visit using AI.
To improve your application’s ability to scale, you designed a normalized database to ensure your queries are not slow.
You also delegated long-running tasks like the dog image upload to a function that runs in the background and split the code into files to make it easier to maintain.
With your backend completed, you can connect it to a UI built with a frontend library like React, Svelte, or Vue and deploy it using Docker in platforms like the Back4app Web Deployment Platform.


