How to Deploy a Vue.js Application
Vue.js is a JavaScript framework developed to address common issues in web application development, such as complex state management and the need for a lightweight, flexible solution.
The framework was designed for simplicity, efficiency, and ease of use with a syntax similar to HTML and JavaScript. Additionally, Vue is reactive, making it faster and more efficient than traditional DOM manipulation.
In this article, you’ll learn about the benefits and limitations of using Vue and how to deploy your Vue application using Back4app’s containerization service for free.
Contents
- 1 Key Takeaways
- 2 Advantages of Developing Your Front-End with Vue
- 3 Limitations of Developing Your Front-End with Vue
- 4 Deploying an Application With Back4app Containers
- 5 Building the Vue Application
- 6 Deploying Vue Apps With Back4app Containers:
- 7 Conclusion
- 8 FAQ
- 9 Are there any limitations to keep in mind when deploying a Vue.js application on Back4app?
- 10 Can I use Back4app to deploy Vue.js applications that require specific environment variables?
- 11 How does the integration between GitHub and Back4app simplify the deployment workflow for Vue.js applications?
Key Takeaways
- Vue.js offers optimized performance techniques, flexibility, and extensive documentation, making it a popular choice for front-end development.
- However, Vue.js may have limitations in terms of long-term stability and a less mature ecosystem compared to other frameworks.
- Back4app Containers provides an easy and efficient way to deploy Vue.js applications, leveraging Docker technology for improved performance, security, and simplified deployment and scaling.
Advantages of Developing Your Front-End with Vue
Vue has become increasingly popular in recent years for several reasons. Here are some of the benefits of developing your web applications with Vue:
Techniques and Solutions for Optimized Performance
Vue provides a set of techniques for optimizing performance when building web applications, such as the virtual DOM and update mechanisms in the form of functions.
With these techniques, Vue minimizes the number of DOM operations and rendering overhead, resulting in faster reload times and improved application performance.
Vue utilizes a virtual DOM, a lightweight representation of the actual DOM, and updates the vDOM when you make changes in your application. It then uses a diffing algorithm to identify the minimal changes required in the actual DOM.
This approach significantly reduces the number of expensive DOM operations, leading to faster rendering and improved performance.
Additionally, Vue gives you fine-grained control over component updates through lifecycle hooks, watchers, and computed properties.
With these functions, you can specify when a component should update based on specific criteria, preventing unnecessary updates and improving overall performance.
Vue is Flexible in Nature
Vue’s flexibility is evident in multiple aspects of the framework, allowing it to adapt to various development scenarios, patterns, or requirements.
One of Vue’s key strengths is its incremental adoption approach, which makes it the perfect front-end framework for integrating into existing projects.
In addition to its incremental adoption approach, you can integrate Vue seamlessly with other libraries and existing ecosystems.
This compatibility fosters interoperability and allows developers to choose the best solutions for their requirements.
For example, Vue functionality can be integrated into other libraries and frameworks like React and Angular.
Vue also offers a flexible and intuitive template syntax that allows you to write templates using HTML-based syntax with added directives and expressions.
This syntax balances simplicity and power, making it easy to understand and work with Vue templates.
Additionally, Vue supports alternative rendering approaches, including JSX (JavaScript XML), providing flexibility for developers preferring alternative syntaxes.
Extensive Documentation and an Active Community
Vue’s documentation is well-structured and concise, clearly explaining concepts with practical examples. The documentation’s clarity and completeness also reduce the learning curve, allowing you to start building applications with Vue.
Another defining aspect of Vue is its community’s dedication to open-source culture and active contribution.
Vue developers actively contribute to the continuous improvement and evolution of Vue.js. They provide code contributions and engage in discussions, offer valuable feedback, and help shape the future direction of Vue.js.
This collaborative approach ensures that Vue.js remains a cutting-edge framework. By actively engaging with the Vue community, you can tap into a vast network of resources, gain valuable support, and unlock opportunities to expand your skills and expertise.
Limitations of Developing Your Front-End with Vue
Although Vue offers advantages for front-end development, it is also essential to note some limitations when developing with Vue. Some of these limitations include:
Long-Term Stability
Vue suffers from substantial corporate backing leaving developers with the perception that Vue is not suitable when considering frameworks to develop the front end of a web application.
Organizations often prioritize frameworks with solid corporate support like Angular and React to ensure the framework’s ability to meet evolving business needs and provide ongoing maintenance.
Less Mature Ecosystem
Compared to Angular and React, Vue has a less mature ecosystem. This leads to scenarios where Vue developers encounter limitations in available libraries and tools to tackle complex processes in large applications.
Vue developers often find themselves in situations where they may need to devise custom solutions for their application requirements. This, thus, leads to additional time and effort in developing the web application.
Deploying an Application With Back4app Containers
Back4App Containers is a platform that uses Docker technology to deploy and run applications in isolated environments called containers.
With this technology, you can package your web applications with all the necessary dependencies and ensure consistent deployments across different environments.
Deploying an application to Back4app Containers is very simple. You need to create a Dockerfile in the root of your application that describes the packaging and running of the application.
Then, you push the application to your GitHub repository. From this step, Back4app builds the Docker image and runs the container.
Here are some of the benefits of using Back4App Containers:
- Improved performance: Containers are lightweight and efficient, leading to improved application performance.
- Enhanced security: Containers are isolated from each other, which can help to improve security.
- Simplified deployment and scaling: Containers can be scaled easily, saving time and money.
Building the Vue Application
In this tutorial, you will build a simple Vue application that suggests activities users can perform in their leisure time.
The Vue app is going to consume an API to perform this action. Then, you will deploy the Vue application to Back4app containers
To get started building the Vue application, run the following command in your preferred directory:
npm create vue@latest
Running this code will generate a prompt allowing you to name your Vue application and select the features you want to integrate into your app.
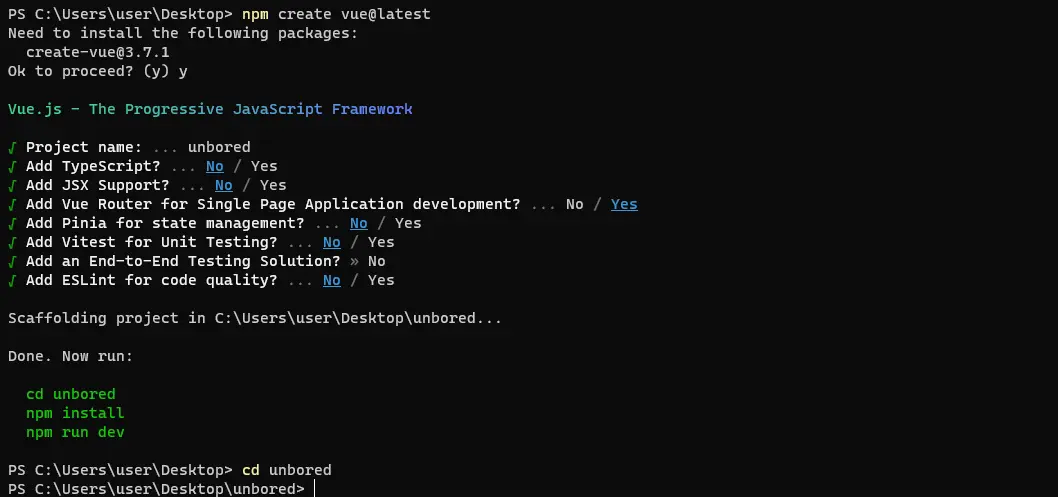
For this application, you will use the Vue Router feature only. After selecting this feature, cd into your application’s directory and run npm install to download and install the application’s dependencies.
To build this application, you must install three additional npm packages: axios, sass, and @iconify/vue.
Axios is a JavaScript library that simplifies making HTTP requests, allowing you easily retrieve data from the API.
Sass is a CSS preprocessor that you will use to style the application. You will use the @iconify/vue package to integrate scalable vector icons in your application.
To install these three packages, run the command below in your application’s root directory:
npm install axios sass @iconify/vue
Once you have installed these packages, you can open your current directory in Visual Studio Code by running the following command:
code .
Create two components in the views directory of your application: HomeView and AboutView. Then, handle the routing of these two components by adding the code block below index.js file in the router directory:
// index.js
import { createRouter, createWebHistory } from 'vue-router'
import HomeView from '../views/HomeView.vue'

const router = createRouter({
  history: createWebHistory(import.meta.env.BASE_URL),
  routes: [
    {
      path: '/',
      name: 'home',
      component: HomeView
    },
    {
      path: '/about',
      name: 'about',
      component: () => import('../views/AboutView.vue')
    }
  ]
})

export default router
The index file in the router directory handles the routing of the Vue web application. Here, two routes are defined: HomeView and AboutVue routes.
To allow your app users to navigate between these two routes, create a header with these routes in your App.vue file:
<!-- App.vue -->
<script setup>
import { RouterLink, RouterView } from 'vue-router'

</script>

<template>
  <header>
  <h1> Unbored </h1>

  <nav>
    <RouterLink to="/" class="link"><button>Home</button></RouterLink>
    <RouterLink to="/about" class="link"><button>about</button></RouterLink>
  </nav>
  </header>

  <RouterView />
</template>

<style lang="scss" scoped>
header{
    padding: 1rem 0;
    display: flex;
    justify-content: space-between;

    nav{
      display: flex;
      gap: 1rem;

      .link{
        text-decoration: none;
        color: inherit;
      }
    }

  }
</style>
In the App.vue file, you imported the RouterLink and RouterView components from the vue-router package.
The RouterLink component links the buttons to their respective routes, while the RouterView component displays the content of the route. You also styled the header in the style block.
After handling the routes, build the HomeView component of your app. The HomeView component should display a new activity an app user could perform when bored upon every button click. To perform this, copy the following code into your HomeView component:
<!-- HomeView.vue -->
<script setup>
import { ref } from 'vue';
import axios from 'axios';
import { Icon } from '@iconify/vue';

const activity = ref('');

const fetchActivity = async () => {
    try {
    const response = await axios.get('<https://www.boredapi.com/api/activity>');
    activity.value = response.data.activity
    console.log(response);
  } catch (error) {
    console.error(error);
  }
}

</script>

<template>
    <div>
        <h1>Tired of feeling bored. </h1>
        <p>Click on the button below to get an activity you can do.</p>
        <button @click="fetchActivity"> Get Activity</button>
        <Icon icon="system-uicons:arrow-down" />
        <h2> {{ activity }}</h2>
    </div>
</template>

<style lang="scss" scoped>

  div{
    display: flex;
    flex-direction: column;
    margin-block-start: 6rem;
    align-items: center;
    gap: 2rem;

    h1{
      text-transform: uppercase;
      letter-spacing: 0.5rem;
    }
  }
</style>
The above code block details the HomeView component. In the HomeView component, you imported the ref and axios functions from their respective packages. You also styled this component in the style block.
The activity variable is a reactive reference to store fetched activity data. The fetchActivity function asynchronously fetches data from the specified API endpoint “https://www.boredapi.com/api/activity” with axios and updates the activity value when an app user clicks the Get Activity button.
To explain to your app users what this app is about, copy and paste the following code into your AboutView component:
<!-- AboutView.vue -->
<template>
  <div class="about">
    <h3>About Unbored</h3>
    <p>The Unbored App suggests activities you could perform instead of staying bored all day</p>
  </div>
</template>

<style lang="scss" scoped>

  h3{
    margin-block-start: 4rem;
    margin-block-end: 3rem;
  }
</style>
To style the body of your Vue APP, create a main.css file in the assets directory and add the code below:
/* main.css */
*{
    margin: 0;
    padding: 0;
    box-sizing: border-box;
}

body{
    inline-size: 50%;
    margin: auto;
    font-family: 'Montserrat', sans-serif;
}

button{
    border: none;
    padding: 0.5rem 0.8rem;
    background-color: inherit;
    font-family: 'Montserrat', sans-serif;
    font-size: small;
    font-weight: bold;
    color: #333333;
    border-radius: 12px;
}

button:hover{
    color: #e2e2e2;
    background-color: #333333;
  }
That’s it! To preview your Vue application, run the following command in the app’s directory:
npm run dev
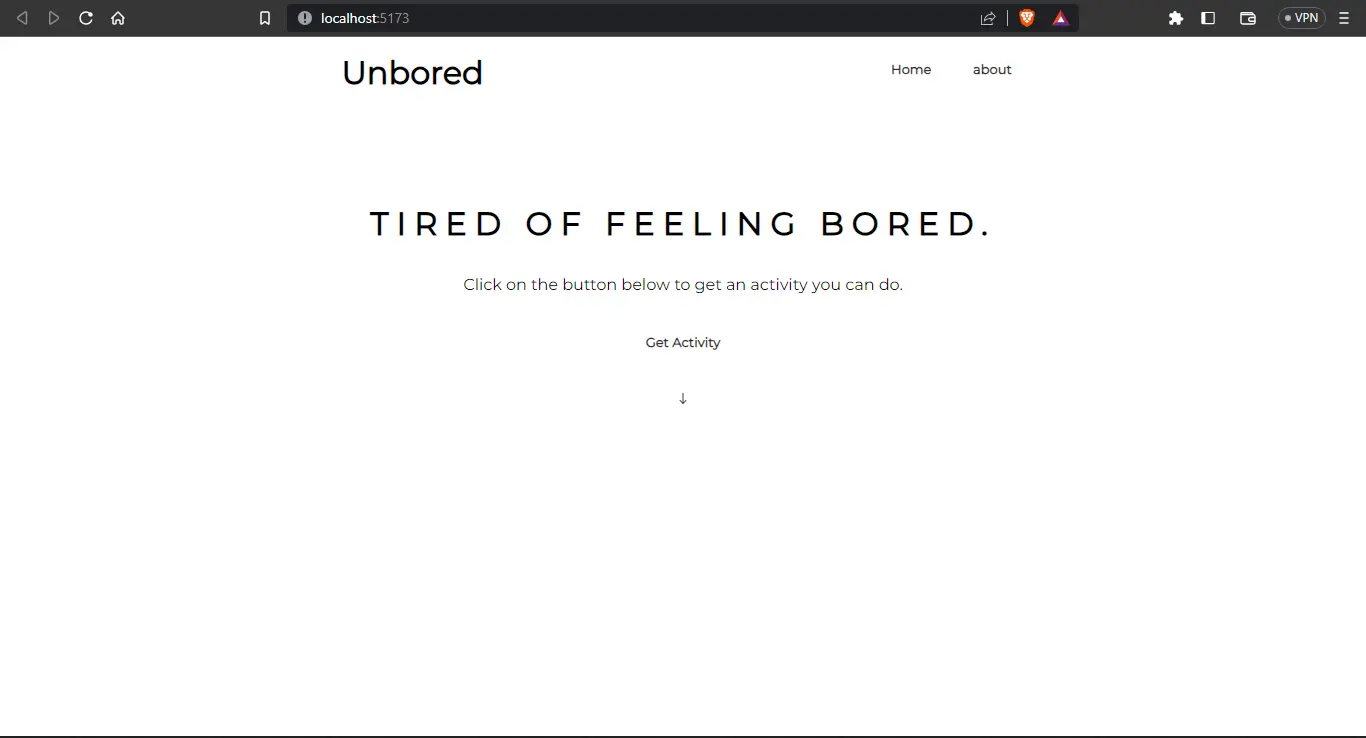
Your application should look like the image below.
Deploying Vue Apps With Back4app Containers:
This is a step-by-step tutorial on how to deploy your Vue application. First, you need to dockerize it. Dockerizing an application requires you to create a Dockerfile, which holds all instructions the Docker Engine needs to do to build the image.
Then, you will test your application locally to ensure everything works perfectly before deploying to Back4app containers.
Dockerizing Your Vue Application
To dockerize your Vue application, you need to create a Dockerfile in the root directory of your Vue app. A Dockerfile is a blueprint the Docker Engine uses for creating a Docker container with all the necessary dependencies and configurations.
The Dockerfile defines the base image, sets the working directory, copies files into the container, installs dependencies, configures the runtime environment, and specifies the commands to be executed when the container is launched.
To grasp Docker technology better, you can read this Dockerfile reference.
To start off dockerizing your Vue application, create a Dockerfile in the root directory and copy the following code into it:
# Dockerfile
FROM node:18

WORKDIR /app

COPY package*.json ./

RUN npm install

COPY . .

RUN npm run build

FROM nginx:1.19.0-alpine

COPY --from=0 /app/dist /usr/share/nginx/html

EXPOSE 80

CMD ["nginx", "-g", "daemon off;"]
The Dockerfile performs the following actions:
- The Dockerfile utilizes the base image
node:18, which provides the Node.js runtime environment.
- Sets the working directory inside the container to
/app.
- Copies the
package.jsonandpackage-lock.jsonfiles to the working directory.
- Installs the dependencies with the
npm installcommand.
- Copies the entire application code to the working directory.
- Builds the application by executing the
npm run buildcommand.
- The Dockerfile then uses the base image
nginx:1.19.0-alpine, which provides the NGINX web server.
- Copies the built static files from the previous stage to the directory
/usr/share/nginx/htmlin the NGINX image.
- Exposes port 80 to allow incoming HTTP traffic.
- It runs the NGINX server with the specified configuration
"nginx", "-g", "daemon off;"using the CMD instruction.
Building and Testing Your Dockerized Vue Application
Before deploying your images to the cloud, you can test the Docker application locally. To test the application, first build the application by running the following command:
docker build -t bored .
After the build process, `you can then run the following command to spin up the Docker container locally:
docker run -p 8080:80 bored
The -p 8080:80 specifies the port mapping between the host and the container. It maps port 8080 on the host to port 80 on the container.
At this point, your application is now running in a container locally. You can then navigate to http://localhost:8080 to view your application.
Deploying Your Application to Back4app Containers
Before deploying your application to Back4app Containers, you need to push the application to a GitHub Repository. You can learn to do this by following these steps in the GitHub documentation.
After pushing your source code to Github, you must create a Back4app account. To create an account on Back4app, follow these steps:
- Locate and click the Signup button on the top-right corner of the landing page.
- Fill out the provided signup form with the necessary details.
- Submit the form to complete the signup process.
Once you have successfully created your Back4app account, log in using your credentials. Then, locate the NEW APP button situated in the top-right corner of your Dashboard.
By clicking the NEW APP button, you will be redirected to a page where you can choose the deployment method for your application. Since you intend to deploy a container, opt for the Containers as a Service option.
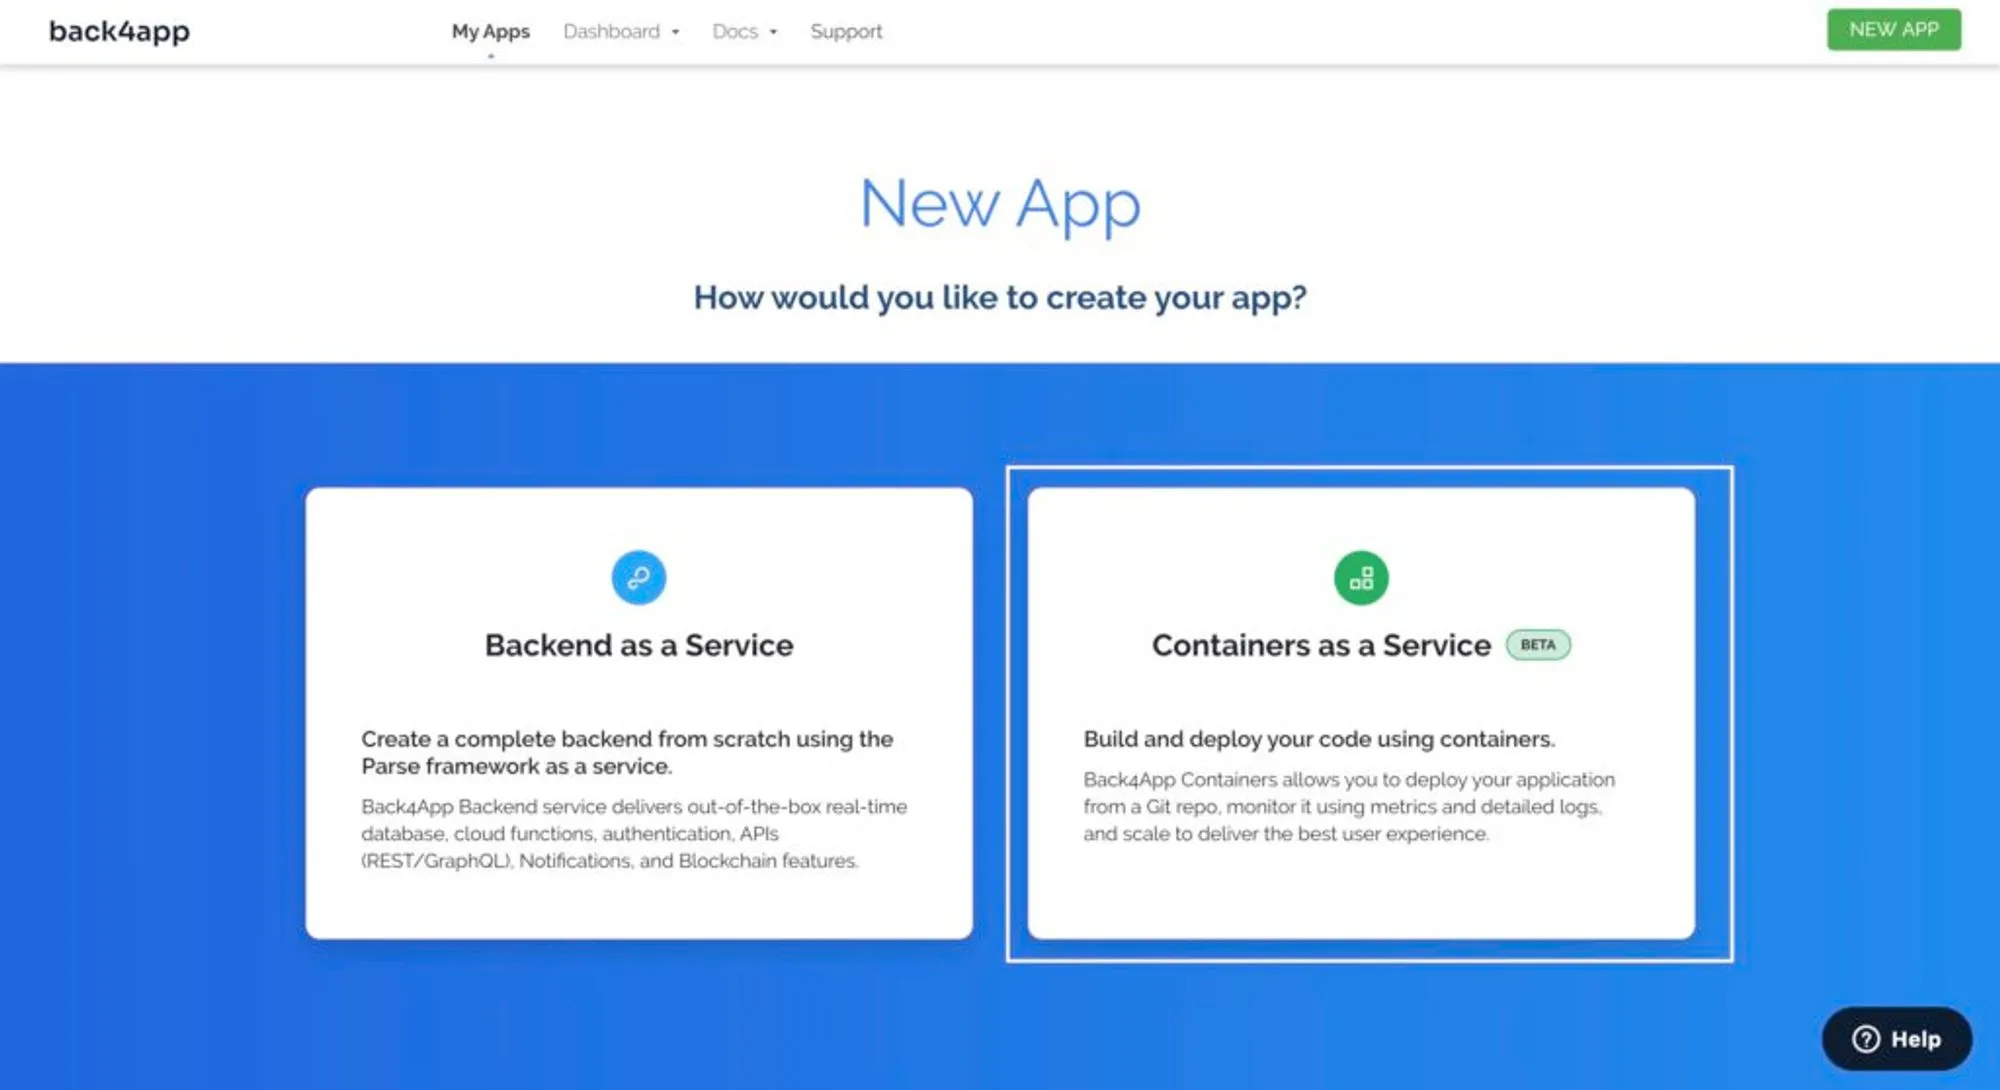
After clicking on the Containers as a Service option, link your application’s GitHub repository and click Select to deploy the application.
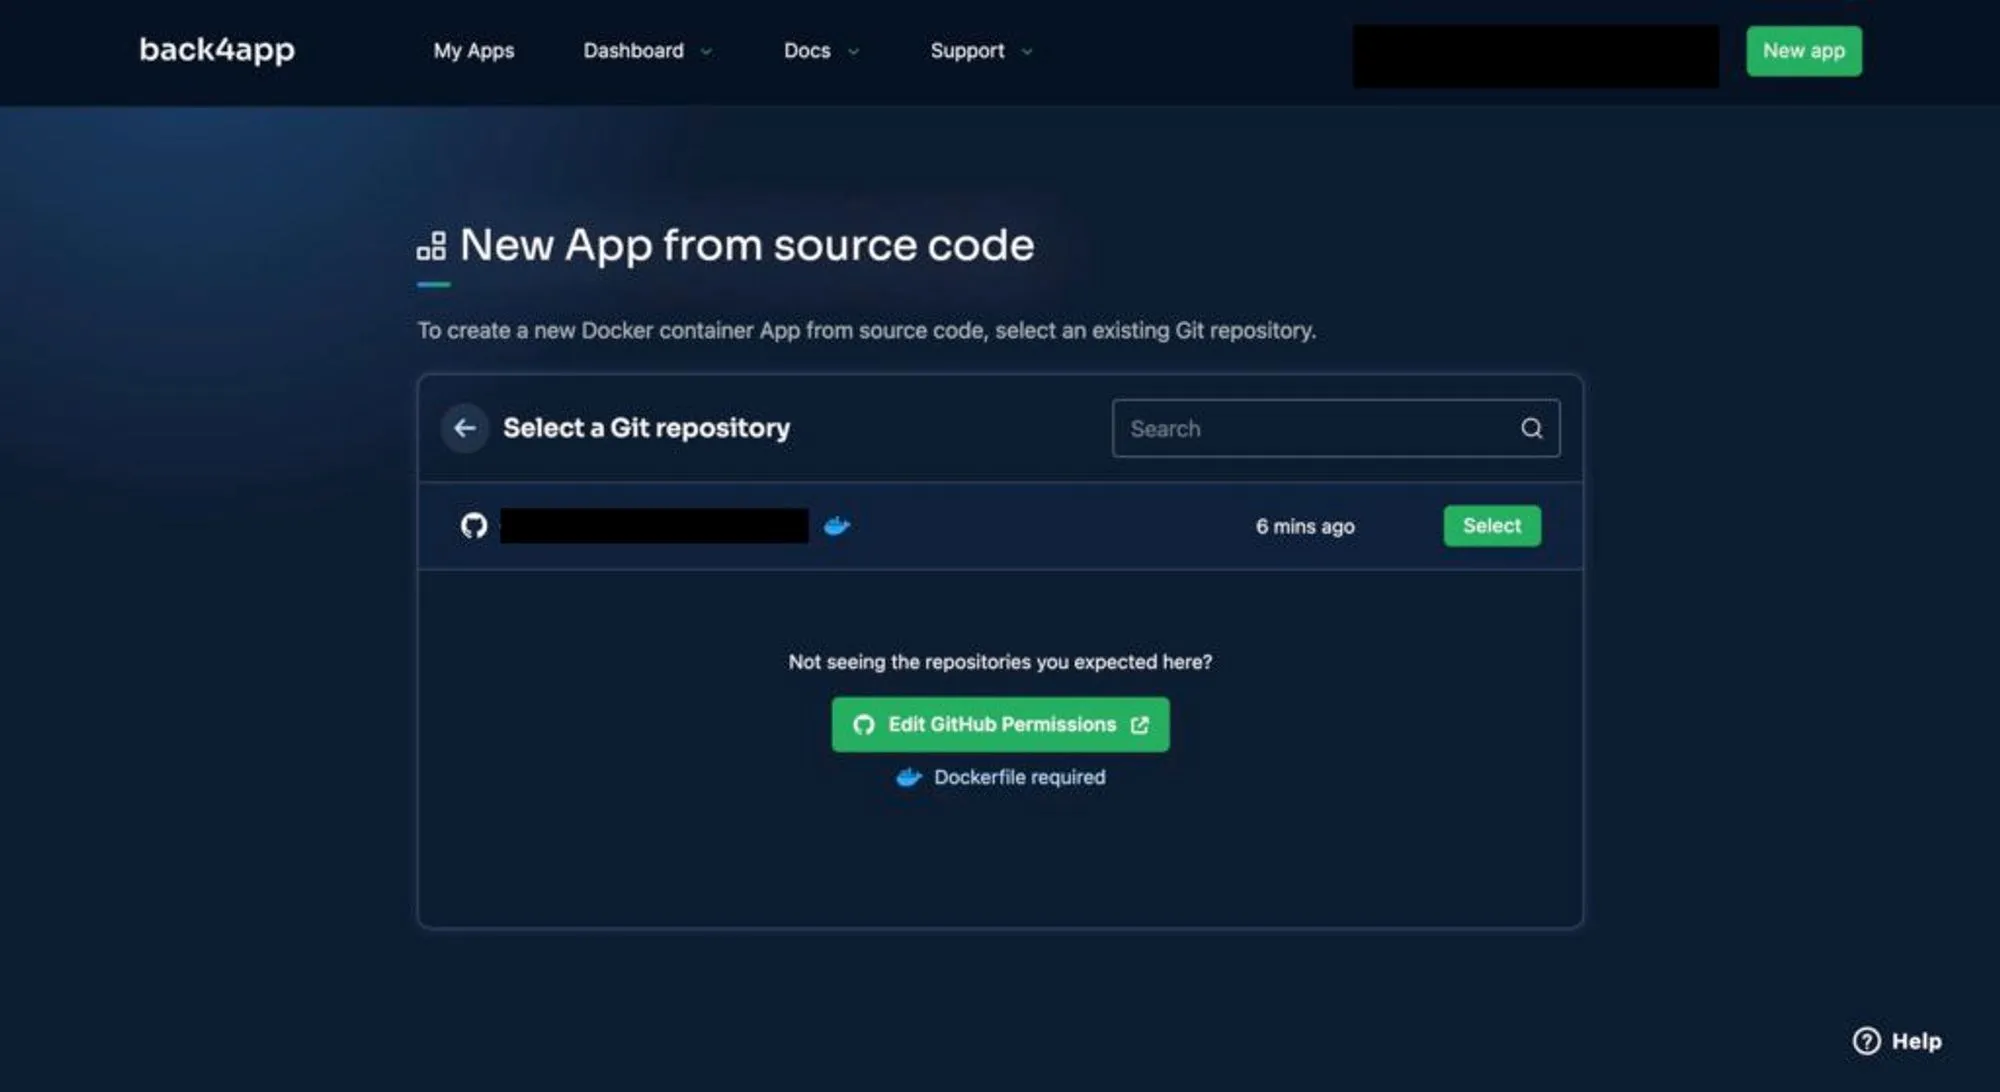
Upon clicking the Select button, you will be directed to a page where you can provide essential information about your application. This includes the app’s name, branch, root directory, and environmental variables.
Ensure you fill in all the necessary environment variables your application might rely on. Once you have completed the required fields, click the Create App button.
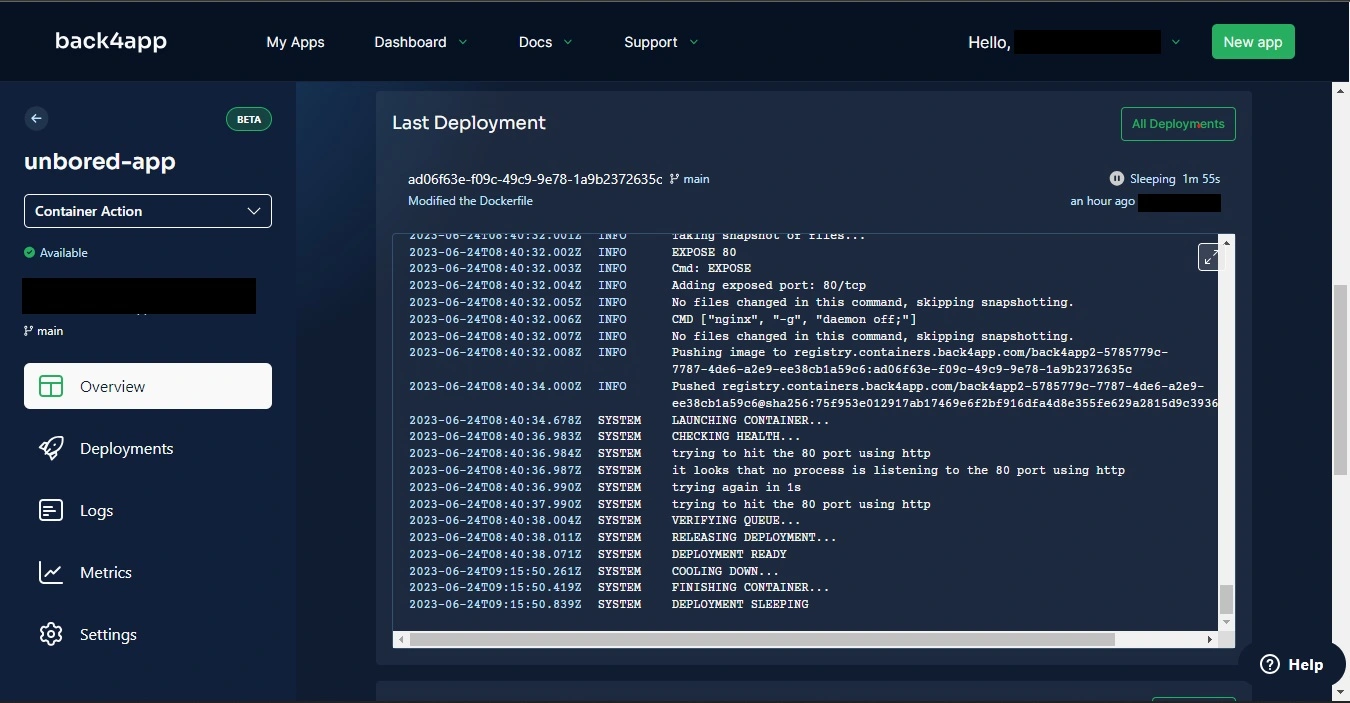
By clicking this button, the deployment process for your Vue application will commence, initiating the necessary steps to make your app available. You will be able to track the progress of the deployment, as depicted in the image below.
Conclusion
Vue is among the best open-source JavaScript frameworks for front-end development. It offers an intuitive approach to building user interfaces with features like reactive data binding and a component-based architecture.
In this article, you learned how to build and deploy a Vue app with Back4app containers. Deploying your apps to Back4app helps simplify complex back-end infrastructure management as Back4app offers tools to manage data, scale, and monitor an application’s performance.
FAQ
Are there any limitations to keep in mind when deploying a Vue.js application on Back4app?
When deploying a Vue.js application on Back4app, it is crucial to consider resource limits. Back4app imposes specific resource limits, including storage and memory, which can affect the scalability and performance of your application. You can scale up your application’s performance by subscribing to Back4app’s paid plans.
Can I use Back4app to deploy Vue.js applications that require specific environment variables?
Yes! Back4app allows you to define and manage environment variables for your Vue.js applications. By securely storing and accessing these variables through Back4app’s environment configuration, you can ensure that your Vue app has the necessary configurations to function correctly.
How does the integration between GitHub and Back4app simplify the deployment workflow for Vue.js applications?
You can effortlessly deploy your Vue.js app from your repository by linking your GitHub account. This integration enables automatic deployment whenever app changes are pushed to the GitHub repository, eliminating the need for manual redeployment processes.


