How to build an Angular application?
Angular is a popular open-source framework for building dynamic, responsive, and complex web applications. Angular was first developed by Google in 2010 under the name “AngularJS.”
Angular allows you to create dynamic, single-page applications with a clean and organized code structure.
Angular uses TypeScript, a superset of JavaScript, which adds features like type checking, interfaces, and classes to the language. This makes Angular code more maintainable and less error-prone.
To streamline web development with Angular, it’s helpful to use a Backend-as-a-Service (BaaS) solution like Back4app.
Back4app provides a pre-built backend infrastructure with features such as authentication, data storage, and server-side logic.
This allows you to focus on building the front end of your applications without worrying about the complexities of backend development.
In this article, you will explore Angular and build a basic blog application using Angular and Back4app.
Contents
- 1 Advantages Of Angular
- 2 Limitations of Angular
- 3 Building The Blog Application
- 4 Integrating Back4App
- 5 Connecting Your Application to Back4app
- 6 Adding Data to Your Back4app Application
- 7 Fetching Data From Back4app
- 8 Deleting Data From Your Back4app Application
- 9 Testing the Application
- 10 Conclusion
- 11 FAQ
- 12 What is Angular?
- 13 What is Back4app?
- 14 Advantages of Angular
- 15 Limitations of Angular
Advantages Of Angular
Angular has gained popularity among developers due to its many advantages. Here are some of the main advantages of Angular:
Two-Way Data Binding
The two-way data binding is a time-saving and productivity-boosting feature that enhances the quality of Angular applications. Two-way data binding allows changes to the model (data) to reflect automatically in the view (UI).
Any changes to the model are immediately reflected in the view. This makes developing complex and dynamic applications easier and faster, eliminating the need for writing boilerplate code to synchronize the model and the view.
Dependency Injection
Dependency injection is a crucial feature of Angular that makes managing dependencies between components and services easier. Dependency injection is a powerful feature that enhances Angular applications’ reliability, maintainability, and testability.
Dependency injection in Angular enables components and services to declare dependencies on other components and services. The dependency injection system then takes over the task of creating and providing these dependencies automatically. This eliminates the need to create and manage dependencies manually, reducing the risk of errors.
Angular’s dependency injection system makes it easy to manage dependencies and reduces the amount of code you need to write.
Component-Based Architecture
Angular’s component-based architecture makes it easy to build complex user interfaces by breaking them down into smaller, reusable components.
Components can be easily reused across different application parts. The components can be developed independently, making managing complex applications with many moving parts easier. This architecture also makes testing and debugging code easier, as components can be isolated and tested separately.
TypeScript
TypeScript is a superset of JavaScript that adds static type checking, interfaces, classes, and other features to the language. It is an open-source language maintained by Microsoft and is a popular choice for developing large-scale web applications.
Angular is written in TypeScript. This provides better tooling and a more robust development experience. TypeScript’s static typing allows developers to catch errors at compile-time rather than runtime, making it easier to maintain and refactor code.
Large Community
Angular has a large and active community of developers, which can be incredibly valuable for several reasons.
A large community offers many resources, such as tutorials, documentation, and forums. These resources can be incredibly helpful for developers new to Angular or looking for solutions to specific problems.
A large community means many developers are actively working on improving the framework by creating and sharing third-party plugins and extensions for Angular. This can save you time and effort, as you can leverage existing code to add new functionality to your projects.
Limitations of Angular
While Angular is a powerful and popular framework for building web applications, it has some limitations you should be aware of. Some of the limitations of Angular include the following:
Steep Learning Curve
Angular can be challenging to learn for some developers due to the fact that it introduces many new concepts and approaches to web development. You may need to spend significant time learning about modules, components, services, dependency injection, and reactive programming.
Large Size
Angular is a relatively large framework compared to other front-end frameworks. The large size of Angular is primarily due to its extensive feature set, which includes many built-in functionalities, such as form handling, routing, and data management.
The large size of Angular can result in slower load times for web applications, which can negatively impact the user experience. This is particularly true for users on slow internet connections.
The large size of Angular can make developing and maintaining complex projects more challenging.
Limited SEO
The limited SEO capabilities of Angular are primarily because it is a single-page application (SPA) framework. SPAs are designed to run entirely in the browser, meaning the HTML code is dynamically generated using JavaScript. This makes it difficult for search engine crawlers to index the content of an Angular-powered website accurately.
Building The Blog Application
Create an Angular application and name it “blog-application.” To create the Angular application, run the following command in your project’s directory on your terminal:
ng new blog-application
After creating your Angular application, you will create two components. The two components will be the home and post components. After creating the components, you will route the components.
To generate the components, run the following commands:
cd blog-application
ng generate component home-component
ng generate component post-component
Once you’ve generated the components, configure their routing in the app-routing.module.ts file.
Like so:
//app-routing.module.ts
import { NgModule } from '@angular/core';
import { RouterModule, Routes } from '@angular/router';
import { HomeComponentComponent } from './home-component/home-component.component';
import { PostComponentComponent } from './post-component/post-component.component';

const routes: Routes = [
  {path: '', component: HomeComponentComponent},
  {path: 'post', component: PostComponentComponent}
];

@NgModule({
  imports: [RouterModule.forRoot(routes)],
  exports: [RouterModule]
})

export class AppRoutingModule { }
The code block above defines two routes in the routes array. The route for the HomeComponentComponent has an empty path. The empty path signifies that the HomeComponentComponent will display as soon as you render your application.
The PostComponentComponent route is defined with a path of ‘post,’ meaning that when you navigate to this route, the PostComponentComponent will be rendered and displayed in the view.
To navigate to the specified routes, you will add a header to your application. You will create the header in the app-component.html file. The header will contain elements that navigate to the different routes.
For example:
<!--app.component.html-->
<div>

  <div class="header">
    <a routerLink=""><h2>Blog</h2></a>

    <a routerLink="post"><button>write</button></a>
  </div>

  <router-outlet></router-outlet>

</div>
The header div contains two child anchor elements. The anchor elements wrap an h2 element and a button element. Clicking on the h2 navigates you to the default route, while clicking on the button element navigates you to the post route. The router-outlet displays the routed components under the header div.
After creating the header, you style the header in the app-compnent.scss file:
/* app.component.scss*/
.header{
    display: flex;
    justify-content: space-between;
    padding: 1rem 0;
}
Integrating Back4App
To begin building an application with Back4app, first, ensure you have an account. If you don’t possess a Back4app account, follow the instructions provided:
- Go to the Back4app website.
- Find the Sign-up button in the top-right section of the homepage and click it.
- Complete the registration form and submit it.
Once you’ve successfully registered, log in to your Back4app account and proceed as follows:
- Locate the NEW APP button in the top-right corner and click on it.
- You’ll be directed to a form where you’ll enter your desired app name.
- Enter your app name and select the CREATE button to initiate your app creation process.
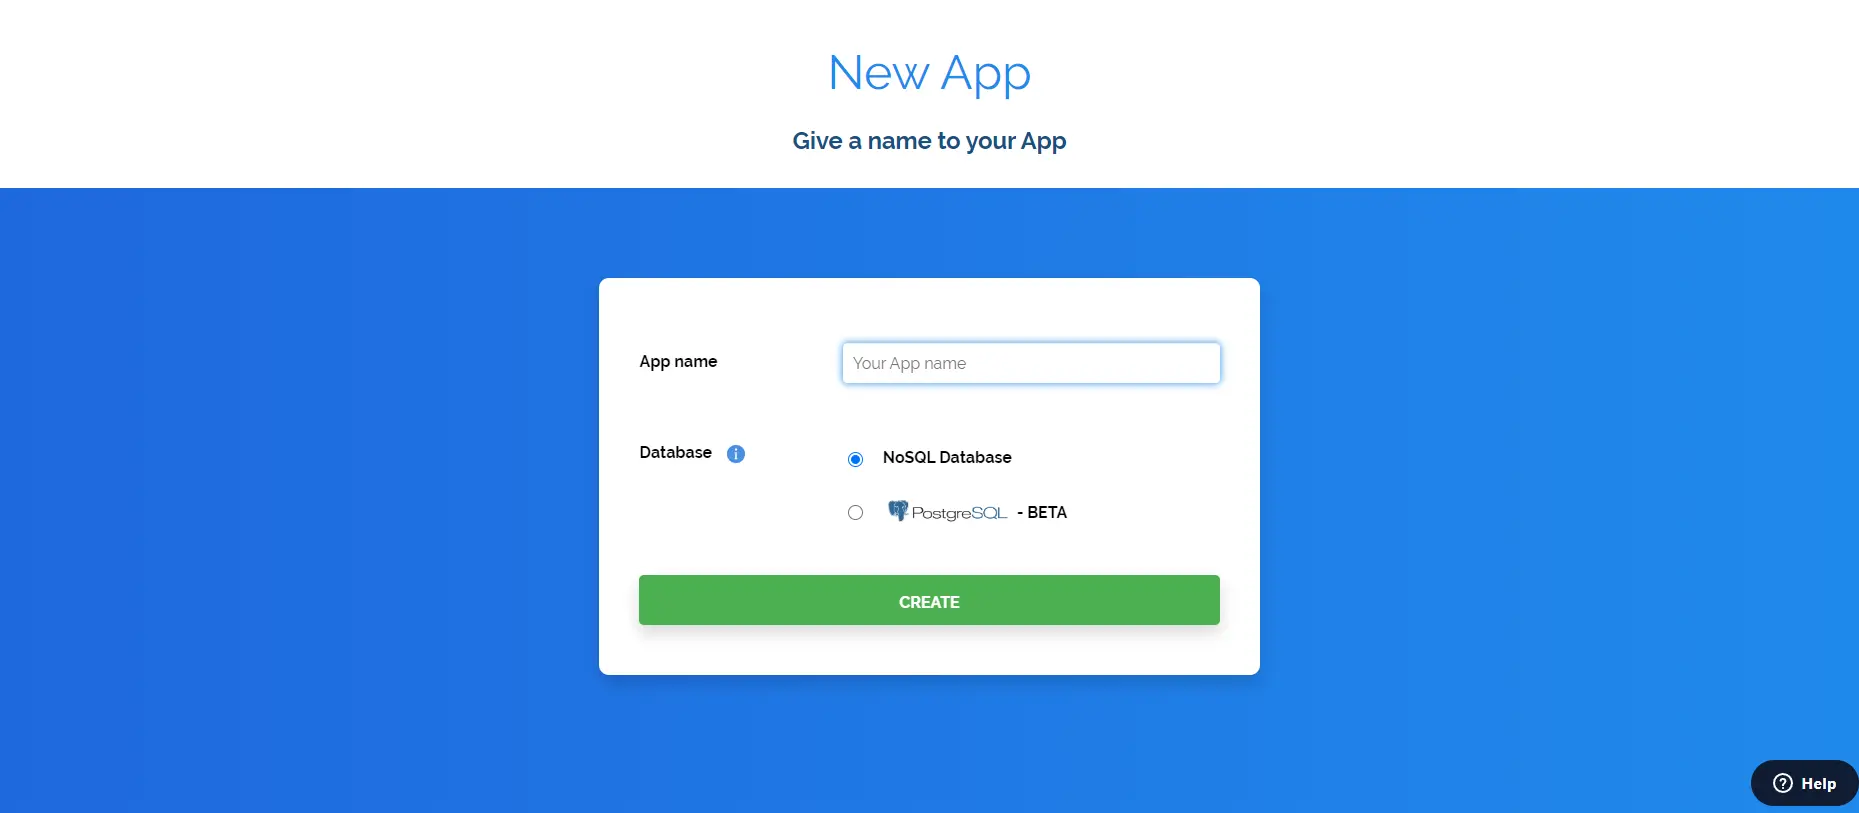
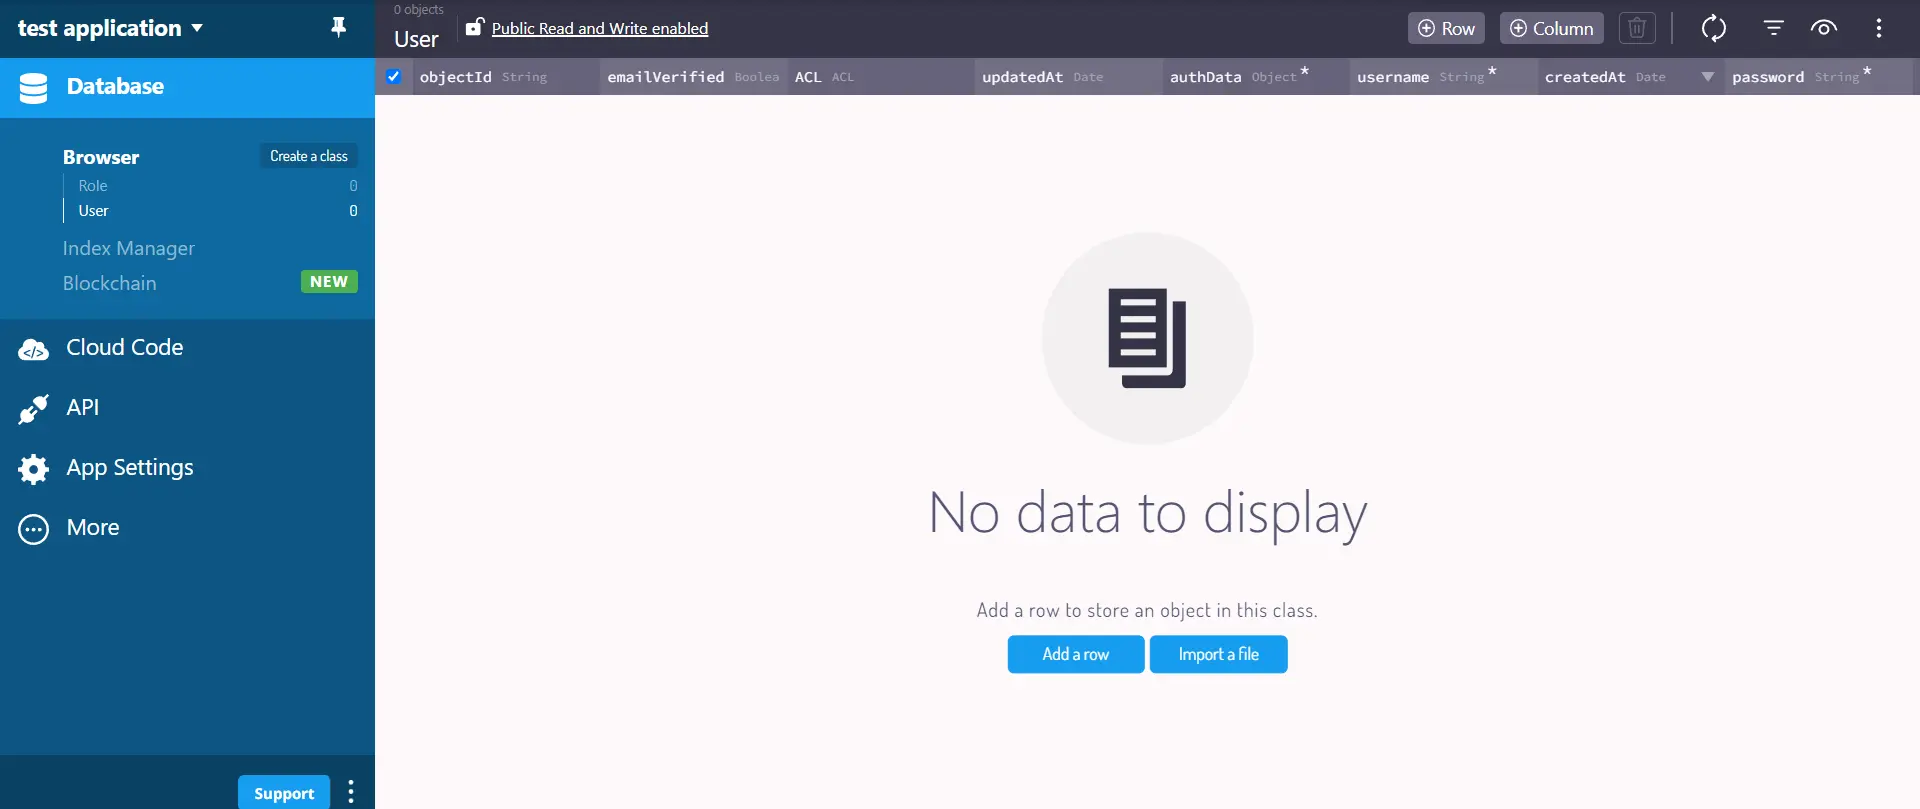
After clicking the ‘CREATE’ button, your application will be generated, and you will be directed to the application dashboard.
Connecting Your Application to Back4app
To connect your Angular application to the Back4app application you created, you must install the Parse JavaScript SDK.
Install the SDK by running either of the commands below, depending on your package manager:
#using npm
npm install parse
		or
#using yarn
yarn add parse
After installing the Parse JavaScript SDK, you must get your Application ID and JavaScript Key. You will need them to connect your Angular application to the Back4app app.
To retrieve the Application ID and JavaScript Key from Back4app, navigate to the Security & Keys section by selecting App Settings on the dashboard. There, you can easily access the necessary keys required for connecting your Angular application to Back4app.
After retrieving your Application ID and JavaScript Key, store them securely in your application.
In your app.component.ts file, import the minified version of Parse from parse. Then call the initialize method on Parse. The initialize method takes the Application ID and JavaScript Key as arguments. Finally, set the serverURL on Parse to ‘https://parseapi.back4app.com/’.
After doing this, your app.component.ts file should look like this:
//app.component.ts
import { Component } from '@angular/core';
import * as  Parse from 'parse';

@Component({
  selector: 'app-root',
  templateUrl: './app.component.html',
  styleUrls: ['./app.component.scss']
})

export class AppComponent {

}

Parse.initialize(PARSE_APPLICATION_ID, PARSE_JAVASCRIPT_KEY);
(Parse as any).serverURL = "<https://parseapi.back4app.com/>";
Adding Data to Your Back4app Application
To add data to your Back4App application, you will build a form to receive data from a user. When submitting the form, you will run a handleSubmit function. The handleSubmit function will contain the logic to add a new post from your blog application into the Back4app app.
Like so:
// post-component.component.ts
import { Component } from '@angular/core';
import * as  Parse from 'parse';

@Component({
  selector: 'app-post-component',
  templateUrl: './post-component.component.html',
  styleUrls: ['./post-component.component.scss']
})
export class PostComponentComponent {

  data: postData = {
    title: '',
    body: '',
  }

  handleSubmit(){
    try {
      const Post = new Parse.Object("Post");

      Post.set("title", this.data.title);
      Post.set("body", this.data.body);

      Post.save().then(() => {
        console.log("New Post added successfully");
      });
    } catch (error) {
      console.log(error);
    }
  }

}

interface postData {
  title: string,
  body: string
}
The code block above is the post-component.component.ts file**.** The handleSubmit function creates a new Parse Post object and sets its title property to the value of the data.title property and the body property to the data.body property. Finally, it saves the properties of the Post object to the Parse server using Post.save().
The data properties will get their values from a user through a form. To do this, you will create a form in the post-component.component.html file.
Like so:
<!-- post-component.component.html -->
<form class="post" (ngSubmit)="handleSubmit()">
    <input type="text" placeholder="Title..." name="title" [(ngModel)]="data.title" >

    <textarea name="body" placeholder="Body..."  cols="30" rows="10" [(ngModel)]="data.body"></textarea>

    <button type="submit">Post</button>
</form>
The ngModel binds the values of the title and body input fields to the data properties. The ngSubmit handles the form submission by calling the handleSubmit function declared in the post-component.ts file.
Next, you will style your component. In the SCSS file of the post-component, input the following code:
/* post-component.component.scss */
.post{
    margin-block-start: 4rem;
    display: flex;
    flex-direction: column;
    gap: 1rem;
    align-items: center;

		input{
	    border: none;
			inline-size: 100%;
	    padding: 1rem;
	    border-radius: 7px;

			&::placeholder{
			  color: #e2e2e2;
			}

		textarea{
	    border: none;
	    inline-size: 100%;
	    padding: 1rem;

			&::placeholder{
		    color: #e2e2e2;
			}
		}
}
Fetching Data From Back4app
To fetch data from your Back4app application, create a Parse query for the class from which you want to fetch data. The query will run in the ngOnInit lifecycle hook.
For example:
// home-component.component.ts
import { Component } from '@angular/core';
import * as  Parse from 'parse';

@Component({
  selector: 'app-home-component',
  templateUrl: './home-component.component.html',
  styleUrls: ['./home-component.component.scss']
})
export class HomeComponentComponent {

  data: postData[] = [];

  async ngOnInit() {

    try {
      const query = new Parse.Query("Post");

      const post = await query.find();

      this.data = post;

    } catch (error) {
      console.log(error);
    }

  }

}

interface postData {
  id: string,
  get: any,
}
The code block above searches for a “Post” object from your Back4app app’s database using the Parse.Query() method. Then it returns an array containing the results of the query by calling the Parse SDK’s find method on the result of the Parse.Query() call. Finally, it assigns the returned array to the data variable.
Using the data array, you will render your HTML template:
<!-- home-component.component.html -->
<div class="home">

    <div class="post" *ngFor="let post of data">
        <h3>{{ post.get('title') }}</h3>
        <p>{{ post.get('body') }}</p>
        <button>Delete</button>
    </div>

</div>
The ngFor directive loops through the array and generate the HTML elements wrapped in its div. The post.get() method retrieves the values of the title and body properties of the attributes in your Back4App database.
You can now style your component by adding the following code in the component’s SCSS file:
/* home-component.component.scss */
.home{
    display: flex;
    flex-direction: column;
    gap: 2rem;
    margin-block-start: 4rem;

    .post{
        border-radius: 12px;
        padding: 1rem;

        &:hover{
            box-shadow: 0 10px 15px -3px rgb(0 0 0 / 0.1);
            background-color: #e2e2e2;
        }

        h3{
            text-transform: uppercase;
            margin-block-end: 0.4rem;
        }

        button{
            margin-block-start: 1rem;
        }
    }
}
Deleting Data From Your Back4app Application
To delete data from your Back4App application, you use the destroy method to remove the corresponding record(s) from your database. You will create a deletePost function in your home-component.component.ts file. The deletePost function will contain the logic for deleting posts from your Back4app app’s database based on a given ID.
Like so:
// home-component.component.ts
async deletePost(id: string) {
    try {
      const Post = Parse.Object.extend("Post");
      const todo = new Post();
      todo.id = id;
      await todo.destroy();
      const newData = this.data.filter( (item: postData) => item.id !== id )
      this.data = newData;
    } catch (error) {
      console.log(error);
    }
  }
The code block above creates a new Post object using the Parse.Object.extend method. Then it sets the id property of the Post object to the id parameter passed to the function.
Next, it calls the destroy method of the Post object to delete the post with the given ID from the Back4app database. Then it filters the data array and returns a new array newData, with all the posts except the deleted post. The newData array is then assigned to the data variable.
Once you have defined the deletePost function in the home-component.component.ts file, you will bind the function to the delete button in the component’s HTML file using the click event.
Your home-component.component.html file should look like this:
<!-- home-component.component.html -->
<div class="home">

    <div class="post" *ngFor="let post of data">
        <h3>{{ post.get('title') }}</h3>
        <p>{{ post.get('body') }}</p>
        <button (click)="deletePost(post.id)">Delete</button>
    </div>

</div>
Finally, add some global styles to the application by adding the code block below to your styles.scss file:
/* styles.scss */
*{
    margin: 0;
    padding: 0;
    box-sizing: border-box;
}

body{
    inline-size: 50%;
    margin: 0 auto;
    background-color: #f2f2f2;
}

a{
    text-decoration: none;
    color: inherit;
}

button{
    border: 1px #333333 solid;
    padding: 0.3rem 0.5rem;
    border-radius: 0.4rem;
    background-color: inherit;
    inline-size: min-content;

		&:hover{
	    background-color: #333333;
	    color: #FFFFFF;
		}
}
Testing the Application
To test the application, open your project’s terminal and run the command below:
ng serve
The command above compiles the application and hosts it on a local server at http://localhost:4200 by default.
When your application launches, you should see the UI shown in the image below:
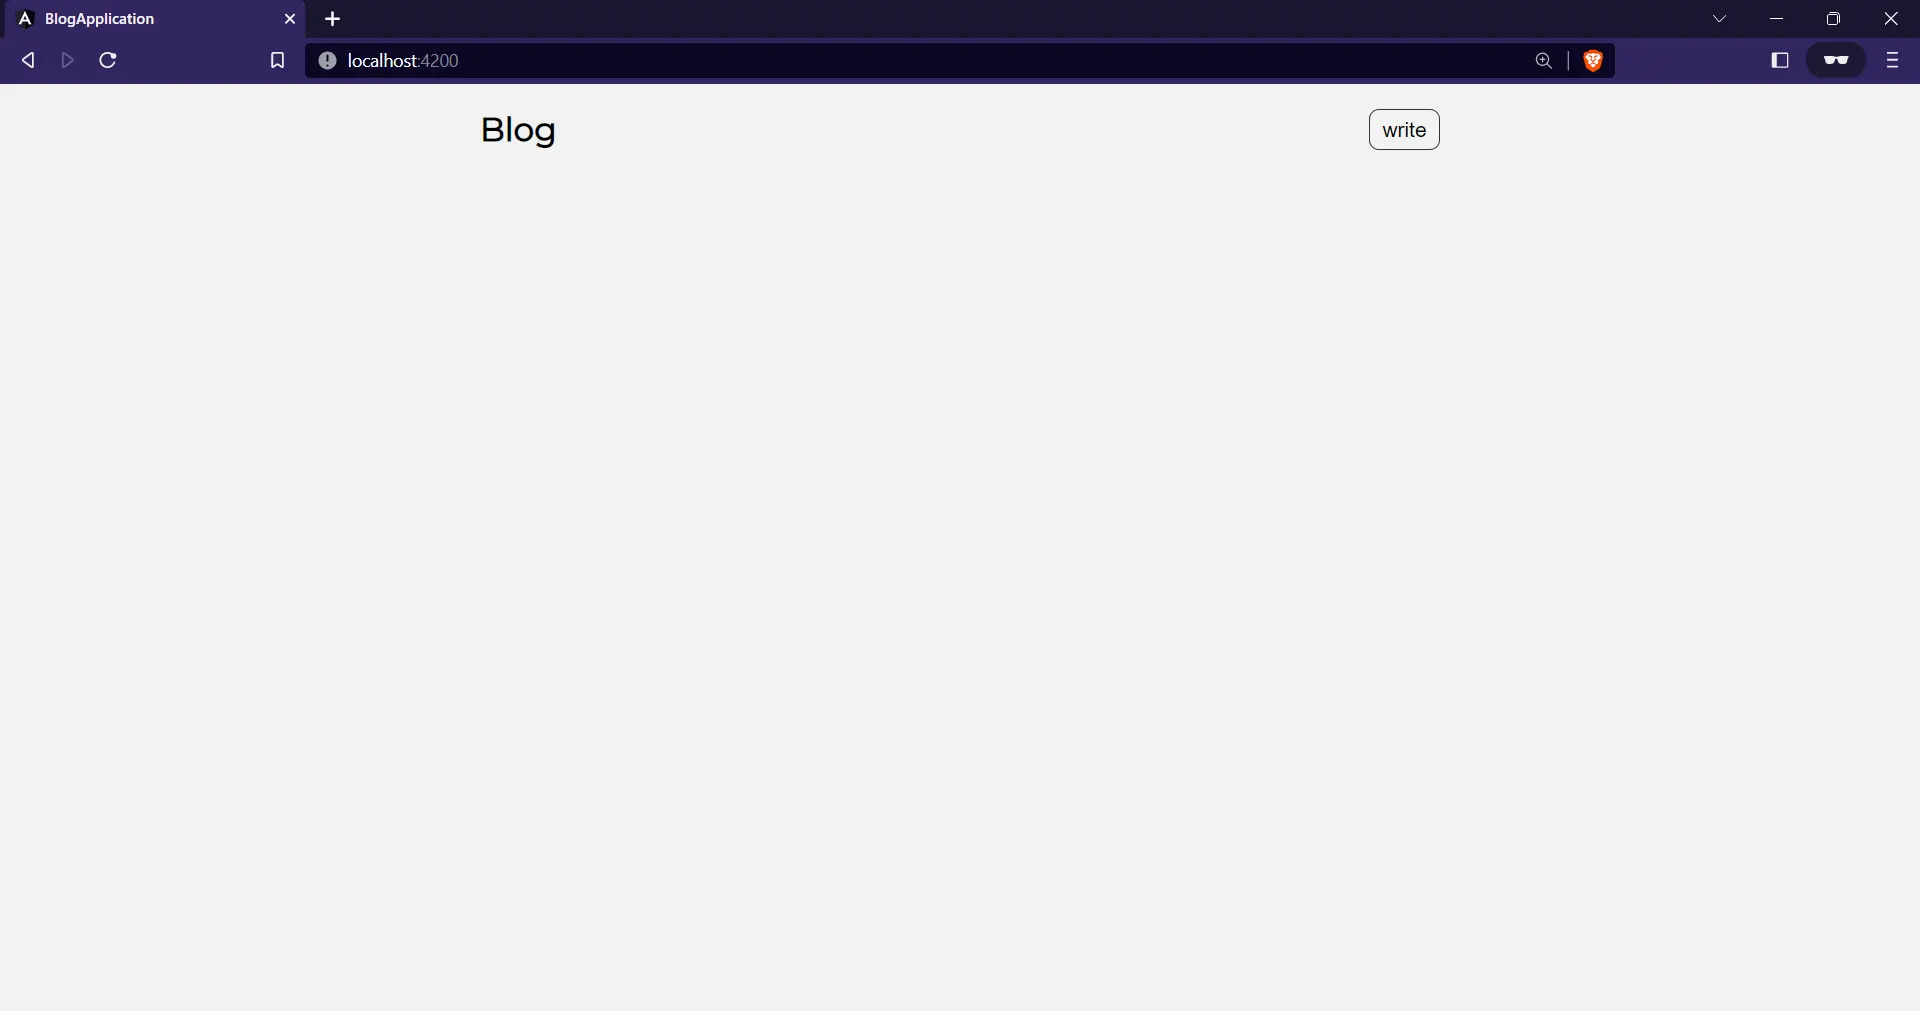
Clicking on the write button will navigate you to the post-component. The post-component contains a form with input fields and a button.
The post-component would look like this:
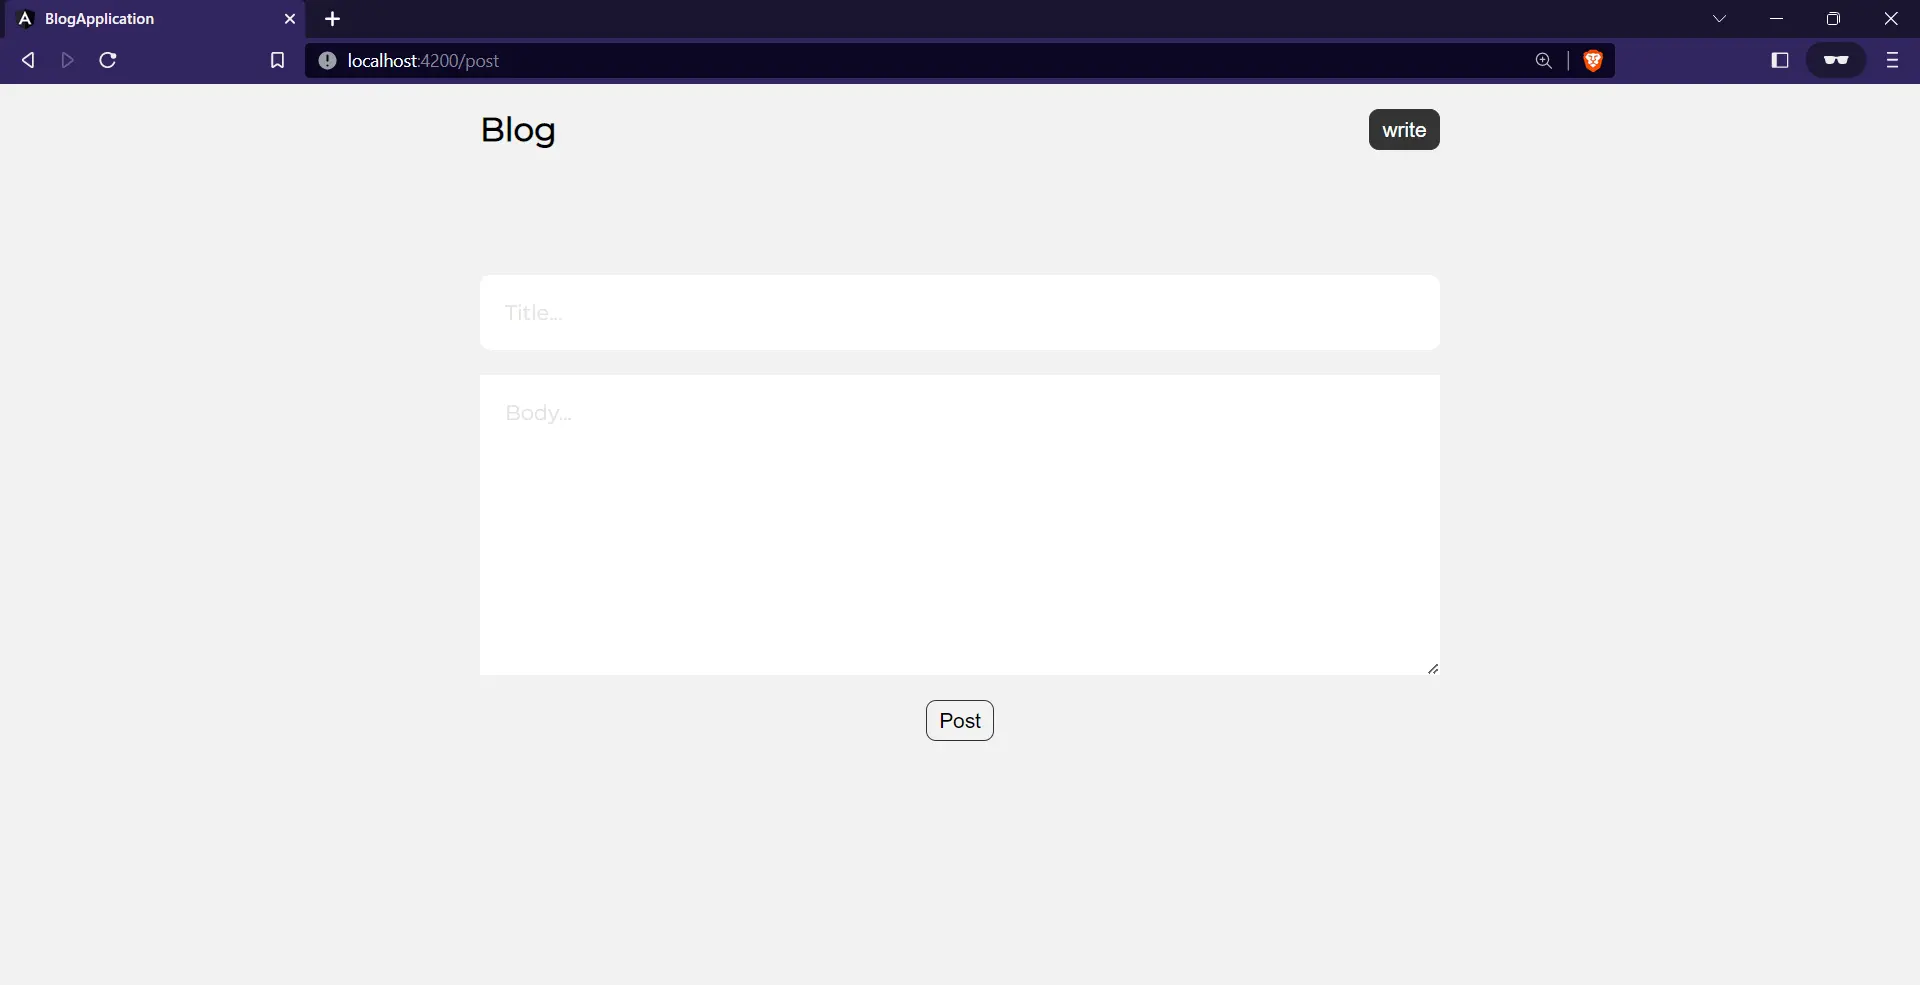
After filling in the input fields, clicking the post button would add the input values to the Back4app database. To confirm this, you can check your Back4app application dashboard or just redirect back to the application’s homepage.
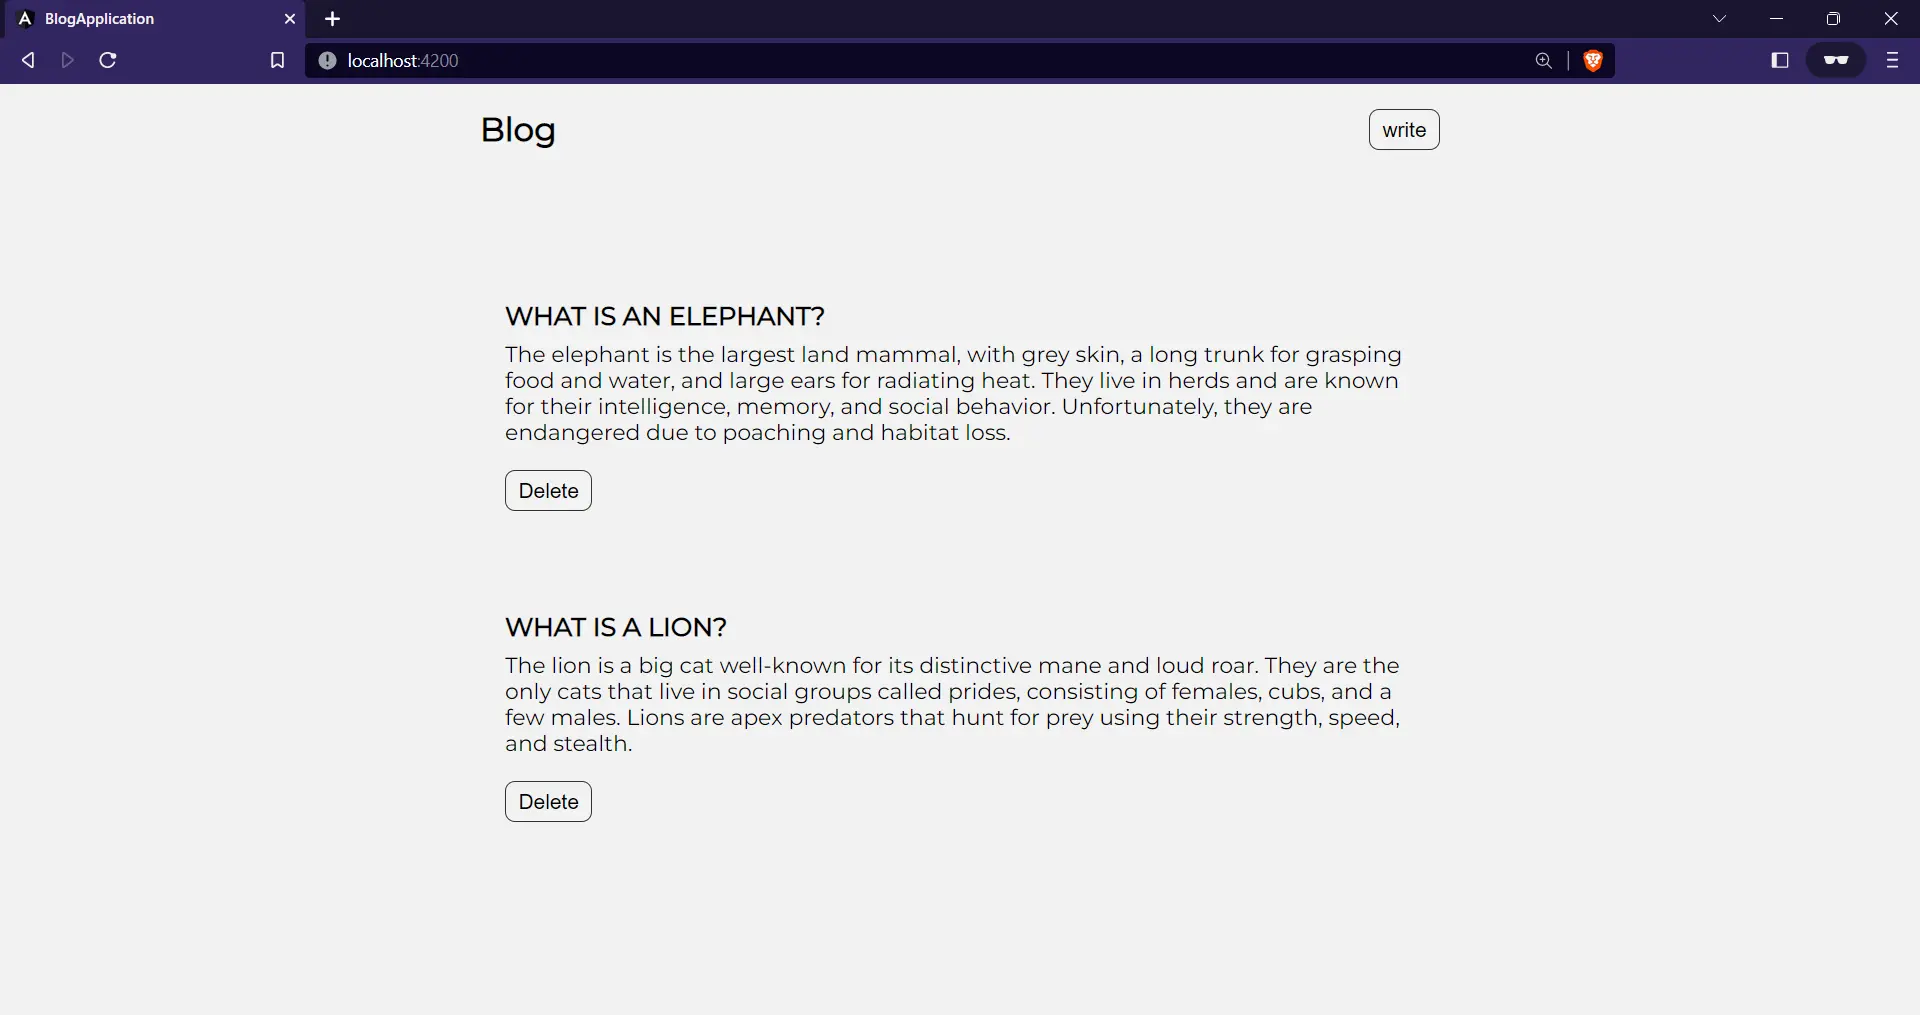
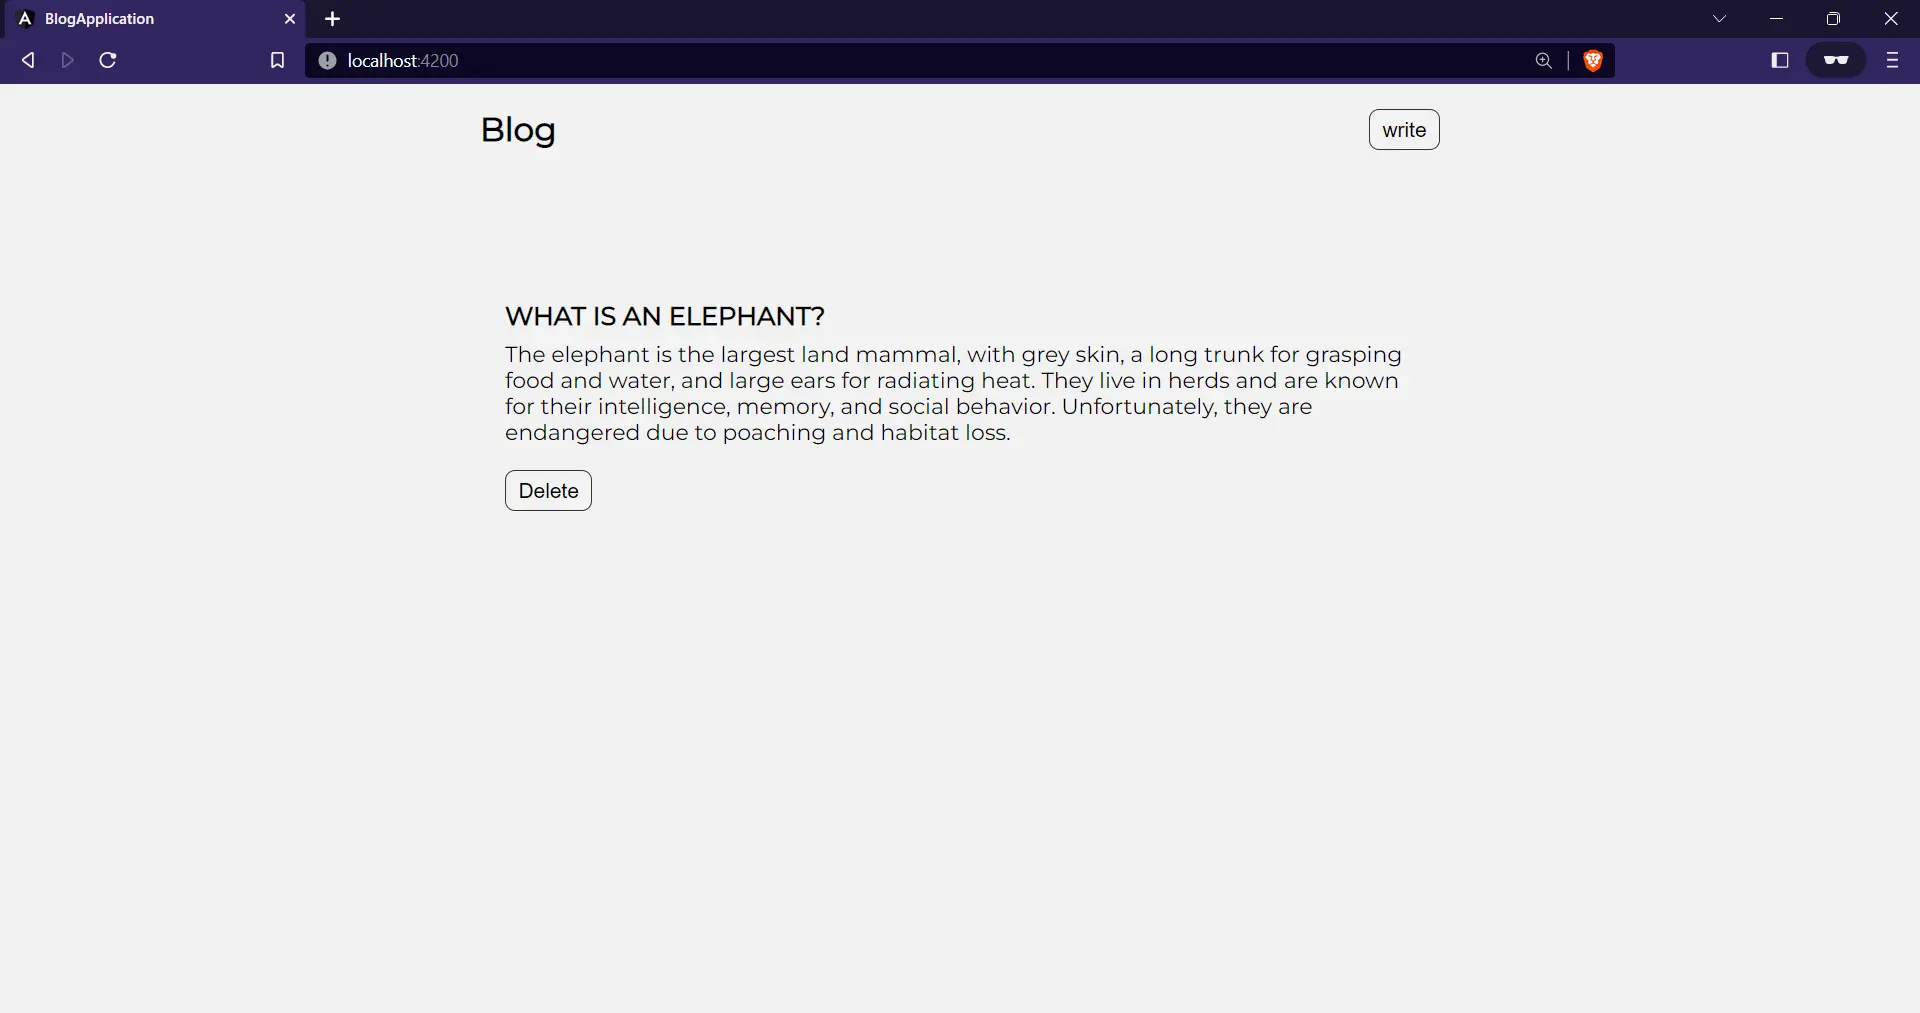
Clicking on the delete button would delete a post. For example, delete the ‘What is a lion?’ post by clicking its delete button:
Conclusion
Angular is a powerful framework for building scalable, robust web applications. It features a modular architecture, powerful data binding, and extensive pre-built components. Its benefits include increased developer productivity, a streamlined development process, and the ability to create dynamic, responsive, and performant user interfaces.
Building an Angular app with Back4app as a Backend-as-a-Service solution can greatly simplify and accelerate development. With Back4app’s pre-built infrastructure, you can focus on creating your application’s front end without worrying about the complexities of backend development, such as authentication and data storage.
FAQ
What is Angular?
Angular is an open-source framework used for developing web applications. Google and a community of developers maintain Angular, and it is widely used for building dynamic and interactive web interfaces.
What is Back4app?
Back4app is a Backend-as-a-Service (BaaS) platform that allows you to build and scale your applications quickly and easily.
It offers a pre-built infrastructure that includes cloud hosting, databases, APIs, and other backend tools and features, which can significantly reduce the time and effort required for backend development.
Advantages of Angular
The advantages of Angular include powerful data binding, modular architecture, a large developer community, pre-built components, and support for various platforms such as web, mobile, and desktop.
Limitations of Angular
Angular has some limitations, including a steep learning curve, complex documentation, a large codebase, and sometimes slower performance compared to other frameworks. The migration to newer versions can also be challenging.


