How to Deploy a Golang Application
Go (Golang) is a programming language developed by Google in 2009 to address common issues in large-scale system development, like slow compilation and the need for concurrent programming.
The language was designed for simplicity, efficiency, and ease of use with a syntax similar to C. Additionally, Go is compiled, making it faster than interpreted languages.
One of Go’s key features is its support for concurrency which allows you to run multiple tasks simultaneously through lightweight threads called Goroutines.
Go is also known for its strong support for networking and web development. Go’s standard library is home to packages for HTTP, TCP/IP, and other networking protocols, making it easy to build networked applications.
In this article, you will explore the benefits, limitations, and deployment options for Go apps. Additionally, you’ll create, dockerize, and deploy a Go application using Back4app’s containerization service for free.
Keep reading to discover how to deploy a Go app.
Contents
- 1 Advantages of Golang in Web Development
- 2 Limitations of Golang
- 3 Golang Deployment Options
- 4 Infrastructure as a Service (IaaS) like AWS
- 5 Platform as a Service (PaaS) like Heroku
- 6 Backend as a Service (BaaS) like Back4app
- 7 Containerization as a Service Like Back4app Containers
- 8 Golang Deployment Process
- 9 Containerizing Go Apps With Docker
- 10 Deploying the Container on Back4app
- 11 Conclusion
- 12 FAQ
- 13 What is Back4App, and why is it a good platform for deploying my app?
- 14 Can I deploy other languages like Rust on Back4app with containers?
- 15 Can I scale my containerized application on Back4App?
Advantages of Golang in Web Development
Go’s increasing popularity isn’t random. There are many advantages you can garner and leverage from using Go for your applications.
High Performance
High performance is one of the main reasons companies like Dropbox and Uber use Go. Go is designed for fast execution times, making the language an ideal choice for applications that require high performance.
Go employs a garbage collector that reduces overhead memory management, allowing faster execution times. Additionally, you can use Go’s built-in concurrency support to increase your application’s performance.
Scalability
Go is an excellent choice for building scalable apps. With Concurrency, you can create programs that can handle many tasks, making Go suitable for apps that handle high-traffic loads that need to scale up quickly.
Go also has excellent support for distributed systems, making it an ideal choice for building large-scale applications that need to run on multiple machines.
Go Is Battle-Tested
Many popular companies use Go to build large-scale applications, including those used by Google, Uber, and Dropbox. This implies that Go has been battle tested to be reliable and stable for building complex applications for large userbases.
Go strongly focuses on backward compatibility, and applications written in Golang will continue to work even as the language evolves.
Great Community Support
Since it was released, Go has been one of the fastest-growing languages in terms of adoption, thus, creating a large and active community. The fact that Go has a large active community means you can easily find resources and answers to questions.
Go is home to many open-source libraries and tools that you can use to speed up development time. Popular build tools like Kubernetes, Docker, and Hugo use packages like Cobra on their CLI tools.
Limitations of Golang
While Golang is a highly performant and scalable programming language, Go has its limitations that you should consider before developing with the language.
Increased Complexity for Certain Tasks
Go may be easy to learn and read, but specific tasks are easier in other languages than in Go. Building an interactive user interface with Go can be challenging because Go needs a built-in GUI toolkit, and third-party packages bring complexity to your project.
Go’s Concurrency Model Can Be Challenging for Beginners
Go’s concurrency model can be challenging for beginners to understand and use effectively. Go uses goroutines and channels for concurrency, which are powerful tools but can be challenging to grasp. You must learn to use channels effectively to avoid deadlocks or race conditions.
Go’s concurrency model also requires that you think differently about code structure and design. You’ll find this difficult if you’re sued to sequential programming models.
Less Mature Library Ecosystem Compared to Other Languages
While Golang’s standard library is comprehensive and has most functionalities that you’ll need to build Go apps, it is less mature than libraries in languages like Java or Python.
Golang is a relatively new programming language; some popular libraries are not yet available. This can be a limitation for specific projects, especially those that require more specialized functionality.
Additionally, third-party libraries for Golang are less widespread than those available for other languages, and you may need to implement some functionalities by yourself, which can be time-consuming.
Golang Deployment Options
After building apps in Go, you have several deployment options, each with advantages and drawbacks.
You have a wide range of options from IaaS services like AWS, PaaS services like Heroku, BaaS services like Back4app & Google Firebase, and CaaS services like Back4App Containers.
Infrastructure as a Service (IaaS) like AWS
Infrastructure as a Service (IaaS) providers like Amazon Web Services (AWS) provides functionality for deploying and managing owned virtual machines on the cloud.
With AWS, you can use services like Elastic Compute Cloud (EC2) to deploy your Golang application on a virtual machine running Linux or Windows. You can also use services like Elastic Container Service (ECS) to deploy your application in a container.
One advantage of using an IaaS service like AWS is that you have complete control over the underlying infrastructure. You can configure the virtual machine to meet your specific requirements. However, you are responsible for managing and maintaining the virtual machine, which can be technical and tasking.
Other IaaS Platforms include:
- Linode
- Microsoft Azure
- Rackspace
- Amazon Web Services (AWS)
- DigitalOcean
- Google Compute Engine (GCE)
Platform as a Service (PaaS) like Heroku
Platform as a Service (PaaS) providers like Heroku provides a platform for deploying Golang applications without distressing the underlying infrastructure.
Heroku provides a simple command-line interface to deploy your application with just a few commands. Heroku also supports automatic scaling and load balancing, making handling high traffic for your app easy.
An advantage of using a PaaS service like Heroku is that you can focus on developing your application without worrying about the infrastructure. Heroku handles all the infrastructure management and maintenance, which saves you time and resources.
However, this also means you have less control over the infrastructure and will have to work within the platform’s limitations.
Other PaaS Providers include:
- Render
- AWS Elastic Beanstalk
- Microsoft Azure App Service
- DigitalOcean App Platform
- The Fly Platform
Backend as a Service (BaaS) like Back4app
Backend as a Service (BaaS) providers like Google Firebase and Back4app provide the complete backend solution for your application, including a database, authentication, and hosting. Firebase supports several programming languages, including Golang, and provides a simple API that you can use to access its services.
One advantage of using a BaaS service like Firebase is that you can quickly and easily set up a backend for your application without managing any infrastructure. Firebase provides a range of features and services; however, you need more control over the infrastructure.
Other BaaS platforms include:
- AWS Amplify
- Cloudkit
- Backendless
- Back4App
- Pocketbase
Containerization as a Service Like Back4app Containers
Containerization is popular for deploying applications. With containerization, you can package your application and its dependencies into a container that you can quickly deploy to any platform that supports container technology.
Back4App is containerization as a service provider that you can use to deploy and manage your Golang application in a container.
One of the advantages of using containerization as a service provider like Back4App is that you can deploy your application to any platform that supports containers without worrying about the underlying infrastructure.
The CaaS provider handles all the container management and maintenance, saving you time and resources. However, you may have to work within the limitations of the containerization platform without access to the infrastructure.
Other CaaS platforms include:
- AWS Container Service
- Azure Container Service
- Docker Enterprise
- Google Container Engine
- IBM Kubernetes Service
- Oracle Container Service
Golang Deployment Process
Here, you’ll learn how to deploy your Golang app to Back4app’s CaaS platform.
What Is Back4app?
Back4app is a cloud offering that you can use to create and deploy backend services for your mobile and web applications.
You can use Back4app’s CaaS feature to deploy and run custom containers on Back4app’s backend servers. You get to add custom logic to your app using your container images without having to manage your server infrastructure.
In this section, you’ll learn how to build a simple CRUD RESTful API in Go, containerize Go programs, and deploy the container on Back4app.
Setting Up Your Development Environment
After you’ve installed Go on your machine from the downloads page, you can create a new directory and initialize a new Go project for your Go app.
Run the command below to create a new directory for your project.
mkdir deployAPI && cd deployAPI
Run the mod init command to initialize a new project in your current working directory with the Go tool.
Like so:
go mod init
You’ll build the RESTful API with the Gorilla Mux package.
Run the command below to install the Gorilla Mux package as a dependency for your project.
go get -u github.com/gorilla/mux
The next step is building the RESTful API. The first step in building a RESTful API with Gorilla Mux is importing the necessary packages in your Go file.
Here’s the list of imports you need for the project.
import (
	"encoding/json"
	"log"
	"net/http"
	"strconv"

	"github.com/gorilla/mux"
)
After listing your imports, you’ll need to set up a database for your app. For simplicity, we’ll use a map for storing and retrieving data.
You can add the map to your application like so:
var users = map[int]string{}
Since the map is empty, you’ll need to input data with a POST request.
The POST Request Handler Function
Your POST request should receive data from the client, parse it, and save it to the map data store.
Add the code block to your application to implement the POST request handler:
func createUserHandler(w http.ResponseWriter, r *http.Request) {
	vars := mux.Vars(r)
	id, err := strconv.Atoi(vars["id"])
	if err != nil {
		w.WriteHeader(http.StatusBadRequest)
		return
	}

	var data map[string]string

	err = json.NewDecoder(r.Body).Decode(&data)
	if err != nil {
		w.WriteHeader(http.StatusBadRequest)
		return
	}

	users[id] = data["name"]

	w.WriteHeader(http.StatusCreated)
}
The createUserHandler handler function takes in the data from the client (JSON), parses the JSON, and saves the data to the map. When the handler successfully adds the data to the map, it writes the StatusCreated success code to the client.
The GET Request
You’ll read data from the data store with a GET request. Your GET request handler function will retrieve an ID from the client, search and return the data to the client.
Add the code block to your application to implement the GET request handler:
func readUserHandler(w http.ResponseWriter, r *http.Request) {
	vars := mux.Vars(r)
	id, err := strconv.Atoi(vars["id"])
	if err != nil {
		w.WriteHeader(http.StatusBadRequest)
		return
	}

	name, ok := users[id]
	if !ok {
		w.WriteHeader(http.StatusNotFound)
		return
	}

	data := map[string]string{"name": name}

	jsonData, err := json.Marshal(data)
	if err != nil {
		w.WriteHeader(http.StatusInternalServerError)
		return
	}

	w.Header().Set("Content-Type", "application/json")
	w.WriteHeader(http.StatusOK)
	w.Write(jsonData)
}
The readUserHandler function retrieves the ID with the Vars function of the mux package and searches through the map for the data before returning the data as JSON to the client, along with a StatusOk success code.
The PUT Request Handler Function
You’ll update data in your data store with a PUT request. Your PUT request handler will accept the ID and a JSON field for the update process.
func updateUserHandler(w http.ResponseWriter, r *http.Request) {
	vars := mux.Vars(r)
	id, err := strconv.Atoi(vars["id"])
	if err != nil {
		w.WriteHeader(http.StatusBadRequest)
		return
	}

	var data map[string]string

	err = json.NewDecoder(r.Body).Decode(&data)
	if err != nil {
		w.WriteHeader(http.StatusBadRequest)
		return
	}

	users[id] = data["name"]

	w.WriteHeader(http.StatusOK)
}
The updateUserHandler function takes in the ID with the vars variable, decodes the JSON from the request body, and updates the field or the ID with the JSON data from the request body.
The DELETE Request Handler Function
Your DELETE request handler function will take in the field ID from the request and delete the field from the data store.
Add the code block to your application to implement the DELETE request handler:
func deleteUserHandler(w http.ResponseWriter, r *http.Request) {
	vars := mux.Vars(r)
	id, err := strconv.Atoi(vars["id"])
	if err != nil {
		w.WriteHeader(http.StatusBadRequest)
		return
	}

	delete(users, id)

	w.WriteHeader(http.StatusOK)
}
The deleteUserHandler function deletes the field with the delete function that takes in the map name and the ID and returns the StatusOk code to the client.
Mounting the Handler Functions to Routes
After defining your app’s endpoints, you must assign the handler functions to routes. The routes are the public interface of your API.
func main() {
	r := mux.NewRouter()

	r.HandleFunc("/users/{id}", createUserHandler).Methods(http.MethodPost)
	r.HandleFunc("/users/{id}", readUserHandler).Methods(http.MethodGet)
	r.HandleFunc("/users/{id}", updateUserHandler).Methods(http.MethodPut)
	r.HandleFunc("/users/{id}", deleteUserHandler).Methods(http.MethodDelete)

	log.Fatal(http.ListenAndServe(":8080", r))
}
In the main function, r is an instance of a new mux router, and the HandleFunc method takes in a route and a handler function. The Methods function specifies the HTTP methods on the routes.
Containerizing Go Apps With Docker
Docker is one of the most popular containerization technologies. Docker was built with Go, and you can containerize your Go apps for portability with Docker.
You’ll have to create a new dockerfile where you’ll specify the build instructions.
Run the command below to create a Dockerfile in your Project’s working directory.
touch Dockerfile
Open the Dockerfile and paste these build instructions to containerize your Go app with Docker.
# Use an official Golang runtime as a parent image
FROM golang:latest

# Set the working directory to /app
WORKDIR /app

# Copy the current directory contents into the container at /app
COPY . /app

# Download and install any required dependencies
RUN go mod download

# Build the Go app
RUN go build -o main .

# Expose port 8080 for incoming traffic
EXPOSE 8080

# Define the command to run the app when the container starts
CMD ["/app/main"]
The build instructions in the dockerfile specify the version of Go for the project, the working directory, the files for the app, and the build instructions for the dockerfile.
Here’s a breakdown of the Dockerfile:
- The file starts with
FROM golang: latestwhich specifies that you want to use the latest version of the official Golang image as the base image for your Docker container. - The
WORKDIR /appline sets the working directory for your container to the/appdirectory. - The
COPY . /appcopies the contents of your current directory into the/appdirectory of the container. - The
RUN go mod downloaddownloads your app’s required dependencies. - The
RUN go build -o main .compiles your Go app and creates an executable file namedmainin the/appdirectory. - The
EXPOSE 8080line tells Docker to expose port 8080; the port that your Go app listens on for incoming requests. - The
CMD ["/app/main"]line specifies the command to run when the container starts (in this case, themainexecutable).
On running the dockerfile, Docker builds the app image and exposes the app on port 8080.
The command starts the container and maps port 8080 on the host machine to port 8080 in the container, and you should be able to access the API on [http://localhost:8080](http://localhost:8080).
Deploying the Container on Back4app
You’ll need to create an account on Back4app (if you don’t have one) to deploy containers.
Here are the steps for creating an account on Back4app.
- Head on to the Back4app website.
- Click the Sign up button on the top-right corner of the landing page to create a new account.
- Finally, fill out the sign-up form and submit it.
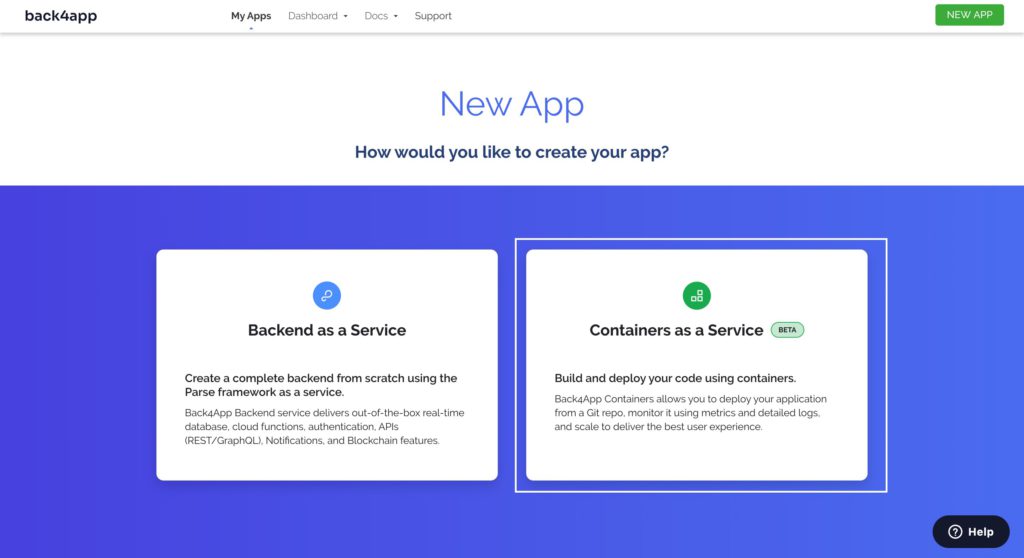
After creating your Back4app account, log on to your account and click the NEW APP button on the top right corner of the UI.
The NEW APP button will take you to a page where you choose how to deploy your app. Since you’re deploying a container, select the Containers as a Service option.
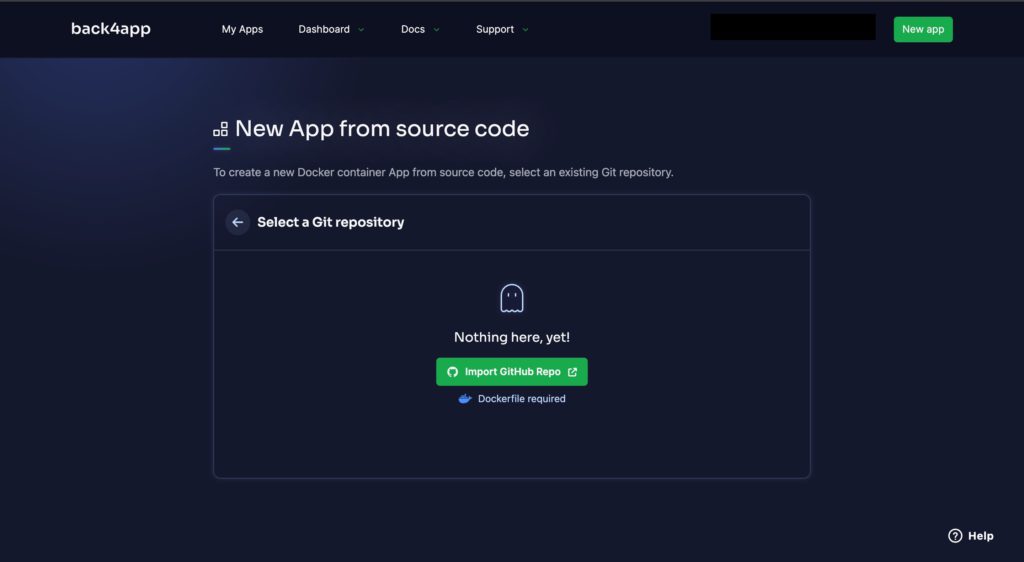
Next, connect your GitHub account to your Back4app account. You can choose to give Back4app access to the source code of all the repositories in your account or to a specific project directory.
Choose the application you want to deploy, in this case, the application you built in this tutorial, and then click Select.
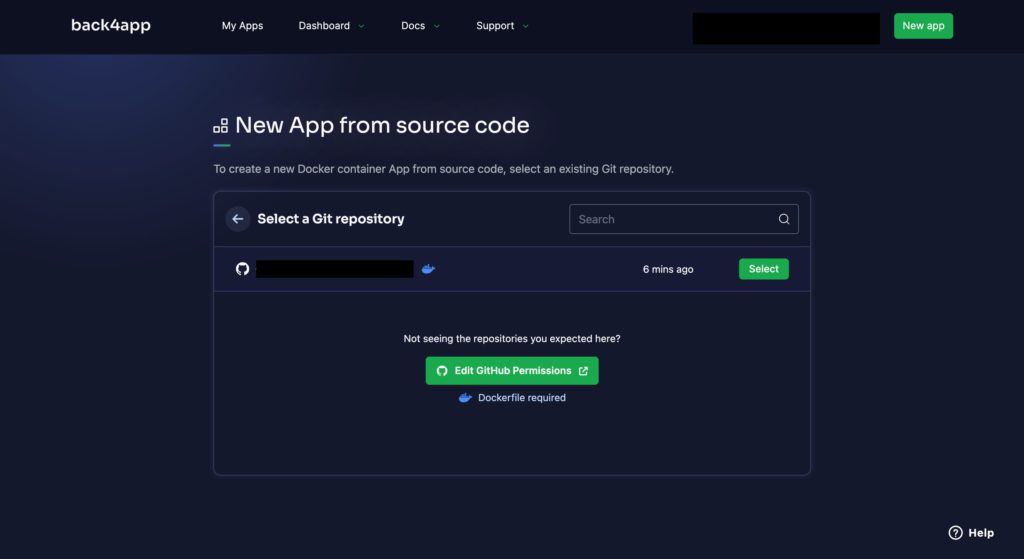
Clicking the select button takes you to a page where you’ll fill out the information about your app, from the name to the branch, root directory, and environmental variables.
Be sure to fill out all the environmental variables your application requires. After you have filled out the required details, click Create App.
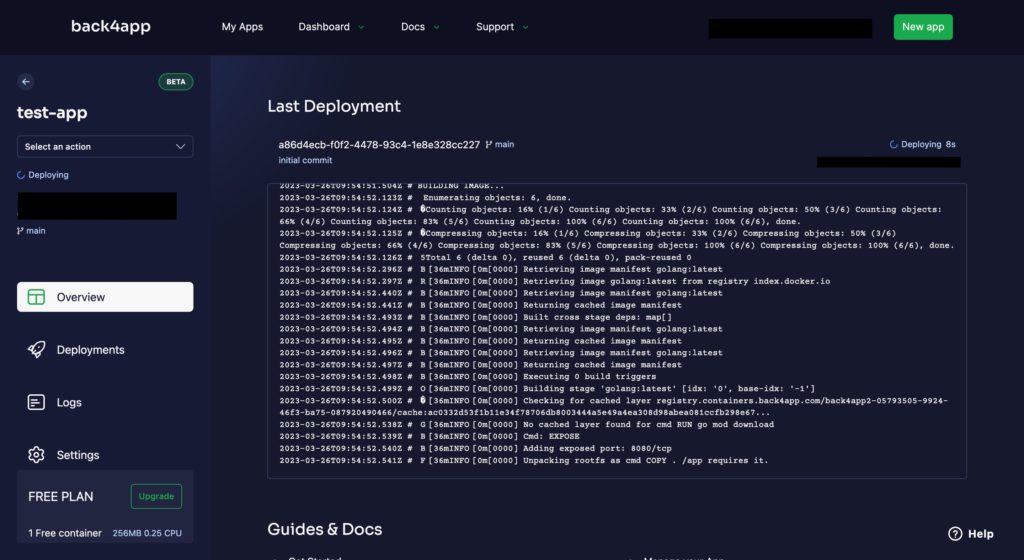
Clicking this button starts the deployment process for your Go application, as shown in the image below.
Conclusion
You’ve learned how to deploy a containerized Go app on Back4app. Following the steps in this tutorial, you should have a Go API running on Back4app.
Deploying your apps to Back4app is a great way to simplify backend infrastructure management. Back4App provides powerful tools for managing your data, scaling your application, and monitoring its performance. It is an excellent choice for developers looking to build great applications rather than manage servers.
FAQ
What is Back4App, and why is it a good platform for deploying my app?
Back4App is a BaaS platform where you can build, host, and scale your applications with a serverless architecture. Back4app also offers containerization services allowing you to manage and deploy software containers without having to worry about managing the underlying infrastructure.
Can I deploy other languages like Rust on Back4app with containers?
Yes, you can deploy Rust on Back4App using containerization technologies like Docker. Back4App supports Docker containers that you can use to deploy applications written in various programming languages, including Rust.
Can I scale my containerized application on Back4App?
Yes, you can scale your containerized application on Back4App with the built-in auto-scaling feature. The auto-scaling feature automatically scales the number of instances of your application based on demand, ensuring that your app can handle increased traffic and workload.


