How to Deploy a React Native Application?
React Native has become a leading framework for creating mobile applications that work and perform exceptionally well on both iOS and Android platforms. However, like any application, React Native apps need a performant way to handle their backend infrastructure.
By Pairing React Native technology and a backend-as-a-service (BaaS) platform like Back4app, you can build and deploy scalable React Native applications quickly and easily.
In this tutorial, you will go through the process of deploying a React Native app on Back4app. We will also discuss React Native and the advantages of using Back4app for backend infrastructure management.
Contents
- 1 Advantages of React Native for Mobile App Development
- 2 Limitations of React Native for Mobile App Development
- 3 Why Use Cloud-Based Backend Services for React Native App Deployment?
- 4 Deploying a React Native Application on Back4app
- 5 Conclusion
- 6 FAQ
- 7 What is React Native?
- 8 Can I use a cloud-based backend service with my React Native app?
- 9 How can I deploy my React Native app on Back4app?
- 10 Is it possible to integrate multiple backend services with a React Native app?
Advantages of React Native for Mobile App Development
React Native offers several benefits as a framework for building great mobile applications.
Here are some of those benefits and advantages:
Truly Native Experience
React Native allows you to build cross-platform mobile applications for iOS and Android using a single codebase.
React Native can achieve this while creating a genuinely native performance on both operating systems. With other cross-platform frameworks like Ionic, they attempt to mimic a native experience on the running operating system.
Ionic uses HTML, CSS, and JavaScript to create web apps wrapped in a mobile native container. Because of this, the mobile app does not have direct access to native device features.
React Native provides a native experience by directly accessing and using native components and APIs provided by the iOS or Android device where the app is running.
Modular Architecture
React Native’s modular architecture allows you to build mobile apps with high flexibility and scalability. A modular architecture means you can break down the app into small, reusable components, making it easier to maintain and modify over time when needed.
Additionally, this modular approach makes it easier for you to collaborate with other developers, as you can develop and test each component independently.
Faster Development Cycles
The time spent during the development of a mobile app has a price, and using tools that can optimize that time will be a game changer. React Native offers many features that result in a faster development cycle.
From its cross-platform apps that save you the need to build independent apps for Android and iOS to its hot reloading, which allows you to see the changes you make to the code immediately reflected in the app. This saves time as you can quickly iterate and test new features without restarting the app.
Limitations of React Native for Mobile App Development
While React Native offers many advantages for mobile development, it also has some limitations that should be considered.
Here are some of the main limitations of React Native:
Large Bundle Sizes
Unfortunately, React Native applications are not popular for being lightweight when compared to native applications. This is because React Native includes its own JavaScript runtime dependencies and libraries that are required to run the app.
Fragmentation Across Platforms
While React Native allows you to write code once and deploy it to multiple platforms, there may still be differences in how the app behaves and looks on different platforms.
React Native isn’t a perfect framework, and certain native features and components tend to act and look differently on iOS and Android. A good example of this is the picker component in React Native which showcases a different design on Android than iOS.
You may occasionally need to write platform-specific code to handle certain UI components or to implement different functionality on both platforms independently.
Why Use Cloud-Based Backend Services for React Native App Deployment?
Cloud-based backend services offer several advantages over self-hosted options. Self-hosted backend services often require you to manually set up and manage servers. Additionally, they also may have limited scalability and reliability, as they are often hosted on a single server.
On the other hand, cloud-based backend services, such as Back4App, provide a more cost-effective and scalable option for developers. They offer better reliability, as they often utilize multiple servers and data centers to ensure uptime.
Other cloud-based options include services like Firebase and AWS Amplify, which offer similar features and benefits for React Native app development.
When it comes to deploying a React Native app, cloud-based backend services like Back4app provide a simpler and faster way to deploy and manage your app’s backend. This can be especially important for small development teams or individual developers who don’t have a lot of resources or technical expertise.
Deploying a React Native Application on Back4app
In this section, you will build a to-do app with React Native using Back4app as its cloud-based backend.
What is Back4app?
Back4App is a cloud platform with application hosting features. It is a Backend as a service (Baas) platform that provides a way to create and deploy scalable mobile and web applications quickly and easily. Avoiding the complexities of building and maintaining their own backend infrastructure
With Back4App, a range of resources and features for building and evaluating web and mobile apps are available. These include a Command Line Interface (CLI), software development kits (SDKs), optimization utilities, analytics, monitoring tools, and user authentication and authorization.
Project Introduction
In this tutorial, you will build a simple to-do React Native application, which you will deploy on the Back4app platform. The React Native application will be able to perform basic CRUD (Create, Read, Update, Delete) operations on a set of data, which will be stored in Back4app’s cloud database.
You will be utilizing Back4app’s API to communicate between the React Native front-end and the backend managed by Back4app.
To follow this tutorial, Here are some necessary prerequisites:
- Familiarity with JavaScript and React Native
- React Native and Expo CLI installed on your computer
- A basic understanding of REST APIs and CRUD operations
Through this project, you will gain an understanding of how to leverage Back4app as a backend solution for React Native development,
Setting up the Deployment Environment
To be able to deploy your React Native app on the Back4app server, you will first need to set up a Back4app account. This account will allow you to create a New App to host your React Native app.
To signup for a Back4app account, navigate to the Back4app website and click on the Sign Up button located at the top right corner of the webpage. This will take you to a signup form which you will fill out with the necessary details.
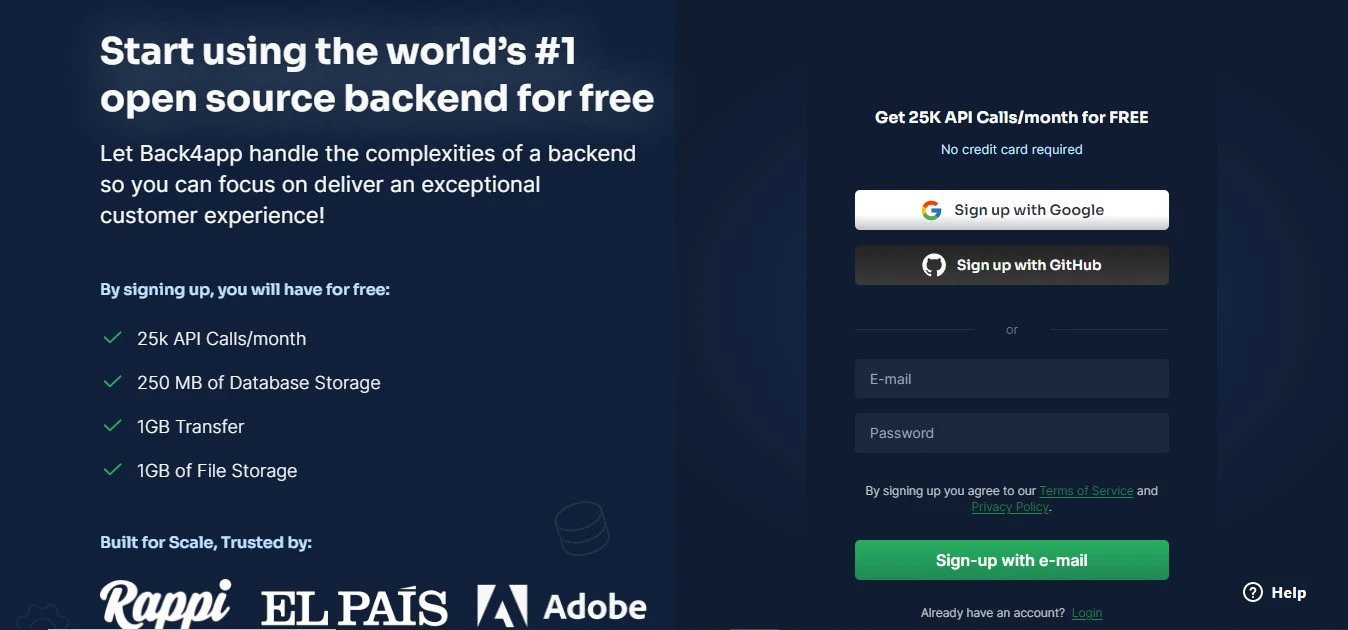
If you already have an existing Back4app account, you can click on the Log In button instead and proceed to log in.
Once you have created your Back4app account, log in and navigate to the top right corner of the screen, where you will find the NEW APP button.
Click this button to navigate to the service page:
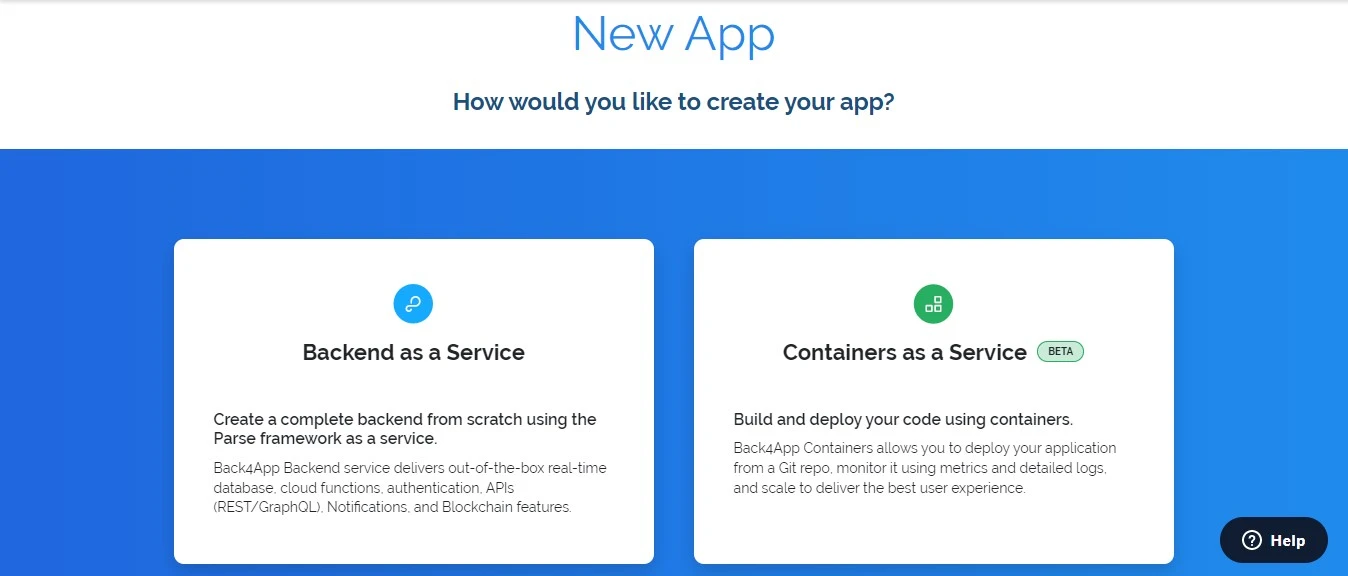
Choose the ‘Backend as a Service’ option and proceed to fill out the following App name form to create a new app to host your React Native app.
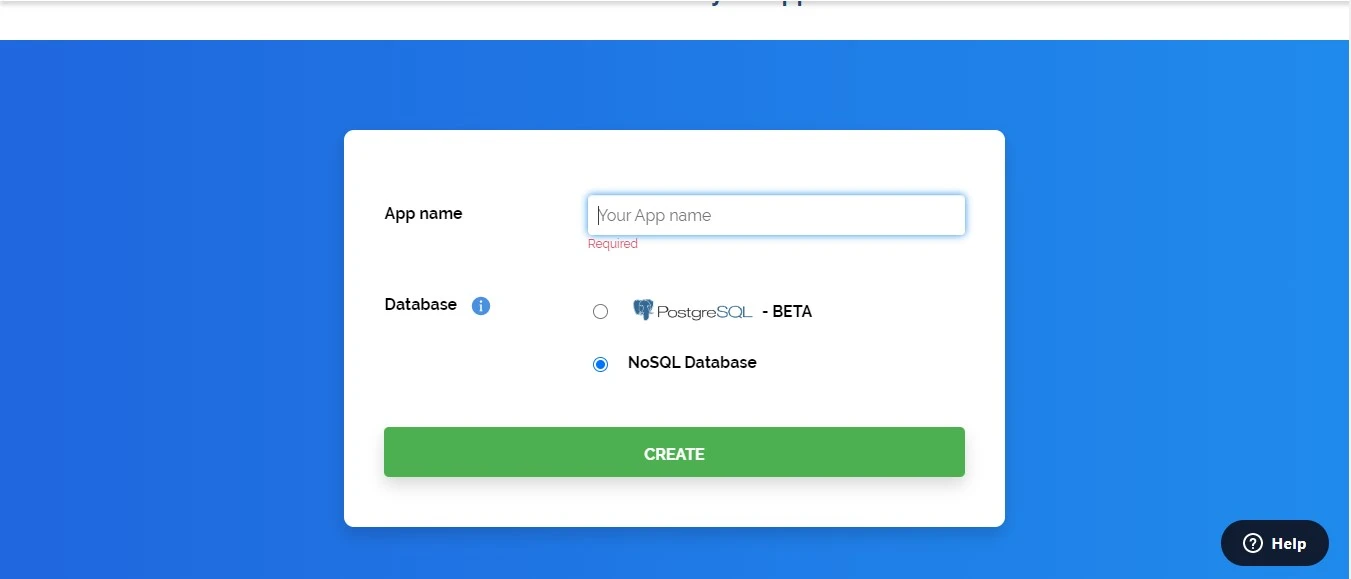
Once you have clicked the CREATE button, Back4app will create your new application and take you directly to its dashboard.
Connecting the React Native App
To start off connecting your React Native app to Back4app, you will first create boilerplate code for your React Native app using the expo cli.
The advantage of using the Expo cli over the react native cli to build your app is that it provides a faster development cycle, allowing you to iterate and test your app more quickly. Expo includes a set of pre-built UI components that can be easily customized, making it easier to create a polished app.
Run the following command in your computer’s terminal to generate the initial codebase for your application:
npx create-expo-app todo-app
This command will generate a boilerplate todo-app React Native project for you to work with.
Keep in mind in the previous section, you created a counterpart app on Back4app. To connect that app to your React Native app, you will need to install the Parse Javascript SDK inside your project. You will also need to install the Async Storage handler. The Async Storage storage system will persist data even if the app is closed or the device is turned off.
Install these dependencies by running the command below:
npm install parse @react-native-async-storage/async-storage --save
Keep in mind that for the iOS build version, you will need to run pod install to sync the native RNAsyncStorage for your project.
After installing all necessary dependencies, the next step is to retrieve the Back4app app keys.
These keys will let your React Native app connect to the app created on Back4app and should be kept safely.
Head to the dashboard of your created app and follow the path App Settings->Security & Keys to grab your Application ID and JavaScript key.
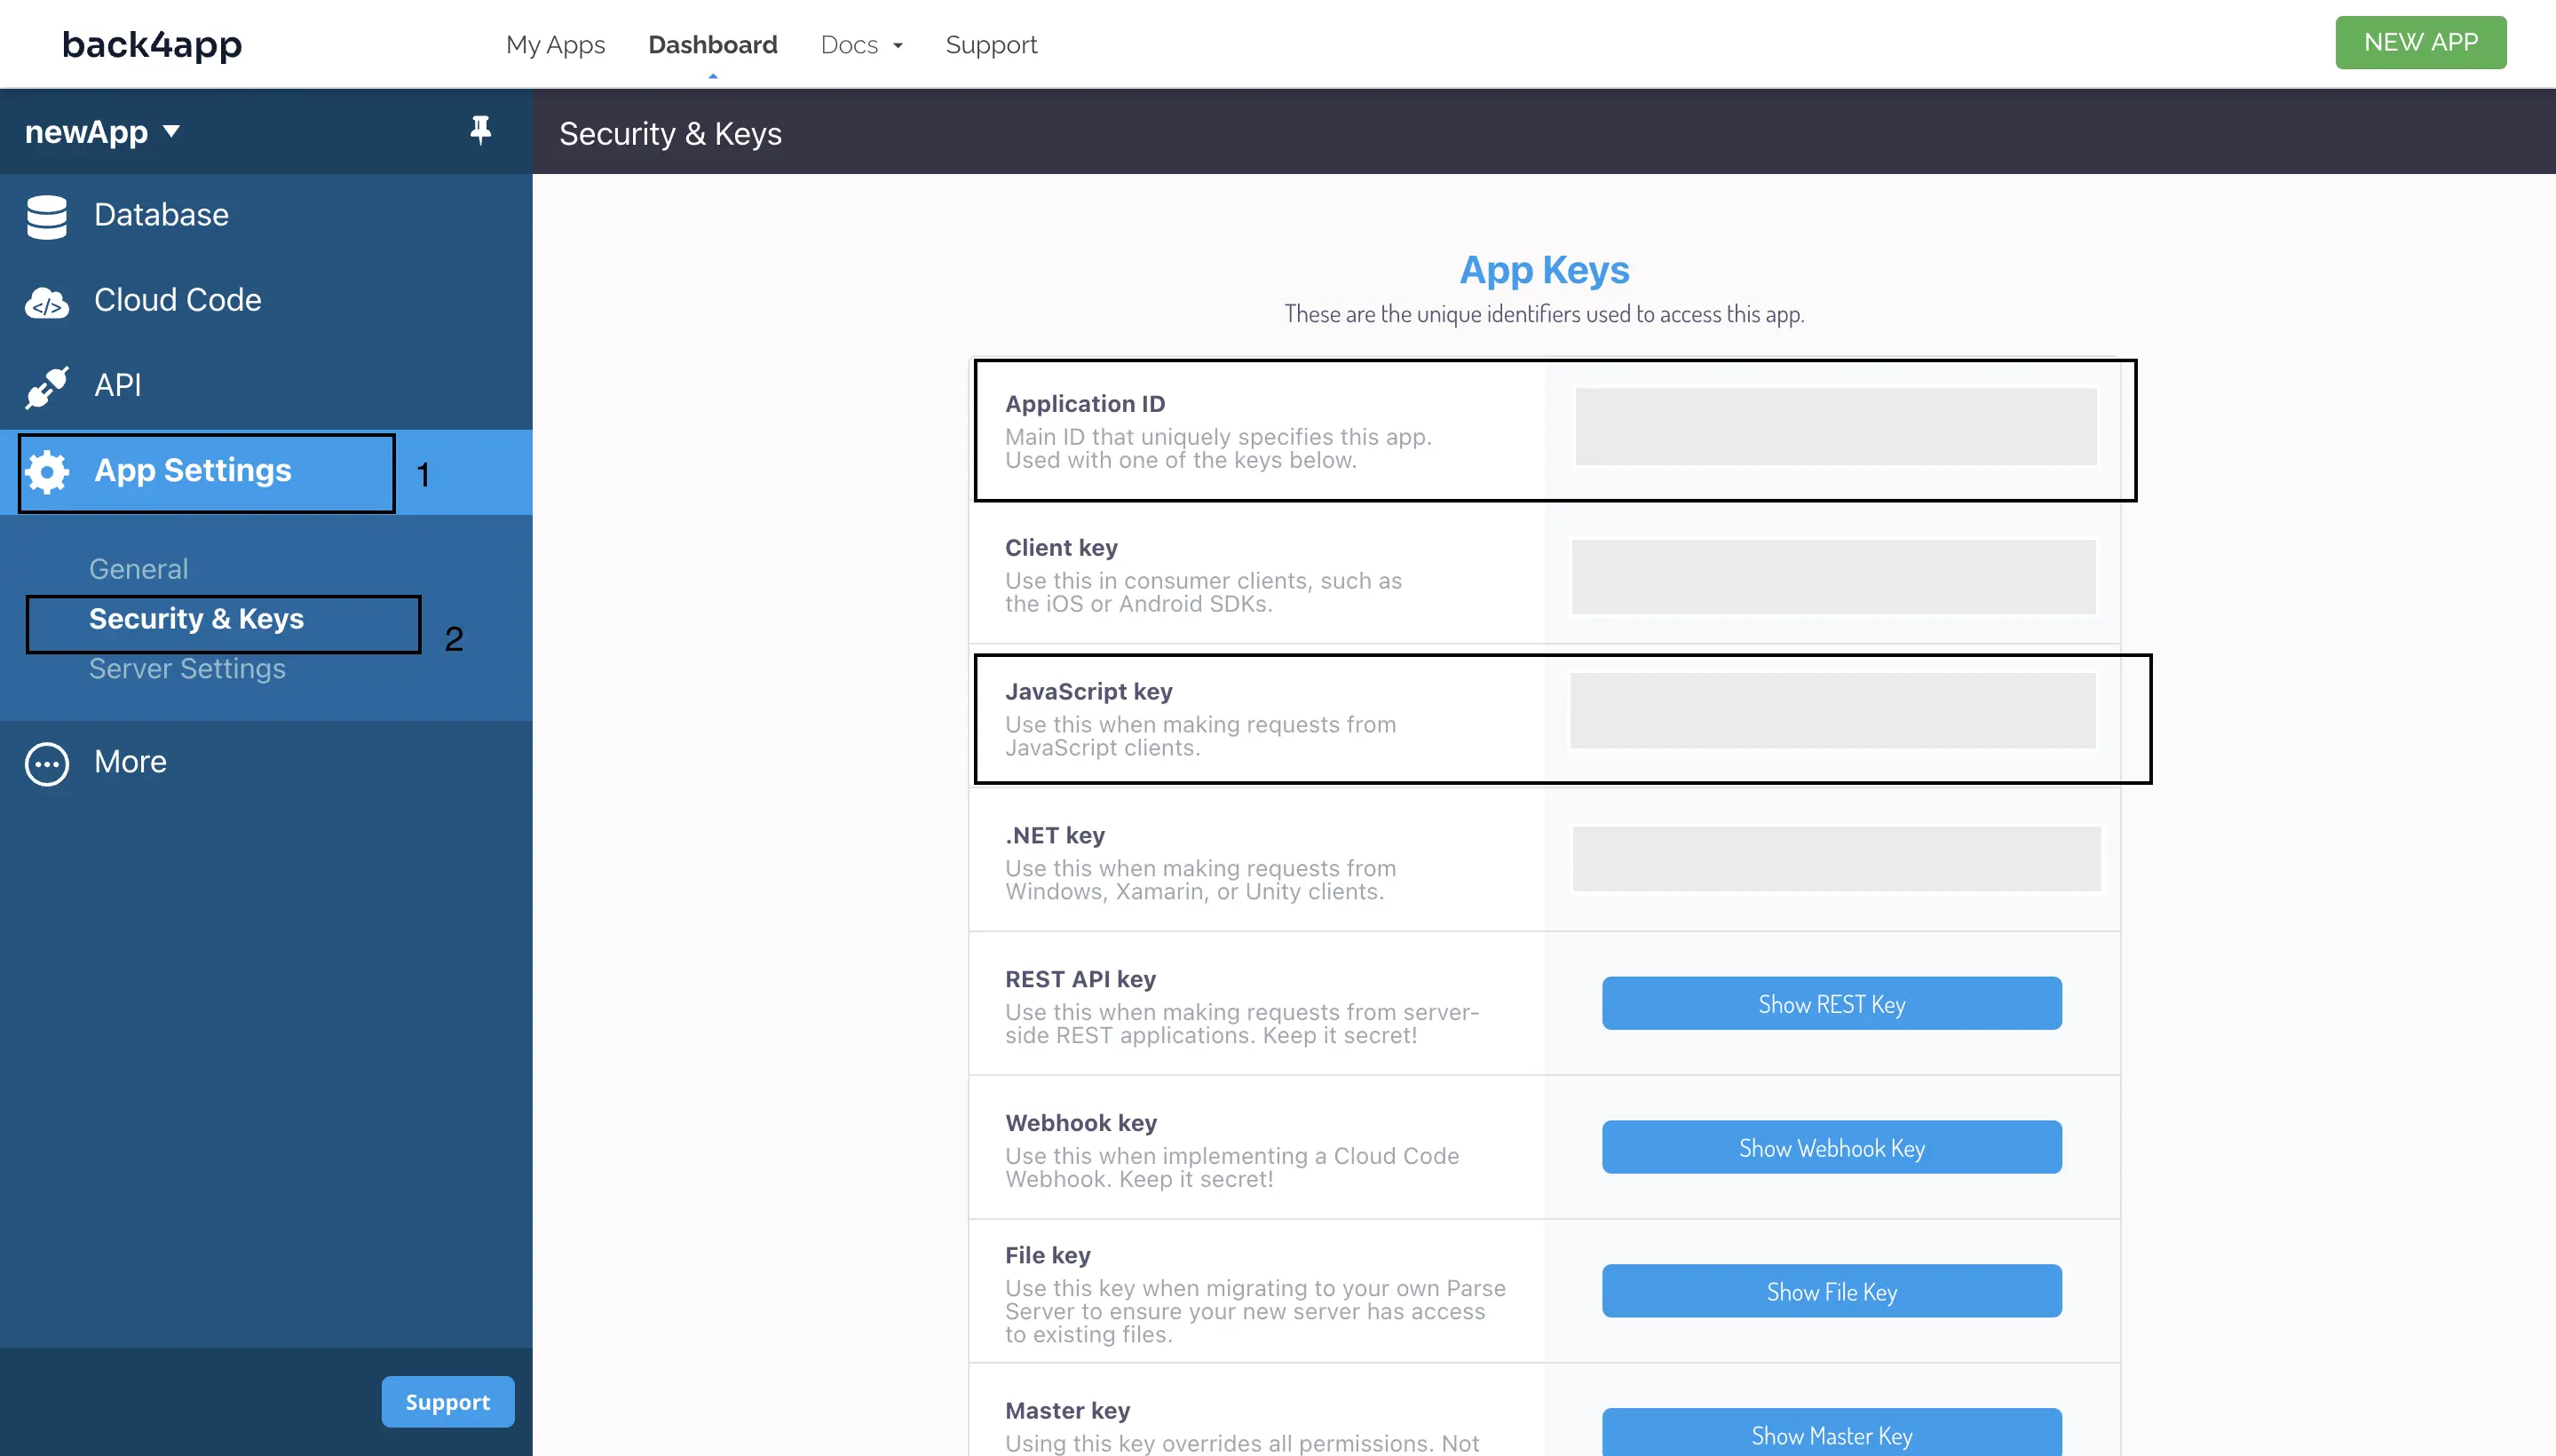
You will use these keys to initialize the Parse SDK inside your React Native app.
Inside your App.js file, override its contents with the following code block:
//Importing the dependencies
import Parse from "parse/react-native.js";
import AsyncStorage from '@react-native-async-storage/async-storage';
Here, you have imported Parse SDK and the AyncStorage handler you installed.
Now initialize the SDK with your personal retrieved application keys:
//Initializing the SDK.
Parse.setAsyncStorage(AsyncStorage);
Parse.initialize('YOUR_APPLICATION_ID_HERE','YOUR_JAVASCRIPT_KEY_HERE');
Parse.serverURL = '<https://parseapi.back4app.com/>';
The setAsyncStorage method is used to set the AsyncStorage for Parse to cache data.
With that, you can connect Your React Native application successfully with Back4app.
Build and Deploy Your React Native App
Now you can build out your React Native application and deploy it to Back4app.
Modify the code inside your App.js file to look like this:
import React, { useState, useEffect } from 'react';
import { StyleSheet, View, TextInput, FlatList, TouchableOpacity, Text } from 'react-native';
//Importing the dependencies
import Parse from "parse/react-native.js";
import AsyncStorage from '@react-native-async-storage/async-storage';

//Initializing the SDK.
Parse.setAsyncStorage(AsyncStorage);
Parse.initialize('YOUR_APPLICATION_ID_HERE','YOUR_JAVASCRIPT_KEY_HERE');
Parse.serverURL = '<https://parseapi.back4app.com/>';

export default function App() {
  const [todos, setTodos] = useState([]);
  const [newTodo, setNewTodo] = useState('');

};
The code block above first imports the useState and useEffect hook from React. These hooks are two of the most commonly used hooks in React Native, as well as in React.
The useState hook allows a functional component to have state by declaring a variable and its setter function. It is used to manage and update state within a component. The useState hook takes an initial state value as its argument and returns an array with two values. The two returned values are the current state value and the function to update the state.
Along with the useState hook import is the useEffect hook. The useEffect hook is used to manage side effects. The useEffect hook takes a callback function as its argument and runs it after every render cycle. A dependency could be passed as a second argument to determine when to re-run the effect.
Within your app component, you will use the useEffect hook to fetch data from the server when the component is mounted or rendered for the first time:
useEffect(() => {
    async function fetchTodos() {
      const Todo = Parse.Object.extend('Todo');
      const query = new Parse.Query(Todo);
      const results = await query.find();
      setTodos(results.map(result => result.toJSON()));
    }

    fetchTodos();
  }, []);
Inside useEffect, an async function fetchTodos is defined. The function creates a new instance of the Todo class, which represents a collection of data stored in the Back4app server. It then searches for a Todo object stored in the server with Parse.Query.
The query.find() method is used to retrieve the parse object data from the server asynchronously and is stored in a results variable. In this case, the data will be a list of to-do items.
setTodos is then called to update the state of the component with the new data that has been fetched from the server and mapped toJSON.
Finally, an empty array [] is passed as the second argument to the useEffect hook to ensure that fetchTodos is only called once when the component is first mounted or rendered.
Next, you will create functions to handle adding and deleting tasks within your to-do app:
async function handleAddTodo() {
    if (!newTodo) return;

    const Todo = Parse.Object.extend('Todo');
    const todo = new Todo();
    todo.set('text', newTodo);
    await todo.save();

    setTodos([...todos, todo.toJSON()]);
    setNewTodo('');
  }

  async function handleDeleteTodo(id) {
    const Todo = Parse.Object.extend('Todo');
    const todo = new Todo();
    todo.set('objectId', id);
    await todo.destroy();

    setTodos(todos.filter(todo => todo.objectId !== id));
  }
In the code block above, handleAddTodo is an asynchronous function that will handle adding tasks in your app. It first checks if there is a new to-do item (newTodo). If there isn’t, it simply returns. However, if there is a new to-do item, it creates a new Parse object called Todo and sets its text property to the new to-do item’s text.
It will save it to the Parse server using the save() method. It then updates the state of the todos array by adding the new to-do item to the end of the array and resets the newTodo state to an empty string.
The second async function handleDeleteTodo will handle the task of deleting todos. It takes an id parameter, which represents the ID of the to-do item to be deleted. It creates a new Todo object and sets its objectId property to the id parameter.
It then uses the destroy() method to delete the object from the Parse server. Finally, it updates the todos state by filtering out the deleted to-do item from the array using filter().
All the standard business logic for your application is now done. You can begin to implement its UI elements.
Import the following code block into your App component:
return (
    <View style={styles.container}>
      <Text style={styles.heading}>Todo List</Text>
      <View style={styles.inputContainer}>
        <TextInput
          style={styles.input}
          placeholder="Add a new todo"
          value={newTodo}
          onChangeText={setNewTodo}
        />
        <TouchableOpacity style={styles.addButton} onPress={handleAddTodo}>
          <Text style={styles.addButtonText}>Add</Text>
        </TouchableOpacity>
      </View>
      <View style={styles.listContainer}>
        {todos.map(todo => (
          <View style={styles.listItem} key={todo.objectId}>
            <Text style={styles.listItemText}>{todo.text}</Text>
            <TouchableOpacity
              style={styles.deleteButton}
              onPress={() => handleDeleteTodo(todo.objectId)}
            >
              <Text style={styles.deleteButtonText}>Delete</Text>
            </TouchableOpacity>
          </View>
        ))}
      </View>
    </View>
  );
}
The return component returns a view with some JSX code.
The TextInput and TouchableOpacity components are used to create the input form for adding new todos.
When the user clicks on the TouchableOpacity component, the onPress event handler fires and calls the handleAddTodo function. The function creates a new Parse object representing the todo item, saves it to the server, and adds it to the todos state using the setTodos function.
The View component with the listContainer style contains a mapping function that iterates through the todos array using the map() method to create individual listItem components for each todo.
The key property is set to the objectId of each todo to avoid rendering errors. When the user clicks on the delete button, the handleDeleteTodo function is called, which removes the corresponding todo item from the server and the todos state.
All the styles used in the App component are defined in the styles object using the StyleSheet.create() method:
const styles = StyleSheet.create({
  container: {
    flex: 1,
    backgroundColor: '#fff',
    alignItems: 'center',
    justifyContent: 'center',
    padding: 20,
  },
  heading: {
    fontSize: 24,
    fontWeight: 'bold',
    marginBottom: 20,
  },
  inputContainer: {
    flexDirection: 'row',
    alignItems: 'center',
    marginBottom: 20,
  },
  input: {
    flex: 1,
    backgroundColor: '#f2f2f2',
    paddingVertical: 10,
    paddingHorizontal: 20,
    borderRadius: 10,
    marginRight: 10,
  },
  addButton: {
    backgroundColor: '#2ecc71',
    paddingVertical: 10,
    paddingHorizontal: 20,
    borderRadius: 10,
  },
  addButtonText: {
    color: '#fff',
    fontWeight: 'bold',
    fontSize: 16,
  },
  listContainer: {
    flex: 1,
    width: '100%',
  },
  listItem: {
    flexDirection: 'row',
    alignItems: 'center',
    justifyContent: 'space-between',
    backgroundColor: '#f2f2f2',
    paddingVertical: 10,
    paddingHorizontal: 20,
    borderRadius: 10,
    marginBottom: 10,
  },
  listItemText: {
    flex: 1,
  },
  deleteButton: {
    backgroundColor: 'red',
  },
Here is the result of the application you just built.

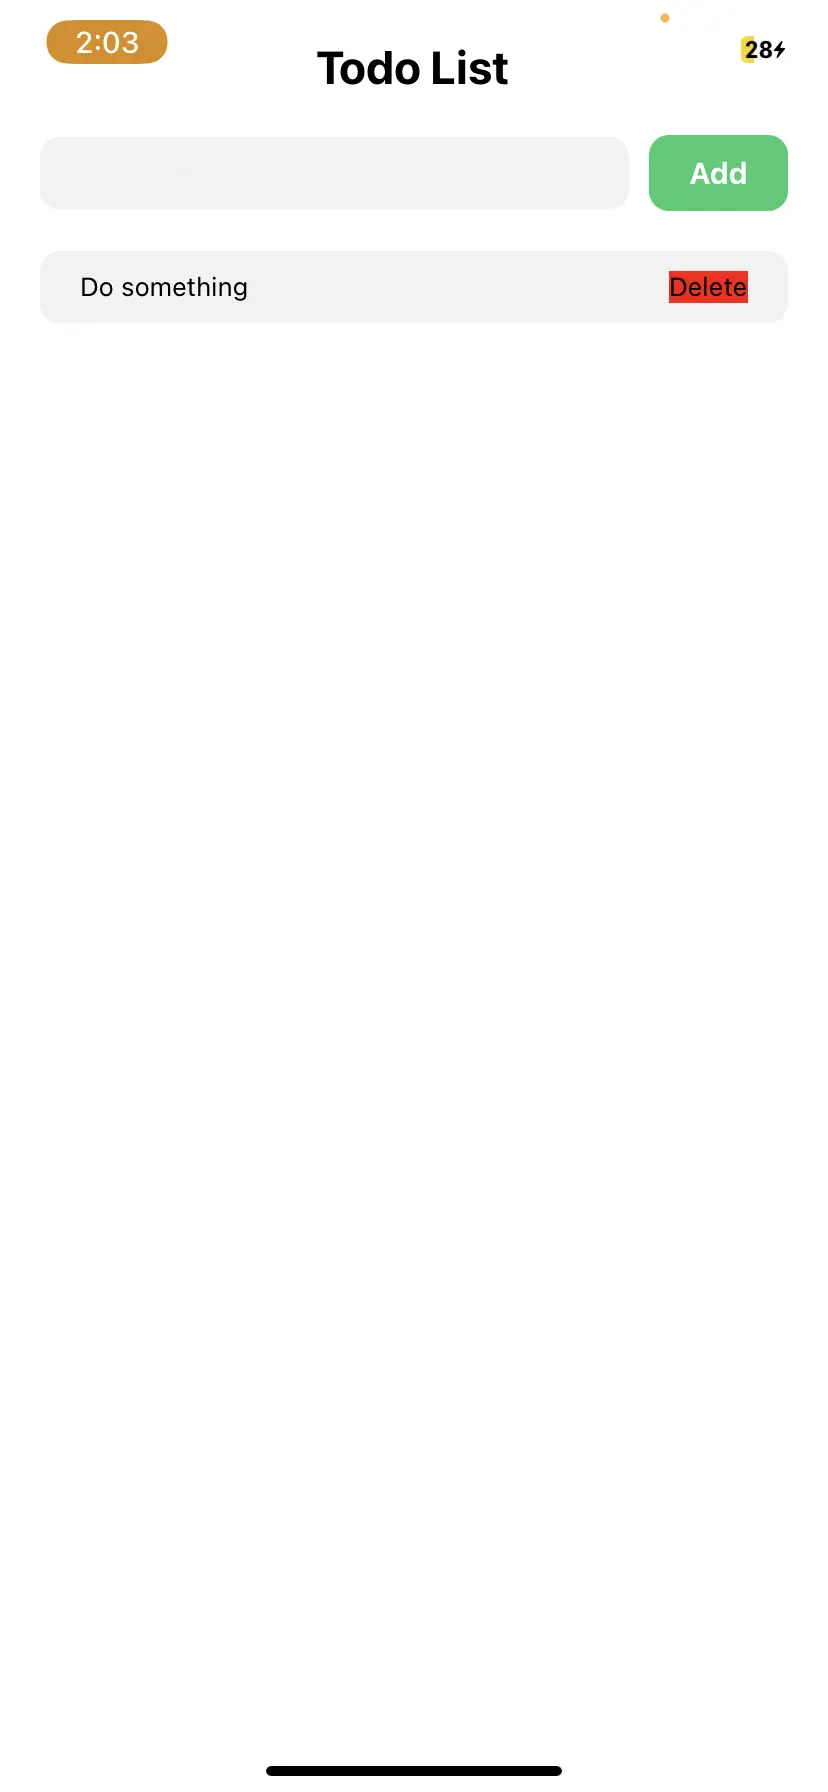
Adding a new to-do item will cause the app to send the data to your Back4app app server.
You can view the data on your app’s dashboard on Back4app.

You have now successfully deployed your React Native application on Back4app.
Conclusion
With your app fully functional on the Back4app servers and able to read, write and store data from your React Native app to Back4app and back, you can see just how Back4app provides a convenient and scalable backend solution.
Back4app also offers a range of other features, including real-time data synchronization, push notifications, and user authentication. The possibilities for extending your app with some of these additional features are endless.
FAQ
What is React Native?
React Native is an open-source framework for building mobile applications. It allows developers to build mobile apps for iOS and Android platforms simultaneously.
Can I use a cloud-based backend service with my React Native app?
Yes, you can use a cloud-based backend service with your React Native app. Back4app is a popular cloud-based backend service that provides scalable and flexible solutions for app development. Other examples of cloud-based backend services include Firebase, AWS Amplify, and Microsoft Azure.
Cloud-based services have an advantage over non-cloud-based backend services since self-hosted servers like Node.js with Express and Django with Python require more setup and maintenance.
How can I deploy my React Native app on Back4app?
To deploy your React Native app on Back4app, you must create a new app on the Back4app platform and configure your project to connect with that app on Back4app using the JavaScript Key and Application ID. This will require you to install the Back4app Parse SDK and Async Storage handler into your project. You should then initialize the SDK within your React Native project to connect with Back4app and interact.
Is it possible to integrate multiple backend services with a React Native app?
Yes, it is possible to integrate multiple backend services with a React Native app. This can be done by using different APIs or SDKs for each backend service and then managing the communication between them within the app. However, this will increase the complexity of the app and potentially cause performance issues. You should carefully consider the need for multiple backend services and how they will work together before implementing them in your app.


