How to Deploy a Svelte Application?

In this article, you will learn how to build a web application using Svelte and deploy it using Back4app containers.
Svelte is a JavaScript framework for developing reactive and dynamic web applications. With the Svelte framework, you can build lightweight and high-performance applications because, unlike traditional JavaScript frameworks, Svelte moves a lot of heavy lifting from the browser to the build stage.
Contents
- 1 Project Overview: Inventory Tracker
- 2 Creating the Svelte Application
- 3 Building a Svelte Application
- 4 Setting Up a Back4app Application
- 5 Connecting Your Svelte Application to Back4app
- 6 Adding Data to Back4app
- 7 Fetching Data From Back4app
- 8 Deleting Data From Back4app
- 9 Testing Your Application
- 10 Dockerizing Your Svelte Application
- 11 Deploying Your Svelte Application
- 12 Conclusion
Project Overview: Inventory Tracker
This article will feature an inventory tracker that integrates with Back4App’s real-time database.
The application will manage a user’s inventory data, allowing them to add, retrieve, and delete product information as needed.
The tracker will store essential details such as product name, price, and quantity on Back4App.
It enables users to easily maintain and monitor their inventory, ensuring accurate and up-to-date information about their products.
Creating the Svelte Application
In this section, you will create a Svelte project using Vite (a front-end framework build tool).
You can create your Svelte application with Vite by running the following command in your terminal:
npm init vite
After running this command, provide a name for your project, select the framework (Svelte), and choose your preferred language variant for the framework.
Like so:
The image above shows that the Svelte project’s name is inventory-tracker, and the language variant is JavaScript.
Next, you need to install some necessary dependencies in the Svelte project. To install the dependencies, switch to your project directory and run the command below:
# Switch to the project directory
cd inventory-tracker

# Install dependencies
npm install
This command will install all the necessary dependencies in your project, and you can now start building your application on your IDE.
Building a Svelte Application
In this section, you will build an inventory tracker application using Svelte and Back4app’s backend as a service feature.
The application will have CRUD (Create, Read, Update, Delete) capabilities, allowing you to add, fetch, edit, and delete data.
Before you start building your Svelte application, ensure you install the svelte-routing library.
The svelte-routing library is a library that adds routing capabilities to your Svelte applications, allowing you to create single-page applications (SPAs).
Install the svelte-routing library by running the command below:
npm i -D svelte-routing
Once installed, create an AddProduct and a Home component in your project’s src directory. In the AddProduct component, add the following lines of code:
<!-- AppProduct.svelte -->
<script>
	let product = {
	  name: "",
	  quantity: "",
	  price: "",
	}
</script>

<form>
	<input type="text" placeholder="Name of Product" bind:value={product.name}>
  <input type="number" placeholder="No of Products" bind:value={product.quantity}>
  <input type="number" placeholder="Price of Products" bind:value={product.price}>

	<div>
		<button>Add Product</button>
	</div>
</form>

<style>
	form{
		display: flex;
		flex-direction: column;
		gap: 2rem;
		align-items: center;
	}
</style>
The code block above renders a form that takes product details. The form contains three input elements of the type text (name) and number (quantity & price).
The input fields take the product’s name, the number of products available, and the product’s price.
With the bind:value attribute in the input elements, the code block binds the values of the inputs to the specified product object properties. The style section contains CSS styles scoped to this Svelte component.
Next, add the code block below to your Home component:
<!-- Home.svelte -->
<script>
    import {Link} from "svelte-routing";
</script>

<main>
    <p>A way to manage and keep track of products in your inventory</p>
    <Link to="/add-products" class="link">Add Products here →</Link>
</main>

<style>
    main{
    display: flex;
    flex-direction: column;
    gap: 2rem;
    align-items: center;
  }
</style>
The Home component imports the Link component from the svelte-routing library. The Link component directs users to the “/add-products” route. You will need to define this route to ensure that the Link component actually works.
To define your routes, open the App component and add the code block below to it:
<!-- App.svelte -->
<script>
  import {Route, Router} from "svelte-routing";
  import AddProduct from './AddProduct.svelte';
  import Home from './Home.svelte';

  export let url = "";
</script>

<Router {url}>
  <h1>Inventory Tracker</h1>

  <div class="container">
    <Route path="/" component={Home} />
    <Route path="/add-products" component={AddProduct} />
  </div>
</Router>

<style>
  h1{
    text-align: center;
    font-family: "Poppins", sans-serif;
    margin-block-start: 1rem;
    margin-block-end: 6rem;
  }
</style>
The code block above imports the Route and Router components from svelte-routing along with the Home and AddProduct components to define their individual routes.
With the Route component, you define the various routes in the application. In this case, the Home and AddProduct routes.
Wrapping the HTML section within the Router component initializes routing for the enclosed components.
From the code block above, rendering the application will display the Home route first since the route’s path is “/.”
The next step is to define the global styles for the application. To do this, create a styles folder within the src directory. In the styles folder, add a global.css file; in this file, define the global styles for the application.
Add the code block below to the global.css file:
/* global.css */
@import url('<https://fonts.googleapis.com/css2?family=Montserrat:ital,wght@0,100..900;1,100..900&display=swap>');
@import url('<https://fonts.googleapis.com/css2?family=Poppins:ital,wght@0,100;0,200;0,300;0,400;0,500;0,600;0,700;0,800;0,900;1,100;1,200;1,300;1,400;1,500;1,600;1,700;1,800;1,900&display=swap>');

*{
    margin: 0;
    padding: 0;
    box-sizing: border-box;
}

body{
    font-family: "Montserrat", sans-serif;
    background-color: #1F2124;
    color: #FFFFFF;
}

.container{
    inline-size: 60%;
    margin: auto;
}

.link{
    text-decoration: none;
    color: inherit;
    font-weight: 500;
}

.link:hover{
    color: #99BCF6;
}

input{
    padding: 1rem;
    border-radius: 12px;
    outline: none;
    border: none;
    font-family: "Montserrat", sans-serif;
    color: #333333;
    inline-size: 100%;
}

button{
    padding: 0.7rem 1rem;
    border-radius: 10px;
    font-weight: 500;
    background-color: #FFFFFF;
    font-family: "Montserrat", sans-serif;
}

button:hover{
    background-color: #99BCF6;
}
After defining the styles, import the global.css file in the App component to apply the defined styles to the application. You can do this by adding this code to the script section of the App component:
//App.svelte
import './styles/global.css';
Now, you have built your Svelte application. Next, you will build your application’s backend using Back4app.
Setting Up a Back4app Application
In this section, you will create a Back4app application that serves as your application’s Backend using the Back4app AI agent.
You need a Back4app account to create one. If you do not have one, you can create one for free.
Log in to your account and click on the “AI Agent” link on the navigation bar on your Back4app account dashboard.
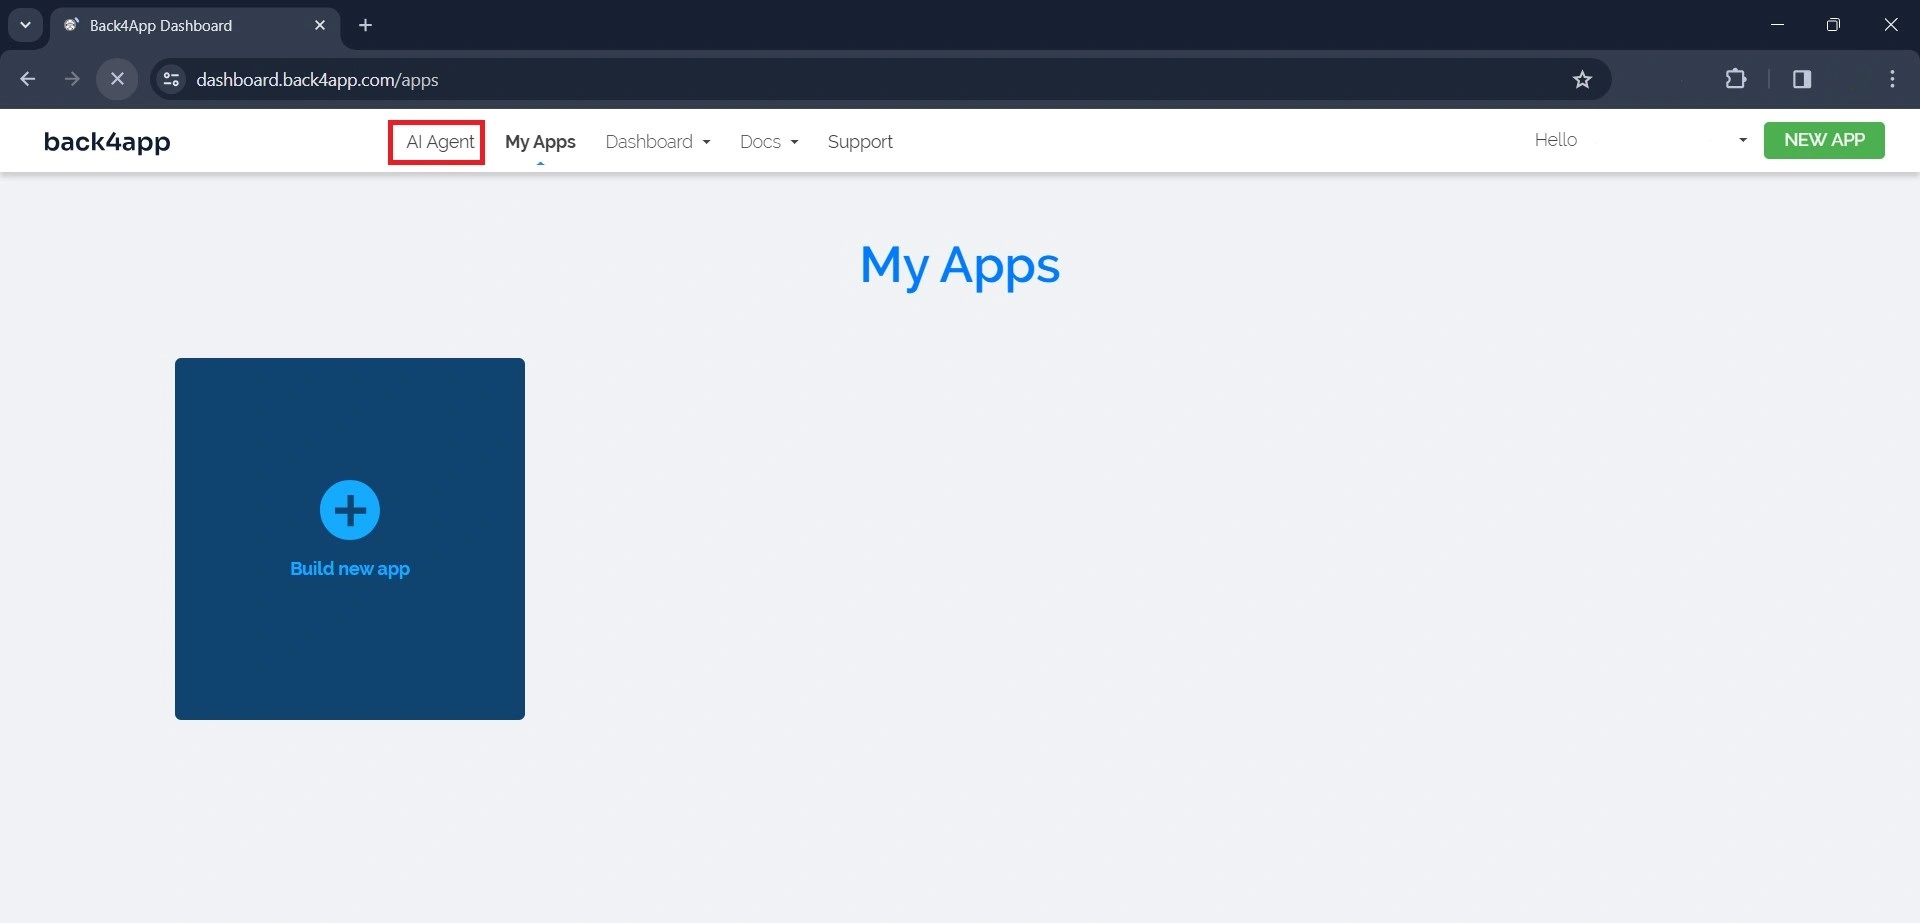
Once you have access to the AI Agent, input a prompt asking the AI Agent to create an application.
The prompt should be similar to the one below:
Create a new application named inventory-trackerAs seen in the prompt above, you must specify the application’s name. As soon as the AI Agent finishes creating the application, it will send a response confirming its creation.
The response should also contain the application’s credentials, similar to the response in the image below.
Among the various credentials the AI Agent provides, ensure you copy the App ID and JavaScript key. You will need them to connect your Svelte application with the Back4app application.
Next, create an inventory class in the Back4app application. In that class, add the name, quantity, and price columns. To do this, using the AI Agent, write this prompt:
In the inventory-tracker app, create an inventory class and add a name, price, and quantity column to the class.You should get a response similar to the image below.

Now that your Svelte UI Back4app backend is ready, you will connect the UI to the backend.
Connecting Your Svelte Application to Back4app
In this section, you will connect your Svelte application to the Back4app application. To do this, you need the Parse SDK.
The Parse SDK is a set of development tools that offers backend services you can use in your web applications.
Install the Parse SDK by running the command below:
npm install parse
After installing the SDK, within the script tag in the App.svelte file, add the code in the code block below.
import Parse from 'parse/dist/parse.min.js';

Parse.initialize('YOUR_APP_ID', 'YOUR_JAVASCRIPT_KEY');
Parse.serverURL = '<https://parseapi.back4app.com/>';
Replace 'YOUR_APPLICATION_ID' and 'YOUR_CLIENT_KEY' with the credentials you copied earlier. Ensure you store them securely using environmental variables.
Adding Data to Back4app
To add data to Back4app, you will use the input values in the AddProduct component form. You will take the values submitted by the user and then add them to your Back4app’s database.
In the script section of the AddProduct component, create an addData function. This function will contain the logic that adds the product’s details to Back4app.
Like so:
// AddProduct.svelte
import Parse from 'parse/dist/parse.min.js';
import { navigate } from "svelte-routing";

let addData = (event) => {
  event.preventDefault();
  try {
    const Inventory = new Parse.Object("Inventory");
    Inventory.set("name", product.name);
    Inventory.set("quantity", +product.quantity);
    Inventory.set("price", +product.price);
    Inventory.save().then(() => {
      console.log("New Product added successfully");
      navigate("/", { replace: true });
    });
  } catch (error) {
    console.log(error);
  }
};
In the code block above, the addData function creates a new Parse object Inventory for the Inventory class.
It sets the values of the name, quantity, and price fields to the corresponding values of the product properties before saving the object to the database.
Note that there is a unary plus (+) operator before the product.quantity and product.price properties.
The operator converts the properties to the number type. Bind the addData function to the form in the AddProduct component with the submit event handler.
This will trigger the addData function anytime the user submits the form.
To bind the function to the form with the submit event handler, replace the form in the AddProduct component with the form below:
<!--AddProduct.svelte-->
<form on:submit={addData}>
	<input type="text" placeholder="Name of Product" bind:value={product.name}>
	<input type="number" placeholder="No of Products" bind:value={product.quantity}>
	<input type="number" placeholder="Price of Products" bind:value={product.price}>

	<div>
	    <button>Add Product</button>
	</div>
</form>
Fetching Data From Back4app
To fetch data from Back4app, you will get access to the Parse Object saved to your Back4app application in the previous section and grab the values in the object.
Before fetching the data, create a Card component in the application’s src directory. This component determines the look and feel of the data fetched from Back4app.
In the component file, write this code:
<!-- Card.svelte -->
<script>
	export let name = '';
	export let quantity = 0;
	export let price = 0;
</script>

<div class="card">
	<h3>{name}</h3>
	<div class="details">
	  <p>Price: ${price}</p>
	  <p>Quantity: {quantity == 0 ? "out of stock" : quantity}</p>
	</div>
	<div>
	  <button>Delete</button>
	</div>
</div>

<style>
	.card{
	    display: flex;
	    flex-direction: column;
	    gap: 1.9rem;
	    padding: 1rem;
	    border-radius: 12px;
	    background-color: #e2e2e2;
	    color: #1F2124;;
	    inline-size: 100%;
	}

	.details{
	    display: flex;
	    gap: 3rem;
	}

	.details p{
	    font-size: 14px;
	    font-weight: 500;
	    color: #888888;
	}
</style>
The Card component displays the product’s name, quantity, and price. It gets these values from its parent component using the three props in the code block above: name, quantity, and price.
Now, in the script tag of your Home component, add the code in the code block below:
//Home.svelte
import { onMount } from "svelte";
import Parse from "parse/dist/parse.min.js";

let products = [];

const fetchProducts = async () => {
  try {
    const query = new Parse.Query("Inventory");
    const productsData = await query.find();
    products = productsData;
  } catch (error) {
    console.log(error);
  }
};

onMount(fetchProducts);
This code imports the onMount lifecycle function from the Svelte framework. It also creates a products array that is empty at first.
In the code block, you can find the fetchProducts function, which holds the logic responsible for fetching the necessary data from Back4app.
The fetchProducts function searches for an “Inventory” object in your app’s database with the Parse.Query method.
It then returns an array of the query results by calling the find() method on the query. Finally, it assigns the array of the results to the product variable.
Making the fetchProducts function an argument of the onMount function ensures that the application fetches your data whenever you render the Home component.
In the HTML section of the component, display the data in the products array.
Like so:
<!-- Home.svelte-->
<div class="products">
	{#each products as product}
		<Card name={product.get('name')} quantity={product.get('quantity')} price={product.get('price')}/>
	{/each}
</div>
The each block iterates over the products array and displays the Card component for each product in the array.
The Card component obtains the values of the name, quantity, and product’s price using the get method on the product. It then assigns those values to its props.
Style the div tag wrapping the each block by adding the defined styles below to the style tag in your Home component.
/* Home.svelte */
.products{
	display: grid;
	grid-template-columns: repeat(3, 1fr);
	gap: 3rem;
	border-top: 2px solid #e2e2e2;
	margin-block-start: 3rem;
	padding-block-start: 2rem;
}
Deleting Data From Back4app
To add the delete functionality to your Svelte application. You will need to modify your components, starting with the Card component. In the Card component, create a new prop called handleClick.
Create the prop by adding the line of code below in the component’s script section:
//Card.svelte
export let handleClick;
Now, bind the prop to the button element in the component’s HTML section with the click event handler.
Like so:
<!-- Card.svelte -->
<div>
	<button on:click={handleClick}>Delete</button>
</div>
In the Home component, you will create a deleteProduct function. This function contains the logic responsible for deleting the selected product.
Add the lines of code below in the component’s script section.
// Home.svelte
const deleteProduct = async (id) => {
  try {
    const Product = Parse.Object.extend("Inventory");
    const product = new Product();
    product.id = id;
    await product.destroy();
    const newData = products.filter((item) => item.id !== id);
    products = newData;
  } catch (error) {
    console.log(error);
  }
};
In the code block above, the deleteProduct function creates a new “Product” object, sets the id property of the object to the id parameter of the function, and then calls the asynchronous destroy method of the object to delete the product with the given ID.
The function filters out the product with the given ID from the product array and creates a new array without the deleted product. The function then assigns the new array to products.
Next, you pass the function to the handleClick prop of the Card component. Now, whenever a user clicks on the button in the Card component, this will trigger the deleteProduct function.
Like so:
<!-- Home.svelte -->
<Card
	name={product.get('name')}
	quantity={product.get('quantity')}
	price={product.get('price')}
	handleClick={() => deleteProduct(product.id)}
/>
Testing Your Application
You will need to test your application to ensure it works properly. To start your application, run the command below.
npm run dev
This command will run your application on the development server and provide you with a link so you can view the application on your web browser.
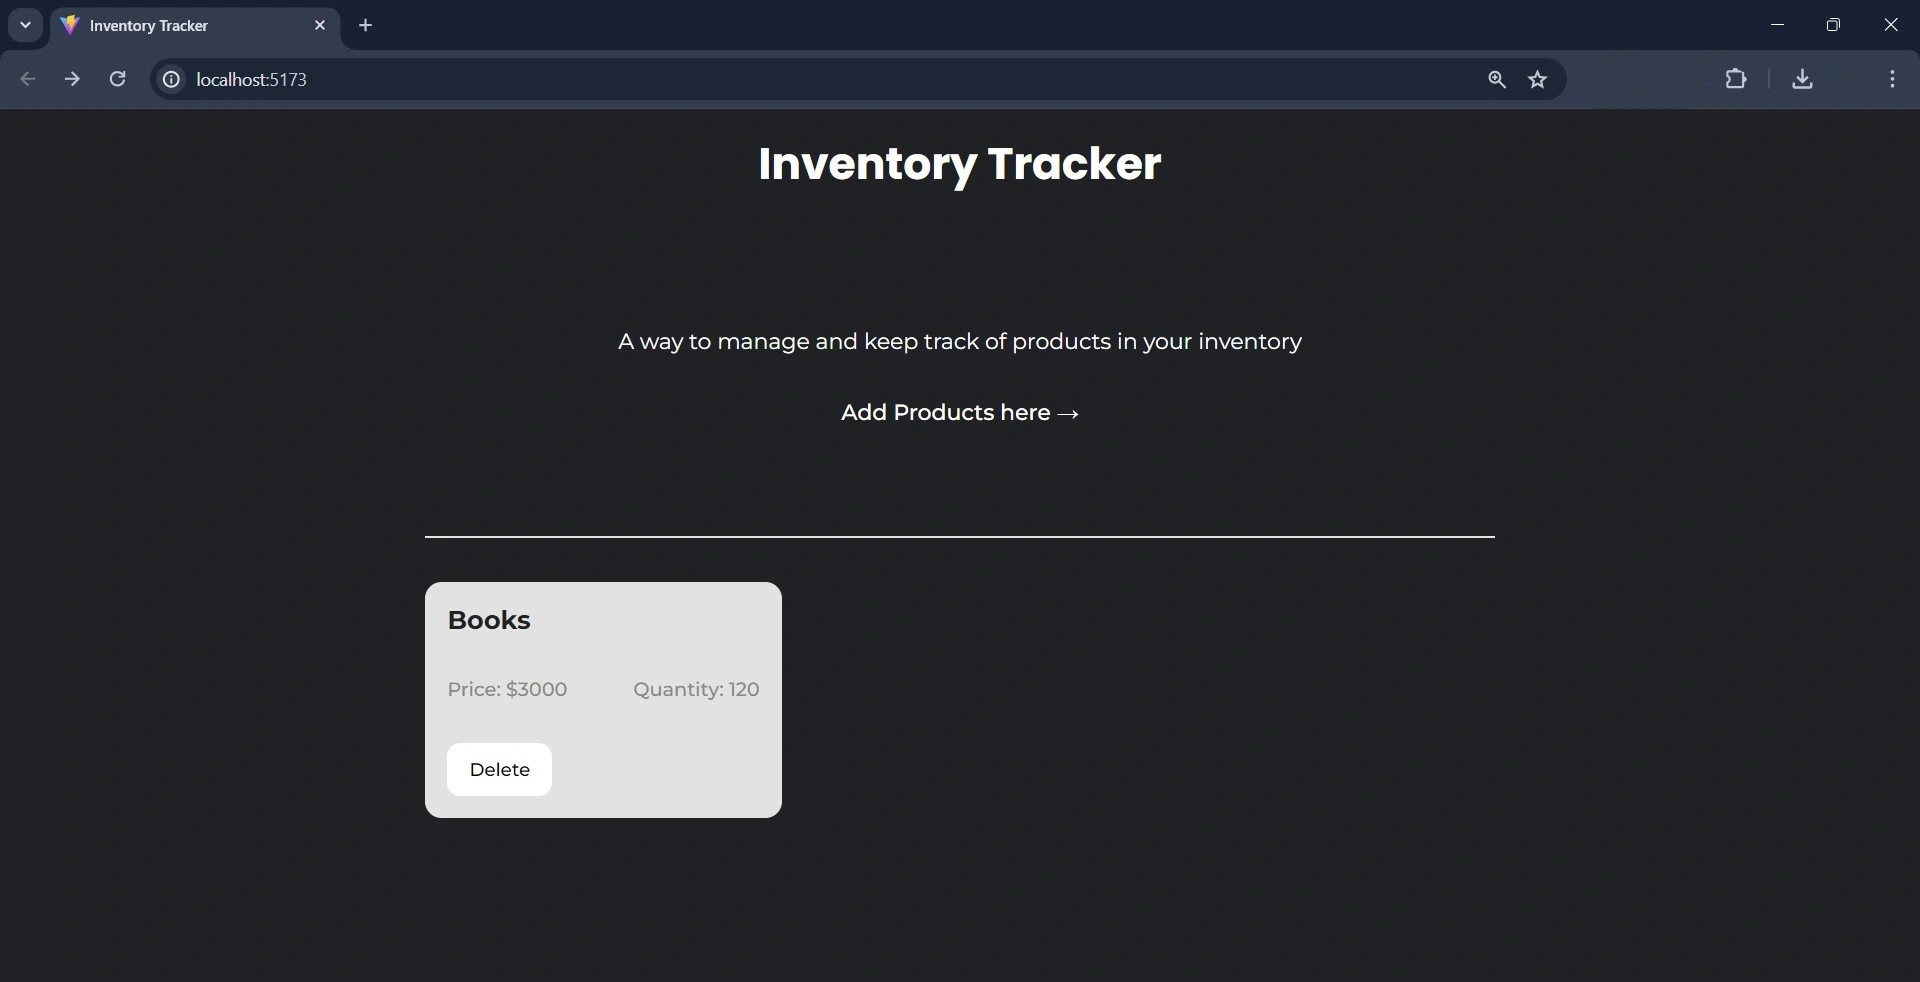
Upon clicking the link, you should see an application that looks like the image below.
Click the “Add Products here” link, and you will be redirected to a new page that looks like this:
Fill out the form and then submit it by clicking the “Add Product” button.
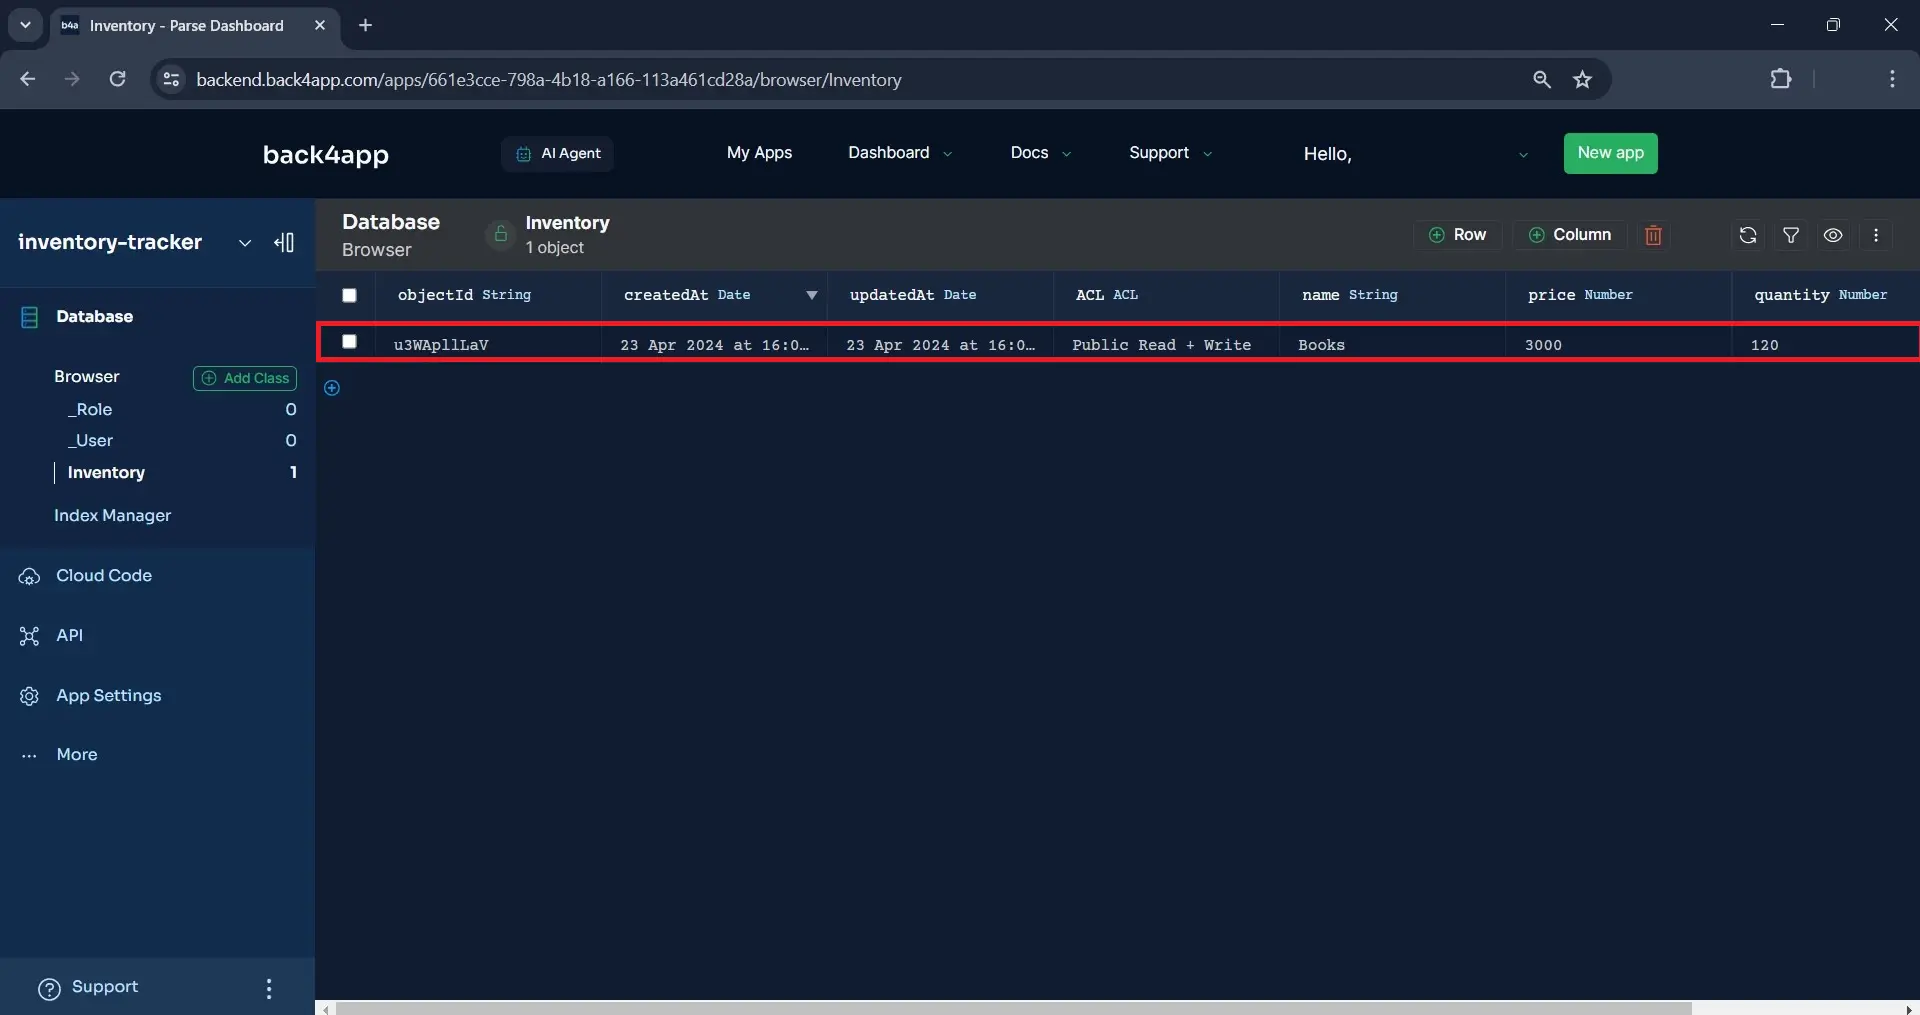
This will add the details you provided to Back4app’s database. You can verify this by visiting the Back4app application’s dashboard.
If the application adds the data successfully, Back4app will add a new row to the database.
Like so:
Upon submitting the form, the application will redirect you to the home page, which will display the new product.
To delete any product, just click on the “Delete” button on the product card.
Dockerizing Your Svelte Application
You must dockerize your Svelte application before you can deploy it on Back4app. To dockerize your Svelte application, create a Dockerfile and .dockerignore files in the root directory of your application.
In the Dockerfile, write the following lines of code:
# Dockerfile
FROM node:18-alpine
WORKDIR /app
COPY package*.json ./
RUN npm install
COPY . .
EXPOSE 5173
CMD ["npm", "run", "dev"]
There are some directories you need to exclude from when building your Docker images are listed below. To specify these directories, add them to the .dockerignore file.
For example:
# .dockerignore
node_modules
The code block above tells Docker to exclude the node_modules directory from the context during the image build process. Since you created your Svelte application with Vite, you must configure Vite to support Docker.
To do this, access your vite.config.js file in your application’s root directory. Replace the code in the file with the code block below:
import { defineConfig } from 'vite'
import { svelte } from '@sveltejs/vite-plugin-svelte'

// <https://vitejs.dev/config/>
export default defineConfig({
  plugins: [svelte()],
  server: {
    host: true,
    strictPort: true,
    port: 5173,
   },
})
The code block above specifies the port the development server listens on and ensures that the application fails to run on any port other than the specified one.
To build your docker image, run the following command in your terminal:
docker build -t inventory-tracker .
Deploying Your Svelte Application
Now that you have dockerized your application, the next step how to deploy a Svelte app. To deploy a Svelte app, you will utilize the Back4app Containers.
Before you deploy your application, you must push it to a GitHub repository so that Back4app can access the application using its repository. To give Back4app access to your GitHub repository, use the Back4app Github app.
After giving Back4app access to the application’s repository, you can now deploy the application on Back4app with the AI agent using the prompt below:
Deploy my repository <<repository-url>> on Back4app containersThis prompt above initiates the deployment process. Ensure you replace the <<repository-url>> with your application’s repository URL.
Upon successful deployment, the AI agent will send you a message telling you the application’s deployment status and providing details about the deployment.
For example:
The image above shows that the application deployed successfully and that you can access the application on your browser by visiting the App URL specified.
Conclusion
In this article, you learned how to build a simple Svelte application using Back4pp. Using the Back4app AI agent, you created a backend for your application, which you interacted with using the Parse SDK.
The AI agent also streamlined the deployment process of your app on Back4app containers.
Back4app simplifies your development workflow by managing your backend and deployment needs. This allows you to focus on building products your users will love.
The code used in this tutorial is available on this GitHub repository.

