How to Build a Backend for Your iOS App?
iOS apps, like web applications, require some way to store and keep track of data. Whether that data is stored on a cloud backend service or a locally built server run personally, a backend is essential for managing user data.
However, building a backend for your iOS app from scratch can be a daunting task, especially if you’re generally new to iOS development and backend development.
In this tutorial, you will learn how to build a backend for your iOS app. First, we’ll provide an overview of iOS development and discuss its benefits and limitations.
Then, you’ll explore the different backend options available to you. Finally, you will learn how to use Back4App, a Backend as a Service (BaaS), as a backend for your iOS app.
Contents
- 1 iOS Overview
- 2 Benefits of Developing iOS Applications
- 3 Limitations of Developing iOS Applications
- 4 Backend Options for iOS Applications
- 5 What’s the Cost of Developing a Backend for an iOS Application?
- 6 How to Build an iOS App Backend With Back4app?
- 7 FAQ
- 8 What programming languages can I use to develop an iOS app?
- 9 Can I use a BaaS provider for my iOS app backend?
- 10 How much does it cost to build an iOS app backend?
iOS Overview
Apple developed iOS as the primary operating system to power the mobile apps built on its iPhones, iPads, and iPod Touch devices.
Building these apps and optimizing them to work on the iOS platform as Apple designed is called iOS development. iOS apps are written using two programming languages, namely, Objective-C and, more recently, Swift.
Objective-C was the primary language used for iOS app development before the introduction of Swift in 2014. Swift was designed to be a more modern and user-friendly language, with features like type inference and optionals that make it easier to read and write.
Both languages can be used in the same project. This is because Swift, according to the Swift Documentation, was designed to be compatible with Objective-C and can be used to interact with existing Objective-C legacy code.
To build your iOS apps, Apple provides Xcode, an integrated development environment (IDE) where you can conveniently write code, build, and develop iOS apps.
Benefits of Developing iOS Applications
As a developer, building iOS apps can be beneficial in the following ways:
High-Quality User Experience
iOS apps are known for their exceptional user experience, with intuitive and polished designs that users find attractive and easy to use.
They have a specific app design guideline created for a top user experience, emphasizing simplicity, clarity, and consistency. This results in visually appealing apps with controls and layouts that make it easy for users to find what they need and complete their tasks quickly.
In addition, Apple provides developers with a comprehensive set of design tools and resources to help ensure that their apps meet the highest quality standards.
iOS apps are also optimized for the specific hardware and software of Apple devices, resulting in fast performance, smooth animations, and high-quality graphics.
Better Security
Another significant benefit of iOS applications is the level of security provided. This is due to several factors, mainly starting with Apple’s strict App Store review process, strong encryption, and privacy-focused features.
The App Store review process is designed to ensure that all App Store apps meet strict content and security guidelines. This includes checks for malicious code, malware, and other potential security threats.
As a result, iOS apps are less likely to contain harmful code or be used for phishing attacks or other malicious activities.
Consistency Across Devices
iOS apps are designed to look and function the same way across all Apple devices, including iPhones, iPads, and iPod Touches.
This consistency makes it easy for users to transition between different devices without the need to learn a new user interface or navigation system. It also ensures that app developers can design and build apps that work seamlessly across all devices without having to worry about compatibility issues or device-specific features.
Developer Tools
Apple provides iOS developers with powerful tools that make developing, testing, and debugging iOS apps easier.
These tools include the iOS SDK, Xcode, and a range of other tools and resources that help optimize the developer experience and quality of apps built.
Limitations of Developing iOS Applications
The iOS development experience is not flawless. There are limitations you will experience when developing an iOS app. Some of them include.
Limited Device Compatibility
A major frustration encountered with developing iOS apps is their short range of device compatibility. Today’s world has a wide range of mobile device manufacturers and an equally wide range of dedicated users.
However, iOS applications only run on Apple’s own hardware. This means that the apps can only be used on the iPhone, iPad, and iPod Touch devices. This limits the potential audience for an app you build and restricts it to the Apple ecosystem.
While Apple has a large user base, the limited device compatibility of iOS applications can be a disadvantage if you are looking to reach a wider audience outside of Apple.
App Store Approval Process
Apple’s App Store review process is known for being strict and can take longer than other app stores, such as Google Play.
The review process is designed to ensure that all apps on the App Store meet Apple’s guidelines for quality, safety, and content. However, it can be a challenge because of the extensive wait time, delaying your app’s release to the public.
Closed Ecosystem
Apple tightly controls its devices’ hardware and software, meaning that only Apple-approved software and hardware can be used with iOS devices. Their closed ecosystem also limits the potential for customization and can create barriers if you wish to offer more flexibility to your app’s users.
This closed system will make it harder for developers to integrate with third-party services and APIs.
Backend Options for iOS Applications
Now that you know the benefits and limitations of developing iOS applications, you should understand the different backend options available for your iOS app.
IaaS
Infrastructure as a Service (IaaS) is a cloud computing model where a third-party provider offers virtualized computing resources over the Internet to users who may need them to run personal software.
Using an IaaS is like renting a virtual computer from a third-party provider. Instead of buying and storing a computer, you can access a computer the provider is hosting over the Internet.
This computer is simply a virtual representation of a real computer, with all the basic infrastructure provided to build your own virtual computing environment with features like storage space, processing power, and memory.
The provider grants you access to this virtual computer, where you can run your own software and applications without having to worry about the physical hardware or maintenance.
With IaaS, you can scale up or down as needed and only pay for what you use. Examples of IaaS services include Amazon Web Services (AWS), Microsoft Azure, and Google Cloud Platform
PaaS
Platform as a Service (PaaS) is another cloud computing model similar to IaaS. PaaS providers offer a pre-configured platform with minimal customization, making it easier and faster for you to create and deploy applications.
The primary difference between IaaS and PaaS is the level of control you have over the underlying infrastructure.
With IaaS, the provider offers virtualized computing resources, such as servers and storage, over the Internet. At the same time, you have complete control over the virtual environment, including the operating system, middleware, and applications.
On the other hand, with PaaS, the provider offers a pre-configured platform for the operating systems, middleware, and other software components needed for developing and deploying applications. You only need to focus on developing the application while the PaaS provider takes care of the underlying infrastructure.
Examples of PaaS services include Heroku, Google App Engine, and Microsoft Azure App Service.
BaaS
With Backend as a Service (BaaS), you can easily integrate a cloud backend into your application without building or managing the underlying infrastructure.
BaaS providers offer pre-built backend services not commonly provided with PaaS or IaaS, such as databases, user authentication, file storage, serverless functions, and push notifications. You can now integrate these services into your applications through an API or SDK.
This eliminates the need for you to build and maintain your own backend infrastructure, allowing you to focus on building the app’s front end. Examples of BaaS services include Back4App, Firebase, and 8Base.
What’s the Cost of Developing a Backend for an iOS Application?
Developing a backend for an iOS app can vary in cost depending on various factors, including time, resources, and the human resources required.
The time spent building and setting up the backend is a significant factor to consider. The time required to build the backend depends on the complexity of the app’s functionalities and the backend’s integration with the app.
It may also require additional time for testing, debugging, and deployment. The more complex the app’s functionalities, the longer it may take to develop the backend, which can ultimately increase the cost.
The human resources required to develop the backend are another critical factor that affects the cost. Hiring and retaining experienced developers can be expensive, and the cost of training and development can add to the overall cost of developing the backend.
The cost of developing a backend for an iOS app can be managed by leveraging existing backend solutions such as Back4app.
How to Build an iOS App Backend With Back4app?
Back4App is a Backend as a Service (BaaS) platform with a ready-made backend infrastructure for mobile and web app development. It provides a powerful and scalable backend infrastructure, including database management, user authentication, push notifications, and more.
Back4App is a great option as a backend for your iOS app for several reasons. Firstly, it provides a simple and user-friendly interface that makes it easy to manage data and APIs.
Secondly, it offers comprehensive documentation that guides you through every step of the development process. Also, Back4App provides scalable cloud hosting that can handle the needs of any app, big or small, and offers high-end security features.
By following the steps outlined below, you can build an iOS app backend using Back4App.
Step 1: Sign Up for a Free Back4app Account
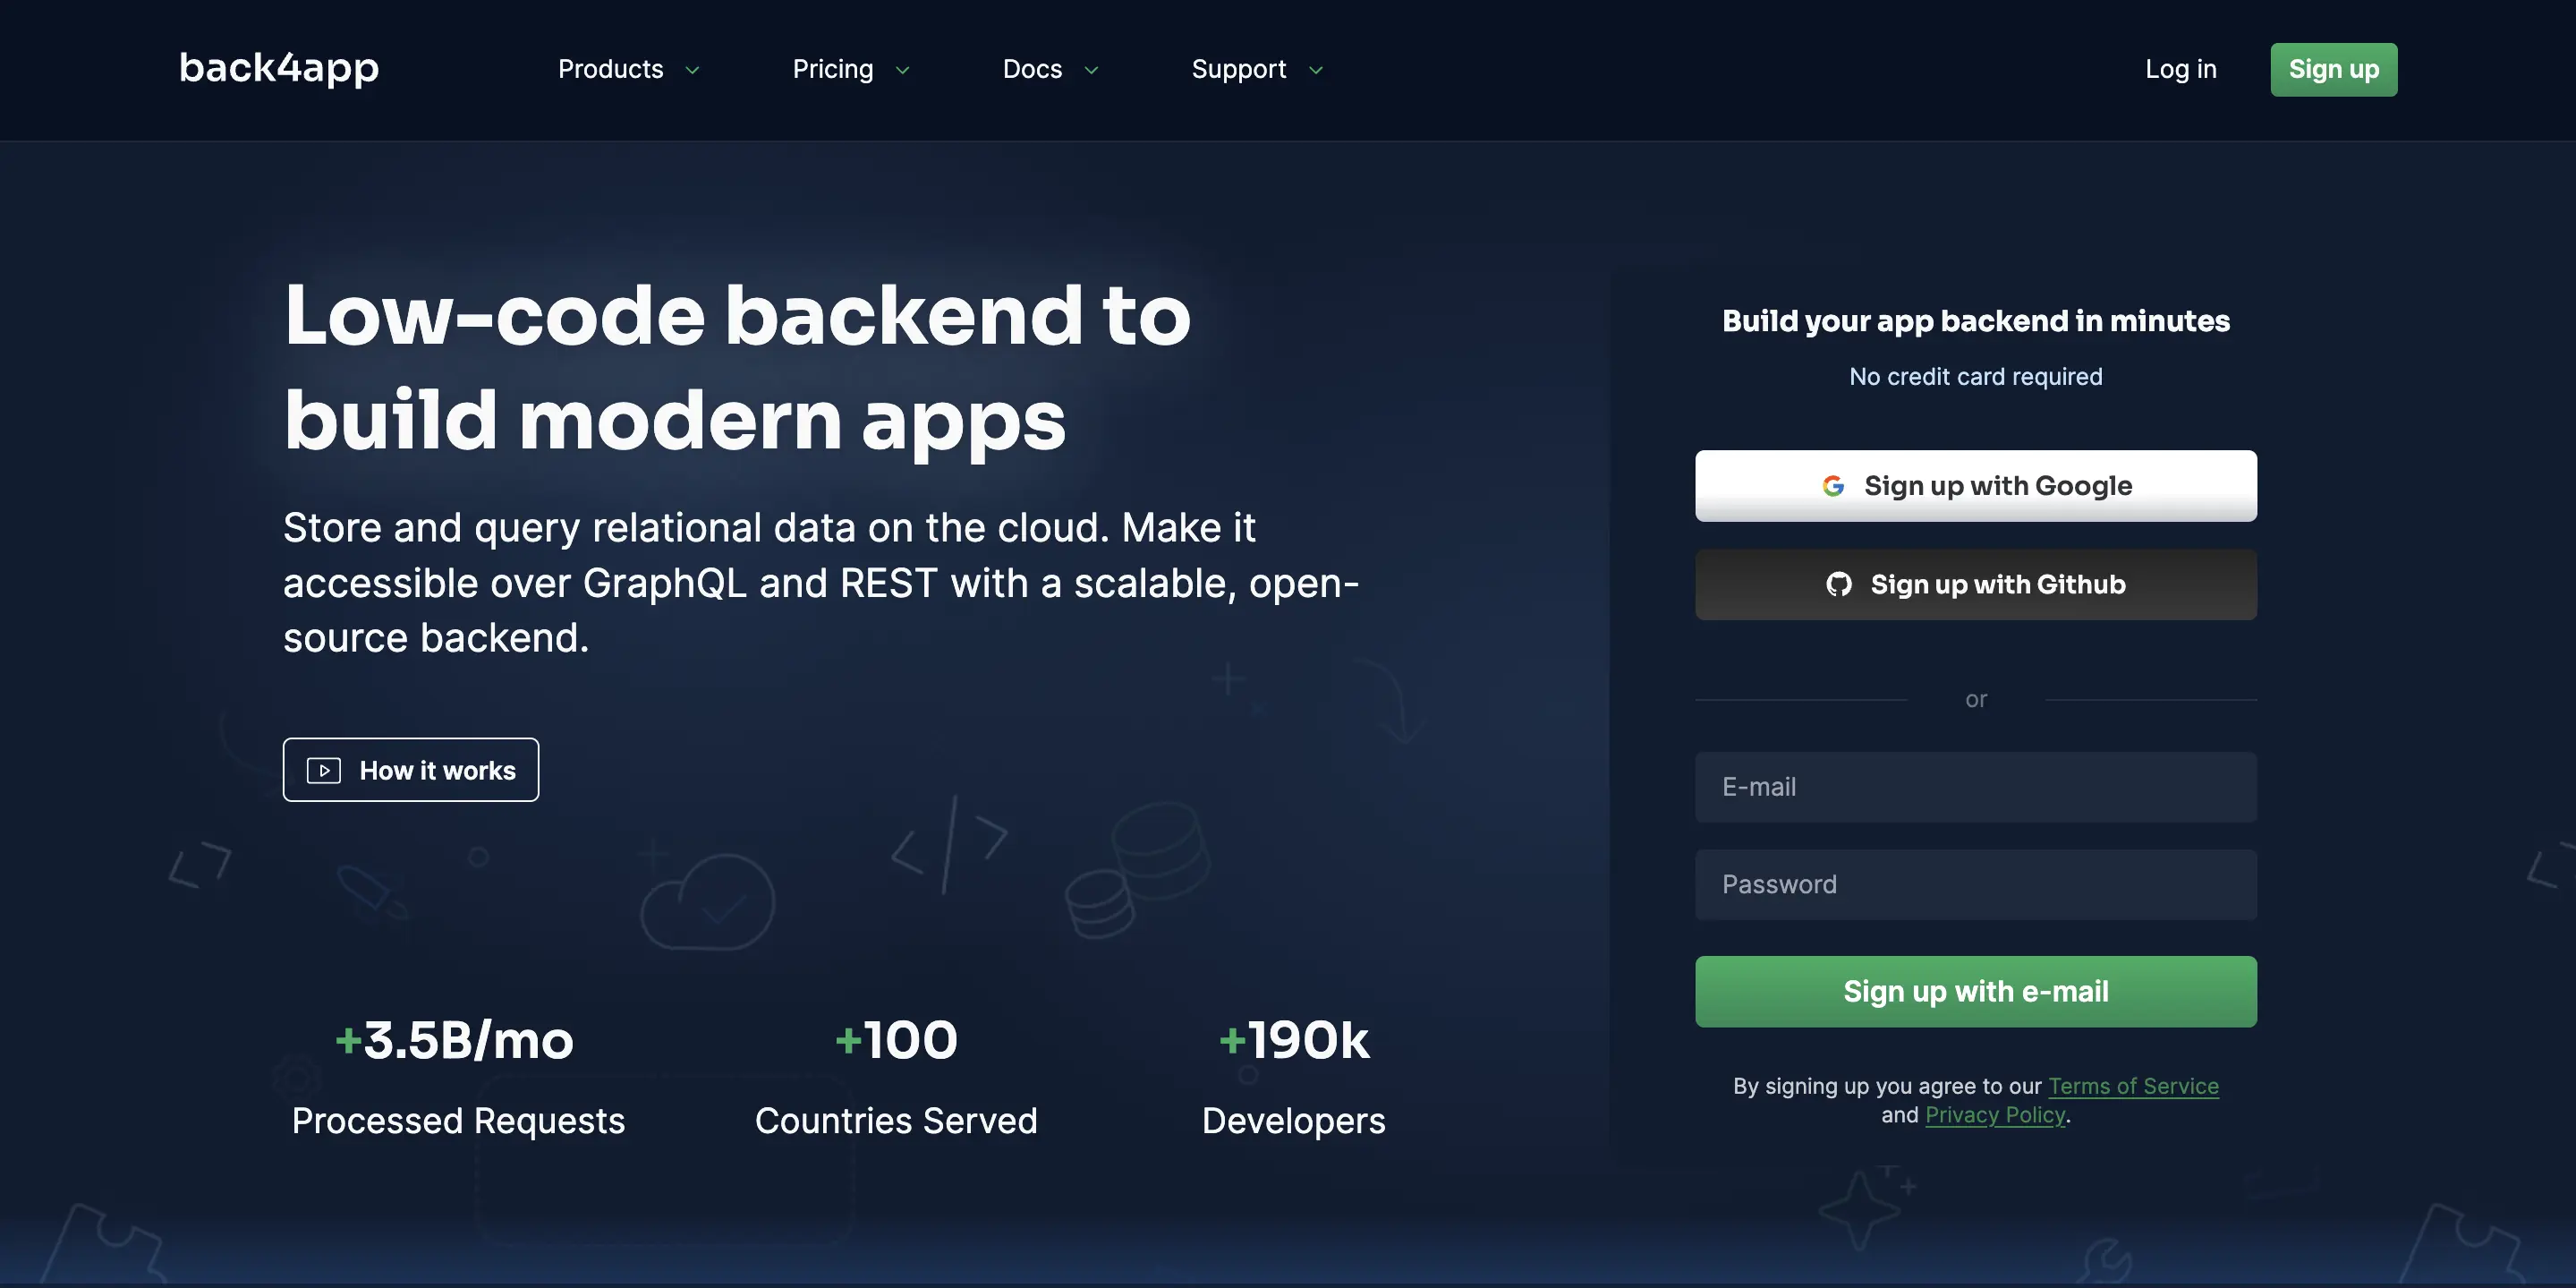
To create a backend infrastructure for your iOS app, sign up for a free Back4App account on the official website. With your Back4App account, you’ll have the ability to create and configure your backend for your iOS app and manage all data-related processes from that backend app.
To sign up for a free account, head to the Back4App website and sign up using a Google account, GitHub account, or email address.
Step 2: Create a New App
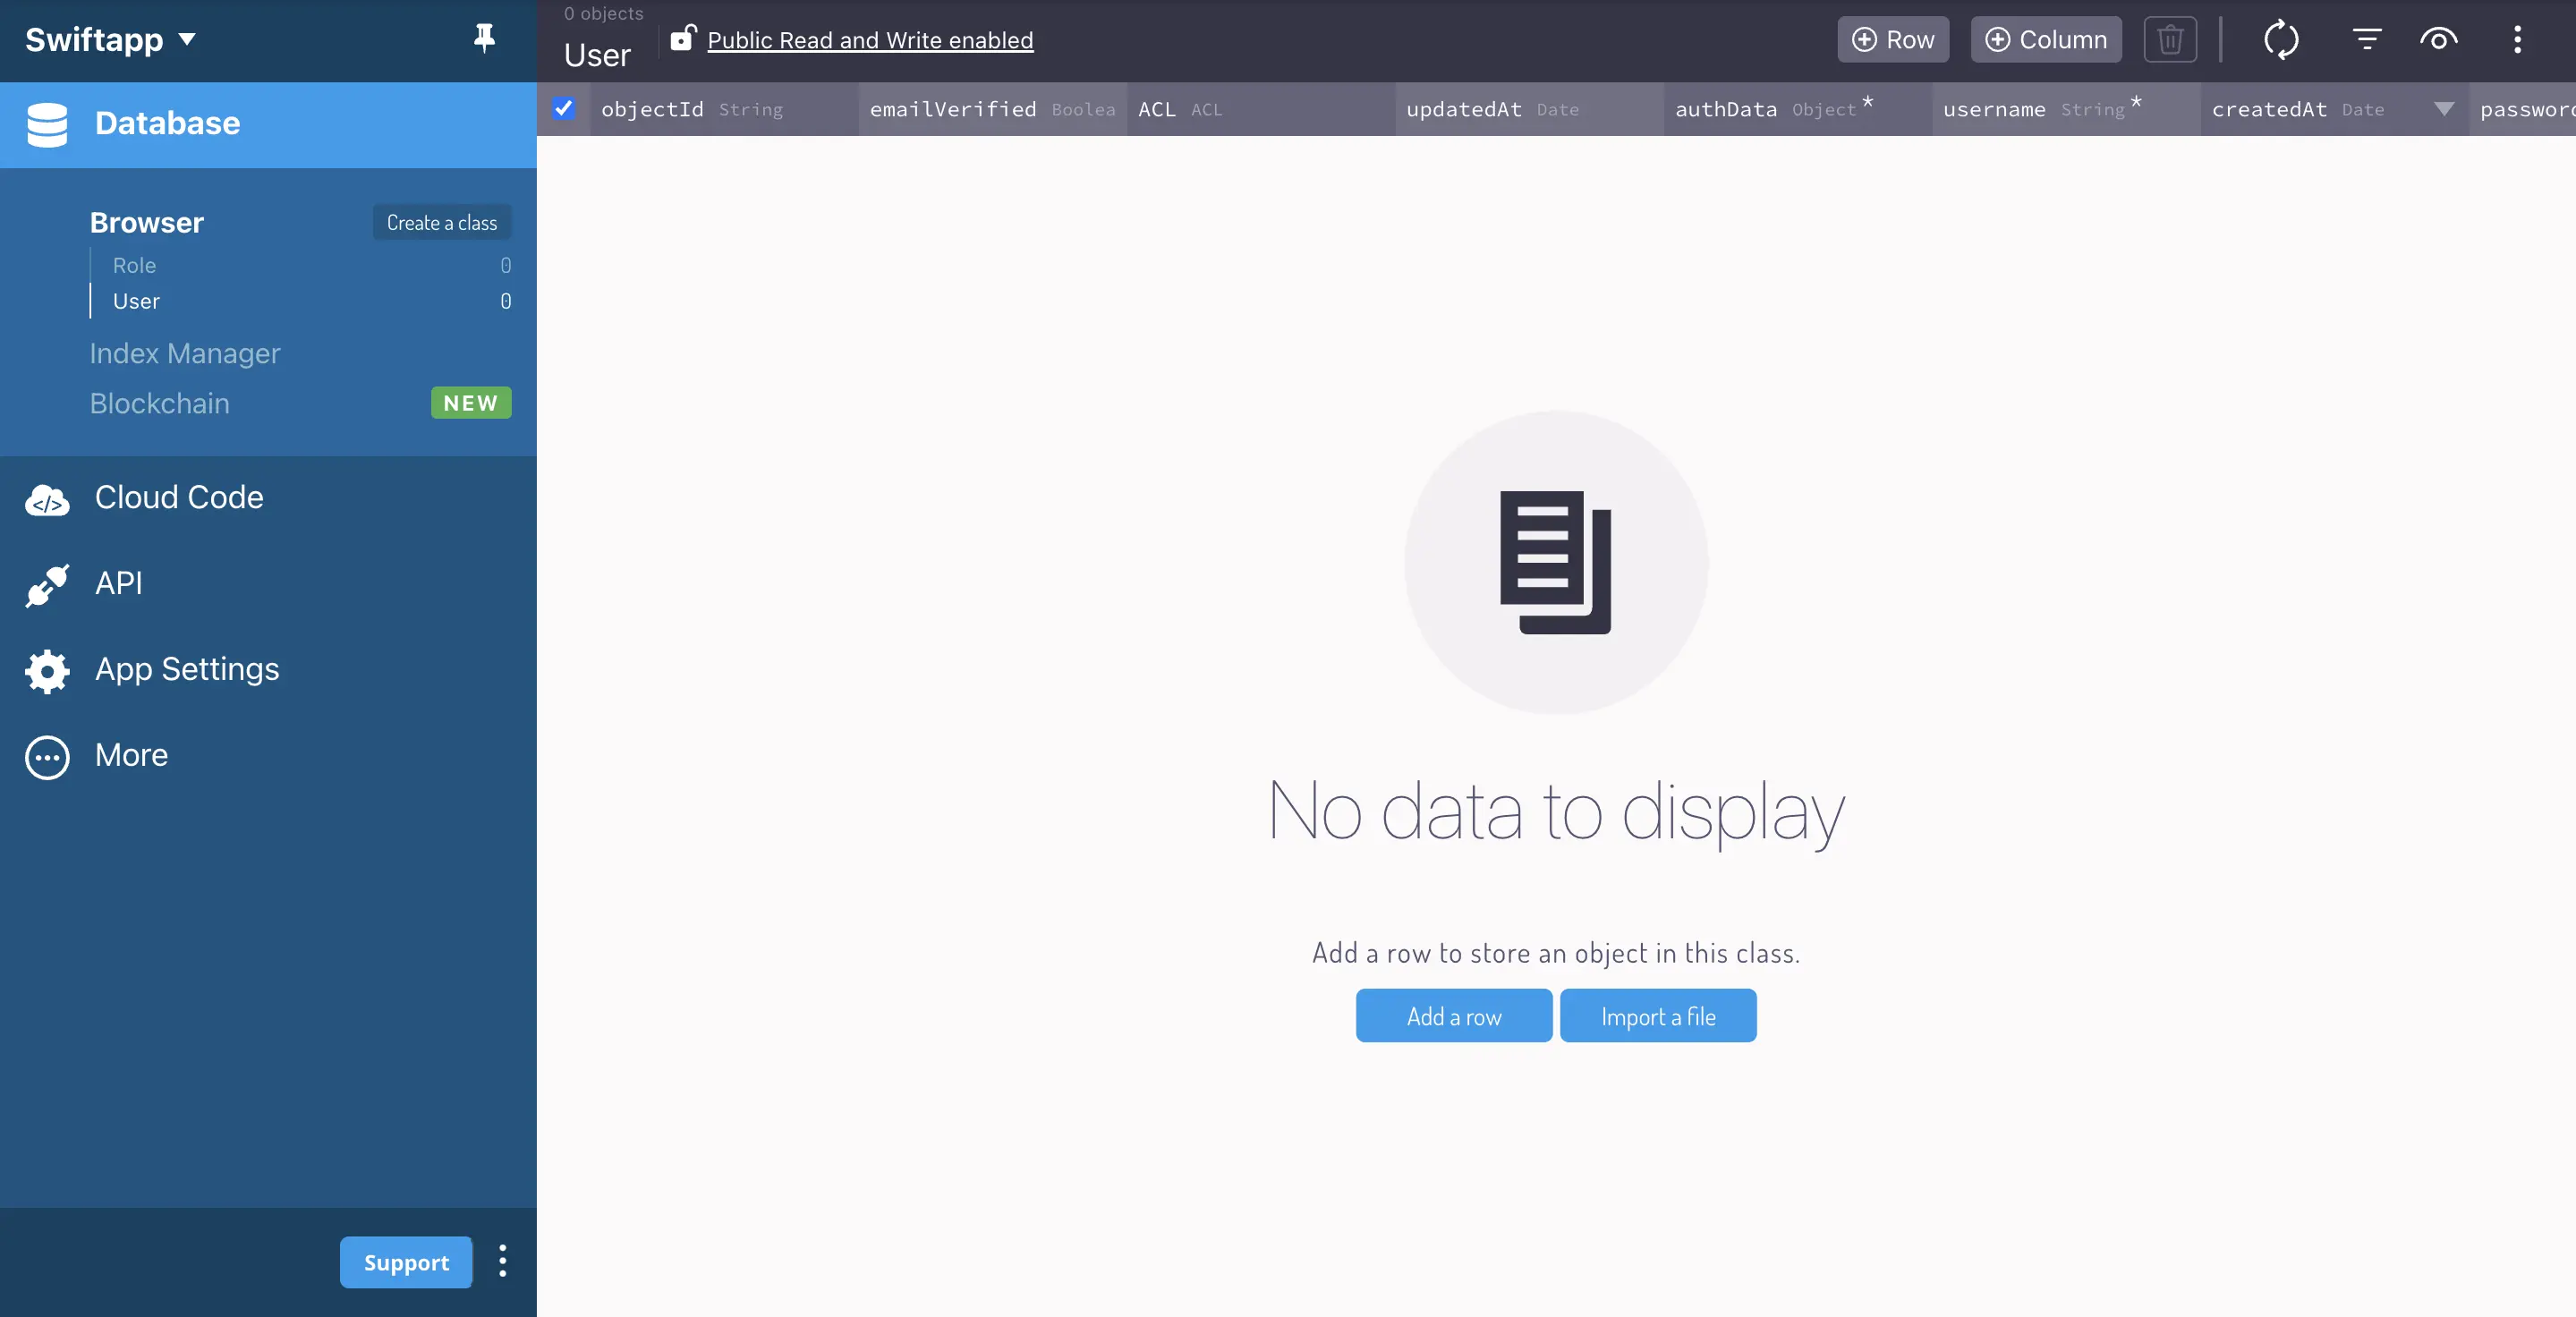
Now that you have a Back4App account, you can log in and proceed to create a NEW APP. A button to do this will be located at the top-right corner of your account page. You should select the option Backend as a Service for your app.
Proceed to give your new app a fitting name and hit the Create button.
Back4App will now build your app and navigate you to its dashboard.
Step 3: Connect Your iOS App to Back4app
The next step is to connect your iOS app to your Back4App backend. You must install the Parse SDK into your iOS app to do this. Your app will use this SDK to gain a direct link to the backend.
Before setting up the connection, you will need to have an up-and-running iOS app to work with. As previously mentioned, iOS applications are built using Xcode, Apple’s IDE, for developing Apple software.
You will need a recent version of Xcode (version 13.0.0 or later) installed on your Mac computer to be able to follow along with this guide. Some of the tools and features you will use in this guide are only available in these versions of Xcode.
Start off by launching Xcode and creating a new Xcode iOS App project:
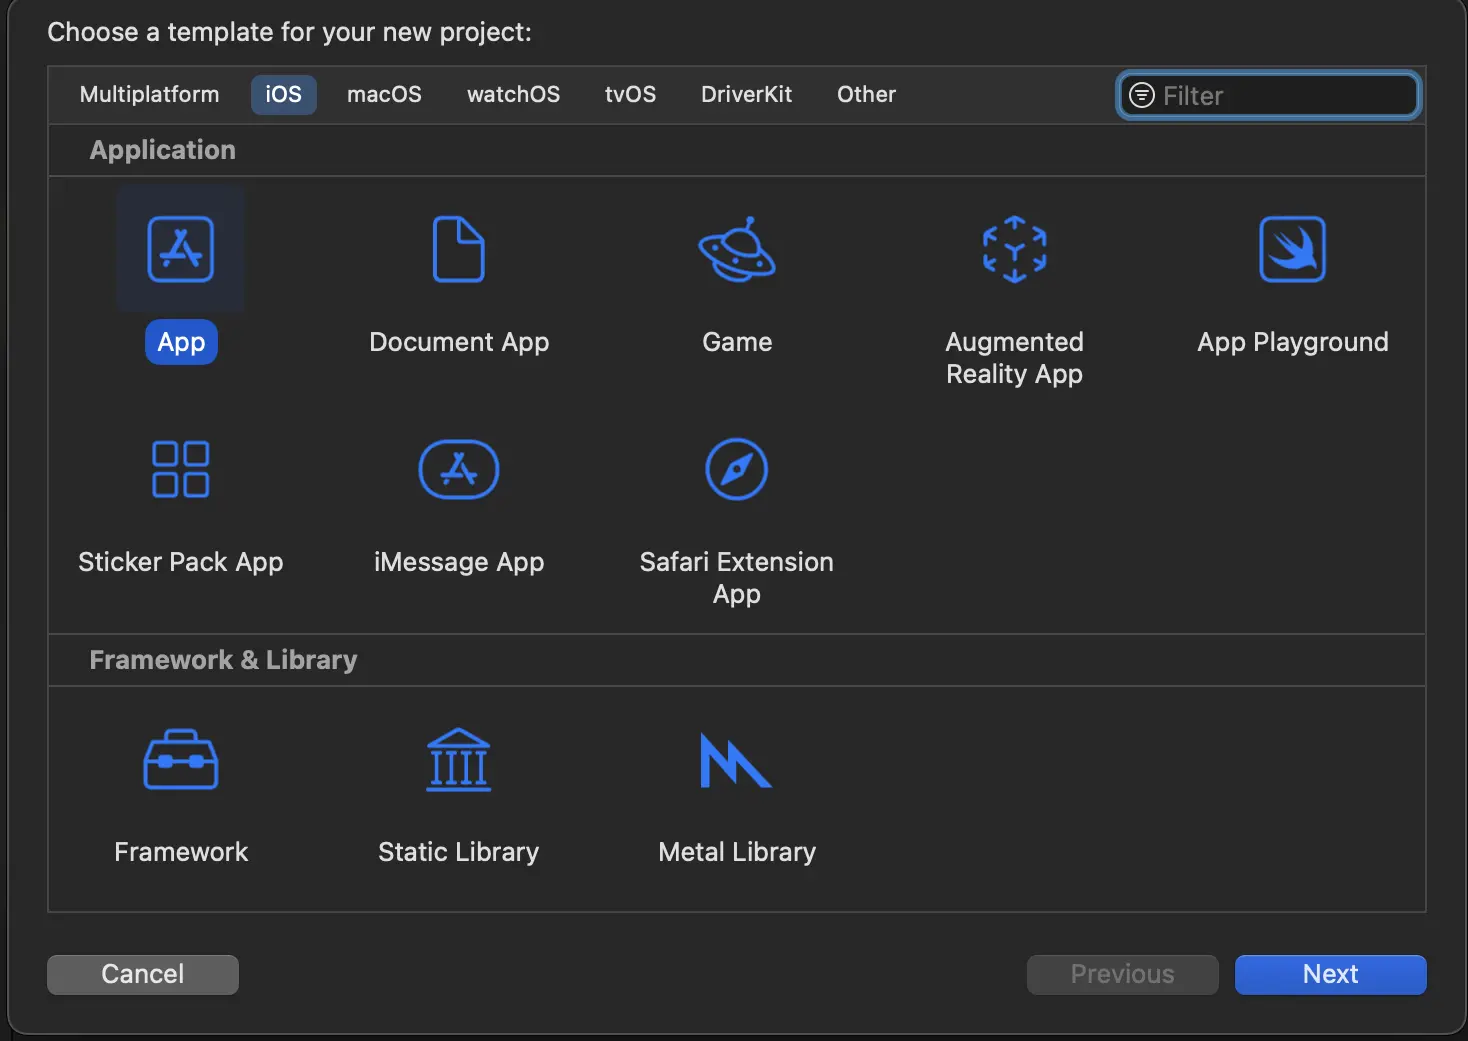
You will be prompted to fill out a name for your app along with some configuration information. Be sure to select SwiftUI as the interface of choice.
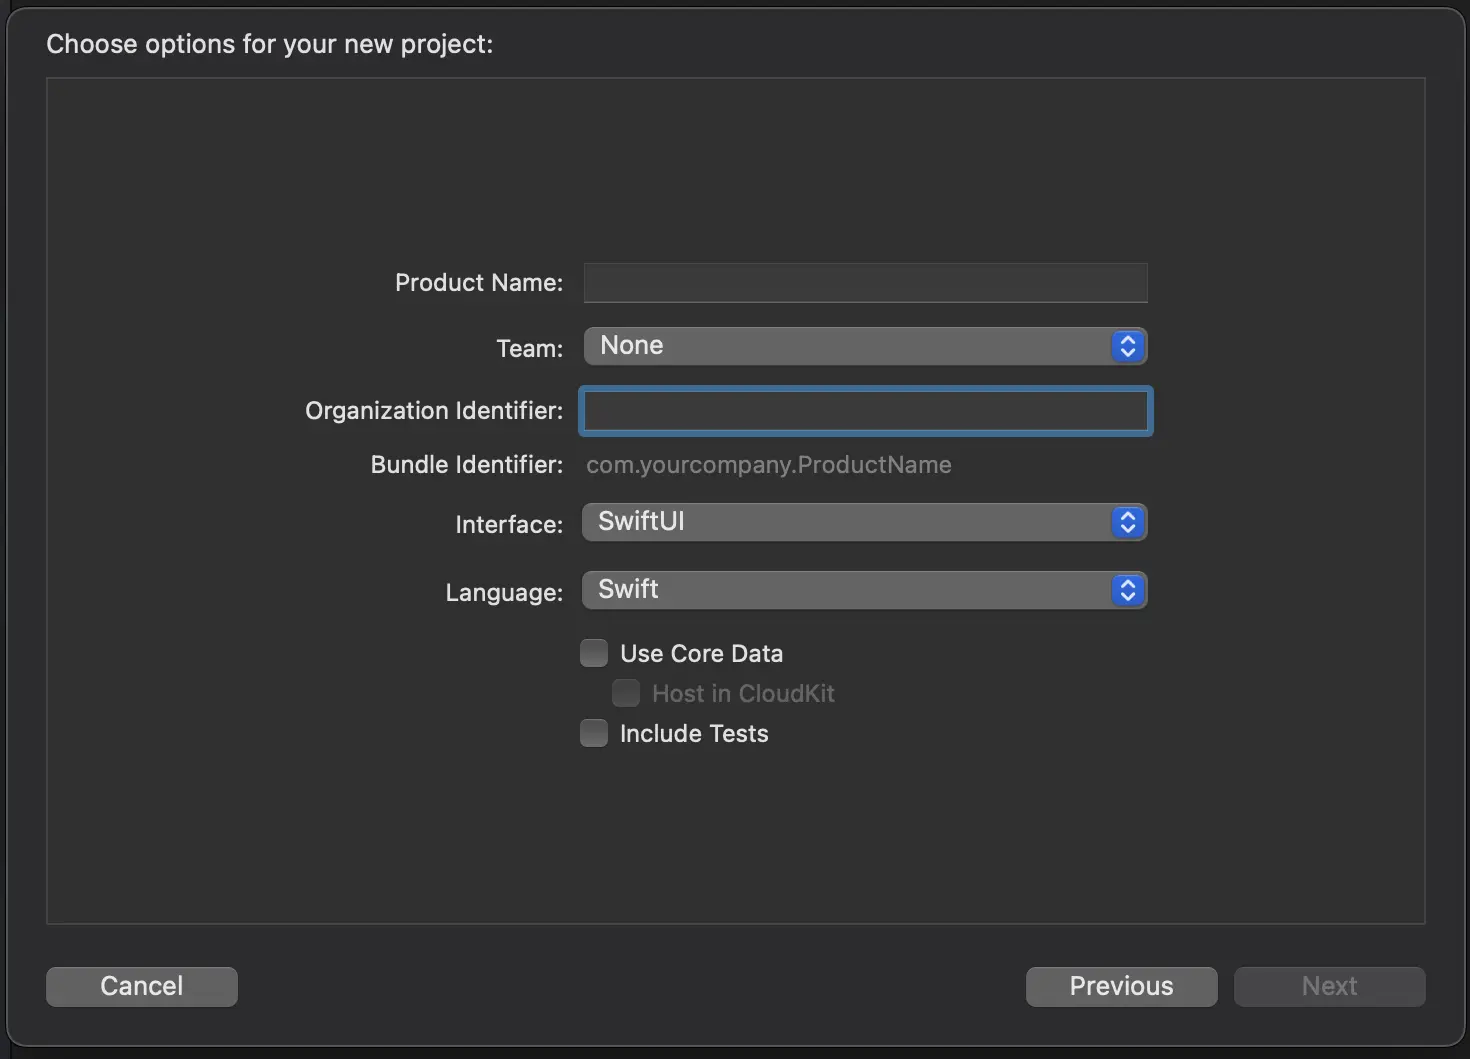
The SwiftUI interface uses a different view system than the phased-out StoryBoard interface. As a result, your current project structure will be missing an AppDelegate.swift file. You need to create this file, as you will need it later in the guide.
Create AppDelegate.swift and import the following code into the file:
import SwiftUI

class AppDelegate: NSObject, UIApplicationDelegate {

    func application(_ application: UIApplication, didFinishLaunchingWithOptions launchOptions: [UIApplication.LaunchOptionsKey : Any]? = nil) -> Bool {
        return true
    }

}
Now inside App in your root project file, copy and paste the following code at the top:
@UIApplicationDelegateAdaptor(AppDelegate.self) private var appDelegate
You are now ready to install the Parse SDK. You will install this with CocoaPods, an open-source dependency manager for Xcode projects. Go ahead and install CocoaPods if you haven’t yet.
First, initialize a Podfile for your project by running the pods init command in a terminal within your project directory.
Open the generated Podfile with Xcode and specify the Parse SDK.
Your Podfile should look something like this:
# Uncomment the next line to define a global platform for your project
#platform :ios, '13.0'

target 'ParseiOS-app' do
  # Comment the next line if you don't want to use dynamic frameworks
  use_frameworks!

  # Pods for ParseiOS-app
  pod 'Parse'

end
You can then install the Parse SDK to your project with the specified Parse dependency in the Podfile.
Run the following command in the terminal:
pod install
Upon installing pods, your project will be rebuilt as a new workspace file with the extension .xcworkspace. From here, you will be working with the rebuilt workspace.
You have successfully installed the Parse SDK into your project.
You may run into an iOS version simulator compatibility error after running the pod install. In case this happens, modify your Podfile to include this at the end:
post_install do |installer|
  installer.generated_projects.each do |project|
    project.targets.each do |target|
      target.build_configurations.each do |config|
        config.build_settings['IPHONEOS_DEPLOYMENT_TARGET'] = '12.0'
      end
    end
  end
end
The code snippet is a post-install hook for your Podfile, which allows you to modify the build settings of your Xcode project after CocoaPods has finished installing the pods.
This particular post-installer sets the minimum deployment target version for the iPhone OS to 12.0. You can change it anytime by assigning a new version to ['IPHONEOS_DEPLOYMENT_TARGET'].
Now install pods again:
pod install
To finish connecting your iOS app, you will need to link your Back4App app’s App ID and Client Key. To do this, head over to App Settings located on the dashboard and navigate to Server Settings > Core Settings.
Within Core Settings, you should find the App id and Client Key personally generated for your Back4App backend. Copy and save these keys.
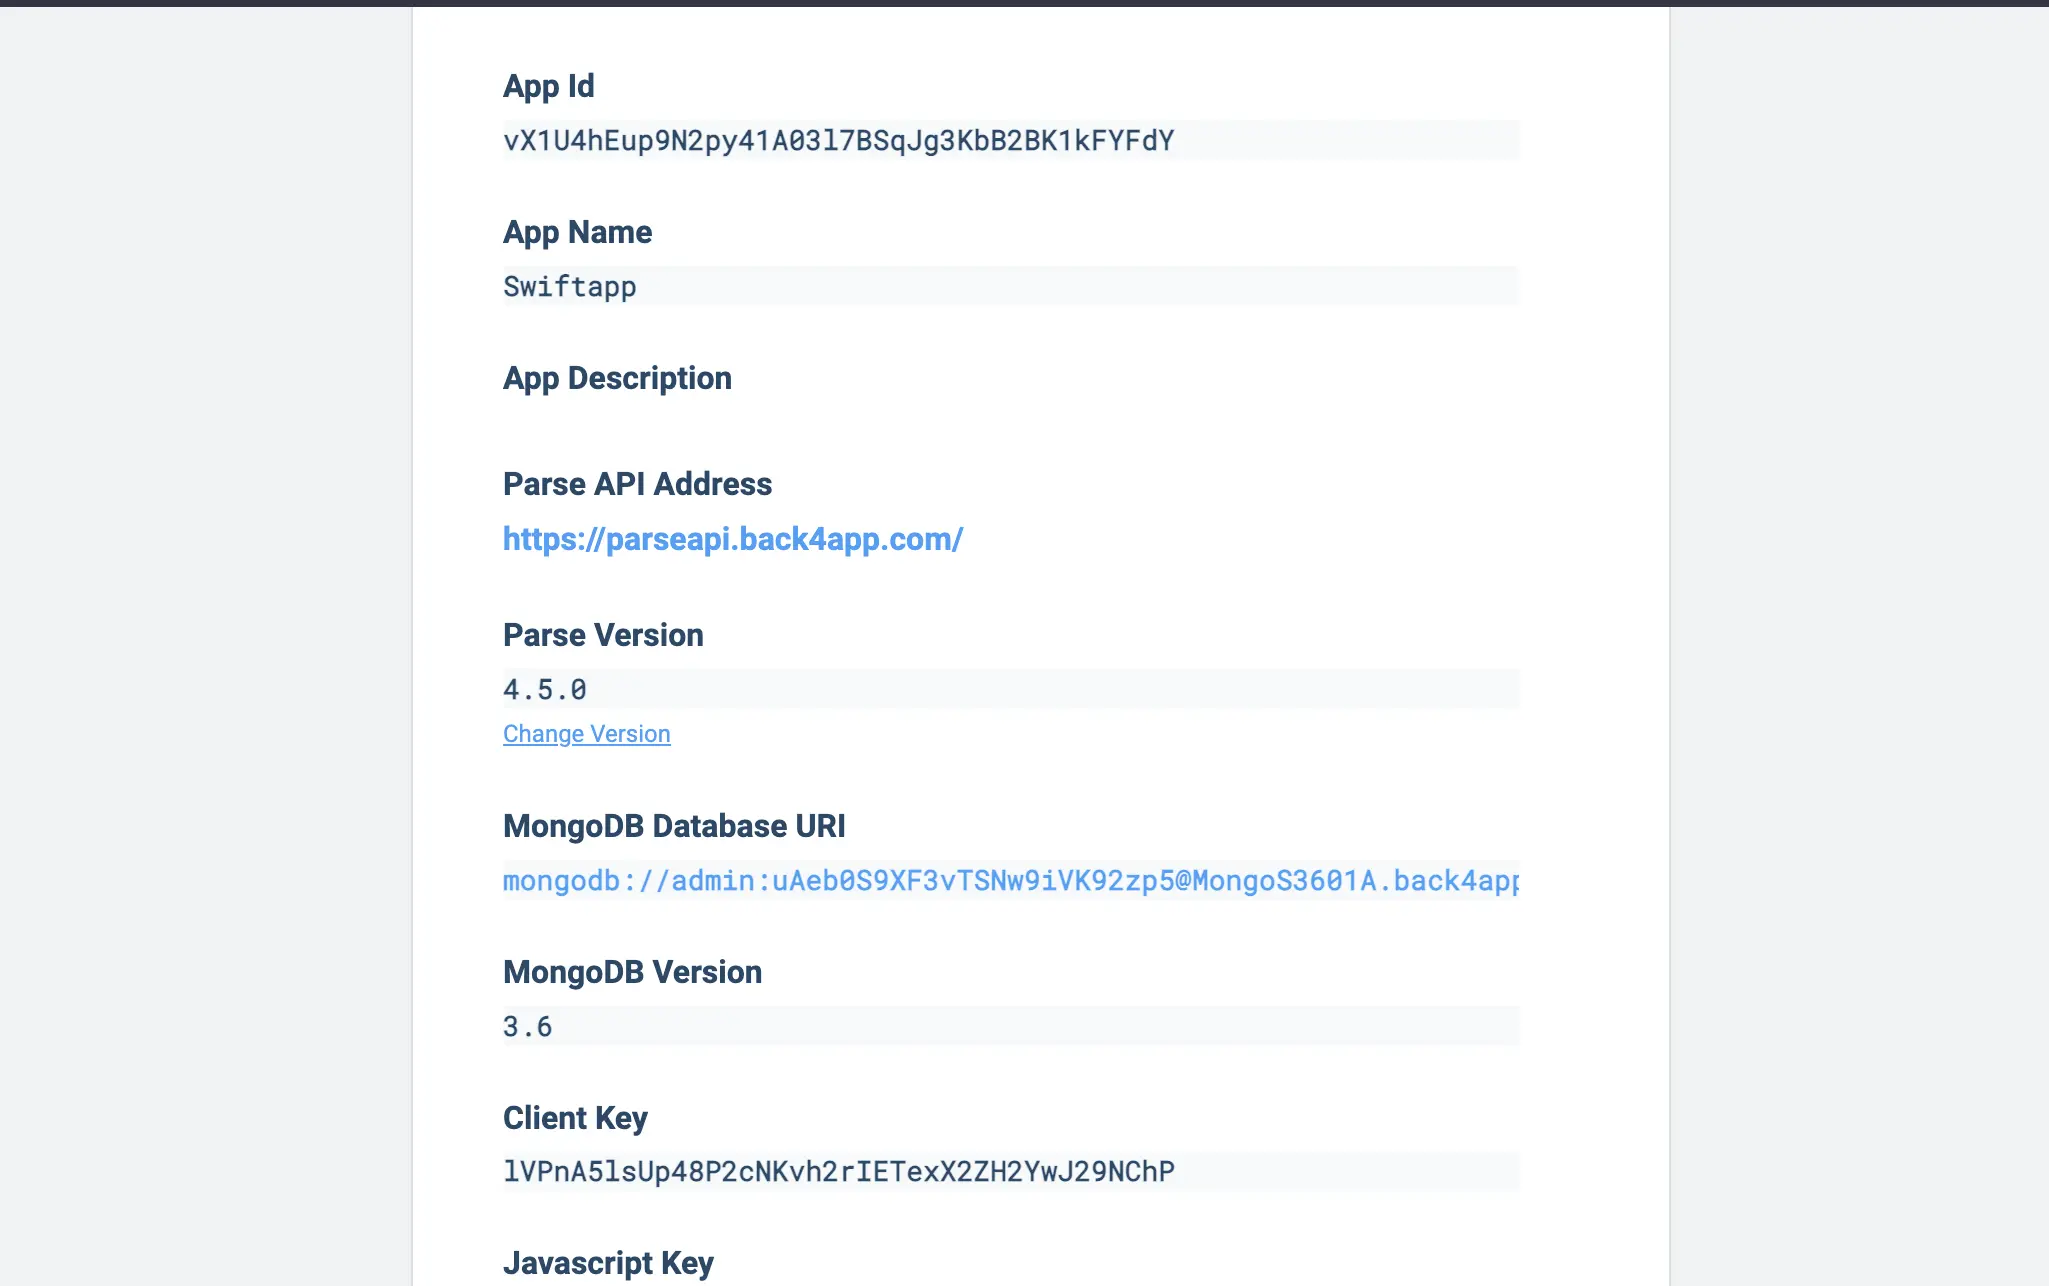
💡 Note: The keys shown in the image above are for a test app built for this guide. Be sure to copy your own personalized keys, as the above would not work for your app.
Next, open AppDelegate.swift and modify the existing code inside the didFinishLaunchingWithOptions function.
Your function should look like this:
func application(_ application: UIApplication, didFinishLaunchingWithOptions launchOptions: [UIApplication.LaunchOptionsKey : Any]? = nil) -> Bool {
        print("app launched!")

        let configuration = ParseClientConfiguration {
    $0.applicationId = "PASTE_YOUR_APPLICATION_ID_HERE"
    $0.clientKey = "PASTE_YOUR_CLIENT_ID_HERE"
    $0.server = "<https://parseapi.back4app.com>"
}
Parse.initialize(with: configuration))

        return true
    }
Paste your saved App id and Client Key into the indicated placeholders.
You should then import the Parse SDK into this file to clear any ‘module not found' errors:
import Parse
Your app is now successfully connected to Back4App!
Step 4: Test Your Backend
In this section, you will be testing your iOS app to confirm that you can interact with the Back4App server and the app you created.
You will test CRUD operations and store data using the Parse SDK.
At the end of the test, you will be able to confirm that the created data is being successfully saved and being read from the backend app.
To store data on the backend you will create a class object within Back4app. By default, a new class will have a schema with three fields: “objectId”, “createdAt”, and “updatedAt”. You can add new fields and data rows.
You will be creating a new field from your iOS app and reading the data stored in your created class.
First, inside ContentView.swift import the Parse SDK right below SwiftUI:
import SwiftUI
import Parse
To test that your app can interact with the backend, you will create a UI for a user to input a score text and have it saved on the backend. The app will also be able to reach into the backend, query data from your class, and display the saved scores.
At the top of the View struct in ContentView.swift create the following mutable state properties:
@State private var newScore: Int = ""
@State private var scores: [PFObject] = []
These state properties will trigger view updates when their values change. The first declares a state property named newScore of type String. It represents the input value entered by the user for a new score. It’s initialized with an empty string "".
The second declares a state property named scores of type [PFObject], which is an array of PFObject instances. This will represent the scores fetched from the backend.
The PFObject class is a class object provided by Parse-SDK-iOS that can store data. It allows you to define custom properties and values for your objects, which can then be saved to the backend.
Next, inside a VStack element, add the following code snippet:
VStack {
  TextField("EnterScore", text: $newScore)
    .textFieldStyle(RoundedBorderTextFieldStyle())
    .padding()
  Button("Save Scores") {
    saveScore()
  }

  List(scores, id: \\.objectId) { score in
    Text(score["score"] as? String ?? "")
  }
}
.padding()
.onAppear {
  fetchScores()
}
You have a TextField where users will enter a score. The text parameter is bound to the newScore state variable, which means any changes in the text field will be reflected in the newScore variable.
Next, there’s a “Save Scores” button that triggers a saveScore() function when tapped.
The List component displays the scores fetched from the backend. You use the scores array to populate the list, and the id parameter specifies a unique identifier for each score item. Inside the list, you have a Text view that displays the score value as a string.
You use optional chaining and the nil-coalescing operator (??) to handle cases where the score is not available or is of a different type.
Lastly, the onAppear modifier is used to trigger the fetchScores() function when the VStack view appears.
At this point, you should be getting an error that saveScores() and fetchScores() can not be found.
You will create those functions next. These functions will handle writing, saving data, and fetching that saved data, respectively, from your linked Back4app backend app.
Use the .save() or saveInBackground() method call to save the newScore variable to the backend:
func saveScore() {
  let score = PFObject(className: "GameScore")
  score["score"] = newScore

  score.saveInBackground { success, error in
    if let error = error {
      print("Error saving score: \\(error.localizedDescription)")
    } else {
      print("Score saved sucessfully: \\(String(describing: score.objectId))")
      newScore = ""
      fetchScores()
    }

  }
}
First, you create a new instance of PFObject with the class name “GameScore”. This object represents a new entry in the backend database. In the next line, you set the “score” property of the object to the value stored of newScore.
Next, you call the saveInBackground method on the score object. Using saveInBackground will start an asynchronous save operation executed on a background queue. Inside the completion closure, you check if an error occurred during the save operation and handle the error.
After successfully saving the score, you reset the newScore state variable to an empty string to clear the text field. Then, call the fetchScores() function to update the list of scores.
Inside the fetchScores() function, you will use Parse’s PFQuery to perform queries on your backend data and retrieve objects from a specific class. In this case, that class is the GameScore class:
func fetchScores() {
  let query = PFQuery(className: "GameScore")
  query.findObjectsInBackground { objects, error in
    if let error = error {
      print("Error fetching scores: \\(error.localizedDescription)")
    } else if let objects = objects {
      scores = objects
    }

  }
}
Here you call the findObjectsInBackground method on the query object to initiate the asynchronous fetch operation. Inside the completion closure, you can handle the results of that query.
If an error occurs during the fetch operation, you print an error message. Otherwise, if the fetch is successful and objects are returned, you update the scores state variable with the fetched objects. These objects represent the scores retrieved from the backend.
When you run your app, enter a new score, and hit the Save Scores button, the app will send and save your new score value to the backend and fetch all saved scores stored. It should then display a list of the scores like the image below.


Notice how the scores correspond with the score values on your backend.
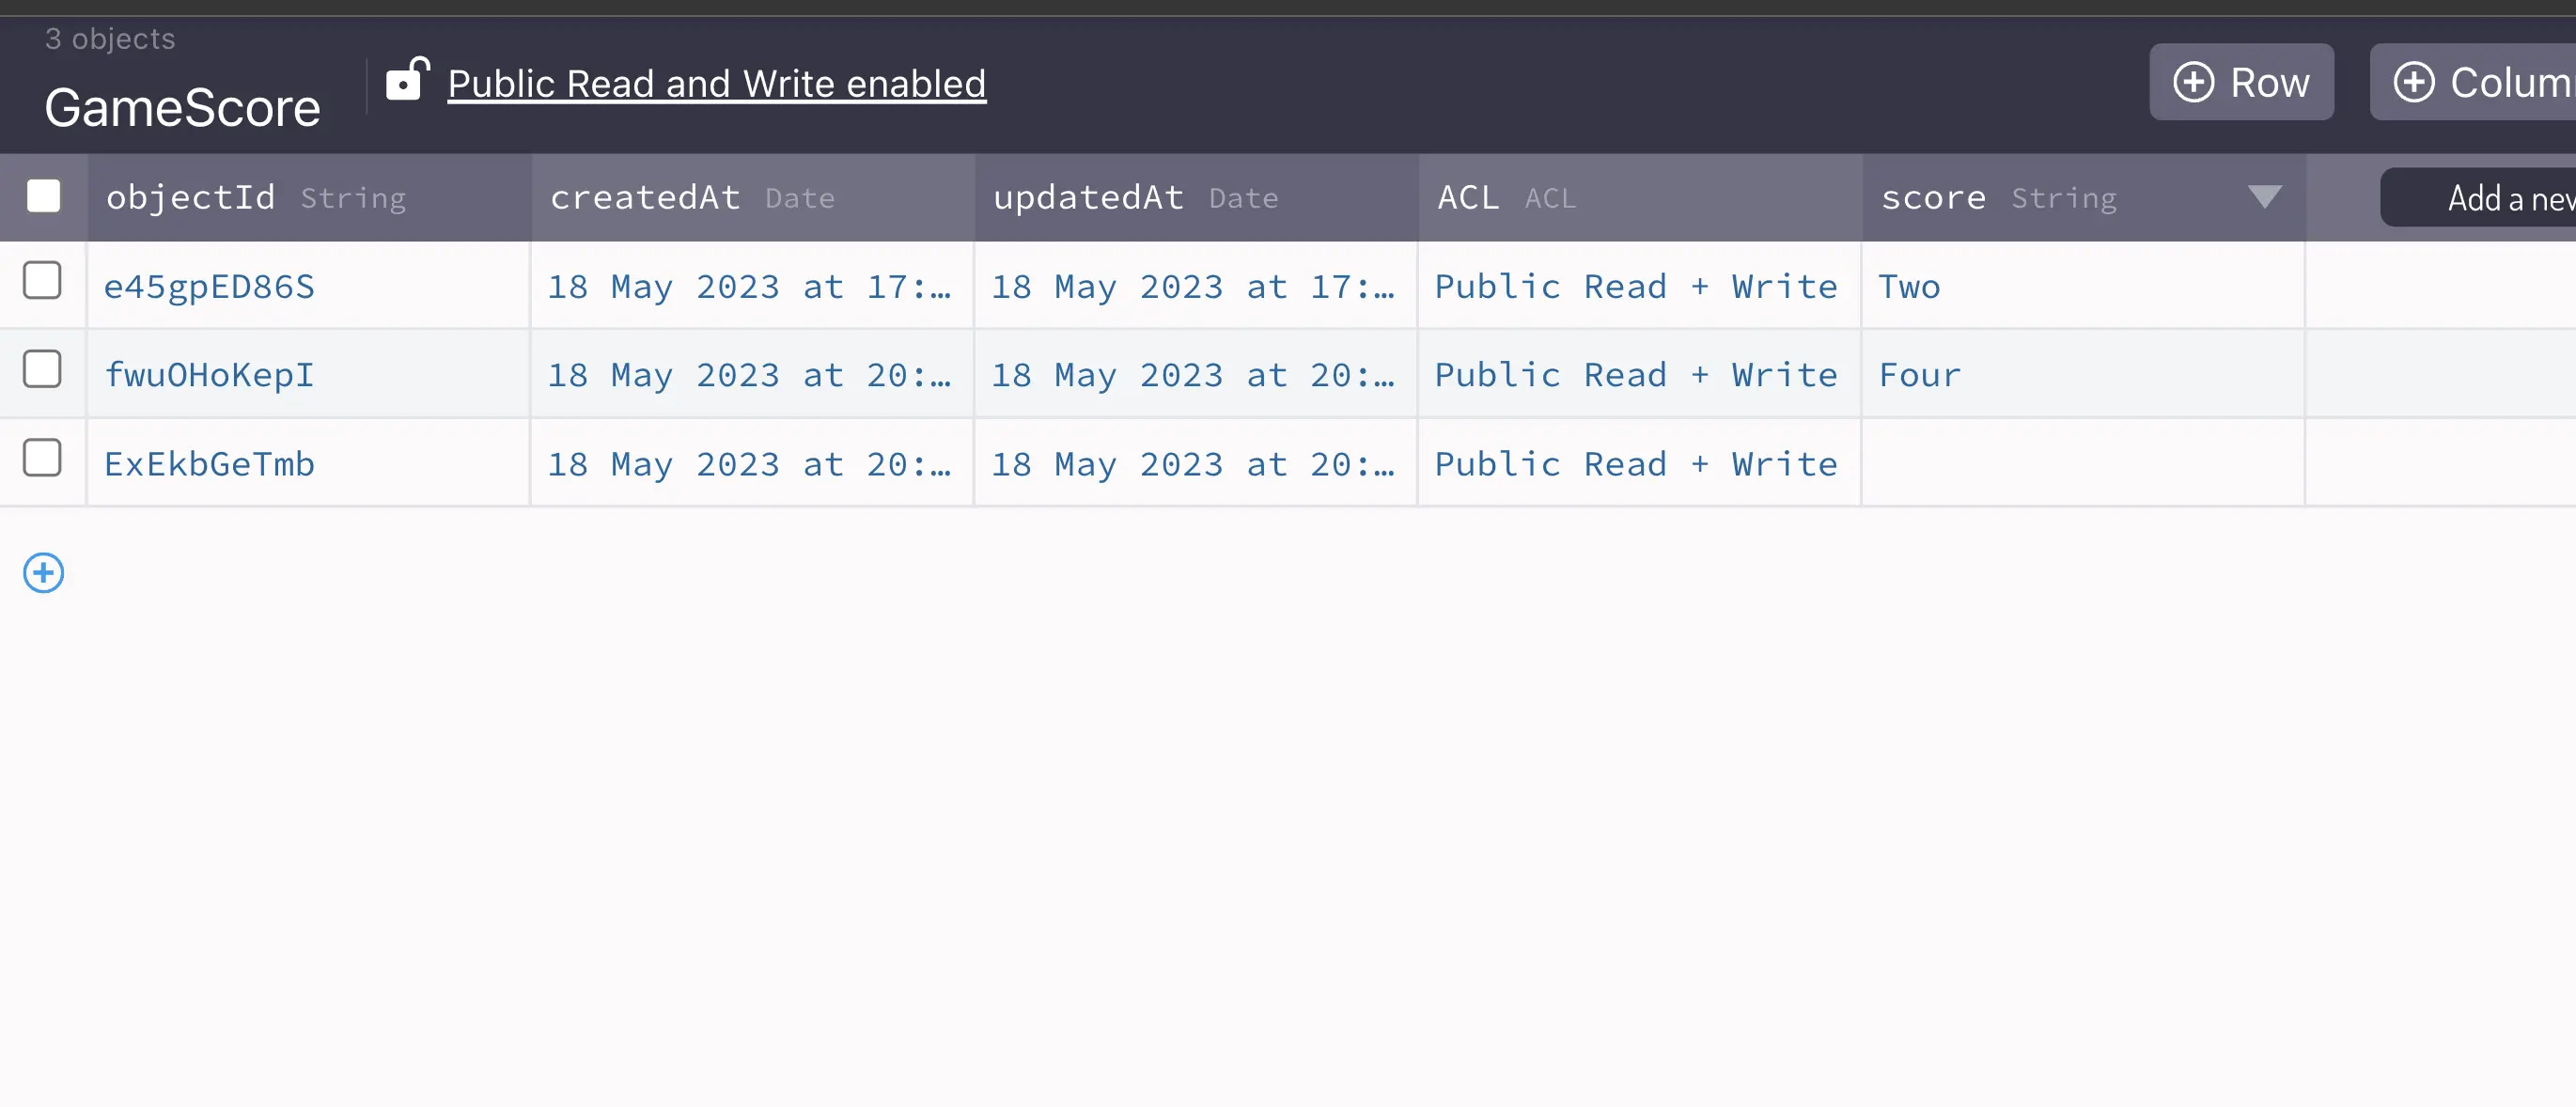
This confirms that the test is passed, and you are successfully writing and reading data from the Back4App backend.
You now know how to build a backend for your iOS mobile apps using Back4App and Swift programming language.
FAQ
What programming languages can I use to develop an iOS app?
You can use Objective-C or Swift programming languages to develop an iOS app.
Can I use a BaaS provider for my iOS app backend?
You can use a BaaS provider like Back4App or Firebase to build your iOS app backend.
How much does it cost to build an iOS app backend?
The cost of building an iOS app backend depends on the backend option you choose. IaaS can be the most expensive option, while BaaS can be the most cost-effective option.


