How to host a Node.js application?
In this article, we’ll talk about Node.js and its deployment options, specifically IaaS, PaaS, and CaaS. We’ll analyze each of the options and look at some of the most popular vendors that offer these cloud services.
In the second part of the article, we’ll learn how to build, dockerize and deploy a simple Node.js application to Back4app Containers.
Contents
- 1 What is Node.js?
- 2 Where to host a Node.js application?
- 3 How to host a Node.js application?
- 4 Conclusion
- 5 FAQ
- 6 What is Node.js?
- 7 What are Node.js deployment options?
- 8 How to host a Node.js application?
What is Node.js?
Node.js is a cross-platform, open-source server environment that allows you to run JavaScript outside a web browser. It has an asynchronous event-driven architecture and runs on Google’s V8 JavaScript Engine. These two characteristics make it exceptionally performant and scalable.
Before Node.js JavaScript developers were only able to work on the frontend code. This was quite inconvenient since the backends had to be written in another programming language.
On top of that companies needed to employ both frontend and backend engineers. But with the release of Node.js in 2009 JavaScript developers became full-stack developers.
Node has a great number of use cases. The server runtime can be used for server-side scripting, web games, building RESTful APIs, real-time applications & more. It is used by numerous tech companies such as PayPal, Uber, Netflix, and LinkedIn.
Node is widely used because of its speed, scalability, a vast ecosystem of modules and libraries, maturity, and great community.
Nevertheless, it comes with a few limitations such as decreased performance for complex tasks, unstable API, and lack of a strong library support system.
To learn more about Node.js advantages and disadvantages take a look at How to Deploy a Node.js Application? (BaaS approach)
Where to host a Node.js application?
Node apps can be hosted on a variety of cloud computing services. The most popular options for deploying Node.js applications are:
- Infrastructure as a Service
- Platform as a Service
- Containers as a Service
Keep in mind that there’s no best deployment option for Node applications. Ultimately the choice depends on your project requirements, budget, and the level of wanted abstraction.
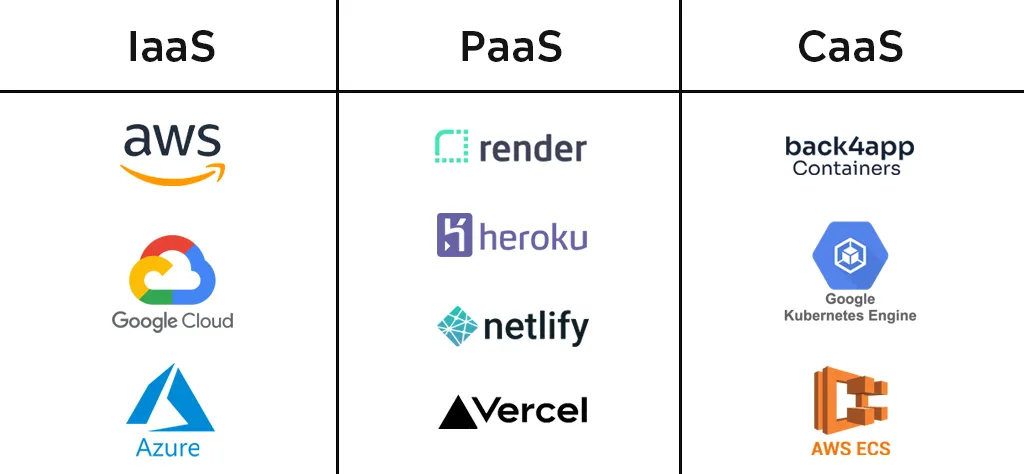
Let’s look at each of the mentioned cloud computing models.
IaaS (Infrastructure as a Service)
Infrastructure as a Service (IaaS) is a cloud computing model in which a cloud provider offers computing resources over the internet.
By using IaaS the customer doesn’t have to worry about the servers, virtualization, storage, and networking. IaaS vendors typically follow a pay-as-you-go pricing model and are one of the cheaper cloud service models.
IaaS is the least abstracted option, therefore extremely flexible and customizable. The con of it is that the customer is responsible for their OS, applications, and data. This option is not suitable for beginners to host a Node.js application, since it requires a decent amount of system administration knowledge.
Amazon Web Services (AWS)
Amazon Web Services (AWS) is an on-demand cloud computing platform provided by Amazon. It offers an extensive range of cloud services, including virtual computers, object storage, databases, ML/AI tools, networking, vision, and more.
At the time of writing AWS is the most popular cloud computing platform with a market share of around 32%. Their trending IaaS solutions are:
- Amazon EC2 (Elastic Compute Cloud) is used to spin up highly configurable virtual computers.
- Amazon S3 (Cloud Object Storage) provides easy-to-use and scalable object storage.
- Amazon VPC (Virtual Private Cloud) allows customers to create isolated virtual networks.
To deploy a production-ready Node app to AWS you’ll most likely need to combine different IaaS and PaaS solutions.
Google Cloud Platform
Google Cloud Platform (GCP) is another popular cloud computing platform suitable for hosting Node.js. It is a mature and stable platform that was released more than ten years ago.
GCP offers a wide range of IaaS, PaaS, CaaS, and BaaS solutions. Most of Google’s end-user products such as Gmail, Slides, and Docs run on GCP.
Their most popular IaaS products are:
- Google GKE (Compute Engine) allows customers to create, manage, and run virtual machines.
- Google GCS (Cloud Storage) is a managed service for storing unstructured data.
- Google Persistent Disk is a reliable, high-performance block storage for VM instances.
The same as with AWS, you’ll need to combine multiple GCP products to deploy an application.
Microsoft Azure
Microsoft Azure or just Azure is a cloud computing platform offered by Microsoft that is a great option to host Node.js. It has more than 200 products for computing, storage, AI, machine learning, vision, Internet of Things, and so on. According to Appinventiv’s research it has a market share of 22%.
Their popular IaaS offerings are Azure Virtual Machines, Azure Storage, and Azure Backup.
PaaS (Platform as a Service)
Platform as a Service (PaaS) is a cloud computing model that allows users to develop, manage, and deliver applications within a cloud environment. On top of that PaaS vendors typically offer a wide range of prebuilt tools for application development, customization, and testing.
PaaS is easier to use than IaaS and doesn’t require much system administration knowledge. By using PaaS you’ll also be able to take advantage of managed databases, automatic backups, and load balancers, to name a few. The downsides of PaaS include the risk of vendor lock-in, and a lower level of flexibility and control compared to IaaS.
Heroku
Heroku is the most popular PaaS on the market. It was established in 2007 and was one of the first PaaS solutions. It supports a variety of programming languages including Java, Node.js, PHP, Go, Scala, and Python. The platform is extremely easy to use, provides great scaling capabilities, and has a huge add-on system.
Until late 2022 the platform used to provide a free plan for web applications, along with free PostgreSQL, and Redis instances. They sadly canceled the free plan to counter fraud and bots.
The cons of Heroku are that it is expensive compared to other solutions on the market, there’s a risk of vendor lock-in, and the platform is lacking good regional support (unless you’re an enterprise user).
Render
Render is a unified cloud for building and running all your apps and websites. It has a slick UI and is extremely easy to use. The best thing about Render is that they provide free hosting for static websites, web applications, and even PostgreSQL and Render instances.
The downsides of Render are that it is a relatively new platform, apps on the free tier take a long to spin up, and bad regional support (only 4 regions).
CaaS (Containers as a Service)
Containers as a Service (CaaS) is a cloud computing model that allows you to easily build, run, deploy, and manage containerized software. The software is usually containerized using Docker technology. This approach requires initial setup, but it is extremely easy to use after that.
Back4app Containers
Back4app Containers is a Containers as a Service (CaaS) platform that allows you to easily deploy dockerized applications. It has a built-in CI/CD system, great GitHub integration, and it’s a great option for Node.js server hosting.
Deploying an app to Back4app Containers is as easy as importing your repository and clicking on a button. The platform offers a free tier and paid tiers that scale as you go.
Amazon Elastic Container Service (ECS)
Amazon Elastic Container Service (ECS) is a comprehensive service for orchestrating containers. It simplifies deploying, managing, observing, and scaling your containerized applications. The platform is relatively cheap and fairly easy to use if you’re already familiar with other AWS products.
Google Kubernetes Engine (GKE)
Google Kubernetes Engine (GKE) is an advanced and automated Kubernetes service. The platform is highly scalable and allows you to accommodate the traffic needs of any site. The two biggest downsides of GKE are that it is not that easy to use and relatively expensive.
How to host a Node.js application?
In this section, we’ll build, dockerize, and deploy a Node.js application to Back4app Containers.
Project Introduction
We’ll build a simple Node.js RESTful API for fetching GitHub user statistics. The API will return the user’s GitHub information along with the number of their followers, following, and stars received.
The API will be implemented using Express — a Node.js web application framework. After we test it, we’ll dockerize it and deploy it to Back4app Containers.
If you’re just interested in the deployment process, feel free to skip the first two sections.
Init Project
To follow along the tutorial you’ll need to have Node.js installed. If you don’t have it yet feel free to download it from the Node.js website.
First, create a new directory and navigate to it:
$ mkdir express-github-stats && cd express-github-statsIf you’re working on a complex Express app, you’ll most likely want to generate it via Express application generator. This tool sets up everything required for building advanced Express apps, such as templates, routing, and more.
Next, run npm init to create a package.json for the app:
$ npm initThis command will prompt you with a bunch of questions about the package version, description, and so on. You can fill it out or just press ENTER a few times.
Since we want to use Express, let’s install it:
$ npm install expressCreate a new file named index.js in the project root like so:
// index.js

const express = require("express");
const app = express();

app.get("/", (req, res) => {
  res.send("Back4app rocks!");
});

app.listen(3000, () => {
  console.log("App listening on port 3000")
});
This simple script initializes a new Express app that listens on port 3000. On top of that it defines the index route (/) that returns the Back4app rocks! message. If a route does not exist a 404 error is returned.
To test it run the server:
$ node index.jsThen open your favorite web browser and navigate to http://localhost:3000.
A better way of running Node.js apps when developing is by using Nodemon. Nodemon is a tool that automatically restarts your Node.js application when file changes are detected.
Code App
Our web app is going to have two URLs:
/returns the API information/<username>/returns specific user’s GitHub information and statistics
First, modify the index endpoint like so:
// index.js

// ...

app.get("/", (req, res) => {
  return res.json({
    name: "express-github-stats",
    description: "simple github user stats fetcher",
    version: "1.0.0",
  });
});
Next, define the user endpoint at the bottom of index.js:
// index.js

// ...

app.get("/:username", async (req, res) => {
  const username = req.params["username"];
  return res.json({
    username: username,
  });
});
This endpoint fetches the username from the URL and returns it in JSON format.
GitHub API
To fetch GitHub user statistics we first need to take a look at how their API works. If you open the page and scroll through the navigation you’ll quickly find the Users section.
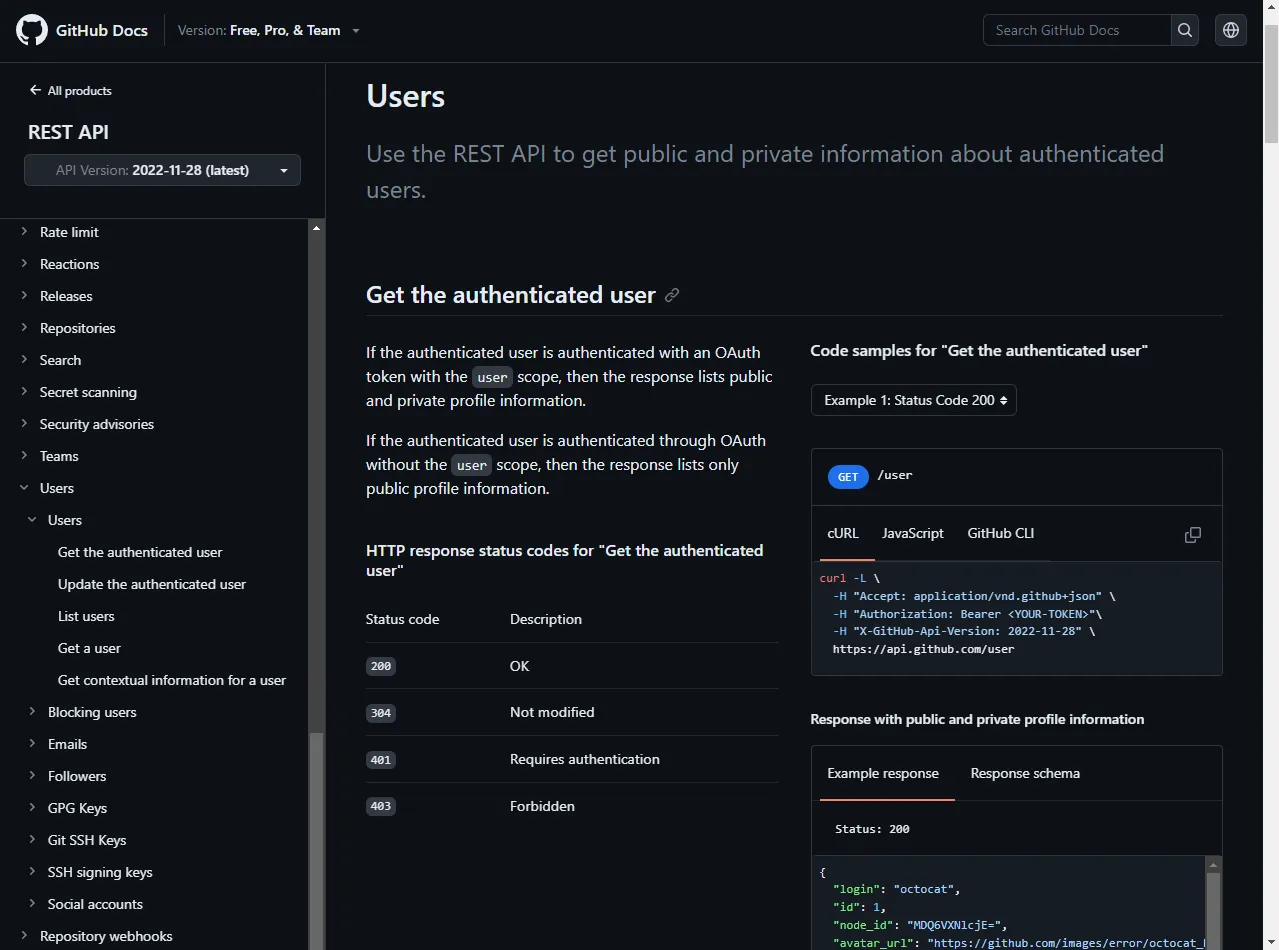
Fetching user details is as easy as sending the following request:
$ curl -L https://api.github.com/users/<username>

# For example:
# curl -L https://api.github.com/users/duplxey
To implement this in our code we’ll use Axios — a promise-based HTTP client for the browser and Node.js.
Install it by using NPM:
$ npm install axiosNext, add it as a dependency at the top of index.js:
const axios = require("axios");Lastly, modify the user endpoint like so:
// index.js

// ...

app.get("/:username", async (req, res) => {
  const username = req.params["username"];
  try {
    const user = await axios({
      method: "get",
      url: `https://api.github.com/users/${username}`,
    });
    const { login, name, location, followers, following } = user.data;
    return res.json({
      username: login,
      name: name,
      location: location,
      followers: followers,
      following: following,
    });
  } catch (e) {
    console.error(e);
    return res.status(400).json({
      detail: "Oops, something went wrong. Check the console for more information.",
    });
  }
});
This code uses Axios to send a GET request to GitHub API. It then restructures the fetched data and returns it in JSON format.
Testing
To test if the app works first restart the server and then run the following command:
$ curl -L http://localhost:3000/duplxey/Alternatively you can visit the URL in your web browser.
The above command should give you a similar response:
{
  "username": "duplxey",
  "name": "Nik Tomazic",
  "location": "Slovenia, Europe",
  "followers": 108,
  "following": 11,
}
Dockerize App
In this article section, we’ll dockerize the Node.js app.
.dockerignore
Our project contains some files and directories that shouldn’t be included in the image. To exclude them we can create a .dockerignore file in the project root like so:
.git/
.idea/
node_modules/
This .dockerignore file excludes the .git, .idea and node_modules directory. A .dockerignore file works similarly to .gitignore files.
If there are additional files and directories you’d like to ignore modify the file accordingly.
Dockerfile
A Dockerfile is a plain text file that allows us to define the instructions that tell Docker how a container should be built. It allows us to specify the base image, environmental variables, commands & more.
Create a Dockerfile with the following contents:
FROM node:18-alpine

# set the working directory
WORKDIR /app

# copy over the dependency files
COPY package.json ./
COPY package-lock.json ./

RUN npm install --production

ENV NODE_ENV="production"

# copy over the project
COPY . .

EXPOSE 3000

CMD ["node", "index.js"]
This Dockerfile uses node:18-alpine as the base image, sets the working directory, copies over package.json, installs the dependencies, and builds the project. Lastly, it starts a Node.js server and exposes port 3000.
For more information on dockerizing Node.js apps take a look at the official Back4app docs.
Testing
The next steps will require you to have Docker installed.
First, build and tag the image:
$ docker build --tag express-github-stats:1.0 .List the images and check if you can see a new image named express-github-stats:
$ docker images

REPOSITORY             TAG       IMAGE ID       CREATED         SIZE
express-github-stats   1.0       5fcb7e4a87a1   2 minutes ago   182MB
Next, use the image to start a new container:
$ docker run -it -p 3000:3000 -d express-github-stats:1.0Argument rundown:
-itruns the container in interactive mode-p 3000:3000maps port3000on the host to port3000in the container-druns the container in detached mode (so it doesn’t occupy the terminal)
Lastly, check the running containers:
$ docker ps

CONTAINER ID   IMAGE                      COMMAND           CREATED    PORTS
60cfegdfe84d   express-github-stats:1.0   "entrypoint.s…"   4s ago     3000->3000/tcp
If you navigate to http://localhost:3000/ in your browser you should see the web app.
Push to GitHub
To perform the following steps you’ll need a GitHub account and Git installed.
Go ahead and login into your GitHub account. Once you’re logged in use the “more button” to start the repository creation process.
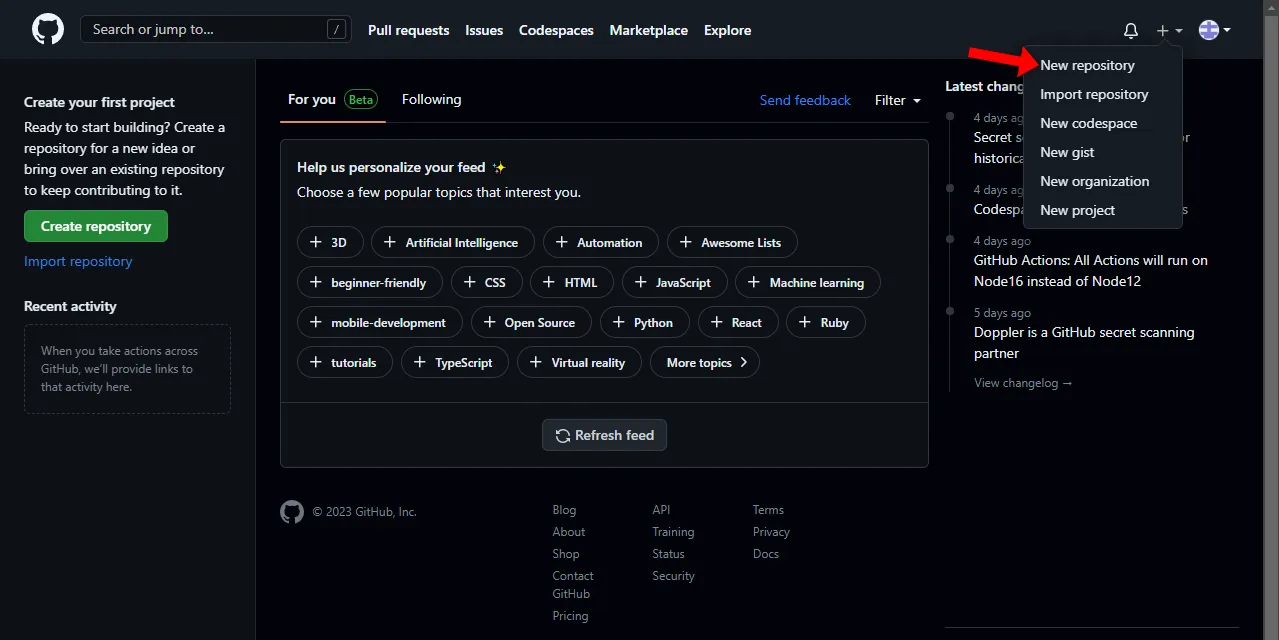
Pick an appropriate name, leave everything else as default, and click “Create repository”.
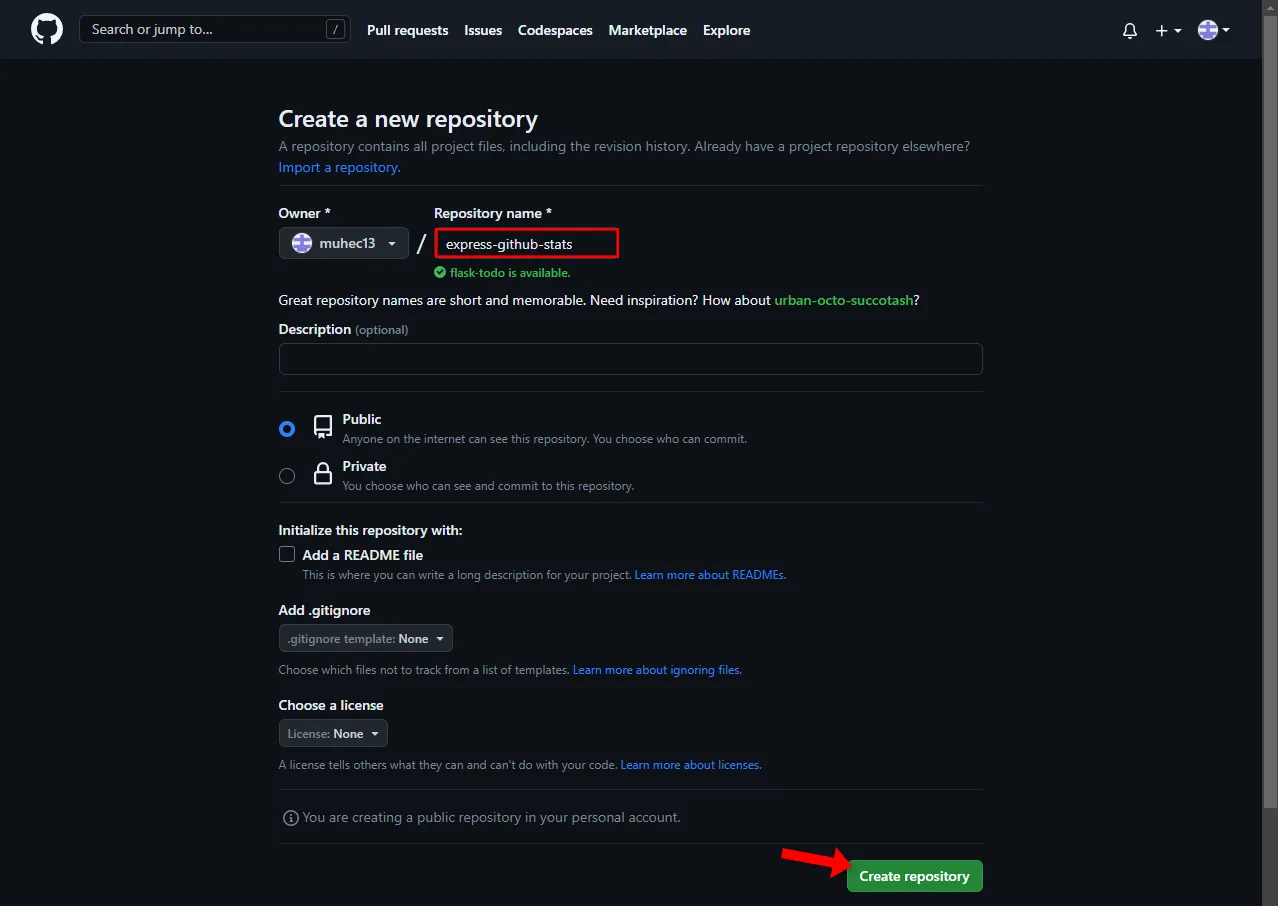
Next, take note of the generated remote URL:
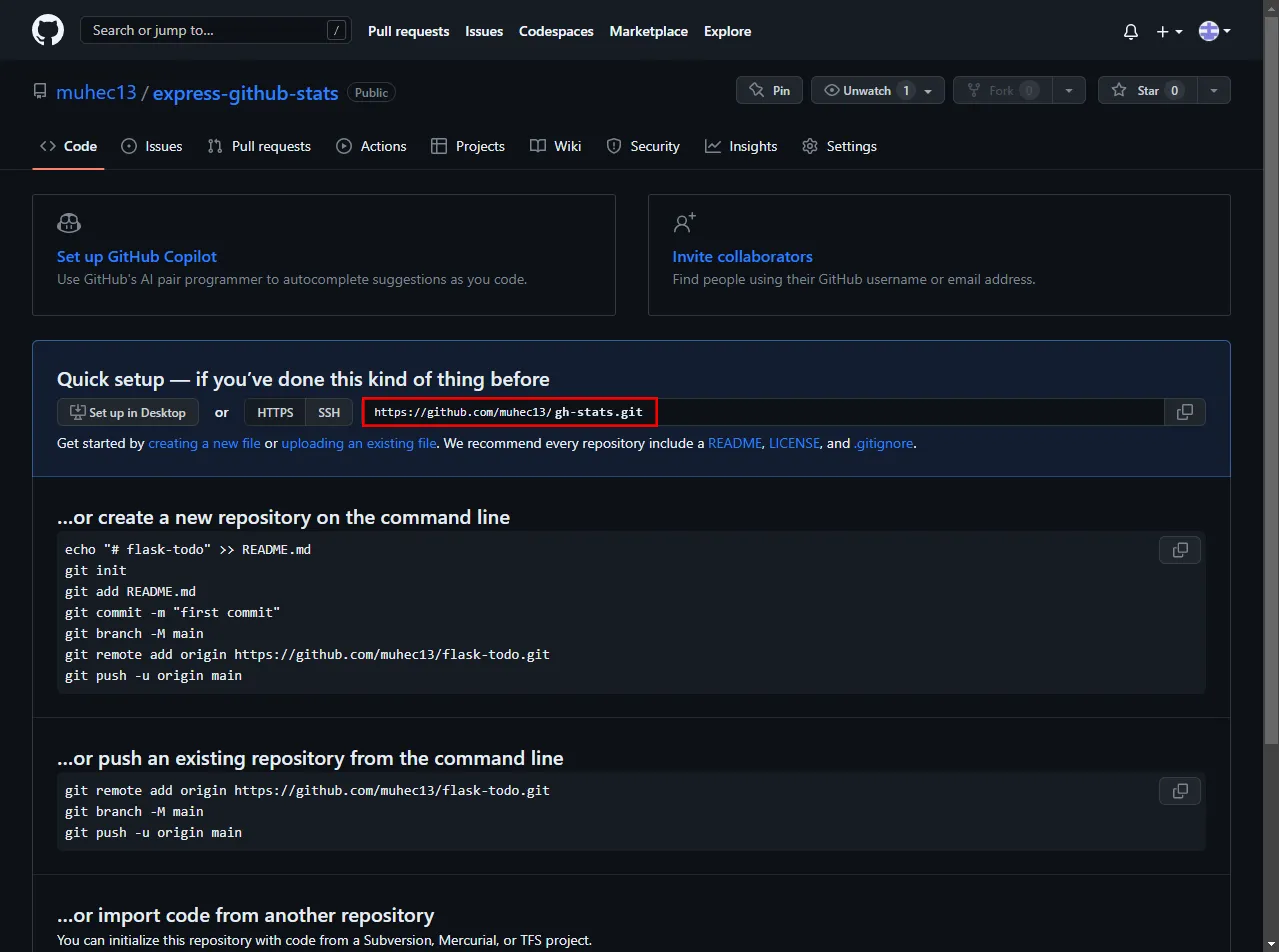
Let’s navigate back to our project and push the code.
First, open the terminal and initialize the local Git repository:
$ git initNext, add the remote, VCS all the files, and create a new commit:
$ git remote add origin <your_remote_url>
$ git add . && git commit -m "init"
Make sure to replace
<your_remote_url>with your GitHub remote URL.
Lastly, push the code to the cloud:
$ git push origin masterIf you open your GitHub repository in the browser again you should be able to see the source code.
Deploy App
To deploy an app to Back4app Containers you’ll need a Back4app account.
As you log in to your Back4app account you’ll be redirected to your app dashboard. Click on the “Build new app” button to initialize the app creation process.
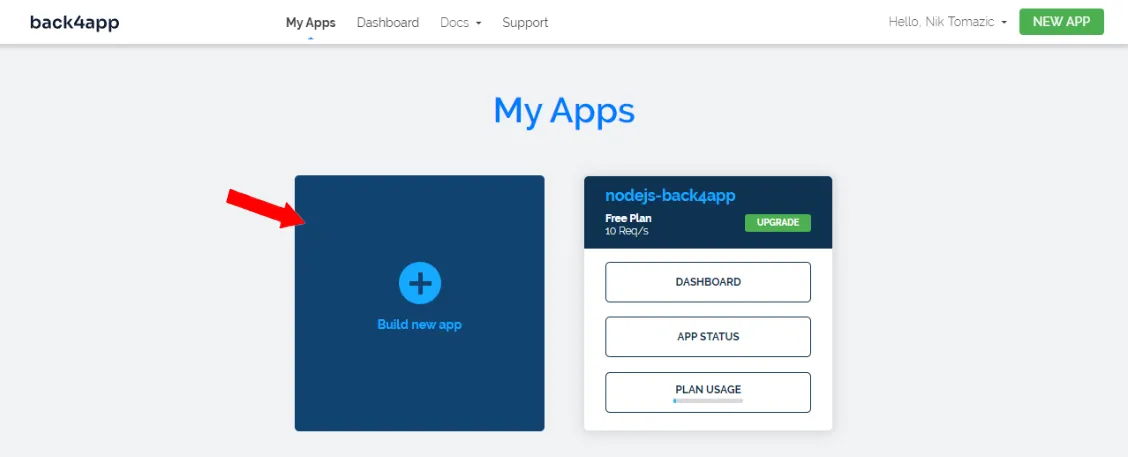
Back4app provides BaaS and CaaS solutions. Since we’re deploying a container select “CaaS”:
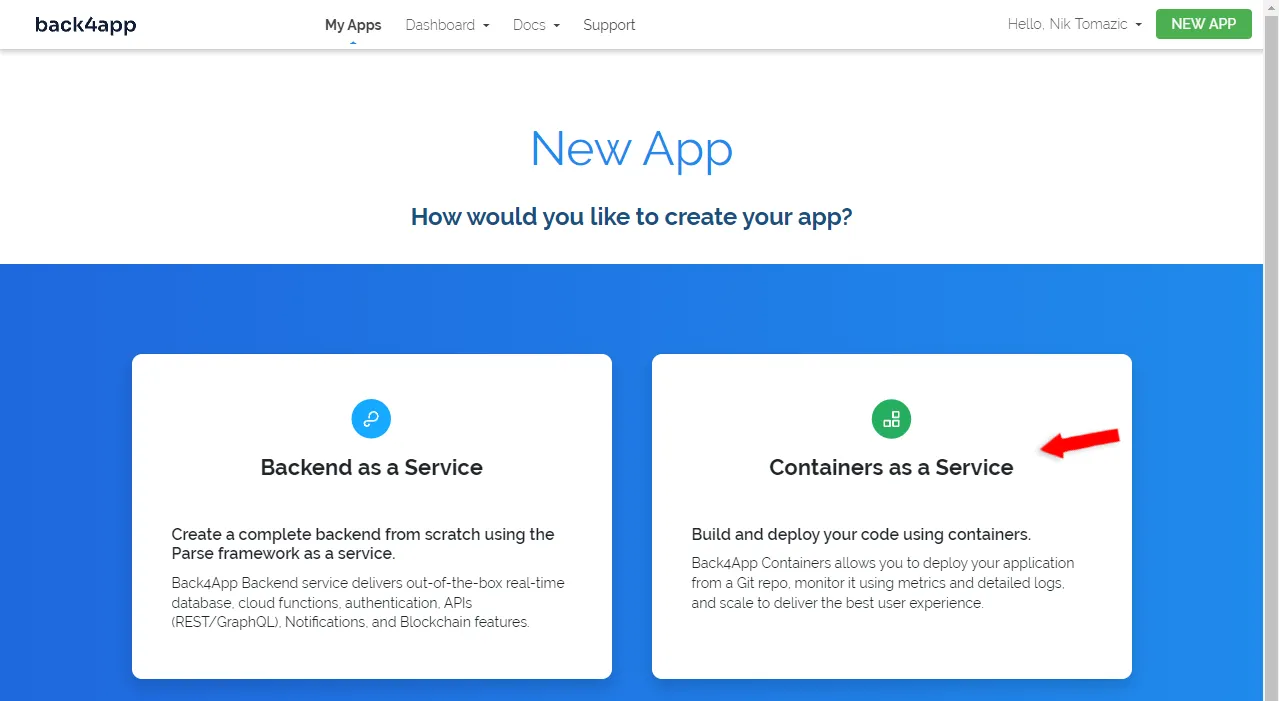
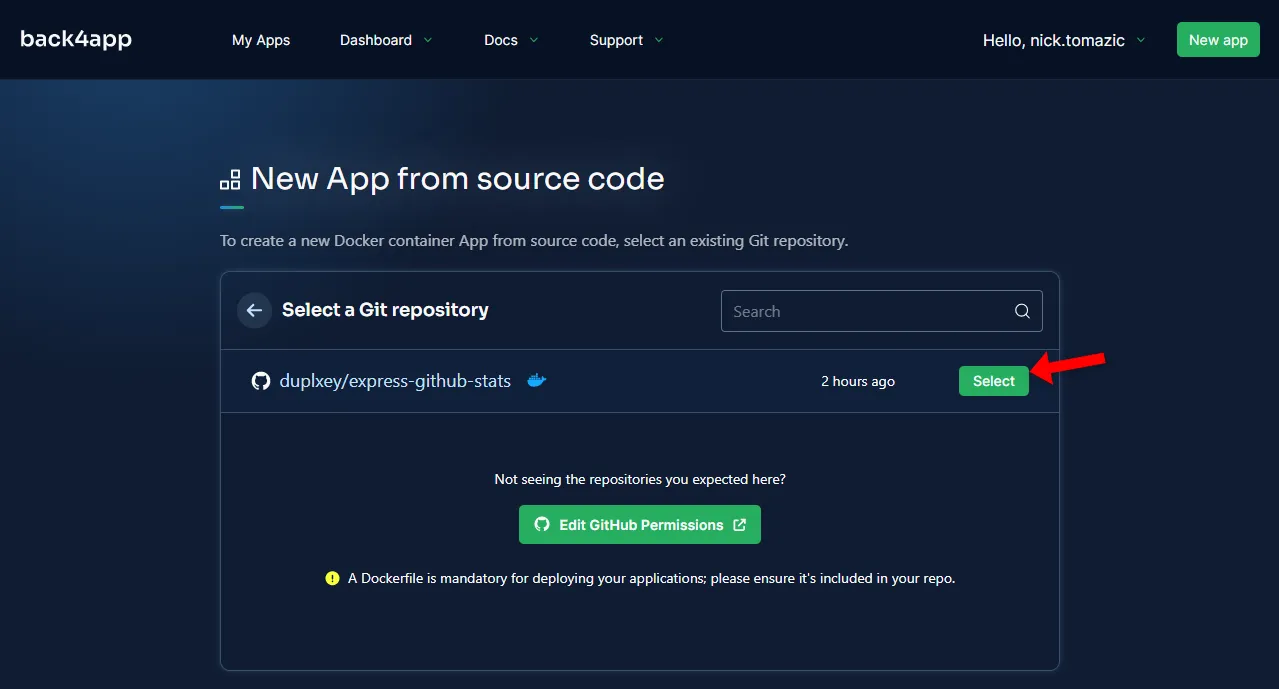
Next, go ahead and link your GitHub account with Back4app (if you haven’t already). Then import the repository we’ve created previously.
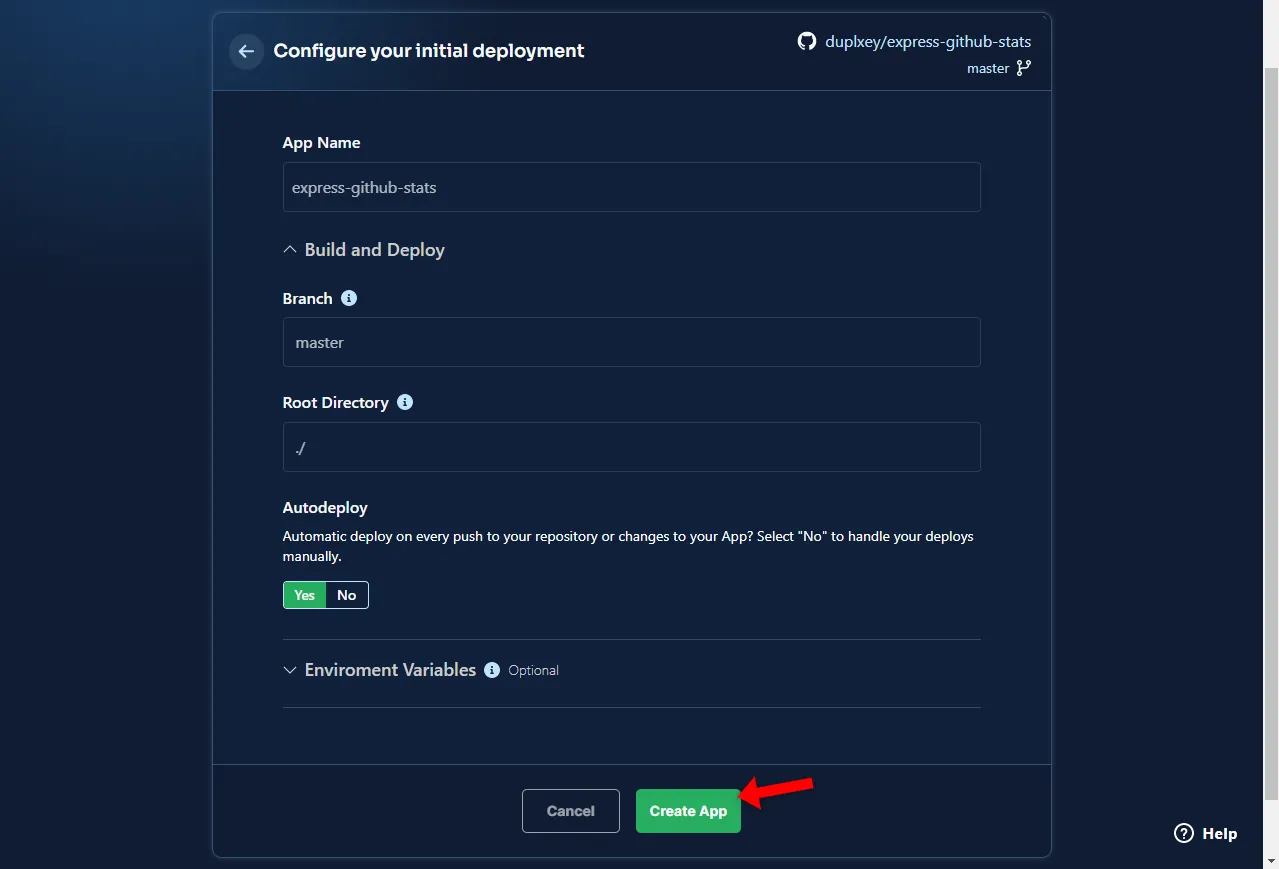
Back4app Containers allows for advanced configuration. We’re building a simple app so we only need to provide the app name. To deploy the app click “Deploy”.
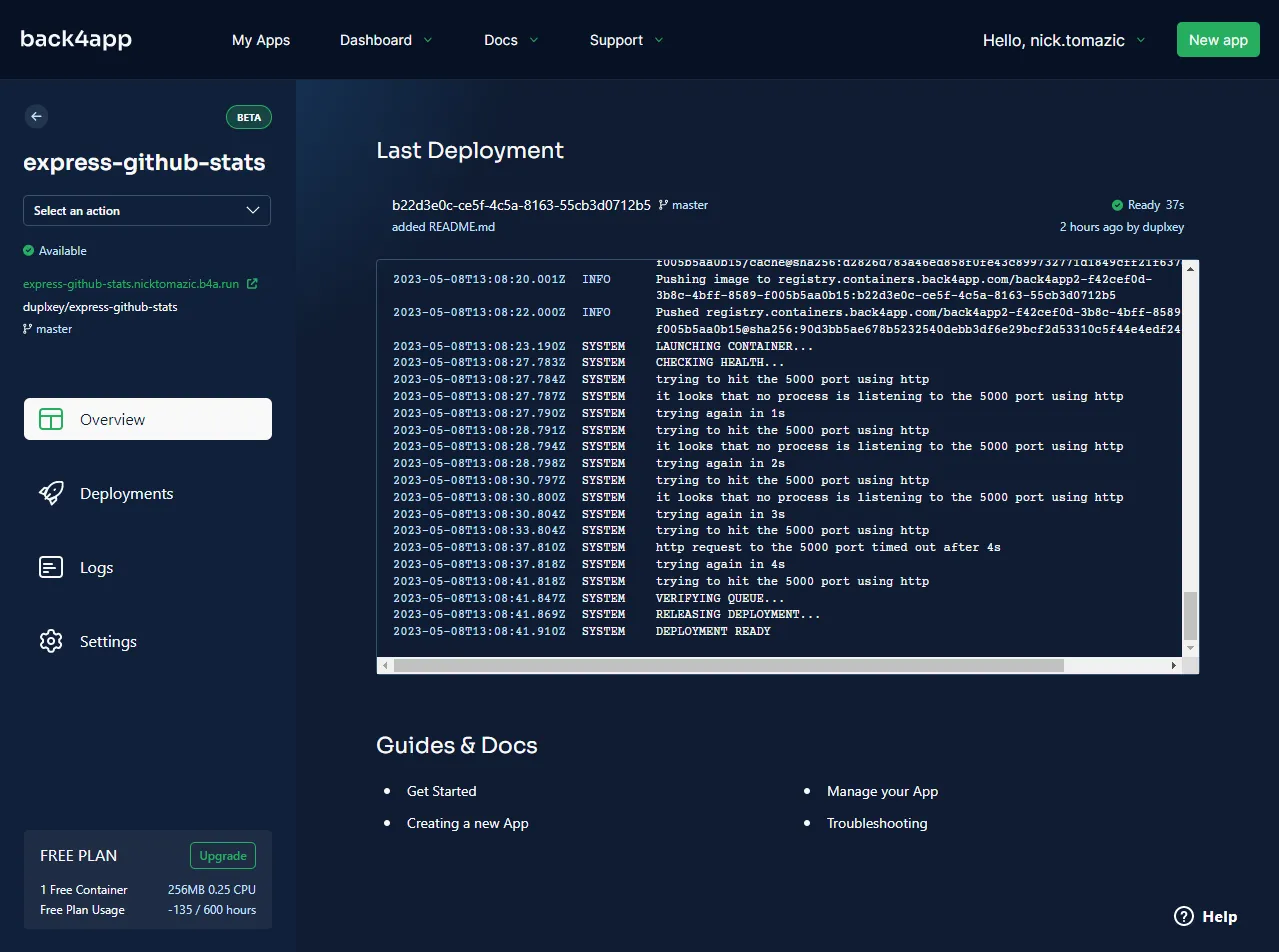
Wait for about 5 minutes for your app to deploy and voila! Once your app is ready the status will change to “Ready”. By clicking on the link on the left side of the screen the app will open your browser.
Conclusion
Throughout the article, we’ve learned about Node.js and looked at different Node.js deployment options. You should now be able to explain the differences between IaaS, PaaS, and CaaS. On top of that, you’ve learned how to deploy a simple Node.js application to Back4app Containers.
The source code is accessible on the GitHub repo.
FAQ
What is Node.js?
Node.js is a cross-platform, open-source server environment that allows you to run JavaScript outside a web browser. It has an asynchronous event-driven architecture and runs on Google’s V8 JavaScript Engine.
What are Node.js deployment options?
Node apps can be deployed to several platforms. Commonly we can divide them into IaaS (AWS, GCP, Azure), PaaS (Heroku, DigitalOcean App Platform, Render), and CaaS (Back4app Containers, ECS) solutions.
How to host a Node.js application?
1. Code the application.
2. Dockerize the application.
3. Build and test the image locally.
4. Push the code to a GitHub repository.
5. Register for Back4app Containers and import the repository.
6. Configure the environment and deploy it.


