How to build a backend for Vue.js?
This article will provide a comprehensive tutorial on how to build a backend for Vue.js. It will provide an overview about Vue.js, advantages and limitations, deployment methods available, and a step-by-step guide on how to build and host a Vue.js application.
Vue is a JavaScript framework for building flexible and performant user interfaces (UIs) and single-page applications (SPAs).
Vue is known for its progressive nature, which means it can be adopted incrementally into existing projects. Vue also features a declarative syntax, which allows you to describe your desired UI state and let Vue handle the underlying logic and updates.
In addition to its progressive nature and declarative syntax, Vue employs a virtual DOM, which is a lightweight representation of the actual DOM. This helps it to render and update the user interface efficiently.
When developing Vue apps, integrating a Backend as a Service (BaaS) platform like Back4app can offer several benefits, such as data storage and user authentication, which can greatly simplify development and save time. In this article, you will explore Vue and learn how to build an application with Vue using Back4app.
Contents
Advantages of Vue
Vue continues to increase in popularity due to its numerous advantages, some of which include the following.
Easy Learning Curve
Vue has a relatively easy learning curve, making it suitable for developers of varying skill levels. Its template syntax is based on familiar HTML, allowing developers to grasp the fundamentals and work with Vue seamlessly and quickly.
With a clear and consistent API design, Vue simplifies the process of building applications by providing logical and intuitive patterns for creating components, using directives, and leveraging lifecycle hooks.
To further facilitate the learning process, Vue offers comprehensive documentation filled with well-written explanations and practical examples. Moreover, the supportive Vue community readily provides assistance, collaboration, and a wealth of learning resources through forums and online communities.
Lightweight Framework
Vue has a small file size, with the core library being only about 20KB when minified and gzipped. Vue’s small size leads to faster initial load times, improving performance and the user experience.
Additionally, due to its modular design, you can also selectively import only the necessary features, further reducing the file size and optimizing performance.
Component-Based Architecture
In Vue, applications are built by creating reusable and self-contained components. Components in Vue are self-contained units that encapsulate HTML, CSS, and JavaScript logic, making them easier to manage and understand. They can be reused across the application, saving development time and effort.
This component-based architecture allows you to create components once and reuse them throughout the application or across multiple projects. This reusability reduces redundant code and promotes code modularity.
Each component can be developed, tested, and updated independently without impacting other parts of the application. This, in turn, simplifies debugging, refactoring, and adding new features to the application.
Reactive Data System
Reactive data refers to data that changes automatically when its underlying value changes. Vue achieves reactivity by wrapping reactive objects in a Proxy. This allows Vue to track properties that are accessed.
When a property is accessed, Vue adds it to a list of dependencies. Upon changing the value of the dependency, Vue automatically updates the view.
Vue’s reactive data system is beneficial as you don’t have to manually update the view when data changes because Vue takes care of it automatically. This makes it easier for you to write declarative code and focus on describing the desired outcome rather than the steps needed to achieve it.
Limitations of Vue
While Vue offers many advantages, it’s essential to consider the drawbacks of developing web apps with Vue. Some of these drawbacks include the following.
Smaller Ecosystem
Vue has a smaller ecosystem compared to other front-end frameworks like Angular and React. Vue’s smaller ecosystem means that it may not have as many libraries and tools available as Angular and React.
This smaller ecosystem causes Vue to be at a disadvantage when developing large complex applications that require extensive libraries and tools. This has led to developers often needing to build custom solutions for specific requirements as the already-made solutions are either limited or not widely supported.
Limited Corporate Backing
Unlike React and Angular, Vue has limited corporate backing. While Angular and React are backed by Google and Facebook, respectively, Vue is an open-source project with a smaller team of maintainers.
This limited corporate backing can be a disadvantage in terms of the development of new features, bug fixes, and security updates. Additionally, it has raised concerns for organizations prioritizing frameworks with solid corporate support and stability for long-term projects.
Building the Backend for a Vue Application
The back end of a Vue app is responsible for handling data storage, authentication, API integrations, and server-side logic tasks. It serves as the foundation for the application’s functionality, facilitating communication between the front-end and external services or databases.
When building the back end of a Vue app, there are several options available for use, including:
Traditional Server-Side Technologies
Traditional backend frameworks like Laravel (PHP), Ruby on Rails, Node.js, and ASP.NET (C#) offer comprehensive solutions for building the backend of a Vue application.
These frameworks have a mature and established presence, with large communities and extensive documentation, ensuring stability and proven practices for developing scalable and secure applications.
They provide pre-built components, code generators, and scaffolding tools that accelerate development by handling common backend tasks, allowing you to focus on building application-specific features.
Additionally, traditional frameworks offer robust Object-Relational Mapping (ORM) tools, simplifying database operations and ensuring data integrity through object-oriented code.
However, traditional backend frameworks may require more setup and configuration compared to other options, which can be daunting for beginners or developers with limited backend experience. Additionally, the learning curve for these frameworks can be steeper due to their extensive feature sets and conventions.
Backend-as-a-Service (BaaS)
Backend-as-a-Service (BaaS) platforms, such as Back4app, offer a convenient solution for building the backend of Vue applications. BaaS platforms abstract the complexities of backend infrastructure, providing pre-built backend services and APIs that developers can easily integrate into their Vue apps.
BaaS platforms accelerate development by offering a wide range of pre-built backend services, such as data storage, user authentication, file storage, and push notifications. These services can be quickly integrated into Vue apps, reducing development time and effort.
While Backend-as-a-Service (BaaS) platforms offer convenience and scalability, there are a few considerations to keep in mind. One drawback is the potential for vendor lock-in, as BaaS platforms may tightly couple your backend code with their specific services and APIs.
Customization and control over the backend may also be limited, which could be a challenge for apps with unique requirements.
Building a Vue Blog App
To create a Vue app, run the following command in the project’s directory terminal:
npm create vue@latest
This code will return a prompt where you can name the Vue app and select the features you will utilize in the Vue app.
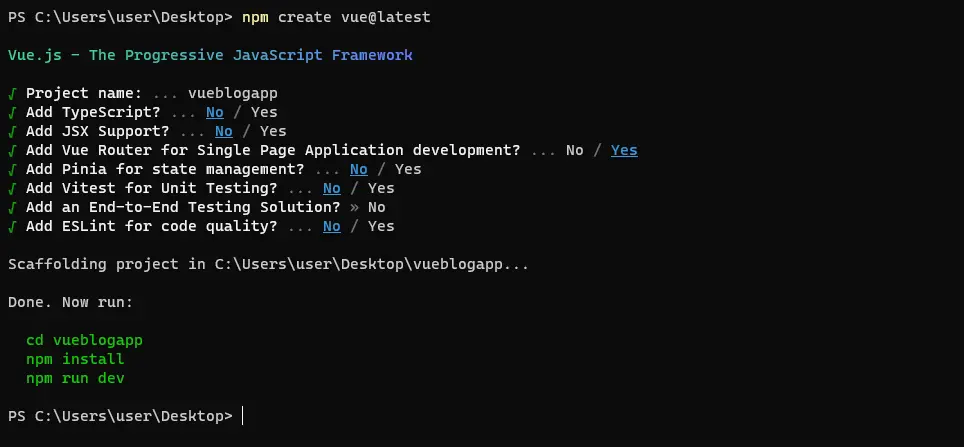
After naming the application and selecting the Vue Router for handling routes in your app, cd into the app and run the command npm install to install dependencies.
In the views directory of your Vue blog application, create two views: CreatePosts.vue and ReadPosts.vue.
After creating the views, add the code block below to your index.js file in the router directory:
//index.js
import { createRouter, createWebHistory } from 'vue-router'
import CreatePosts from '../views/CreatePosts.vue'

const router = createRouter({
  history: createWebHistory(import.meta.env.BASE_URL),
  routes: [
    {
      path: '/',
      name: 'post',
      component: CreatePosts
    },
    {
      path: '/readposts',
      name: 'read-posts',
      component: () => import('../views/ReadPosts.vue')
    }
  ]
})

export default router
The code block above sets up a Vue Router instance with two routes: The '/' path associated with the CreatePosts component and the '/readposts' path associated with the dynamically imported ReadPosts component. This router instance manages navigation within your Vue application.
Next, add a header containing routes nested in button HTML tags in your App.vue file to allow the app users to navigate to the desired routes.
Like so:
<!-- App.vue -->
<script setup>
import { RouterLink, RouterView } from 'vue-router';
</script>

<template>
  <header>
    <h1>Vue Blog</h1>

    <nav>
        <RouterLink to="/" class="link"><button>Create Posts</button></RouterLink>
        <RouterLink to="/readposts" class="link"><button>Read Posts</button></RouterLink>
      </nav>
  </header>

  <RouterView />
</template>
The code block above sets up the routing in the blog app. It imports both the RouterLink and RouterView components from the vue-router library. It imports these components in the script setup block (Vue 3 feature) of the App.vue file.
The template block contains the HTML markup for the App.vue file. It includes a header titled “Vue Blog” and a navigation bar with two buttons wrapped in a RouterLink component that links to the corresponding route. The RouterView component is used to render the content of the current route.
After setting up the routing, style the header and the route links by adding the style block below to your App.vue file:
<style lang= "scss" scoped>
  header{
    padding: 1rem 0;
    display: flex;
    justify-content: space-between;

    nav{
      display: flex;
      gap: 1rem;

      .link{
        text-decoration: none;
        color: inherit;
      }
    }

  }
</style>
Integrating Back4app into your Vue Blog App
Begin by setting up your Vue application, and then create an instance on Back4app to establish a connection with your Vue app. In order to do this, you’ll require a Back4app account.
If you are not already a Back4app user, follow these easy steps to sign up:
- Navigate to the Back4app website.
- Locate the Sign-up button on the main page and click it.
- Complete the registration form with your details and submit.
Once your account is successfully set up, log in to Back4app. Look for the NEW APP option situated in the upper right corner and select it. This will lead you to a form where you need to provide your application’s name. After inputting the name, click on the CREATE button to finalize the process.
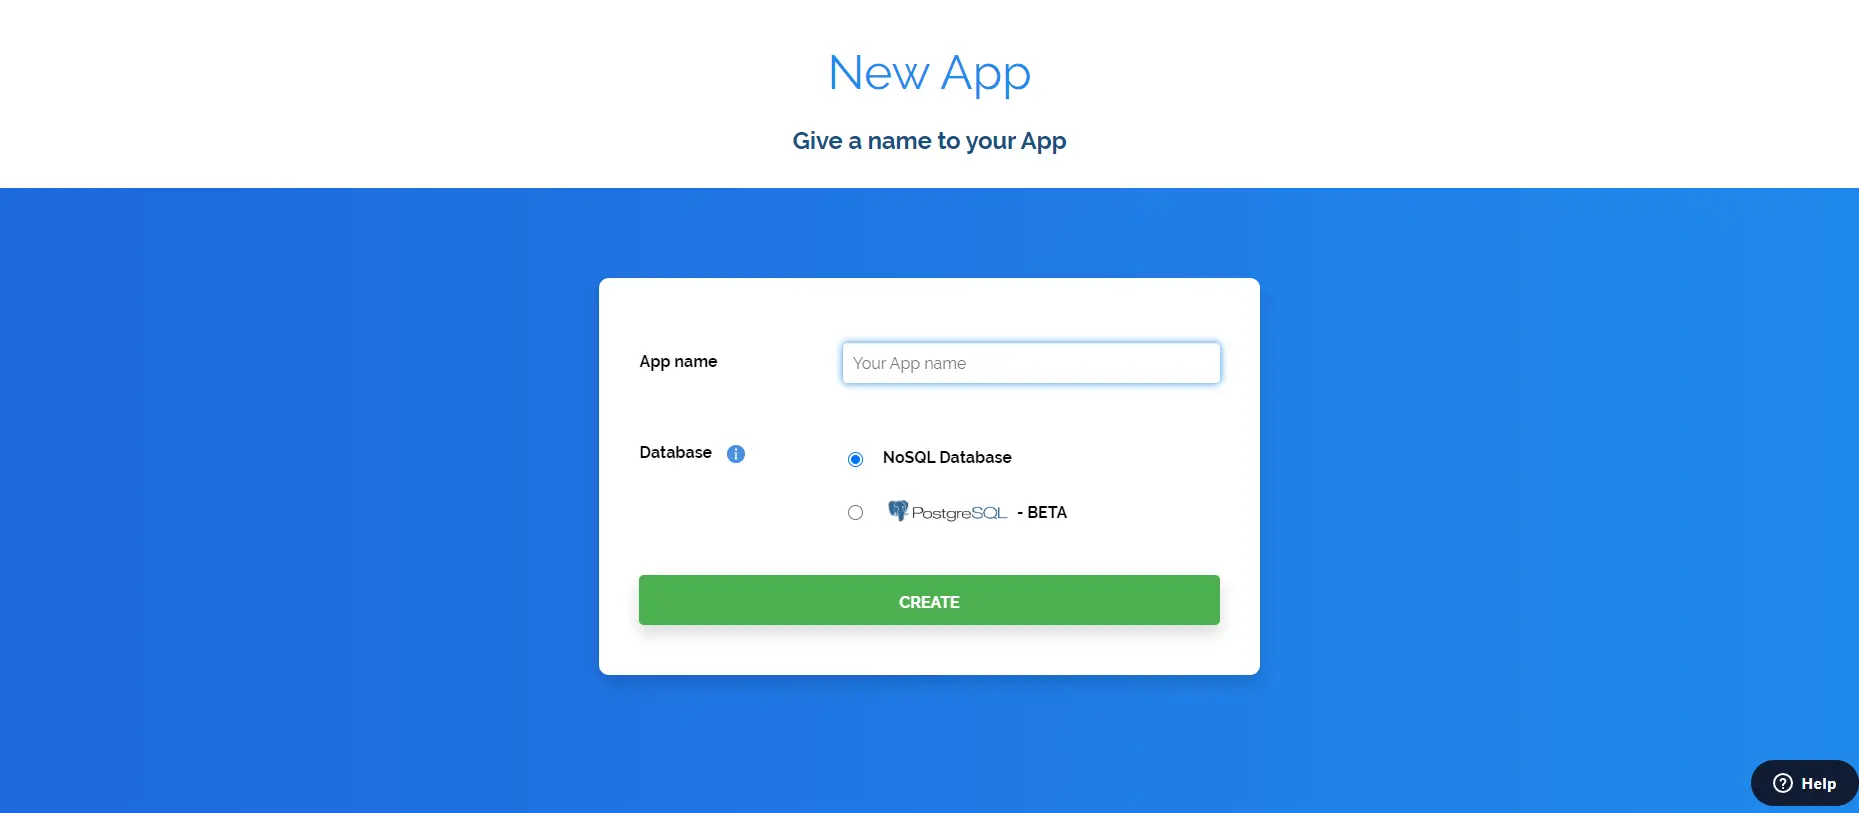
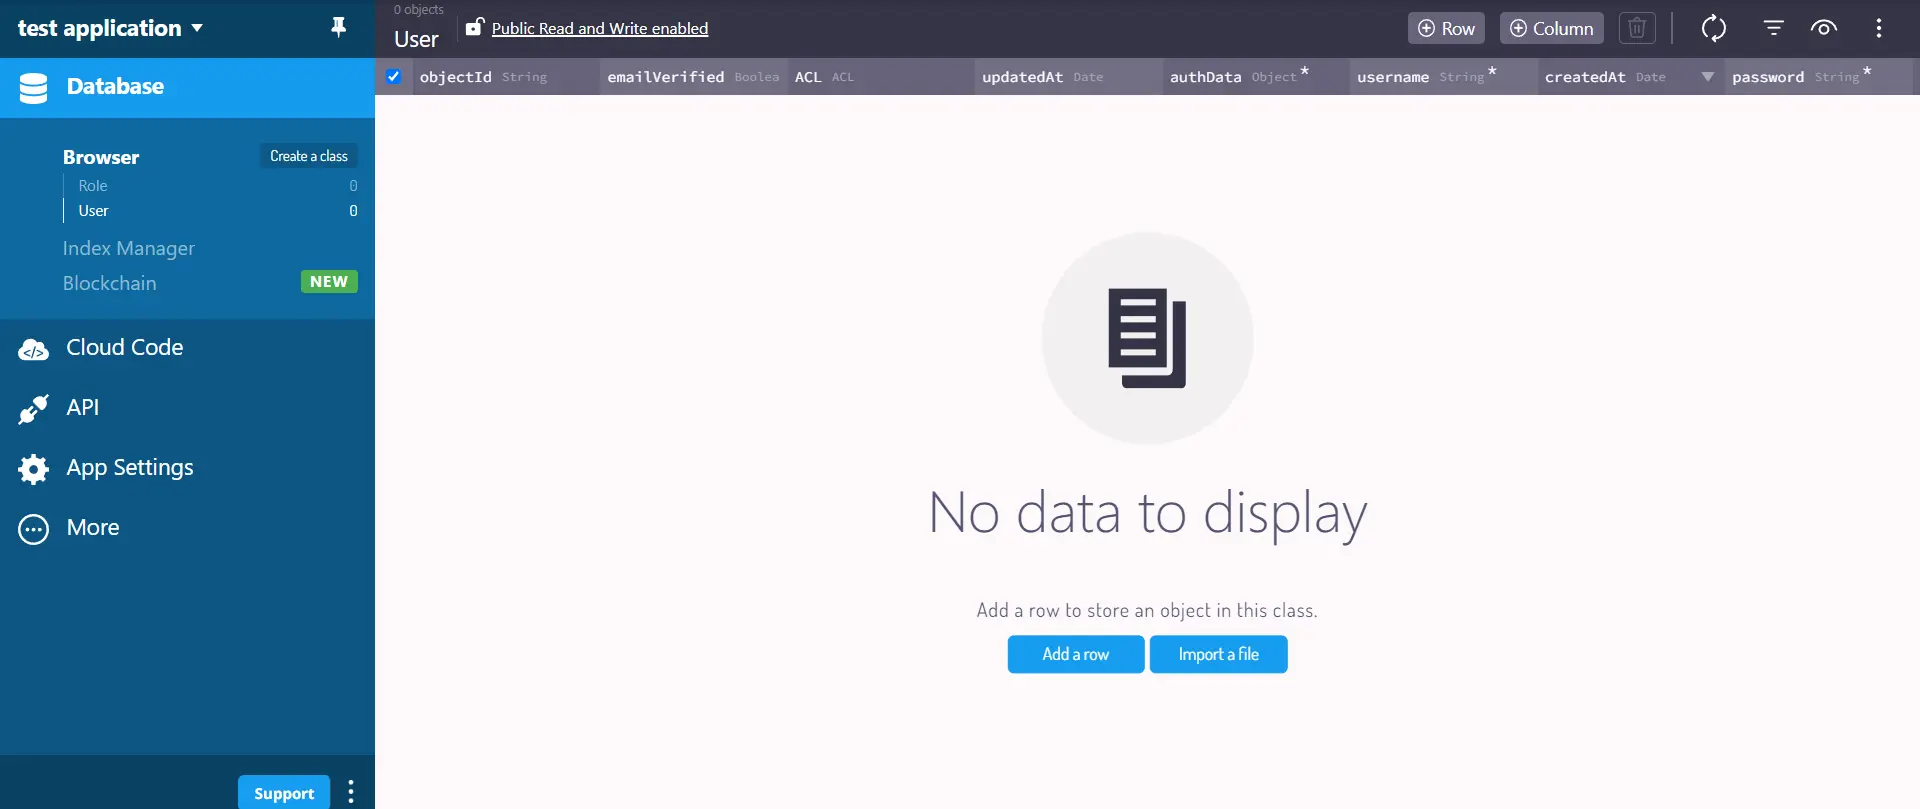
After clicking the ‘CREATE’ button, your application will be generated, and you will be directed to the application dashboard.
Connecting the Vue Blog App to Back4app
To connect your Vue application to Back4app, first, you need to install the Parse JavaScript SDK.
To install the SDK, run either of the following commands depending on which package manager you are using:
#using npm
npm install parse
		or
#using yarn
yarn add parse
Next, you’ll need to configure the SDK using two of your Back4app application’s credentials, Application ID and Javascript KEY.
Get the Application ID and JavaScript Key from Back4app by navigating to the Security & Keys section by selecting App Settings on the dashboard.
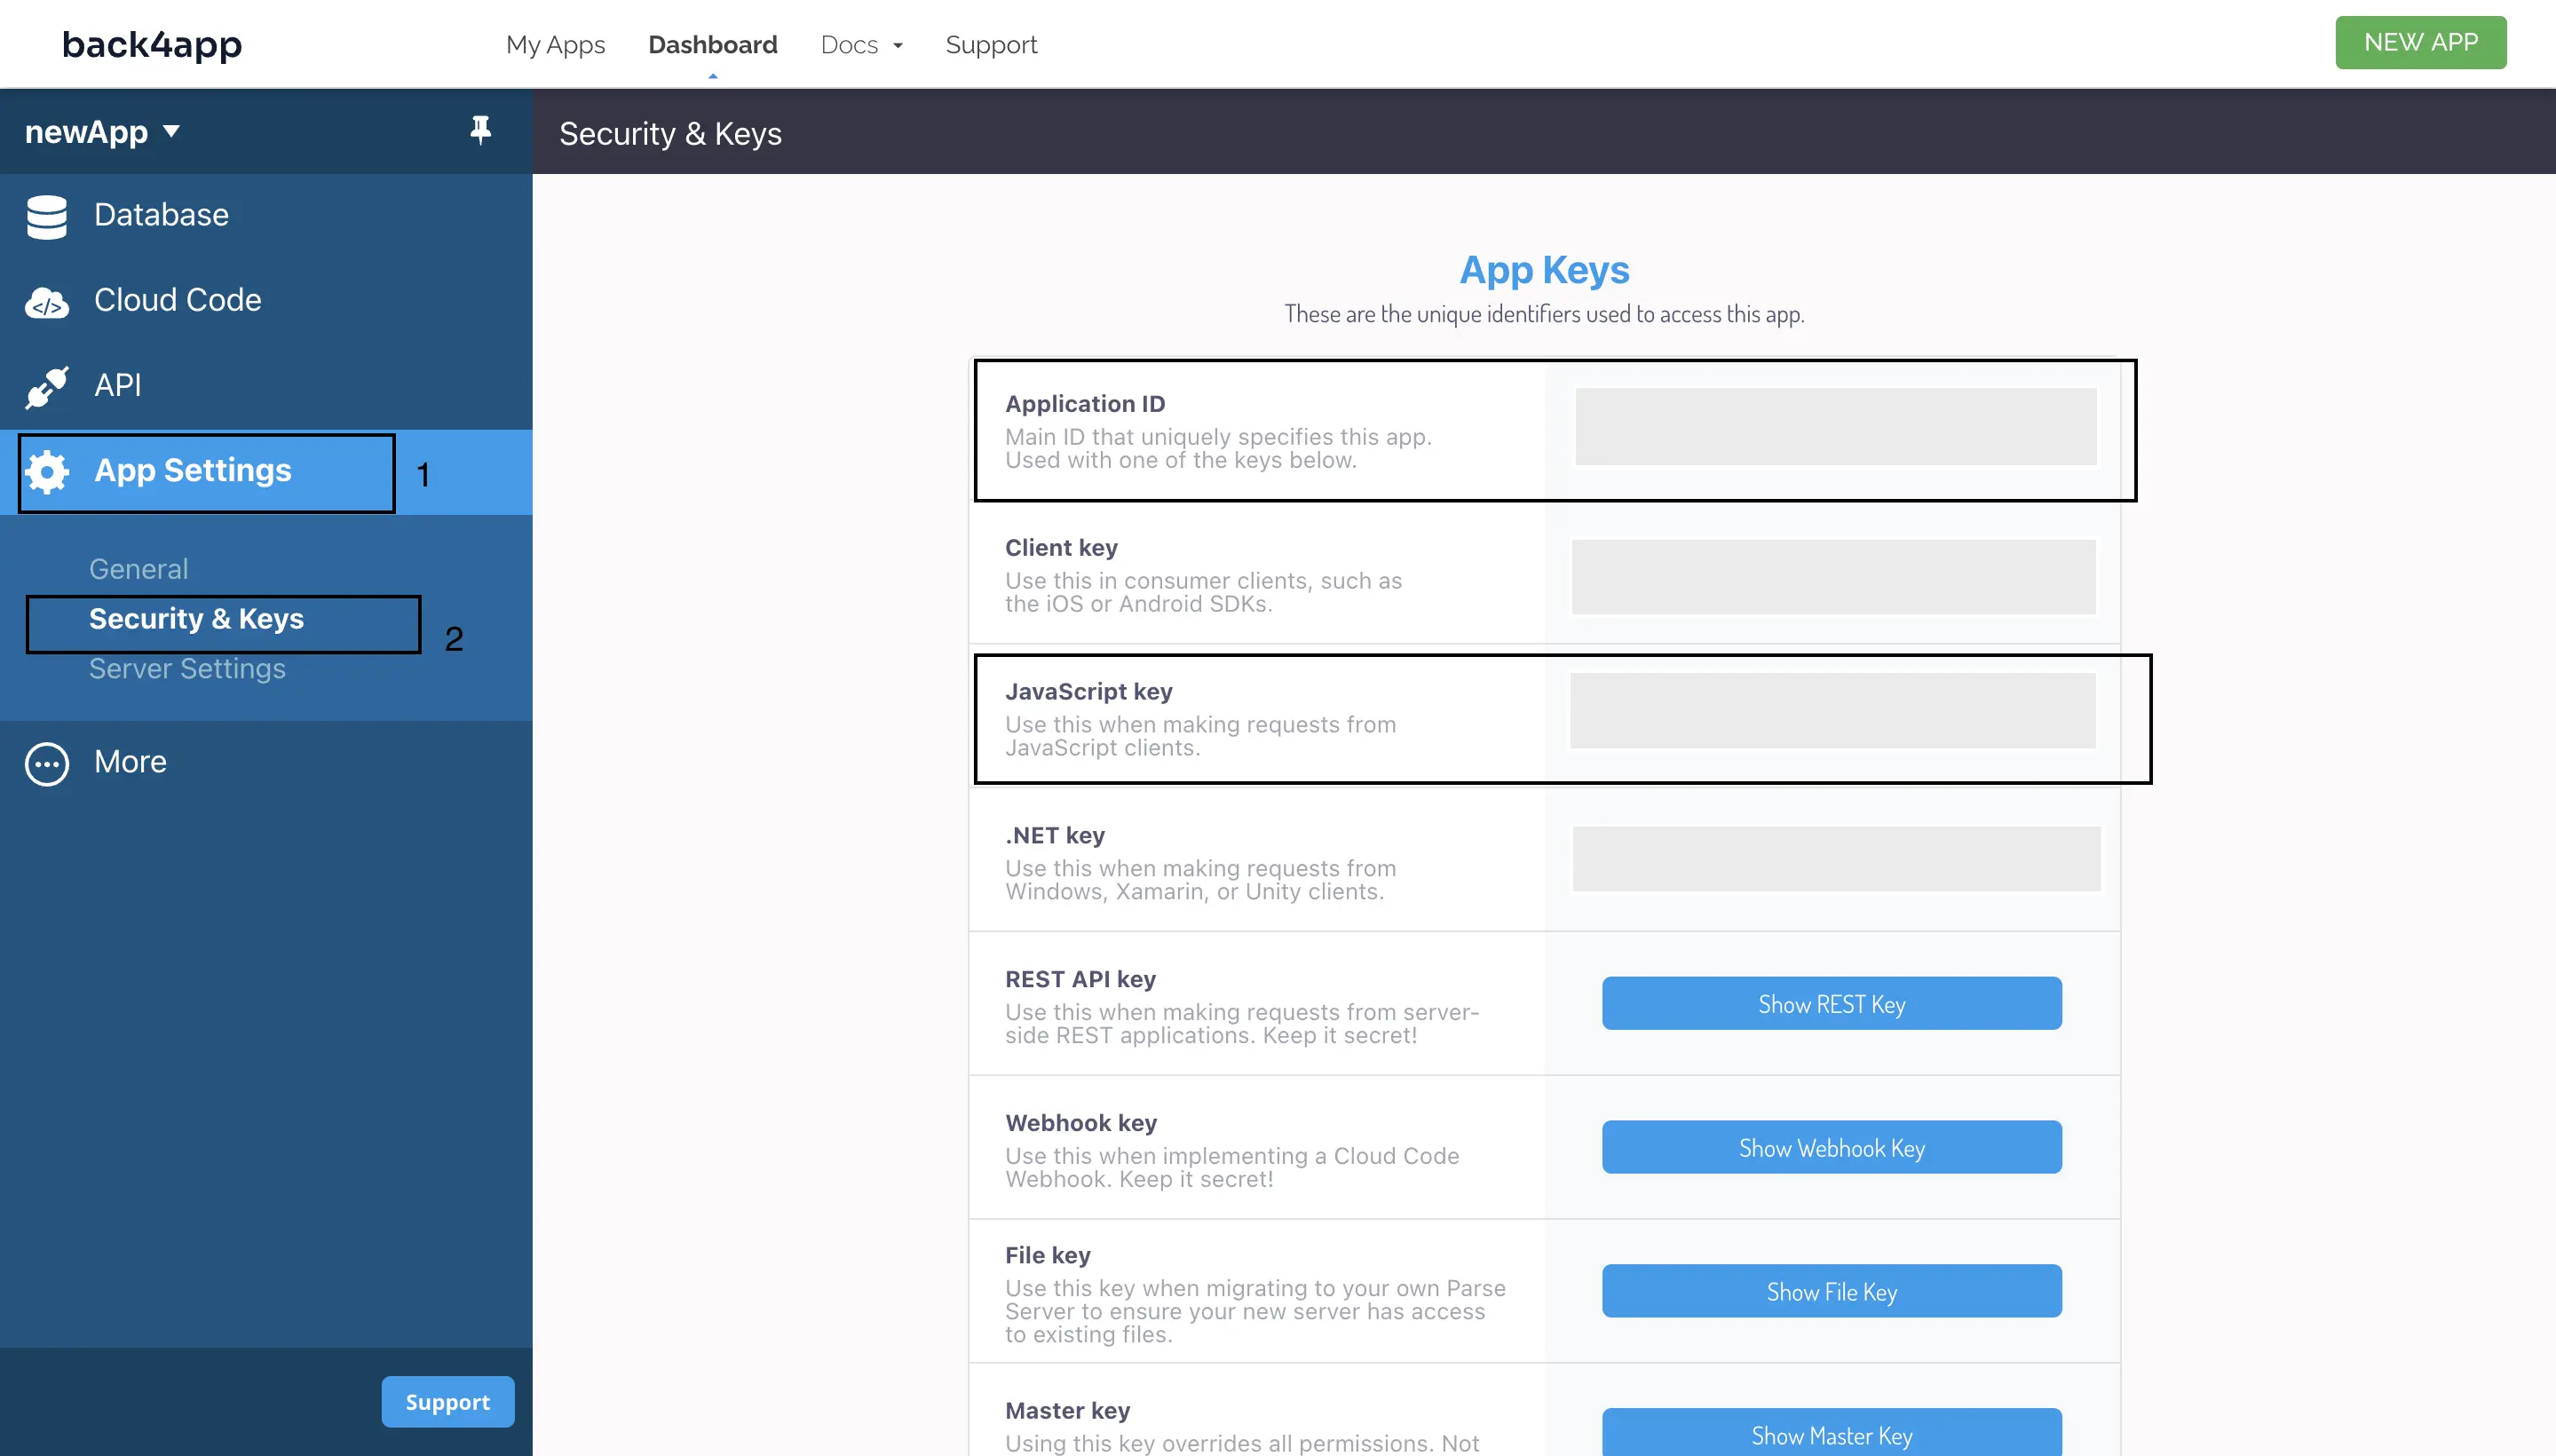
Storing your application keys as plain text is a security risk, as malicious users can gain access to your application. Thus, store your application’s credentials securely using either environmental variables or your preferred method of storing sensitive keys.
Next, import the minified version of Parse from the parse package you installed in your main.js file. Then call the initialize method on the Parse object and pass the Application ID and JavaScript Key as arguments.
Finally, set the Parse.serverURL property to ‘https://parseapi.back4app.com/’.
For example:
import Parse from 'parse/dist/parse.min.js';

Parse.initialize(VUE_APP_PARSE_APPLICATION_ID, VUE_APP_PARSE_JAVASCRIPT_KEY);
Parse.serverURL = '<https://parseapi.back4app.com>';
Your main.js file should be similar to the code block below after adding the code block above:
// main.js
import { createApp } from 'vue'
import App from './App.vue'
import router from './router'
import Parse from 'parse/dist/parse.min.js';
import './assets/main.css';

const app = createApp(App)

app.use(router)

Parse.initialize(VUE_APP_PARSE_APPLICATION_ID, VUE_APP_PARSE_JAVASCRIPT_KEY);
Parse.serverURL = '<https://parseapi.back4app.com>';

app.mount('#app')
Adding Data to Back4app
To capture data from the blog user, you will need to build a form. Upon submission of the form, the Vue app will run a submitPost() function that performs the logic required to save the data in the Back4app instance.
Add the code block below to your CreatePosts.vue file to create your form:
<!-- CreatePosts.vue -->
<script setup>
import { ref } from 'vue';
import { Parse } from 'parse/dist/parse.min.js';

const blog = ref({
  title: "",
  post: "",
})

function submitPost() {
  try {
      const Post = new Parse.Object("Post");

      Post.set("title", blog.value.title);
      Post.set("body", blog.value.post);

      Post.save().then(() => {
        console.log("New Post added successfully");
      });
    } catch (error) {
      console.log(error);
    }
  blog.value.title = ''
  blog.value.post = ''
}
</script>

<template>
  <form @submit.prevent="submitPost">
    <input id="blog-title" v-model="blog.title" placeholder="Title"/>
    <textarea id="blog-post" v-model="blog.post" placeholder="Post" rows="20"></textarea>
    <button>Submit Post</button>
  </form>
</template>
The code block above is a component that enables users to submit a blog post. It utilizes the Vue composition API and imports the ref function from the Vue library.
The submitPost function creates a new Parse Post object and sets the title and body properties of this Post object to the value of the blog.title and blog.post properties with the set method.
Then, The Post object is then saved to Back4App with the save method. Upon success or failure, the code displays a message in the console. After submitting the post, the title and post values in the blog object are reset to an empty string, clearing the form fields.
This file’s <template> block defines a form element with the @submit.prevent event listener that triggers the submitPost function when the form is submitted.
Inside the form are input and textarea elements bound to the blog object’s properties (blog.title and blog.post) with v-model. This enables two-way data binding, ensuring that changes in the form elements update the blog object.
Style the CreatePosts view for a more appealing user interface by adding the code block below to your CreatePosts.vue file:
<style lang= "scss" scoped>
  form{
    display: flex;
    flex-direction: column;
    gap: 2rem;
    align-items: center;

    input{
      padding: 1rem;
      background-color: #f2f2f2;
      font-family: 'Poppins', sans-serif;
      border: none;
      border-radius: 12px;
      inline-size: 70%;

      &::placeholder{
        color: #e3e3e3;
        font-weight: bold;
        font-family: 'Poppins', sans-serif;
      }
    }

    textarea{
      padding: 1rem;
      border: none;
      background-color: #f2f2f2;
      font-family: 'Poppins', sans-serif;
      border-radius: 12px;
      inline-size: 70%;

      &::placeholder{
        color: #e3e3e3;
        font-weight: bold;
        font-family: 'Poppins', sans-serif;
      }
    }
  }

</style>
Reading Data from Back4app
In order to display data in your application that has been saved in your Back4app instance, you must first be able to read from your Back4app instance.
To read data from your Back4app instance, you need to create a Parse query for the class you want to fetch data from. You can then use Vue’s onBeforeMount lifecycle hook to fetch the data and display it in your app.
For example:
<!-- ReadPosts.vue -->
<script setup>
import { onBeforeMount, ref } from 'vue';
import Parse from 'parse/dist/parse.min.js';

const postList = ref([])

onBeforeMount( async () => {
  try {
      const query = new Parse.Query("Post");

      const post = await query.find();

      console.log('Posts to be read displayed')
      postList.value = post;
      console.log(postList.value)

    } catch (error) {
      console.log(error);
    }
})

</script>

<template>
  <div>
    <ul class="postlist">
      <div class="post" v-for="(post, index) in postList">
        <div>
          <h2>{{ post.get('title') }}</h2>
          <p>{{ post.get('body') }}</p>
        </div>
      </div>
    </ul>
  </div>
</template>
The ReadPosts.vue file fetches and displays posts from Back4app. The script imports the onBeforeMount hook and the ref function from the vue package. The hook executes an asynchronous function before the Vue app mounts.
The function searches for a “Post” object from your Back4app app’s database with the Parse.Query() method. Then it returns an array containing the query results by calling the Parse find method on the result of the Parse.Query() call. Finally, it assigns the returned array to the postList variable.
In the template block, the v-for directive loops through the postList array and generates a new div element for each post in the postList array. The post.get() method retrieves the values of the title and body properties of the attributes in your Back4App database.
You can now style your ReadPosts.vue file by adding the following Scss code in the style block:
<style lang= "scss" scoped>
  .postlist{
    display: flex;
    flex-direction: column;
    gap: 2rem;

    .post{
      display: flex;
      justify-content: space-between;
      padding: 1rem;

      h2{
        margin-block-end: 1rem;
        text-transform: uppercase;
      }

      p{
        opacity: 0.4;
        font-weight: bold;
        font-size: 13px;
        margin-block-end: 0.5rem;
      }

    }
  }

</style>
Modifying Your Vue App to Add the Delete Post Functionality
Another vital functionality you can add to your blog App is the ability to delete posts. To implement this functionality, use the destroy method available to the Parse SDK.
Like so:
<!-- ReadPosts.vue -->
<script setup>
import { onBeforeMount, ref } from 'vue';
import Parse from 'parse/dist/parse.min.js';
const postList = ref([])

onBeforeMount( async () => {
  try {
      const query = new Parse.Query("Post");

      const post = await query.find();

      console.log('Posts to be read displayed')
      postList.value = post;
      console.log(postList.value)

    } catch (error) {
      console.log(error);
    }
})

const deletePost = async (id) => {
  try {
      const Post = Parse.Object.extend("Post");
      const todo = new Post();
      todo.id = id;
      await todo.destroy();
      const newPostList = postList.value.filter( (item) => item.id !== id )
      postList.value = newPostList;
    } catch (error) {
      console.log(error);
    }
}

</script>
This script is an update to the ReadPosts.vue file handling the delete functionality. The deletePost function creates a new Post object using the Parse.Object.extend method. Then it sets the id property of the Post object to the id parameter passed to the function.
Next, it calls the destroy method of the Post object to delete the post with the given ID from the Back4app database. Then it filters the postList array and returns a new array newPostList, with all the posts except the deleted post. The newPostList array is then assigned to the postList variable.
You can then bind the deletePost function to a click event on the button element in the template block of your ReadPosts.vue file.
Like so:
<template>
  <div>
    <ul class="postlist">
      <div class="post" v-for="(post, index) in postList">
        <div>
          <h2>{{ post.get('title') }}</h2>
          <p>{{ post.get('body') }}</p>
        </div>
        <button @click="deletePost(post.id)">Delete</button>
      </div>
    </ul>
  </div>
</template>
Finally, add some global styles to style the buttons and body of your Vue APP in the assets directory:
/* main.css */
*{
    margin: 0;
    padding: 0;
    box-sizing: border-box;
}

body{
    inline-size: 90%;
    margin: auto;
    font-family: 'Poppins', sans-serif;
}

button{
    border: none;
    padding: 0.5rem 0.8rem;
    background-color: inherit;
    font-family: 'Poppins', sans-serif;
    font-size: small;
    font-weight: bold;
    color: #333333;
    border-radius: 12px;
}

button:hover{
    color: #e2e2e2;
    background-color: #333333;
  }
Testing Your Vue Blog App With Back4app Integrated
Now that you have built and integrated Back4app into your Vue app. You can run the npm command in your project’s terminal to test the application:
npm run dev
This command compiles the application and hosts the application on a particular local server http://localhost:5173/
When the app launches, you should see the CreatePosts view for creating posts as your home route:
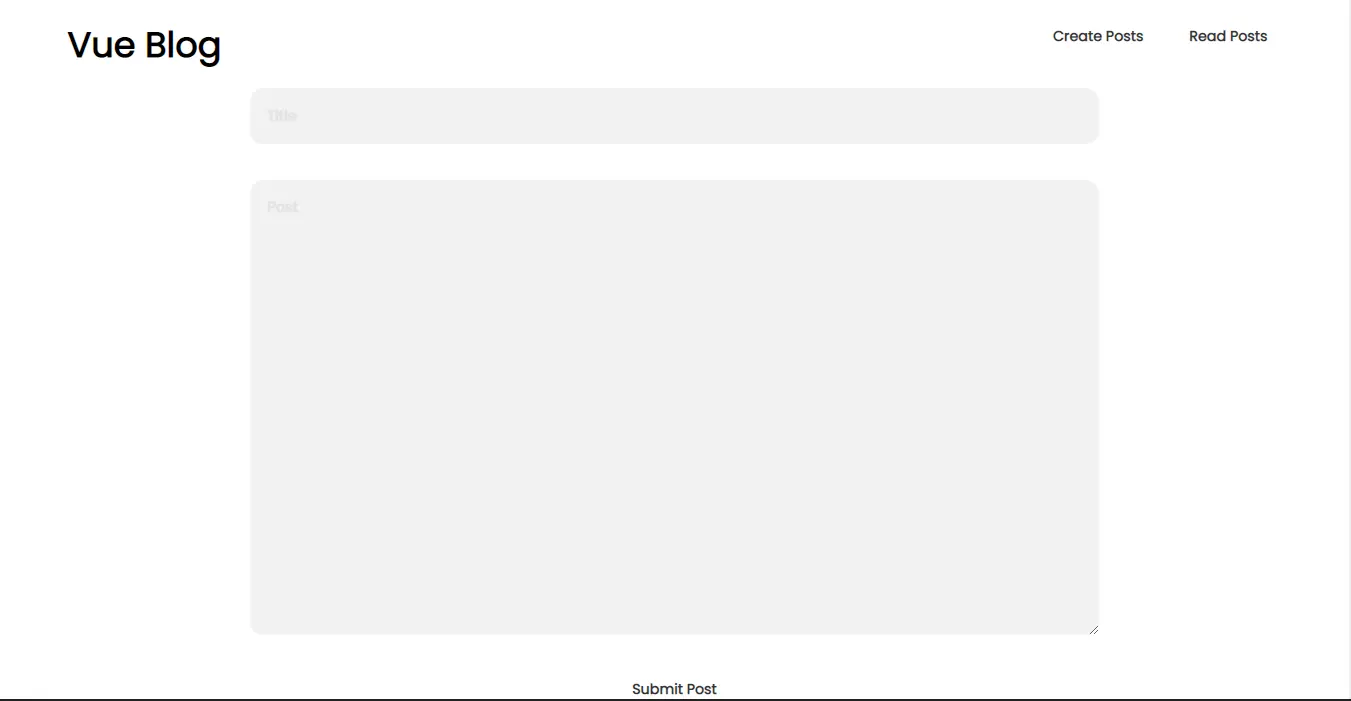
After filling in the input fields, clicking the Submit Post button would add the input values to the Back4app database. Check your Back4app application dashboard or navigate to the ReadPosts view to confirm this.
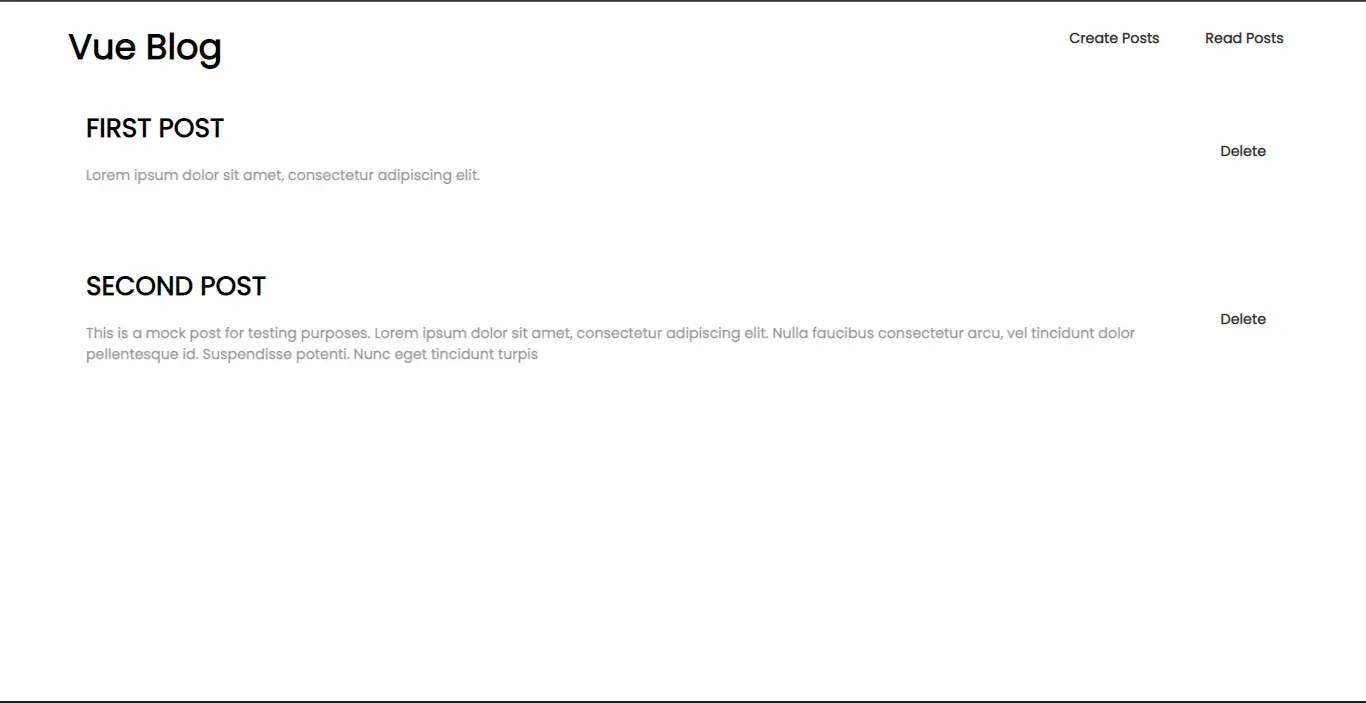
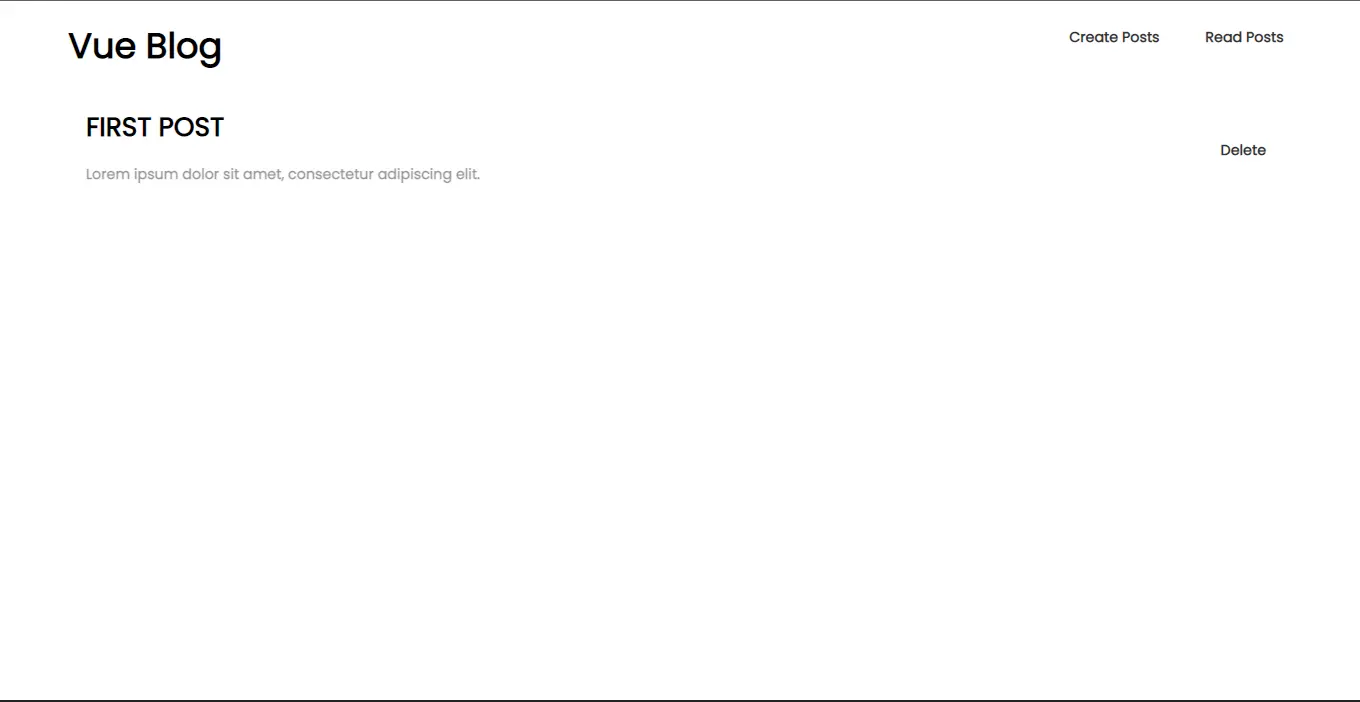
Clicking on the delete button would delete a post. For example, delete the ‘SECOND POST’ by clicking its delete button:
Conclusion
Vue provides developers with a robust and scalable solution for creating modern web applications with its reactive data-binding, component-based architecture, and ecosystem of libraries.
Integrating Vue with Back4app enables developers to handle the backend of their applications easily.Back4app reduces the complexity traditionally associated with backend development allowing developers to create full-stack web applications.
FAQ
What is Vue?
Vue is a progressive JavaScript framework for building user interfaces. It offers a flexible, component-based architecture allowing developers to create interactive and dynamic web applications.
How can I create a Vue app?
To create a Vue app, ensure you have the node package manager installed, then navigate to your desired directory in the terminal and run the command npm create vue or npm init vite. Follow the prompts to set up the project with the desired options and dependencies.
What is Back4app?
Back4app is a Backend-as-a-Service (BaaS) platform that provides a pre-built backend infrastructure for web and mobile applications. It offers features such as authentication, data storage, and server-side logic, simplifying backend development.
How does Back4app help me build Vue apps?
Back4App simplifies the development of Vue apps by providing a user-friendly backend-as-a-service platform. It offers scalable backend management, support for multiple databases, user authentication, and file storage, among others. With Back4App, you can focus on front-end development while seamlessly integrating with a powerful, flexible backend infrastructure.


