How to build and deploy a Nuxt application?

Nuxt.js is an open-source framework made on top of Vue.js, Nitro, and Vite, which allows you to develop web apps.
Inspired by Next.js (a React framework for Server Side Rendering), Nuxt.js enables developers to craft fast web applications by applying different rendering modes.
Released in 2016, Nuxt.js has gained wide acceptance among developers due to its developer-friendly philosophy and rich features.
Contents
- 1 Advantages of Nuxt.js
- 2 Limitations of Nuxt.js
- 3 Building and Deploying a Nuxt.js Application on Back4app
- 4 Creating the Backend for Your Nuxt.js Application
- 5 Creating Cloud Code
- 6 Building the Front End of Your Application
- 7 Connecting the Front End and Backend Bits of Your Application
- 8 Deploying the Fully Built Web Application
- 9 Conclusion
Advantages of Nuxt.js
Nuxt.js offers several advantages that make it a compelling choice for Vue.js development:
Universal Rendering
Nuxt.js controls how your web app is displayed on the user’s end. It starts by rendering the initial page on the server, making it super fast to load, especially for people with slower internet connections.
This helps search engines crawl your website faster, leading to better SEO.
Nuxt.js then smoothly switches to a client-side rendering (SPA) for navigating between pages within your app. This keeps things quick and responsive, just like you’d expect from a modern website.
Optimized Performance Through Hydration and Code Splitting
Nuxt 3 enables selective hydration, meaning that segments of the app’s state are hydrated on the client side for a faster first-page load and enhanced user experience, which is very useful for an app with a huge state tree and many parts.
Similarly to Next.js, Nuxt splits files automatically into smaller bundles depending on the routes.
This way, the browser requires only code related to the current view from the server, significantly reducing the user’s page load time.
That means fewer bandwidth resources are being utilized and an improved user experience.
Built-in Routing
Nuxt.js, by default, handles routes through file-based routing, simplifying navigation and route management within your application.
It also allows you to choose to configure your routes dynamically for more complex routing scenarios.
API Routes
Nuxt.js lets you skip setting up a whole separate server for simple tasks! It has built-in shortcuts called API routes.
API routes can handle data fetching during server-side rendering, supporting RESTful and GraphQL APIs. This makes your app feel snappy and helps search engines understand your app’s content better.
Limitations of Nuxt.js
While Nuxt.js offers a powerful development experience, here are some limitations to consider:
Learning Curve
Nuxt.js introduces concepts that differ from traditional Vue.js development. Being new to Nuxt.js requires time to adapt to its specific architecture and features.
Nuxt also offers a vast ecosystem of tools, libraries, and plugins. Familiarizing yourself with these options can add to the initial learning curve.
Limited Ecosystem
Unlike other major frameworks like React and Angular, Nuxt is relatively young. As a result, its ecosystem of third-party libraries and plugins is still growing.
You will need to build custom solutions to fulfill certain requirements in specific situations.
Complexity in Server-Side Rendering
While server-side rendering (SSR) is a powerful feature in Nuxt.js, it can make app development more complex. Compared to more straightforward rendering methods, SSR has a steeper learning curve.
Also, implementing SSR effectively requires careful planning and management of data fetching and application state.
This can lead to potential errors or inconsistencies between the content initially rendered on the server and the final, interactive version rendered on the client.
Building and Deploying a Nuxt.js Application on Back4app
We will build a contact management application to understand better how to build and deploy a Nuxt app with Back4App.
This app will allow users to create, view, and delete their contact information, keeping their network contact book organized and easily accessible.
For the backend of this project, we will use Back4app’s built-in PostgreSQL database to store contact information such as name, email, phone numbers, and company.
This process will be made easier with the help of Back4App’s AI Agent.
For the front end of the project, we will use Nuxt.js to create the app’s UI. Then, we will connect the front and back end using the Parse SDK before deploying the Nuxt front end with Back4App Containers.
Let’s get started.
Creating the Backend for Your Nuxt.js Application
The first step to create a Nuxt app is to get the backend ready.
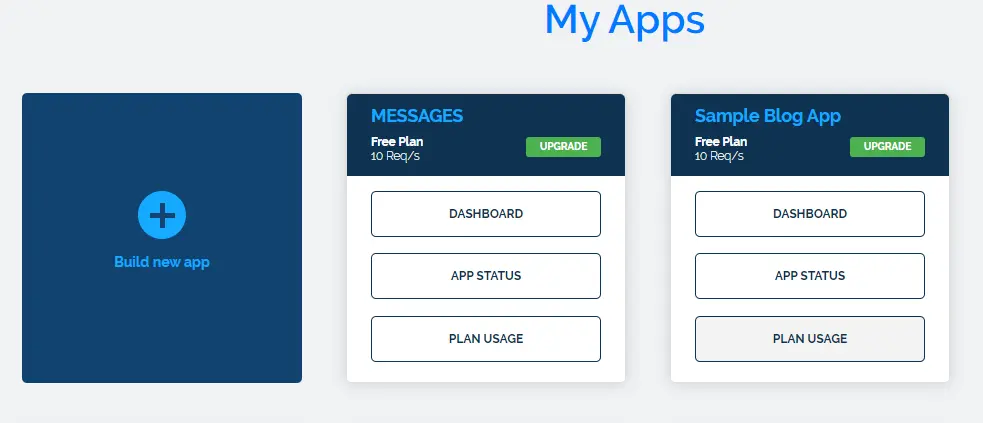
To start creating the back end for your Contacts application, navigate to the Back4App website, log in, and create a new application by clicking “Build New App.”
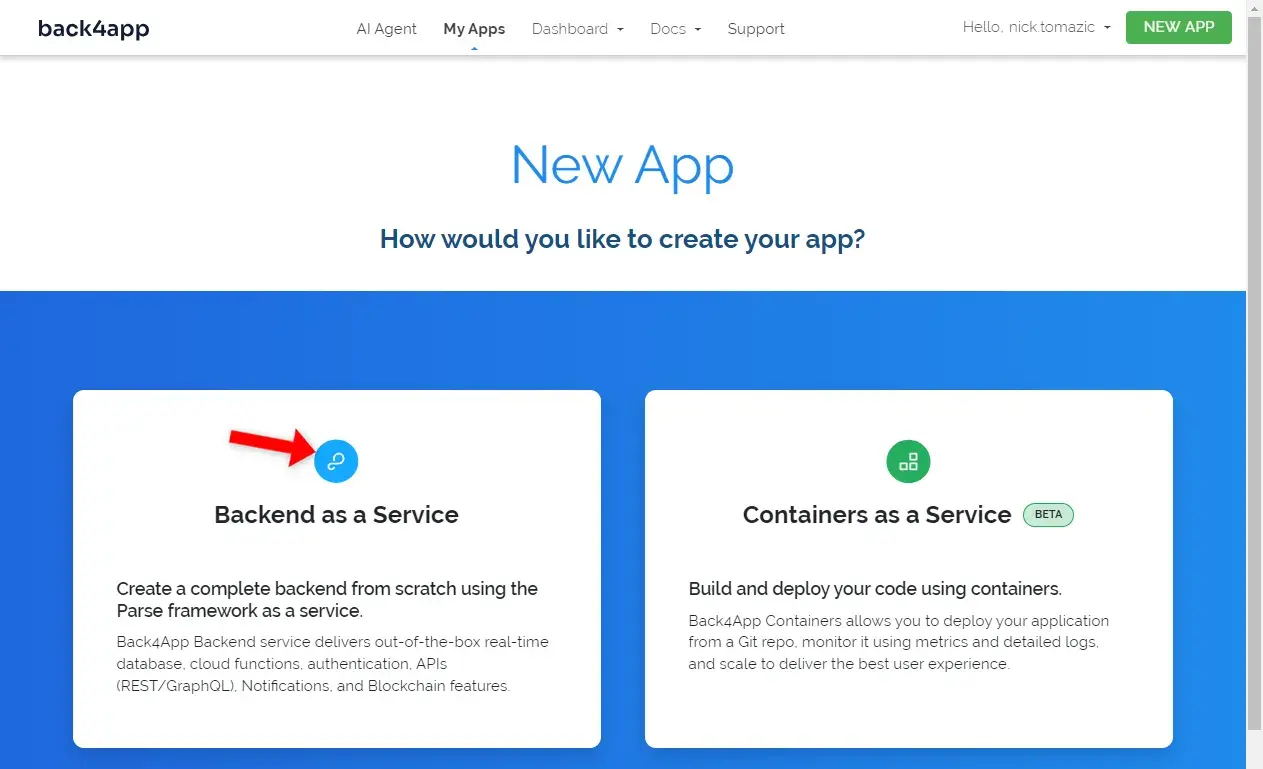
Select the “Backend as a Service” option, which you will see after building a new application, as shown in the image below.
Give your application a name and select the PostgreSQL option, which we will use for the database.
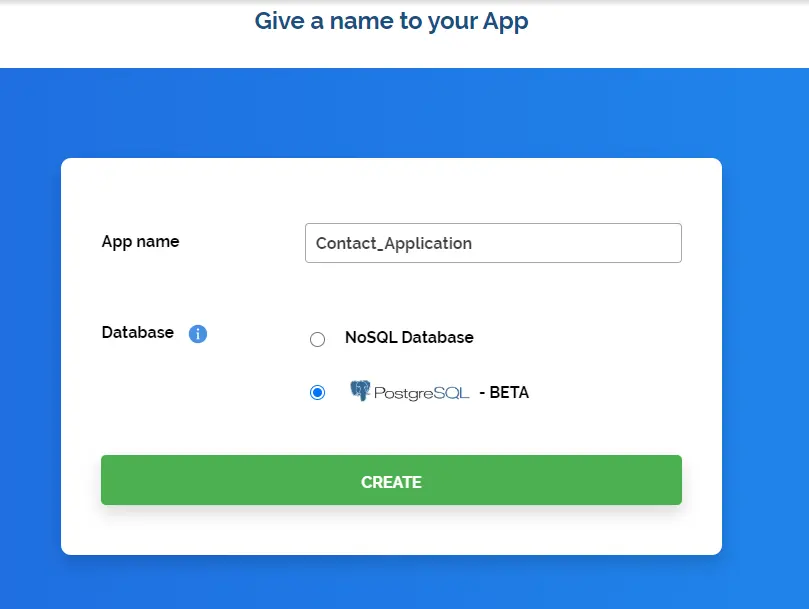
After clicking the “CREATE” button, Back4app will take a little time to set up your application, including the database.
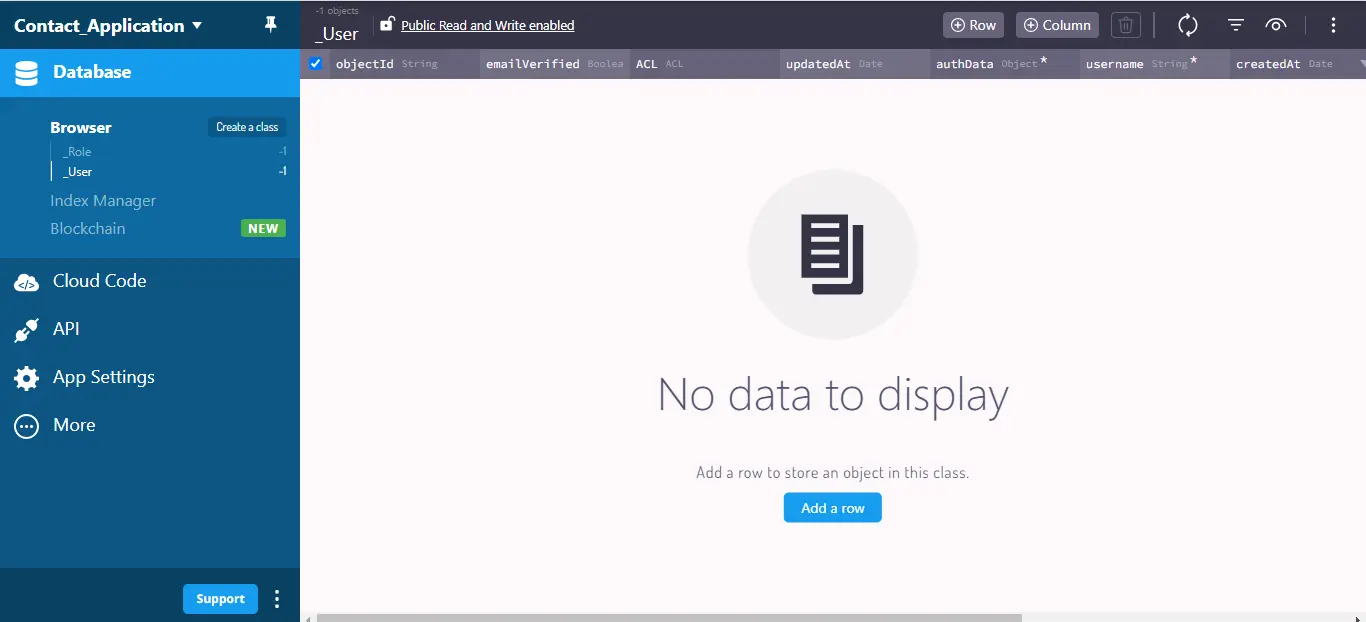
Once everything is ready, you’ll be automatically directed to your application, as shown in the image below.
To structure the PostgreSQL database design you will use for the app, navigate to Back4app’s AI Agent and type in the following prompt.
Create database tables in my Back4app app; do you need me to provide any information?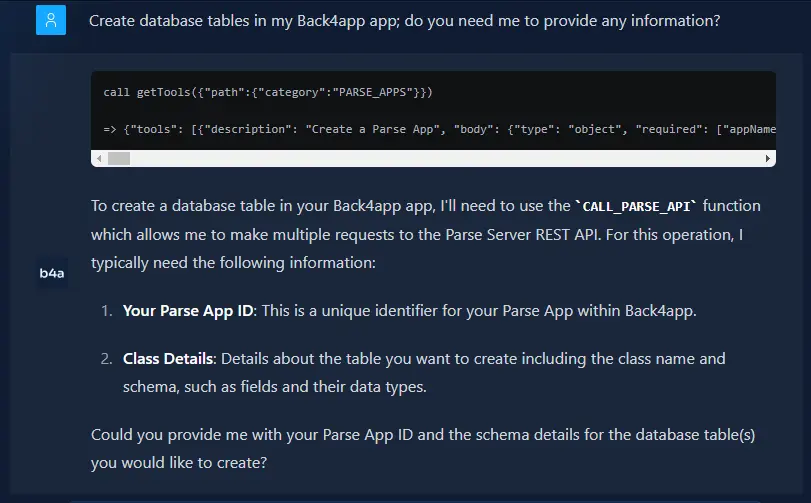
To set up your database, the AI Agent will generate a list of things it needs. This list will include details like the unique keys for your application and how your data is structured (the schema).
After giving the AI Agent your app keys, feed the AI Agent how your database schema should look. It should be similar to the one below for the contact application we are building:
1. Contact Class:
Class Name: Contact

Fields:
objectId (String, Automatically generated by Back4App).
name (String, Required)
email (String, Required)
phone (String, Required)
address (String, Required)
company (String, Optional)
After passing the above information on to the agent, you can confirm by navigating the database to see if the contact class and related fields have been created.
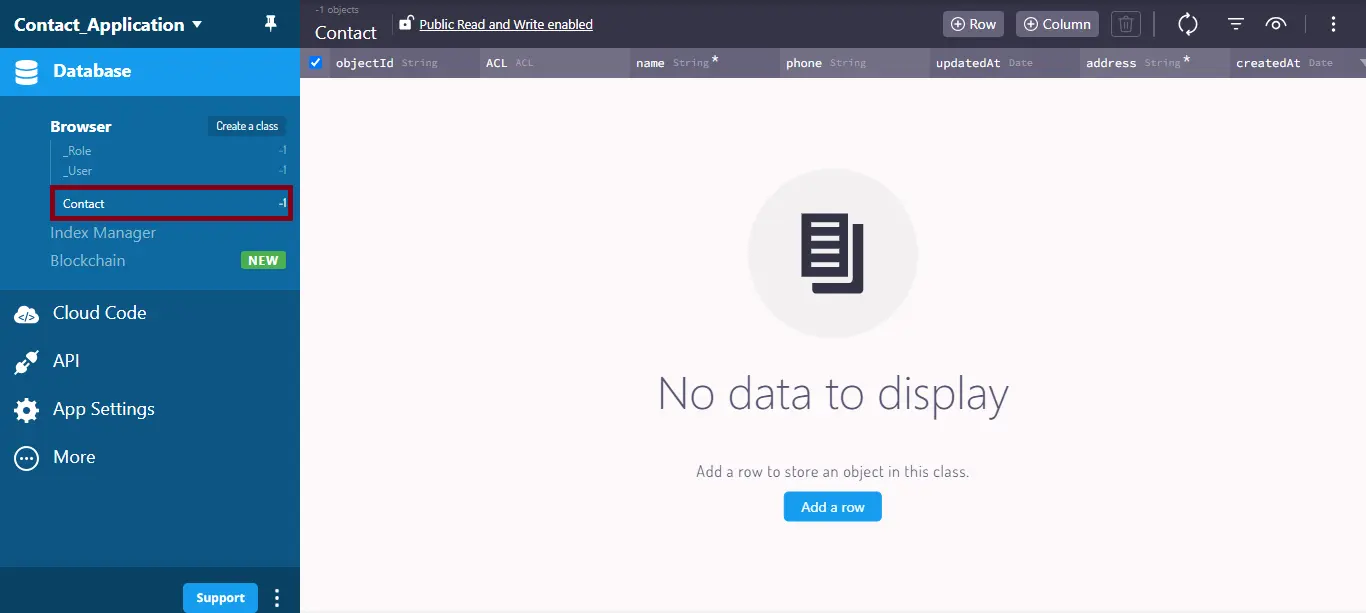
Next, prompt the AI agent to populate your database with test data using the prompt below.
Populate my contact database with some test data with around 10 test contacts with variations in their information.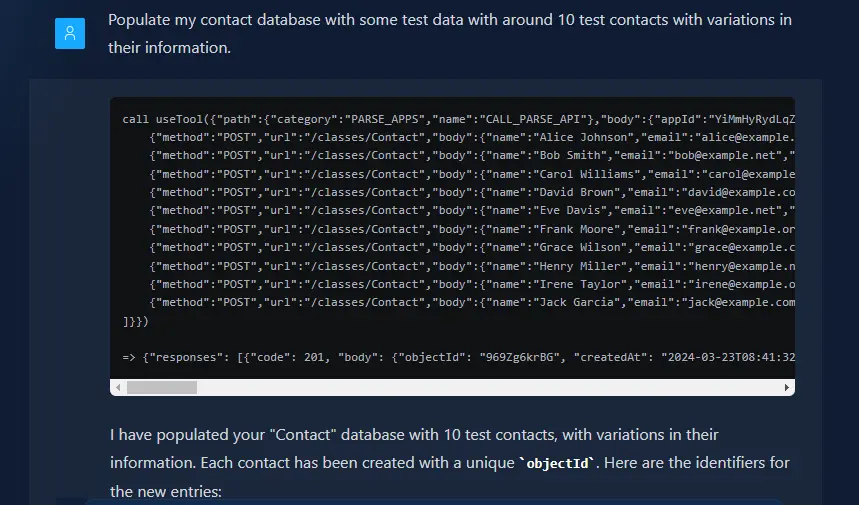
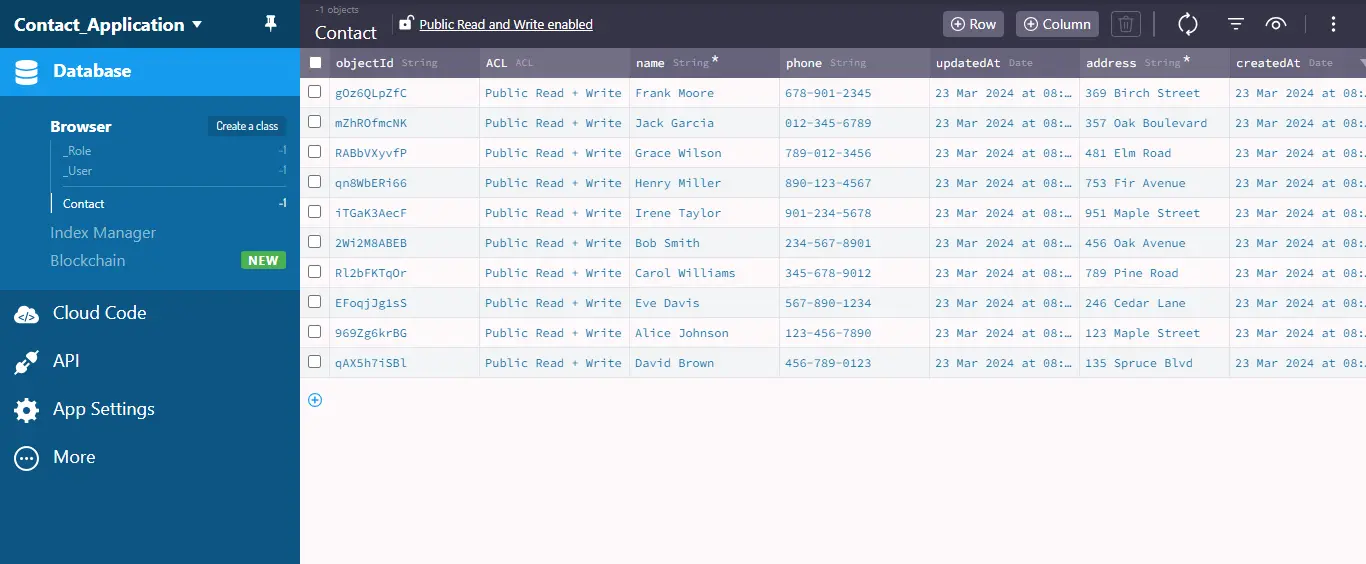
Now, you have test data to work with.
Creating Cloud Code
Back4App’s Cloud Code feature allows you to run custom JavaScript code directly on Back4App’s servers.
This feature helps you reduce the processing load on your mobile app or website. It also helps protect your data and application from security vulnerabilities since the cloud code is run on Back4App’s secure servers.
Now you have a test database populated with contacts, it’s time to implement features for your contact management system.
In this section, you will learn how to create cloud code to implement certain features for your application, such as:
- Viewing All Contacts
- Creating New Contacts
- Deleting Contacts
You will implement these features with the Back4App AI Agent. Let’s get started.
To fetch all books from the library, provide the Back4App AI agent with the following prompt for generating the required cloud code.
Develop a cloud code function named "getContacts" to retrieve all contacts
from the database. The function should return an array containing objects
representing a contact instance with its associated keys and values.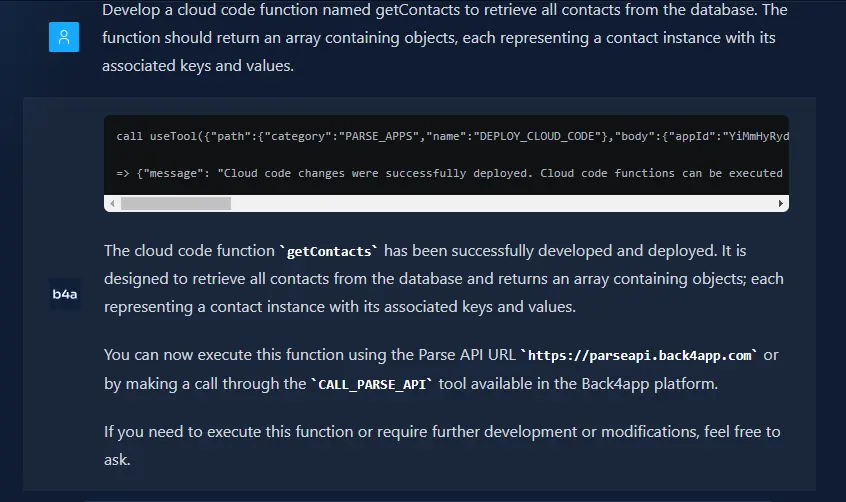
Next, you will also task the Back4App AI Agent with creating new contacts by passing the following prompt:
Generate a cloud code function named “createContact” that takes in the necessary arguments to create a new contact in the Contact class.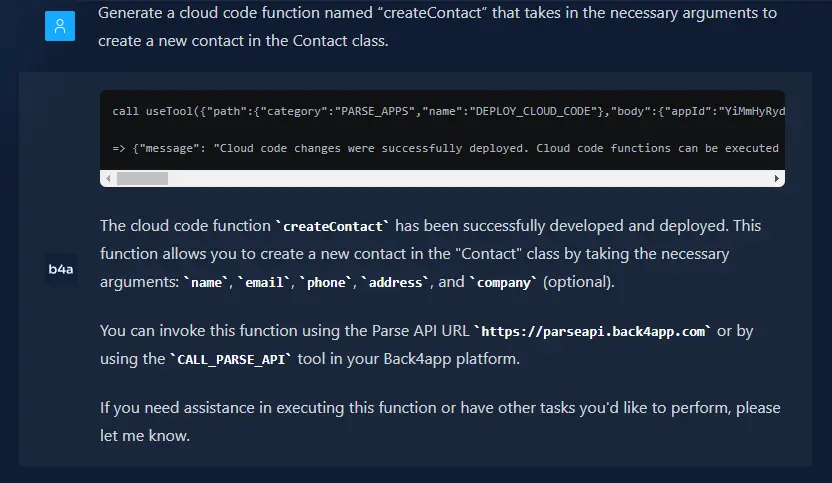
Finally, you will also provide the Back4App AI Agent with the following prompt to create a function for deleting contacts from the database.
Create a cloud code function "deleteContact" that deletes a contact from the Contact class based on the provided "objectId." If the deletion is successful, return a message indicating success. If there's an error, return an error message.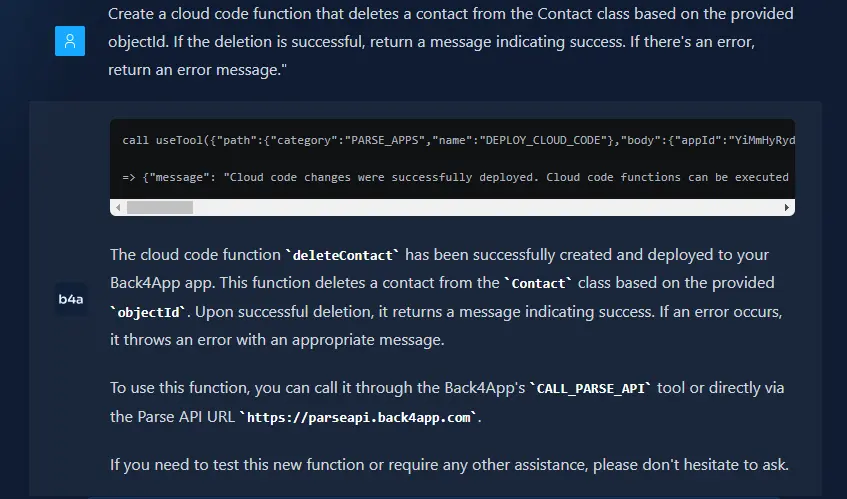
To check if the Agent correctly generated your cloud functions, review the main.js file located at the end of this navigation path.
Back4app dashboard → Cloud Code → Functions & Web Hosting → cloud → main.js.
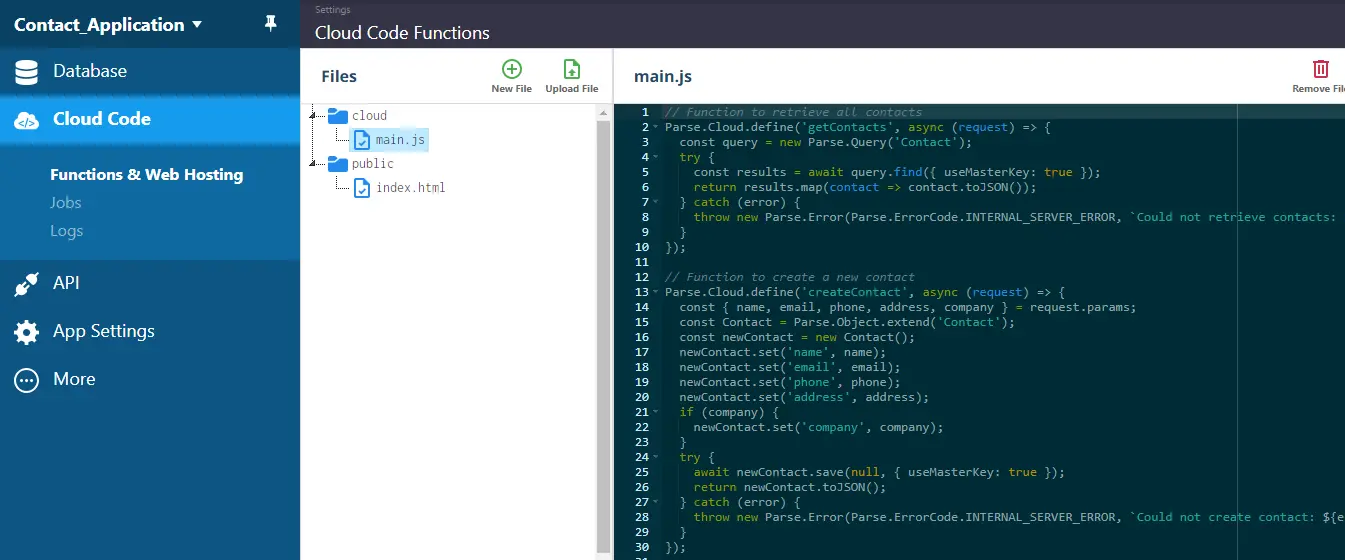
You should see the three functions you defined in the same main.js file to ensure your cloud functions were correctly created.
Building the Front End of Your Application
We will create a front-end to interact with all the cloud code functions we created. We will be creating the front end with Nuxt.js.
To get started with the front end’s development, run the following code serially in the terminal of your preferred directory:
npx nuxi init b4a_nuxt_app
cd b4a_nuxt_app
npm install
These lines of code will initialize a Nuxt application with b4a_nuxt_app as its name, and then all the necessary packages and dependencies will be installed for your application to function correctly.
After running the above commands in your terminal, you install some npm packages to help style your application. Run the following npm commands serially in your terminal to install these packages:
npm install sass
npm install -D tailwindcss postcss autoprefixer
The above lines of code will install SASS, a CSS preprocessor, and TailwindCSS, a utility CSS framework. You will utilize these packages to style your application speedily.
Next, you will configure TailwindCSS in your application by running the following command:
npx tailwindcss init
The code above creates a tailwind.config.js file in the root directory of your Nuxt application.
This tailwind.config.js file is the central configuration point for your Tailwind CSS integration within Nuxt.js. It allows you to customize various aspects of Tailwind CSS to suit your specific project requirements.
Open your application in your preferred text editor (VSCode, Eclipse, Sublime Text). Navigate to the tailwind.config.js file and structure to look like the code block below:
// tailwind.config.js
/** @type {import('tailwindcss').Config} */
export default {
  content: [
    "./components/**/*.{js,vue,ts}",
    "./layouts/**/*.vue",
    "./pages/**/*.vue",
    "./plugins/**/*.{js,ts}",
    "./app.vue",
    "./error.vue",
  ],
  theme: {
    extend: {},
  },
  plugins: [],
};
The content array in the above code block houses the file paths Tailwind CSS will monitor to generate its utility classes.
Next, create an assets folder in your app’s root directory. In the folder, create a main.scss file to add styles to your application. Paste the code below in the main.scss file:
/* main.scss */
@import url("<https://fonts.googleapis.com/css2?family=Roboto:ital,wght@0,100;0,300;0,400;0,500;0,700;0,900;1,100;1,300;1,400;1,500;1,700;1,900&display=swap>");
@import url("<https://fonts.googleapis.com/css2?family=Montserrat:ital,wght@0,100..900;1,100..900&display=swap>");

@tailwind base;
@tailwind components;
@tailwind utilities;

body {
  background-color: #f2f2f2;
}

.montserrat {
  font-family: "Montserrat", sans-serif;
}

.roboto {
  font-family: "Roboto", sans-serif;
}
The code block above imports two different Google Fonts, integrates Tailwind CSS for styling elements, sets a light gray background color for your web application and defines custom classes for efficiently applying the imported fonts.
This main.scss file provides a solid base for building the visual style of your web application.
In your nuxt.config.ts file, which houses configurations for your Nuxt app, paste the following code below:
// nuxt.config.ts
export default defineNuxtConfig({
  devtools: { enabled: true },
  postcss: {
    plugins: {
      tailwindcss: {},
      autoprefixer: {},
    },
  },
  css: ["~/assets/main.scss"],
  ssr: false,
});
In your Nuxt config file, you defined the main.scss file as the only CSS file your Nuxt application will use. You also disabled Server Side Rendering for your Nuxt application.
Since Nuxt handles routing automatically through the file-based routing system and we are done configuring the application, we can head to creating different web pages.
To build the user interface for this application, we’ll create three pages within a pages folder at the project root. These pages will be:
index.vue: This is the home page, introducing the application’s purpose.contactForm.vue: This page allows users to create and save new contacts to the database.contactsList.vue: This page lists all contacts stored in the database.
Now, in your index.vue file, paste the following code:
// index.vue
<template>
  <div class="welcome montserrat flex flex-col gap-8 items-center mt-10">
    <h1 class="text-4xl">Welcome to {{ appName }}!</h1>
    <p class="text-[#888888] font-md text-md w-1/2">
      This application helps you manage your contacts. You can view existing
      contacts, add new ones, and keep your contact information organized.
    </p>
    <NuxtLink to="/contactForm">
      <button
        class="px-4 py-2 hover:bg-[#333333] hover:text-white rounded-lg font-medium"
      >
        Add Contact
      </button>
    </NuxtLink>
  </div>
</template>

<script setup>
const appName = "Contact Book";
</script>

<style scoped>
.welcome {
  text-align: center;
  padding: 2rem;
}
</style>
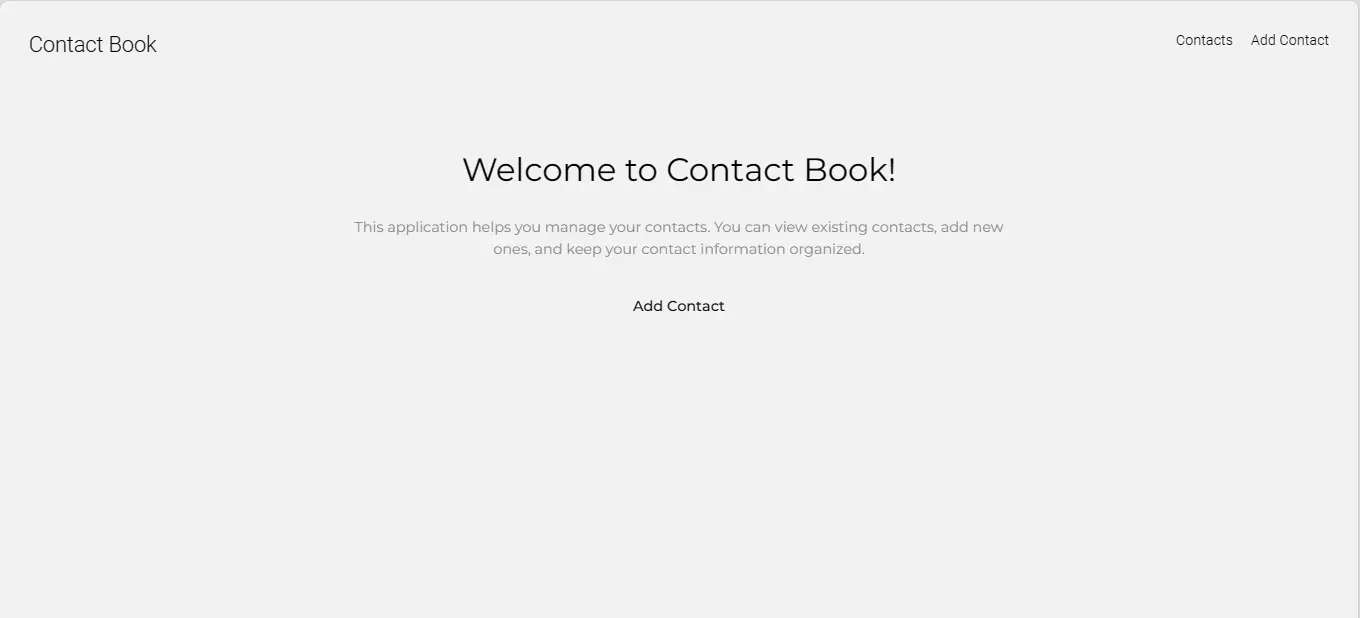
This code block creates the welcome page for your contact management application.
It displays a title, a description of the app’s purpose, and a button to navigate to the contact form page. The code block also defined TailWind classes to style the application.
Also, In your contactForm.vue file, paste the following code:
<template>
  <div>
    <p class="montserrat text-2xl font-medium text-center">
      Fill the form below to create a contact
    </p>
    <form
      @submit.prevent="createContact"
      class="flex flex-col gap-8 items-center mt-10"
    >
      <input
        v-model="contact.name"
        type="text"
        placeholder="Name"
        required
        class="w-1/2 p-3 hover:shadow-lg outline-none montserrat"
      />
      <input
        v-model="contact.email"
        type="email"
        placeholder="Email"
        required
        class="w-1/2 p-3 hover:shadow-lg outline-none montserrat"
      />
      <input
        v-model="contact.phone"
        type="tel"
        placeholder="Phone"
        required
        class="w-1/2 p-3 hover:shadow-lg outline-none montserrat"
      />
      <input
        v-model="contact.address"
        type="text"
        placeholder="Address"
        required
        class="w-1/2 p-3 hover:shadow-lg outline-none montserrat"
      />
      <input
        v-model="contact.company"
        type="text"
        placeholder="Company"
        class="w-1/2 p-3 hover:shadow-lg outline-none montserrat"
      />
      <div>
        <button
          class="px-4 py-2 hover:bg-[#333333] hover:text-white rounded-lg font-medium"
          type="submit"
        >
          Submit
        </button>
      </div>
      <p v-if="message" :class="{ error: isError }">{{ message }}</p>
    </form>
  </div>
</template>

<script setup>
import { ref } from "vue";

const contact = ref({
  name: "",
  email: "",
  phone: "",
  address: "",
  company: "",
});
const message = ref("");
const isError = ref(false);

</script>

<style>
.error {
  color: red;
}
</style>
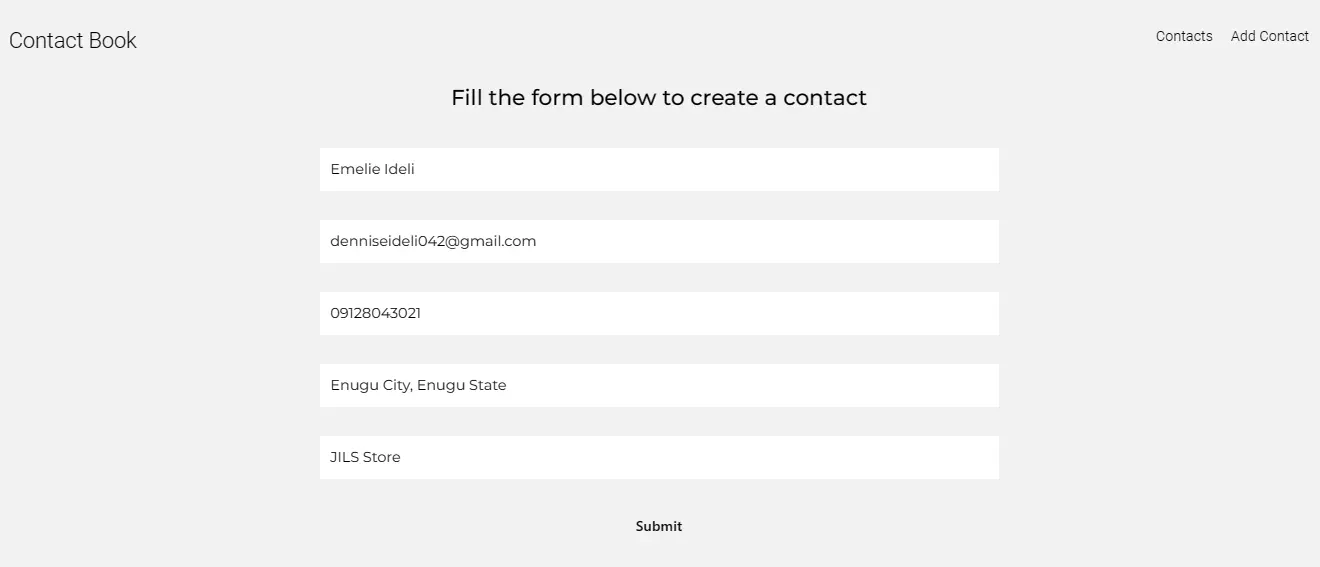
The code block above defines the structure for a form that app users can use to create and store contacts. Here are the key points:
A form element captures contact details (name, email, phone, address, company) using various input fields.
Each input field is linked to a property in the contact object (v-model) and uses appropriate input types for validation.
A submit button will trigger the createContact function, which we will implement in the next section. A message area will also display feedback (success or error) based on the message and isError variables.
The code block uses Vue’s ref to create 3 reactive variables:
contact: Stores the entered contact information.message: Holds feedback messages for the user.isError: Indicates whether the message represents an error.
A simple style rule defines the appearance of error messages using the .error class in the code block.
Also, in your contactsList.vue file, paste the following code:
<template>
  <div class="px-8">
    <p class="montserrat text-3xl font-medium mb-10">Your Contacts</p>
    <div class="grid grid-cols-3 gap-5 items-center justify-center">
      <div
        v-for="contact in contacts"
        :key="contact.objectId"
        class="contact montserrat bg-[#FFFFFF] hover:shadow-lg mb-4 rounded-lg
				        flex flex-col gap-3 p-3 w-11/12 items-center"
      >
        <p class="text-lg">Name: {{ contact.name }}</p>
        <p class="text-lg">Email: {{ contact.email }}</p>
        <p class="text-lg">Phone: {{ contact.phone }}</p>
        <p class="text-lg">Address: {{ contact.address }}</p>
        <p class="text-lg">Company: {{ contact.company }}</p>
        <div class="mt-5">
          <button
            @click="deleteContact(contact.objectId)"
            class="px-4 py-2 hover:bg-[#333333] hover:text-white rounded-lg font-medium"
          >
            Delete
          </button>
        </div>
      </div>
    </div>
  </div>
</template>

<script setup>
import { ref, onMounted } from "vue";

const contacts = ref([]);
</script>
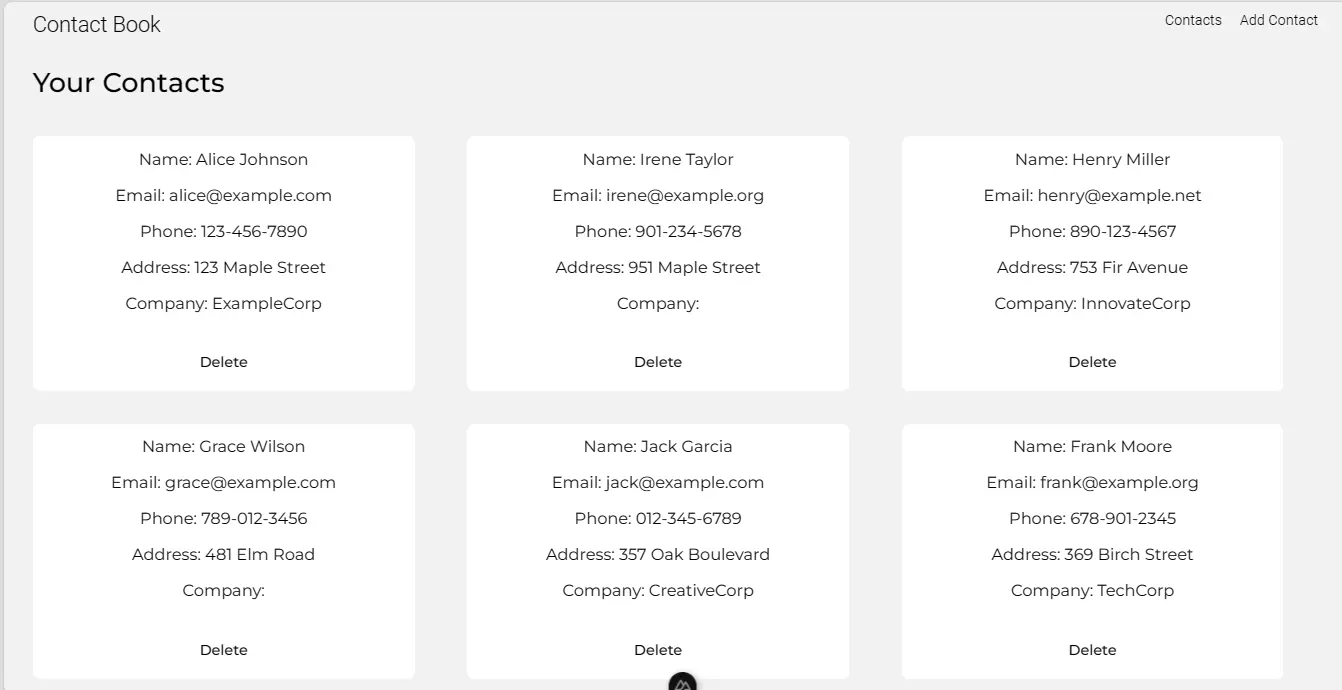
The code block above displays a list of contacts in your application. Here are the key points:
The code block creates a section titled “Your Contacts” and uses a responsive grid layout (3 columns) for displaying contacts.
It loops through a contacts array using v-for and presents each contact’s information (name, email, phone, address, company).
Each contact entry has a “Delete” button that will trigger the deleteContact function, which we will implement later.
The code block utilizes a reactive array (contacts) to store the contact list. This ensures the UI updates dynamically as the data changes. The contacts array will store data you fetched from the Back4app database
Paste the code below in your app.vue file in the root directory to include routes to all these pages.
<template>
  <div>
    <NuxtLayout>
      <header class="flex justify-between p-8 roboto font-light">
        <NuxtLink to="/">
          <p class="text-2xl">Contact Book</p>
        </NuxtLink>

        <nav class="flex gap-5 text-md">
          <NuxtLink to="/contactsList" class="hover:text-[#888888]"
            >Contacts</NuxtLink
          >
          <NuxtLink to="/contactForm" class="hover:text-[#888888]"
            >Add Contact</NuxtLink
          >
        </nav>
      </header>
      <main>
        <NuxtPage />
      </main>
    </NuxtLayout>
  </div>
</template>
The code block defines the overall layout of the Nuxt application with the <NuxtLayout> component.
The code block features a horizontal navigation menu with links to the contactsList.vue and the contactForm.vue page.
The code block also includes the <NuxtPage /> component, a key component in Nuxt.js that dynamically renders the current page’s content.
This ensures that your app displays appropriate content based on the user’s navigation within the application.
Connecting the Front End and Backend Bits of Your Application
To connect your Nuxt contact application to your Back4app database and backend instance, you will need to install the Parse SDK.
The Parse SDK bridges your front-end application (user interface) and your Back4App backend, allowing you to interact with Back4App databases and cloud functions.
To install the Parse SDK, run the following command in the terminal of your root directory:
npm install parseAfter installation, you need to initialize Parse by getting the following information:
- Application ID
- JavaScript Key
- Back4app Server URL
You can get this information by navigating to Security & Keys on your Back4app application’s dashboard. Keep your App ID and JavaScript Key securely in your application.
Now, modify your app.vue file to initialize Parse in your application:
<template>
<!--   Previous Content -->
</template>

<script setup>
import Parse from 'parse';

// Initialize Parse SDK
Parse.initialize('YOUR_APP_ID', 'YOUR_JAVASCRIPT_KEY');
Parse.serverURL = '<https://parseapi.back4app.com>';
</script>
Also, modify your contactForm.vue and contactsList.vue files to connect your cloud code functions to the front end of your application.
In your contactForm.vue page, paste the following code:
<template>
<!--   Previous Content -->
</template>

<script setup>
import { ref } from 'vue';
import Parse from 'parse';

const contact = ref({
  name: '',
  email: '',
  phone: '',
  address: '',
  company: '',
});
const message = ref('');
const isError = ref(false);

const createContact = async () => {
  try {
    await Parse.Cloud.run('createContact', { ...contact.value });
    message.value = 'Contact created successfully!';
    isError.value = false;

    contact.value = { name: '', email: '', phone: '', address: '', company: '' };
  } catch (error) {
    message.value = `Error: ${error.message}`;
    isError.value = true;
  }
};
</script>

<style>
.error {
  color: red;
}
</style>
The code block above connects your cloud code function for the logic behind creating a new contact to your Nuxt application.
It interacts with the backend to store the contact information and provides feedback to the user based on the success or failure of the operation.
The code block attempts (with a try-catch block) to execute a function named createContact on the Back4App server using the Parse SDK (await Parse.Cloud.run('createContact', {...contact.value})). This sends the contact information (contact.value) to the Back4App server for storage.
Upon successful storage, a message “Contact created successfully!” appears, and the form clears, resetting the contact object and allow for new entries.
However, if an error arises, an informative error message displays, including details from the server with template literals (${error.message}).
Paste the following code in your contactsList.vue file:
<template>
  <!--   Previous Content -->
</template>

<script setup>
import { ref, onMounted } from "vue";
import Parse from "parse";

const contacts = ref([]);

const fetchContacts = async () => {
  try {
    contacts.value = await Parse.Cloud.run("getContacts");
  } catch (error) {
    console.error("Failed to fetch contacts", error);
  }
};

const deleteContact = async (objectId) => {
  try {
    await Parse.Cloud.run("deleteContact", { objectId });
    contacts.value = contacts.value.filter(
      (contact) => contact.objectId !== objectId,
    );
  } catch (error) {
    console.error("Failed to delete contact", error);
  }
};

onMounted(fetchContacts);
</script>
The above code manages fetching and deleting contacts for your application. It interacts with the Back4App Backend to handle data storage and retrieval.
The code block defines two essential functions:
fetchContacts: This asynchronous function retrieves the list of contacts from the backend. It usesParse.Cloud.run('getContacts'), calling the cloud code function “getContacts” on your Back4App server. The retrieved contacts are stored in a reactive array namedcontacts.
deleteContact: This asynchronous function handles deleting a specific contact. It takes anobjectIdas an argument, a unique identifier for the contact within the backend database. The function usesParse.Cloud.run('deleteContact', { objectId })to call the cloud code function named “deleteContact,” passing theobjectIdto be deleted. When successful, the code filters the localcontactsarray to remove the deleted contacts.
Now that you are done connecting the application’s front and back end, you can preview the application by running the npm command below.
npm run devYou will notice the Nuxt Nitro server loading. After loading, the application should be available at the URL http://localhost:3000/. You should see a screen similar to the image below when navigating to the URL.
Navigating to the Contacts Page, you should see an array of contacts. These contacts are the dummy data the Back4app AI Agent created for you during the Back4app backend creation.
Clicking on the Add Contact link, you should see a form to input details for the new contact. For example:
You should notice the fields clearly by clicking on the “Submit” button. Navigating to the Contacts page, you will see the newly created contact.
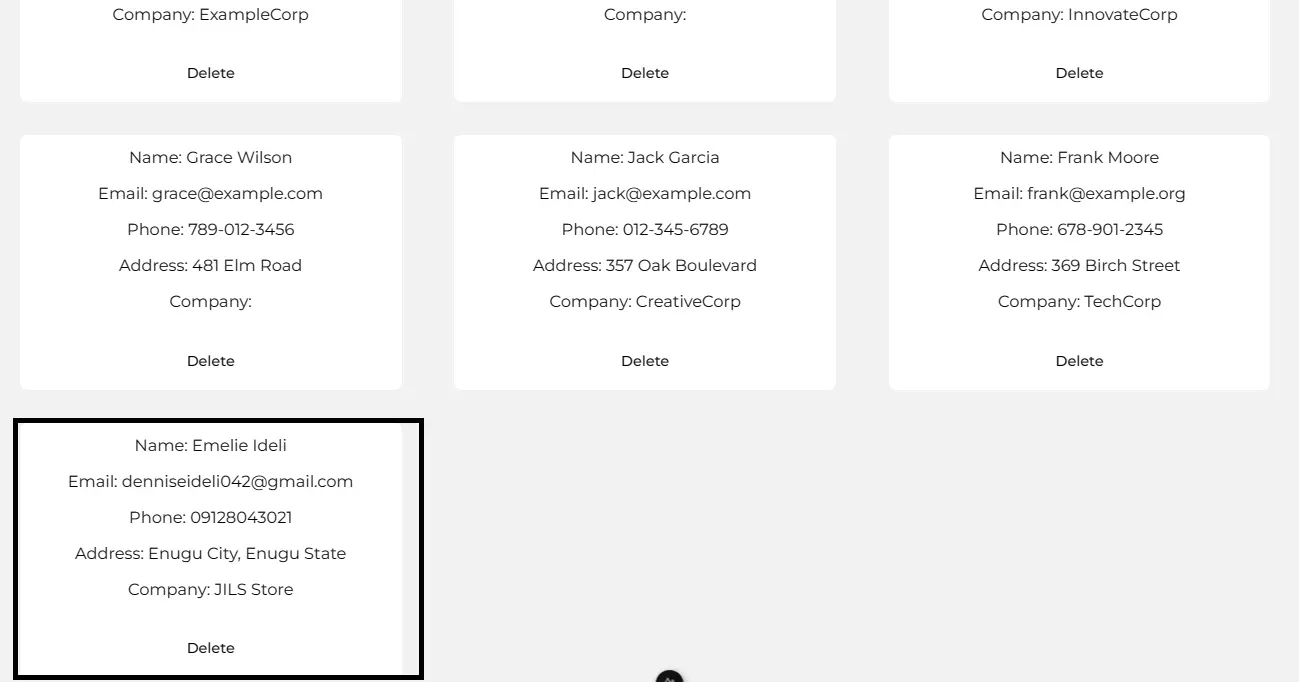
Deploying the Fully Built Web Application
Below are the steps to deploy a Nuxt app. Now that you are done building and testing the application, you can then deploy the Nuxt application using Back4app containers to make your app public.
To hasten the deployment process, prompt the Back4app AI Agent with the following instructions:
Give me simplified steps to deploy my Nuxt application with Back4app containers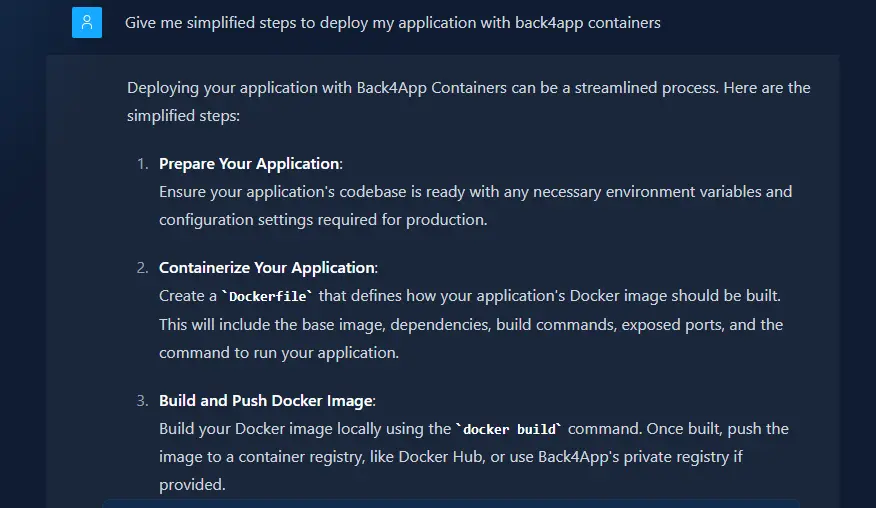
You should see similar steps to the ones outlined below.
Containerize Your Application (Create a Dockerfile)
Build and Push Docker Image
Configure Deployment
Deploy Your Container
To dockerize your application, create a Dockerfile and a .dockerignore file in the root directory and paste the following scripts below.
In the Dockerfile:
FROM node:18
WORKDIR /app
COPY package*.json ./
RUN npm install
COPY . .
EXPOSE 3000
RUN npm run build
CMD [ "npm", "run", "start" ]
Also, in the .dockerignore file:
node_modules
.nuxt
A Dockerfile contains instructions for building a Docker image. The Dockerfile includes installation steps for necessary app dependencies.
The .dockerignore file is a simple text file that lists patterns to instruct Docker about what files and folders to exclude when building the image.
Now, to build your application’s docker image, run the following docker command in your terminal:
docker build -t b4a_contacts_app .
Ensure that you push your application to your GitHub account before attempting to deploy the application on Back4app. Once you push the application, integrate your GitHub account with Back4app.
You can do this with the Back4app Github app. After integrating your GitHub with Back4app, you can now deploy your application.
Navigate to the Containers page from your Back4app dashboard.
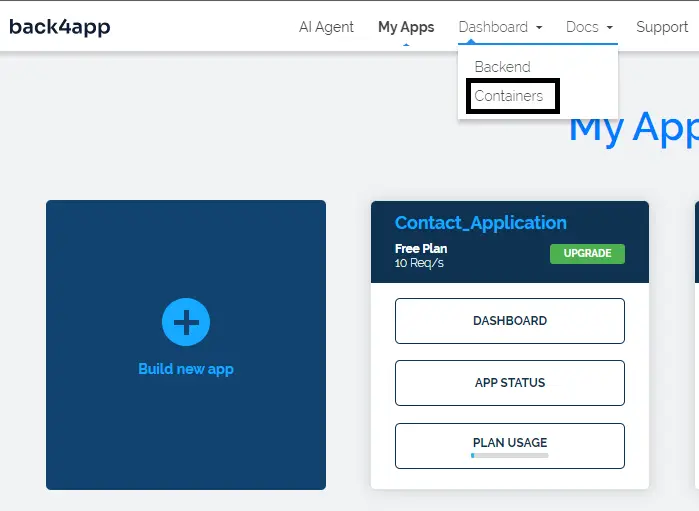
Then, you click the “Create New App” button on the screen. You will then select the repository you want to deploy, give it the name b4a_contacts_app, and create the application. It should take some time to finish deploying.
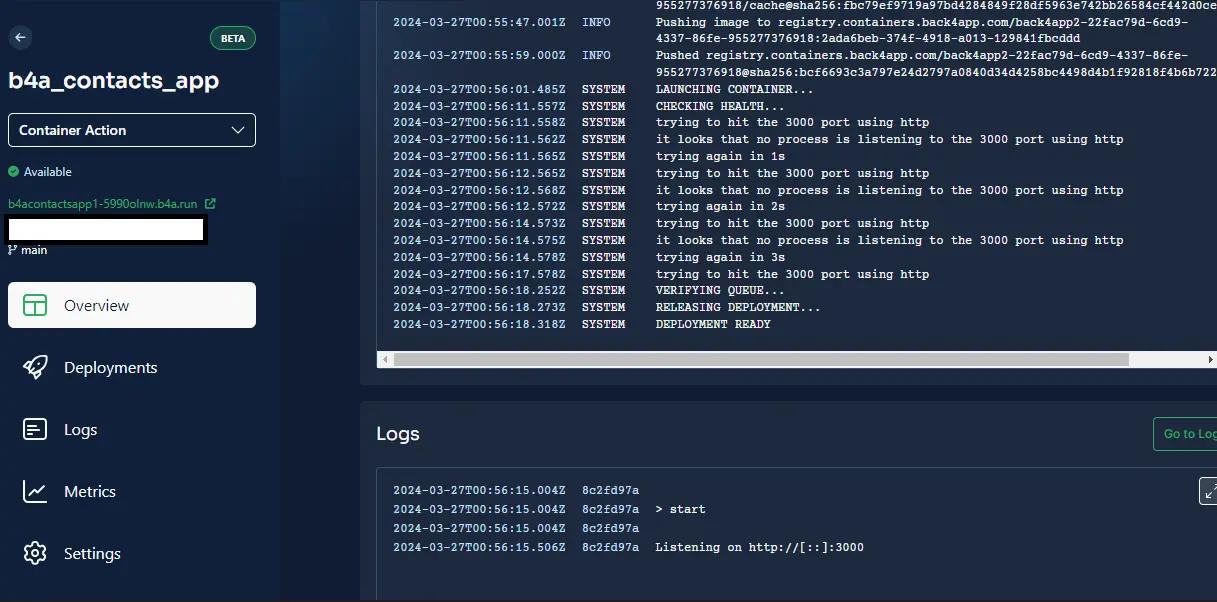
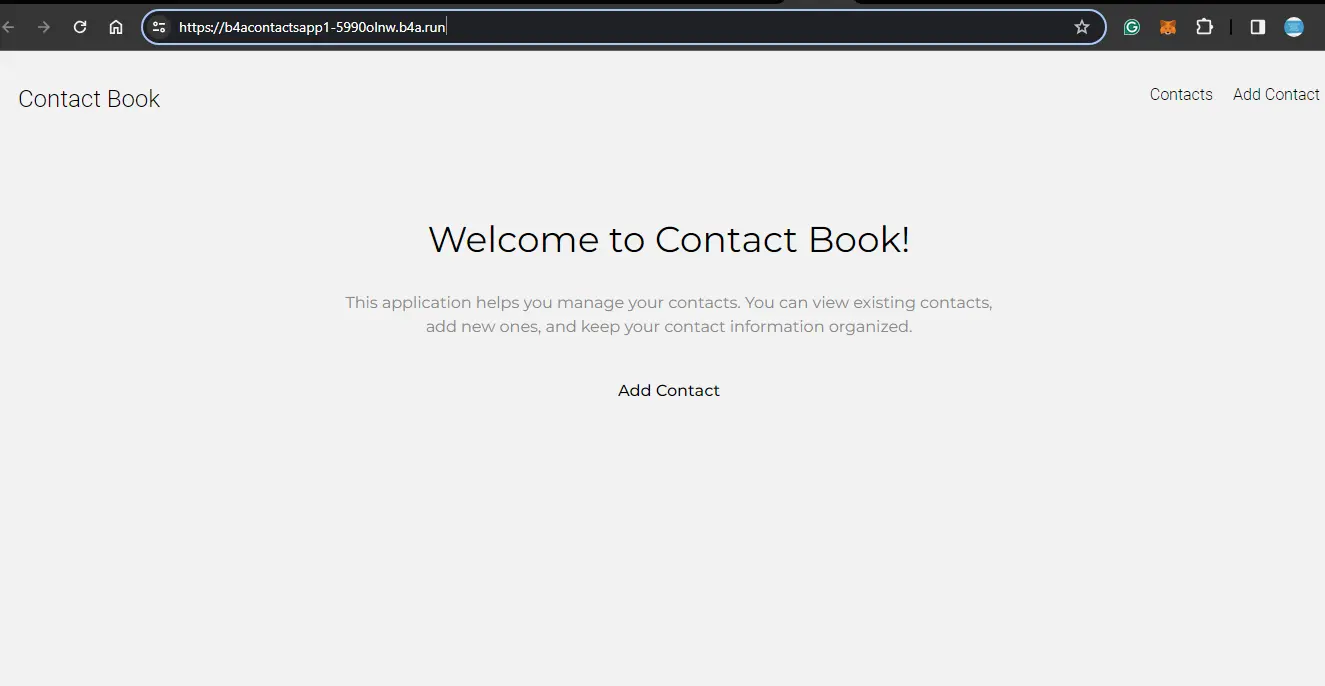
After deployment, your live app should be available at this URL, https://b4acontactsapp1-5990olnw.b4a.run/.
Conclusion
In this article, you learned how to build and deploy a Nuxt.js application with a PostgreSQL database, all within the Back4app ecosystem.
You also learned the advantages and disadvantages of building web applications with Nuxt.js.
From building the cloud-code functions and designing the database with Back4App’s AI Agent to understanding the Back4App backend’s low-code, user-friendly interface.
You also deployed the Nuxt application with Back4App Containers and became familiar with the array of tools Back4App provides to streamline app development.
With this combination of tools, you’re well on your way to quickly building and deploying web applications.
You can learn more about how the AI Agent works to get familiar with streamlining your app development.


