How to Deploy a Node.js Web Application?
Node.js is a JavaScript runtime environment that allows you to run JavaScript code outside the browser.
Node.js is built on the Chrome V8 JavaScript engine and features an event-driven, non-blocking I/O model that makes it very efficient for building server-side applications.
In this article, you will explore the advantages and limitations of Node.js for server-side application development and deployment options for Node.js applications.
Additionally, you’ll build, dockerize, and deploy a Node.js application to Back4app Containers for free.
Contents
Advantages of Node.js for Web App Development
Since Node.js was released in 2009, it has been a prime choice for building server-side web applications. Here are some of the reasons.
Efficiency and Scalability
As mentioned earlier, Node.js runs on Chrome’s V8 engine, which enables it to run JavaScript code. This engine uses Just-in-time (JIT) compilation to convert native JavaScript code to machine code.
On runtime, the Turbofan and Crankshaft components of V8 analyze the machine code and re-compile it to provide the best possible performance.
Additionally, due to Node.js’s event-driven model, it can execute code in response to events, such as user interaction, without blocking the application’s main thread, making it ideal for applications with large traffic.
Node.js’s modular architecture and built-in support for clustering make applications developed with it easy to scale. Its modular architecture allows you to break your application into component parts that can be scaled independently.
While the cluster module allows you to spawn multiple instances of your application across multiple cores or servers. This enables horizontal scaling, where the application can be scaled by adding more servers to the cluster.
Shallow Learning Curve
Node.js is based on JavaScript, a widely used programming language for web development. The use of JavaScript in Node.js has made server-side development with Node.js more accessible to developers who are already familiar with JavaScript.
This reduces the complexity of web development and streamlines the development process.
Large Ecosystem
Node.js has a large and active community of developers who have created a vast ecosystem of modules and packages.
The Node.js package manager, npm, hosts over one million packages that you can use to add functionality to their applications.
These packages can range from small utility libraries like lodash to large frameworks Nest.js that can be used to build complex web applications.
The availability of a wide range of modules and packages can significantly reduce the time and effort required to develop web applications.
You can leverage these packages to add features such as authentication, database integration, and server-side rendering to your applications.
Limitations of Node.js for Web App Development
When it comes to web application development, Node.js offers many benefits, such as efficient performance, scalability, and a vast ecosystem of modules and packages. However, like any technology, Node.js has some limitations. Some of the limitations include the following.
Large Memory Consumption
Node.js uses a non-blocking I/O model, which means that it can handle many requests concurrently without creating new threads. However, each request still requires memory to be allocated for its processing.
This means that Node.js applications can consume a lot of memory, especially if they handle many concurrent requests. This can be a problem for applications running on systems with limited memory.
Asynchronous Programming Model
While Node.js’s asynchronous programming model is a significant advantage, it can also be a source of complexity for developers.
Asynchronous programming requires a different way of thinking about program flow. This shift can be challenging for developers who are used to synchronous programming.
Additionally, asynchronous programming can lead to callback hell, a situation where the code becomes difficult to read and maintain due to the nested callbacks.
Single-threaded Event Loop
Node.js is designed to handle I/O-intensive tasks, such as network communication, file I/O, and database operations.
However, it may not be the best choice for CPU-intensive tasks like complex calculations, data processing, or machine learning.
This is because Node.js uses a single-threaded event loop model, which means that it can only execute one task at a time.
If a task takes a long time to complete, it can block the event loop and make the application unresponsive.
Deploying a Node.js Web Application
There are multiple ways to deploy a Node.js application. Let’s explore some of them.
Cloud Hosting Services
Cloud hosting services let you deploy your Node.js application on servers managed by companies like Amazon Web Services (AWS), Google Cloud Platform (GCP), or Microsoft Azure.
They offer benefits like scalability, global availability, easy deployment, and pay-as-you-go pricing. Additionally, they integrate with other cloud services like databases and load balancing to help you build better applications.
You simply deploy your Node.js application to the cloud provider’s servers to use cloud hosting services. Then, you can access your application through a web browser or other client application.
Some examples of cloud hosting services for Node.js include:
- AWS Elastic Beanstalk
- GCP App Engine
- Microsoft Azure App Service
These platforms make it easy to deploy, scale, and manage your Node.js applications without worrying about the underlying infrastructure.
Plus, they offer features like automatic scaling, load balancing, and built-in monitoring to help you keep your application running smoothly.
Virtual Private Servers (VPS)
Virtual Private Servers (VPS) are virtual machines that run on physical servers, allowing you to install and run your Node.js application as if it were running on a dedicated server.
Virtual private servers give you greater control and customization options than shared hosting while also providing a more cost-effective alternative to dedicated servers.
To use VPS hosting for your Node.js application, select a hosting provider offering pre-configured Node.js images or install Node.js and other dependencies yourself.
Some examples of VPS hosting providers for Node.js include:
- DigitalOcean
- Linode
- Vultr
Containerization
Containerization is a technique for deploying and running applications in a containerized environment that isolates them from the underlying infrastructure.
Containers provide a lightweight and flexible alternative to traditional virtual machines, making them ideal for deploying Node.js applications.
They are portable, allowing you to build and test applications on their local machines and then deploy them to any platform that supports containerization.
Containers can also be easily scaled up or down depending on workload, providing increased scalability. They provide consistency across different platforms, making managing and maintaining applications easier.
Some examples of platforms that offer Containerization as a Service (CaaS) include:
- Back4app Containers
- AWS ECS
- Azure ACI
- Google GKE
Deploying a Node.js App on Back4app using Back4app Containers
Back4app is a cloud platform that enables you to create, manage and deploy web applications using an intuitive UI or their fully-featured CLI tool. Back4app offers a range of services, one of which is containerization.
Back4app containers eliminate the gap between development and production by automating repetitive tasks and managing your server-side infrastructure, ensuring you don’t have to worry about DevOps.
In this article, you’ll build and deploy a simple Node.js application using Back4app containers. The Node.js application you’ll be building is a simple bookstore API with support for CRUD (Create, Read, Update, Delete) functionality.
Setting up Your Development Environment
Create a new project directory and initialize npm in the project directory by running the command below:
mkdir bookstoreapp && cd bookstoreapp && npm init -y
Next, install the required dependencies for the project by running the command below:
npm install express dotenv mysql knex
The dependencies you installed above are:
- Express.js: Express is a Node.js framework that simplifies the Node.js application development process.
- dotenv: dotenv is an npm package you can use to manage your environmental variables.
- MySQL: The MySQL dependency is the Node.js driver for MySQL, which you’ll use as your database for this application.
- Knex: Knex is a query builder for JavaScript. You will need this dependency to interact with your database without writing raw SQL queries.
Next, create a routes.js and an index.js file in your project’s root directory.
Then, add the code block below to your index.js file:
//index.js
require("dotenv").config();
const express = require("express");
const app = express();
const port = 3000;
const router = require("./routes.js");

app.use(express.json());
app.use(express.urlencoded({ extended: true }));
app.use("/", router);

app.listen(port, () => {
  console.log(`App listening at ${port}`);
});
The code block above creates an Express server and listens for incoming HTTP requests on port 3000. It uses middleware functions to parse incoming data and associates a router with the root path to handle incoming requests.
Finally, it starts the server and logs a message to the console indicating that the server is running and listening on the specified port.
Next, add a start script to your package.json file. Like so:
"start": "node index.js",
Connecting to Your Database
Knex requires a knexfile containing configuration options for connecting to a database.
Run the command below to create a knexfile:
knex init
To configure Knex to use MySQL, replace the contents of your knexfile.js file with the code block below:
// Update with your config settings.

require("dotenv").config()

/**
 * @type { Object.<string, import("knex").Knex.Config> }
 */
module.exports = {
  development: {
    client: "mysql",
    connection: {
      host: process.env.DEV_HOST,
      user: process.env.DEV_USER,
      password: process.env.DEV_PASSWORD,
      database: process.env.DEV_NAME,
    },
    migrations: {
      directory: "./db/migrations",
    }
  },
  production: {
    client: "mysql",
    connection: {
      host: process.env.DB_HOST,
      user: process.env.DB_USER,
      password: process.env.DB_PASSWORD,
      database: process.env.DB_NAME,
    },
    migrations: {
      directory: "./db/migrations",
    }
  },
};
Next, create a db folder in your project’s root directory and create a db.js file.
Add the code block below to your db.js file:
//db.js

const knex = require("knex");
const knexFile = require("../knexfile.js");

const environment = process.env.NODE_ENV || "development";

module.exports = knex(knexFile[environment]);
The code block above sets the environment variable to either the NODE_ENV environment variable or development if NODE_ENV is not set. Thus, letting you specify different configurations for different environments, such as development or production.
Creating Migration Files
Run the command below to create migration files for your database:
knex migrate:make bookstore
The command above creates a migration file in your knexfile.js specified file path (”./db/migrations”).
Next, open your migration file and replace the code in it with the code block below:
/**
 * @param { import("knex").Knex } knex
 * @returns { Promise<void> }
 */
exports.up = function (knex) {
  return knex.schema.createTable("books", (table) => {
    table.increments("id").primary();
    table.string("title");
    table.string("author");
    table.string("genre");
    table.timestamps(true, true);
  });
};

/**
 * @param { import("knex").Knex } knex
 * @returns { Promise<void> }
 */
exports.down = function (knex) {
  return knex.schema.dropTableIfExists("books");
};
Then, run the command below to execute the migration file:
knex migrate:latest
Implementing Routing
Finally, add the code block below to your routes.js file:
const express = require("express");
const router = express.Router();
const db = require("./db/db.js");

// GET /books
router.get("/books", async (req, res) => {
  try {
    const books = await db("books");
    res.json(books);
  } catch (err) {
    console.error(err);
    res.status(500).send("Internal Server Error");
  }
});

//POST /books/new
router.post("/books/new", async (req, res) => {
  try {
    const { title, author, genre } = req.body;
    const book = await db("books").insert({
      title,
      author,
      genre,
    });
    res.status(201).json(book);
  } catch (err) {
    console.error(err);
    res.status(500).send("Internal Server Error");
  }
});

//PUT /books/:id
router.put("/books/:id", async (req, res) => {
  const { id } = req.params;

  try {
    const { title, author, genre } = req.body;
    const book = await db("books").where({ id }).update(
      {
        title,
        author,
        genre,
      },
      ["id", "title", "author", "genre"]
    );

    if (book.length !== 0) {
      res.status(201).send(book);
    } else {
      res.status(404).json({ error: "Book not found" });
    }
  } catch (err) {
    console.error(err);
    res.status(500).send("Internal Server Error");
  }
});

//DELETE /books/:id
router.delete("/books/:id", async (req, res) => {
  const { id } = req.params;

  try {
    const book = await db("books").where({ id }).del();

    if (book !== 0) {
      res.status(200).json({ message: "Book deleted" });
    } else {
      res.status(404).json({ error: "Book not found" });
    }
  } catch (err) {
    console.error(err);
    res.status(500).send("Internal Server Error");
  }
});

module.exports = router;
The code block above defines several routes for handling HTTP requests, including getting all books, creating a new book, updating an existing book, and deleting a book.
Creating a Dockerfile
A Dockerfile is a file that contains a set of instructions, written in a specific format, for how to build a Docker image. A Docker image is a snapshot of a container that includes everything needed to run an application, such as the application code, runtime, libraries, and system tools.
To run a Node.js application on Back4app Containers, you must create a Dockerfile containing instructions for building the Docker image.
Run the command below to create a Dockerfile:
touch Dockerfile
Next, you’ll need to choose a base image for your Node.js application. A base image in Docker is the starting point for building a new Docker image. It is the foundation upon which your Docker image is built.
Add the code block below to your Dockerfile to specify your base image:
# Specify base image
FROM node:18-alpine
This line specifies the base image on which this Docker image will be built. In this case, the Node.js 18 version is running on an Alpine Linux distribution.
Next, you need to specify your working directory. All subsequent commands in the Dockerfile will be executed relative to this directory.
Add the code block below to your Dockerfile to specify your working directory:
# Specify working directory
WORKDIR /app
Then, you need to copy your package.json and package-lock.json files from the current directory (i.e., the directory containing the Dockerfile) to the working directory (/app).
Add the code block below to your Dockerfile to copy the files:
# Copy package.json and package-lock.json
COPY package*.json ./
Next, you need to run the npm install command in the working directory to install the Node.js dependencies listed in package.json and package-lock.json.
Add the code below to your Dockerfile to install the dependencies:
# Install dependencies
RUN npm install
The command above will install all the dependencies listed in your package.json ****and package-lock.json files and store them in the node_modules folder in the specified working directory.
Next, you need to copy your application’s source code into your working directory.
Add the code block below to your Dockerfile to copy the source code:
# Copy source code
COPY . .
Next, you need to expose a port to the host machine. Exposing a port allows the Docker container to receive incoming network connections on the exposed port when you run it.
Add the code block below to your Dockerfile to expose port 3000 to the host machine:
# Expose port 3000
EXPOSE 3000
Finally, you need to specify the command that should run when the Docker container starts. Typically, Node.js applications are started using the npm start command.
Add the code block below to your Dockerfile to specify the command:
# Run the app
CMD ["npm", "start"]
Your finished Dockerfile should look like the code block below:
# Specify base image
FROM node:18-alpine

# Specify working directory
WORKDIR /app

# Copy package.json and package-lock.json
COPY package*.json ./

# Install dependencies
RUN npm install

# Copy source code
COPY . .

# Expose port 3000
EXPOSE 3000

# Run the app
CMD ["npm", "start"]
After creating your Dockerfile, push your code to GitHub.
Creating a new Back4app Application
The first step to deploying a Node.js application on Back4app is creating an account on Back4app (if you don’t have one). You can create one by following the steps below.
- Navigate to the Back4app website.
- Next, click the Sign up button on the top-right corner of the landing page.
- Finally, fill out the sign-up form and submit it.
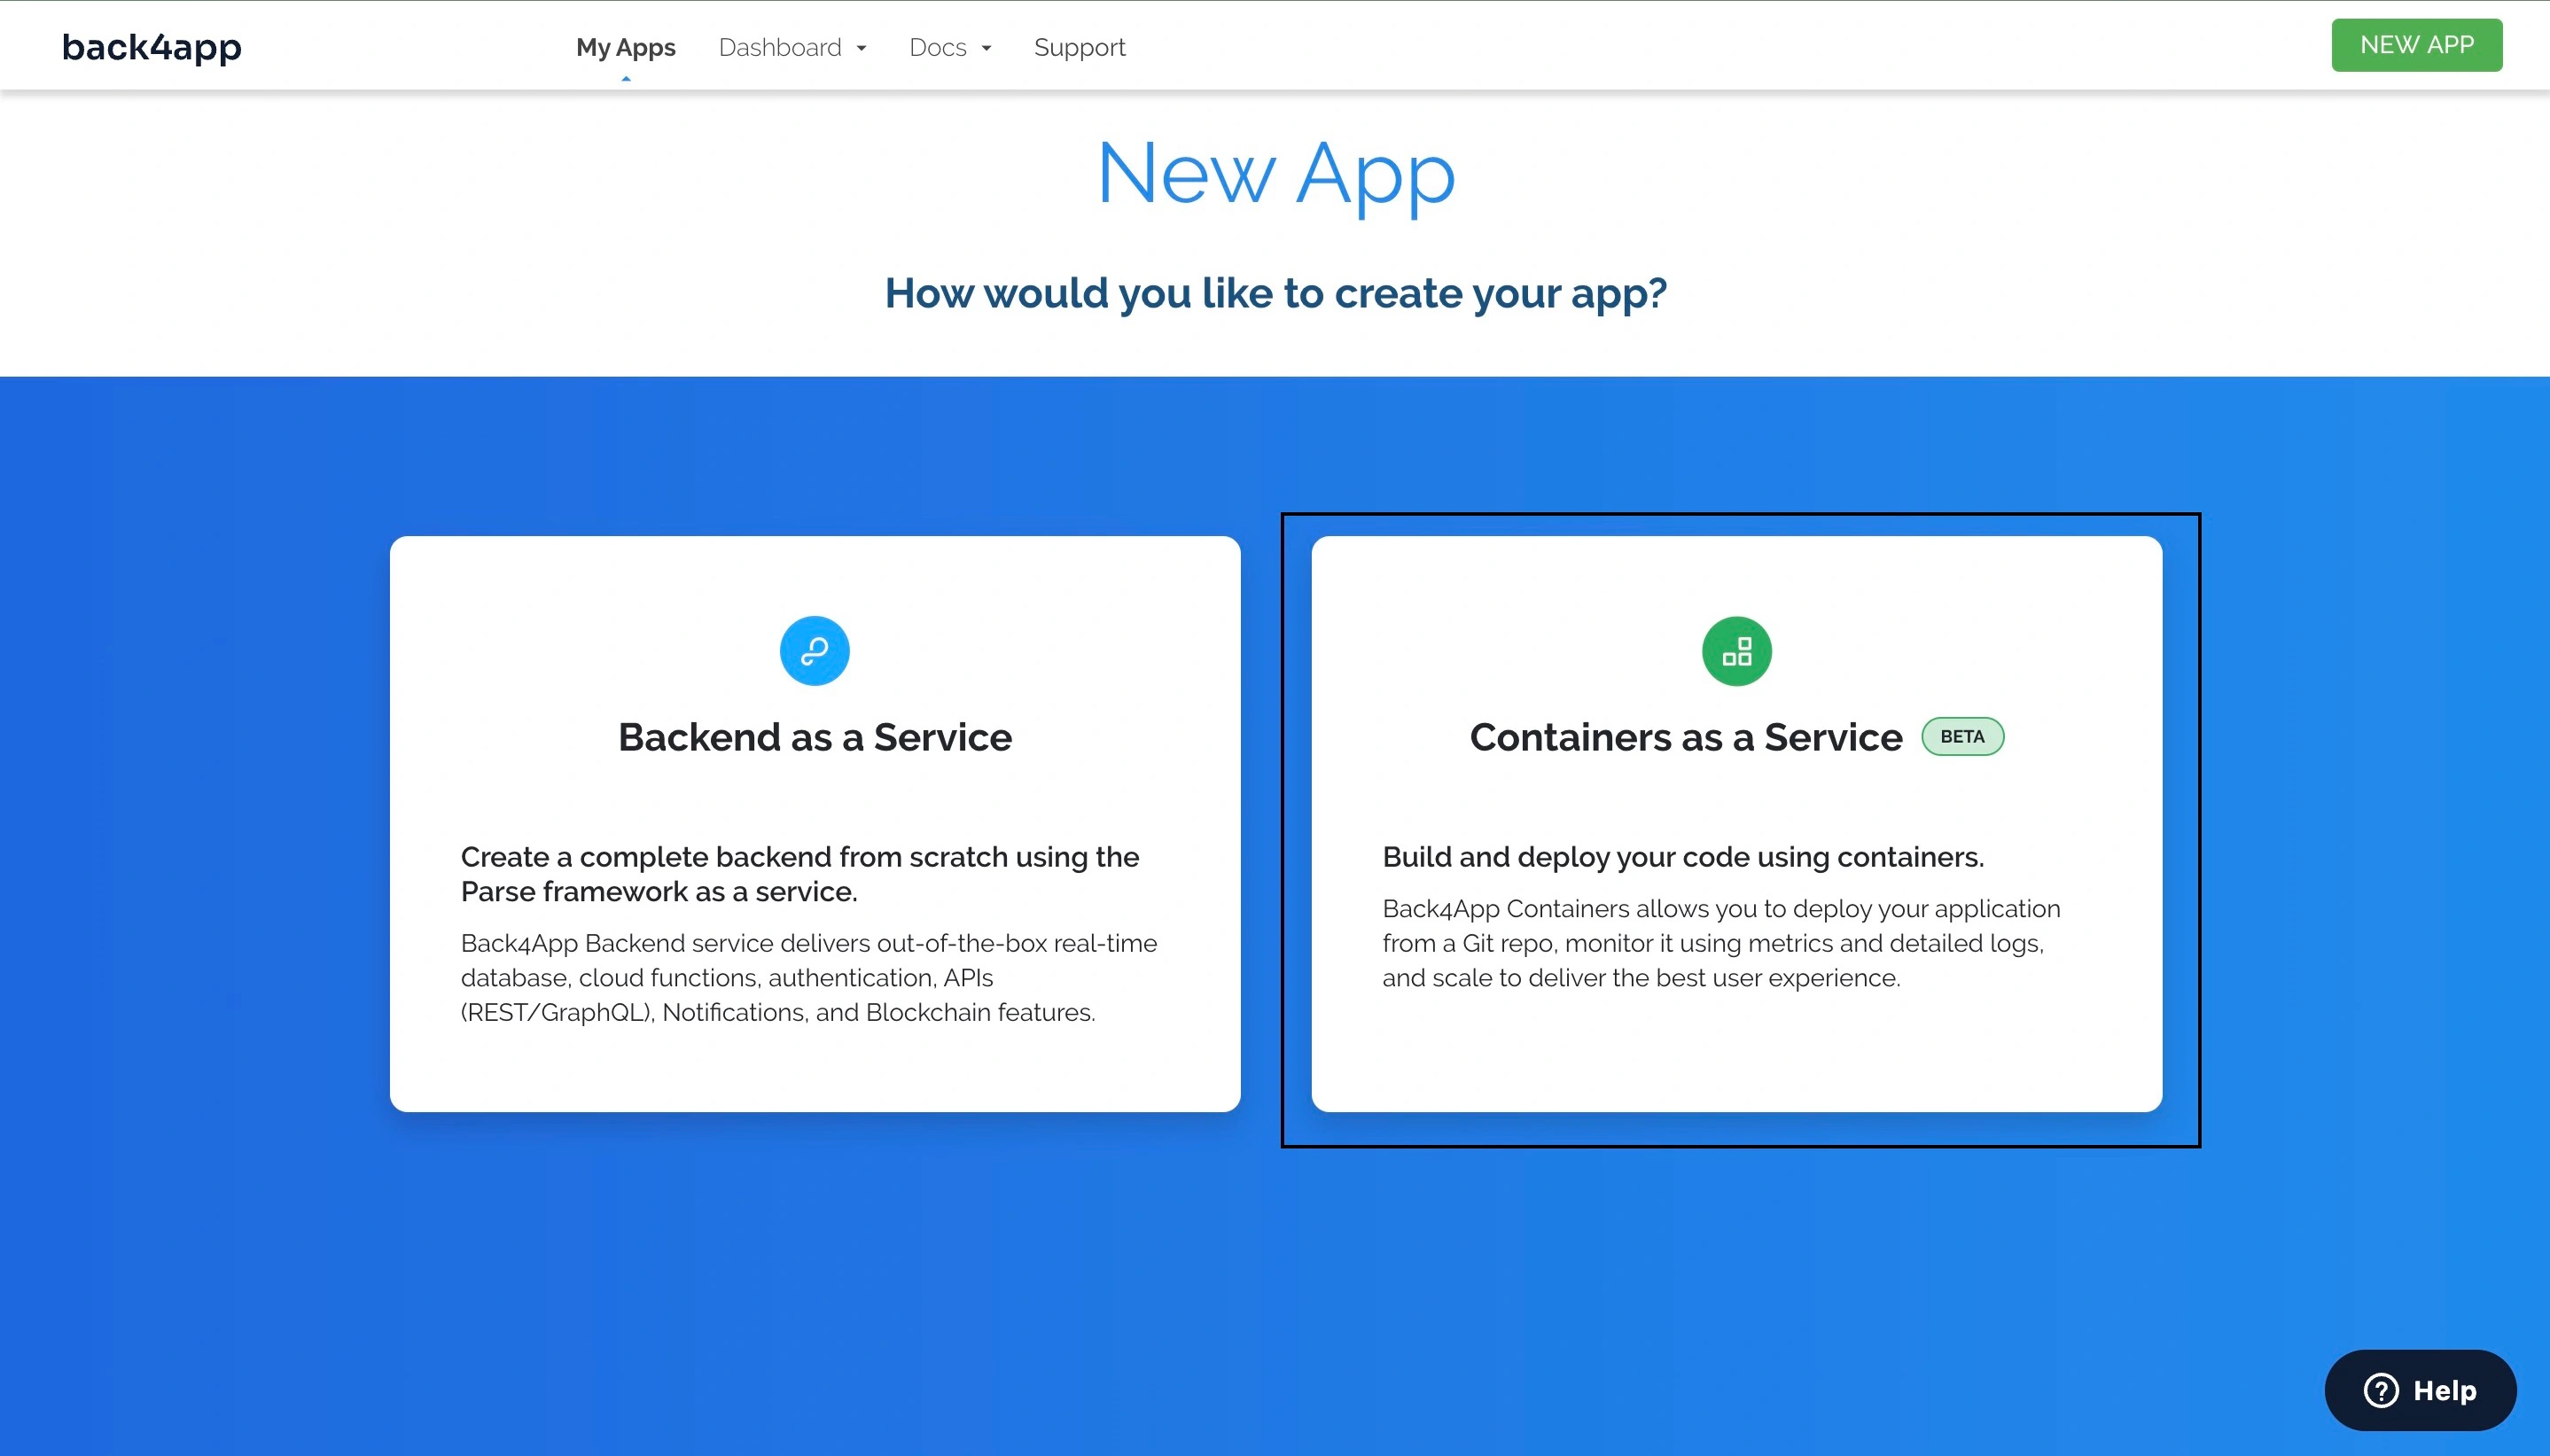
After successfully creating your Back4app account, log into your Back4app account and click the NEW APP button on the top right corner.
Clicking this button will take you to a page where you choose “How you would like to create your new app?”. Since you are deploying using containerization, choose Containers as a Service, as shown in the image below.
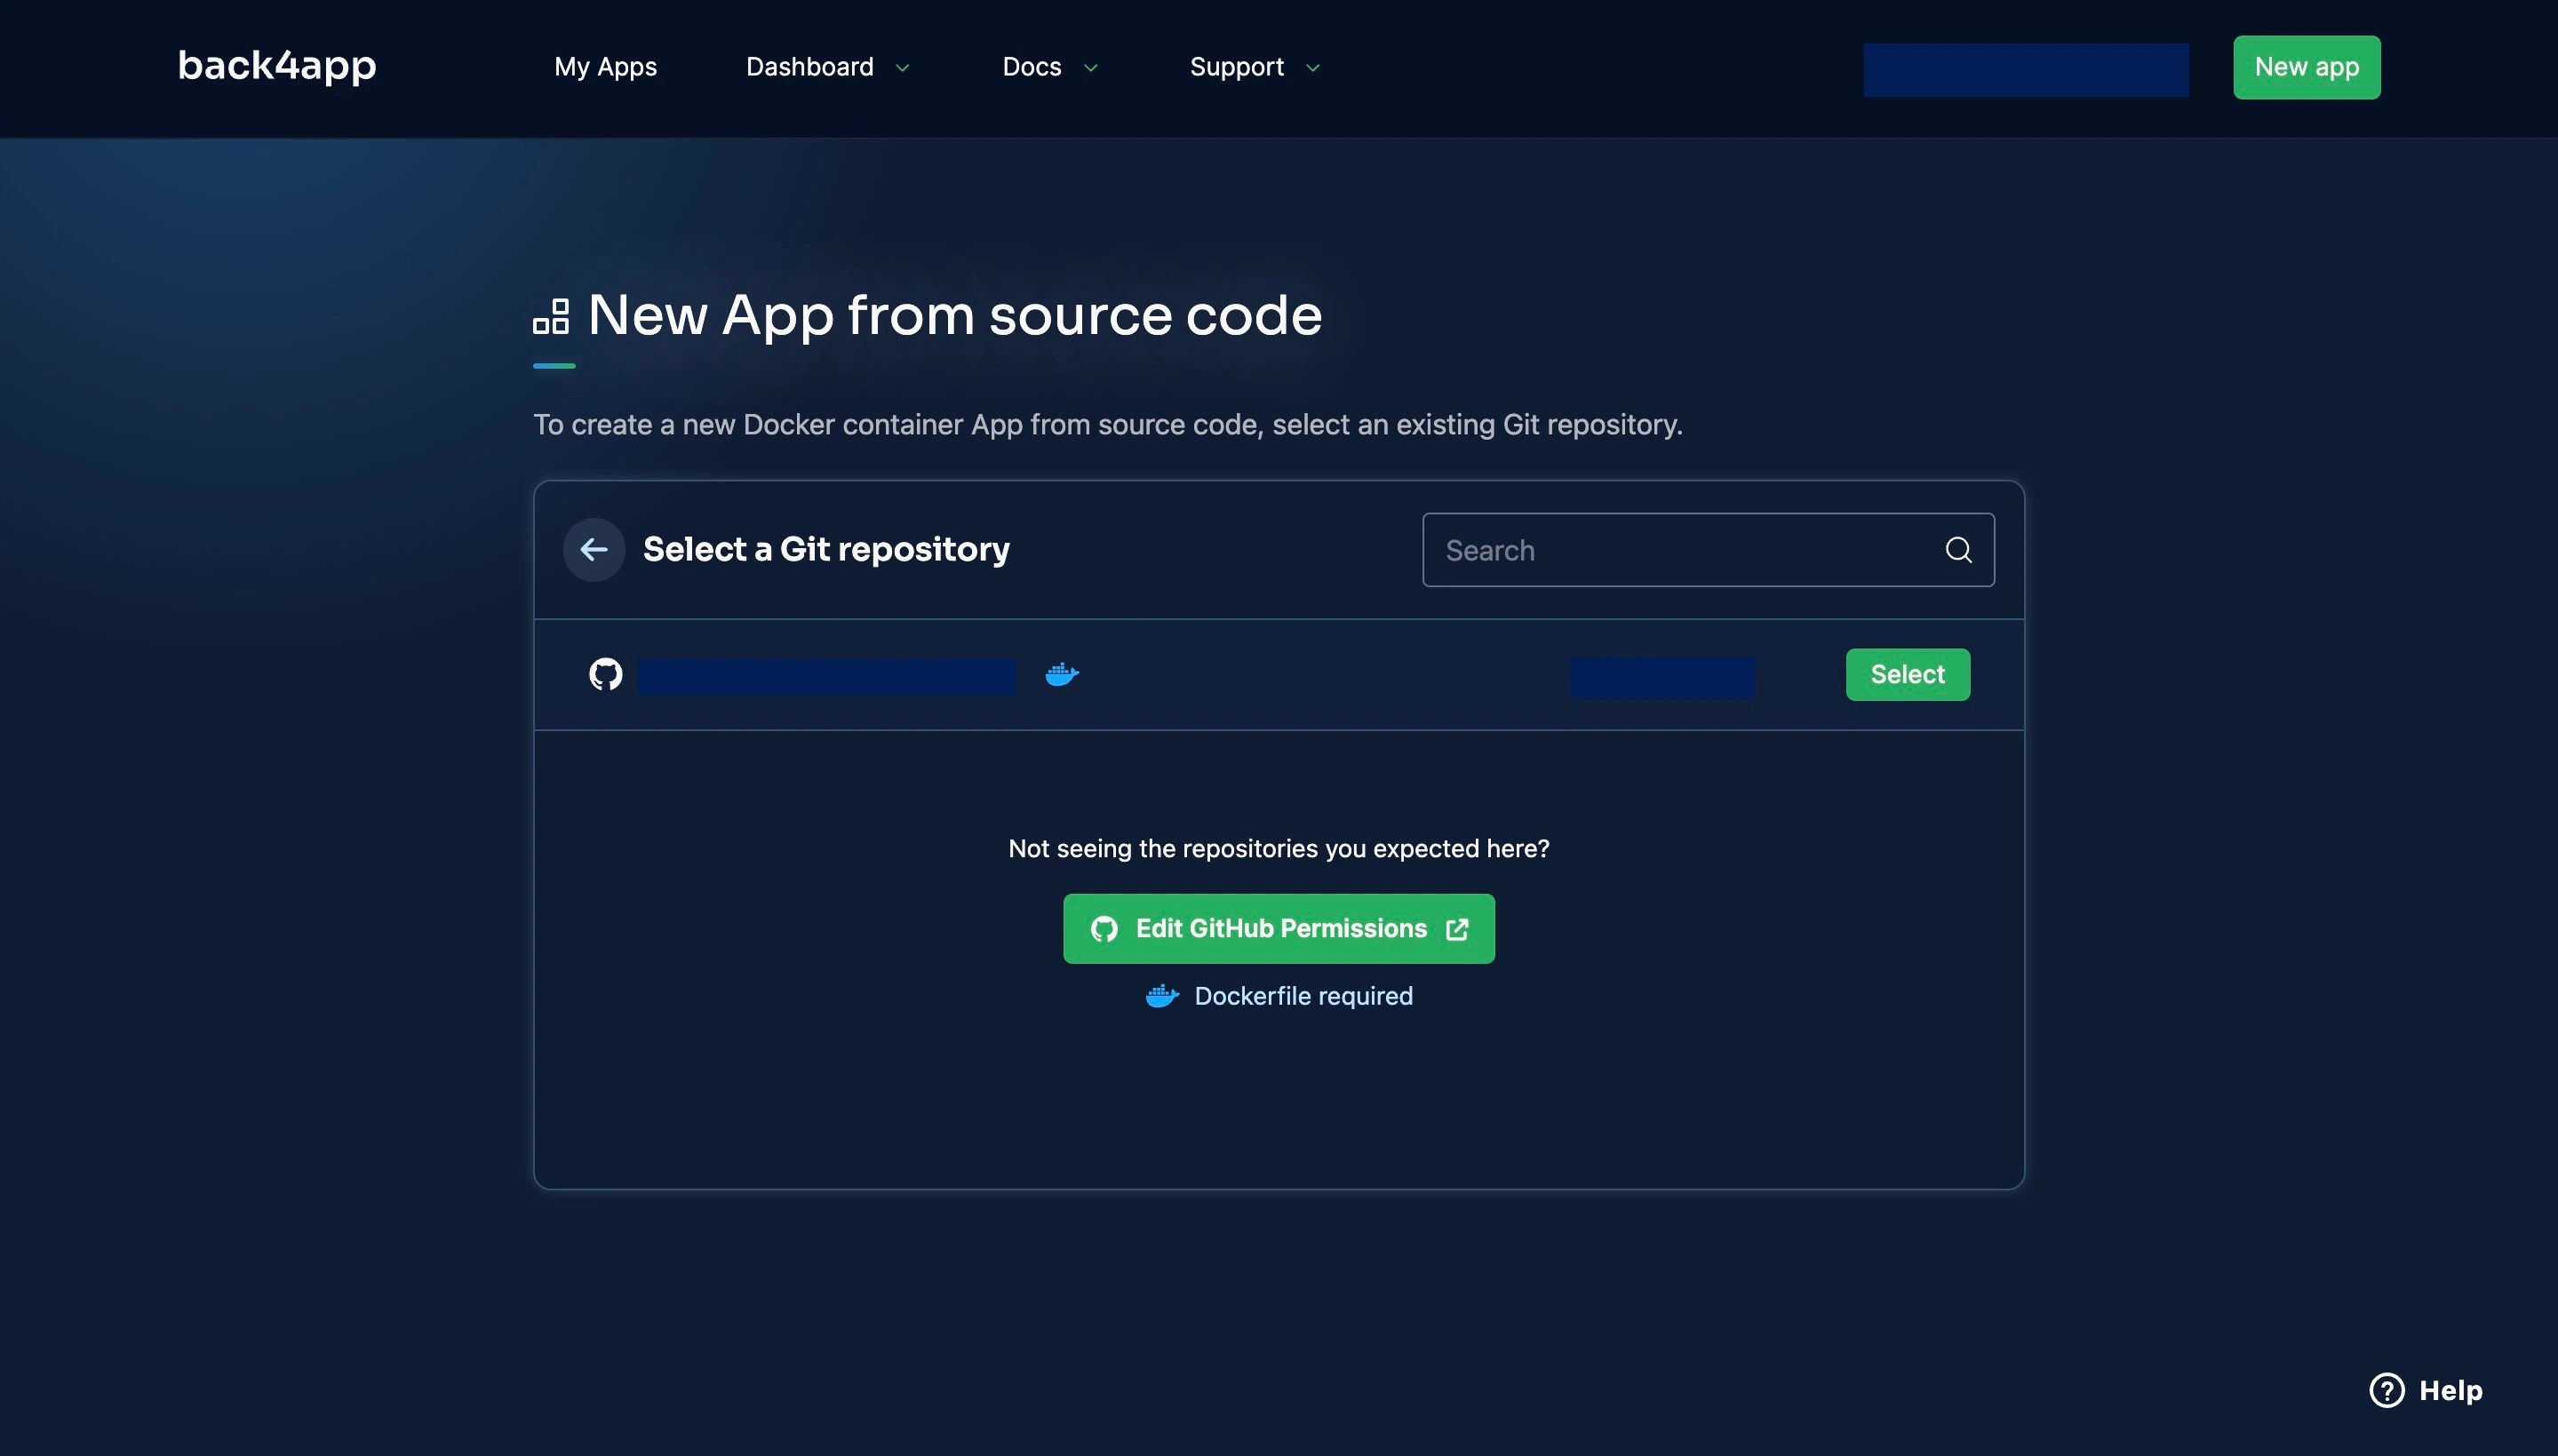
Next, connect your GitHub account to your Back4app account. You can choose to give Back4app access to all the repositories in your account or to specific repositories.
Choose the application you want to deploy, in this case, the application you built in this tutorial, and click Select.
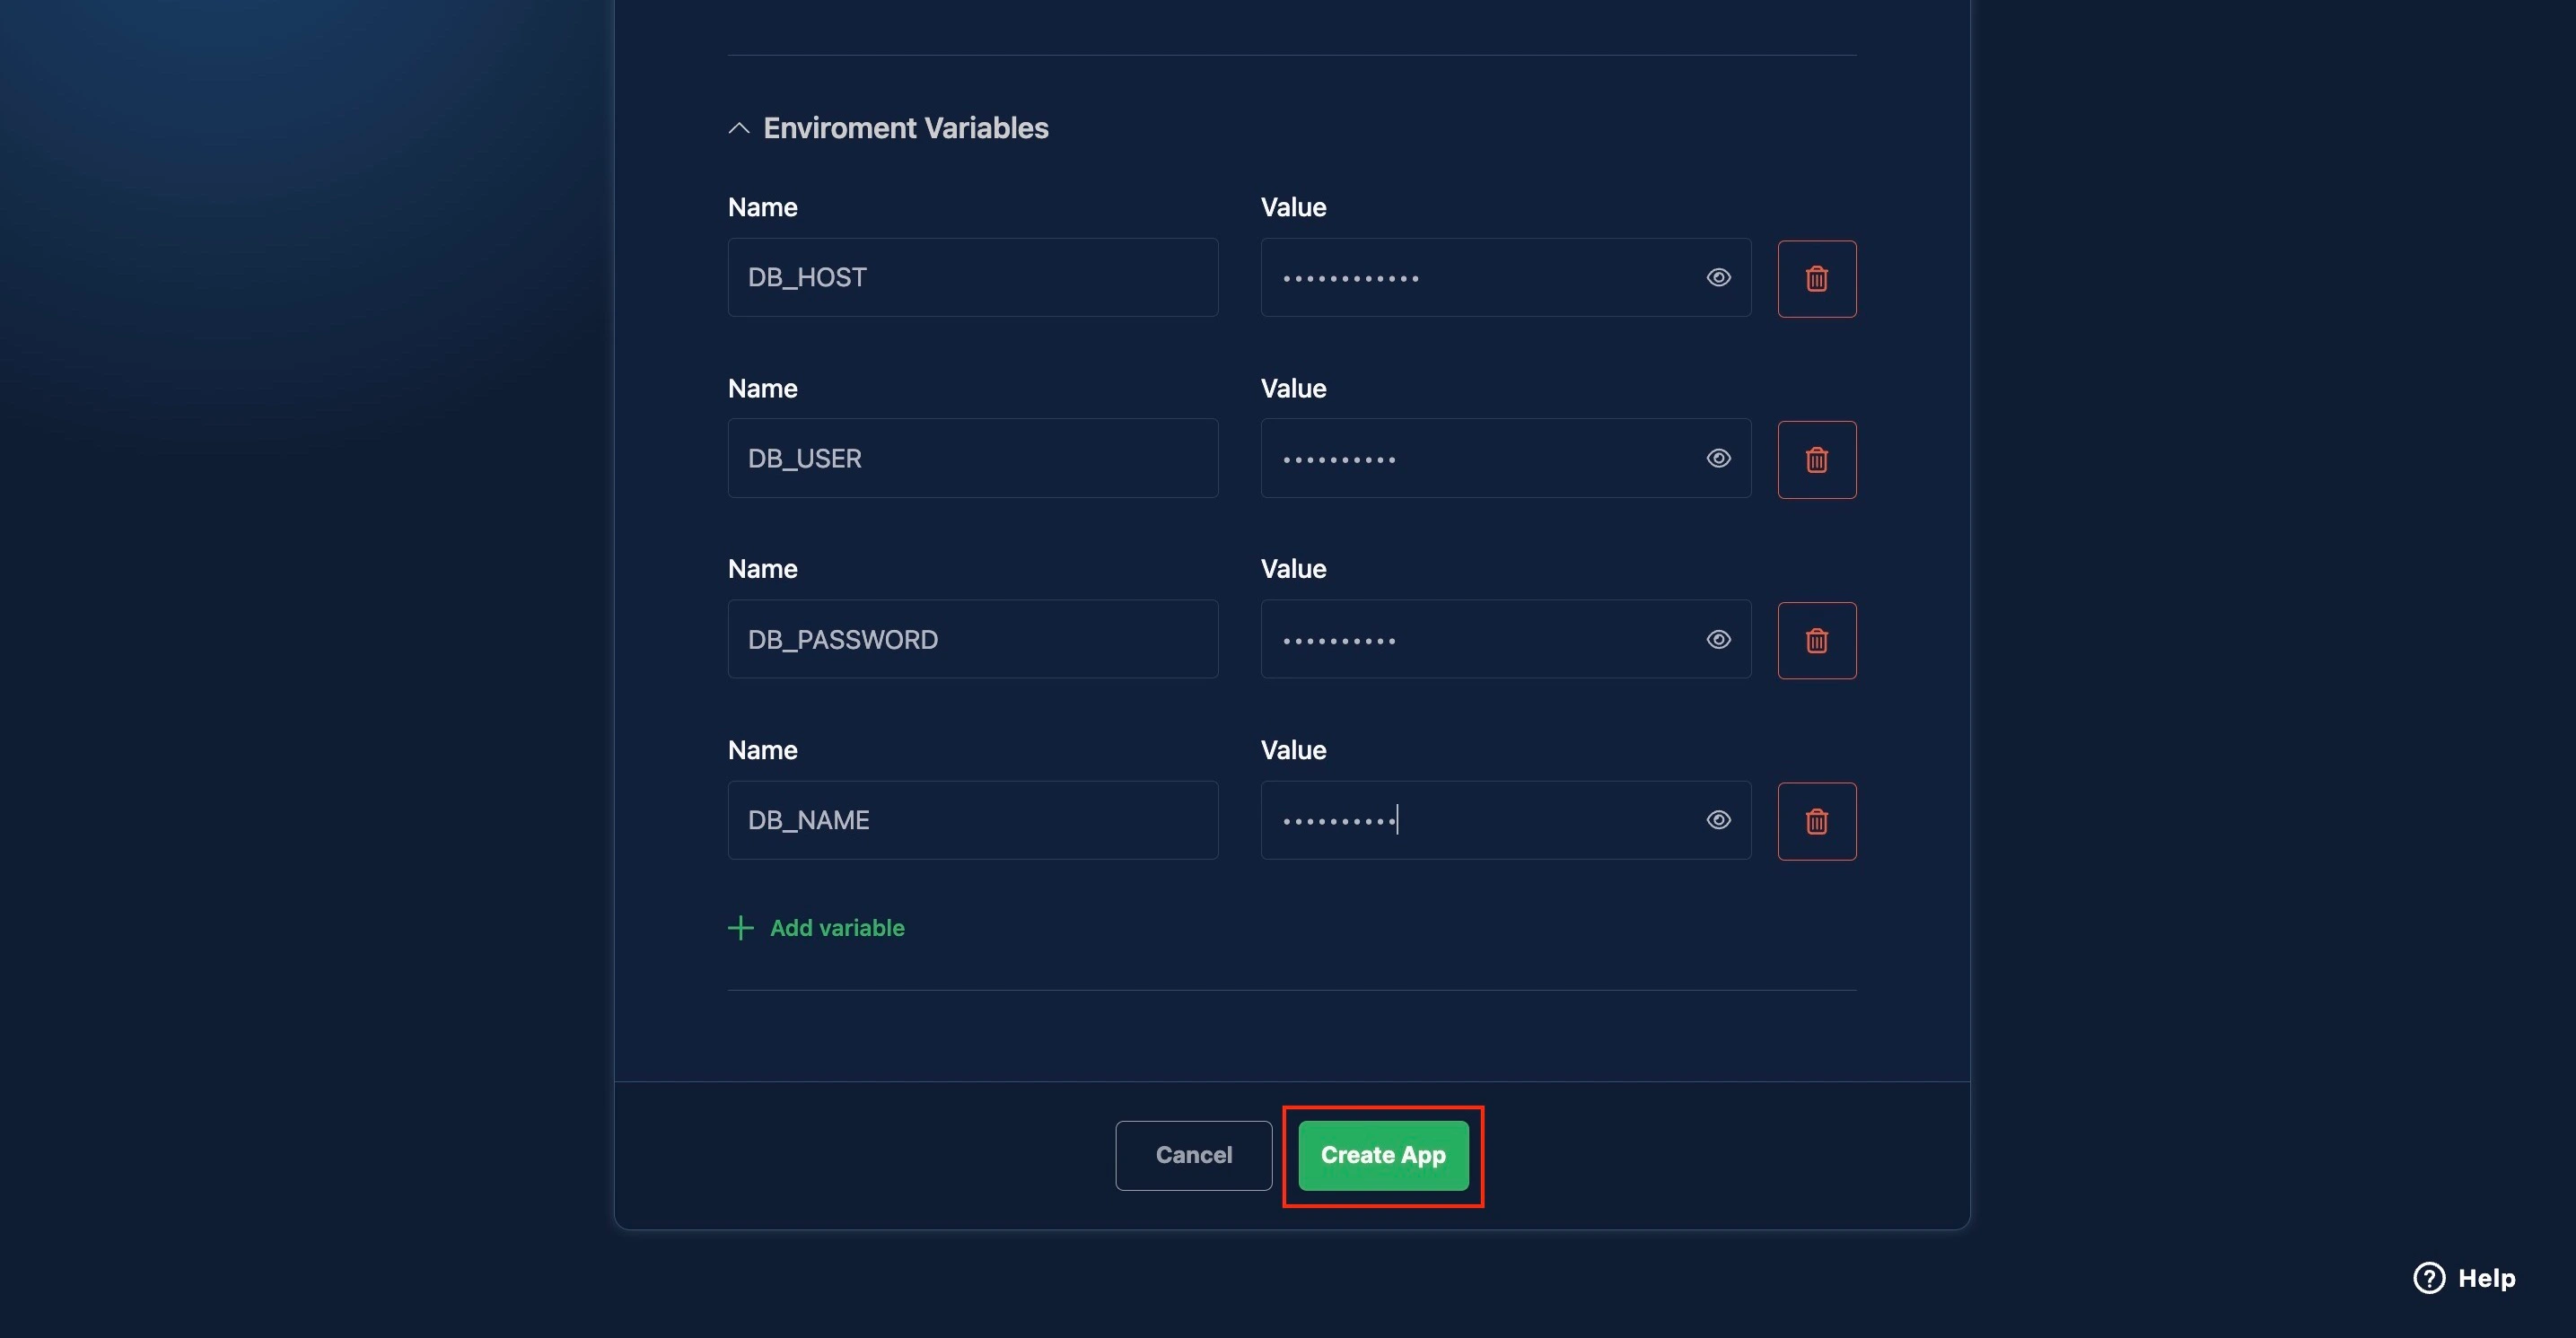
Clicking the select button will take you to a page where you will be required to fill out some information about your app, such as the name, branch, root directory, and environmental variables.
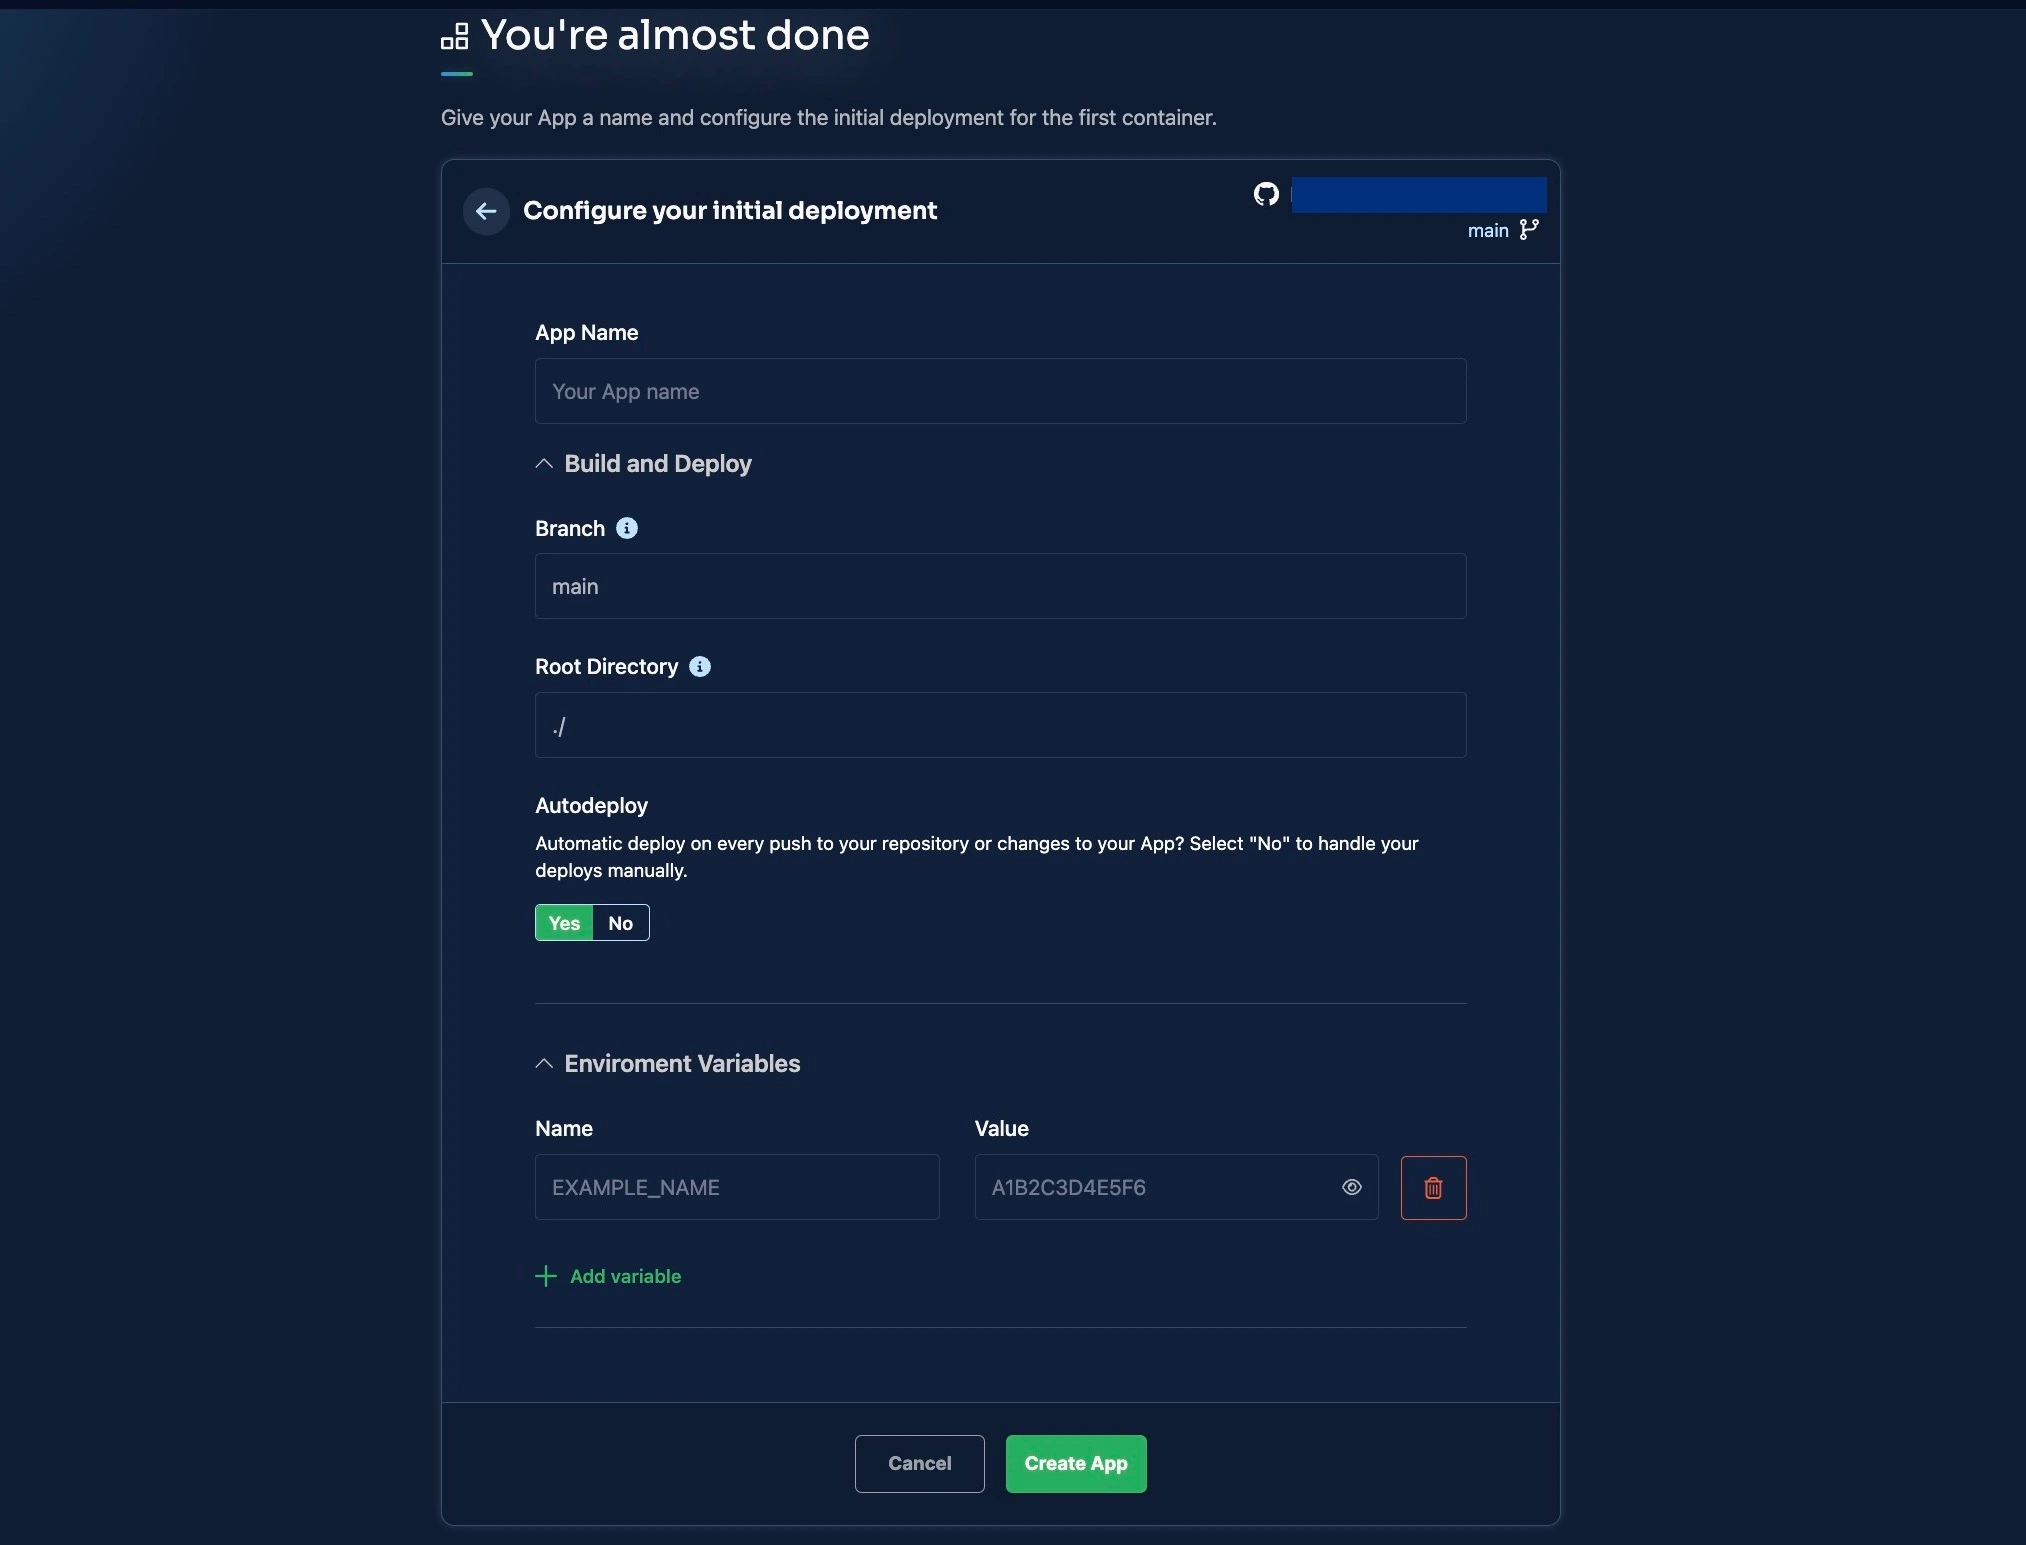
Be sure to fill out all the environmental variables your application requires to function. After you have filled out the required details, click Create App, as shown in the image below.
Clicking the Create App button starts your deployment process. When the deployment process is complete, a URL from which your deployed application can be accessed will be specified at the left corner of the screen, as shown in the image below.
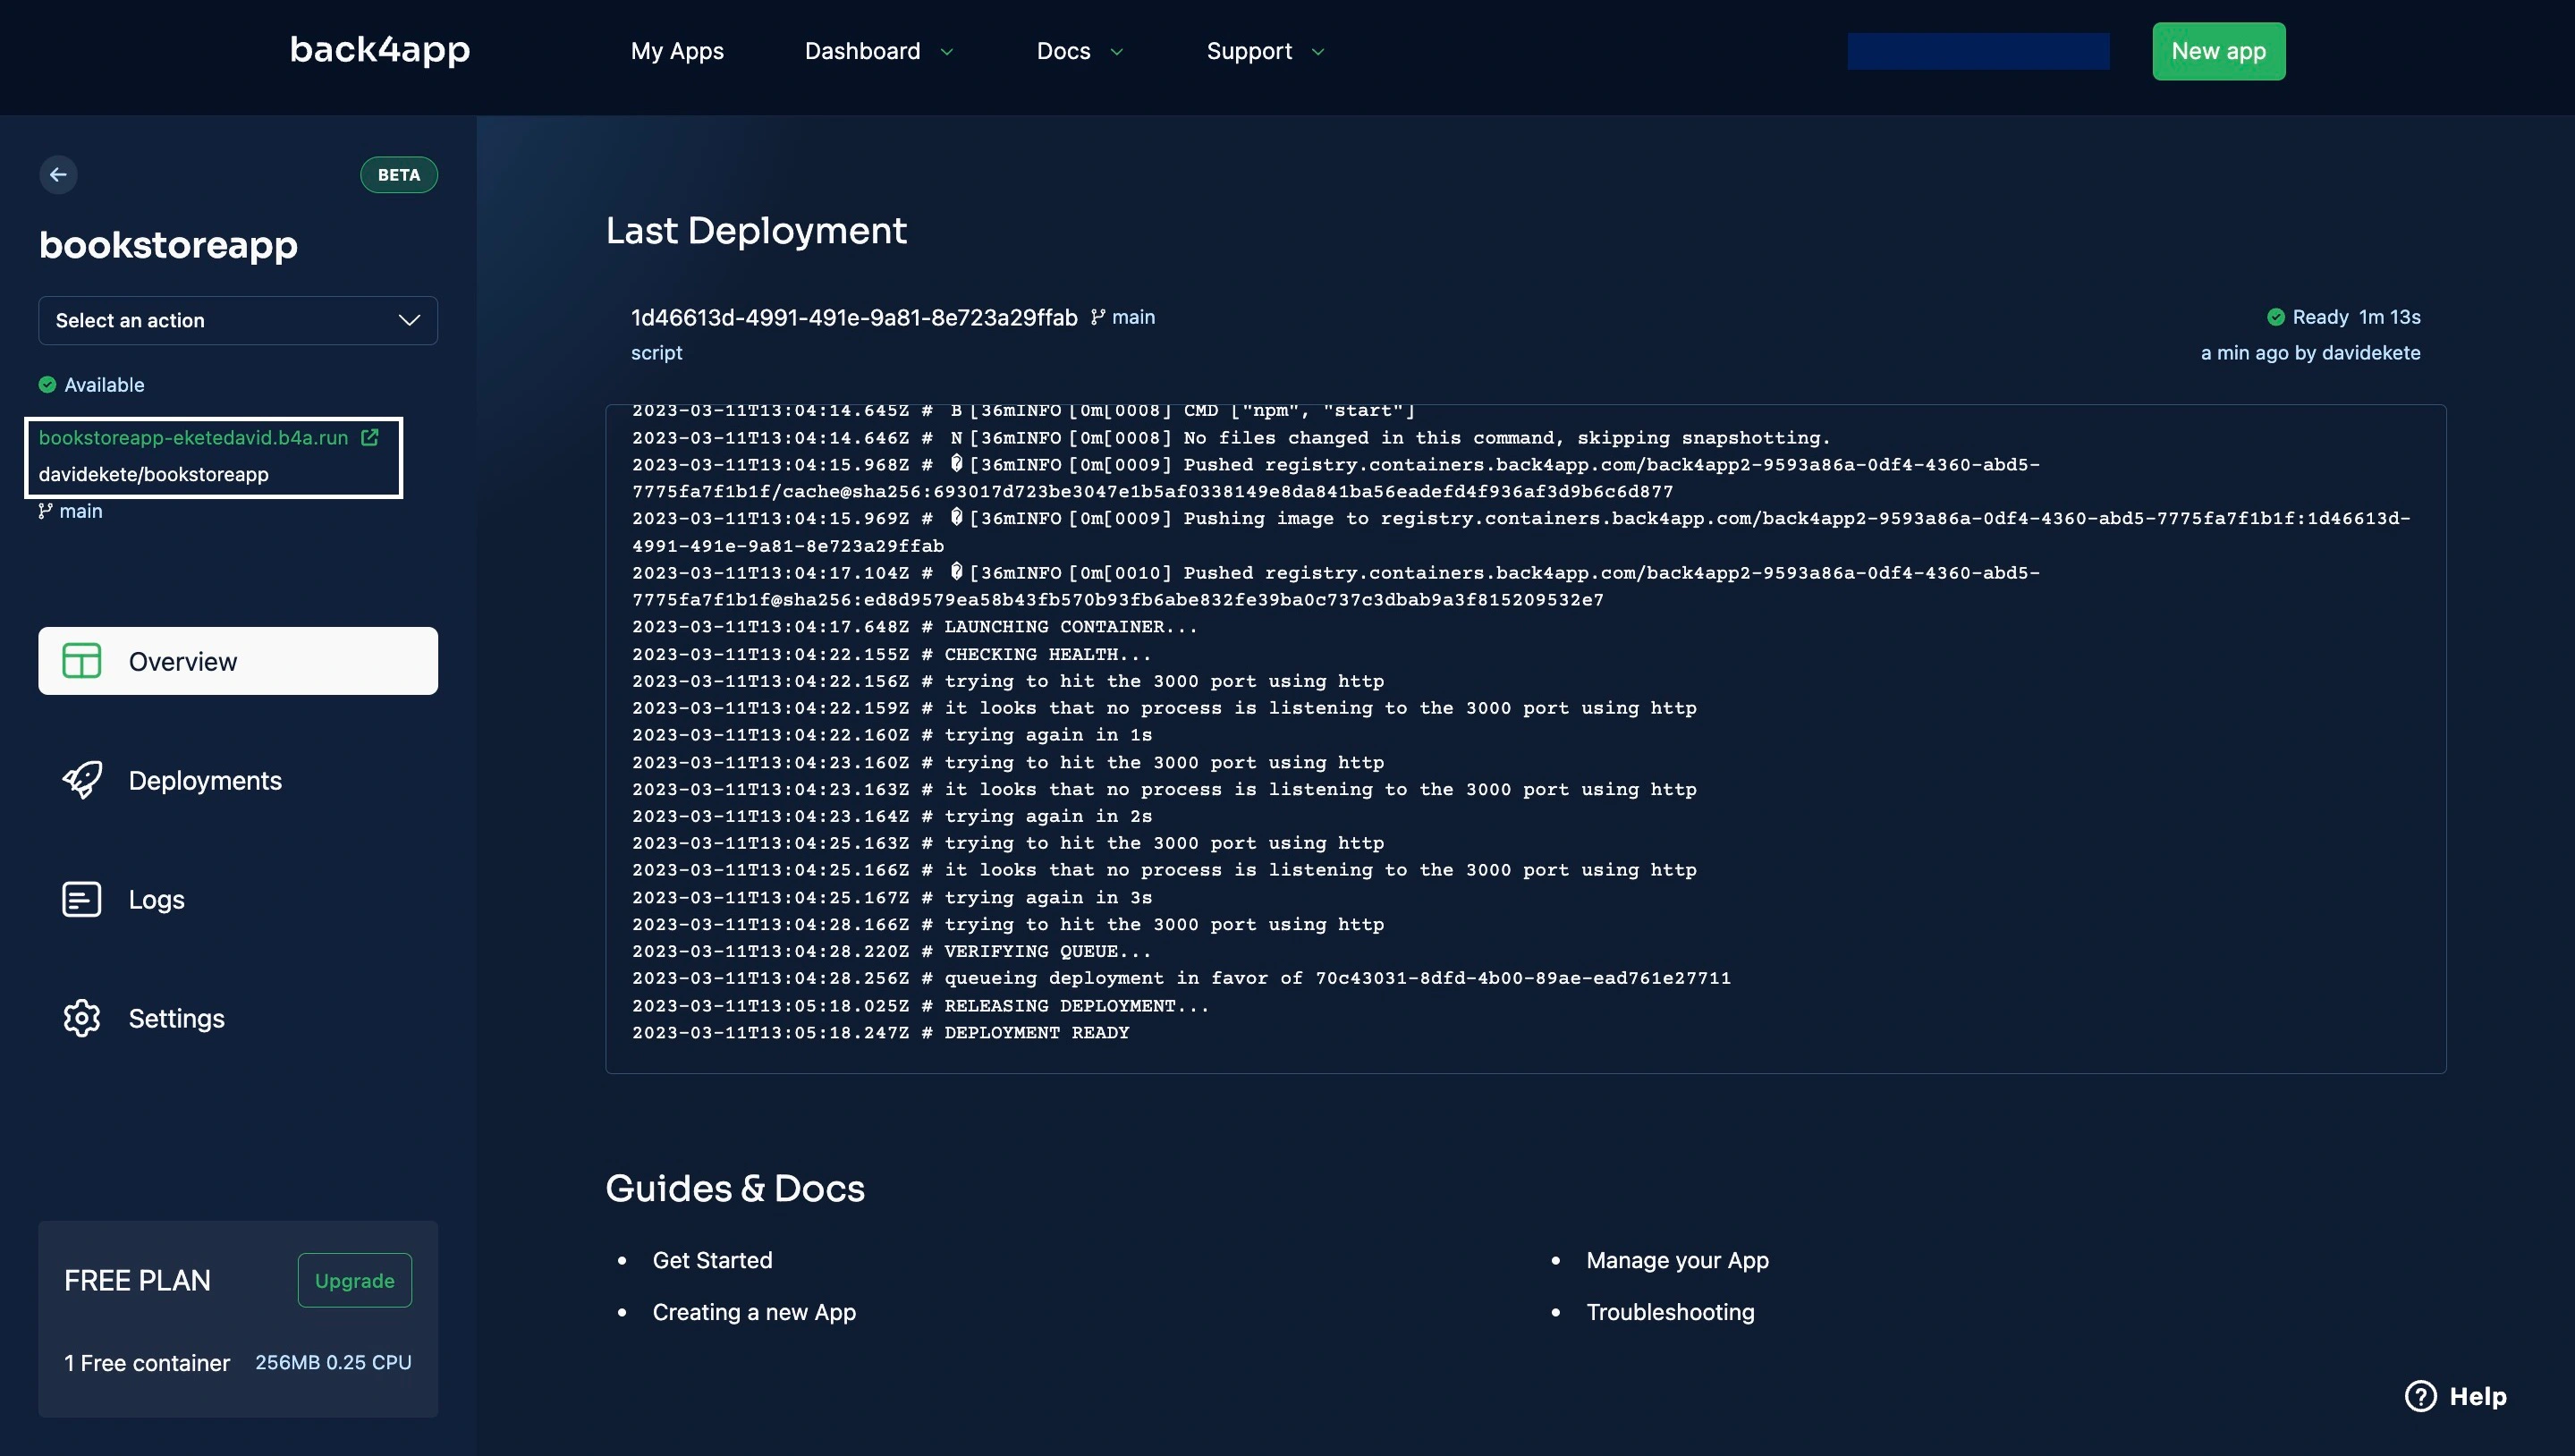
If your deployment process is taking a lot of time, you can check the logs to see if an error occurred with the deployment or check Back4app’s troubleshooting guide.
Conclusion
Node.js is a popular framework that offers many advantages, such as its fast performance, scalability, and flexibility. However, it also has some limitations, such as its single-threaded nature, which can make it challenging to handle heavy workloads.
Despite these limitations, several deployment options are available for Node.js applications, including Back4app, which provides a reliable and user-friendly platform for hosting and managing Node.js apps.
By creating a Node.js app and following the steps outlined in this article, you can easily deploy your Node.js applications on Back4app and take advantage of its many benefits.
Still interested about Node.js deployment and hosting? Please check these two tutorials:
FAQ
How to Deploy a Node.js Web Application?
– Set Up Your Development Environment
– Connect to Your Database
– Create Migration Files
– Implement Routing
– Create a Dockerfile
– Create a new Back4app Application


