How to Deploy a Redux JS Application?

Redux.js is a robust state management library tailored for JavaScript applications, commonly used in conjunction with React.
Its significance comes to the fore when dealing with intricate states across diverse components. It offers a centralized repository that guarantees coherent and foreseeable state modifications via a one-way data pathway.
Redux streamlines the debugging, testing, and management of asynchronous operations by presenting a solitary point of reference for the app’s state.
As complexity escalates within applications, the indispensability of Redux becomes apparent in upholding an organized and expandable strategy for state management.
In this tutorial, we will lead you through deploying a Redux. js-powered application, using the container capabilities of Back4app.
This approach combines the state management proficiency of Redux.js, which ensures efficient data flow and centralized state control, with the comprehensive hosting solutions offered by Back4app.
Contents
Prerequisites:
To follow this tutorial, you’ll need:
- Node.js and npm: Need Node.js and npm to manage the redux project’s dependencies. You can download Node.js and npm from the official Node.js website.
- Github Account: Establishing a GitHub account is essential to oversee version control and systematically track changes within your project’s source code.
- Back4app Account: The initial step involves registering an account on Back4app for streamlined application deployment.
- Docker Desktop: To incorporate Docker into your workflow, start by downloading and installing Docker Desktop tailored to your operating system.
- Visual Studio Code: Visual Studio Code offers a robust coding environment equipped with essential tools for scripting and effective code management.
Step 1: Create a Redux JS Project
Creating a Redux.js application involves the following steps:
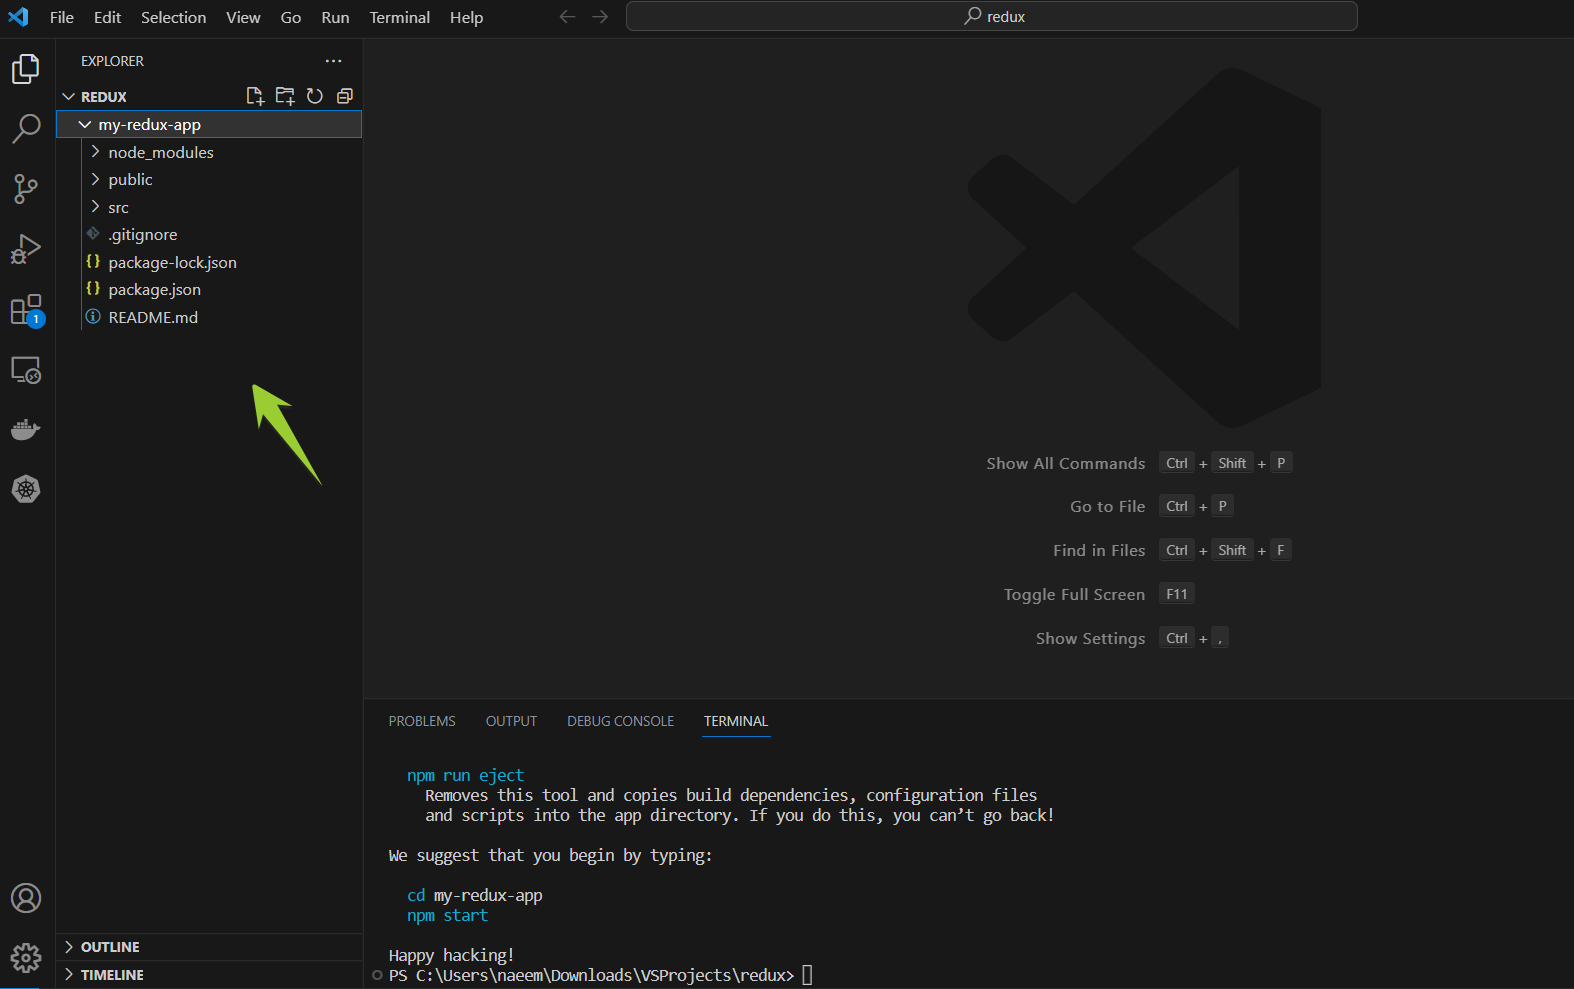
Create a New React Application: Open a terminal in Visual Studio Code and run the following commands to create a React application and navigate to the app folder.
| npx create-react-app my-redux-app cd simple-redux-counter |
Install Redux Toolkit: Run the following command to install the redux toolkit.
| npm install @reduxjs/toolkit react-redux |
Create Redux Files: Inside the src folder, create a features directory. Inside the features directory, create this file.
‘src/features/counterSlice.js’
| import { createSlice } from ‘@reduxjs/toolkit’; const counterSlice = createSlice({ name: ‘counter’, initialState: { value: 0 }, reducers: { increment: state => { state.value += 1; }, }, }); export const { increment } = counterSlice.actions; export default counterSlice.reducer; |
Update the ‘src/App.js’ file with the following code.
| import React from ‘react’; import { useSelector, useDispatch } from ‘react-redux’; import { increment } from ‘./features/counterSlice’; function App() { const count = useSelector(state => state.counter.value); const dispatch = useDispatch(); return ( <div> <h1>Simple Redux Counter</h1> <p>Count: {count}</p> <button onClick={() => dispatch(increment())}>Increment</button> </div> ); } export default App; |
Configure the Redux Store: In the src folder, create a store.js file to configure the Redux store.
| import { configureStore } from ‘@reduxjs/toolkit’; import counterReducer from ‘./features/counterSlice’; const store = configureStore({ reducer: { counter: counterReducer, }, }); export default store; |
Update ‘index.js’: Open the src/index.js file and update the code to use the Redux store configuration.
| import React from ‘react’; import ReactDOM from ‘react-dom’; import { Provider } from ‘react-redux’; import App from ‘./App’; import store from ‘./store’; ReactDOM.render( <Provider store={store}> <App /> </Provider>, document.getElementById(‘root’) ); |
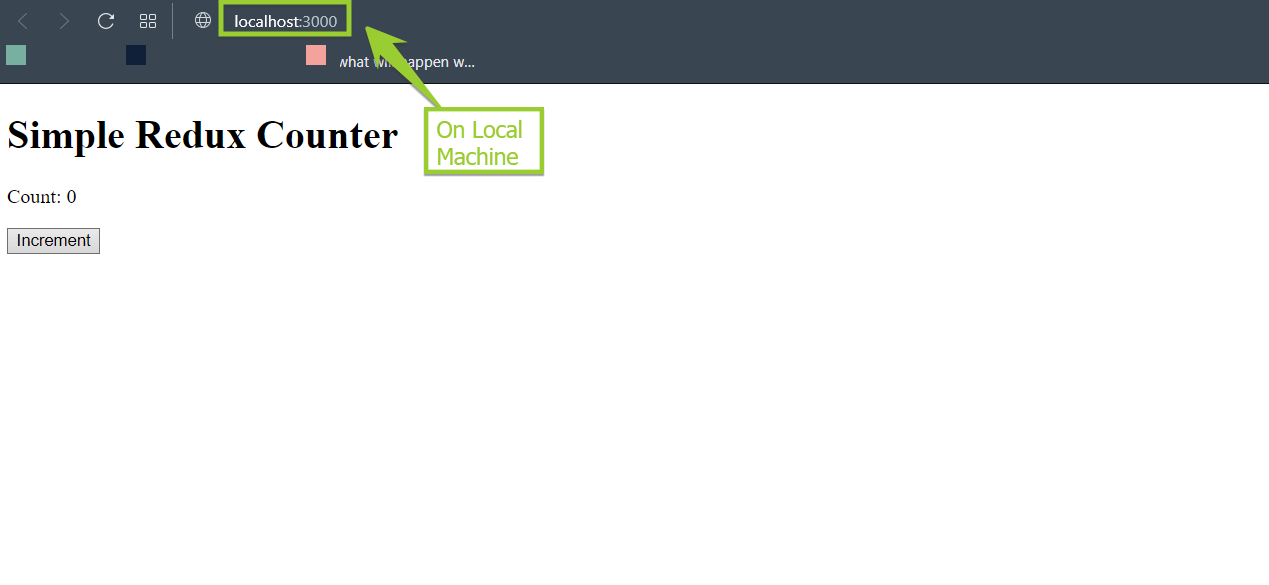
Step 2: Launch the Development Server/ Run your Project Locally
Start the redux application’s development server using the following command:
| npm start |
This action will initialize the Redux.js application, and you can access it by visiting http://localhost:3000 using your web browser.
Step 3: Dockerize the Application
Create a Dockerfile to Dockerize the Redux application:
| # Utilize an official Node.js runtime as the foundation image FROM node:14 # Set the working directory within the container WORKDIR /usr/src/app # Copy package.json and package-lock.json to the working directory COPY package*.json ./ # Install the necessary dependencies for the application RUN npm install # Transfer the remaining application code to the container COPY . . # Compile the React application RUN npm run build # Make the port used by the app accessible EXPOSE 3000 # Launch the app when the container starts CMD [ “npm”, “start” ] |
To build the image, open a terminal in the root directory of your Redux application (where your Dockerfile is located) and run the following command.
| docker build -t my-redux-app . |
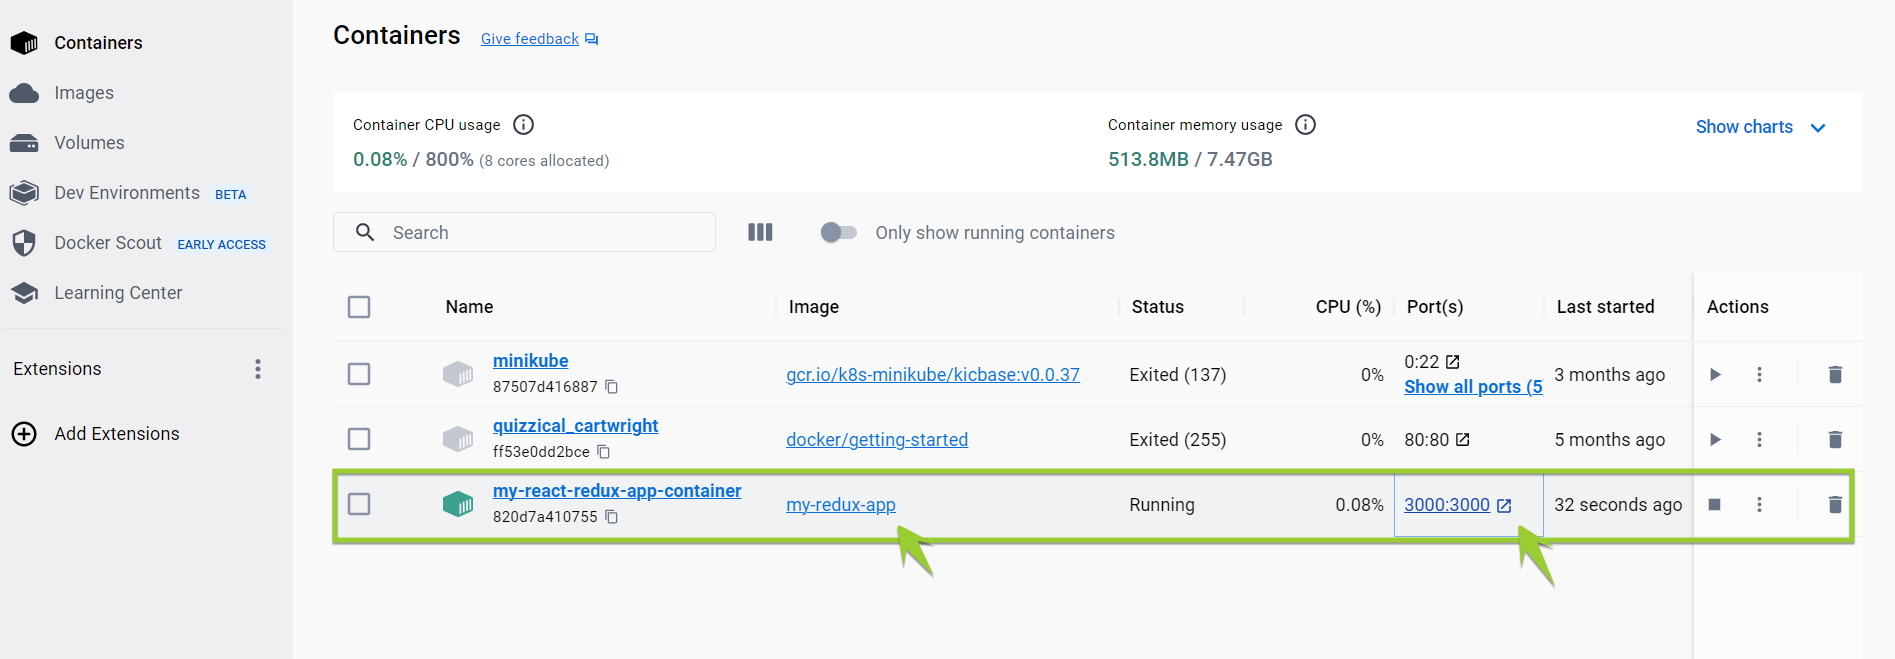
After the image is built, you can run a container from it using the following command.
| docker run -it -p 3000:3000 –name my-react-redux-app-container my-redux-app |
The -p 3000:3000 flag maps port 3000 in the container to port 3000 on your host machine.
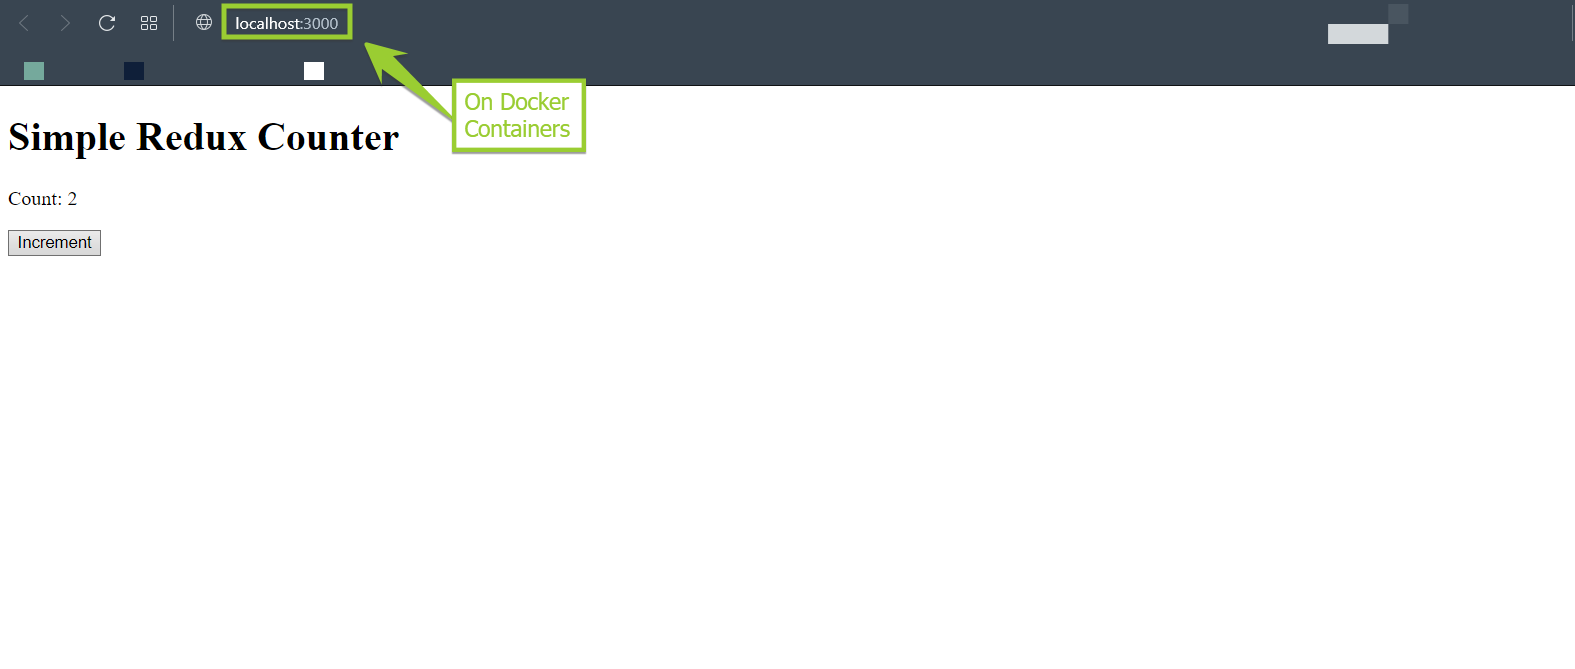
Open your web browser and navigate to http://localhost:3000 to see your Redux application running in the Docker container.
Step 4: Pushing Project to GitHub
Follow the below steps to upload the ‘my-redux-app’ project to a GitHub repository.
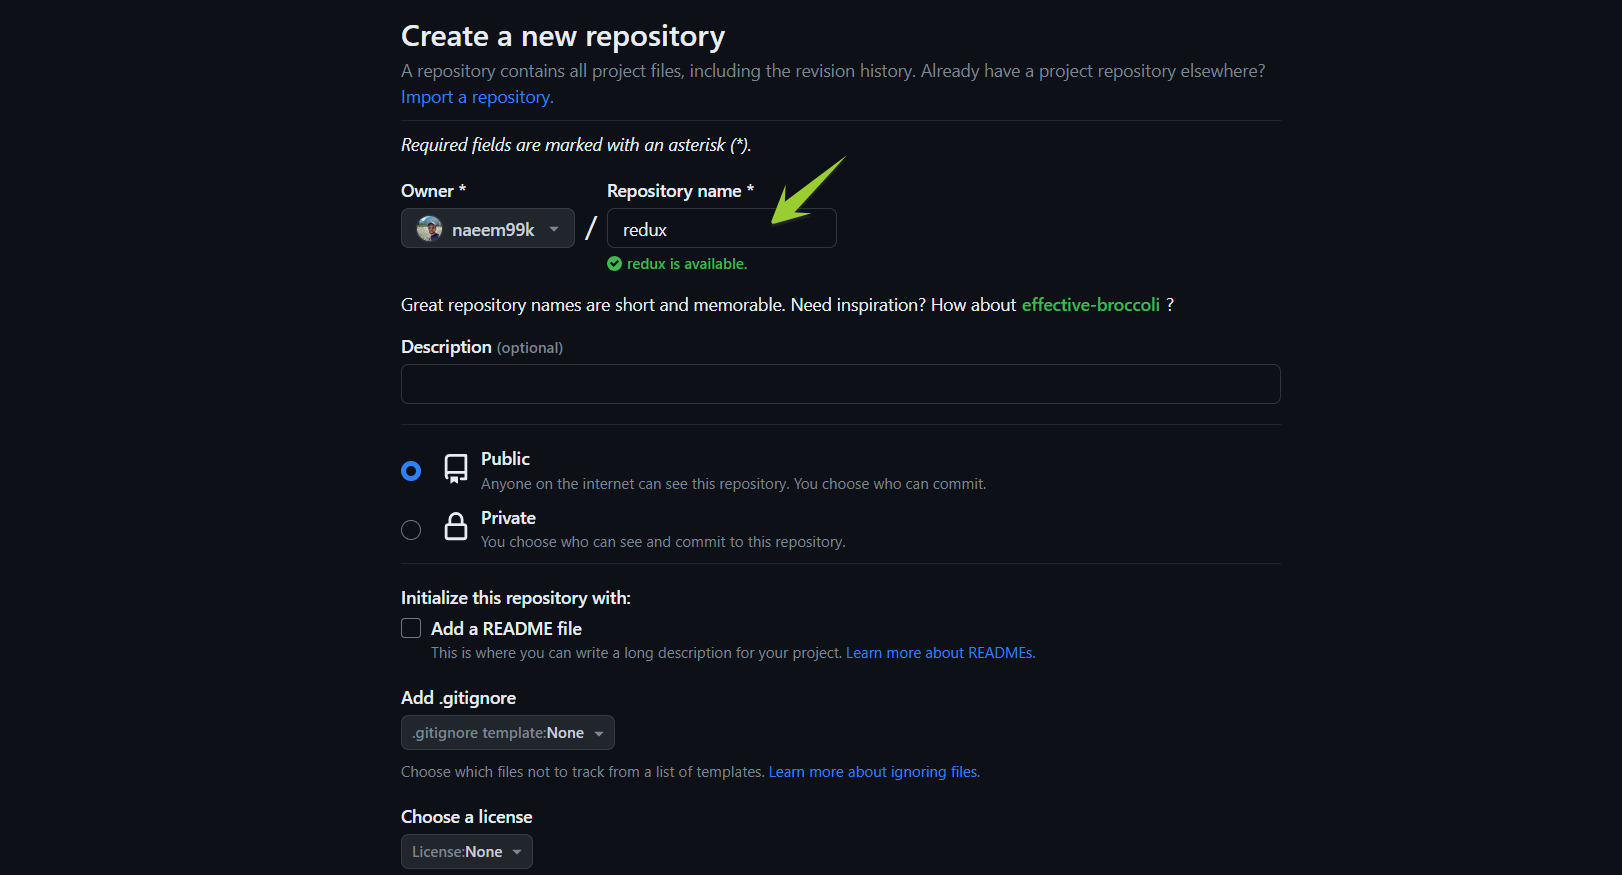
- Create a GitHub Repository:
Visit GitHub and log in to your account. Click on the “+” icon in the upper right corner, choose “New repository,” and create and name it ‘redux’.
- Initialize the Git Repository:
Open your terminal and navigate to the main directory of your “my-redux-app” project.
Run the following command to start a new Git repository:
| git init |
- Add Files to Staging Area:
Add all the files in your project directory to the staging area with this command:
| git add . |
Alternatively, if you want to select specific files, replace them. with the filenames, you intend to add.
- Commit Your Changes:
Make a commit for the changes you’ve staged by entering this command:
| git commit -m “first commit” |
- Updating Branch:
Now run the following command to change the branch to main.
| git branch -M main |
- Add the Remote Repository:
In the terminal, link the remote repository using the below command.
| git remote add origin https://github.com/naeem99k/redux.git |
- Push to GitHub:
Push your local repository to GitHub using this command:
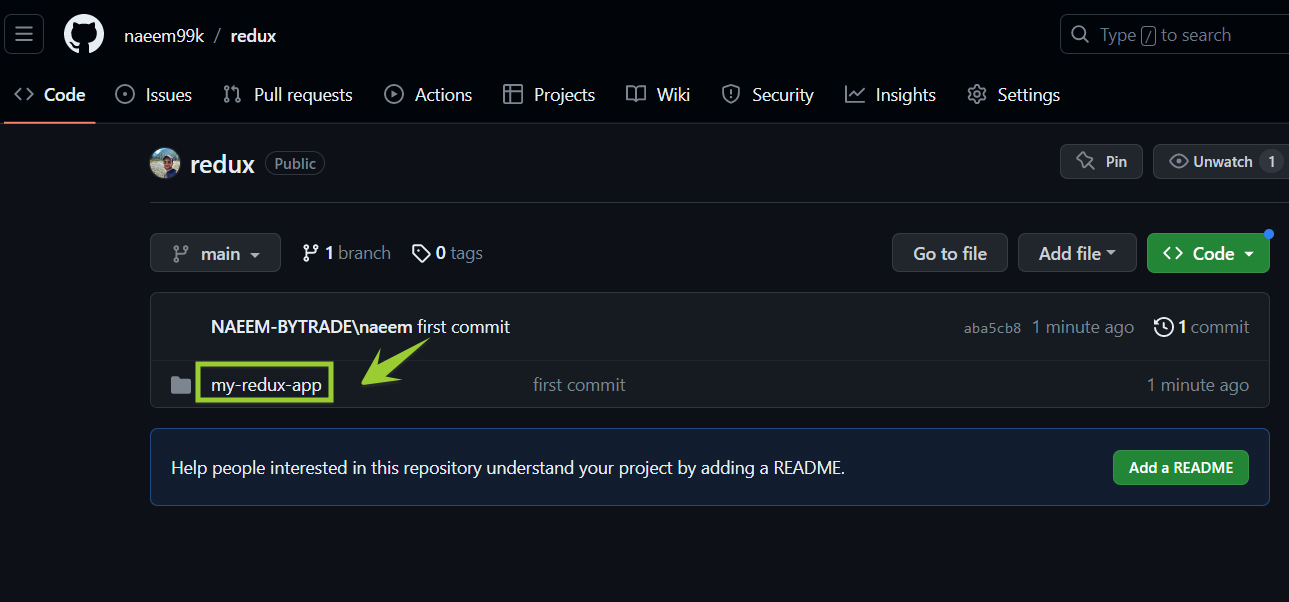
| git push -u origin main |
Refresh your GitHub repository page in your web browser. Your “my-redux-app” project should now be visible on GitHub.
Step 5: Deploying the Project to the Back4app Platform
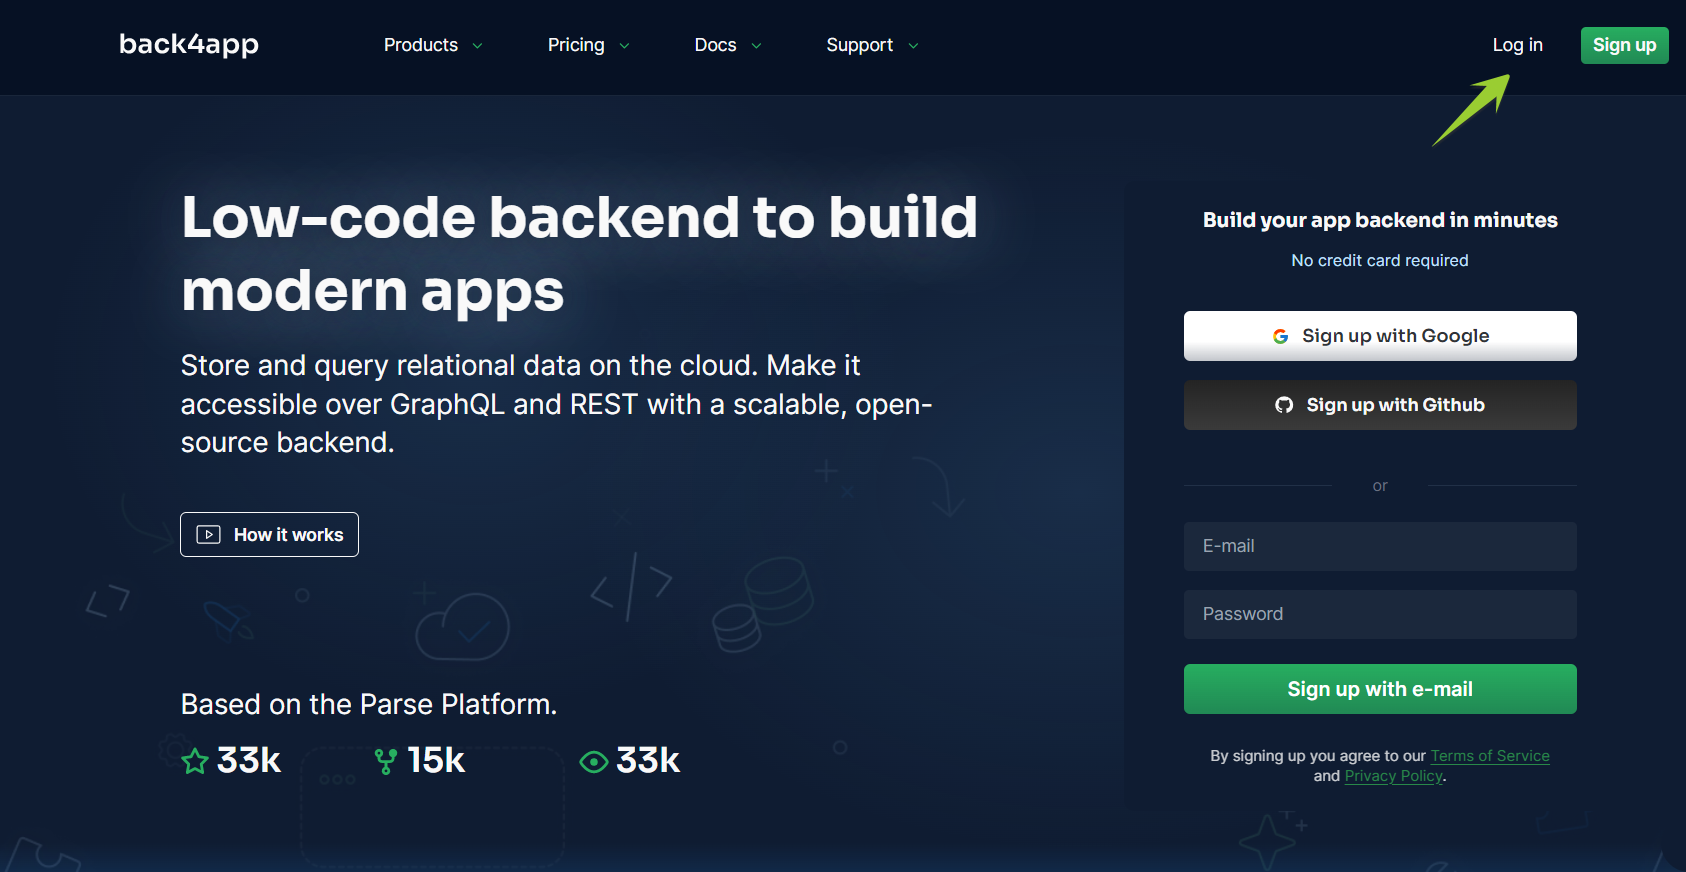
After successfully uploading your code, navigate to the Back4app platform.
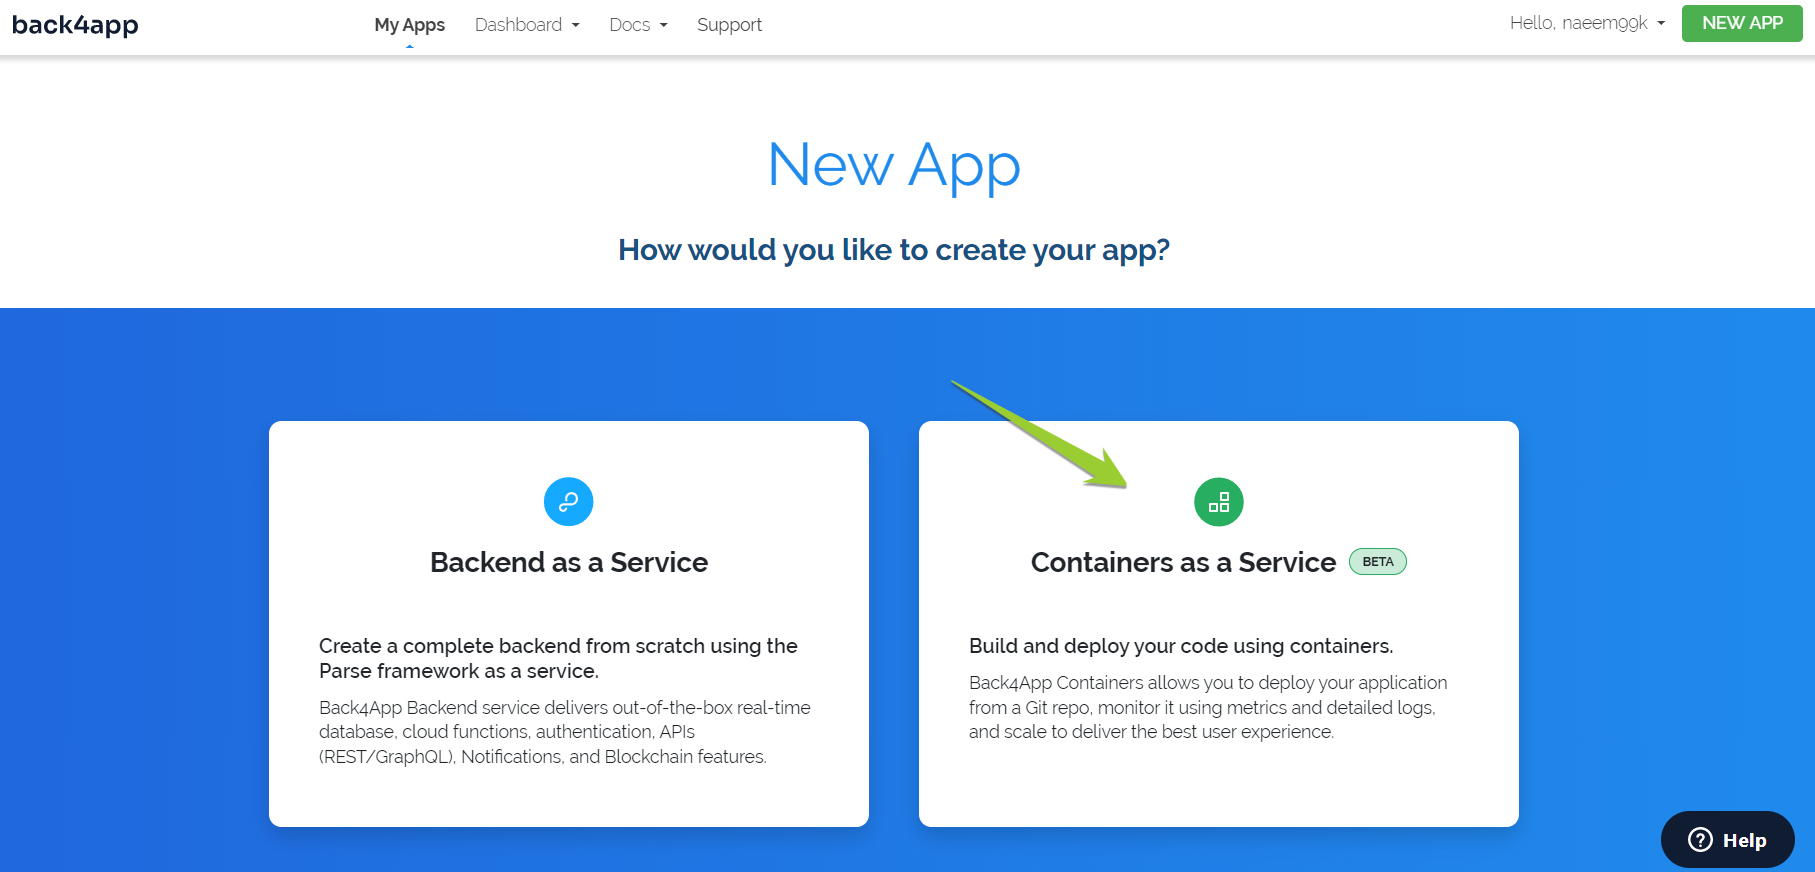
Begin the application creation process using the ‘Containers as a Service’ functionality.
Follow the provided instructions to establish a connection between your GitHub account and Back4app.
- This step grants Back4app access to your repositories.
- You can allow access to all repositories or only the ones you intend to deploy.
- Once done, click “Save” to return to your Back4app dashboard and configure the application.
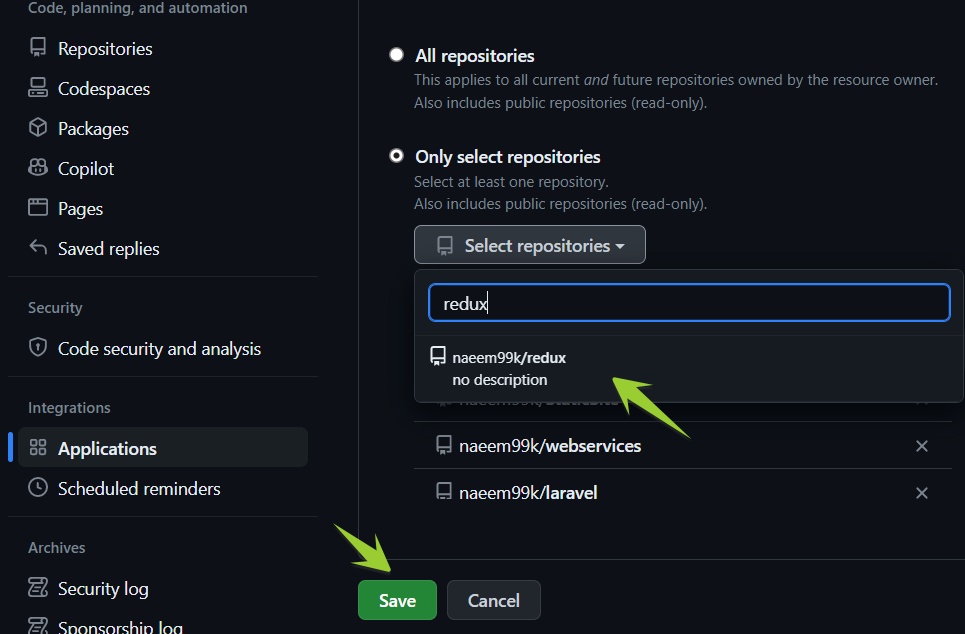
- In the “Container Apps” section of Back4app, locate and select your ‘redux’ repository.
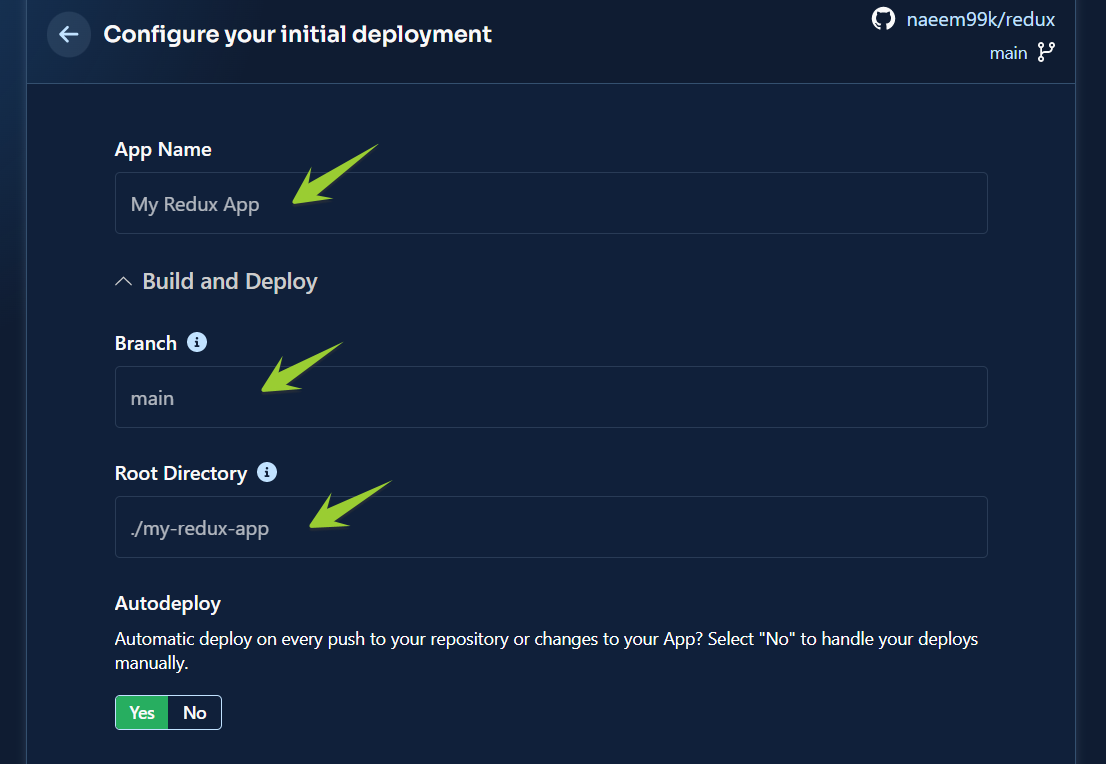
- Choose a name for your application, select your preferred branch name, and specify the source directory as needed.
- To initiate the Redux.js application within the Back4app Container, click the “Create App” button.

After the deployment process is completed, use the application’s link provided by Back4app.
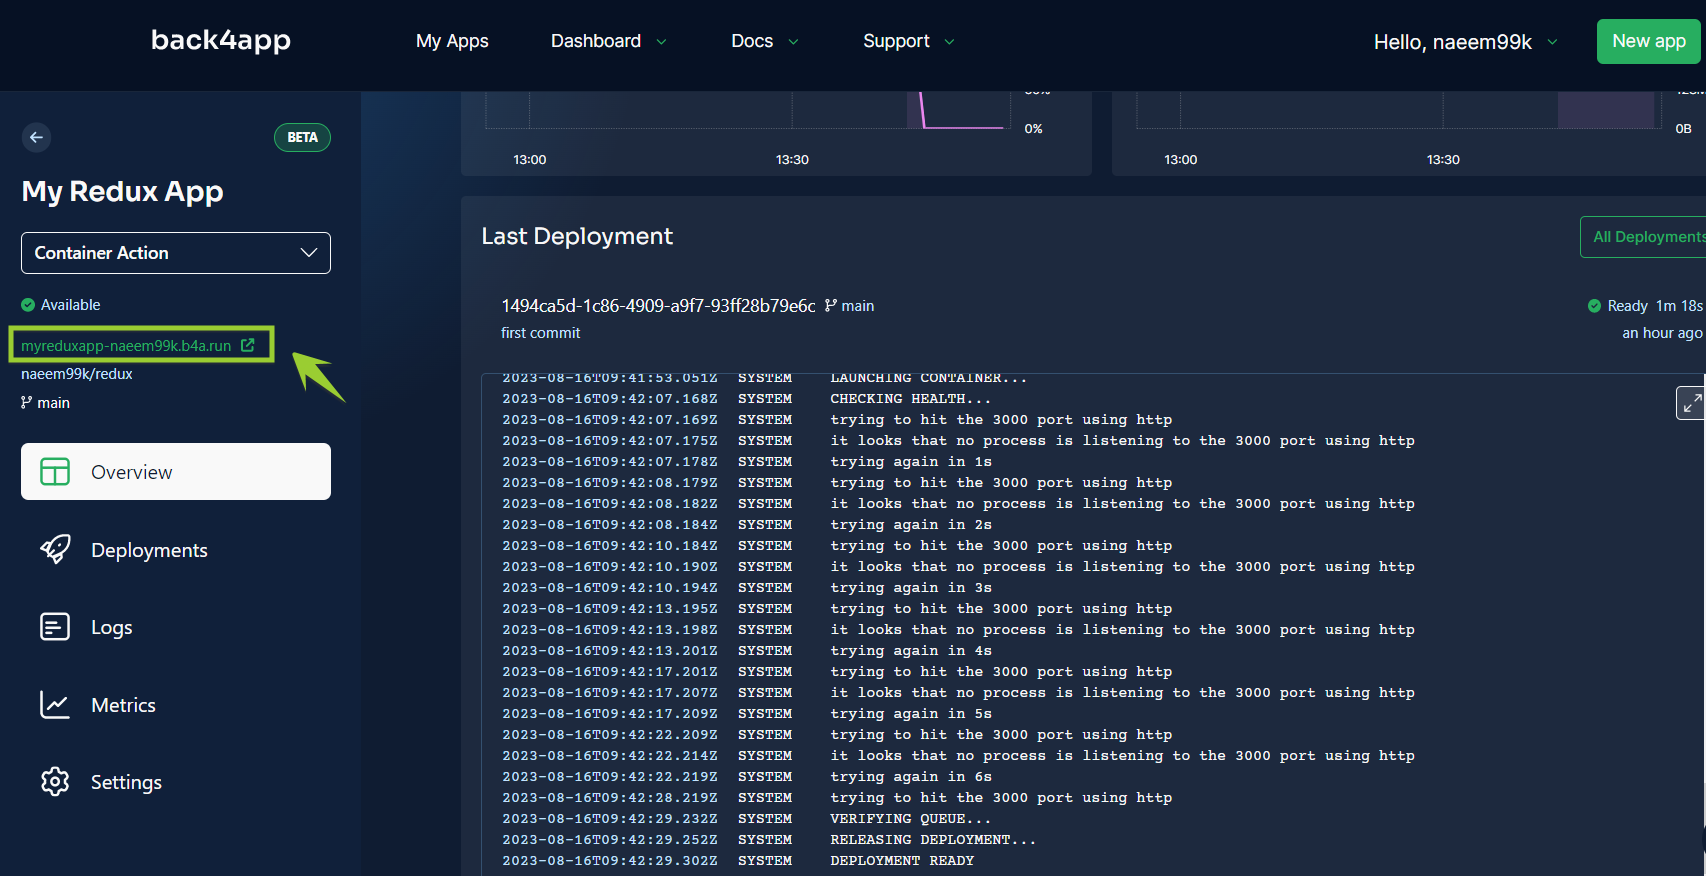
This link will take you to the Redux.js application’s homepage.
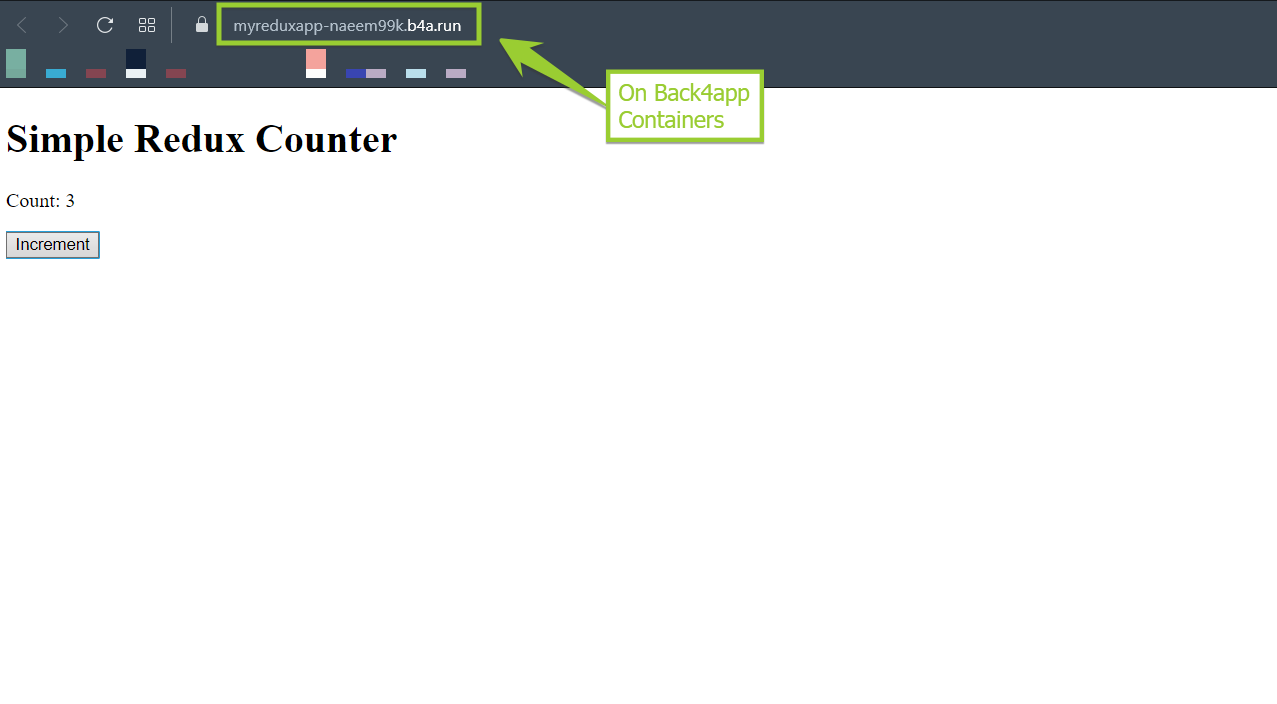
Congratulations! Your Redux.js project has been successfully deployed on Back4app Containers.
Conclusion
In summary, integrating Back4app Containers for deploying Redux.js applications presents developers with a harmonious blend of capabilities.
Developers can seamlessly propel their projects forward by uniting the strengths of Redux.js and Back4app’s containerization. Redux.js simplifies state management, while Back4app expedites deployment and scalability.
Through this approach of Back4app Containers and Redux.js, developers are empowered to create web applications that are user-focused and exhibit exceptional performance and interactivity, ushering in a new era of immersive digital experiences.

