How to make a Geolocation App?
In today’s world, location-based applications are becoming more and more popular. Almost every other popular app incorporates geolocation features to some extent. Some do it to enhance user experience and provide more of a personalized experience, while others are built around location-based features.
In this article, we’ll teach you everything you need to know about geolocation apps. We’ll talk about their key features, types of geolocation apps and explain the process of creating a geoapp from the business’s perspective. Additionally, we’ll guide you through the process of developing a geolocation app using Back4app and React Native.
Contents
- 1 What is a geolocation app?
- 2 Key features of location-based apps
- 3 Types of location-based apps
- 4 Process of creating a geolocation app
- 5 How to develop a geolocation app?
- 6 Conclusion
- 7 FAQ
- 8 What is a geolocation app?
- 9 What are the key features of a geolocation app?
- 10 What are the types of geolocation apps?
- 11 How to develop a geolocation app?
What is a geolocation app?
A geolocation or location-based app is any mobile or web application that tracks the location of the user’s device. Apps do this to personalize and enhance user experience, provide location-dependent services, for marketing purposes, informational purposes, and so on.
Geolocation apps use different technologies to obtain the user’s location, including the following:
- Global positioning system (GPS)
- Assisted global positioning system (A-GPS)
- Indoor geolocation technologies
- Cell towers or WiFi
Each of the mentioned technologies has its advantages and disadvantages. Some are faster, while others are more precise and reliable. But don’t worry about them too much. The location is usually obtained by the device itself.
Key features of location-based apps
Geolocation apps vary a lot in features, but most of them include these geolocation features:
- Map view: The map view is a core feature of geolocation apps. It provides users with a visual representation of their current location and points of interest. It allows users to explore areas, find directions, and perform geospatial queries.
- Location tracking: Geolocation apps often offer real-time location tracking, enabling users to share their location with others or keep track of their movements.
- Personalization: Geolocation apps may offer personalization features, such as saving favorite locations, setting preferences for route types (e.g., walking, driving), visual settings, etc.
- Notifications: Some geolocation apps use geofencing to send notifications when users enter or exit an area. Additionally, they can send a notification when user is near an event, et cetera.
- Integration with other services: Many geolocation apps integrate with 3rd-party services or platforms to enhance functionality. For example, Google integrates with Booking.com to provide hotel options and transit platforms to fetch public transport information.
Types of location-based apps
There are many types of location-based applications, but let’s look at some of the main ones.

Navigation apps are the most obvious example of geolocation apps. They’re usually centered around a map view and provide features such as location tracking, finding nearby businesses, performing geo queries, and providing driving directions.
Examples: Google Maps, Waze, Sygic GPS.
On-demand apps
On-demand apps are another popular example of geolocation apps. These apps allow you to get a ride, order food, groceries, and more. On-demand services use user location to display nearby rides, stores, and restaurants. On top of that, they provide real-time tracking of orders.
Examples: Uber, Uber Eats, Lyft.
Social networks & dating apps
Social media apps are usually less transparent about their geolocation usage. Most social media apps use user location to provide a personalized experience, connect people, tag images and photos, and display regionally popular content.
Examples: Facebook, Instagram, Tinder.
Tourism apps
Tourism apps use user location to recommend nearby hotels, events, experiences, and more.
Examples: Airbnb, Booking, Eventbrite.
Fitness apps
Most fitness apps, especially running apps, have built-in location tracking. Location tracking allows them to track user routes, calculate the route distance, average running speed, altitude difference, and more.
Examples: Strava, GoogleFit, RunKeeper.
Process of creating a geolocation app
Creating a location-based mobile app can be a daunting task. But don’t worry! With the following steps, you’ll be well on your way to creating an excellent geolocation app.
Step 1: Define the geolocation app’s purpose
The first step of creating a geolocation app is to define its purpose and main features. Ask yourself what problem your app will solve and who the target audience is.
Once you know that, it’s time to research the market. Find your competitors and think about what makes your app better than all the existing ones.
Step 2: Pick the technologies
The crucial part of developing a good geolocation app is picking the right tech stack. Your app will likely be split into the backend and the frontend.
When choosing the backend tools, think about what type of data you will store, where the data will be stored, and so on. Conversely, when selecting the frontend technologies, opt for the ones that will allow you to build a responsive app with an elegant design.
Additionally, you’ll need a geolocation API. When choosing a geolocation API, consider different options such as Google Maps, OpenStreetMap, and MapBox. Make sure to pick the geolocation API that is the most appropriate for your type of app.
Step 3: Design the app
This step is the most important one from the user’s perspective. When designing your app, make sure it’s appealing, easy to use, and has a decent amount of features. Follow good UI/UX practices and consider how the end user will use your location-based application.
Step 4: Build an MVP
Before creating a fully-fledged application, creating a minimum viable product (MVP) is a good idea. The MVP should contain enough features to be usable by the early users, who will then provide feedback. The feedback will allow you to validate your idea and improve your product.
Step 5: Full version and release
The last step you have to take is to build a full-version app. Check your project’s backlog and implement all the other vital features. Fix all the bugs and release your geo-based app.
After the release, you’ll, of course, have to maintain your application. The geolocation API might change over time. You’ll have to add support for newer operating systems, fix bugs, add new features, et cetera.
How to develop a geolocation app?
In this article section, we’ll take a look at how to build a geolocation app using Back4app and React Native with Expo.
Prerequisites
- Experience with JavaScript, especially ES6.
- Basic understanding of React Native (and Expo).
- JavaScript IDE installed on your local machine.
- Android emulator or a physical Android device.
What is Back4app?
Back4app is an excellent tool for building modern applications quickly without the need for advanced coding skills. The platform comes with many useful features, such as user management, authentication, real-time databases, Cloud Code functions, social integrations, APIs, and more.
With Back4app, you can focus on the important parts of your app, like the main functionality and design, without worrying about the backend or the complicated infrastructure.
Best of all, Back4app offers a free plan for testing and trying things out. As your app grows, you can then seamlessly upgrade to premium plans with transparent and predictable pricing.
Project Overview
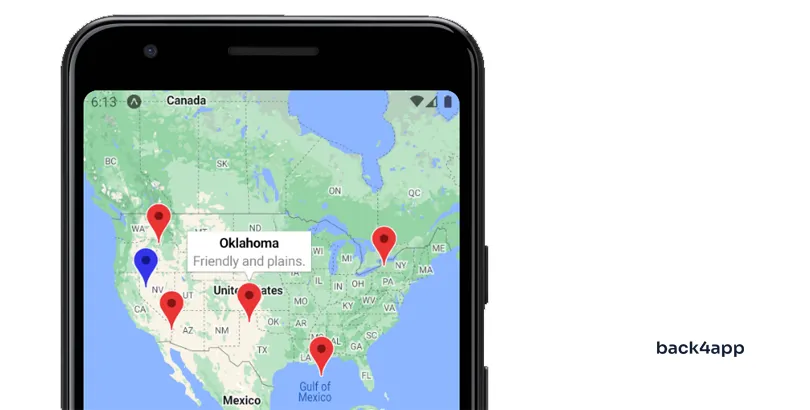
To demonstrate the power of Back4app, we’ll build a simple geolocation app. The app will allow users to view the map, view places stored in the database, and perform geospatial queries. The geo queries will include sorting places by distance, finding places within distance, et cetera. Our app’s backend will be handled by Back4app, and we’ll utilize React Native and Google Maps on the frontend.
Create Back4app App
The following steps will require you to have a Back4app account. If you don’t have one yet, go ahead and sign up for free!
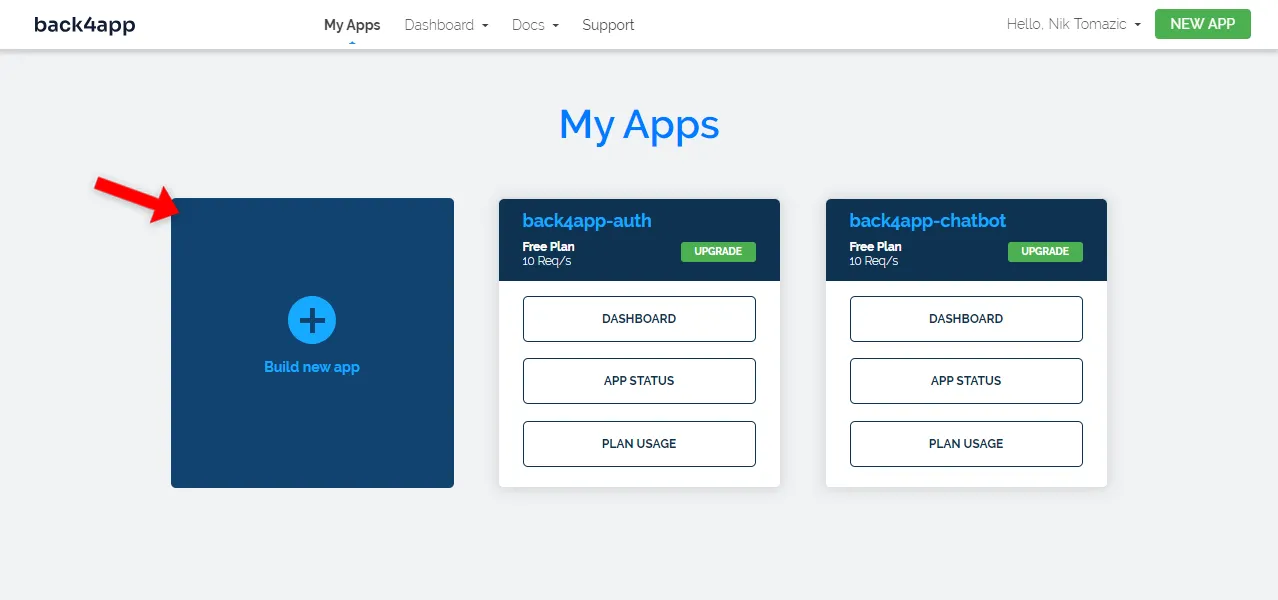
As you log in, you’ll be redirected to your app list. To create a new app, click “Build new app”.
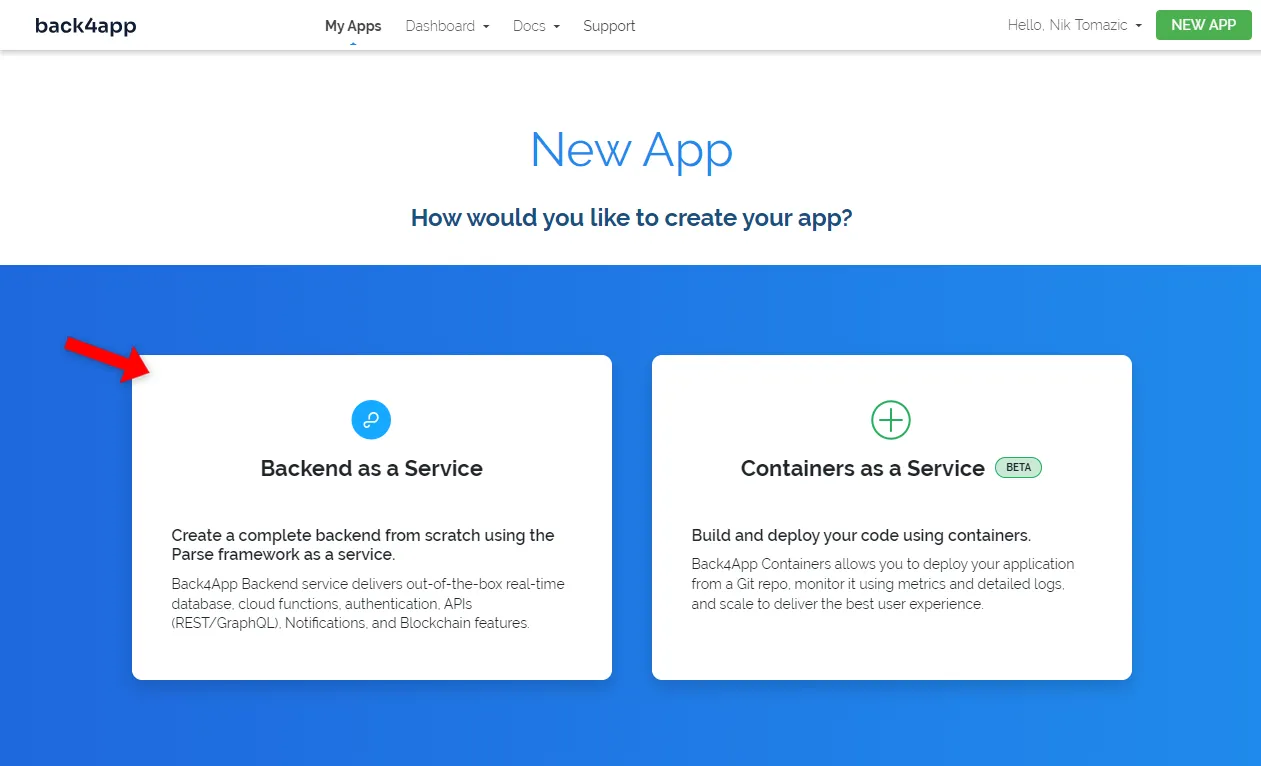
Back4app allows us to deploy two types of apps either:
- Backend as a Service (BaaS) — a fully-fledged backend solution, or
- Containers as a Service (CaaS) — a platform for deploying containerized software.
Since we’re building a geolocation app, we’ll go with “Backend as a Service”.
Next, give your app a nice name, select “NoSQL” as the database, and click “Create”.
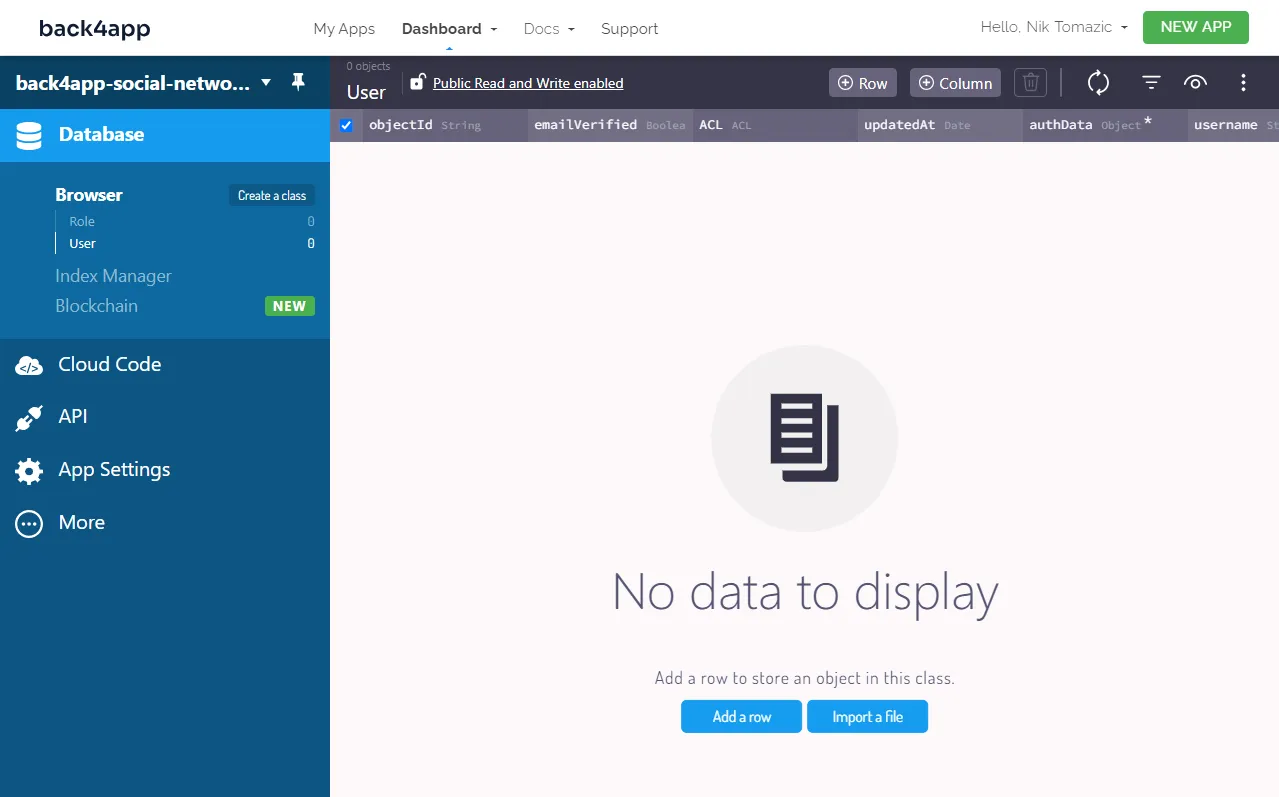
Back4app will take a little bit to prepare everything necessary for your application. Once your application is ready, you’ll be redirected to your app’s database view.
Create Database Classes
Moving along, we need to take care of the database.
As mentioned in the project introduction, we want to store places in the database and display them on the map. We’ll have to create a new database class to hold these places.
Go ahead and create a new class by clicking on the “Create a class” button. Name it Place, enable “Public Read and Write”, and click “Create class & add columns”.
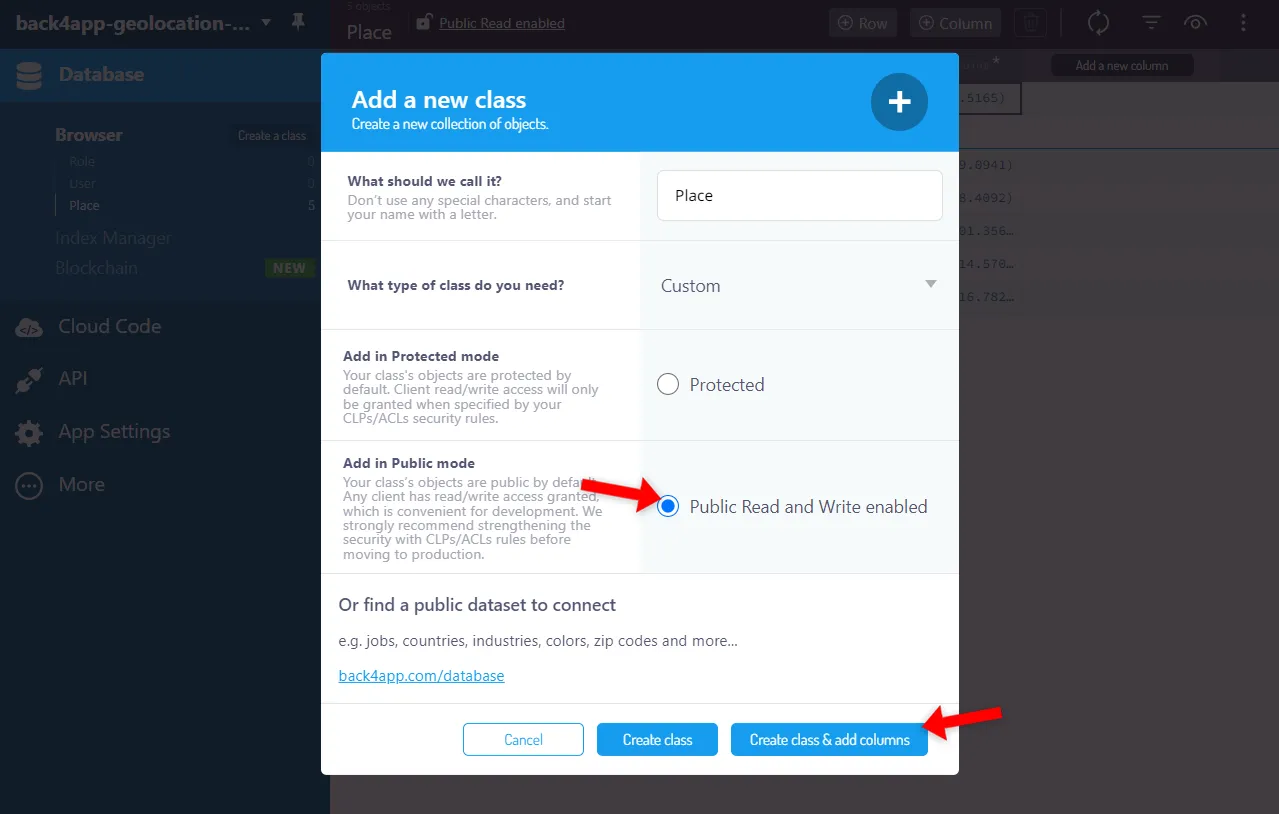
Next, add the following three columns:
+-------------+-------------+--------------------+----------+
| Data type   | Name        | Default value      | Required |
+-------------+-------------+--------------------+----------+
| String      | name        | <leave blank>      | yes      |
+-------------+-------------+--------------------+----------+
| String      | description | <leave blank>      | no       |
+-------------+-------------+--------------------+----------+
| GeoPoint    | location    | <leave blank>      | yes      |
+-------------+-------------+--------------------+----------+
Once you’ve created the class, add a few sample places to the database. Example:
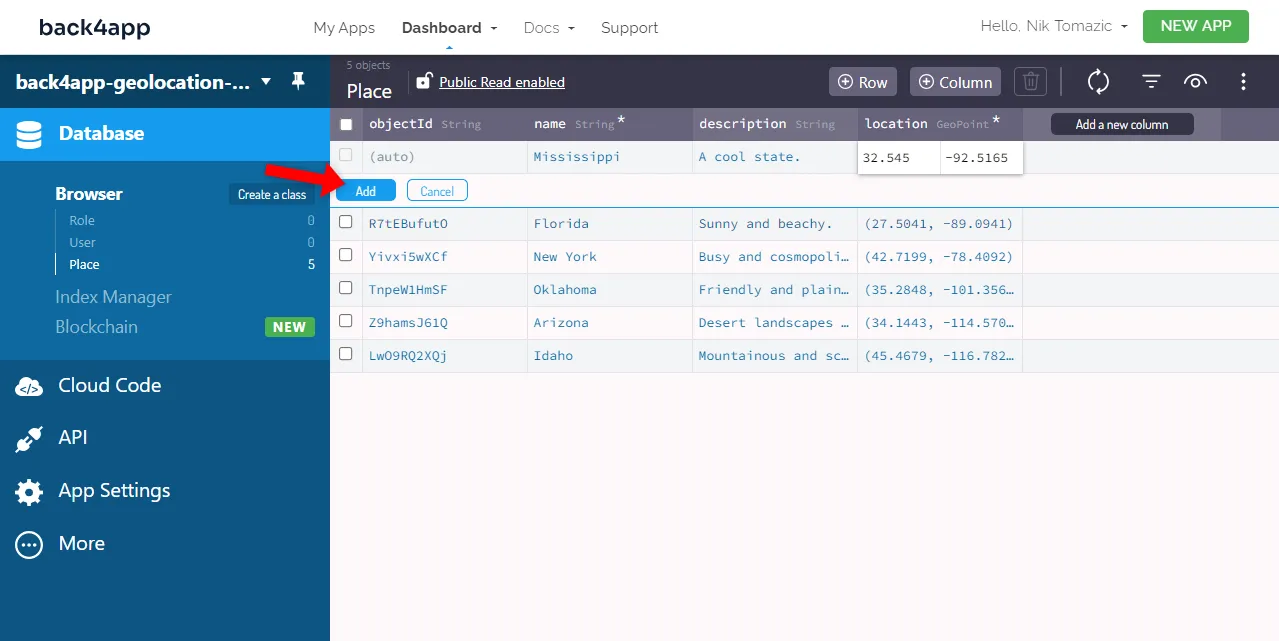
Alternatively, you can import this US states database export. To import it, use the three dots button at the top right of the screen, select “Import > Class Data”, and then select the file.
Great, we’ve successfully created a database class and populated it. The backend part of our project is now complete. That was easy!
Code Frontend
In this section, we’ll take care of the frontend part of our geolocation app.
Init Project
The following steps will require you to have Node installed. If you don’t have it download it.
Start by creating an Expo project:
$ npx create-expo-app@latest back4app-geolocation-app --template blank@sdk-49We used the blank@sdk-49 template because we want to use the newest version of the Expo SDK.
Expo’ll take roughly a minute to prepare everything required for your project. Once your project is ready, change your current directory to it. Then start the Expo development server:
$ cd back4app-geolocation-app
$ expo start
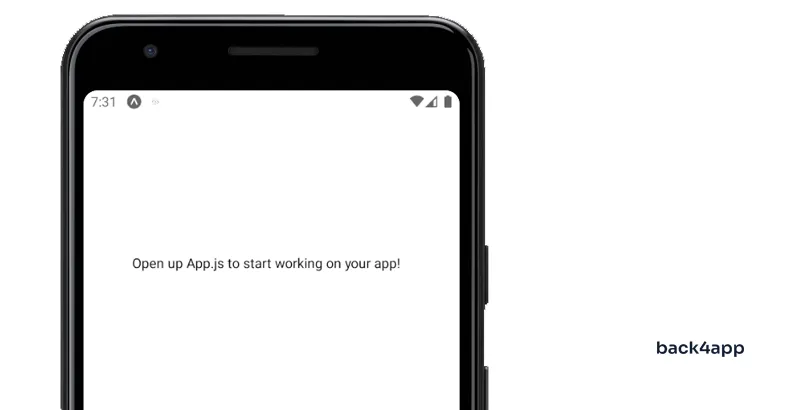
Press A on your keyboard to open the app in the emulator or the connected Android device.
React Native Maps
To display the map, we’ll use react-native-maps. React Native Maps is a great package that provides map components for iOS and Android. It supports Google Maps and MapKit.
Start by installing it via npm:
$ npx expo install react-native-mapsNext, replace your App.js contents to include the <MapView> like so:
// App.js

import React from "react";
import {StyleSheet, View} from "react-native";
import MapView from "react-native-maps";

const initialRegion = {
  latitude: 30.0000,
  longitude: -100.0000,
  latitudeDelta: 64,
  longitudeDelta: 64,
};

export default function App() {
  return (
    <View style={styles.container}>
      <MapView
        initialRegion={initialRegion}
        style={styles.map}
      />
    </View>
  );
}

const styles = StyleSheet.create({
  container: {
    flex: 1,
  },
  map: {
    zIndex: 10,
    width: "100%",
    height: "100%",
  },
});
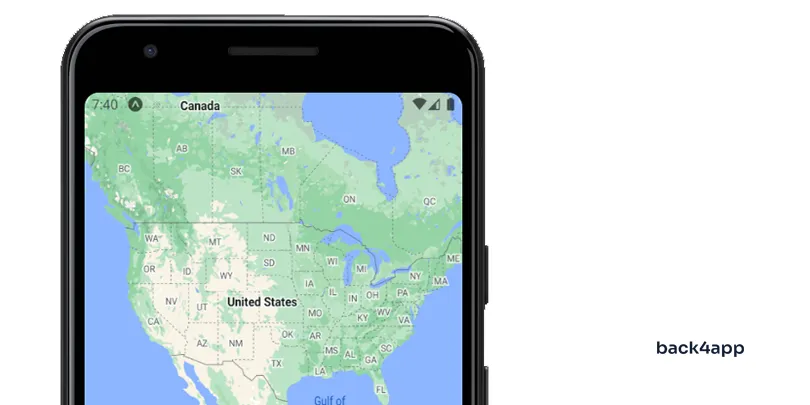
If you open the app now, you should be able to see the map.
Fetch User Location
To fetch user locations, we’ll utilize the expo-location package.
Start by installing it via npm:
$ npx expo install expo-locationBefore accessing the user’s location, we must ask for their permission. To do that, we can use the built-in Expo function called requestForegroundPermissionsAsync() in the useEffect() like so:
// App.js

import React, {useEffect, useState} from "react";
import {StyleSheet, View} from "react-native";
import MapView, {Marker} from "react-native-maps";
import * as Location from "expo-location";

// ...

export default function App() {

  const [location, setLocation] = useState(null);

  useEffect(() => {
    (async () => {
      let {status} = await Location.requestForegroundPermissionsAsync();
      if (status !== "granted") {
        console.error("Permission to access location was denied.");
        return;
      }
      let location = await Location.getCurrentPositionAsync({});
      setLocation(location);
    })();
  }, []);

  return (
    <View style={styles.container}>
      <MapView
        initialRegion={initialRegion}
        style={styles.map}
      >
        {location && (
          <Marker
            title="You are here"
            description={`
              ${location.coords.latitude.toFixed(4)},
              ${location.coords.longitude.toFixed(4)}
            `}
            coordinate={{
              latitude: location.coords.latitude,
              longitude: location.coords.longitude,
            }}
            pinColor="blue"
          />
        )}
      </MapView>
    </View>
  );
}

// ...- When the app starts, we ask for user’s permission to access their coarse location. If the access is granted, we then store the location in the
locationstate usinguseState(). - We updated the return statement to display the user’s location (if
locationis notnull).
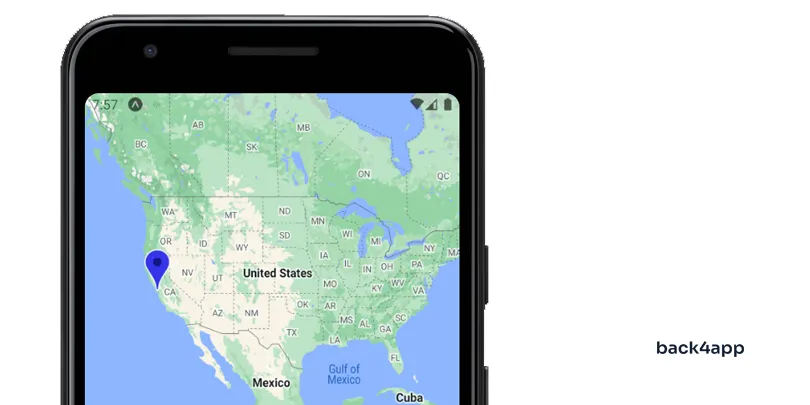
Rerun the app, and you should be able to see a blue marker indicating your current location.
Install Parse
As you might know, Back4app is based on the Parse platform. If we want to interact with the Back4app database or Back4app in general, we have to install the Parse SDK.
First, install the Parse SDK:
$ npx expo install [email protected] @react-native-async-storage/async-storageI used Parse version
3.5.1, because the newer version doesn’t work well with Expo SDK 49.
Next, create a Parse instance in App.js right under the imports:
// App.js

// ...

import Parse from "parse/react-native.js";
import AsyncStorage from "@react-native-async-storage/async-storage";

Parse.setAsyncStorage(AsyncStorage);
Parse.initialize(
  process.env.EXPO_PUBLIC_PARSE_APPLICATION_ID,
  process.env.EXPO_PUBLIC_PARSE_JAVASCRIPT_KEY,
);
Parse.serverURL = "https://parseapi.back4app.com/";

// ...
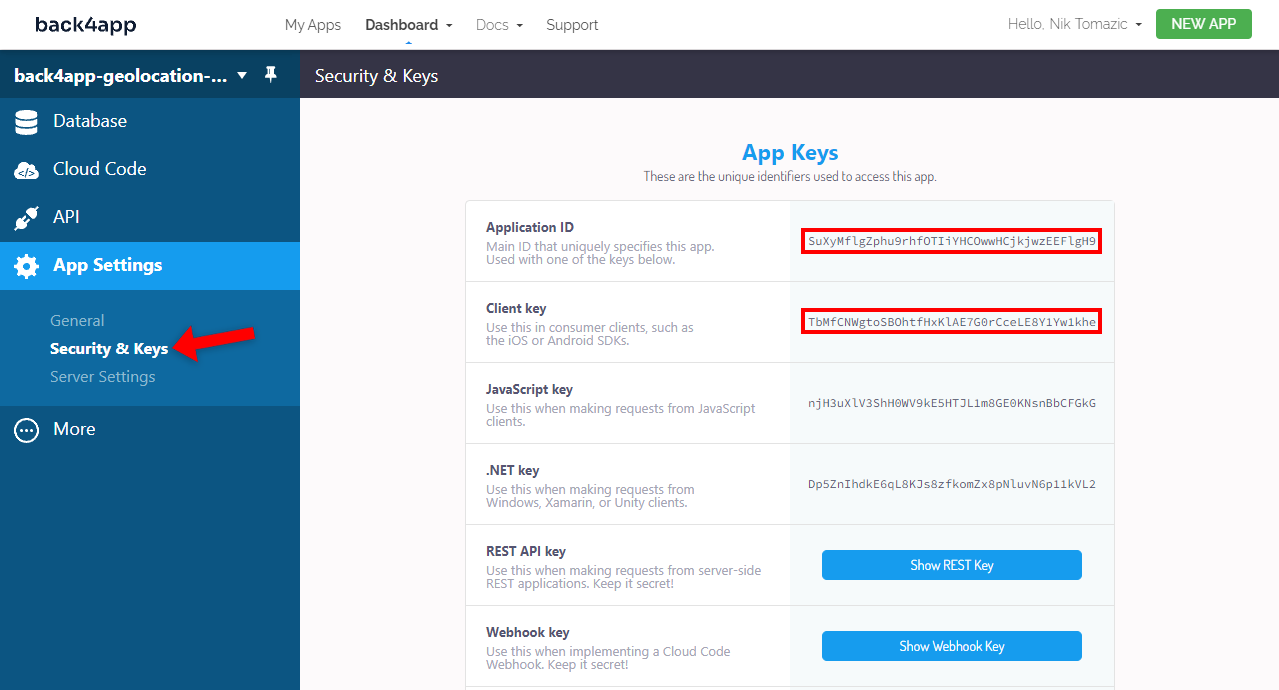
We’ll utilize environmental variables instead of hard coding the Parse application ID and JavaScript key. Since SDK 49, Expo automatically loads environmental variables from the .env.local file.
Go ahead and create .env.local file in the project root with the following contents:
EXPO_PUBLIC_PARSE_APPLICATION_ID=<parse_app_id>
EXPO_PUBLIC_PARSE_JAVASCRIPT_KEY=<parse_javascript_key>
Make sure to replace <parse_app_id> and <parse_javascript_key> with your actual ID and key. To obtain your credentials navigate to your Back4app app and select “App Settings > Security & Keys” in the sidebar.
Fetch Places from Database
To fetch places from the database, we’ll use the Parse instance we’ve created in the earlier step.
We first need to create a new Parse.Query on the Place class and then run find() to execute the query. After that we transform the results into our marker format.
Modify your App.js like so:
// App.js

// ...

export default function App() {

  // ...

  const [places, setPlaces] = useState([]);

  useEffect(() => {
    // ...

    // fetch `Place` objects from the database
    const placesQuery = new Parse.Query("Place");
    placesQuery.find().then((places) => {
      places = places.map((place) => {
        return {
          title: place.get("name"),
          description: place.get("description"),
          coordinate: {
            latitude: place.get("location").latitude,
            longitude: place.get("location").longitude,
          },
        };
      });
      setPlaces(places);
    });
  }, []);

  return (
    <View style={styles.container}>
      <MapView
        initialRegion={initialRegion}
        style={styles.map}
      >
        // ...
        {places.map((place, index) => (
          <Marker
            key={index}
            title={place.title}
            description={place.description}
            coordinate={place.coordinate}
          />
        ))}
      </MapView>
    </View>
  );
}

// ...- We used
useState()to create another state that holds markers for places. - We upgraded the
useEffect()hook to get the places from the database on app startup. - We changed the render function to display
Placemarkers on the map.
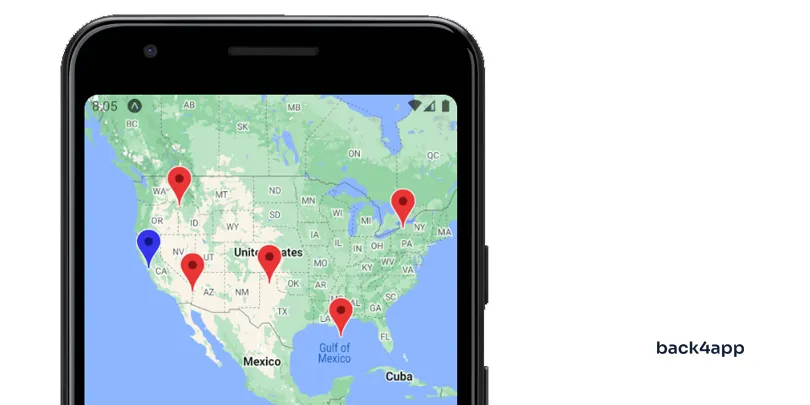
Open your app once again, and you should be able to see all the places.
Geoqueries
In this last section, we’ll look at how to perform geospatial queries using Back4app.
Parse comes with a class named GeoPoint. The GeoPoint class represents a latitude/longitude point and allows us to calculate distances between two GeoPoints, and perform proximity-based queries.
We’ll leverage this class to implement the following two functionalities:
- Sort places from the user’s location by distance.
- Find places within
Xkilometers of the user’s location.
Go ahead and add the following to your App.js:
// App.js

// ...

const maxDistance = 3000;

export default function App() {

  // ...

  const sortPlacesByProximity = async () => {
    let parseQuery = new Parse.Query("Place");
    let locationGeoPoint = new Parse.GeoPoint(
        location.coords.latitude,
        location.coords.longitude
    );
    parseQuery.near("location", locationGeoPoint);

    let results = await parseQuery.find();
    for (let result of results) {
      console.log(result.get("name"));
    }
  };

  const findPlacesWithinDistance = async () => {
    let parseQuery = new Parse.Query("Place");
    let locationGeoPoint = new Parse.GeoPoint(
        location.coords.latitude,
        location.coords.longitude
    );
    parseQuery.withinKilometers("location", locationGeoPoint, maxDistance);

    let results = await parseQuery.find();
    for (let result of results) {
      console.log(result.get("name"));
    }
  }

  const moveUserToRandomLocation = () => {
    setLocation({
      coords: {
        latitude: Math.random() * (-78.848974 - -103.520833) + 31.3845,
        longitude: Math.random() * (-78.848974 - -123.885444) + -123.885444,
      }
    });
  };

  return (
    <View style={styles.container}>
      <View style={styles.buttonContainer}>
        <Button
          title="Sort places by proximity"
          color="#239658"
          onPress={sortPlacesByProximity}
        />
        <Button
          title={`Find places within ${maxDistance} km`}
          color="#239658"
          onPress={findPlacesWithinDistance}
        />
        <Button
          title="Move user to random location"
          color="#061124"
          onPress={moveUserToRandomLocation}
        />
      </View>
      // ...
    </View>
  );
}

const styles = StyleSheet.create({
  // ...
  buttonContainer: {
    zIndex: 25,
    width: "100%",
    position: "absolute",
    bottom: 0,
    marginVertical: 4,
    display: "flex",
    gap: 4,
  },
});sortPlacesByProximity()andfindPlacesWithinDistance()first transform user’s location to aGeoPoint, create aParse.Query, and then execute a specific geo function.moveUserToRandomLocation()is used to move the user to a random location within the US. This method is used primarily for testing the previously two mentioned methods.- We also added three buttons for triggering the corresponding functions.
Don’t forget about the import at the top of the file:
import {Button, StyleSheet, View} from "react-native";Rerun the server, and you should see the following:
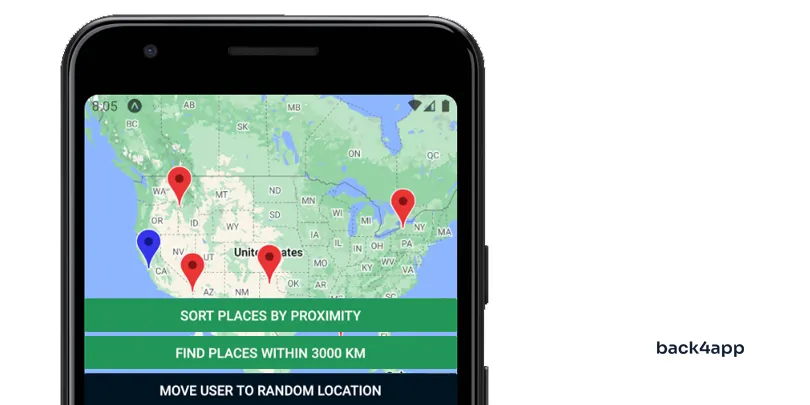
Test the geo queries by clicking the “Sort places by proximity” button:
LOG  Arizona
LOG  Idaho
LOG  Oklahoma
LOG  Florida
LOG  New York
Do the same for the within-distance functionality:
LOG  Arizona
LOG  Idaho
LOG  Oklahoma
Lastly, move the user to a random location and test the geo queries again.
Conclusion
In this article, we’ve successfully built a geolocation app. The app allows users to view the map, see their location, fetch places from the database, and perform geo queries. By now, you should have a good understanding of how geolocation apps work and how they’re built.
Here are a few ideas you can implement to test your understanding:
- Real-time user location tracking (the user marker should move when the device moves)
- User location history (users should be able to view their location history)
- Navigation (display path from the user location to a custom location)
The source code is available on the back4app-geolocation-app GitHub repository.
FAQ
What is a geolocation app?
A geolocation or location-based app is any mobile or web application that tracks the location of the user’s device. Apps do this to personalize and enhance user experience, provide location-dependent services, for marketing purposes, informational purposes, and so on.
What are the key features of a geolocation app?
– Map view
– Location tracking
– Personalization
– Notifications
– Integration with other services
What are the types of geolocation apps?
– Navigation apps
– On-demand apps
– Social networks
– Tourism apps
– Fitness apps
How to develop a geolocation app?
1. Create a BaaS-based app on Back4app.
2. Use Back4app’s database view to design the database.
3. Bootstrap a frontend project using your favorite technology, e.g., Expo.
4. Install a geolocation API and the Parse SDK.
5. Use Parse.GeoPoint class and other Back4app geo features.
6. Implement all the features.


