How to Upload Files to Back4app
Effective file management is crucial when developing web applications that involve user file uploads.
Back4app provides an easy and efficient file storage, management, and retrieval solution mechanism based on Parse.
In this guide, you will learn how to store your files using Back4app by integrating its file storage capabilities with a React app.
Contents
How File Storage Works on Back4app
Back4app manages file uploads and storage using the Parse.File class.
The Parse.File class allows you to store files that are too large to store in Parse.Object such as images, videos, documents, and any other binary data.
To upload a file to Back4app’s cloud storage, you have to create an instance of Parse.File with the file data and save the instance. A new instance of Parse.File requires a file name, the file, and the content/file type (optional).
It is important to ensure that the file name contains a file extension to help Parse handle it accordingly.
However, your names don’t have to be unique because each upload gets a unique identifier, so uploading multiple files named example.jpeg won’t cause naming collisions.
When you upload a file, Parse.File auto-detects its type based on the file extension from the file name. However, you can override the auto-detection by specifying the Content-Type parameter.
To access your uploaded files on Back4app, you need to associate them with a data object after you upload them.
Then, you can query the associated data object to retrieve the files. Files that are uploaded but not associated with a data object become “orphan files,” and you won’t be able to access them.
Now that you understand how file storage works on Back4app, you will create a gallery application with React to demonstrate how you can store and retrieve files from Back4app.
Creating a React Application
To implement Back4app’s file storage capabilities with React, you first need to create a React application to integrate with Back4app. To do this, you use Vite, a front-end tool for quickly building web applications.
You can create a React application with Vite by running the following command in your terminal:
npm init vite
Once you run the command above, Vite will ask you to provide a name for the project before giving a list of options for selecting the framework you want to use to build your web application.
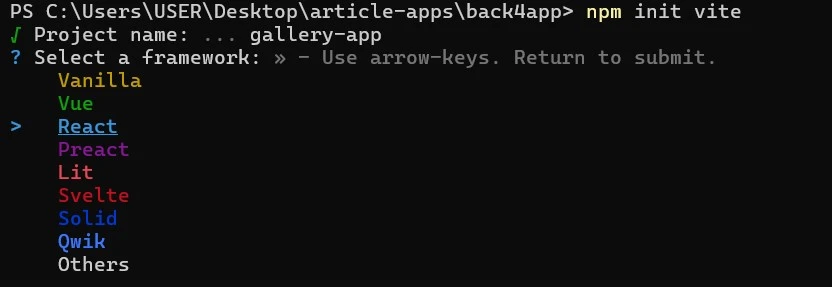
As seen in the image above, the project’s name is gallery-app. After selecting the React option, you will choose the programming language to develop the React application.

For this project, select the JavaScript option. Now, your project is ready.
Next, you need to install some required dependencies in your project. To install the dependencies, switch to your project directory and run the command below:
# Switch to the project directory
cd gallery-app

# Install dependencies
npm install
This command will install all the necessary dependencies in your project, and you can now start building your application on your IDE.
Building the React Application
Open your React project with your IDE and create a components folder in the src directory. Within the components folder, add a FileUpload component.
In the FileUpload component, add the following lines of code:
//FileUpload.jsx
import React from "react";

function FileUpload({updateData}) {
  const [file, setFile] = React.useState("");

  const handleFIleUpload = (event) => {
    setFile(event.target.files[0]);
  };

  return (
    <form>
      <label htmlFor="file-upload" className="custom-file-upload">
        Choose File
      </label>
      <input
        id="file-upload"
        type="file"
        style={{ display: "none" }}
        onChange={handleFileUpload}
      />
    </form>
  );
}

export default FileUpload;
The code block above represents a FileUpload component that allows you to select a local file. It contains a file state. It utilizes an input element of the file type to access and select a local file from your device.
In the code block, there is a handleFileSelect function. This function uses the setFile method to update the file state with the first file selected by the user.
Now, modify the code in your app component by adding the lines of code in the code block below:
//App.jsx
import FileUpload from "./components/FileUpload";

function App() {
  return (
    <main className="container">
      <h1 className="title">My Gallery</h1>
      <>
        <FileUpload />
      </>
    </main>
  );
}

export default App;
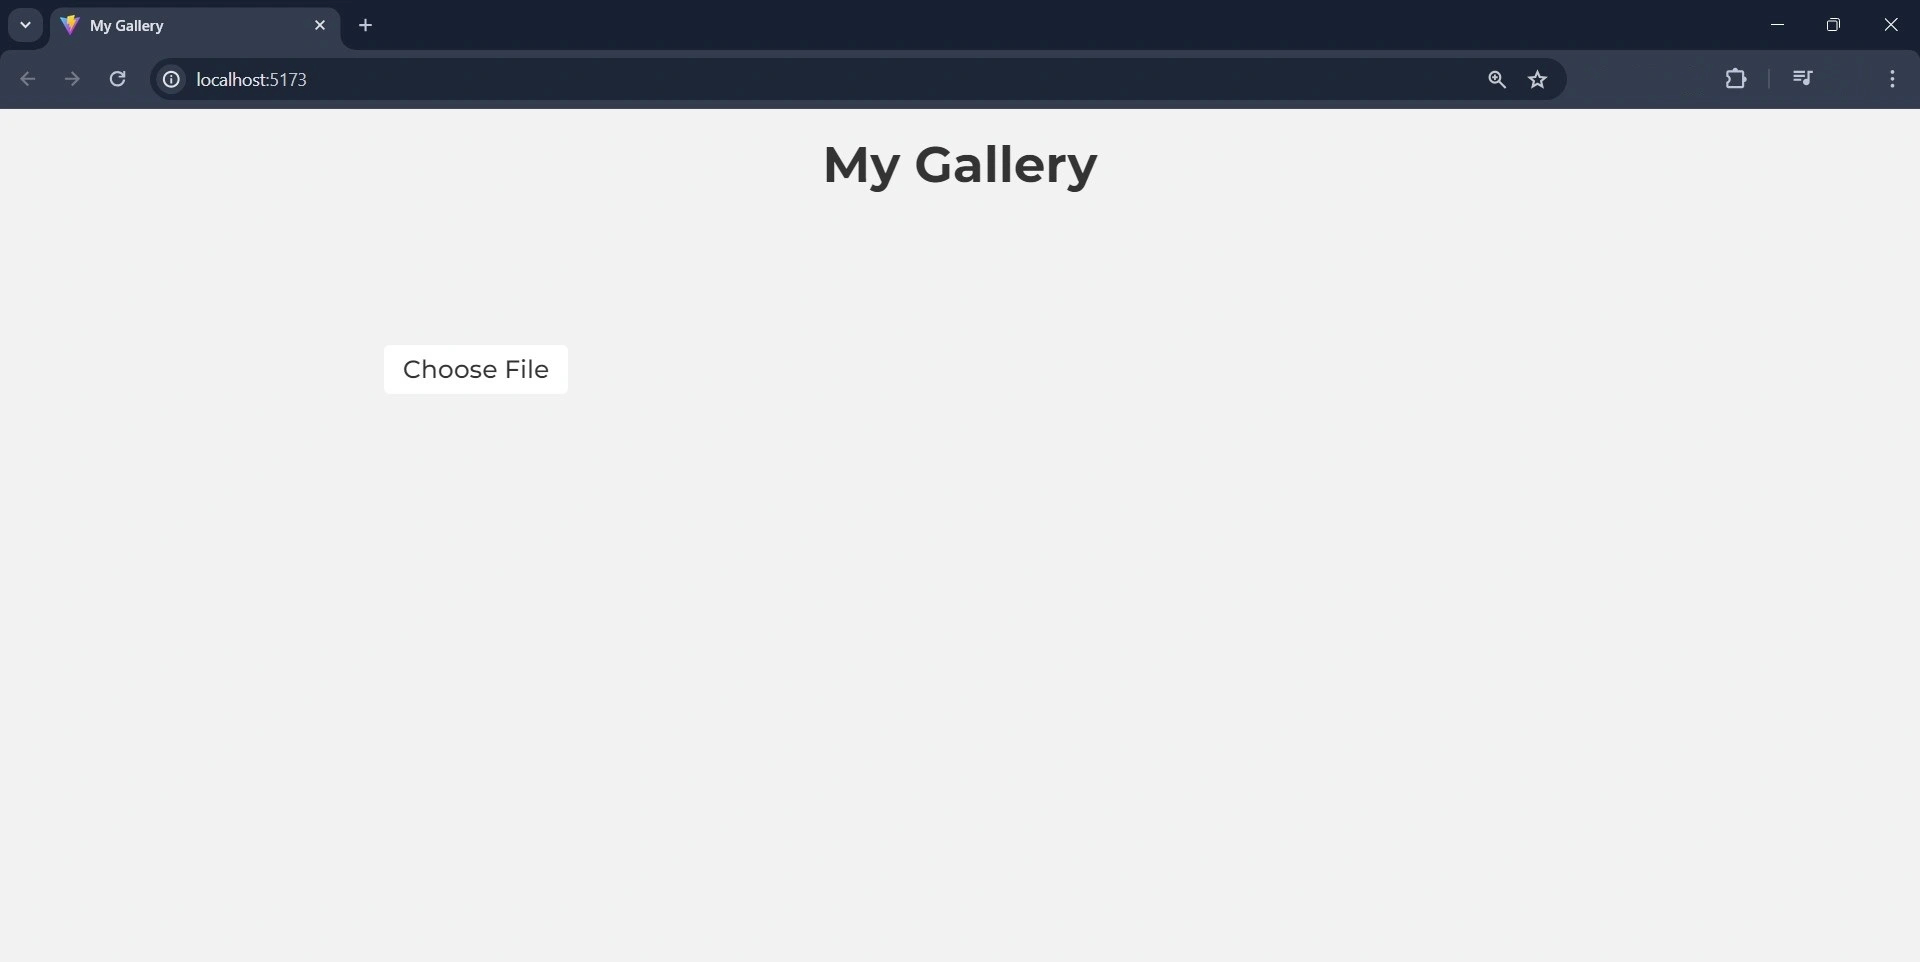
This code block above imports the FileUpload component and renders it within a main element. The component also contains a h1 element that renders the text “My Gallery.”
You have your components ready. Next, you need to style the application. To do this, replace the code in your index.css file and add this code instead:
/*index.css*/
@import url('<https://fonts.googleapis.com/css2?family=Montserrat:ital,wght@0,100..900;1,100..900&display=swap>');

*{
  margin: 0;
  padding: 0;
  box-sizing: border-box;
}

body{
  background-color: #F2F2F2;
  color: #333333;
  font-family: "Montserrat", sans-serif;
}

.container{
  inline-size: 60%;
  margin: auto;
}

.title{
  text-align: center;
  margin-block-start: 1rem;
  margin-block-end: 6rem;
}

.custom-file-upload {
  display: inline-block;
  font-weight: 500;
  padding: 6px 12px;
  cursor: pointer;
  background: #FFFFFF;
  border: none;
  border-radius: 4px;
}

.custom-file-upload:hover {
  background-color: #333333;
  color: #FFFFFF;
}
Setting up a Back4app Application
To set up a Back4app application, you need to be logged in to your Back4app account. If you don’t have an account, you can create one for free.
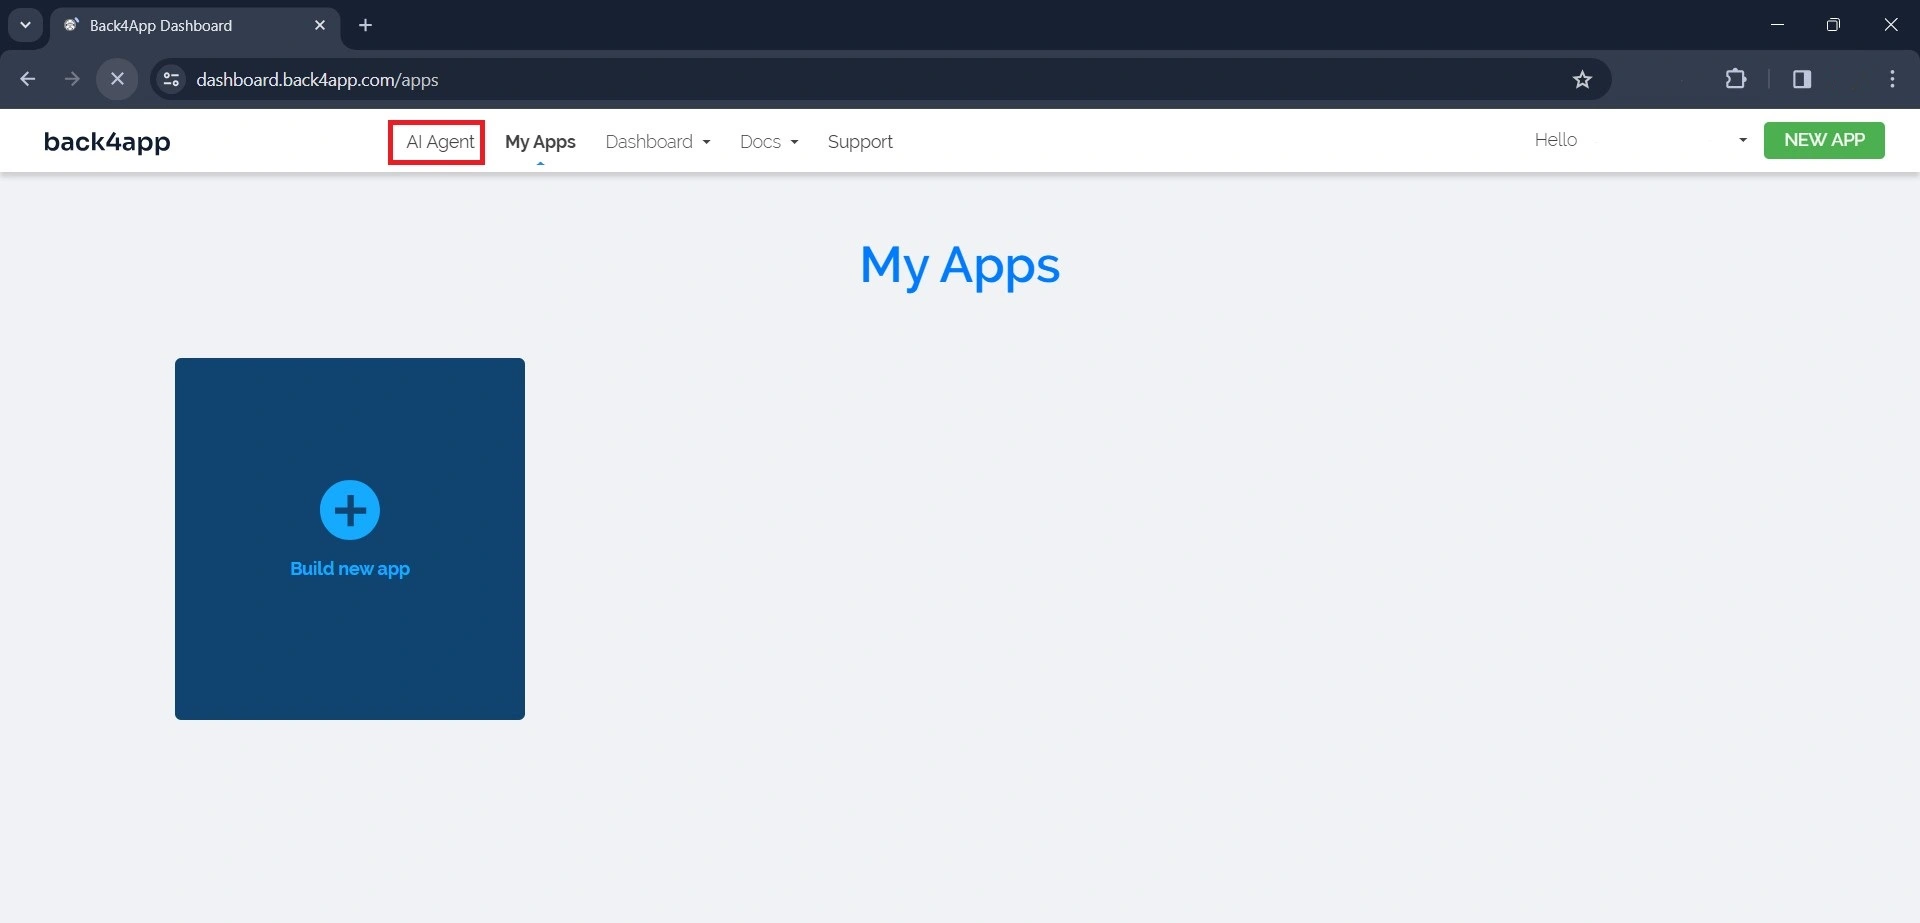
Once logged in, you will use the Back4app AI agent to create a new app. The AI agent is a Back4app service that allows you to interact and manage your Back4app applications using prompts.
You can access it by clicking on the AI agent link on the navigation bar of your account dashboard, as shown in the image below.
To create a Back4app application with the AI agent, write a message asking the AI to create the application, similar to the prompt below:
Create a new Back4app application named gallery-appThe prompt above will make the AI create a new Back4app application. Once the AI creates the application, it will send a response confirming its creation along with the application’s credentials.
Like so:
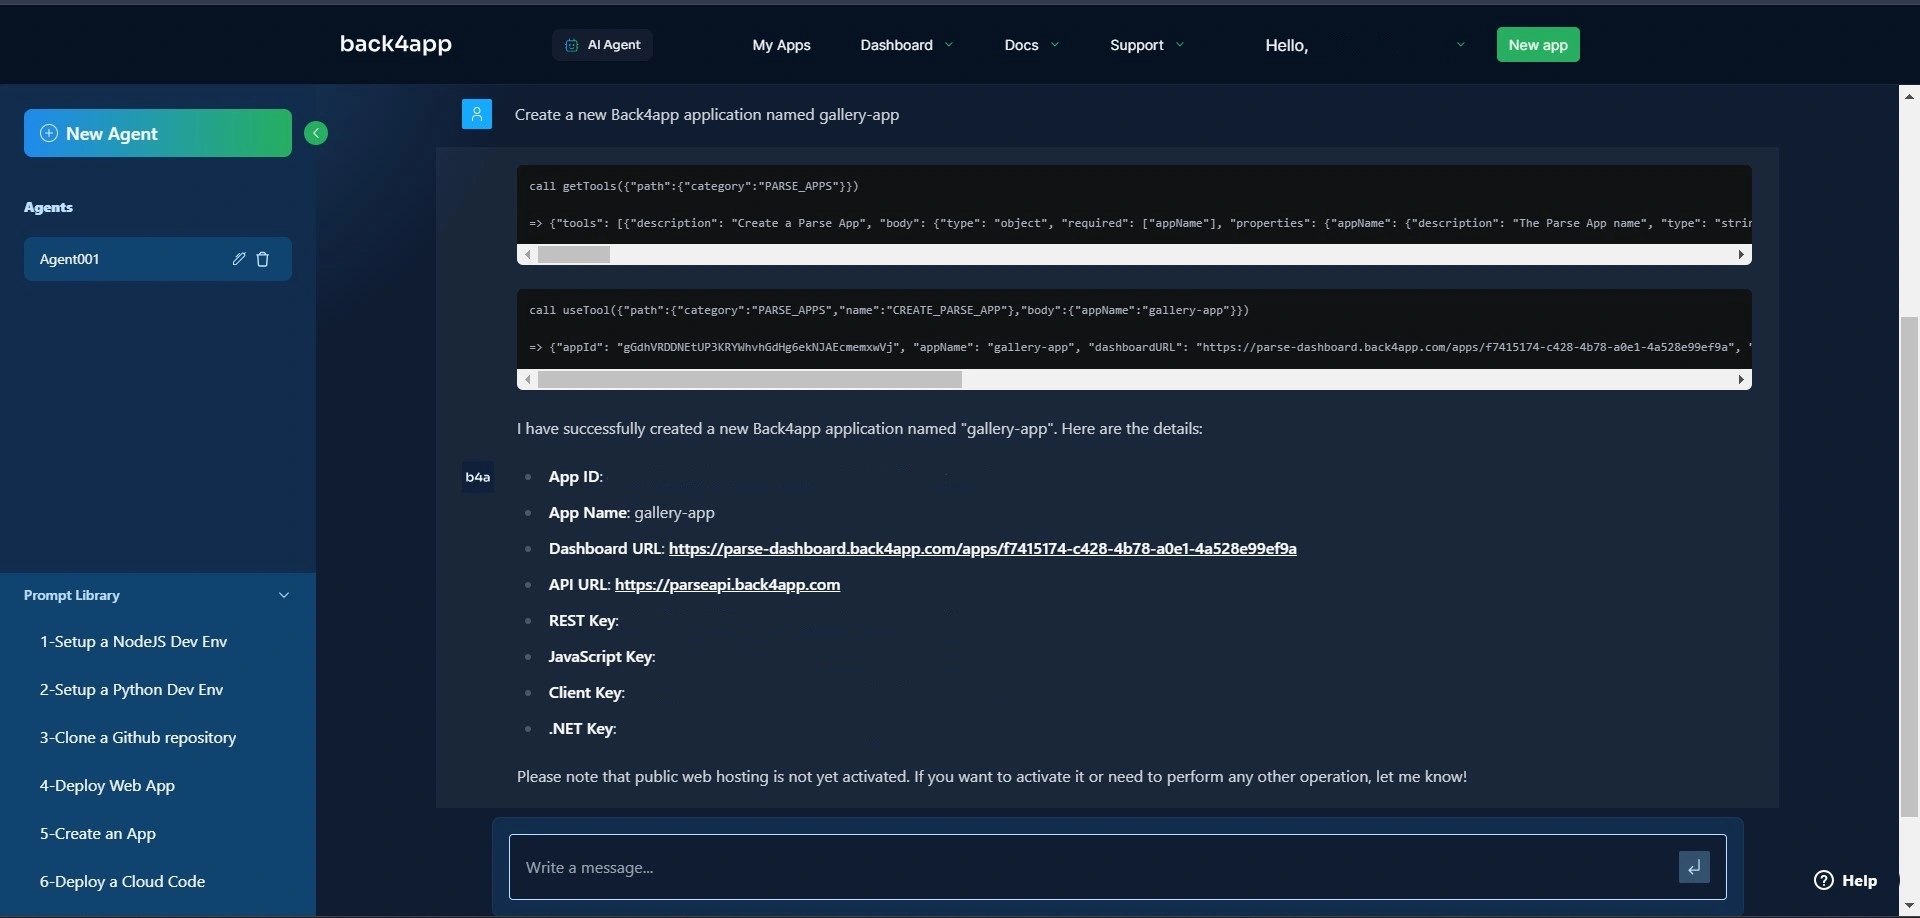
Now, your Back4app application is ready. Copy the App ID and JavaScript key credentials because you will need them later.
To access the application, visit your application dashboard by clicking the “My Apps” link on the navigation bar.
Now that you have successfully created a Back4app backend using the AI agent, next, you will need to connect your React app to your backend.
Connecting Your React App to Back4app
To connect your React app to Back4app, you will need to install the Parse SDK by running the command below:
npm install parse
Next, import a minified version of parse into your app component and initialize it with the credentials you saved earlier in the article by adding the code block below to your app component:
//App.jsx

import Parse from 'parse/dist/parse.min.js';

Parse.initialize('YOUR_APP_ID', 'YOUR_JAVASCRIPT_KEY');
Parse.serverURL = "<https://parseapi.back4app.com/>";
Replace 'YOUR_APPLICATION_ID' and 'YOUR_CLIENT_KEY' with the credentials obtained from your Back4App. Ensure that you save the credentials securely, for example, using env variables.
Uploading Files to Back4app
To store a file on Back4app’s cloud storage, you first need to create an instance of Parse.File. Next, you need to save the Parse.File instance by calling the save method on it.
Then, you need to associate the saved file with a data object, so that you can be able to retrieve the file.
To achieve this, create a new subclass of Parse.Object, add the file to a property of your new subclass, and save it to Back4app.
To implement the logic above, modify the handleFileUpload function in the FileUpload component to match the code block below:
//FileUpload.jsx
const handleFileUpload = async (event) => {
    event.preventDefault();
    try {
      let name = "image.jpg";
      const File = new Parse.File(name, event.target.files[0]);
      const photo = await File.save();

      const Gallery = Parse.Object.extend("Gallery");
      const gallery = new Gallery();
      gallery.set("photo", photo);
      await gallery.save();

      console.log("File saved:", File);
      updateData();
    } catch (error) {
      console.error("Error saving file:", error);
    }
  };
The handleFileUpload function holds the logic responsible for uploading a photo from your local device to the server. It creates a new Parse.File instance.
The Parse.File method takes two arguments: the name variable representing the photo’s name and the first file the user selects.
The function saves the file to the server by calling the save method on the File instance. It then creates a new Parse object for a Gallery class.
Using the set method, it sets the photo file as the value of the photo property of the gallery object. Finally, the function saves the gallery object to the server with the gallery.save() function.
Fetching Files From Back4app
To fetch a file from Back4app’s cloud storage, you need to retrieve the Parse Object holding the file. You can do this by creating a new query targeting the class with the Parse Object.
To implement the logic above, create a Feed component and add the code block below to it:
//Feed.jsx
import React from "react";
import Parse from "parse/dist/parse.min.js";

function Feed({data}) {
  const [gallery, setGallery] = React.useState([]);

  React.useEffect(() => {
    const fetchFiles = async () => {
      let query = new Parse.Query("Gallery");
      const results = await query.find();
      setGallery(results);
    };
    fetchFiles();
  }, [data]);

  return (
    <div className="photos">
      {gallery.map((item) => (
        <img src={item.get("photo").url()} key={item.id} />
      ))}
    </div>
  );
}

export default Feed;
The code block above creates a gallery state and assigns it an empty array. It uses the useEffect hook to run the fetchFiles function.
The useEffect hook will run the function after the component’s first render and whenever the data prop changes.
The fetchFiles function creates a new query targeting the “Gallery” class with the Parse.Query method.
Calling the find method on the query returns an array containing the query’s results. Finally, the fetchFiles function assigns the array of the results to the gallery state using the setGallery function.
Finally, with the map method, you render an img element for every item in the gallery array. The code sets the value of the img element’s src attribute to the URL of each item’s photo property.
Style the div element with the class photos by adding the code block below to your index.css file:
/*index.css*/
.photos{
  display: grid;
  grid-template-columns: repeat(3,1fr);
  gap: 2rem;
  margin-block-start: 4rem;
}
To display the Feed component in your application, ensure that you import and call the Feed component in your App component. After making all the modifications, your App component should look like this:
//App.jsx
import React from "react";
import Parse from "parse/dist/parse.min.js";
import FileUpload from "./components/FileUpload";
import Feed from "./components/Feed";

Parse.initialize(PARSE_APP_ID, PARSE_JAVASCRIPT_KEY);
Parse.serverURL = "<https://parseapi.back4app.com/>";

function App() {
  const [data, setData] = React.useState(1);

  const updateData = (prevState) => {
    setData(() => prevState + 1);
  };

  return (
    <main className="container">
      <h1 className="title">My Gallery</h1>

      <>
        <FileUpload updateData={updateData} />
        <Feed data={data} />
      </>
    </main>
  );
}

export default App;
Testing your Application
Start your application by running the code block below in your application’s directory:
npm run dev
Running the command above will start up your application on http://localhost:5173/.
Navigate to http://localhost:5173/, and you should see a page similar to the image below:
Click on the “Choose File” button and select an image from your local device.
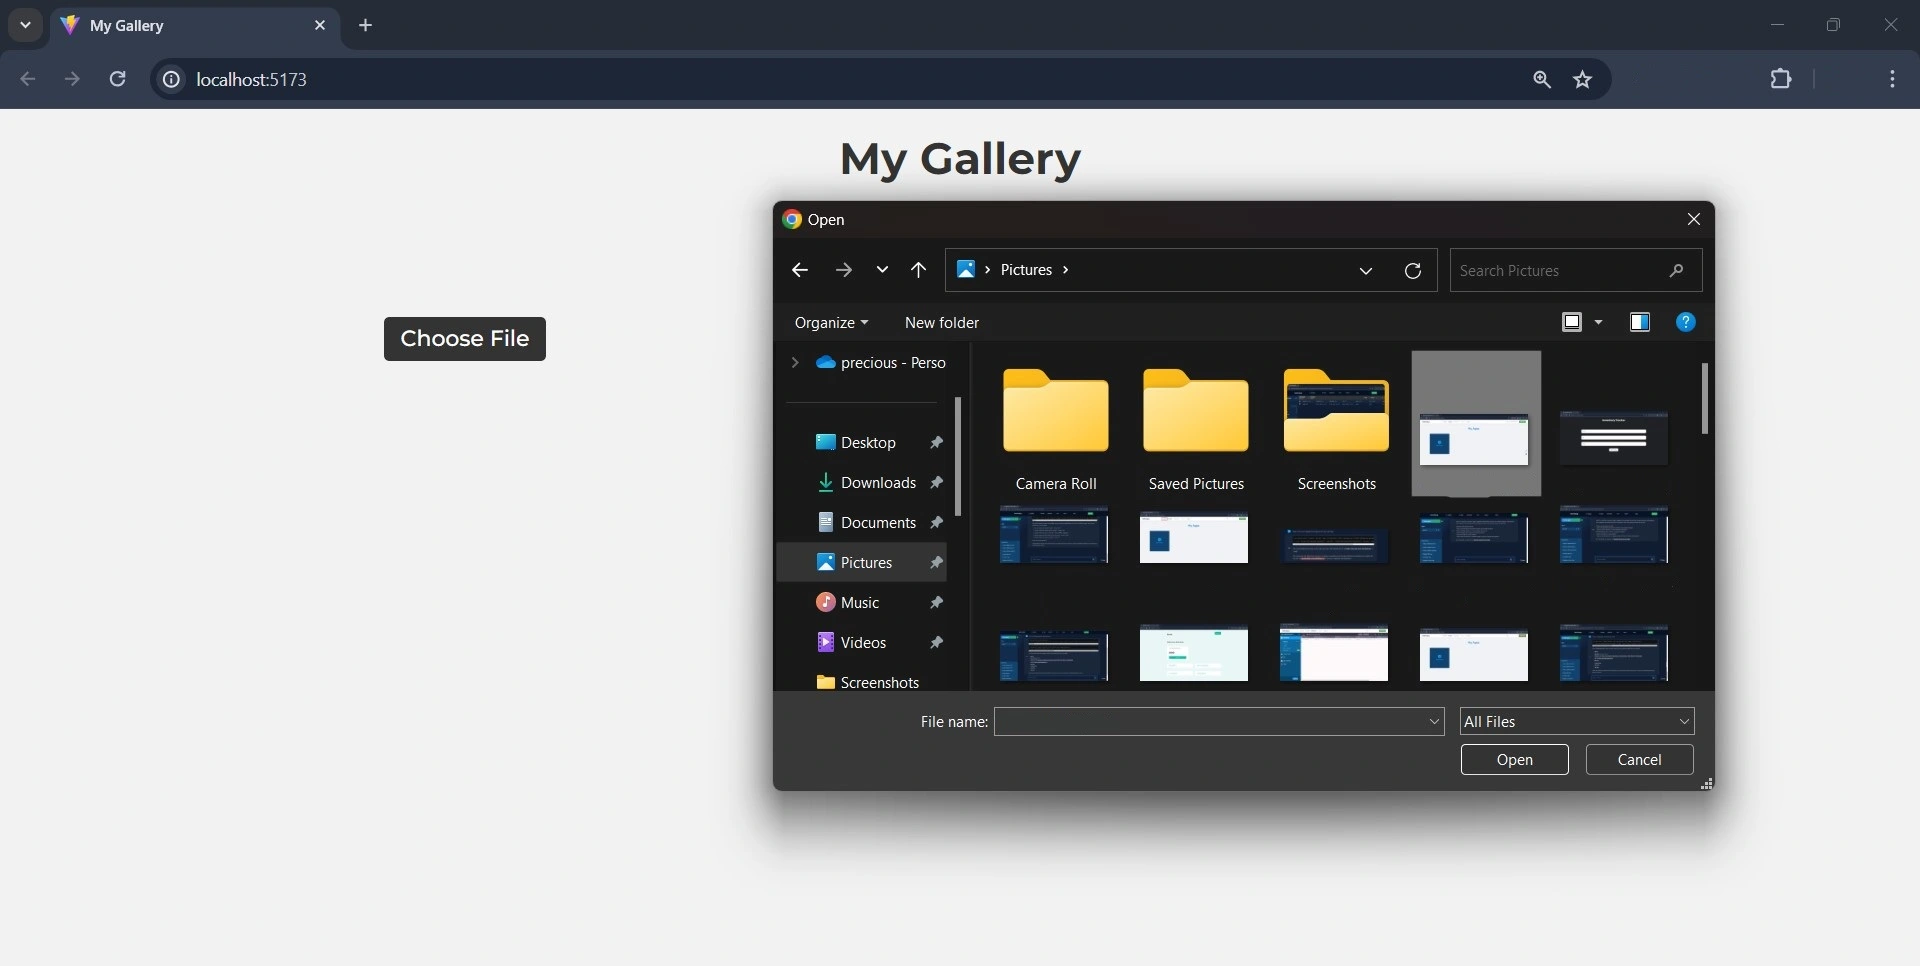
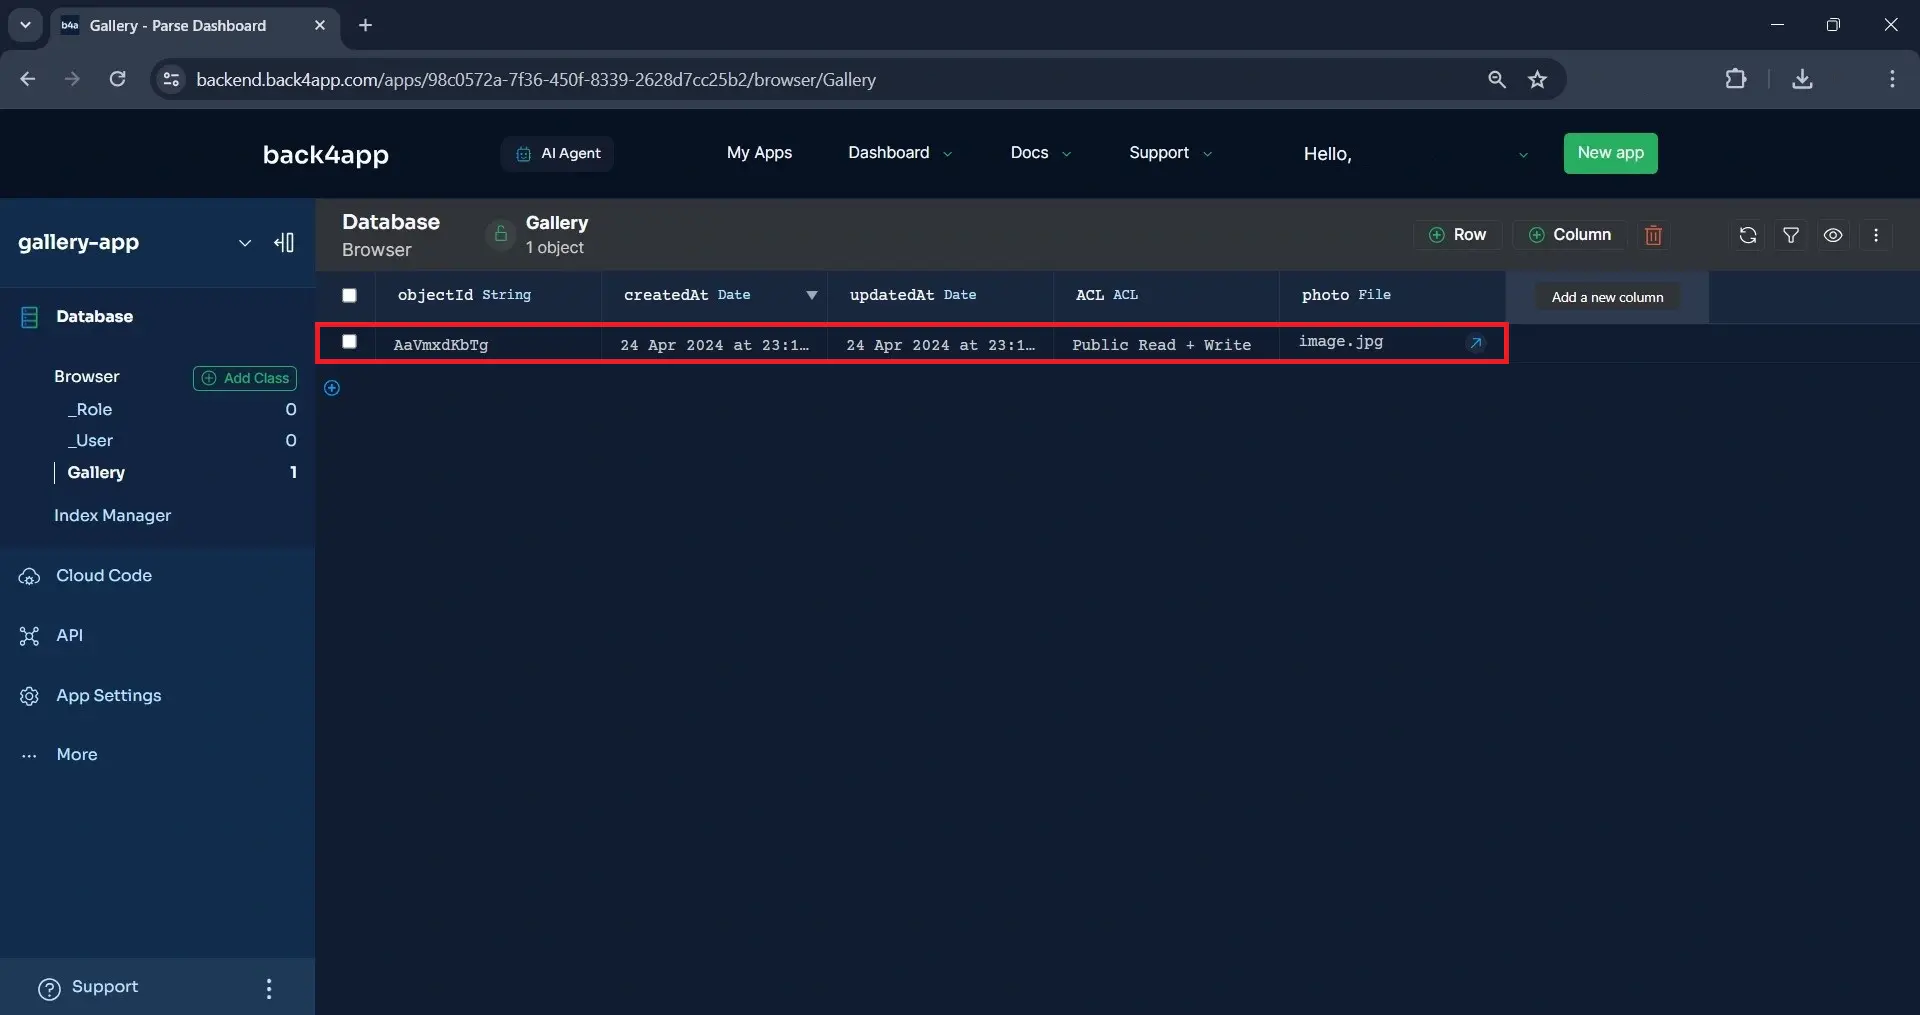
You can verify if the image was uploaded successfully by visiting your Back4app application’s dashboard.
Upon successful upload, Back4app will add a row to the “Gallery” class table, as shown in the image below.
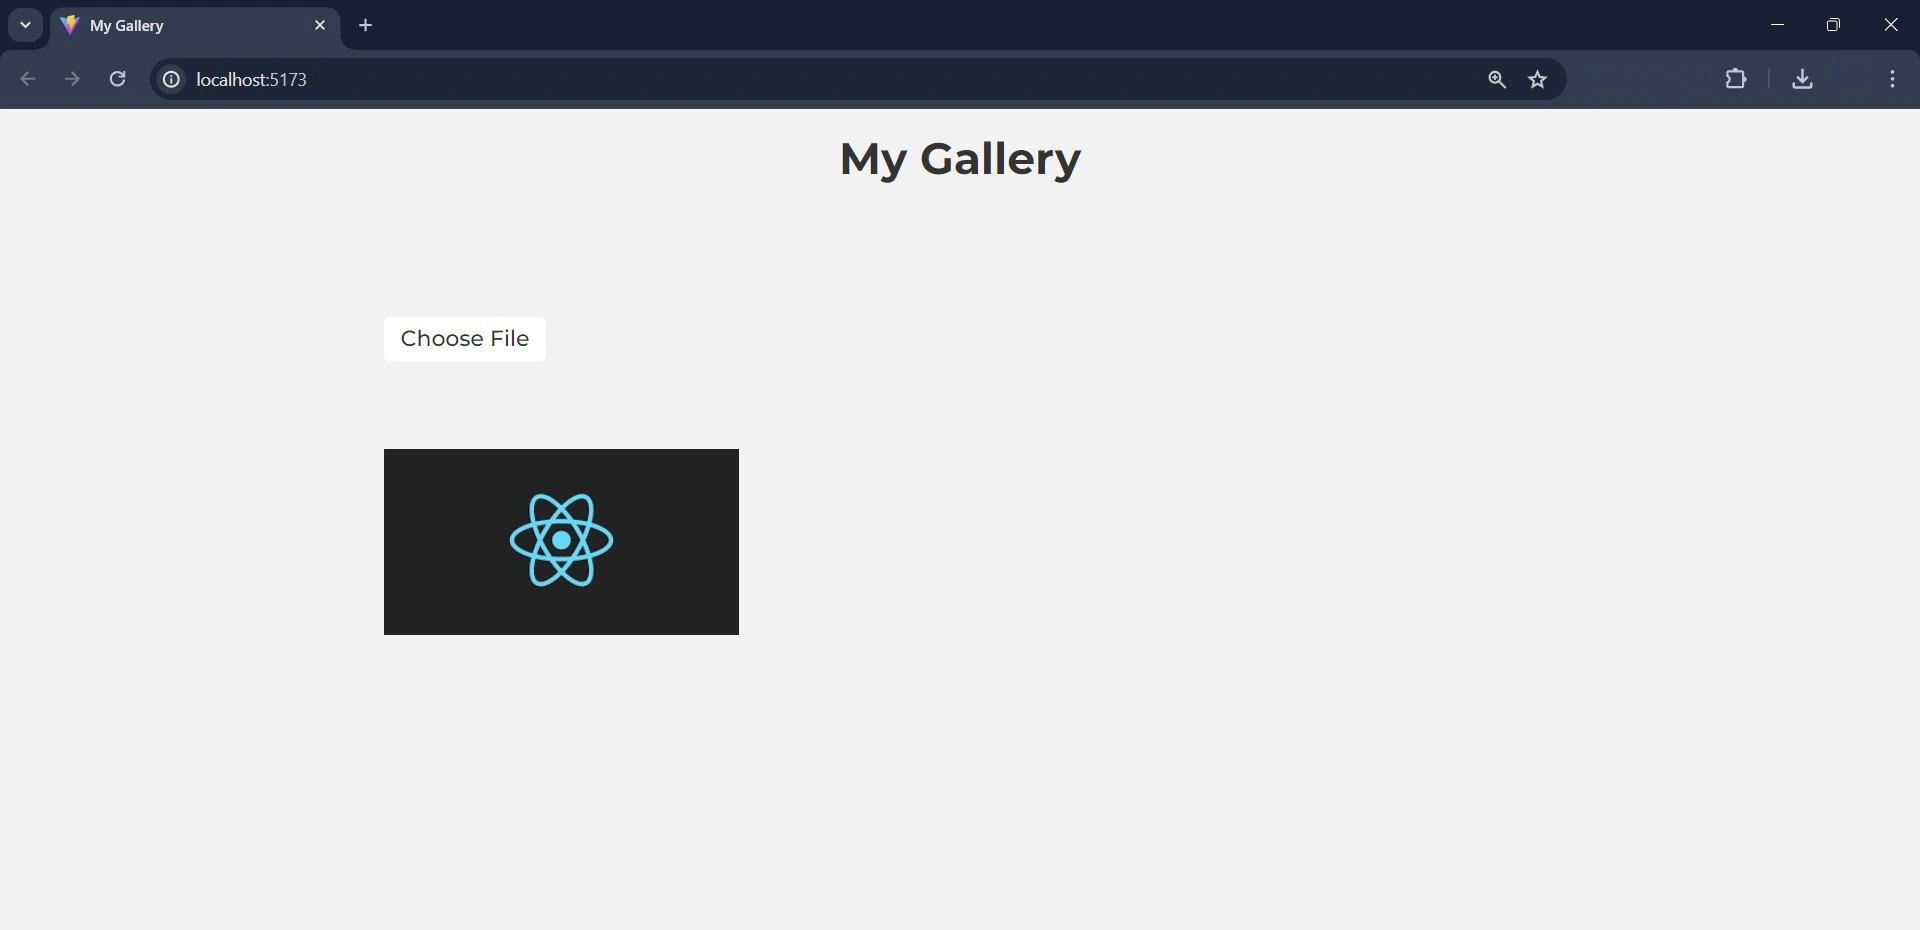
Alternatively, you can verify by seeing the image displayed on your screen, as shown in the image below.
Deploying Your Application on Back4app Containers
In this section, you will deploy your application on Back4app Containers. To do this, you must first dockerize your application and push it to a GitHub repository.
You can execute the deployment process manually using the Back4app UI or automatically using the Back4app AI agent. For this tutorial, you will execute the deployment process using the AI agent.
Creating a Dockerfile
Create a Dockerfile in your application’s root directory and add the code block to it:
FROM node:18
WORKDIR /app
COPY package*.json ./
RUN npm install
COPY . .
EXPOSE 5173
CMD ["npm", "run", "dev"]
Next, create a .dockerignore file in the root directory of your application and add the code block below to it:
node_modules
Adding the node modules to the .dockerignore file will ensure that Docker excludes the node_modules folder from the context when building the image.
Note that you created the React application with Vite, so you will have to configure Vite to support Docker. To configure Vite, replace the code in the vite.config.js with the code block below:
import { defineConfig } from 'vite'
import react from '@vitejs/plugin-react'

// <https://vitejs.dev/config/>
export default defineConfig({
  plugins: [react()],
  server: {
    host: true,
    strictPort: true,
    port: 5173,
   },
})
This code block ensures that Vite only starts the server if the specified port is available, and it specifies the port number that the development server will listen on port 5173.
Next, build the application’s docker image to ensure everything works by running the command below in your terminal:
docker build -t gallery-app .
Here, you have successfully dockerized your application, and the next you will deploy it.
Deploying Your Application
Before deploying your app, integrate your GitHub account with the Back4app Github app and grant it access to the repository you want to deploy.
Navigate to the AI agent and enter the prompt below to deploy your application:
Deploy my repository <<repository-url>> on Back4app containers
Replace the repository-url with your application’s GitHub repository URL. The prompt above initiates the deployment process.
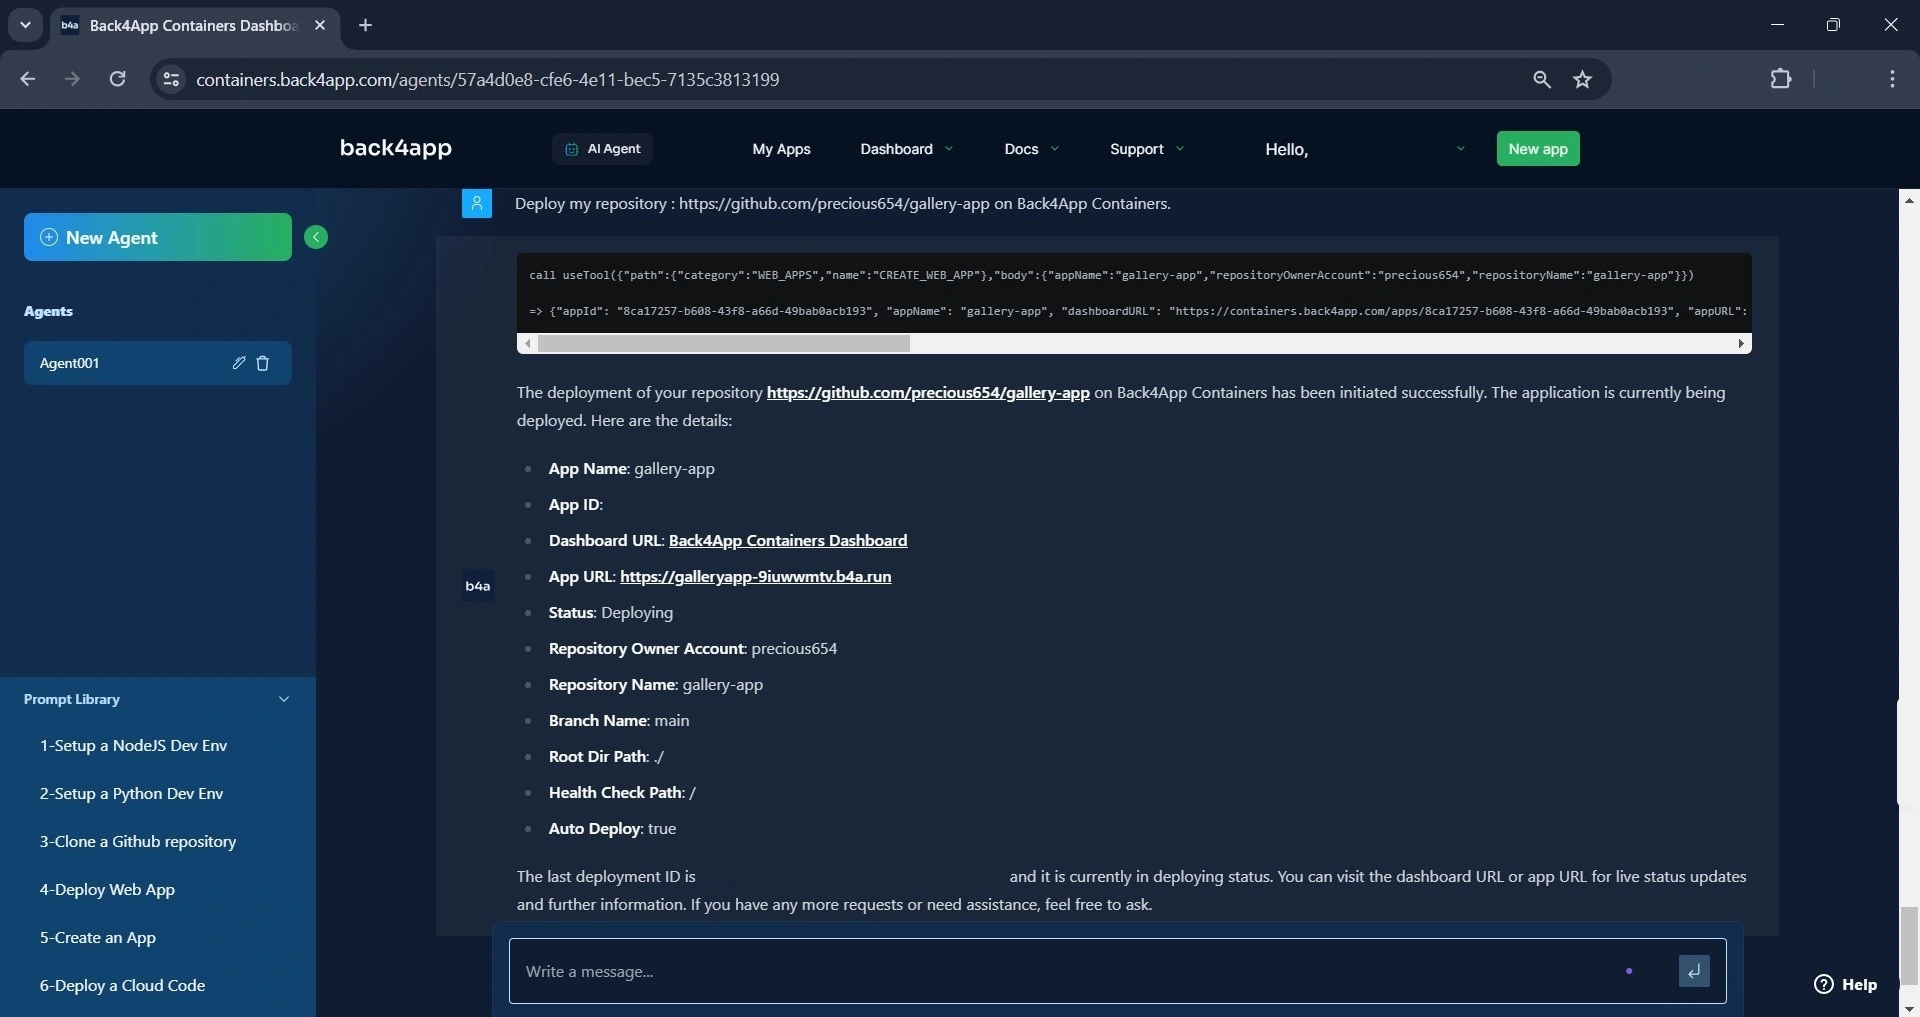
As seen in the image above, the AI agent started the deployment process. In the meantime, the deployment status is “deploying.”
After a few minutes, you can ask the AI agent about the application’s deployment status. If the application was deployed successfully, the deployment status will change to ready.
Like so:

In the image above, you can see that the deployment status changed from “deploying” to ”ready,” indicating that the application deployed successfully and is now live.
You can access the application on your browser using the app URL provided.
Conclusion
In this article, you learned how to upload and fetch files using Back4app by building a simple gallery application with React.
Additionally, you explored how to deploy a React app on Back4app using the Back4app AI agent.
With Back4app, you can efficiently and securely store and manage your files. The code used in this tutorial is available in this GitHub repository.


