An Instagram clone using SwiftUI and GraphQL

Today we are starting a series of blog posts that will teach you how to use a lot of cool tools to build your own Social Network: an application that resembles Instagram.
We won’t save up on tech and will be using the latest and greatest: Parse, GraphQL, some NodeJS and especially the (yet to be released) latest Apple’s framework SwiftUI.
This will take a few posts in order to be fully functional, but when we get there, you will realize how simple it can be to get your ideas up and running with very little effort here at Back4app.
For better learning, download the iOS Instagram Clone project with source code.
So, it seems it is time for…
Contents
Do you want a quick start?
Clone this App from our Hub and start using it without any hassles!
Some Introduction
Well, you probably already know the huge benefits Parse brings to your development process, especially if hosted in Back4app, as our set of tools increases productivity by huge amounts.
And our latest posts about GraphQL showed you how easy it can be to maintain APIs development over time if you use it. If you missed those posts, I strongly suggest that you take your time and read them, as they will greatly improve your understanding as we go.
You can read more about GraphQL and we also have a full post about how to use on the article Web API.
You can also see some integration with NodeJS in Cloud Code Functions reading GraphQL and NodeJS.
That leaves us with SwiftUI.
SwiftUI is, according to Apple, “an innovative, exceptionally simple way to build user interfaces across all Apple platforms with the power of Swift”.
I myself like to think that SwiftUI is more than that.
If you, like me, are developing software for some time, you probably know that the developer community has always been split between the convenience of using Storyboards, Apple’s drag and drop UI building interface, or the power of programmatic UI.
SwiftUI comes to bring the best of both worlds: it is easy enough for beginners to learn, while keeps the maintainability of a coded UI.
Combine that with real-time rendering, so developers can easily see the visual output of what they are coding, and make it two-ways so if you change code, it will reflect on the UI, and graphically change the UI and it will reflect on the code, and what you get is one of the most powerful yet easy ways to deliver beautifully designed, yet maintainable over time UIs.
So, what you are going to need?
At the time of writing this post, Apple is still beta testing the new macOS Catalina, XCode 11, iOS 13 and a few other products that should hit the shelves soon.
While you can use XCode 11 with macOS Mojave, you will need Catalina in order to render the previews of SwiftUI in real-time.
No Catalina? No Previews for you!
This is a decision you have to make as I found that changing the change from Bash to ZSH as the official macOS shell in Catalina broke many of my tools and scripts I use for my daily workflow, I decided to stay in Mojave for a while. It is up to you to decide if you are going to update or not.
Also, you will need a Back4app account with an App created. You can learn how to create your first App in Back4app’s documentation.
Last but not least, we will be using Apollo Client in order to integrate GraphQL to our project. If you don’t have experience with it, I have written a very detailed post on how to configure and use it Web Authentication.
So, before we even start, you will need:
- XCode 11 installed (with macOS Catalina if you want to see Previews)
- Your new App created in Back4app
- Apollo Client installed and configured
My App is going to be called Back4Gram, as it will resemble Instagram.
Our very first Class
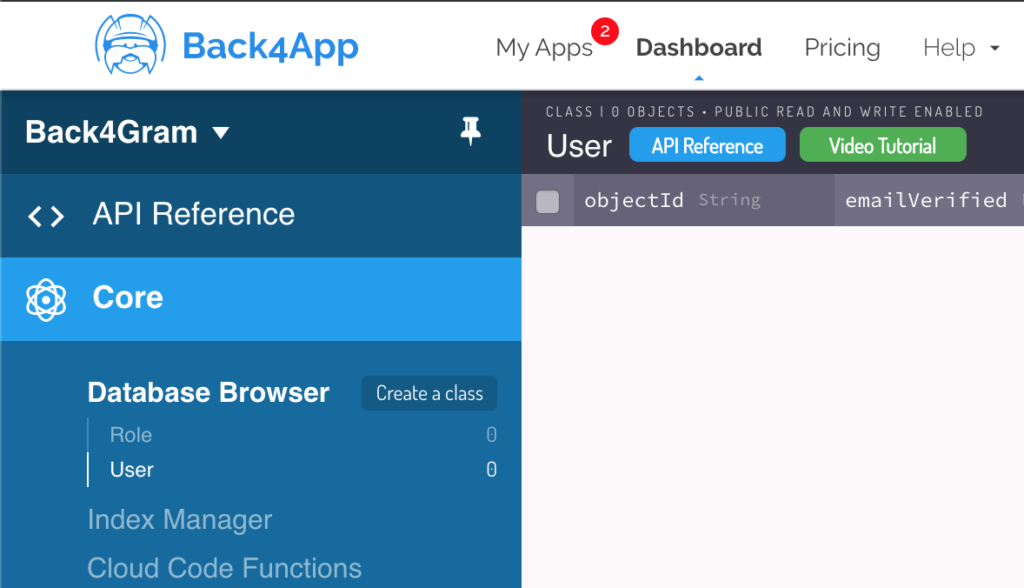
I always tell you guys about how Parse creates the User class, so you can sign up new users and authenticate existing ones, and the Role class, so you can group users with similar privileges. This is great because, at least for authentication, we don’t have to create any class.
The User class has three automatically created properties, two of those mandatory and one optional:
- username (mandatory)
- password (mandatory)
- email (optional)
Those are enough for our App to register and manage users.
As you probably know, Apple’s policy about storing users’ emails is very strict, so I recommend not asking or keeping that information or you might get unapproved.
As this is a tutorial only, I will ask the user to enter that information, just so you can see how it works.
User and Role classes created automatically
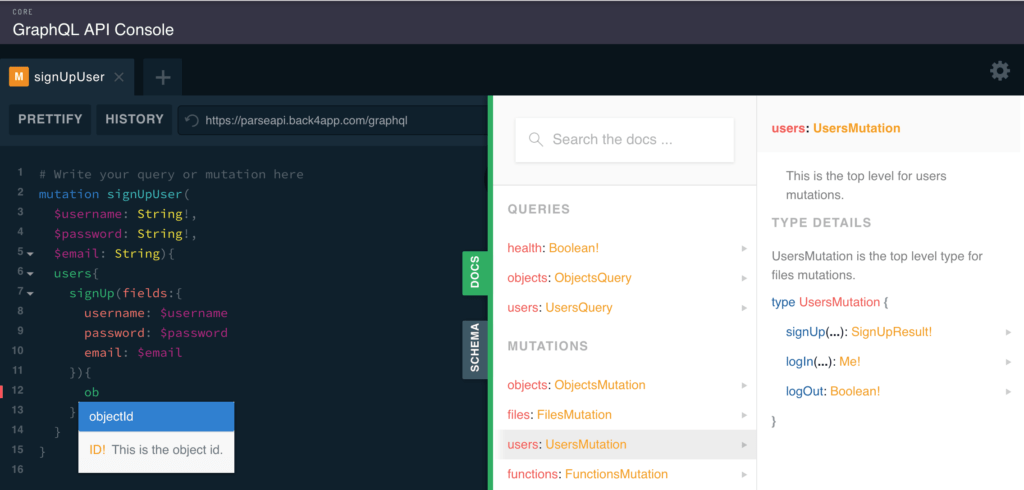
As if that wasn’t helpful enough, your newly created App already has GraphQL Queries and Mutations automatically created for us. This is true for our automatically created classes and also for any other class that you create over time. We got you covered with the documentation too!
Did I tell you we also have Autocomplete? We do!
So, my first Mutation will be as above, and use our specific mutation signUp() to create a new user:
The query will depend on the Parse version that you are using:
Parse 3.7.2:
mutation signUpUser($username: String!, $password: String!, $email: String) {
  users {
    signUp(
      fields: { username: $username, password: $password, email: $email }
    ) {
      objectId
    }
  }
}
Parse 3.8:
mutation signUpUser($username: String!, $password: String!, $email: String) {
    signUp(
      fields: { username: $username, password: $password, email: $email }
    ) {
      objectId
    }
}
Parse 3.9:
mutation signUpUser($username: String!, $password: String!, $email: String) {
    signUp(
      fields: { username: $username, password: $password, email: $email }
    ) {
      id
    }
}
Notice I am making my variables username and password mandatory by having a “!” at the end of their types, while email is optional, by not having the “!” after its type.
In the end, I’m returning the objectId of the newly created user.
And since we are here, let’s also code our GraphQL mutation for logging in an already existent user.
In this case, both username and password are mandatory, and I’ll be retrieving the sessionToken for the user:
Parse 3.7.2
mutation logInUser($username: String!, $password: String!){
  users{
    logIn(username: $username, password: $password){
      sessionToken
    }
  }
}
Parse 3.8
mutation logInUser($username: String!, $password: String!){
    logIn(username: $username, password: $password){
      sessionToken
    }
}
Parse 3.9
mutation logInUser($username: String!, $password: String!){
    logIn(username: $username, password: $password){
      sessionToken
    }
}
Last but not least, a mutation for the user to log out, which does not require any parameter and only returns a Boolean:
Parse 3.7.2
mutation logOutUser{
  users{
    logOut
  }
}
Parse 3.8
mutation logOutUser{
    logOut
}
Parse 3.9
mutation logOutUser{
    logOut
}
Add all those to a new file called UserMutations.graphql, also, save your schema.graphql file that you learned how to download in our previous article.
Keep those files safe as we will add them to our…
SwiftUI Project
Let’s create our SwiftUI project.
Launch XCode 11 and hit the “Create a new XCode Project” from the Welcome to XCode window.
If you don’t get that window, you can always go to File > New > Project.
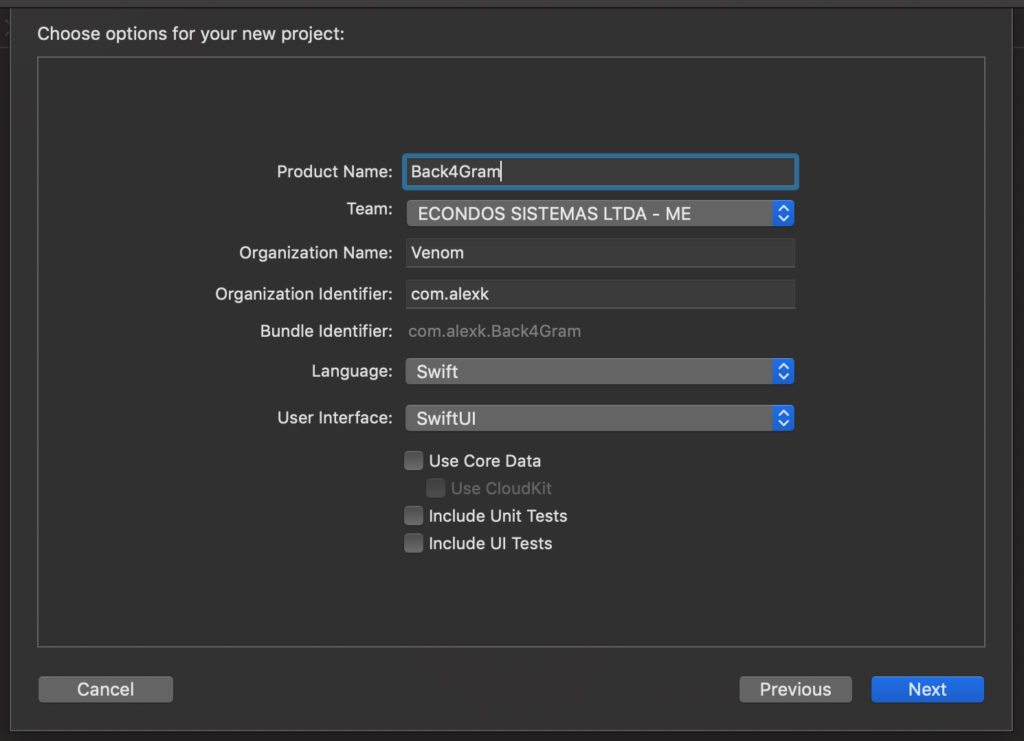
Choose iOS App on the top, then Single View App. Give it a good name and remember to choose Swift as the Language and SwiftUI as the User Interface:
Don’t forget to select SwiftUI as the User Interface
Now, install the Apollo Client as you learned in our web api article, and after that, add the UserMutations.graphql and schema.graphql files to your project.
Compile and add the newly generated API.swift file to the project.
At this point what I expect you to have is:
- XCode 11 installed and running
- Apollo client installed and integrated within your XCode Project
- UserMutations.graphql and schema.graphql files added to your XCode Project
- API.swift generated file added to your XCode Project
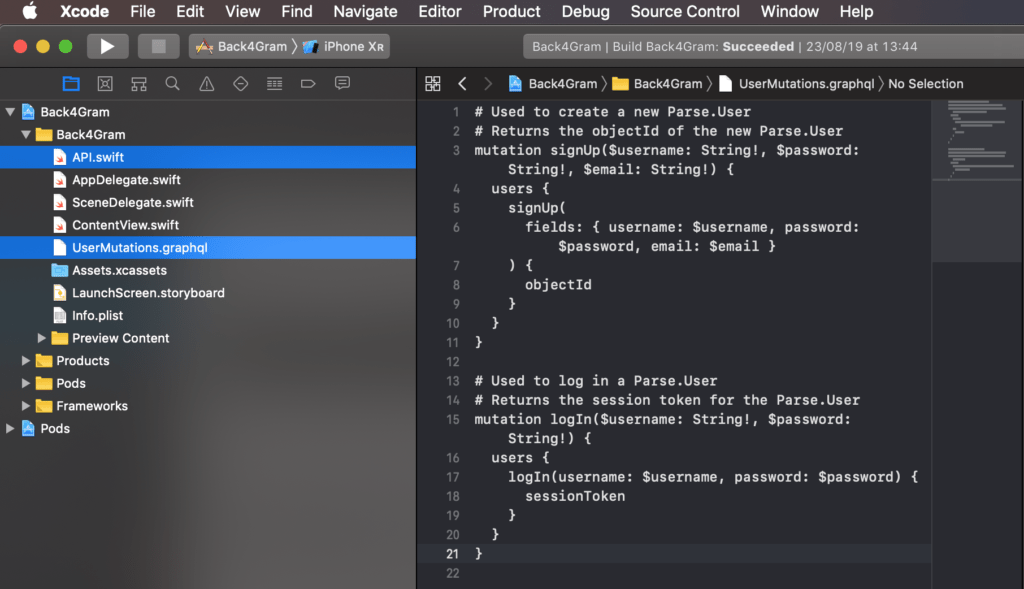
Your project should look similar to this:
Everything integrated into XCode 11
We are now ready to start some SwiftUI’ing.
Sign Up now to Back4App and start to build your Instagram Clone App.
Deciding our Controls
Before we can log in or out a user, we must have that user created in the first place. So we are going to code our SignUp screen first.
Usually, we can have 4 to 5 controls in that screen:
- Some type of Text to tell the user what screen this is (text)
- Username (text entry control)
- Password (secure text entry control)
- Confirm Password (optional, depends on the platform, secure text entry control)
- Email (formatted text entry control)
- Sign Up button (button)
As this will be a mobile app, I decided not to put the Confirm Password text entry control, as most mobile platforms allow the user to see the last typed character and for most cases that is enough for the user to determine if the password is being typed correctly.
Those controls will show vertically aligned, one below the other, in the order above, each with its own color.
Actually building the UI
As I mentioned earlier, I am not using macOS Catalina so I won’t have Previews enabled, but I will compile and show you the results alongside with my code as I had it.
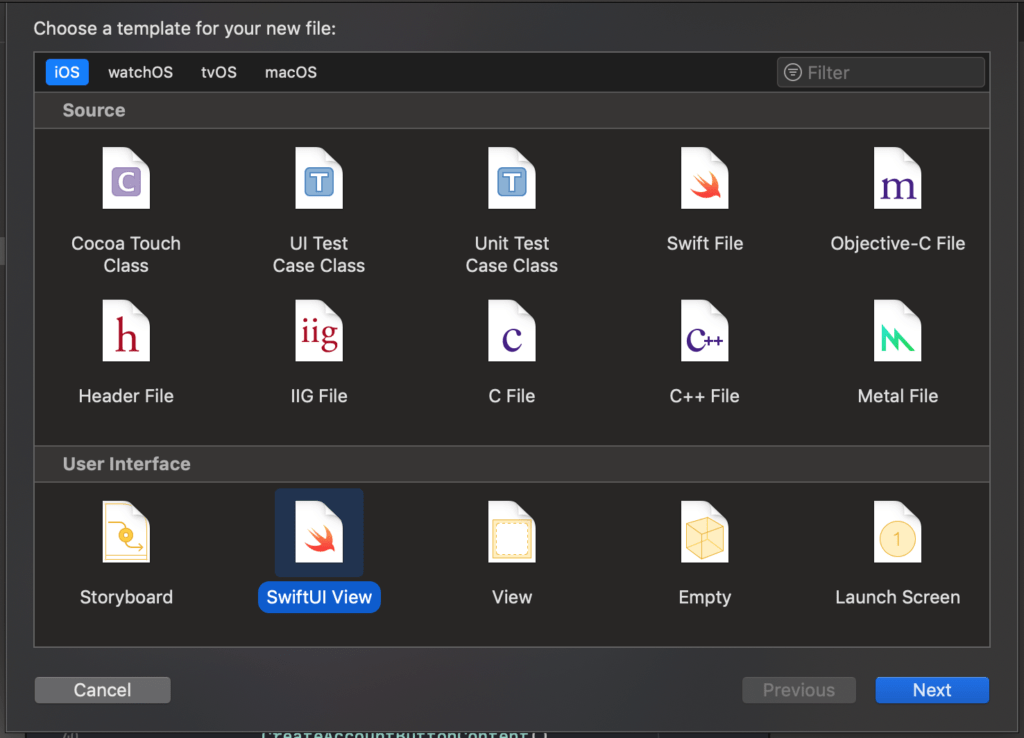
Create a new SwiftUI View by going to File > New > File and then choosing SwiftUI View in the User Interface section.
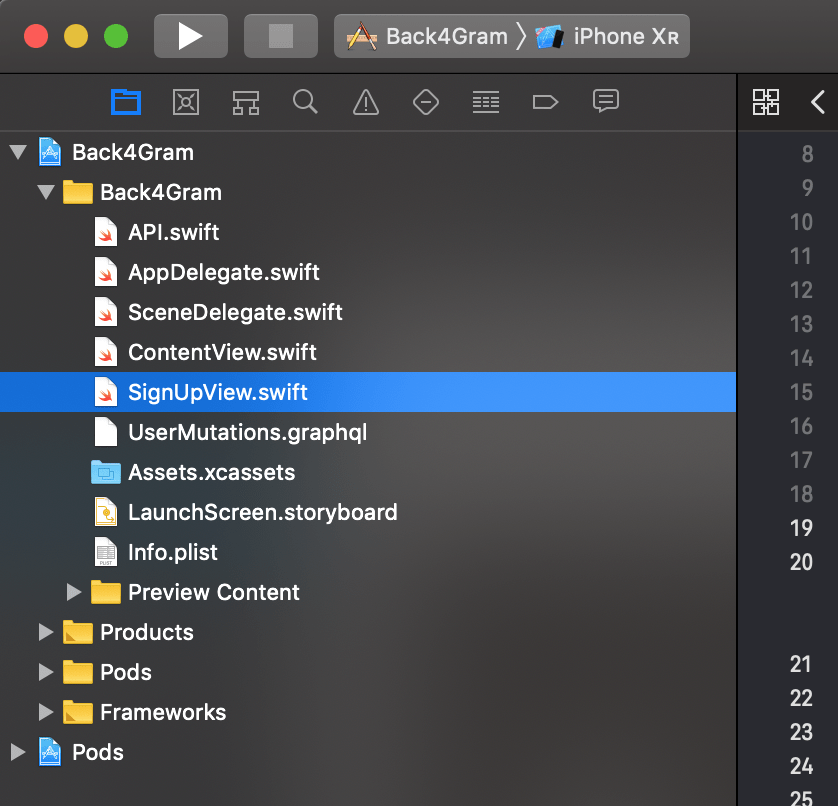
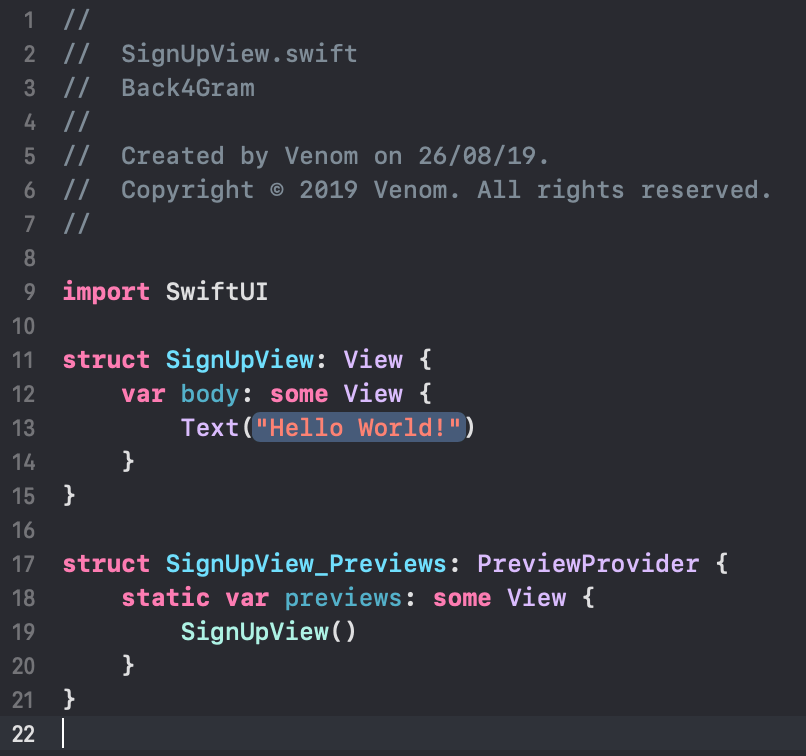
Name that file SignUpView.swift and it will appear integrated into your Project.
You will notice that the newly created view has already a Text control with the “Hello World!” string in it.
The beauty of Swift is that you can create multiple simple views, containing only the controls necessary to that view, and then merging multiple views into a more complex one. It is Object Orientation at its best.
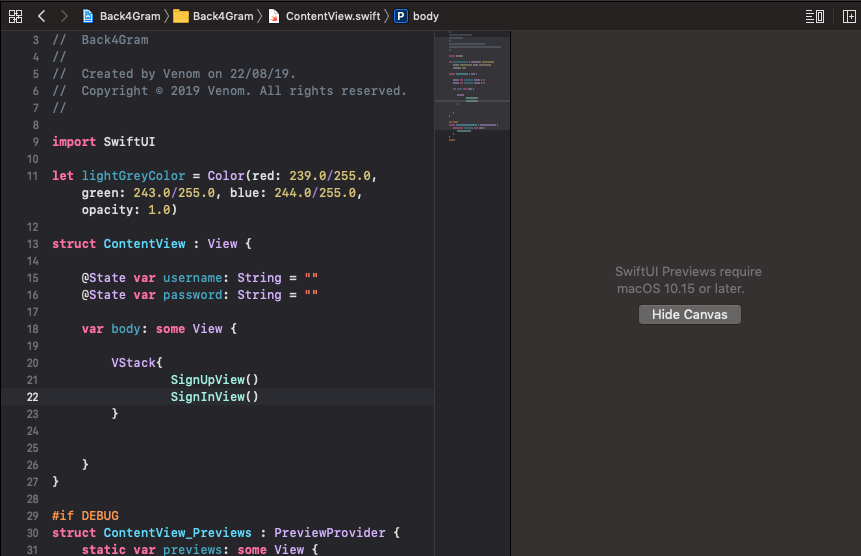
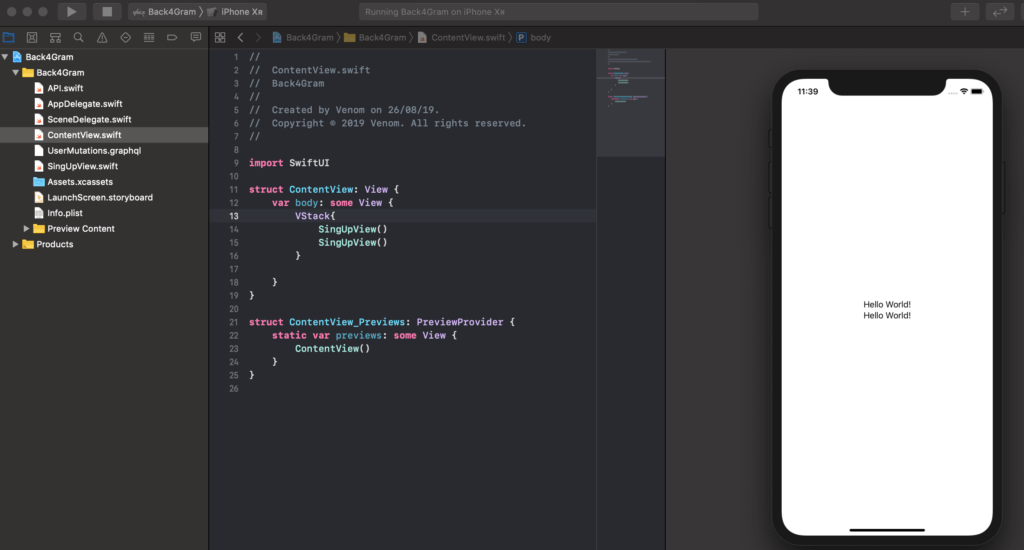
We decided to have our controls vertically aligned and SwiftUI has a specific control for that named VStack (Vertical Stack): everything that is inside a VStack will be automatically stacked vertically, so, just for testing, let’s add our VStack control to our ContentView.swift and inside it, add twice the SignUpView:
Added SignUpView twice in the VStack: it shows twice vertically aligned
Now, how cool is that! If we need more controls, we can just keep adding them!
Let’s remove the VStack and the duplicity and have just one SignUpView() in that View an then go back to our SignUpView and start changing it, as we already saw the results of our test. Your ContentView should look similar to this now:
struct ContentView: View {
    var body: some View {
        SignUpView()
    }
}
We already know we will need that VStack with Text on the top of the screen, so let’s just add the VStack to the SignUpView instead and change the “Hello World!” string to something useful, like “Sign Up”. Our SignUpView should look like this:
struct SignUpView: View {
    var body: some View {
        VStack{
            Text("Sign Up")
        }
    }
}
And since we already know which controls we must add below that, we can add:
- a TextField for Username
- a SecureField for Password
- a TextField for Email
- a Button for signing up
The TextFields and SecureField both are quite similar to the old UITextField, but have to rely on binding to state, so we are going to declare those as:
Control(“Placeholder”, text: stateValueToBindTo)
and the very first step is to declare those state to bind to:
@State var username: String = ""
@State var password: String = ""
@State var email: String = ""
With that out of the way, we can start adding our controls:
Text("Sign Up")
TextField("Username", text: $username)
SecureField("Password", text: $password)
TextField("Email (optional)", text: $email)
Last but not least, we can add our Button, which has this structure:
Button(action: {
//Code to run when triggered
}){
//Content
}
As you probably noticed, it works quite as much as a UIButton, but its structure is much more flexible as we can define its content programmatically, adding practically anything in there: a Text, an Image. You name it.
The old target/action structure is gone, replaced by a new action:{} structure to handle behavior when tapped.
Our button will have a Text in it saying “Sign Up!”, so let’s add it:
Button(action: {

}){
    Text("Sign Up!")
}
And your final code should look like this:
struct SignUpView: View {
    @State var username: String = ""
    @State var password: String = ""
    @State var email: String = ""

    var body: some View {
        VStack{
            Text("Sign Up")
            TextField("Username", text: $username)
            SecureField("Password", text: $password)
            TextField("Email (optional)", text: $email)
            Button(action: {

            }){
                Text("Sign Up!")
            }
        }
    }
}
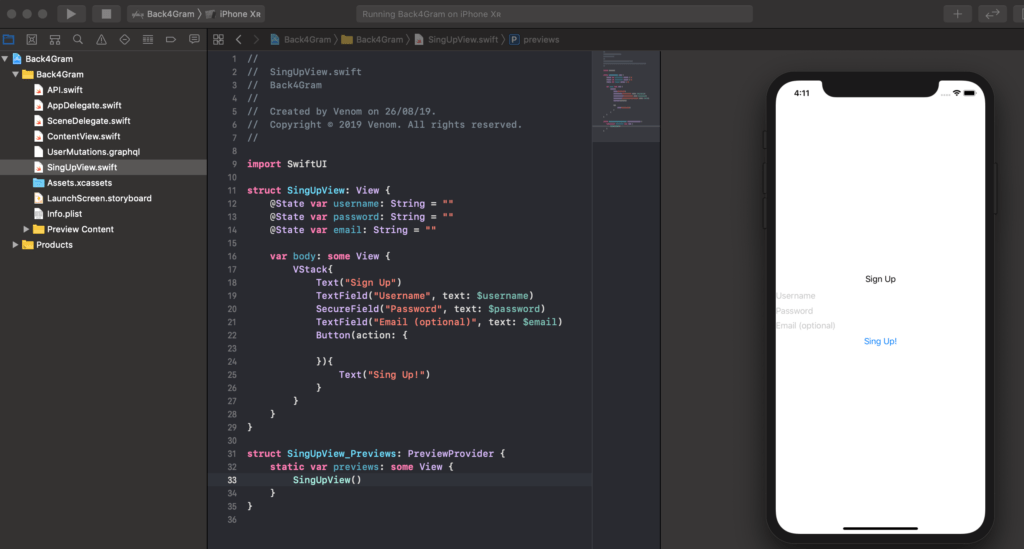
And how about our Preview?
Looks promising, but we can improve a lot by setting a few visual properties.
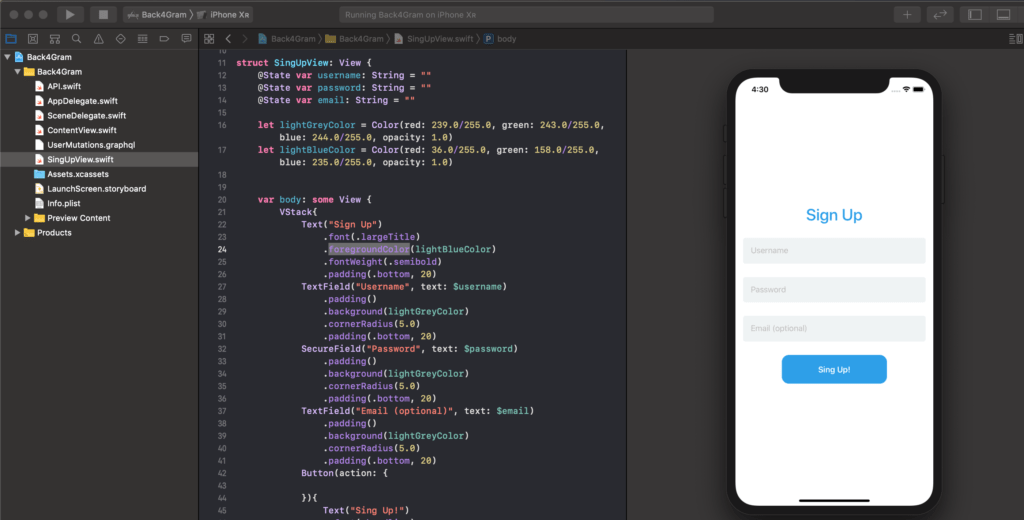
And if there is something super neat about SwiftUI is that you can add visual properties to the code and see the changes in real-time too!
Let’s try some!
First, let’s declare the colors we will use
let lightGreyColor = Color(red: 239.0/255.0, green: 243.0/255.0, blue: 244.0/255.0, opacity: 1.0)
    let lightBlueColor = Color(red: 36.0/255.0, green: 158.0/255.0, blue: 235.0/255.0, opacity: 1.0)
then let’s add a few nice features:
Some Padding so we have some space between those elements.
Set the background and foregroundColor properties so we have controls that are consistent with our brand.
Some cornerRadius so we can have rounded corners.
And setting font and fontWeight to make things nicer.
Voilà!
Is that nice or what?
Just so you keep track of our code at this point:
struct SignUpView: View {
    @State var username: String = ""
    @State var password: String = ""
    @State var email: String = ""

    let lightGreyColor = Color(red: 239.0/255.0, green: 243.0/255.0, blue: 244.0/255.0, opacity: 1.0)
    let lightBlueColor = Color(red: 36.0/255.0, green: 158.0/255.0, blue: 235.0/255.0, opacity: 1.0)


    var body: some View {
        VStack{
            Text("Sign Up")
                .font(.largeTitle)
                .foregroundColor(lightBlueColor)
                .fontWeight(.semibold)
                .padding(.bottom, 20)
            TextField("Username", text: $username)
                .padding()
                .background(lightGreyColor)
                .cornerRadius(5.0)
                .padding(.bottom, 20)
            SecureField("Password", text: $password)
                .padding()
                .background(lightGreyColor)
                .cornerRadius(5.0)
                .padding(.bottom, 20)
            TextField("Email (optional)", text: $email)
                .padding()
                .background(lightGreyColor)
                .cornerRadius(5.0)
                .padding(.bottom, 20)
            Button(action: {

            }){
                Text("Sign Up!")
                 .font(.headline)
                 .foregroundColor(.white)
                 .padding()
                 .frame(width: 220, height: 60)
                 .background(lightBlueColor)
                 .cornerRadius(15.0)
            }
        }.padding()
    }
}
So, we’ve got our nice shiny screen almost ready.
How about…
Some Functionality
Now that we got our UI ready and done, it is time to add our Apollo calls to our GraphQL methods.
As we are going to use those calls in almost all Views, we should create an Apollo client in a place where all views can access it. That place is the AppDelegate.swift.
Declare your Apollo client in there below the
import UIKit
and the start of the code block
@UIApplicationMain
class AppDelegate: UIResponder, UIApplicationDelegate {
...
just as we showed you in our previous article, and from now on all Views can perform GraphQL queries and mutations.
You first have to import the Apollo framework and then instantiate your client like this:
import Apollo

// Apollo Client initialization.
// More about it here: https://www.back4app.com/docs/ios/swift-graphql
let apollo: ApolloClient = {
    let configuration = URLSessionConfiguration.default
    configuration.httpAdditionalHeaders = [
        "X-Parse-Application-Id": "YourAppIdHere",
        "X-Parse-Client-Key": "YourClientKeyHere"
    ]

    let url = URL(string: "https://parseapi.back4app.com/graphql")!

    return ApolloClient(
        networkTransport: HTTPNetworkTransport(
            url: url,
            configuration: configuration
        )
    )
}()
Just replace the strings YourAppIdHere and YourClientKeyHere for your current values and we can go on.
As you probably guessed, we must perform our Mutation for SignUp when we click the Sign Up button, so, in the action block, let’s call it:
            // Perform the SignUpUser mutation, passing the parameters we just got from our TextFields
            apollo.perform(mutation: SignUpUserMutation(username: self.username, password: self.password, email: self.email)){ result in
                // Let's switch the result so we can separate a successful one from an error
                switch result {
                    // In case of success
                    case .success(let graphQLResult):
                        // We try to parse our result
                        if let objId = graphQLResult.data?.users?.signUp.objectId {
                            print ("User created with ObjectId: " + objId)
                        }
                        // but in case of any GraphQL errors we present that message
                        else if let errors = graphQLResult.errors {
                            // GraphQL errors
                            print(errors)

                        }
                    // In case of failure, we present that message
                    case .failure(let error):
                      // Network or response format errors
                      print(error)
                }
            }
That will work but those print() methods will only print to the console. We need to present an Alert to our user, so let’s change it for an Alert, with the following structure:
Alert(title: Text(“Title”), message: Text(“Message”), dismissButton: .default(Text(“TextOfButton”)))
As we will need to change the title and the message in runtime, we must set a Struct to handle those values, as self variables cannot be changed in runtime:
struct Message {
    var alertTitle: String = ""
    var alertText: String = ""
}

var myMessage = Message()
And also create an State so the View can know when to show the alert:
@State private var showingAlert = false
And our full code for our Button action should be like this:
Button(action: {
            // Perform the SignUpUser mutation, passing the parameters we just got from our TextFields
            apollo.perform(mutation: SignUpUserMutation(username: self.username, password: self.password, email: self.email)){ result in
                // Let's switch the result so we can separate a successful one from an error
                switch result {
                    // In case of success
                    case .success(let graphQLResult):
                        // We try to parse our result
                        if let objId = graphQLResult.data?.users?.signUp.objectId {
                            myMessage.alertTitle = "Yay!"
                            myMessage.alertText = "User signed up!"

                            self.showingAlert = true

                            print ("User created with ObjectId: " + objId)
                        }
                        // but in case of any GraphQL errors we present that message
                        else if let errors = graphQLResult.errors {
                            // GraphQL errors

                            myMessage.alertTitle = "Oops!"
                            myMessage.alertText = "We've got a GraphQL error: " + errors.description
                            self.showingAlert = true

                            print(errors)
                        }
                    // In case of failure, we present that message
                    case .failure(let error):
                        // Network or response format errors
                        myMessage.alertTitle = "Oops!"
                        myMessage.alertText = "We've got an error: " + error.localizedDescription
                        self.showingAlert = true

                        print(error)
                }
            }
           }){
               Text("Sign Up!")
                .font(.headline)
                .foregroundColor(.white)
                .padding()
                .frame(width: 220, height: 60)
                .background(lightBlueColor)
                .cornerRadius(15.0)
           }
           .alert(isPresented: $showingAlert) {
                Alert(title: Text(myMessage.alertTitle), message: Text(myMessage.alertText), dismissButton: .default(Text("OK")))
           }
Looks promising, huh?
So iiiiiiiiiit’s tiiiiiime
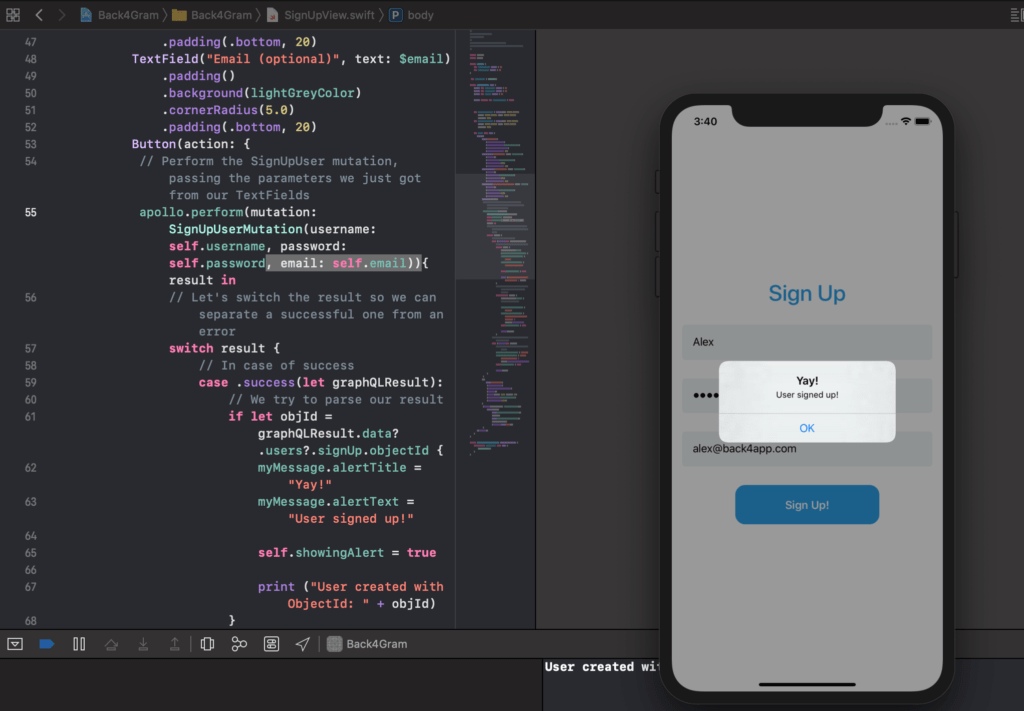
Compile and run. Try to sign up a new user and you should get…
Let’s see if the user is created in our Parse Dashboard!
Conclusion
You’ve made a fully working SwiftUI view that performs GraphQL mutations using Apollo Client. How awesome is that!
We will keep on working on our Instagram clone App! The next steps are Logging in and out and the post is already in the oven!
Stay tuned!
Reference
- Part 1 of this series is Instagram Clone.
- Part 2 is Instagram Login.
- Part 3 is Instagram Profile.
- Part 4 is Instagram HomeView.
- See the app backend at iOS Instagram Clone Backend.
- Download an iOS Instagram Clone project with source code and start using Back4App.
Sign Up now to Back4App and start to build your Instagram Clone App.
