An Instagram clone using SwiftUI and GraphQL – Login

In our previous post about how to create an Instagram clone app, you learned how to configure everything to have SwiftUI up and running in XCode 11, and created a fully working Sing Up view with GraphQL.
Today we will learn how to create a login view and have the user log out.
We will be needing the project from the previous post, so if you didn’t follow that one, I strongly suggest that you do.
Buckle your seat belts and let’s go!
For better learning, download the iOS Instagram Clone project with source code.
Contents
Do you want a quick start?
Clone this App from our Hub and start using it without any hassles!
Creating the Login view
Our Login view will be quite similar to our SignUp view, even simpler actually.
In or logInUser Mutation we only need two parameters: username and password:
The queries and mutations will depend on the Parse version that you chose:
Parse 3.7.2:
mutation logInUser($username: String!, $password: String!){
  users{
    logIn(username: $username, password: $password){
      sessionToken
    }
  }
}
Parse 3.8:
mutation logInUser($username: String!, $password: String!){
    logIn(username: $username, password: $password){
      sessionToken
    }
}
Parse 3.9:
mutation logInUser($username: String!, $password: String!){
    logIn(username: $username, password: $password){
      sessionToken
    }
}
so we will only need to ask those for our users.
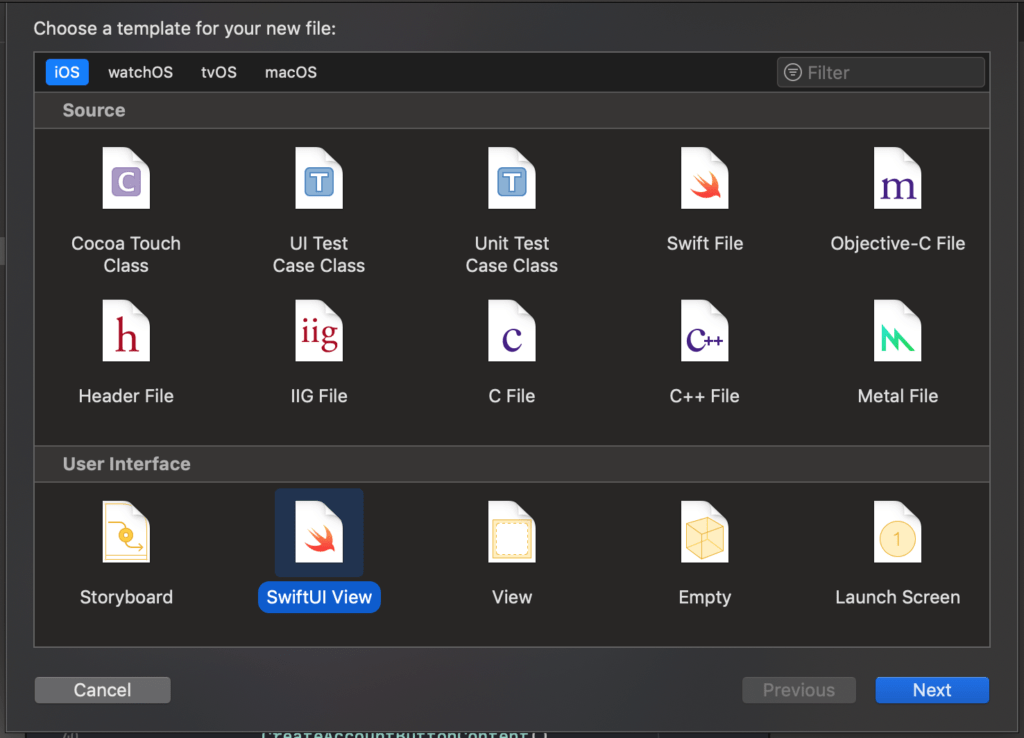
Let’s start by adding a new SwiftUI View going to File > New > File and selecting our SwiftUI View
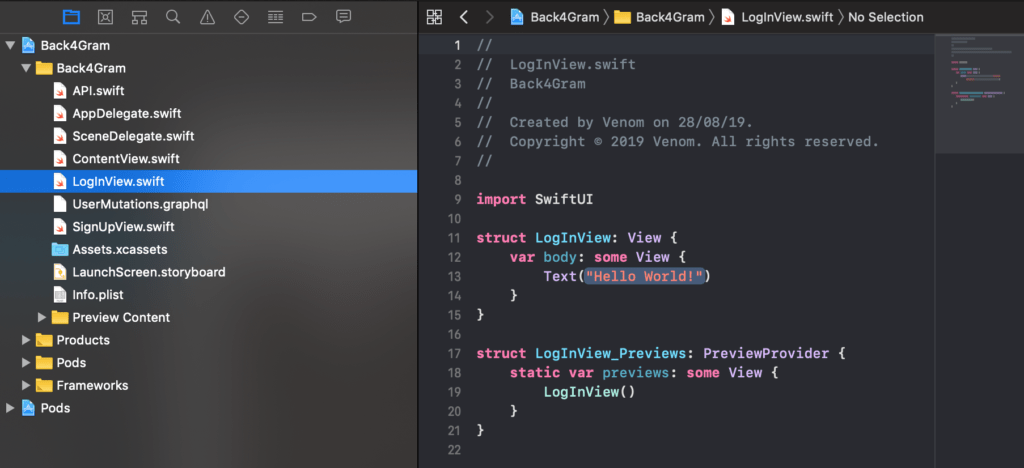
Let’s name this view LogInView.swift and add open it in our project:
And as you already learned, create your VStack with the controls we will need:
- TextField for username
- SecureField for password
- Button for performing the action
To keep the design consistent, I moved the colors we will be using to the AppDelegate.swift, so I had to import SwiftUI there as well:
import SwiftUI

let lightGreyColor = Color(red: 239.0/255.0, green: 243.0/255.0, blue: 244.0/255.0, opacity: 1.0)
let lightBlueColor = Color(red: 36.0/255.0, green: 158.0/255.0, blue: 235.0/255.0, opacity: 1.0)
Remember to remove the color lines from the SignUpView.swift and LogInView.swift.
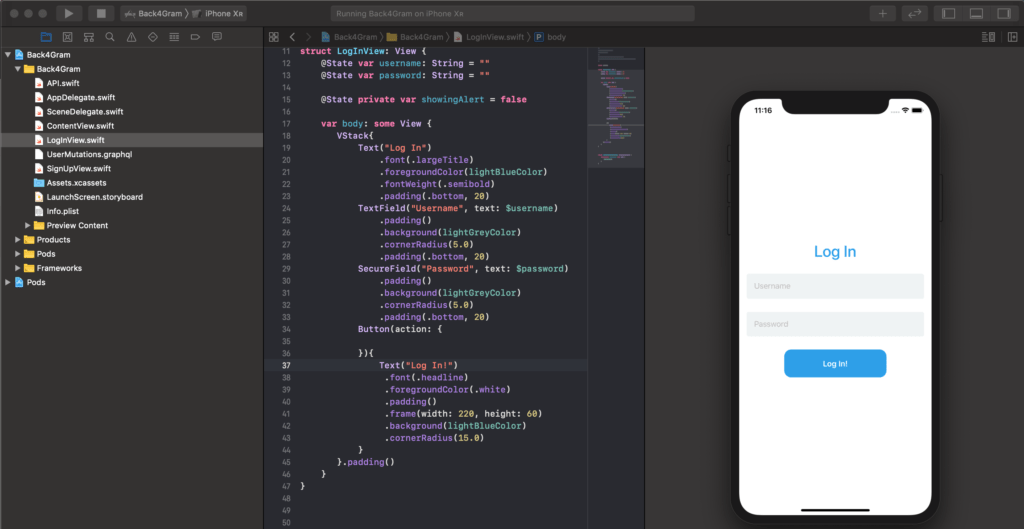
Also, in order to keep the consistency of the controls, I just copied and pasted from our SignUp view and removed the email TextField and changed the TextFields to reflect the new functionalities. My code ended up like this:
struct LogInView: View {
    @State var username: String = ""
    @State var password: String = ""

    @State private var showingAlert = false

    var body: some View {
       VStack{
           Text("Log In")
               .font(.largeTitle)
               .foregroundColor(lightBlueColor)
               .fontWeight(.semibold)
               .padding(.bottom, 20)
           TextField("Username", text: $username)
               .padding()
               .background(lightGreyColor)
               .cornerRadius(5.0)
               .padding(.bottom, 20)
           SecureField("Password", text: $password)
               .padding()
               .background(lightGreyColor)
               .cornerRadius(5.0)
               .padding(.bottom, 20)
           Button(action: {

           }){
               Text("Log In!")
                .font(.headline)
                .foregroundColor(.white)
                .padding()
                .frame(width: 220, height: 60)
                .background(lightBlueColor)
                .cornerRadius(15.0)
           }
       }.padding()
    }
}
This was simple. Let’s see how it looks?
Change your ContentView.swift to show that view instead:
struct ContentView : View {
    var body: some View {
        LogInView()
    }
}
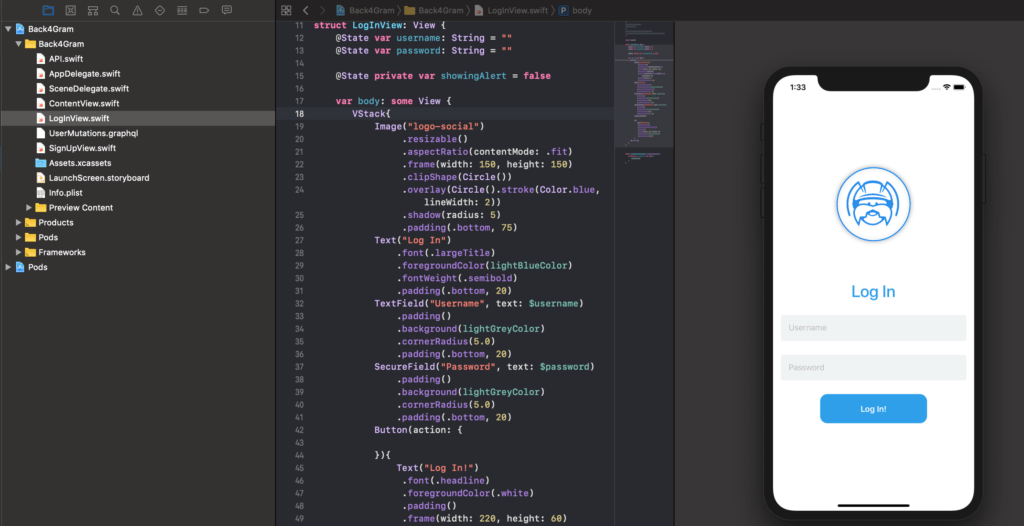
Looking neat!
Let’s make it neater by adding our logo on the top!
Our logo will consist of an image that we will integrate into our project. I used this one.
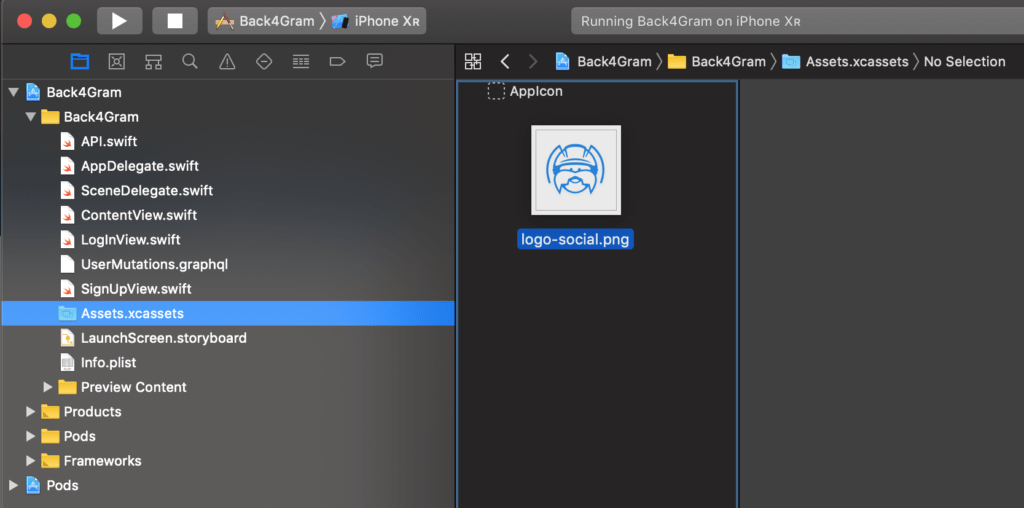
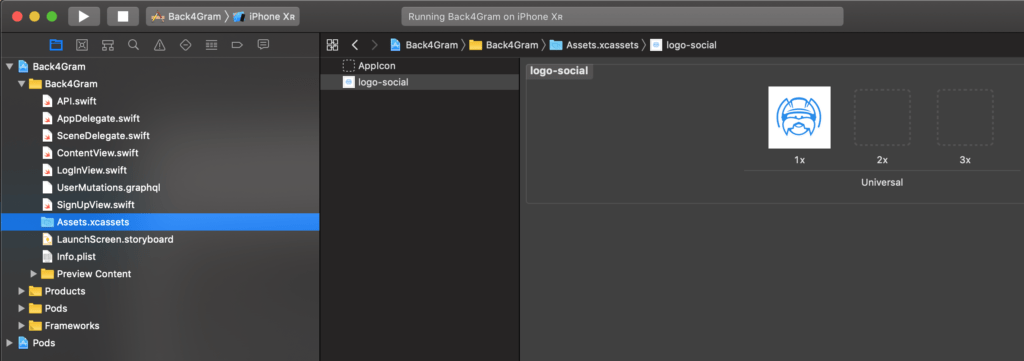
Drag and drop that image to your Assets.xcassets folder in the project:
It should look like this:
From now on we can reference it into our code with that name: logo-social.
Sign Up now to Back4App and start to build your Instagram Clone App.
Our Logo
Our logo will consist of that image but simply putting the image there would look amateur. We will make it shine: circular, with a fixed size, some stroke on the borders and, of course, drop shadow because of… drop shadow.
The code for all that looks like this:
Image("logo-social")
    .resizable()
    .aspectRatio(contentMode: .fit)
    .frame(width: 150, height: 150)
    .clipShape(Circle())
    .overlay(Circle().stroke(Color.blue, lineWidth: 2))
    .shadow(radius: 5)
    .padding(.bottom, 75)
And it goes on the top of our VStack:
var body: some View {
       VStack{
           Image("logo-social")
                .resizable()
                .aspectRatio(contentMode: .fit)
                .frame(width: 150, height: 150)
                .clipShape(Circle())
                .overlay(Circle().stroke(Color.blue, lineWidth: 2))
                .shadow(radius: 5)
                .padding(.bottom, 75)
           Text("Log In")
               .font(.largeTitle)
               .foregroundColor(lightBlueColor)
               .fontWeight(.semibold)
               .padding(.bottom, 20)
...
Now, ain’t that beautiful?
The sessionToken
Our login process will return a sessionToken string. We must keep that sessionToken secure as it will be used during our operations: while that sessionToken is valid, we will have access to our application. When it is deleted or invalidated, our calls will get denied.
As this is directly related to security, we will need to store it securely. The correct place for doing so is the Keychain on iOS.
The one thing about the Keychain is that is difficult and boring to use, so I decided to use this wrapper to manage it. It makes life so much easier and since we are already using Cocoapods, it makes total sense.
Let’s edit our Podfile and add this to our pods:
pod 'SwiftKeychainWrapper'
then let’s update our Pods with the command
pod install
and finally, reopen our xcworkspace project.
We are now ready to use our Keychain engine to…
Store the sessionToken
According to the documentation of our new pod, the way to save a value to the keychain is
KeychainWrapper.standard.set("SomeValue", forKey: "SomeKey")
but let’s add some logic to it as well.
To start out, let’s import our wrapper:
import SwiftKeychainWrapper
The first thing is that we will have to call our logInUser mutation and when that responds, we store the sessionToken if there is one. If not, we have to notify the user with an alert.
Now, if you remember in our previous article, we already have an alert coded including its structure. Let’s reuse that by removing the code below from our SingUpView.swift and passing it to our AppDelegate.swift file so all views can access it:
struct Message {
    var alertTitle: String = ""
    var alertText: String = ""
}

var myMessage = Message()
Now, back to our logic, the first thing we have to do is to determine if the user has filled the username and password text boxes. If not, there is no information for the login process and we must notify the user about that.
Our action code for the login button should check it. Let’s add this piece of code in there that checks the string size of the state variables linked to those text fields:
           Button(action: {
            // Check if there is a Password typed
            if (self.password.count == 0 || self.username.count == 0){

                // If not, we must show the Alert
                myMessage.alertText = "You must provide an Username and Password."
                myMessage.alertTitle = "Oops..."
                self.showingAlert = true
            } else {
                // If so, we can proceed

            }
           }){
               Text("Log In!")
                .font(.headline)
                .foregroundColor(.white)
                .padding()
                .frame(width: 220, height: 60)
                .background(lightBlueColor)
                .cornerRadius(15.0)
           }
           .alert(isPresented: $showingAlert) {
               Alert(title: Text(myMessage.alertTitle), message: Text(myMessage.alertText), dismissButton: .default(Text("OK")))
           }
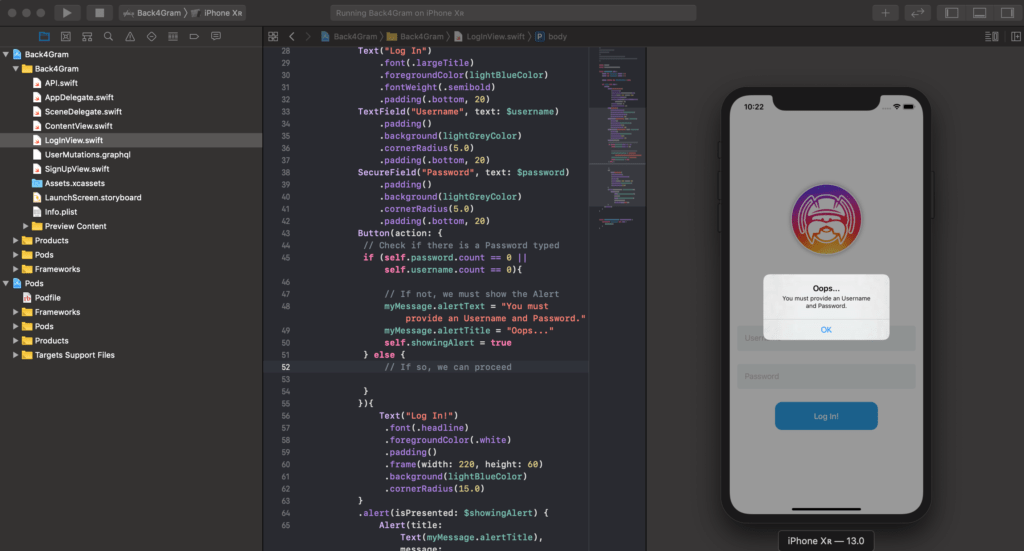
and test it…
Nice!
Now we must call our GraphQL mutation in order to retrieve the sessionToken and, if we get any, store it in the Keychain.
You already learned how to call the Mutations so let’s do it, but this time if we get the sessionToken, we will store it:
// Perform the LogInUser mutation, passing the parameters we just got from our TextFields
apollo.perform(mutation: LogInUserMutation(username: self.username, password: self.password)){ result in
    // Let's switch the result so we can separate a successful one from an error
    switch result {
        // In case of success
        case .success(let graphQLResult):
            // We try to parse our result
            if let sessionToken = graphQLResult.data?.users?.logIn.sessionToken {
                myMessage.alertTitle = "Yay!"
                myMessage.alertText = "User signed in!"

                self.showingAlert = true

                print ("User sessionToken " + sessionToken)


                // Write the sessionToken to our Keychain
                let _: Bool = KeychainWrapper.standard.set(sessionToken, forKey: "Back4Gram.sessionToken")
            }
            // but in case of any GraphQL errors we present that message
            else if let errors = graphQLResult.errors {
                // GraphQL errors

                myMessage.alertTitle = "Oops!"
                myMessage.alertText = "We've got a GraphQL error: " + errors.description
                self.showingAlert = true

                print(errors)
            }
        // In case of failure, we present that message
        case .failure(let error):
            // Network or response format errors
            myMessage.alertTitle = "Oops!"
            myMessage.alertText = "We've got an error: " + error.localizedDescription
            self.showingAlert = true

            print(error)
    }
}
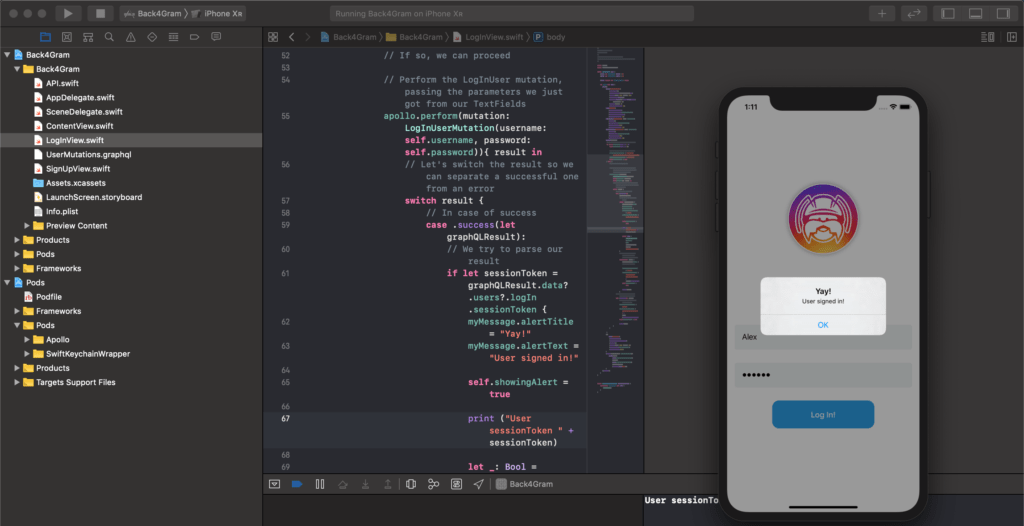
Let’s test it!
Sweet! But how do we know it actually worked?
We can go to the Parse Dashboard of our App and check if there is a new Session object written:
Like a charm!
And since we are here…
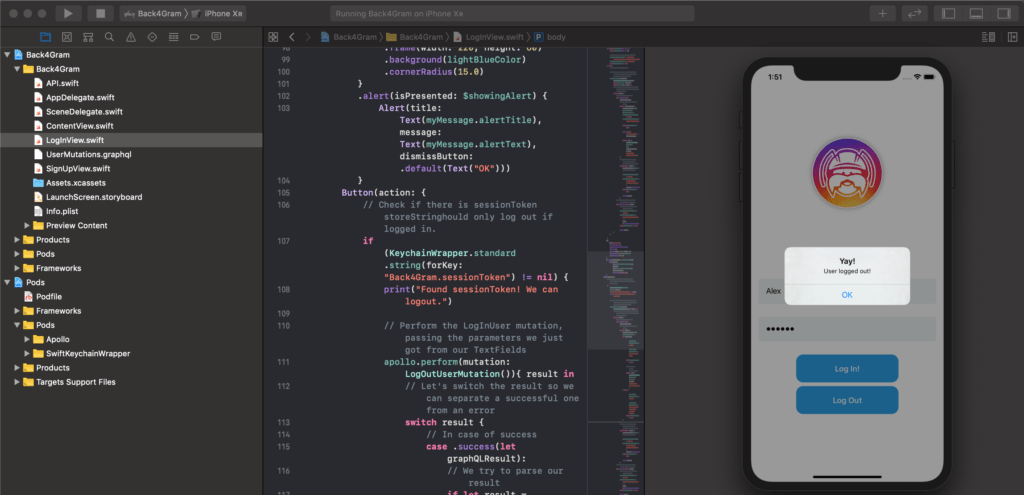
How about adding a button for logging out? Just for testing so we know everything is smooth:
Button(action: {
    // Check if there is sessionToken storeStringhould only log out if logged in.
    if (KeychainWrapper.standard.string(forKey: "Back4Gram.sessionToken") != nil) {
        print("Found sessionToken! We can logout.")

        // Perform the LogOutUser mutation
        apollo.perform(mutation: LogOutUserMutation()){ result in
            // Let's switch the result so we can separate a successful one from an error
            switch result {
                // In case of success
                case .success(let graphQLResult):
                    // We try to parse our result
                    if let result = graphQLResult.data?.users?.logOut {
                        if (result) {
                            myMessage.alertTitle = "Yay!"
                            myMessage.alertText = "User logged out!"

                            self.showingAlert = true

                            // Clear the stored sessionToken
                            let _: Bool = KeychainWrapper.standard.set("", forKey: "Back4Gram.sessionToken")
                        } else {
                            myMessage.alertTitle = "Oops!"
                            myMessage.alertText = "User logout operation returned False."
                            self.showingAlert = true
                        }
                    }
                    // but in case of any GraphQL errors we present that message
                    else if let errors = graphQLResult.errors {
                        // GraphQL errors

                        myMessage.alertTitle = "Oops!"
                        myMessage.alertText = "We've got a GraphQL error: " + errors.description
                        self.showingAlert = true

                        print(errors)
                    }
                // In case of failure, we present that message
                case .failure(let error):
                    // Network or response format errors
                    myMessage.alertTitle = "Oops!"
                    myMessage.alertText = "We've got an error: " + error.localizedDescription
                    self.showingAlert = true

                    print(error)
            }
        }
    } else {
        // Network or response format errors
        myMessage.alertTitle = "Oops!"
        myMessage.alertText = "The user does not seem to be logged in."
        self.showingAlert = true
    }
}){
    Text("Log Out")
        .font(.headline)
        .foregroundColor(.white)
        .padding()
        .frame(width: 220, height: 60)
        .background(lightBlueColor)
        .cornerRadius(15.0)
}
.alert(isPresented: $showingAlert) {
    Alert(title: Text(myMessage.alertTitle), message: Text(myMessage.alertText), dismissButton: .default(Text("OK")))
}
Once again, let’s test it!
Sweet!
We will be moving that Log Out button somewhere else later, but for now, it works for showing that our flow is working.
But how about our Session object now that we logged out?
Automatically gone, as expected!
Conclusion
Congratulations! You now have the login and logout functionalities implemented! Not only that but you learned how to call different mutations, validate results and store values in the Keychain! How awesome is that!
In the next chapter, we will start working with multiple views and start building our main view!
Stay tuned!
Reference
- Part 1 of this series is Instagram Clone using Swift UI and GraphQL.
- Part 2 is Instagram Login Using Swift UI and GraphQL.
- Part 3 is Profile View Using Swift UI and GraphQL.
- Part 4 is Instagram Clone Home View.
- Download an iOS Instagram Clone project with source code and start using Back4App.
Sign Up now to Back4App and start to build your Instagram Clone App.
What is SwiftUI?
SwiftUI is a new way to create user interfaces for applications on Apple platforms. It allows developers to determine the UI using Swift code.
What is a sessionToken?
The login process we are developing will return a sessionToken string. It needs to be secured. If we are able to keep the sessionToken valid we will have the access to the application, otherwise we will lose the access to the application. It’s related to security.
What is Keychain?
We know that sessionToken is related to the security of your app. So, it needs to be stored at a secure place. That secure place is called keychain. It can be a bit tricky to use and it can also feel boring to use also.
