How to Deploy a Next.js Application
Deploying a Next.js application involves making your Next.js web application accessible on the internet for users all over to interact with it.
While various deployment options are available, Back4app’s Container as a Service (CaaS) platform offers several advantages. These advantages make it a compelling choice for any developer looking to deploy their web app with easy steps.
In this article, you will build a Next.js application and learn how you can host and deploy that application using Back4app’s containerization service.
Contents
Key Takeaways
- You will learn how to utilize the Container as a Service cloud model for deploying your Next.js web application swiftly and efficiently.
- You will discover the strengths of Next.js such as Server-Side Rendering, Automatic Code Splitting, Built-In Routing, and Static Site Generation that enhance the user experience.
- You will understand the potential limitations of Next.js such as its learning curve, limited ecosystem, complexity of Server-Side Rendering, and limited routing flexibility.
What Is Next.js?
Next.js is an open-source framework extended on top of the React Library for generating web applications. With Next.js, you can conveniently build server-side rendered (SSR) and statically generated React applications that are performant for your needs.
It was created by Vercel (formerly Known as Zeit) in the year 2016. In recent years Next.js has gained a lot of popularity due to its ease of use and powerful features.
Advantages of Next.js
Next.js offers several advantages that make it a popular choice for web development. Some of these advantages include:
Server-Side Rendering
The Next.js framework enables Server-Side Rendering for its web applications. Server-Side Rendering allows pages to be pre-rendered on the server before being sent to the client as HTML. It provides better search engine optimization (SEO).
When using Server-side rendering, your pages are rendered on the server before they are sent to the client, in return increasing the pages’ load times. This is especially beneficial for users with slower connections or devices.
Additionally, server-side rendering makes fetching data from APIs or databases easy before rendering the page.
Automatic Code Splitting
Code splitting refers to the technique of breaking down a JavaScript application and all its building code into smaller chunks. Next.js automatically splits code based on the page routes.
Next.js’s automatic code-splitting feature results in faster initial page loads. It also reduces the amount of JavaScript sent to the client, improving performance and user experience.
Built-In Routing
Next.js’s built-in routing system is a significant advantage of the framework. With the built-in routing system, defining routes and navigating between pages is easy. Next.js supports both client-side and server-side routing.
With this routing system comes support for dynamic routing, enhancing developer productivity, improving application performance, and delivering a smooth and efficient user experience.
API Routes
Next.js applications come with default API routes that allow developers to create serverless API endpoints directly within their applications. API routes are a powerful feature of Next.js that provide several advantages for building web applications.
These advantages include allowing developers to create serverless functions, define and organize API endpoints, and fetch data during server-side rendering. The routes eliminate the need for a separate backend server. They also support REST and GraphQL APIs.
Next.js uses API routes to efficiently handle API requests, making it easy to build scalable, performant, and SEO-friendly applications.
Static Site Generation
Static Site Generation is a key advantage of the Next.js framework. Next.js uses static site generation to pre-render pages at build time and serve them as static files. This feature ensures fast page load times by pre-rendering each page into HTML files.
Static sites are highly SEO-friendly and have reduced attack vectors, making them more secure. The static sites generated by Next.js are inherently scalable, as they can handle high traffic loads without straining server infrastructure.
Next.js enables offline support for static sites, so users can continue browsing and accessing previously visited pages without an internet connection.
Limitations of Next.js
While Next.js is a powerful and popular framework for building server-side rendered React applications, here are some limitations you should be aware of:
Learning Curve
Next.js introduces additional concepts and conventions not familiar to traditional React development. Switching to building with Next.js may require time to understand and adapt to its specific architecture and features.
Next.js offers a range of configuration options that can be customized based on project requirements. With its tools, libraries, and plugin options, you must take some time to familiarize yourself with the Next.js ecosystem.
Limited Ecosystem
Next.js is a relatively new framework compared to established frameworks/libraries like React and Angular. As a result, its ecosystem is still growing and in its infant stages. It does not have the same breadth of libraries and plugins as more established frameworks.
You may need to rely on community-supported packages or build custom solutions for specific requirements.
Server-Side Rendering Complexity
While Server-Side Rendering is a powerful feature of Next.js, it can also introduce complexity to the development process.
It most often requires considerably more time to learn and implement. Using Server-Side Rendering can lead to server-rendering errors or inconsistencies between server and client rendering.
It is best to be careful when implementing this rendering. You must be able to manage data fetching and application state effectively, as the server and client need to synchronize their states.
Limited Routing Flexibility
Next.js has a built-in routing system that follows a file-based routing approach. This aims at simplifying routing in many cases. However, it may not provide the same level of flexibility as more advanced routing libraries.
Customizing routing behavior beyond the default conventions may require additional workarounds, which are not always convenient.
Next.js Deployment Options
Various deployment options are available for Next.js applications, including Containers as a Service (CaaS) and Infrastructure as a Service (IaaS).
You should know what these options are, how they work, and how they compare against each other to fit your built Next.js application best.
Infrastructure as a Service (IaaS)
IaaS is a cloud computing model that provides virtualized computing resources over the internet. When using IaaS, developers can deploy and manage their applications on virtual machines (VMs) hosted by a cloud provider.
Deploying a Next.js application on an IaaS platform offers various advantages, including control and flexibility. IaaS platforms are also cost-effective since they follow a pay-as-you-go program. This means you are charged based on the resources your application ends up using.
Some popular IaaS platforms you could use to deploy your Next.js applications include:
- Amazon Web Services (AWS) EC2
- Google Cloud Platform (GCP) Compute Engine
- Microsoft Azure Virtual Machines
- DigitalOcean
Container as a Service (CaaS)
CaaS is a cloud computing model similar to an IaaS platform. However, asides from providing computing resources, they provide a fully managed environment for deploying and managing containerized applications.
This means little configuration and work go into handling the running of the application. This also means there is very little control over customizations.
When deploying a Next.js application as a container, the application code, runtime, and dependencies are bundled into a container image. This image can then be deployed and run on a CaaS platform.
Some popular CaaS platforms you can deploy your Next.js applications on include:
- Back4App
- AWS Elastic Container Service (ECS)
- Google Kubernetes Engine (GKE)
- Azure Container Service (AKS)
CaaS platforms simplify deployment. They also improve scalability, portability, and security for your applications. It abstracts away infrastructure management and provides built-in orchestration and scaling.
Building and Deploying a Next.js App on Back4App
In this section, we’ll discuss what it takes to build a web application using the Next.js framework and deploy the app to the Back4app platform using the Back4app container service.
You will learn all you learn how to navigate the platform and use the container service to make your web application accessible through the Back4app servers. After reading this section you will learn how to deploy a Next.js app.
What is Back4app Containers?
The Back4app CaaS platform is a platform that provides you with a cloud-based service model, allowing you to manage and deploy containers and applications to those containers.
Back4App Containers are a powerful feature of the Back4App platform that provides you with a flexible, scalable, and secure environment for running your applications.
These containers support multiple programming languages such as PHP, Python, Node.js, etc. Some developers some it’s a great free Next.js hosting platform.
Back4app’s containers can be automatically scaled to meet your demands. Each container is isolated from the others, ensuring your application’s data is protected. The containers integrate easily with the Back4App ecosystem.
This makes it easy for you to connect your containers to other Back4App services, such as databases and cloud functions.
Project Introduction
In this tutorial, you will build a basic application using Next.js. This application will fetch random advice from an external API using the fetch API. The app will then display the advice on the web application interface you will build.
You can skip building the Next.js application to deploying the application on Back4app. Find the final source code for the application in this GitHub repository.
Prerequisites
To follow along with this tutorial and deploy your Next.js application on Back4app, you need to satisfy the following prerequisites.
Ensure that you have:
- Understanding of React library concepts
- Experience with Docker, including installing Docker
- Familiarity with Node.js and NPM
- Git installed on your computer and a GitHub account.
Coding Your Next.js Application
To create the scaffold for the Next.js application, run the following command in your node.js terminal:
npx create-next-app@latest
On running the command above, you will get a series of prompts displayed in your terminal. These prompts are for you to configure your Next.js application.
The prompts will be similar to this terminal screenshot.

Next.js configures your application to match your prompt answers. You won’t be needing App Router and Tailwind CSS in this application. Select No for those options.
When your application is created, begin to build the interface.
First, add the following global styles to the globals.css file:
/* globals.css */
* {
  box-sizing: border-box;
  padding: 0;
  margin: 0;
}

body{
  background-color: #151E3D;
  color: #8BACD9;
  inline-size: 60%;
  margin: auto;
}

a {
  color: inherit;
  text-decoration: none;
}

button{
  padding: 0.7rem 1rem;
  border-radius: 12px;
  background-color: aqua;
  color: #8BACD9;
  border: none;
}

button:hover{
  background-color: #151E3D;
  color: #8BACD9;
}
You can find the globals.css file in the styles folder of the src directory. After adding the global styles, to apply them to your application, import the globals.css file into your _app.tsx file in the pages directory.
Before importing the globals.css file in the _app.tsx file, you first need to create a layout component to define the layout of your application.
To do this, create a component folder in the src directory and a Layout.tsx file inside that folder. In the Layout.tsx file, write the following code:
// Layout.tsx
import React from "react";
import styles from "../styles/Home.module.css";
import { Comforter } from "next/font/google";

const comforter = Comforter({
  weight: ["400"],
  subsets: ["latin"],
});

function Layout(props: any) {
  return (
    <>
      <header className={styles.header}>
        <h1 className={comforter.className}>Advice Generator</h1>
      </header>
      {props.children}
    </>
  );
}

export default Layout;
The code block above defines a Layout component. In the Layout component, you import your styles from the Home.module.css file and the Comforter function from the next/font/google module.
Using the Comforter function, you configure the comforter font and apply it to the h1 element in your header by setting the className prop to comforter.className.
The props.children expression will render child components inside the Layout component.
You should also define your header style in the Home.module.css file and the other necessary styles.
For example:
/* Home.module.css */
.header{
  text-align: center;
  text-transform: uppercase;
  letter-spacing: 0.2rem;
  margin-block-start: 15%;
  margin-block-end: 1rem;
  opacity: 0.6;
}

.card{
  inline-size: 100%;
  margin: auto;
  border-radius: 12px;
  background-color: aqua;
  padding: 4rem 0;
  font-weight: bold;
  display: flex;
  flex-direction: column;
  gap: 3rem;
  align-items: center;
}

.card h3{
  color: #333333;
  text-transform: uppercase;
  letter-spacing: 0.2rem;
}

@media (max-width: 768px) {

  .header{
    margin-block-start: 30%;
  }

  .card{
      font-size: 12px;
      padding: 2rem;
  }

}
Now, import the global.css file and the Layout component into the _app.tsx file and wrap your application in the Layout component:
// _app.tsx
import Layout from "@/components/Layout";
import "@/styles/globals.css";
import type { AppProps } from "next/app";

export default function App({ Component, pageProps }: AppProps) {
  return (
    <Layout>
      <Component {...pageProps} />
    </Layout>
  );
}
You have defined your application’s layout. Next, you can fetch the advice from the API and display it in the application. To do this, you will utilize the index.tsx file in the pages directory.
In the index.tsx file, override the existing code with the following code:
// index.tsx
import React from "react";
import styles from "../styles/Home.module.css";
import { Montserrat } from "next/font/google";

const montserrat = Montserrat({ weight: ["100", "400"], subsets: ["latin"] });

export default function Home() {
  const [advice, setAdvice] = React.useState("");
  const [count, setCount] = React.useState(1);

  function handleClick() {
    setCount((prevState) => prevState + 1);
  }

  React.useEffect(() => {
    fetch("<https://api.adviceslip.com/advice>")
      .then((res) => res.json())
      .then((data) => setAdvice(data.slip.advice));
  }, [count]);

  return (
    <main>
      <div className={styles.card}>
        <h3 className={montserrat.className}>Advice No{count}</h3>
        <p className={montserrat.className}>{advice}</p>
        <button className={montserrat.className} onClick={handleClick}>
          generate
        </button>
      </div>
    </main>
  );
}
The code block defines the home page. It imports the React library, the Home.module.css for styling, and the Google font Montserrat from the Next.js font library.
The useEffect hook is a powerful tool that allows you to perform side effects in React components. In this application, you have used the useEffect hook to fetch the advice from your API. The advice fetched from the API is then set to the advice state.
The useEffect hook will run initially when the component renders and then again whenever the value of the count state changes. This is because you’ve set the count state as the value of the dependency array.
When you click on the generate button, the handleClick function will run, incrementing the count state by 1. This causes the useEffect hook to run again, fetch new advice from the API, and update the advice state. Every time you click the generate button, a piece of new advice will be displayed on your screen.
Your Next.js application is complete!
To start up the application, run the following command:
npm run dev
The application should be running on your local server http://localhost:3000.
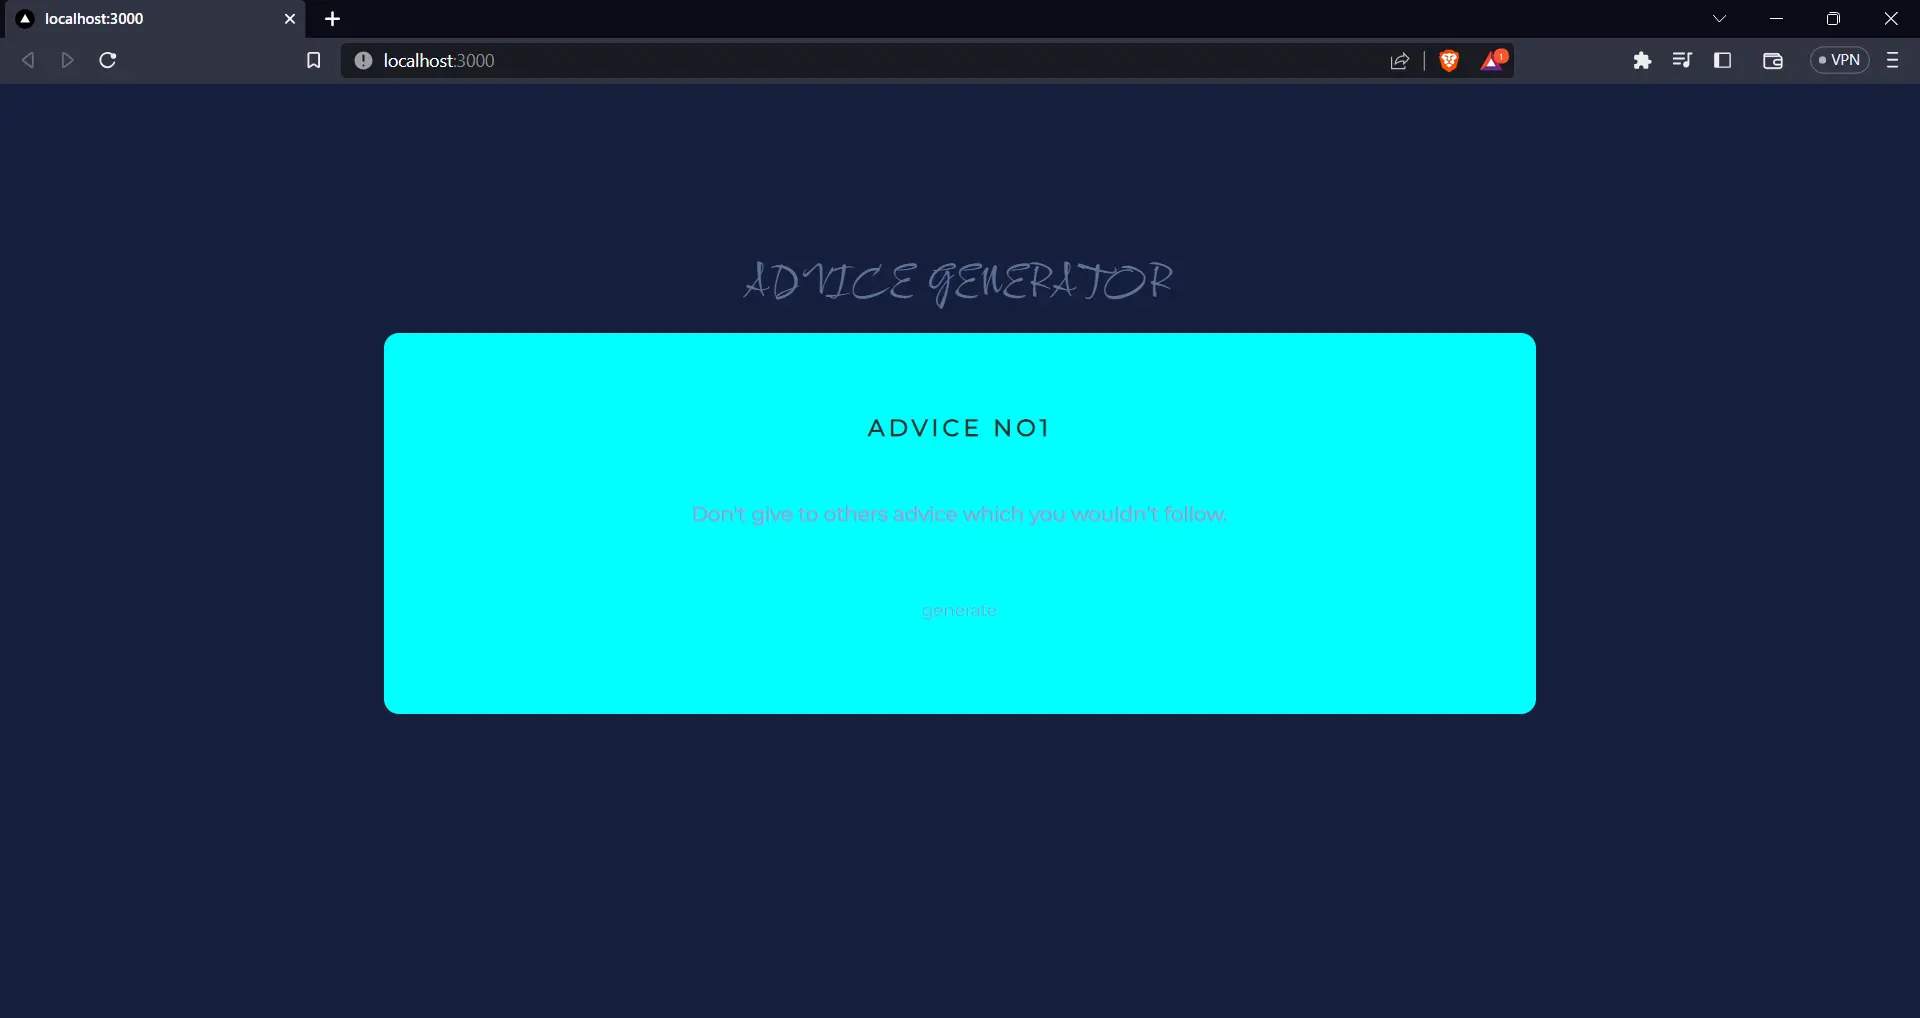
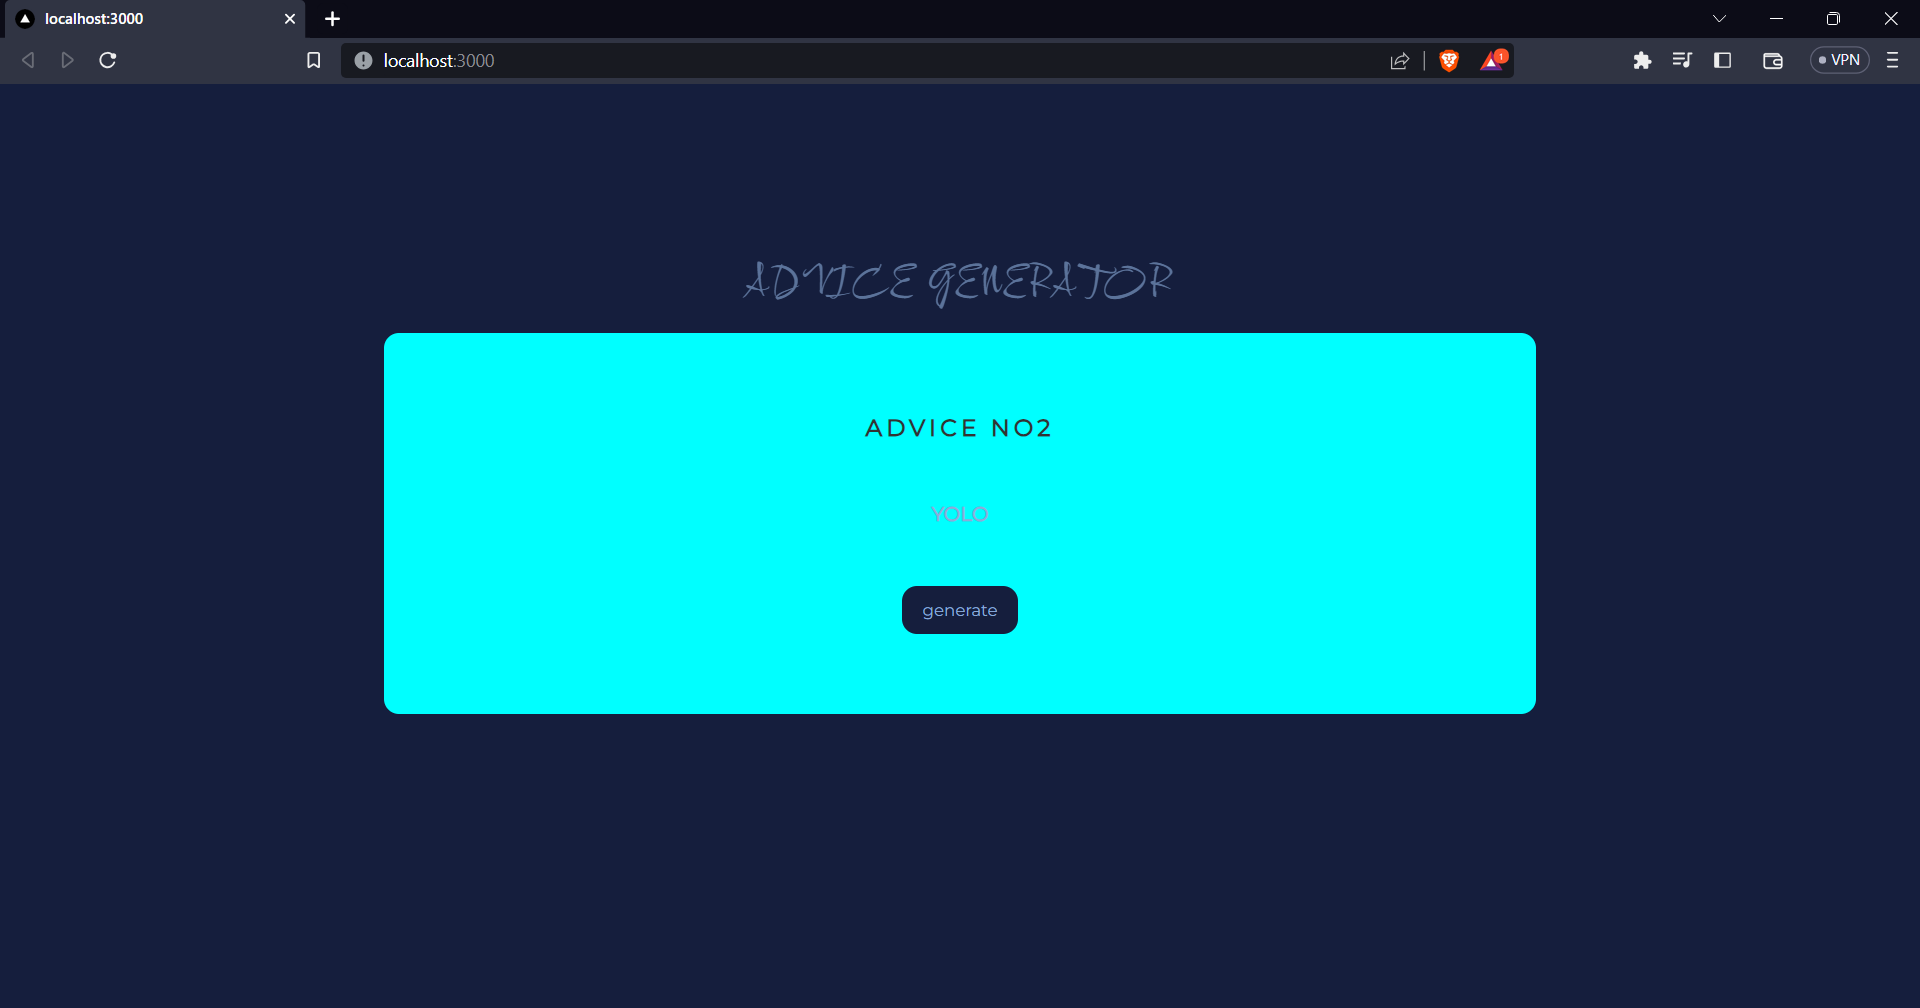
Clicking the generate button will fetch and display a piece of new advice. It will also increment the “advice no” by 1 every time.
Dockerize the Application
Before deploying the Next.js application on Back4app, you must dockerize the application. Dockerizing an application will package your application and its dependencies into Docker containers.
Docker containers provide a lightweight, isolated, and portable way to run your applications with their needed libraries and configurations.
This makes deploying your applications to any machine with Docker installed easy. With dockerizing your application comes simplified deployment, improved portability, scalability, etc.
Below is a step-by-step guide on how you can dockerize your Next.js application:
Step 1: Create a Dockerfile in your project root
Create a new file named Dockerfile in the root directory of your Next.js project. This file will contain the instructions for Docker to build an image of your application.
Step 2: Define your Dockerfile
In the Dockerfile, input the following code:
FROM node:latest
WORKDIR /app
COPY package*.json ./
RUN npm install
COPY . .
RUN npm run build
EXPOSE 3000
CMD ["npm", "run", "start"]
This Dockerfile does the following:
- Starts from the official Node.js 14 runtime.
- Sets the working directory to
/app. - Copies
package.jsonandpackage-lock.jsonto the Docker image and installs dependencies. - Copies the rest of the application code to the Docker image.
- Builds the Next.js application.
- Exposes port 3000 for the application.
- Defines the command to start the application.
These specifications describe the environment in which your application will run.
Step 3: Build the Docker image
Run the following command in your terminal to build the Docker image:
docker build -t advice-generator .You can replace “advice-generator” with the name you want to give to your Docker image.
Run the Docker container
After the image is built, you can run it as a container with the following command:
docker run -p 3000:3000 advice-generator This command maps port 3000 in the Docker container to port 3000 on your machine.
Following these steps will run your Next.js application in a Docker container. You can access it by navigating to http://localhost:3000 in your web browser.
Pushing Your Next.js Application to GitHub
After dockerizing the application, you need to push the application to a GitHub repository. To push the application to a GitHub repository, create a new repository within your GitHub account and run the following commands in your application’s directory on your terminal:
git init
git add .
git remote add origin <your-repository-url>
git commit -m 'initial commit'
git branch -M main
git push -u origin main
- git init: This command initializes a new Git repository in your current directory.
- git add: This command adds all the files in your current directory to the staging area.
- git remote add origin <your-repository-url>: This command links your local repository to a remote repository. Replace the <your-repository-url> with the URL of your remote repository.
- git commit -m ‘initial commit’: This command takes all of the changes written in the staging area and stores them in a new commit.
- git branch -M main: This command creates a new branch named main and switches to it.
- git push -u origin main: This command pushes your commits in your main branch to the origin remote repository.
Deploy the Application to Back4app
To deploy your application to Back4app, you must first create a Back4app account. To do this, follow these steps:
- Visit Back4app’s website.
- Click on the “Sign up” button.
- Fill out the sign-up form and submit it.
If you already have a setup Back4app account, you can simply Log in and proceed to the next step.
After creating an account, log into your account and click the “New App”
button. You can find the button at the top right corner of the screen.
You will be shown a screen similar to the one displayed below.
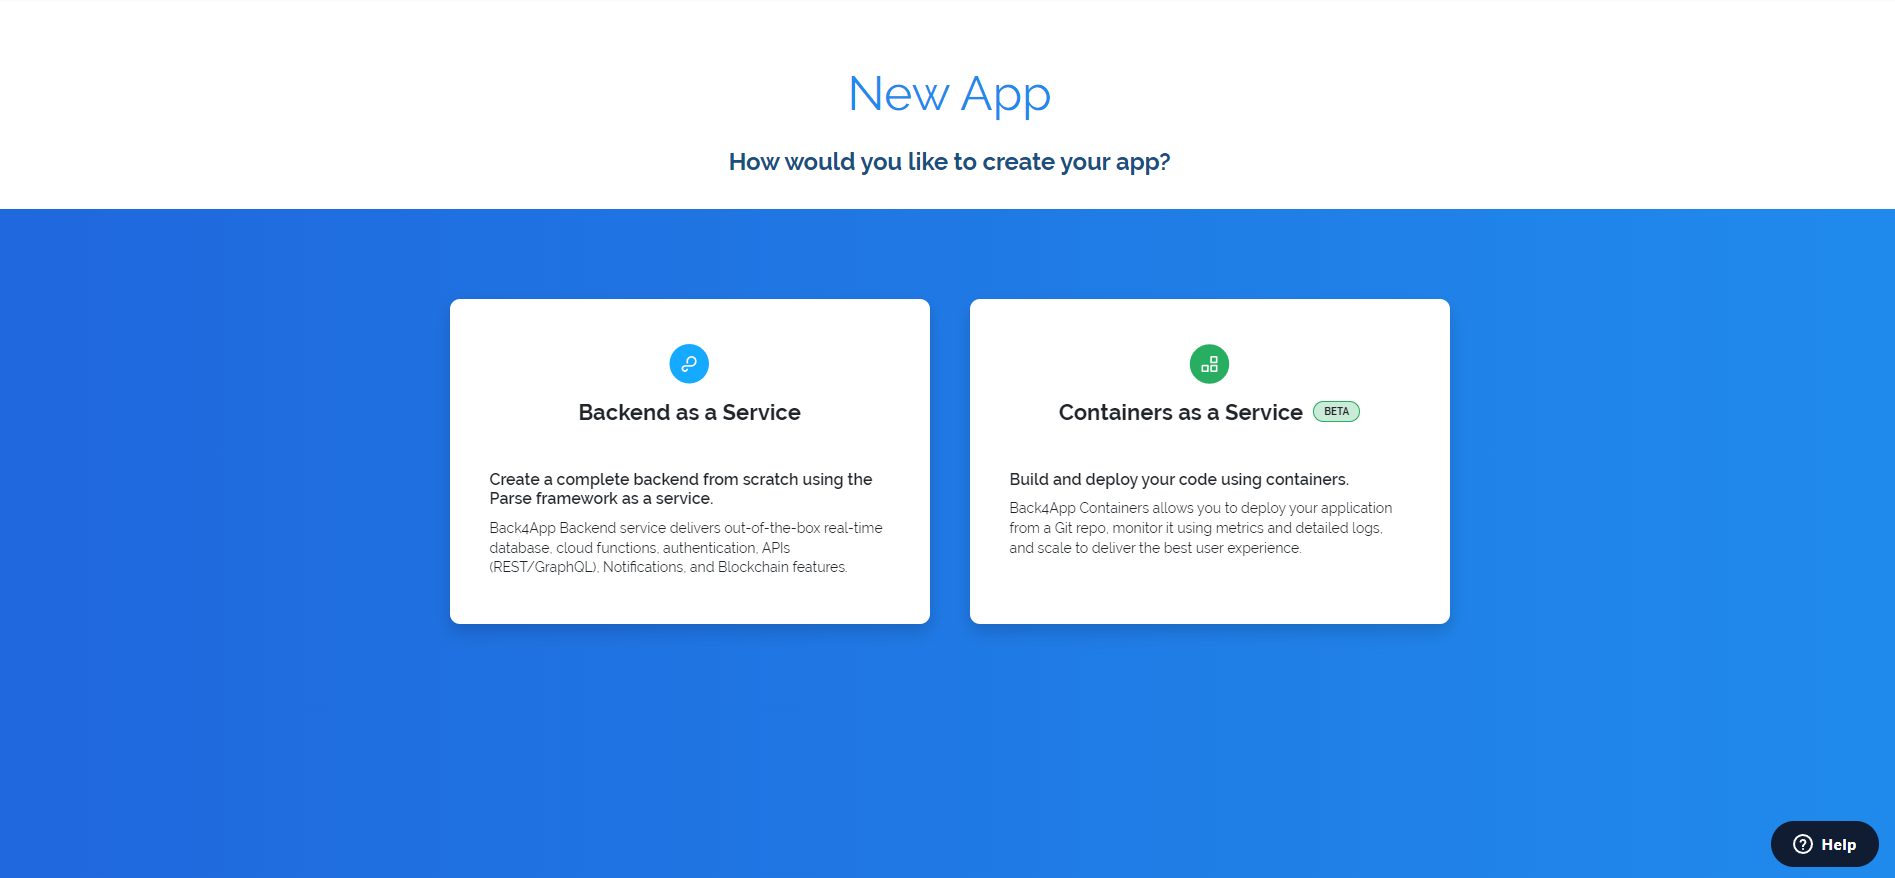
Select the Container as a Service option to build and deploy your application using containers. The build should not take long. Once that is over, link your GitHub account to the built CaaS application.
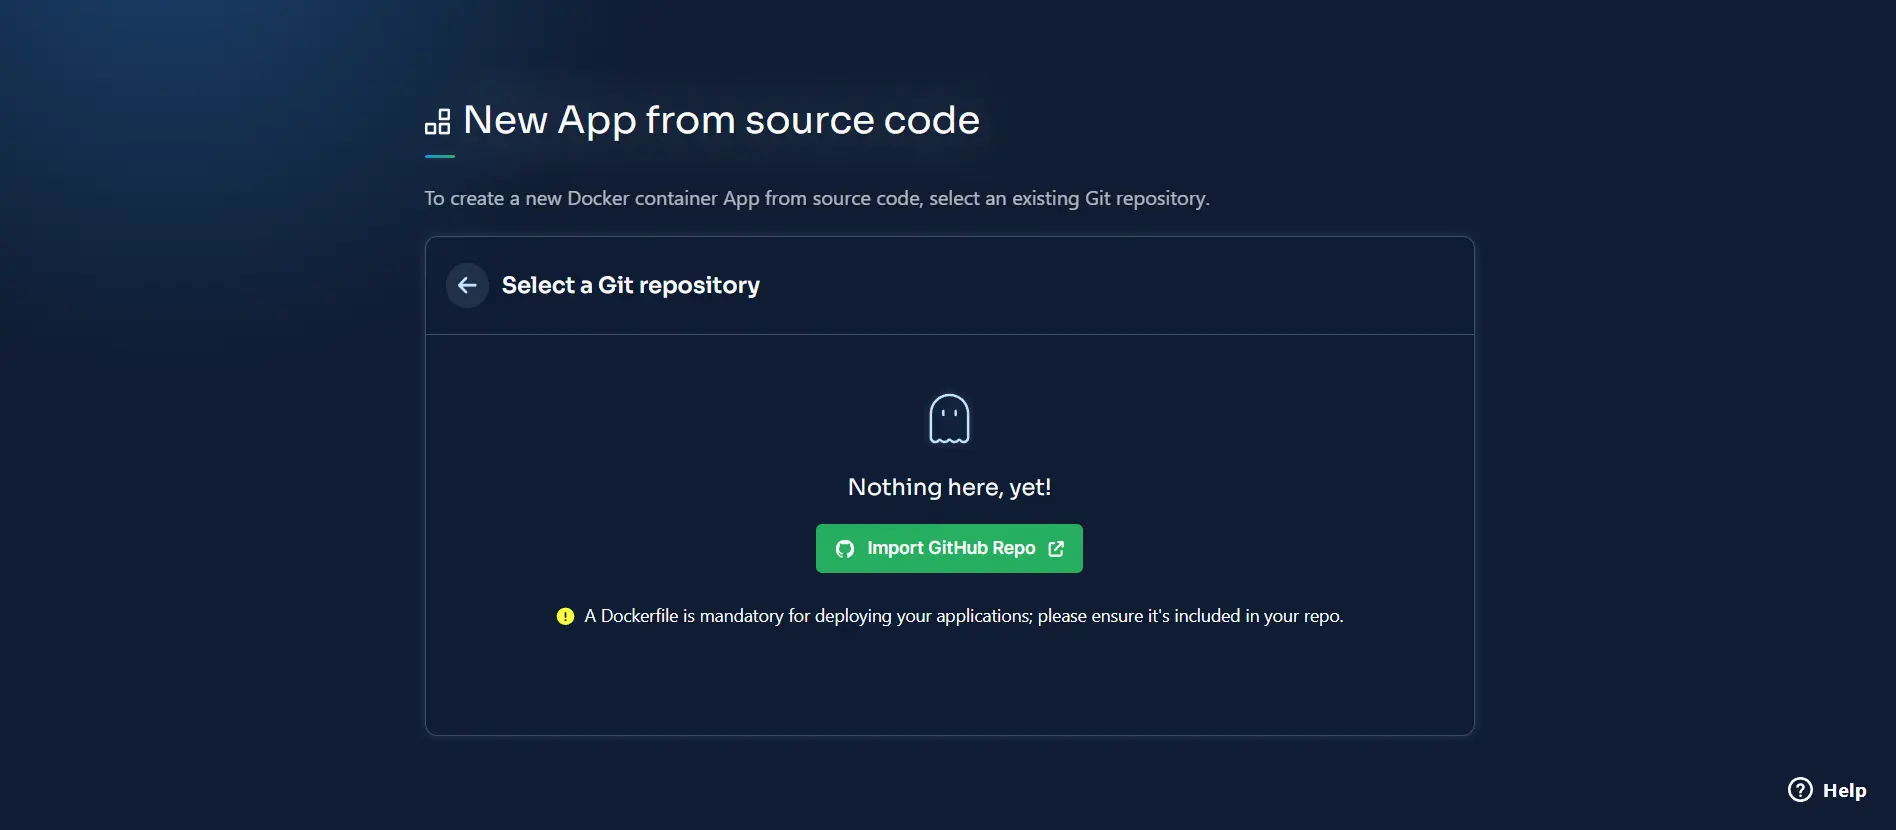
Then select the repository you want to deploy from your linked GitHub account in the Back4app application.
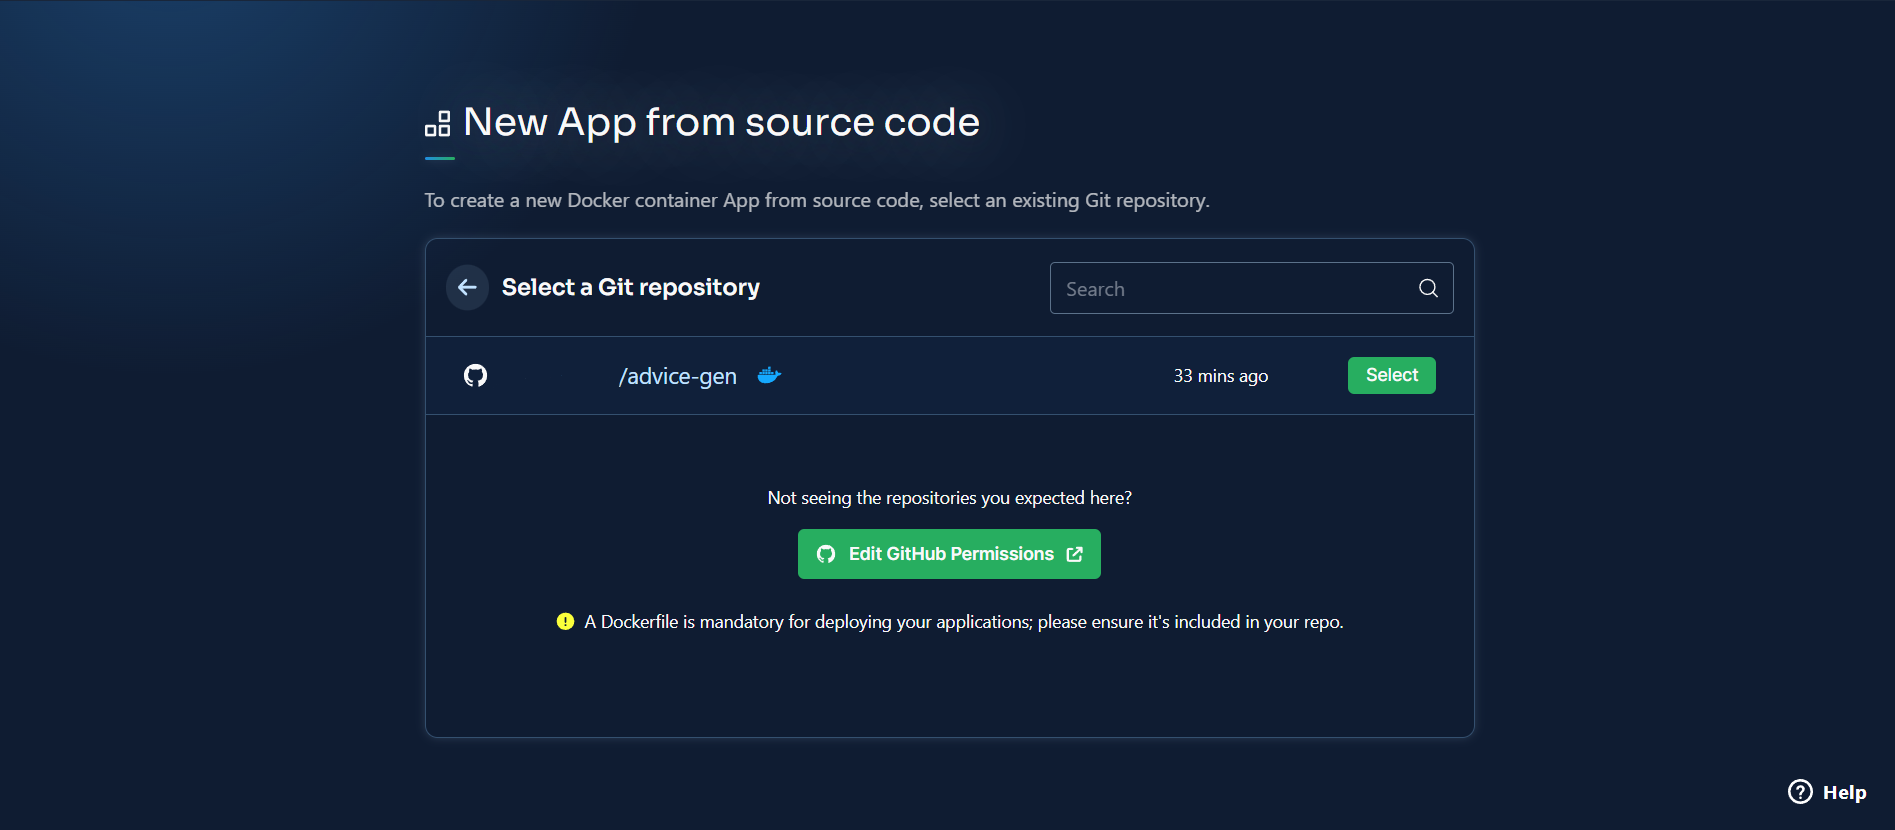
Now you have selected a repository, all that’s left is to deploy the application. Before you do that, you’ll need to name it and configure its deployment.
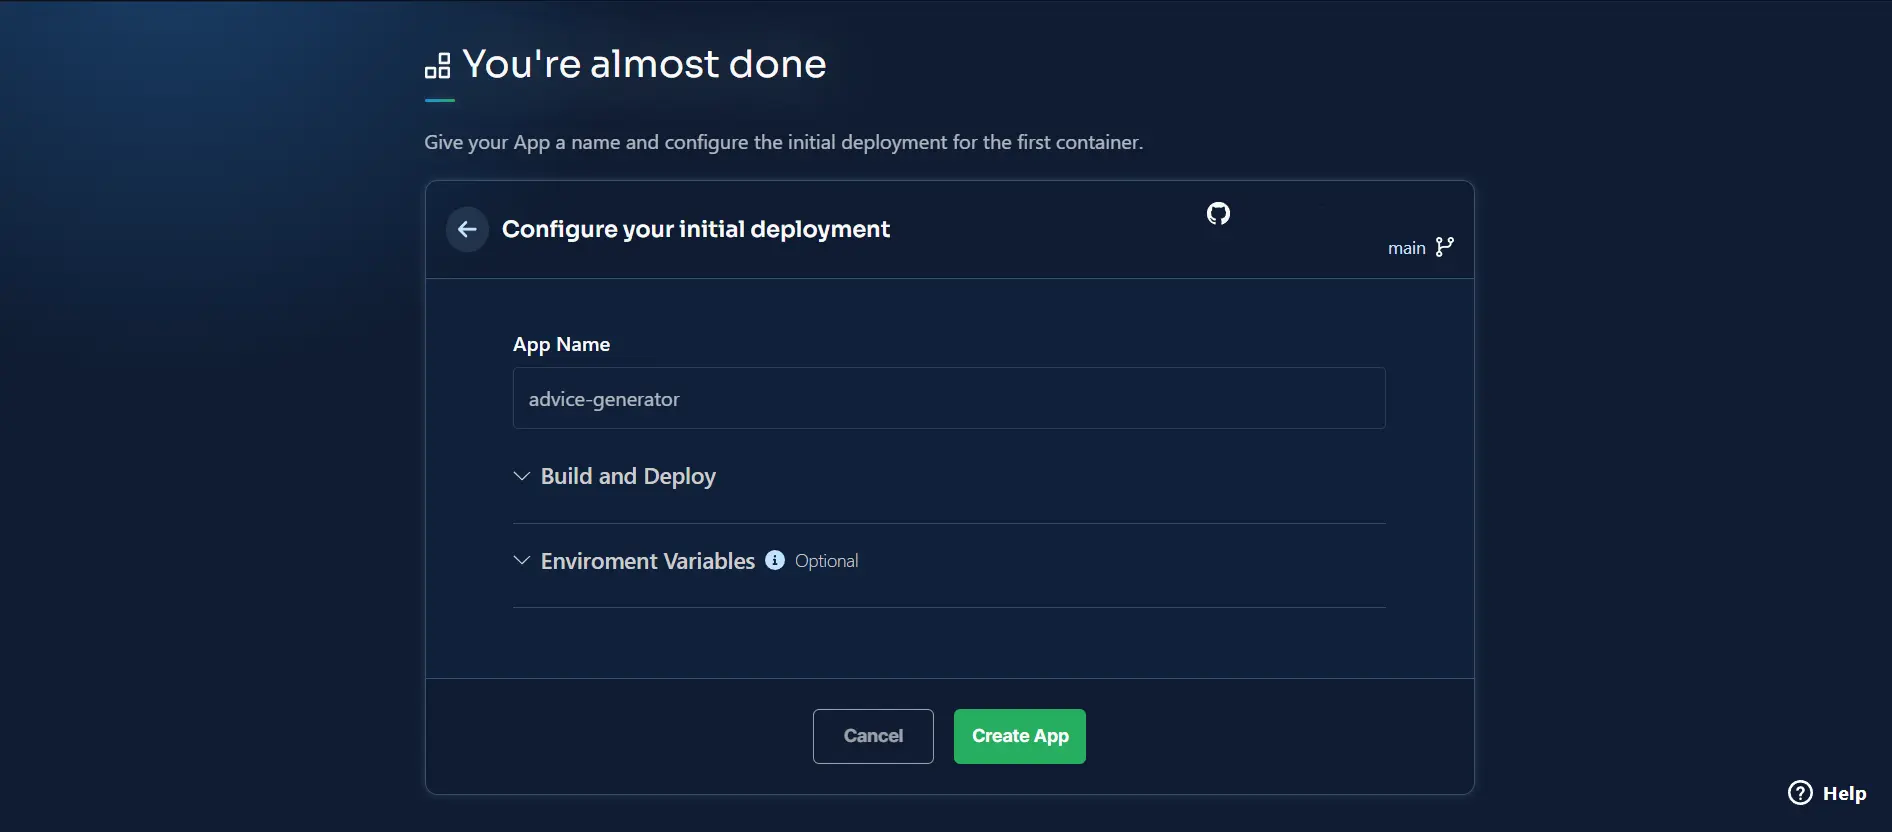
Click the “Create App” button to deploy your application.
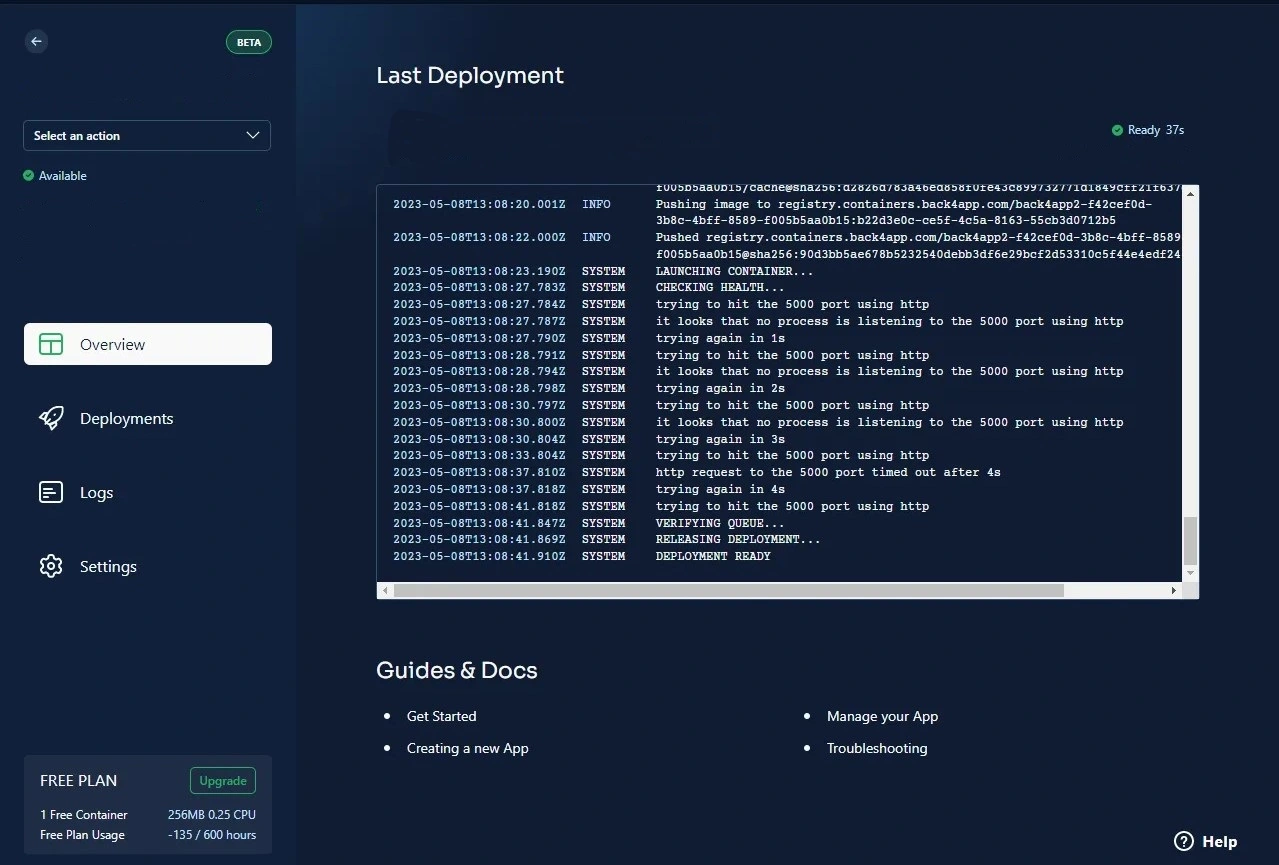
Congratulations, you have successfully deployed your application on Back4app. You can access the application on the web by navigating to the link provided by Back4app on the screen above.
Conclusion
Next.js is an open-source framework for building server-side rendered (SSR) React applications. It also offers many advantages, including static site generation, automatic code splitting, built-in routing, API routes, etc. These advantages make Next.js a powerful framework.
Deploying a Next.js application using Back4pp’s CaaS simplifies the development process. The Back4app CaaS platform is a scalable, secure, and cost-effective solution for deploying Next.js applications.
Its user-friendly interface, real-time updates, GraphQL and REST APIs support, automated backups, and serverless environment make it a perfect choice for developers.
FAQ
What Is Next.js?
Next.js is a popular React framework that offers many features for building high-performance and SEO-friendly web applications. Some of the features Next.js offers include server-side rendering, static site generation, automatic code splitting, API routes, built-in CSS and Sass support, TypeScript support, etc. Vercel, formerly known as Zeit, created and continues to maintain the Next.js framework.
How To Deploy a Next.js Application?
You can deploy a Next.js application using Back4app. Back4app is a robust platform that provides a scalable and flexible environment for deploying applications.
To deploy a Next.js application on Back4app’s CaaS platform., follow these simple steps:
1. Create a Next.js application
2. Dockerize the application
3. Push the application to a GitHub repository
4. Set Up Your Back4app Account
5. Create a Back4app application
6. Link your GitHub account to the Back4app application
7. Select the application’s repository
8. Deploy the application


