How to Deploy a JavaScript Application (2026 Guide)
To deploy a JavaScript application, package it with a Dockerfile, push the code to a GitHub repository and connect that repository to a container platform — this guide uses Back4app Containers, which builds the image and serves your app on a production URL with HTTPS on a free tier. The complete walkthrough below takes about ten minutes from empty folder to live application.
In this guide: Deployment options compared · Step-by-step tutorial · Troubleshooting · Why Back4app Containers
Contents
- 1 JavaScript deployment options compared
- 2 How to deploy a JavaScript application: step by step
- 3 Troubleshooting common deployment errors
- 4 Why deploy JavaScript on Back4app Containers
- 5 Conclusion
- 6 How do I deploy a JavaScript application?
- 7 Where can I deploy a JavaScript application for free?
- 8 Do I need Docker to deploy a JavaScript app?
- 9 What is the difference between deploying static JavaScript and a Node.js app?
- 10 Why does my container deploy but show an error page?
- 11 How do I add a custom domain to my deployed app?
- 12 How do I deploy updates after the first release?
- 13 Does my JavaScript app need a backend too?
JavaScript deployment options compared
“JavaScript application” covers everything from a static page to a server-rendered app, and the right hosting depends on which you have. These are the four routes teams actually use in 2026:
| Option | What it runs | Free tier | Best for |
|---|---|---|---|
| Back4app Containers | Any Dockerized app — static or Node.js | Yes, no time limit | One workflow for any JavaScript stack, with logs and metrics |
| Static hosting (CDN) | HTML, CSS and JS files only | Yes | Purely static sites with no server code |
| PaaS | Node.js processes | Varies | Server apps with a git-push workflow |
| Virtual machine (IaaS) | Anything you install | Trials only | Full control, manual server administration |
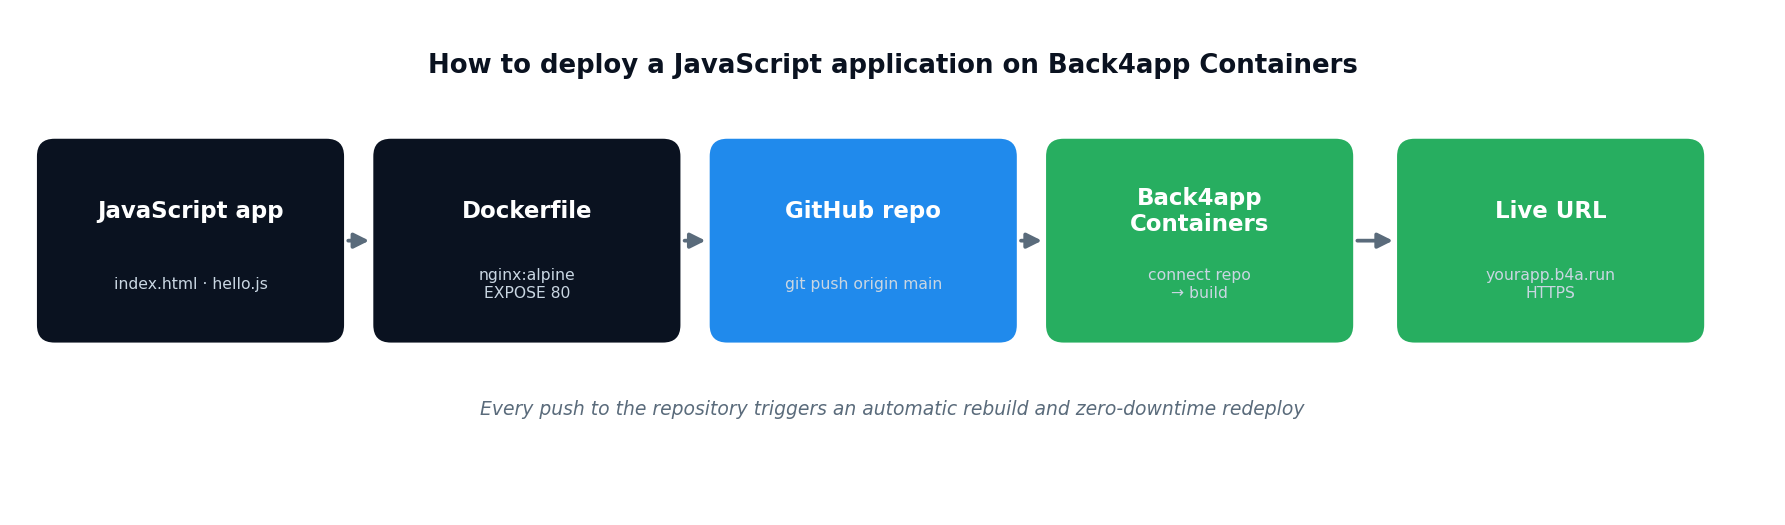
The container route is the most portable of the four: the same image runs on your machine, on Back4app, or on any other container host, so your deployment pipeline survives changes to the rest of your stack. Here is the whole flow at a glance:
How to deploy a JavaScript application: step by step
You will need a free Back4app account, a GitHub account, and Docker installed locally if you want to test the image before pushing (optional).
Step 1 — Create the JavaScript application
Create a project folder with two files. First, index.html:
<!DOCTYPE html>
<html lang="en">
<head>
  <meta charset="utf-8">
  <title>My First JavaScript Application</title>
</head>
<body>
  <h1 id="headline"></h1>
  <script src="hello.js"></script>
</body>
</html>
Then hello.js, which writes the headline when the page loads:
document.getElementById('headline').textContent = 'My First JavaScript Application';Open index.html in a browser to confirm it works locally before going further. If you are deploying an existing project instead, skip ahead — the remaining steps are identical.
Step 2 — Add a Dockerfile
The Dockerfile tells the platform how to build and serve your app. For a static JavaScript application, Nginx serves the files and the whole file is five lines:
FROM nginx:alpine
COPY index.html /usr/share/nginx/html/
COPY hello.js /usr/share/nginx/html/
EXPOSE 80
CMD ["nginx", "-g", "daemon off;"]
If your project is a Node.js application rather than static files, use a Node base image instead — the rest of the tutorial is unchanged:
FROM node:20-alpine
WORKDIR /app
COPY package*.json ./
RUN npm ci --omit=dev
COPY . .
EXPOSE 3000
CMD ["node", "server.js"]
Two details that prevent most deployment failures: the port in EXPOSE must match the port your server actually listens on, and a Node server must bind to 0.0.0.0 rather than localhost, which is unreachable from outside the container.
Step 3 — Push the project to GitHub
Create a repository on GitHub, then from your project folder:
git init
git add .
git commit -m "first js commit"
git branch -M main
git remote add origin https://github.com/YOUR-USER/YOUR-REPO.git
git push -u origin main
Step 4 — Create the app on Back4app Containers
Sign in to Back4app and click New App in the top-right corner of the My Apps dashboard.

Choose the container option and Back4app asks you to select a Git repository. The first time, you authorize the GitHub integration so the platform can read your repositories.
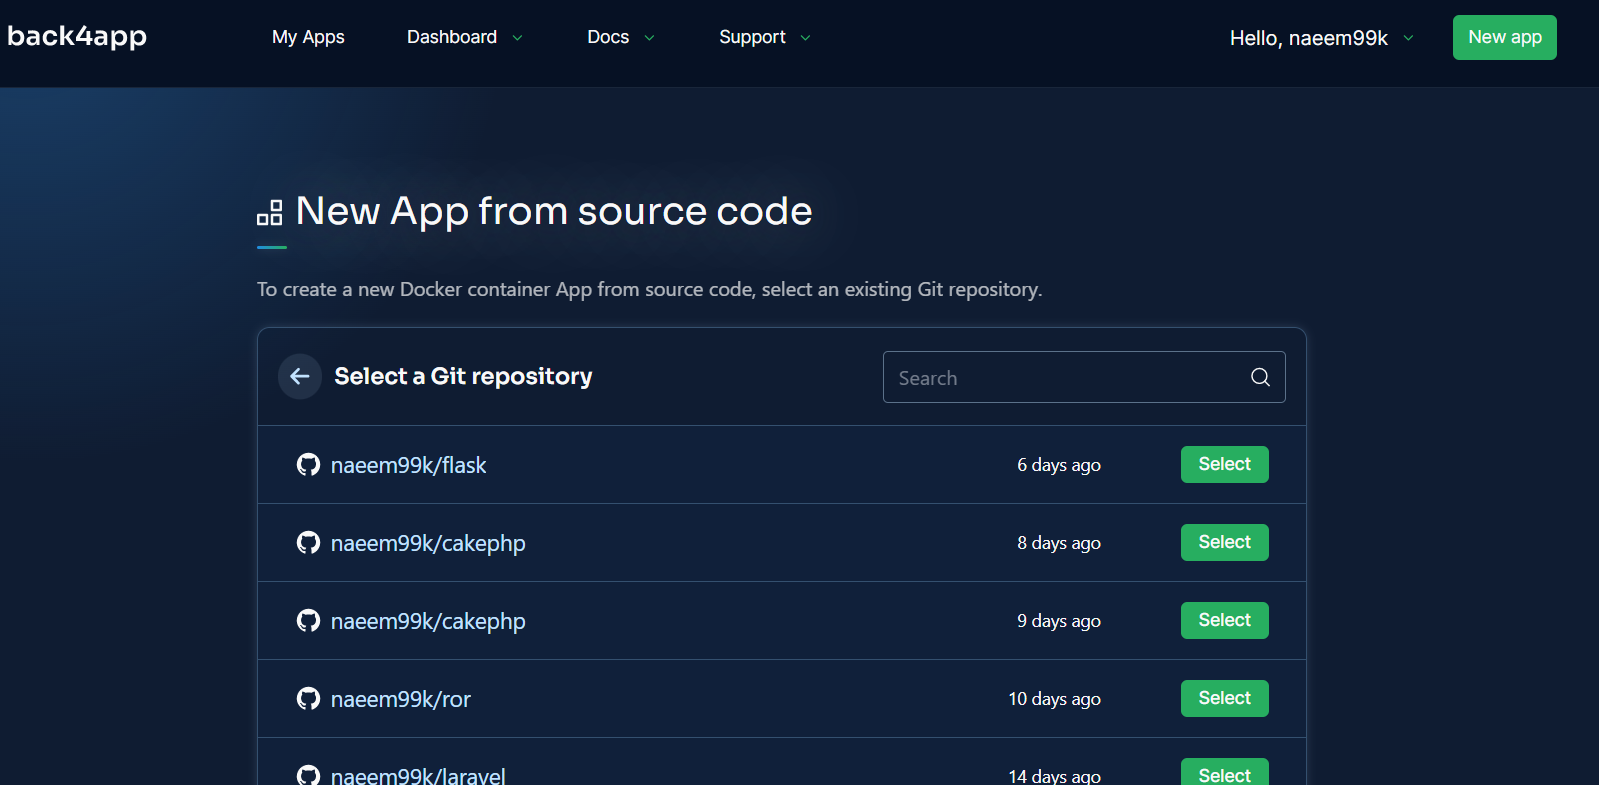
Find the repository you just pushed and click Select.

Step 5 — Configure and create
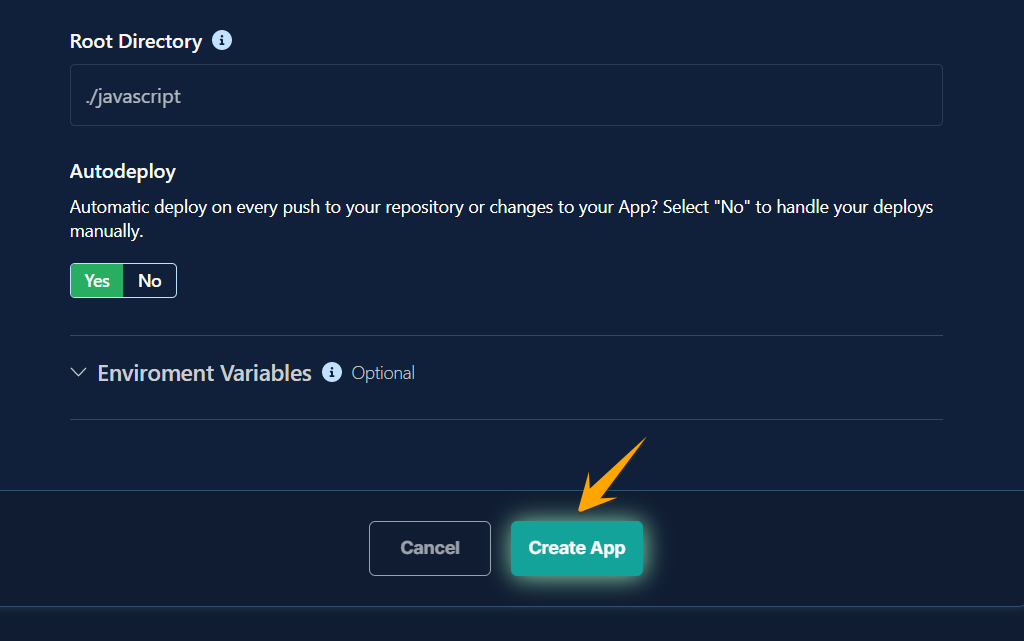
Set the branch, the root directory (leave it as the project root unless your app lives in a subfolder), and any environment variables your app needs. Keep Autodeploy on Yes so every future push redeploys automatically, then click Create App.
Step 6 — Watch the deployment
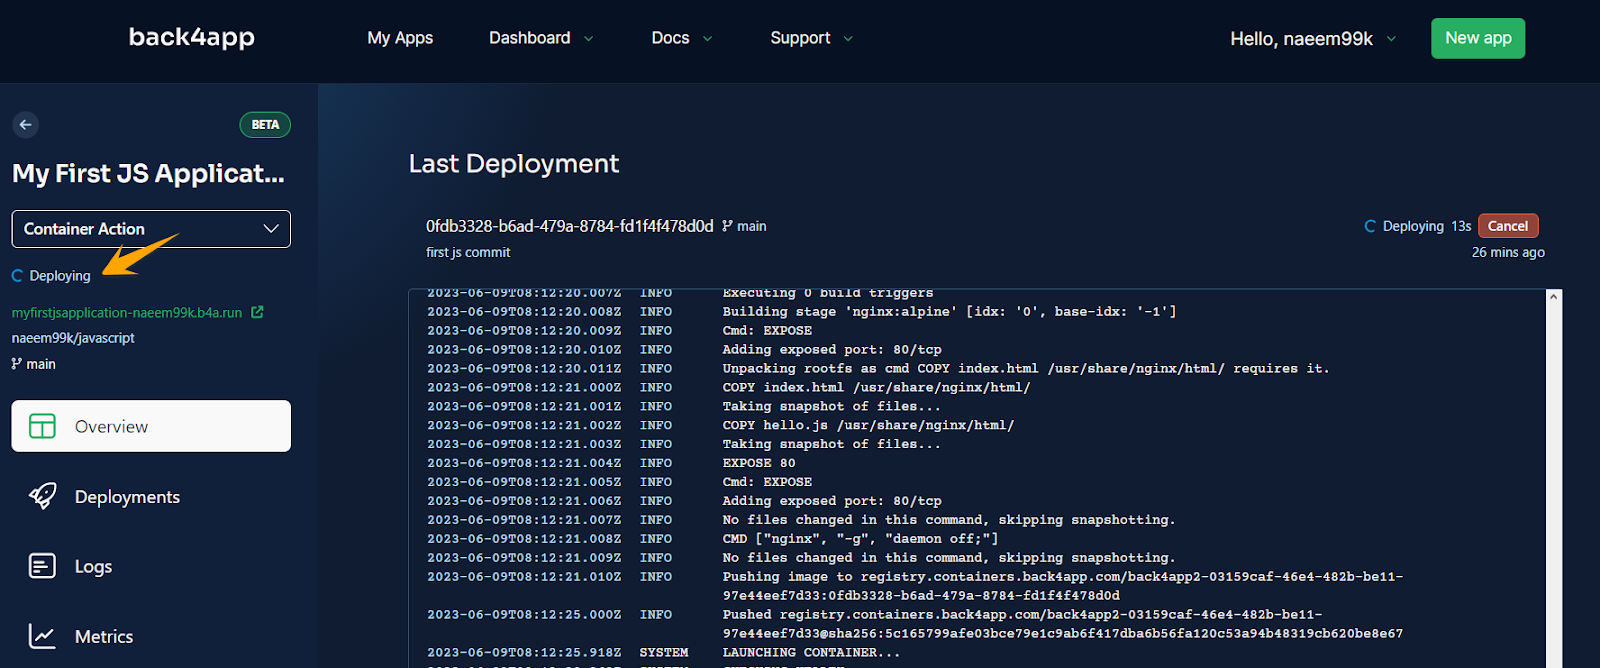
The build starts immediately and streams Docker logs in real time — you can follow each instruction of your Dockerfile executing, the image being pushed to the registry, and the container launching. The sidebar gives you Deployments, Logs and Metrics for the running app.
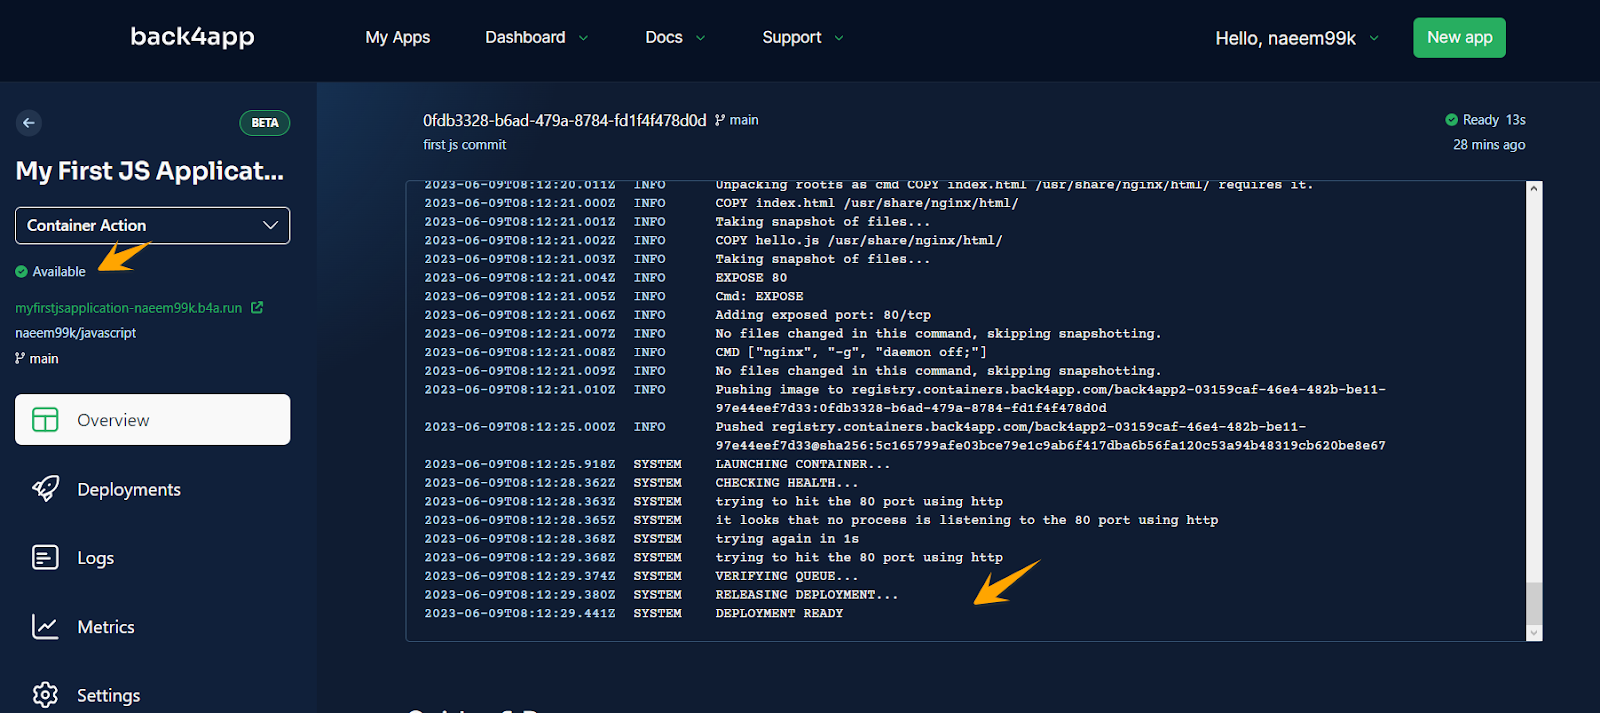
When the health check passes, the status changes to Available and the logs end with DEPLOYMENT READY.
Step 7 — Open your live application
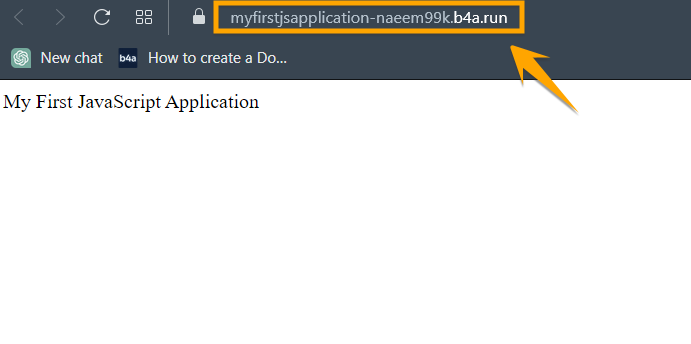
Click the generated URL — a .b4a.run address served over HTTPS — and your JavaScript application is live on the internet.
From here, every git push to the connected branch rebuilds the image and swaps the container with zero downtime. You can add a custom domain in the app settings, and the SSL certificate is issued automatically.
Troubleshooting common deployment errors
- Deployment succeeds but the page does not load — almost always a port mismatch. The platform health-checks port 80 by default; make sure
EXPOSEand your server’s listening port agree, and that a Node server binds to0.0.0.0. - Build fails on
npm ci—package-lock.jsonis missing or out of sync withpackage.json. Commit the lock file, or usenpm installin the Dockerfile. - Files not found in the image — check the root directory setting and your
.dockerignore; paths inCOPYare relative to the build context. - App works locally but not in the container — environment variables are the usual culprit. Anything in your local
.envmust be declared in the platform’s environment variables section. - Changes not appearing after a push — confirm autodeploy is enabled and that you pushed to the branch the app is connected to.
Why deploy JavaScript on Back4app Containers
The Back4app web deployment platform is built around exactly the workflow above — connect a repository and get a running application — with the operational pieces included rather than assembled:
- Deploy straight from GitHub, with automatic builds on every commit.
- Zero-downtime deployments — the new container only takes traffic once it is healthy.
- Real-time monitoring of CPU, RAM, bandwidth and logs from the same dashboard.
- Native Docker support, so any language or framework that runs in a container runs here.
- Global infrastructure across major cloud providers.
- Free tier with no time limit, and predictable pricing as you grow.
If your application also needs data, user accounts or APIs, the same platform provides them: pair the container with Back4app’s Backend as a Service for a managed database with instant REST and GraphQL APIs, authentication and file storage — frontend and backend on one platform, one bill, one dashboard.
Deploying something more specific? See our guides for Node.js backends, Next.js, React applications, static sites, and Docker containers in general.
Conclusion
Deploying a JavaScript application comes down to three artifacts — your code, a Dockerfile, and a connected repository. Once those exist, the platform handles building, serving, scaling and redeploying, and shipping an update becomes a git push. Start on the Back4app free tier and you can have this tutorial’s app live in the next ten minutes.
How do I deploy a JavaScript application?
Package the application with a Dockerfile, push the project to a GitHub repository, then connect that repository to a container platform such as Back4app Containers. The platform builds the Docker image and serves your app on a production URL with HTTPS, redeploying automatically on every push. The full walkthrough with screenshots is in this guide.
Where can I deploy a JavaScript application for free?
Back4app Containers has a free tier with no time limit that runs Dockerized JavaScript applications straight from GitHub. Other options with free allowances include Render and Google Cloud Run. Free plans limit resources and may sleep after inactivity, but they comfortably host portfolios, MVPs and internal tools.
Do I need Docker to deploy a JavaScript app?
Not always, but it is the most portable route. A Dockerfile makes the deployment identical on your laptop and in production, and it works on any container platform, so you are never locked into one host. For a static JavaScript app the Dockerfile is about five lines, as shown in this tutorial.
What is the difference between deploying static JavaScript and a Node.js app?
A static JavaScript app is plain HTML, CSS and JS served by a web server such as Nginx — no runtime is executing your code on the server. A Node.js application runs a server process that must stay alive and listen on a port. Both deploy as containers; only the Dockerfile differs, using an Nginx base image for static files or a Node base image for server apps.
Why does my container deploy but show an error page?
The most common cause is a port mismatch: the platform checks a specific port (80 by default on Back4app Containers) and your container listens on another one. Make sure the Dockerfile exposes the same port your server binds to, and that the server listens on 0.0.0.0 rather than localhost, which is not reachable from outside the container.
How do I add a custom domain to my deployed app?
After the first successful deployment, open the application settings on your hosting platform and add the domain, then create the DNS record it shows you at your registrar. Back4app Containers issues the SSL certificate automatically once the DNS propagates, so the custom domain serves over HTTPS with no extra configuration.
How do I deploy updates after the first release?
With autodeploy enabled, you simply push to the connected branch: the platform detects the commit, rebuilds the image and swaps the running container with zero downtime. If you prefer manual control, turn autodeploy off and trigger each deployment from the dashboard.
Does my JavaScript app need a backend too?
If your app stores data, authenticates users or calls private APIs, yes. You can pair the deployed frontend with a Backend as a Service such as Back4app, which provides a database with instant REST and GraphQL APIs, user authentication and file storage — so frontend hosting and backend live on the same platform.