How to Deploy an Angular Application (2026 Guide)
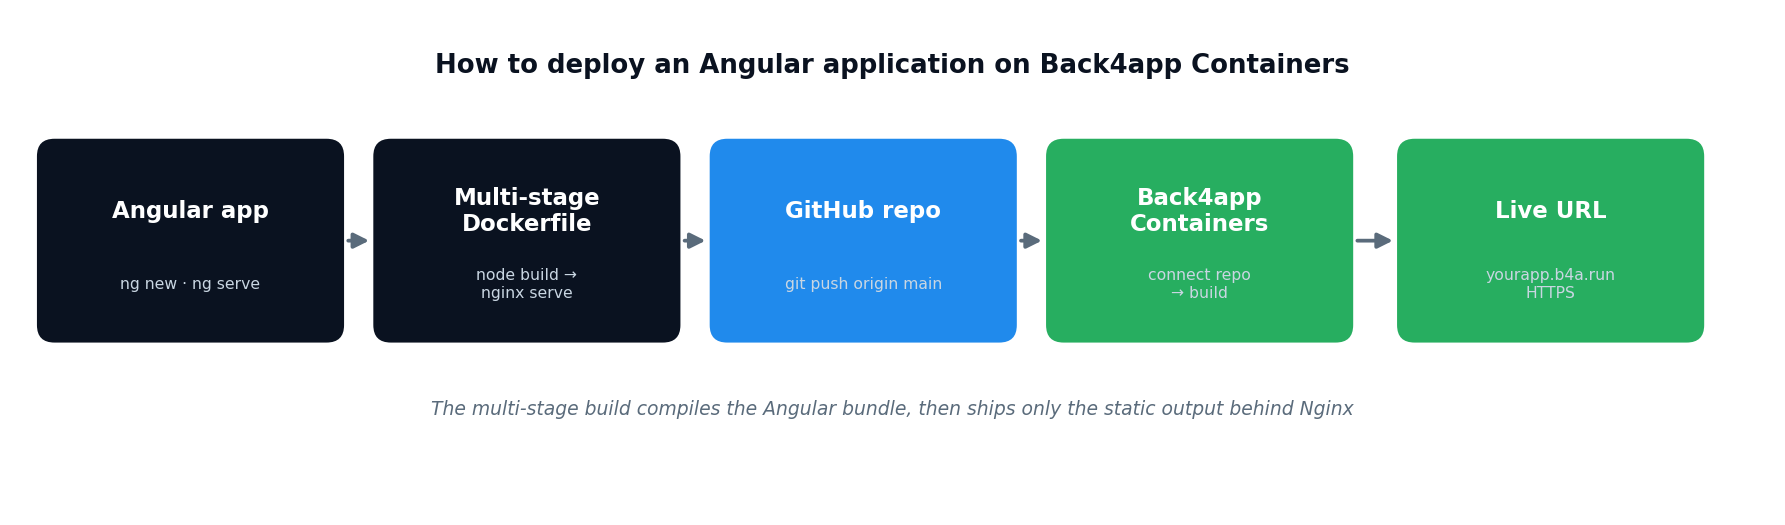
To deploy an Angular application, compile it with the Angular CLI, package it in a multi-stage Dockerfile that builds with Node and serves the result through Nginx, push the project to GitHub and connect the repository to Back4app Containers — which builds the image and publishes your app on an HTTPS URL, on a free tier. The complete walkthrough below takes about fifteen minutes.
In this guide: Prerequisites · Step-by-step deployment · Troubleshooting · Why Back4app Containers
A note on naming before we start: AngularJS is the original 1.x framework, which reached end of life in January 2022. Angular (version 2 and above) is the TypeScript rewrite that Google actively maintains, and it is what this tutorial covers.
Contents
- 1 Prerequisites
- 2 How to deploy an Angular application: step by step
- 3 Troubleshooting common Angular deployment errors
- 4 Why deploy Angular on Back4app Containers
- 5 Conclusion
- 6 How do I deploy an Angular application?
- 7 What is the difference between Angular and AngularJS?
- 8 Why does my Angular app show a 404 when refreshing a route?
- 9 Where can I deploy an Angular application for free?
- 10 Why use a multi-stage Docker build for Angular?
- 11 What is the correct output path for the Angular build?
- 12 How do I deploy updates after the first release?
- 13 Does my Angular app need a backend?
Prerequisites
- Node.js and npm — install the current LTS release from the official Node.js site; npm comes with it.
- Angular CLI — installed globally with npm.
- A GitHub account for the repository the platform will build from.
- A free Back4app account.
- Docker (optional) if you want to test the image locally before pushing.
npm install -g @angular/cliHow to deploy an Angular application: step by step
Step 1 — Create the Angular project
Generate a new application with the CLI. Answer the prompts for routing and stylesheet format — the defaults are fine for this tutorial.
ng new my-angular-app
cd my-angular-app
If you are deploying an existing Angular project instead, skip to Step 3 — the remaining steps are identical.
Step 2 — Run it locally
Start the development server to confirm everything works before containerizing:
ng serve --open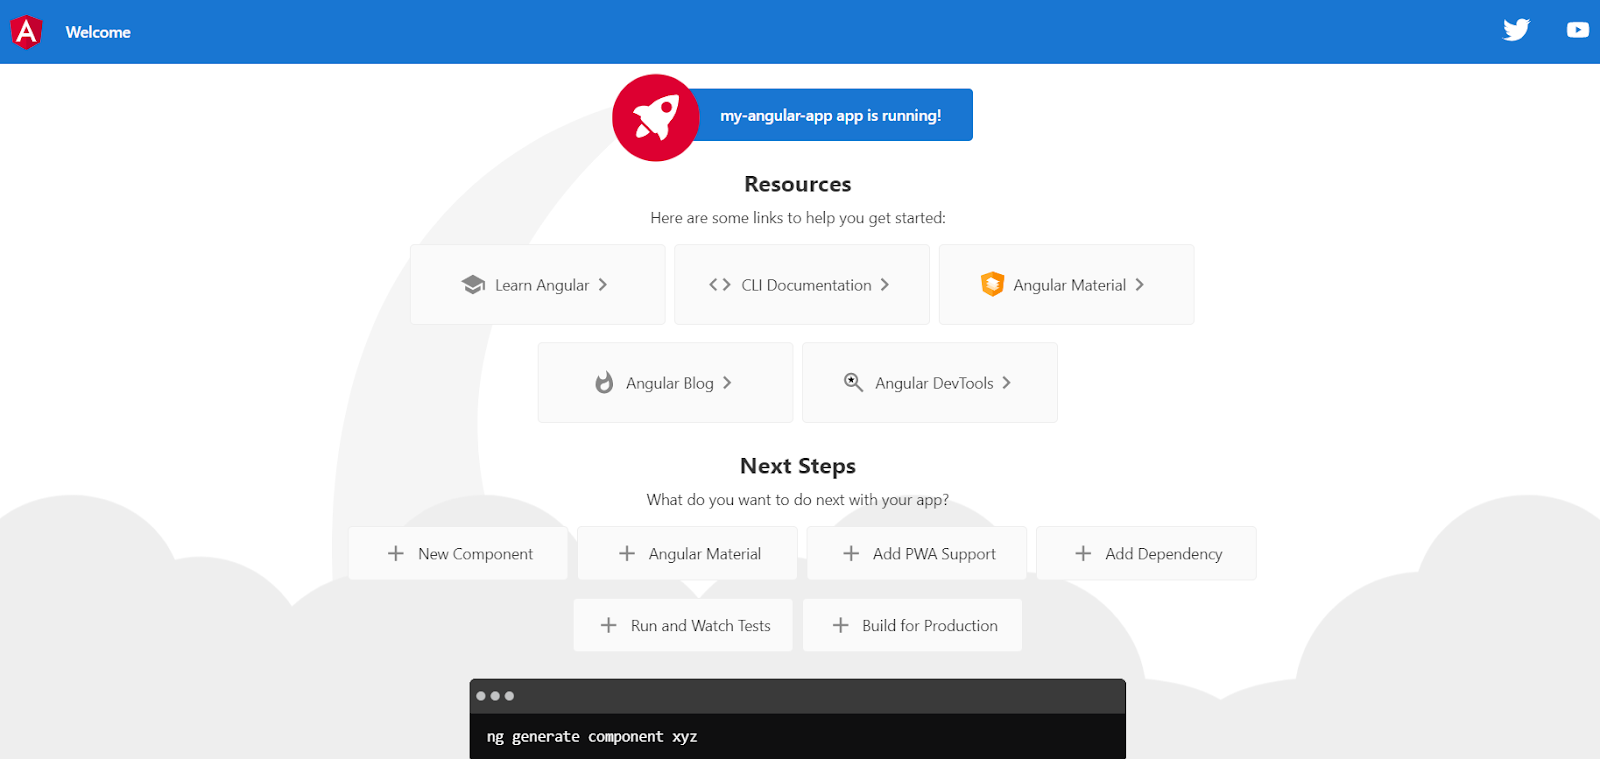
Step 3 — Add the Nginx configuration
Angular is a single-page application with client-side routing, so the web server must return index.html for every path instead of hunting for matching files. Without this, refreshing any route other than the home page returns a 404. Create nginx.conf in the project root:
server {
  listen 80;
  location / {
    root /usr/share/nginx/html;
    index index.html index.htm;
    try_files $uri $uri/ /index.html =404;
  }
}
Step 4 — Write the multi-stage Dockerfile
Angular needs Node and the whole dependency tree to compile, but none of that is needed to serve the result. A multi-stage build compiles in a Node image and then copies only the compiled output into a small Nginx image — a final container a fraction of the size, with a much smaller attack surface. Create Dockerfile in the project root:
# Stage 1 — build the Angular bundle
FROM node:20-alpine AS builder
WORKDIR /app
COPY package*.json ./
RUN npm ci
COPY . .
RUN npm run build

# Stage 2 — serve the compiled output with Nginx
FROM nginx:alpine
COPY --from=builder /app/dist/my-angular-app/browser /usr/share/nginx/html
COPY nginx.conf /etc/nginx/conf.d/default.conf
EXPOSE 80
CMD ["nginx", "-g", "daemon off;"]
Check the output path before continuing. Recent Angular versions build to dist/<app-name>/browser, while older ones build to dist/<app-name>. Open angular.json, find outputPath, and make the COPY --from=builder line match your project — a wrong path is the most common cause of a blank page after deployment.
Optionally, test the image locally before pushing:
docker build -t my-angular-app .
docker run -p 8080:80 my-angular-app
Step 5 — Push the project to GitHub
Create a repository on GitHub, then from the project folder:
git init
git add .
git commit -m "first commit"
git branch -M main
git remote add origin https://github.com/YOUR-USER/YOUR-REPO.git
git push -u origin main
Step 6 — Create the app on Back4app Containers
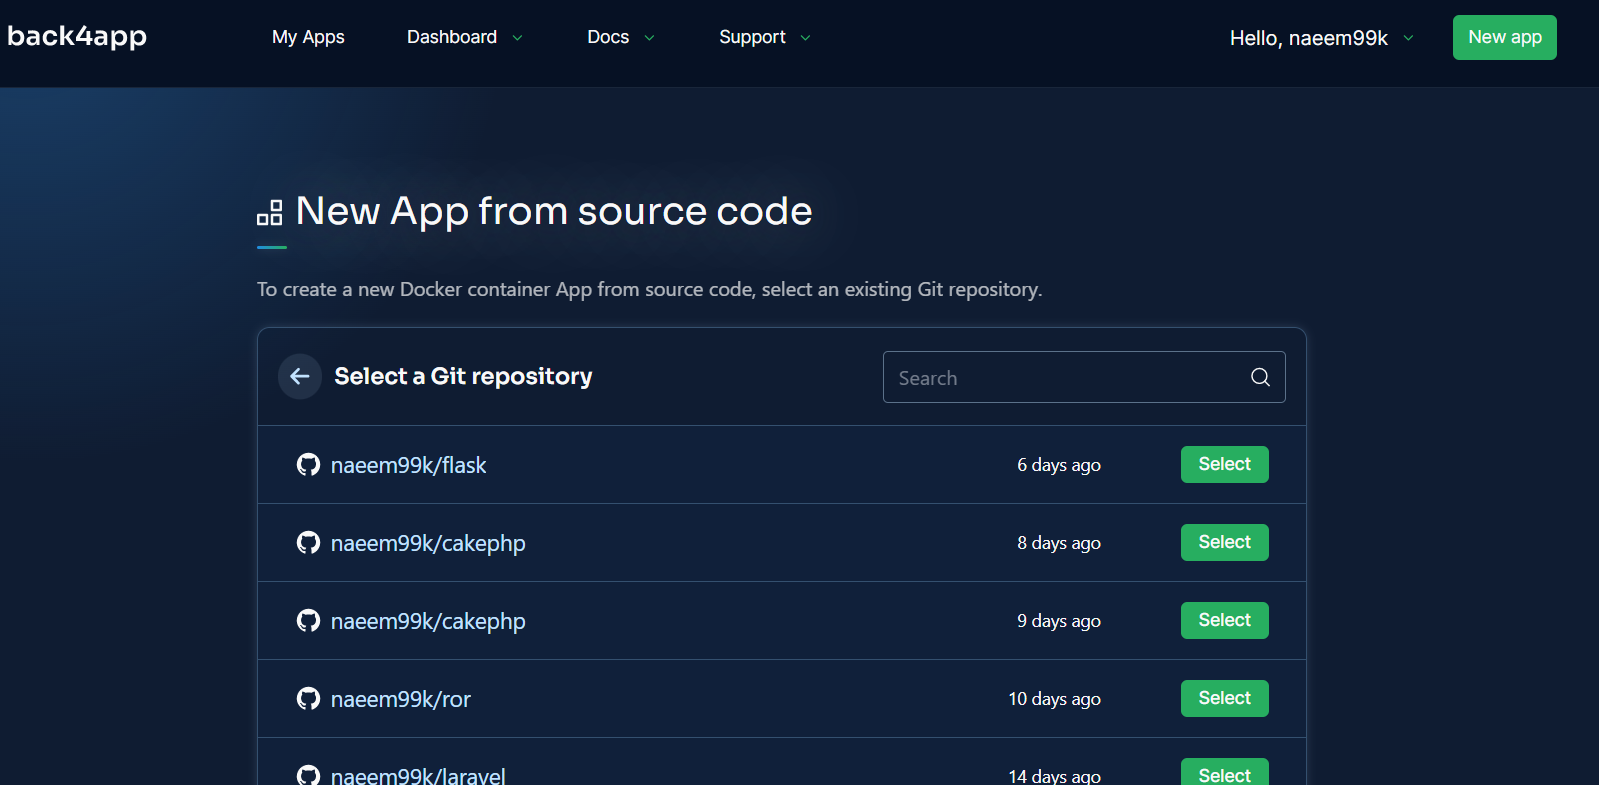
Sign in to Back4app, click New App and choose the container option. The platform asks you to select a Git repository — the first time, you authorize the GitHub integration so it can read your repositories.
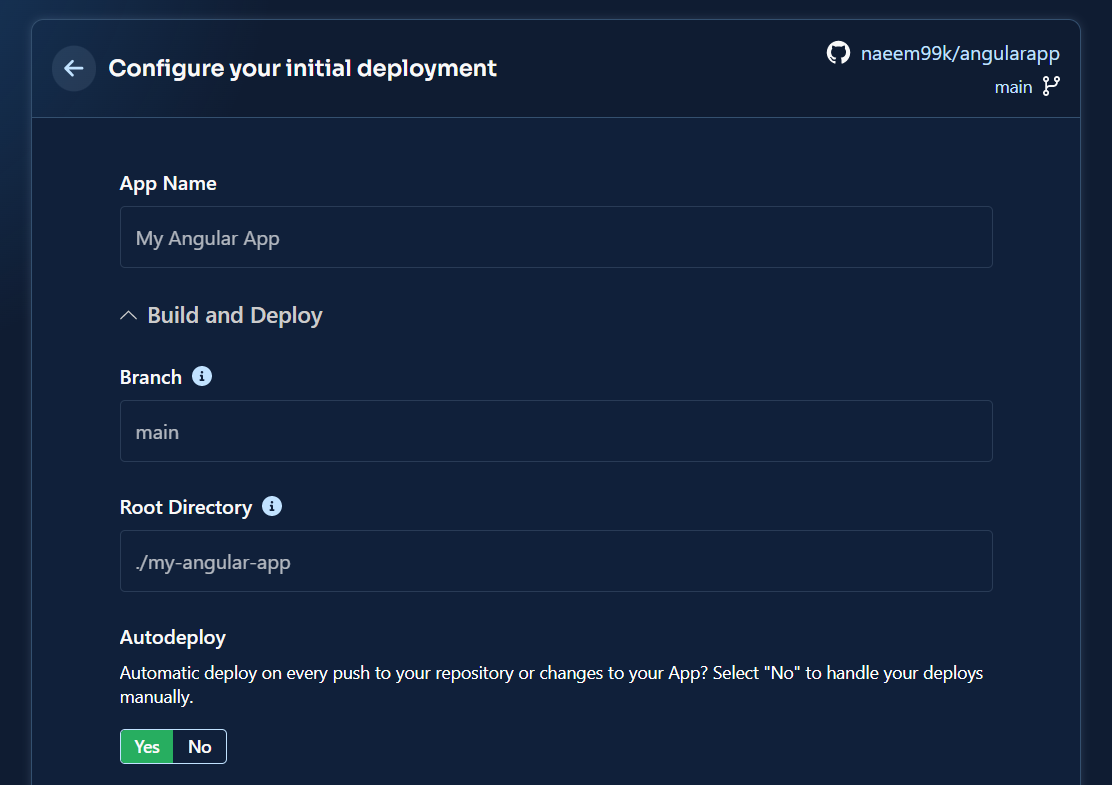
Select the repository you just pushed, then configure the deployment: give the app a name, confirm the branch, set the root directory (leave it at the project root unless your Angular app lives in a subfolder), and keep Autodeploy on Yes so every future push redeploys automatically.
Step 7 — Watch the build and open your app
The build starts immediately and streams the Docker logs in real time. You can follow both stages executing — npm installing and compiling, then the COPY --from=builder moving the dist folder into Nginx — until the health check passes and the status turns Available.
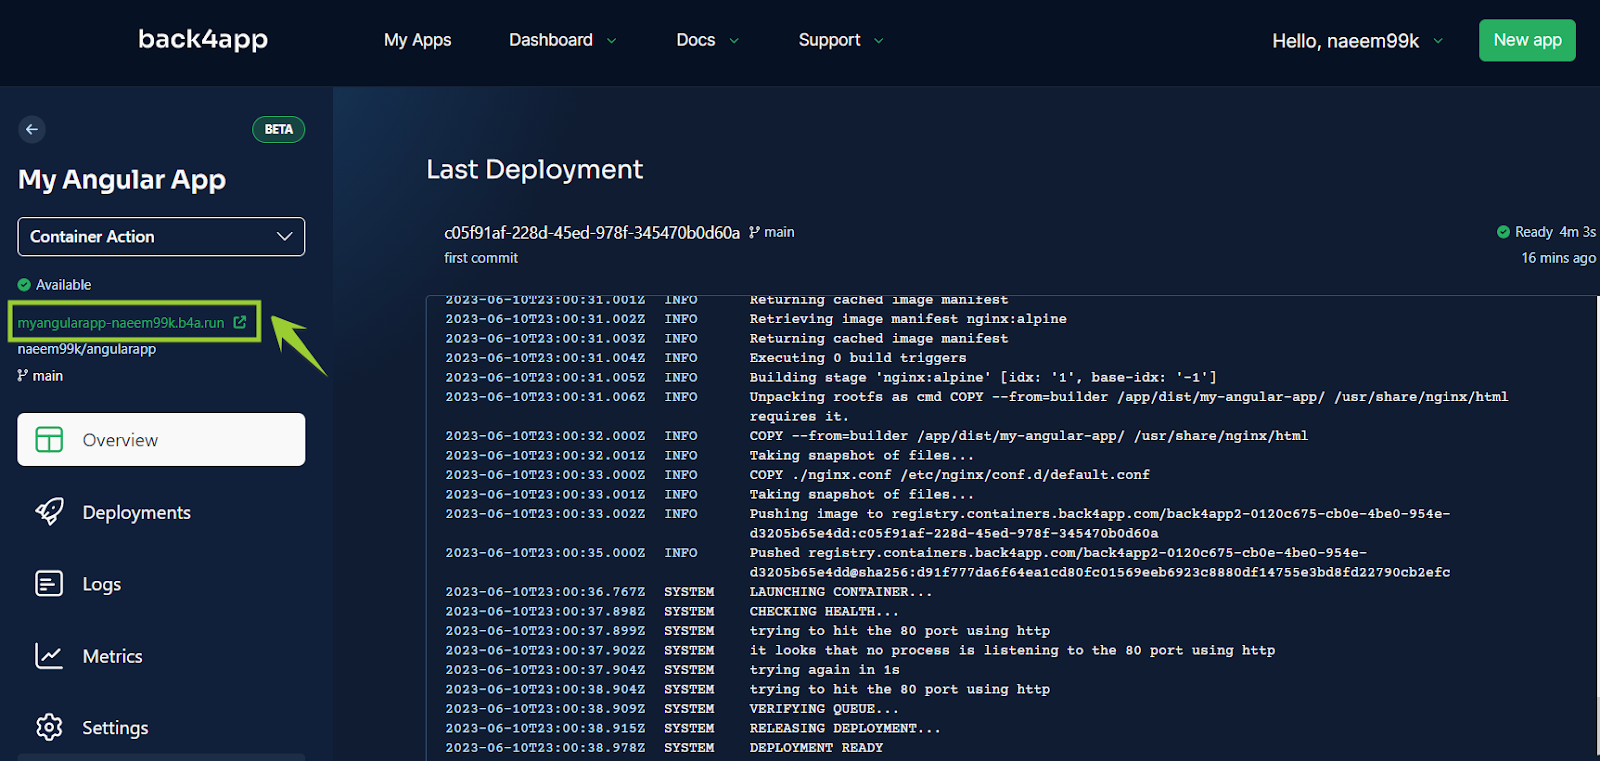
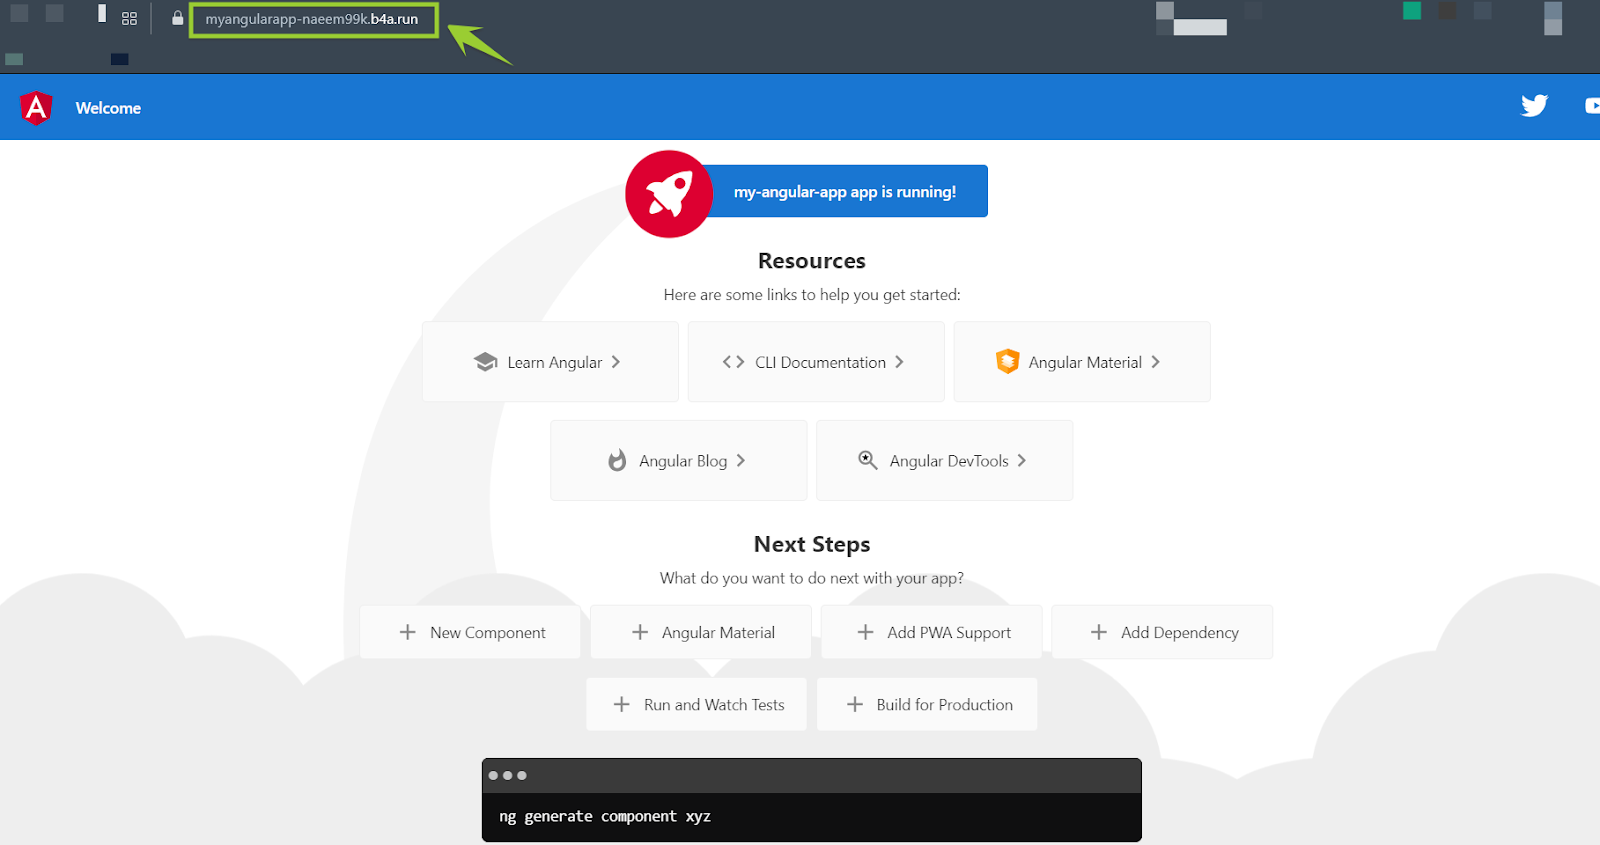
Click the generated .b4a.run URL and your Angular application is live over HTTPS.
From here, every git push to the connected branch rebuilds the image and swaps the container with zero downtime. You can add a custom domain in the app settings and the SSL certificate is issued automatically.
Troubleshooting common Angular deployment errors
- Blank page after a successful deploy — the
COPY --from=builderpath does not match your build output. CheckoutputPathinangular.json; recent versions add a/browsersubfolder. - 404 when refreshing a route — the Nginx
try_filesrule is missing or the config was not copied into the image. Confirmnginx.confexists and that the Dockerfile copies it to/etc/nginx/conf.d/default.conf. - Build fails on
npm ci—package-lock.jsonis missing or out of sync withpackage.json. Commit the lock file, or switch tonpm install. - Build runs out of memory — large Angular projects can exceed the default Node heap. Add
ENV NODE_OPTIONS=--max_old_space_size=4096before the build step. - Assets or styles missing in production — check the
assetsandstylesentries inangular.json, and confirm the build ran in production mode. - Changes not appearing after a push — confirm autodeploy is enabled and that you pushed to the branch the app is connected to.
Why deploy Angular on Back4app Containers
The Back4app web deployment platform is built for exactly this workflow — connect a repository, get a running application — with the operational pieces included rather than assembled:
- Deploy straight from GitHub, with automatic builds on every commit.
- Zero-downtime deployments — the new container only takes traffic once it is healthy.
- Real-time monitoring of CPU, RAM, bandwidth and logs in the same dashboard.
- Native Docker support, so your multi-stage Angular build runs exactly as written.
- Free tier with no time limit, and predictable pricing as the app grows.
If your Angular app also needs data, user accounts or APIs, the same platform provides them: pair the container with Back4app’s Backend as a Service for a managed database with instant REST and GraphQL APIs, authentication and file storage.
Deploying something else? See our guides for JavaScript applications, Next.js, React, Vue.js, and Docker containers in general.
Conclusion
Deploying Angular comes down to three artifacts: the compiled bundle, a multi-stage Dockerfile that serves it through Nginx, and a connected GitHub repository. Once those exist, the platform handles building, serving, scaling and redeploying — and shipping an update becomes a git push. Start on the Back4app free tier and put this tutorial’s app online in the next fifteen minutes.
How do I deploy an Angular application?
Build the app with the Angular CLI, package it with a multi-stage Dockerfile that compiles the bundle in Node and serves the output with Nginx, push the project to GitHub, then connect the repository to a container platform such as Back4app Containers. The platform builds the image and serves your app on an HTTPS production URL. The full walkthrough is in this guide.
What is the difference between Angular and AngularJS?
AngularJS refers to the original 1.x framework, which reached end of life in January 2022. Angular means version 2 and above — a complete rewrite in TypeScript with a different architecture, currently the version actively maintained by Google. This guide covers modern Angular; if you still run an AngularJS project, the same container workflow applies, but the build commands differ.
Why does my Angular app show a 404 when refreshing a route?
Angular uses client-side routing, so the server must return index.html for any path instead of looking for a matching file. The fix is one line in the Nginx configuration: try_files $uri $uri/ /index.html. The nginx.conf in this tutorial already includes it, which is why deep links and page refreshes work after deployment.
Where can I deploy an Angular application for free?
Back4app Containers offers a free tier with no time limit that runs Dockerized Angular apps directly from GitHub, including HTTPS and automatic redeploys. Other options with free allowances include Render, Netlify and Google Cloud Run. Free plans limit resources but comfortably host portfolios, demos and internal tools.
Why use a multi-stage Docker build for Angular?
Angular needs Node and the full dependency tree to compile, but none of that is required to serve the result. A multi-stage build compiles in a Node image and then copies only the compiled dist folder into a small Nginx image, so the final container is a fraction of the size and has a much smaller attack surface.
What is the correct output path for the Angular build?
It depends on your project name and Angular version: older versions output to dist/your-app-name, while recent versions output to dist/your-app-name/browser. Check the outputPath in angular.json and make the COPY line in your Dockerfile match — a wrong path is the single most common cause of an empty page after deployment.
How do I deploy updates after the first release?
With autodeploy enabled, push to the connected branch and the platform rebuilds the image and swaps the running container with zero downtime. If you prefer manual control, set autodeploy to No and trigger each deployment from the dashboard.
Does my Angular app need a backend?
If it stores data, authenticates users or calls private APIs, yes. You can pair the deployed frontend with a Backend as a Service such as Back4app, which provides a managed database with instant REST and GraphQL APIs, user authentication and file storage — keeping frontend hosting and backend on the same platform.